

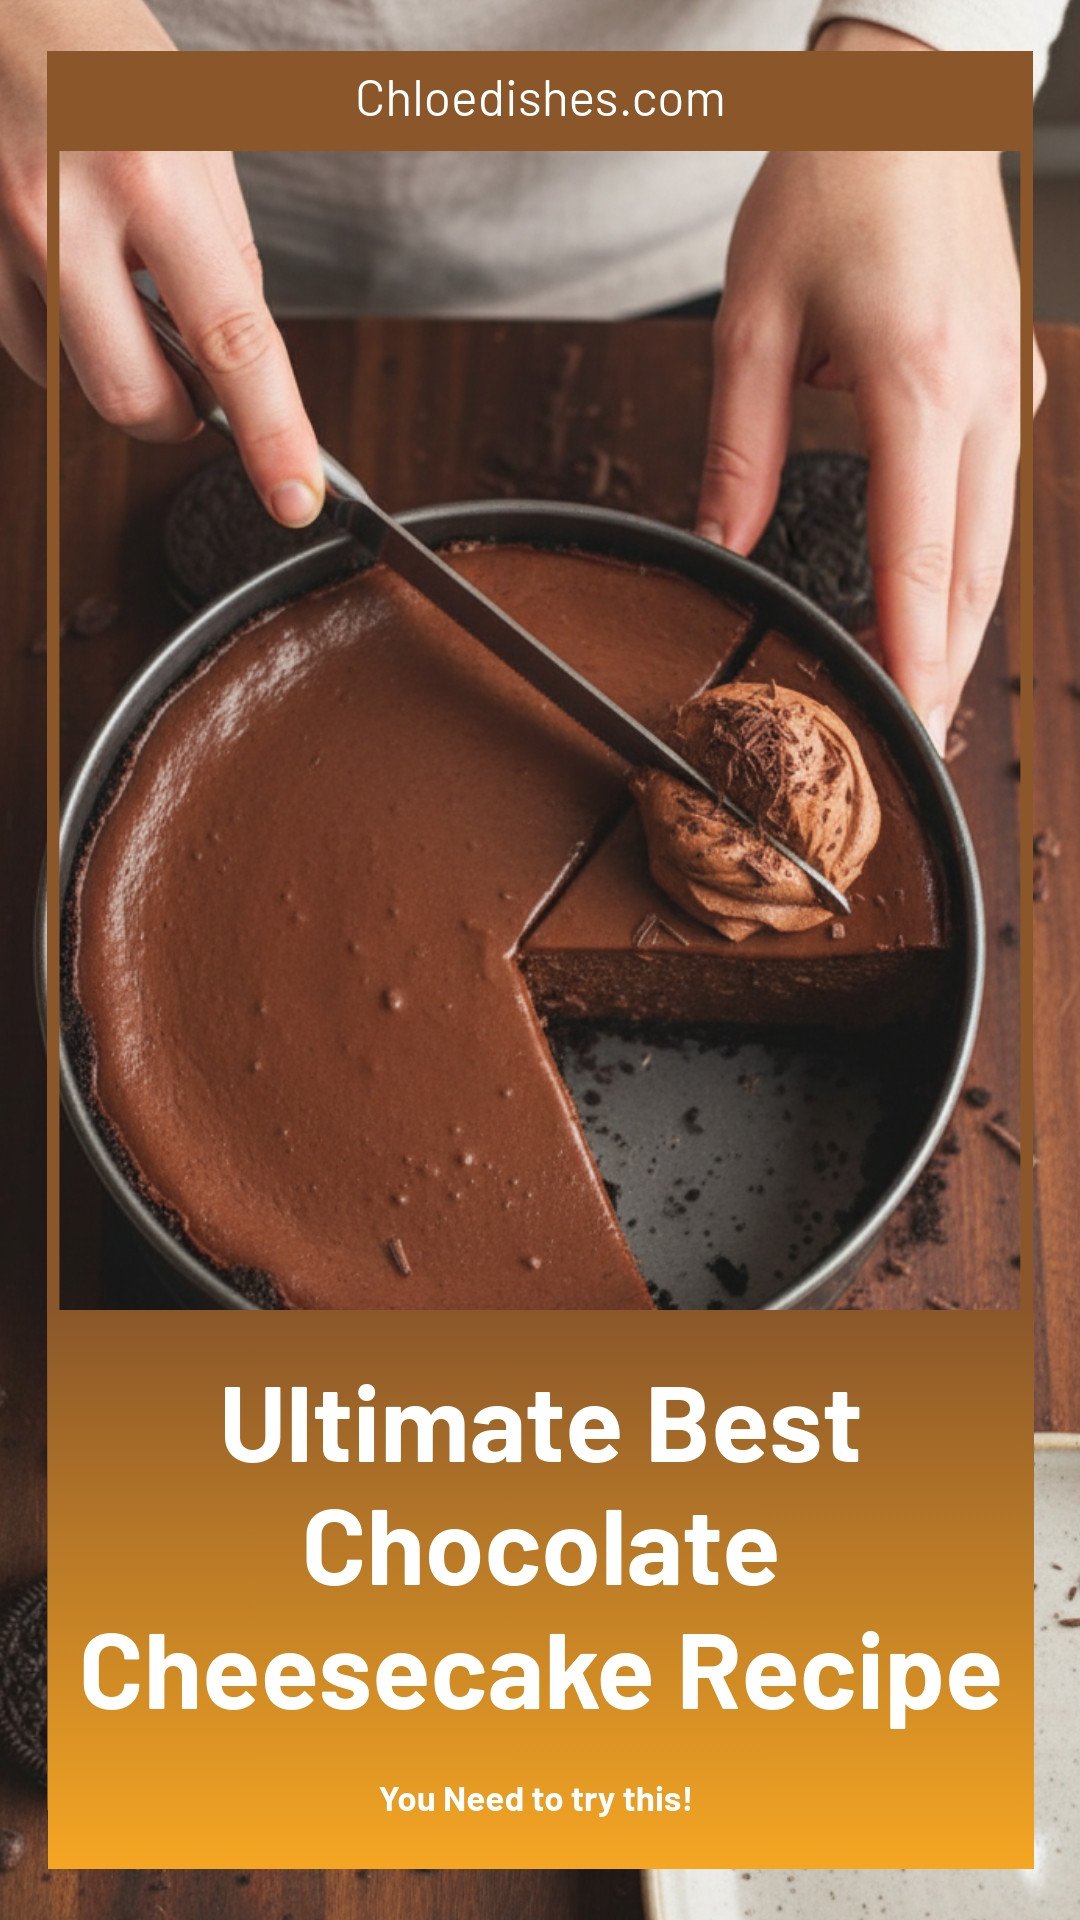
An Old Friend in a New Pan
The first time I made this chocolate cheesecake, I burnt the crust. I still laugh at that. My kitchen smelled like a campfire and chocolate, and I thought I had ruined everything. But my grandma always said, “Burnt or not, love covers a mess.” So I scraped off the dark edges and kept going. That is why this recipe feels like an old friend to me. It teaches you that perfect doesn’t matter. What matters is the creamy middle and the happy faces around the table. Doesn’t that smell amazing? I can almost smell it now. *Fun fact: Oreo cookies were invented in 1912, but they were first sold in a tin bucket, not a plastic package.* Have you ever made a cheesecake that went a little wrong but still tasted wonderful? I would love to hear your story.The Secret in the Batter
Now, let us talk about the heart of this cake. The chocolate cheesecake part is where the magic hides. You melt chocolate with hot cream and a pinch of coffee powder. That little pinch does not make it taste like coffee. It makes the chocolate taste deeper, like it woke up from a nap. Beating the cream cheese and sugar until fluffy is like fluffing a pillow. It makes the cake light and smooth. You have to scrape the bowl, or you will find lumpy surprises later. I always tell my grandkids: scrape like you mean it. Why does this matter? Because taking your time with the batter stops cracks from forming. A crack is not a disaster, but a smooth top is a little victory. Every smooth slice you cut is a tiny celebration.A Water Bath and a Little Faith
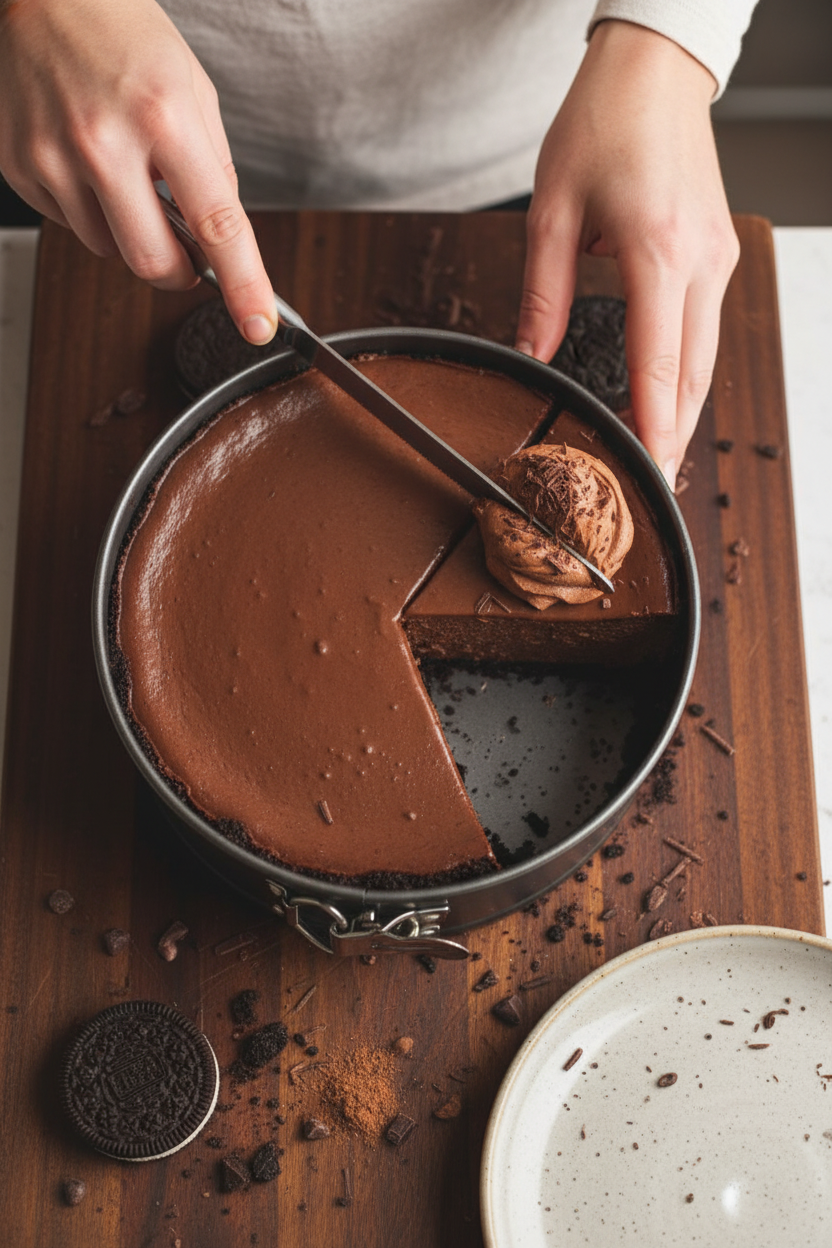
Here is the part that scares people. You bake the cheesecake in a pan of hot water. Yes, water in the oven! You wrap the cake pan in foil so no water sneaks in. It sounds strange, but it works. The steam from the water wraps around the cake like a warm blanket. It bakes the cheesecake gently, so the middle stays soft and jiggly. When you take it out, the center will wobble like a happy jellyfish. That is exactly how it should be. Does that sound scary to you? I promise, it is easier than it looks. The first time I did it, I held my breath. Then I saw the jiggle, and I knew it was alive with goodness. Why does this matter? Water baths are not just for fancy chefs. They help your cheesecake stay silky instead of dry. It is a simple trick that makes a big difference.Waiting Is the Hardest Part
After the cake comes out of the oven, you have to be patient. Let it cool on the counter for two hours. Then put it in the fridge all night. I know, that feels like forever. But this waiting is what makes the cake slice cleanly. I once tried to cut a warm cheesecake. It turned into a chocolate puddle. My husband said it tasted like soup with sugar. We laughed and ate it with spoons. It was still good, but not pretty. That night in the fridge lets the flavors settle and hug each other. The cream cheese and chocolate become best friends. The cake gets firm enough to hold its shape. Trust me, it is worth the wait. What is the longest you have ever waited for a dessert? I once waited two days for a pie. It was torture, but so good.The Shiny Crown on Top
The next day, you make the ganache. That is just chocolate and cream melted together until it looks like shiny fudge. You pour it over the cold cheesecake and let it drip down the sides. It makes the cake look like it belongs in a bakery window. Then comes the chocolate whipped cream. You whip cold cream with sugar and cocoa powder until it forms soft peaks. It is lighter than a cloud and tastes like a chocolate milkshake in spoon form. I always lick the beaters. That is a grandma rule. *Fun fact: The word “ganache” was first used in 1862, and it was an accident. A chef spilled hot cream on chocolate and got called a “ganache” — which is French for dummy. But the accident turned into a treasure.*Making It Your Own
You can dress this cheesecake however you like. Pipe the whipped cream into little stars around the edge. Add fresh berries on top if you want. Or just leave it plain and let the chocolate shout for itself. I have made this cake for birthdays, Sunday dinners, and even a Tuesday afternoon when I needed cheering up. Every time, someone says, “This is the best chocolate thing I have ever eaten.” That makes my heart grow two sizes. So now I ask you: Who would you share this cake with? Maybe a friend who loves chocolate. Or a neighbor who needs a smile. Or just yourself, with a big fork and no one watching.A Slice of Life
Every time I make this cheesecake, I think about burnt crusts and waiting overnight. I think about the little jiggle in the middle and the shiny ganache crown. It is not just a dessert. It is a memory you can eat. I hope you give it a try. If your crust burns a little, smile. If your cake cracks, call it a river of chocolate. It will still taste like heaven. And you will have a story to tell. Here is a quick question before you go: Do you like your cheesecake with berries, just chocolate, or maybe a drizzle of caramel? I am curious which team you are on.Ingredients:
| Ingredient | Amount | Notes |
|---|---|---|
| Oreo or Chocolate Creme cookies | 285g (about 25 cookies) | For the crust |
| Unsalted butter, melted | 5 tbsp (70g) | For the crust |
| Semi-sweet chocolate (or mix of dark/milk) | 340g | For the cheesecake filling |
| Heavy cream | 1 cup (240g) | For the cheesecake filling |
| Instant coffee / espresso powder | 1 tsp | For the cheesecake filling |
| Cream cheese, room temperature | 24oz (3 x 8oz packs / 680g) | For the cheesecake filling |
| Granulated sugar | 200g (1 cup) | For the cheesecake filling |
| Salt | ½ tsp | For the cheesecake filling |
| Large eggs, room temperature | 4 | For the cheesecake filling |
| Vanilla extract | 1 tsp | For the cheesecake filling |
| Cocoa powder | 15g (about 2 tbsp) | For the cheesecake filling |
| Semi-sweet chocolate (for ganache) | 100g | For the ganache topping |
| Heavy cream (for ganache) | ½ cup (120g) | For the ganache topping |
| Heavy cream, chilled (for whipped cream) | 1 cup (240g) | For the whipped cream |
| Granulated sugar (for whipped cream) | ¼ cup (50g) | For the whipped cream |
| Cocoa powder (for whipped cream) | 3 tbsp (about 20g) | For the whipped cream |
My Grandma’s Secret to the Best Chocolate Cheesecake
I still remember the first time I made this cheesecake for my family. My kitchen looked like a chocolate explosion. But the smell? Oh, doesn’t that smell amazing? It filled every corner of the house. My little nephew peeked around the door and whispered, “Is it ready yet?” We all laughed. This recipe is special because it uses a secret trick my grandma taught me. You mix instant coffee into the chocolate. Don’t worry—you won’t taste coffee. It just makes the chocolate taste deeper and richer. Like a warm hug in dessert form.
Before we start, let me share one hard-learned tip. Always bring your cream cheese and eggs to room temperature. I once used cold cream cheese straight from the fridge. My batter turned lumpy, and I nearly cried. Set them on the counter for an hour before baking. Your cheesecake will be silky smooth, I promise. Now, let’s get our hands messy. We are making the ultimate chocolate cheesecake. I call it my “rainy day special,” but honestly, any day works.
Step 1: Preheat your oven to 350°F. Grab a 9-inch springform pan. Brush the bottom and sides with a little melted butter. Then line the bottom with parchment paper. Wrap the outside of the pan tightly with two big sheets of aluminum foil. This stops water from sneaking in during baking. My grandma used to say, “Tight foil means no tears.” She was right.
Step 2: Now for the crust. Take about 25 Oreo cookies (or any chocolate creme cookies) and put them in a food processor. Grind them until they look like dark sand. Add 5 tablespoons of melted butter and pulse again. Pour the crumbs into your pan. Press them down firmly using the bottom of a measuring cup. Push hard! If the crust is too loose, it will fall apart later. Bake the crust for 8 minutes, then turn the oven down to 325°F.
Step 3: Let’s make the chocolate filling. Put 340 grams of semi-sweet chocolate and 1 teaspoon of instant coffee into a heat-proof bowl. Heat 1 cup of heavy cream until it just boils. Pour the hot cream over the chocolate. Cover the bowl with a plate and wait 5 minutes. Then stir gently until it becomes a smooth, shiny ganache. Set it aside to cool. (Fun fact: resting the ganache lets the chocolate melt without burning. Smart, right?)
Step 4: In a stand mixer with a paddle attachment, beat 24 ounces of room-temperature cream cheese with 1 cup of sugar and ½ teaspoon of salt. Mix on medium speed for about 3 minutes. Stop and scrape the bowl with a rubber spatula. Do this a few times. You want no lumps left behind. My grandma always said, “Scrape like you mean it.” Crack 4 eggs into a separate bowl and whisk them lightly. Pour the eggs and 1 teaspoon of vanilla into the cream cheese mixture. Mix on low speed just until combined. Do not overmix, or your cheesecake might crack.
Step 5: Sift 2 tablespoons of cocoa powder into the batter. Mix slowly until just combined. Scrape the bowl again. Now pour in your cooled ganache. Whip on low until everything is one beautiful chocolate color. Scrape once more. Pour the batter into your crust. Gently tap the pan on the counter to pop any air bubbles. Place the pan into a large baking sheet. Carefully pour 1 to 2 inches of boiling water into the baking sheet. The foil will keep the water out. Close the oven door.
Step 6: Bake at 325°F for 60 to 70 minutes. I usually do 65 minutes. The edges will look firm, but the center should still jiggle a little when you shake the pan. Remove the pan from the water bath carefully. Let the cheesecake cool on the counter for about 2 hours. Then move it to the fridge. Let it chill overnight—at least 12 hours. This is the hardest part. Waiting. But trust me, it is worth it. What is your favorite thing about chocolate desserts? Share below!
Step 7: The next day, prepare the chocolate ganache topping. Heat ½ cup of heavy cream until boiling. Pour it over 100 grams of semi-sweet chocolate. Rest for 5 minutes, then stir until silky. Let it cool a little until it thickens but is still pourable. For the chocolate whipped cream, combine 1 cup of cold heavy cream, ¼ cup of sugar, and 3 tablespoons of cocoa powder. Whip with an electric beater until stiff peaks form. Be careful not to overwhip, or you will get butter!
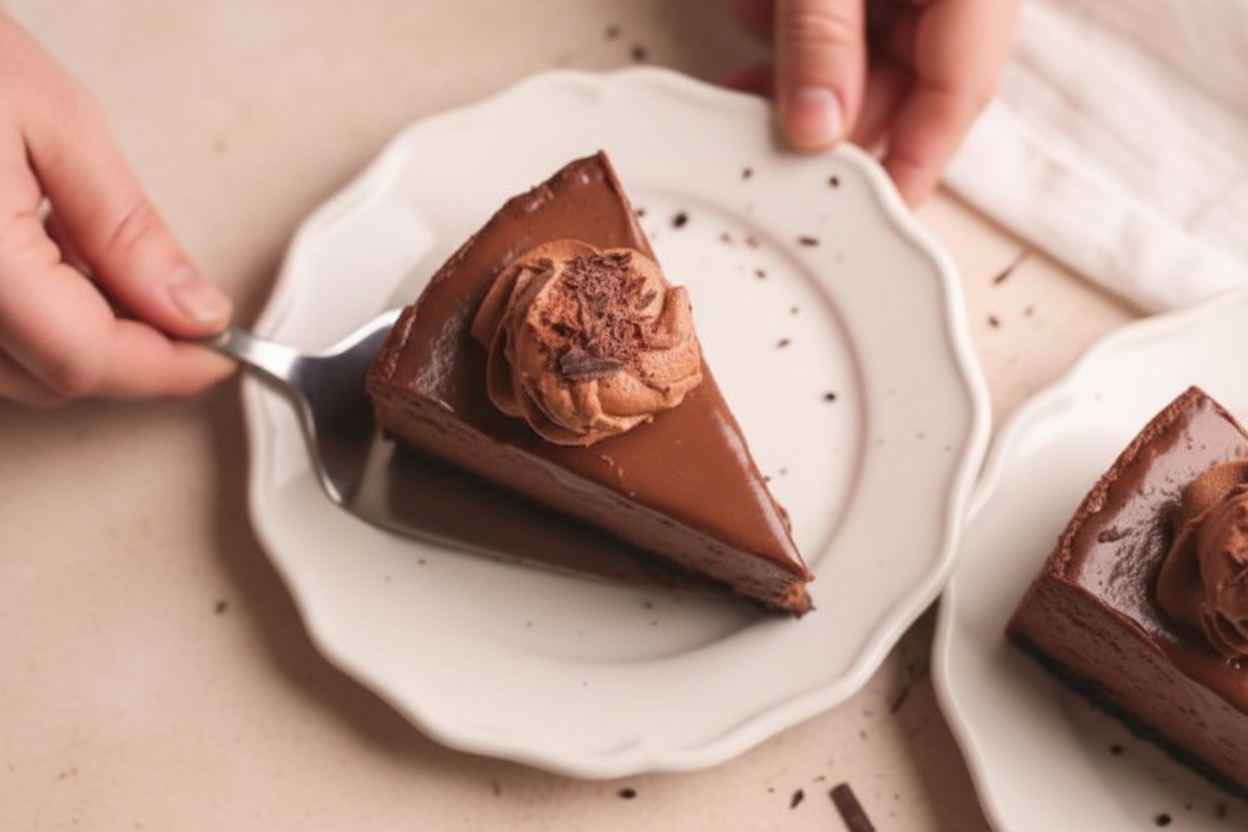
Step 8: Gently remove the cheesecake from the pan. Transfer it to a serving plate. Pour the ganache over the top. Spread it carefully and let some drip down the sides. Fill a piping bag fitted with a star tip with the chocolate whipped cream. Pipe pretty rosettes around the edge. Slice, serve, and watch everyone smile. This dessert is pure love on a plate.
Cook Time: 65 minutes
Total Time: 4 hours 15 minutes (plus overnight chilling)
Yield: 12 servings
Category: Dessert
Three Fun Twists to Try
Sometimes I like to switch things up. Here are three creative twists that will make your cheesecake even more special. Each one is simple and delicious.
Peppermint Dream: Add ½ teaspoon of peppermint extract to the cheesecake batter. Crush some candy canes and sprinkle them on top of the ganache. It tastes like a winter wonderland.
Spicy Mexican Chocolate: Stir in ½ teaspoon of cinnamon and a pinch of cayenne pepper with the cocoa powder. The heat sneaks up and dances with the chocolate. It is surprisingly lovely.
Berry Swirl Surprise: Warm up 1 cup of raspberry jam until runny. Dollop it on top of the batter before baking. Use a knife to swirl it gently. The tart fruit cuts through the rich chocolate perfectly. Which one would you try first? Comment below!
How to Serve and Sip
This cheesecake is a star on its own, but a few extras make it shine. Dust some fresh raspberries or sliced strawberries around the plate. A tiny pinch of flaky sea salt on top of the ganache brings out the chocolate flavor. For a fancy touch, drizzle a little caramel sauce on the plate before setting the slice down.
For drinks, a cold glass of milk is a classic choice. It cools the richness and makes kids cheer. For grown-ups, a small cup of dark coffee or a glass of red wine like a Merlot pairs beautifully. The wine’s fruit notes hug the chocolate. Which would you choose tonight?
Storing Your Chocolate Cheesecake Like a Pro
This cheesecake stays fresh in the fridge for up to five days. Just cover it loosely with plastic wrap or foil. I once left mine out overnight by accident. The next morning, it had a sad, sweaty top. Learn from my mistake—always wrap it tight.
Freezing works wonderfully, too. Slice the cheesecake first, then wrap each piece in plastic and foil. Pop them in a freezer bag. They keep for up to three months. When you want a piece, thaw it in the fridge overnight.
To reheat a single slice, let it sit out for 20 minutes. Then microwave it for 10 seconds. The ganache gets soft again, like fresh. Batch cooking is smart here. Make two cheesecakes at once. Freeze one for a busy week. Why does this matter? Having a homemade dessert ready saves you stress when company shows up. Have you ever tried storing it this way? Share below!
Three Common Cheesecake Problems and Easy Fixes
First problem is a cracked top. This happens when you overbake or cool too fast. I remember my first cheesecake looked like a map of rivers. The fix? Bake until the center is still jiggly. Then let it cool slowly on the counter for two hours.
Second problem is a crumbly crust. It falls apart when you slice. This usually means you did not press it firmly enough. Use the bottom of a glass to really pack those cookie crumbs down. Why does this matter? A solid crust holds your forkful together. It makes every bite feel special.
Third problem is lumps in the batter. Cold cream cheese is the usual culprit. Set your cream cheese out for an hour before mixing. I once forgot and ended up with lumpy cheesecake. It still tasted good, but the texture was off. Why does this matter? Smooth batter gives you a velvety cheesecake. That creamy feeling is why we love it. Which of these problems have you run into before?
Your Cheesecake Questions, Answered
Q: Can I make this gluten-free?
A: Yes. Swap the Oreos for gluten-free chocolate sandwich cookies. The rest of the recipe is naturally gluten-free.
Q: How far ahead can I make it?
A: You can make it up to two days before serving. The flavor actually gets better after a night in the fridge.
Q: Can I swap the chocolate?
A: Sure. Use milk chocolate for a sweeter, softer cheesecake. Dark chocolate gives a bold, rich taste.
Q: How do I scale this recipe?
A: To make a smaller 6-inch cake, halve all the ingredients. Bake for about 45 minutes instead of 65.
Q: Any optional tips?
A: Add a pinch of cinnamon to the crust for a warm twist. It pairs beautifully with the chocolate. Which tip will you try first?
A Warm Goodbye from Chloe
Thank you for spending time in my kitchen today. This cheesecake is pure love in every bite. I hope you make it for a birthday, a holiday, or just a Tuesday. Take a photo of your creation. Tag us on Pinterest so we can see your beautiful work.
Fun fact: Oreo cookies were invented in 1912 in New York City. They are older than sliced bread.
Cooking is about sharing joy. This cheesecake brings people to the table with smiles. Have you tried this recipe? Tag us on Pinterest! I look forward to seeing your chocolatey masterpieces. Until next time, keep your oven warm and your heart full.
Happy cooking!
—Chloe Hartwell.
Ultimate Best Chocolate Cheesecake Recipe
Description
Indulge in the ultimate best chocolate cheesecake recipe with a rich, creamy texture. Easy to bake, perfect for dessert lovers.
Ingredients
Instructions
- Pre-heat the oven to 350F (conventional, no fan), and prepare a 9″ springform pan by brushing a light coating of butter on the bottom and side, and lining with parchment paper. Cover the outside bottom and edges of the pan on the outside with 2 large sheets of aluminum foil tightly
- For the crust, grind the Oreo cookies in a food processor until they make a fine crumb. Add the melted butter and grind again. Transfer to the pan and press down firmly to form a tight crust. I use a measuring cup for this step, and press quite firmly as that helps make sure the crust isn’t soft or crumbly
- Bake the crust for ~8 minutes. Remove from the oven, and turn down the temperature to 325F
- Add the chocolate and instant coffee to a heat-proof bowl. Bring the cream to a boil and pour it over the chocolate. Cover and rest for 5 minutes, then stir until you have a smooth ganache. Set it aside to cool down
- Add the cream cheese, sugar and salt to the bowl of a stand mixer fit with a paddle attachment. Mix on medium speed for ~3 minutes until the mixture is creamy and fluffy. Make sure to scrape the edges and bottom of the bowl with a rubber spatula a few times through this process, as that will help ensure there aren’t any lumps left behind
- Break the eggs in a separate bowl and lightly whisk to break the yolks. Pour into the batter along with the vanilla, and mix on low speed just until the eggs are combined into the batter. Avoid overmixing at this stage
- Sift in the cocoa powder and mix slowly until just combined, scraping the bowl again
- Add the ganache and whip until just combined. Scrape again
- Transfer the batter to the pan with the crust. Gently tap the pan several times on your counter to get rid of any air bubbles
- Place a large baking sheet in the pre-heated oven, and fill it with 1-2″ of boiling water. Place the cheesecake pan inside this pan. The aluminum foil will prevent the water from leaking into the pan. Close the oven door
- Bake for 60-70 minutes at 325F (I do 65 minutes). The cheesecake is done when the edges are firm but the center is jiggly (see video)
- Remove the cheesecake pan from the oven carefully, and let cool at room temperature for ~2 hours. After that, transfer to the fridge to cool completely overnight (at least 12 hours)
- The next day, prepare chocolate ganache for the top of the cheesecake by bringing the cream to a boil and pouring over the chocolate. Rest for 5 minutes, then mix until you have a silky ganache
- Prepare the chocolate whipped cream by adding all the ingredients into a bowl and whisking with an electric beater (or stand mixer with balloon whisk attachment) until the cream reaches stiff peaks. Avoid overmixing as it will cause the cream to split. Transfer the cream to a piping bag fit with a star tip of choice
- Gently remove the cheesecake from the pan and carefully transfer it to a serving stand. Pour over the ganache once it has slightly thickened but is still runny. Spread it carefully and let some drip off the edges
- Pipe rosettes around the edge with the chocolate whipped cream
- Serve and enjoy!
Notes
- For best results, ensure all ingredients are at room temperature before starting. The cheesecake needs at least 12 hours to chill in the fridge overnight.


Leave a Reply