
I remember the first time I tried chickpeas. I was a little girl, and my grandma called them “little happy beans.” She was right. They are so friendly and easy to cook with. You will love this recipe because it uses just one can of chickpeas. Everything comes together on one baking sheet.
Doesn’t that smell amazing already? These fajitas are perfect for a busy weeknight. You don’t need a lot of fancy tools or ingredients. Just a can opener, a knife, and a pan. Let me show you how easy it is.
Let’s Make Crispy Chickpea Fajitas
Step 1: First, preheat your oven to 400°F. Grab your two cans of chickpeas and drain them in a colander. Pour the chickpeas onto a few layers of paper towels. Let them dry while you chop the vegetables. (Hard-learned tip: If the chickpeas are wet, they won’t get crispy. Pat them dry until they feel a little dry to the touch.)
Step 2: Now, cut the bell peppers and portobello mushrooms into long strips. Slice the zucchini into little half-moons. Cut the red onion into thin slices. I always cut my onion with my eyes squinted shut. I still laugh at how silly I must look!
Step 3: Take a large baking sheet. Put the dried chickpeas on one half. Put all the chopped veggies on the other half. Drizzle everything with the olive oil. Sprinkle all the spices on top: chili powder, cumin, smoked paprika, salt, garlic powder, and onion powder. Toss them with your hands until they are fully coated. What is your favorite spice to add to fajitas? Share below!
Step 4: Bake the sheet for 20 to 25 minutes. The veggies should be soft and the chickpeas should look a little golden. Then, turn your oven to “broil” for just 2 or 3 minutes. Watch it closely! The edges will get crispy and have little black char marks. That is where all the flavor hides.
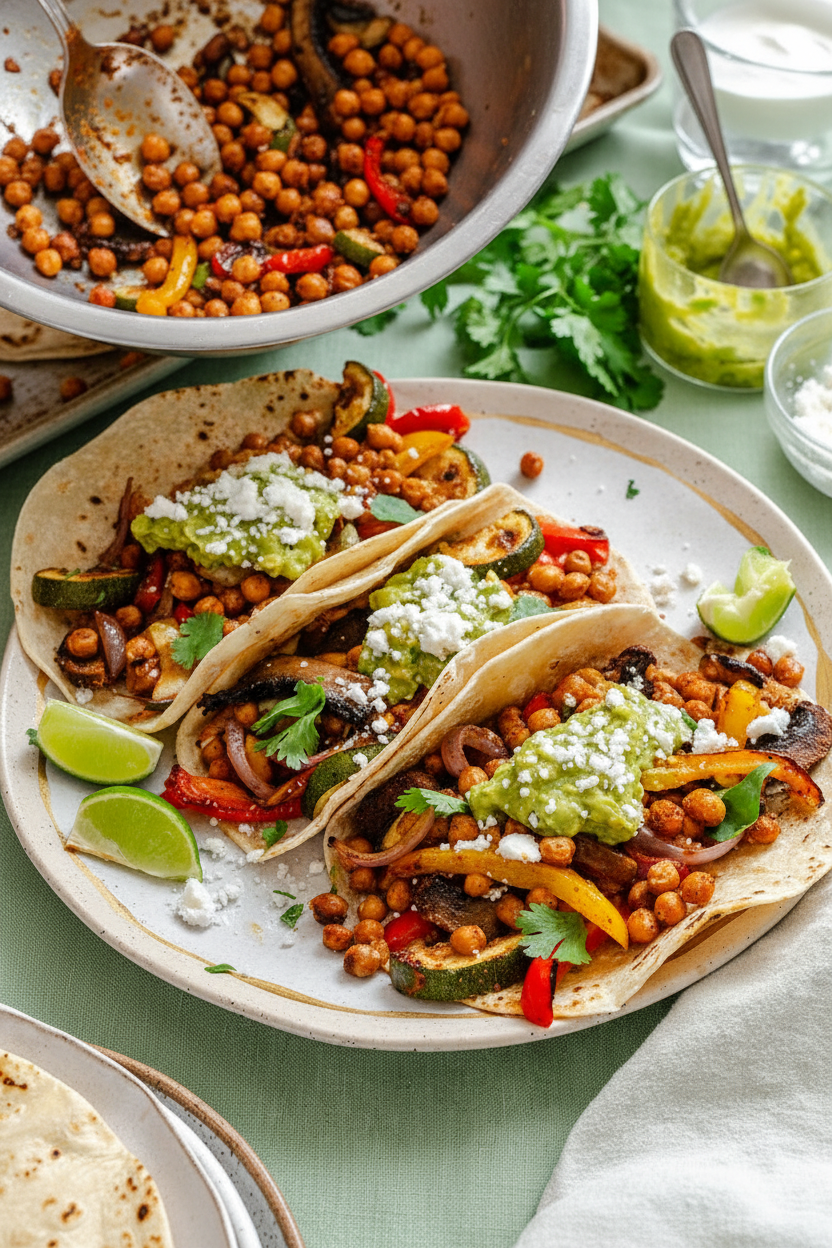
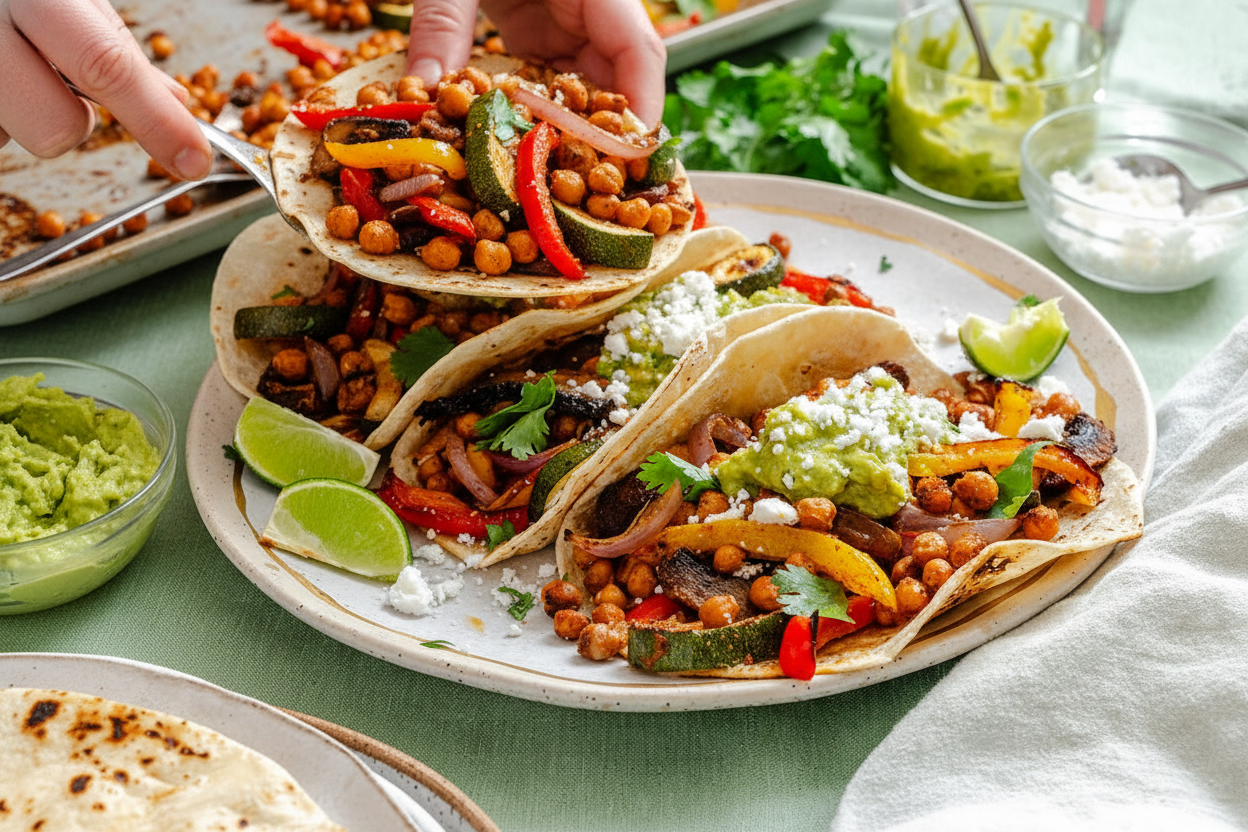
Step 5: Warm your tortillas in the microwave or on a dry pan. Spoon the roasted chickpeas and veggies right down the middle. Top it all with guacamole, sour cream, some crumbled cheese, and fresh cilantro. Fold it up and take a big bite. That crunch is pure happiness.
Cook Time: 25–28 minutes
Total Time: 35 minutes
Yield: 4 fajitas
Category: Dinner, Fajitas
Three Fun Ways to Mix It Up
Sometimes I like to change this recipe to keep it interesting. Here are three of my favorite twists. They are all so good, it is hard to choose.
Spicy Mango Kick: Add some fresh mango chunks before baking. Drizzle a little hot honey on top at the end for a sweet and spicy surprise.
Cheesy Herb Dream: Sprinkle mozzarella cheese over the veggies in the last 5 minutes of baking. Add a handful of fresh basil when you serve it.
Smoky BBQ Swap: Replace the chili powder with a smoky BBQ rub. Serve with pickled red onions for a tangy crunch. Which one would you try first? Comment below!
What to Eat and Drink With It
These fajitas are wonderful all by themselves, but a little side dish never hurts. I love serving them with a simple corn salad or black beans on the side. A big squeeze of lime over everything makes it extra fresh.
For a drink, try an icy glass of horchata for the whole family. It is sweet and creamy, and it cools down the spice. For grown-ups, a cold Mexican lager beer is perfect. It is light and bubbles away the heat. Which would you choose tonight?
Storing and Reheating Your Chickpea Fajitas
This recipe makes a big batch. That is a good thing. You can eat it for lunch all week. Let the fajita filling cool down first. Then put it in a glass container with a lid. It stays good in the fridge for four days. I once forgot a container in the back of my fridge. I found it three days later. It was still tasty! That is why this matters. Batch cooking saves you time on busy nights. You just heat and eat. For the freezer, scoop the filling into a zip bag. Lay it flat to save space. It lasts for three months. To reheat, use a pan on the stove. A microwave works too. Sprinkle a little water on top first. This keeps it from drying out. Have you ever tried storing it this way? Share below!
Three Common Problems and Easy Fixes
Sometimes your chickpeas do not get crispy. This happens if they are wet. Pat them dry with a towel before baking. I learned this the hard way. I once had soggy chickpeas for dinner. It was still good, just not crispy. A second problem is watery veggies. Zucchini lets out a lot of water. Cut it into thick half-moons, not thin slices. Spread the veggies out on the pan. Give them room to breathe. Why does this matter? Dry veggies taste sweeter and char better. You get more flavor. A third problem is burnt edges. Watch your oven closely during broil. Ovens can be different. Set a timer for two minutes. Check and add more time if needed. I remember burning my first batch. The smoke alarm went off. That taught me to stay nearby. Which of these problems have you run into before?
Five Quick Questions and Answers
Q: Is this recipe gluten-free? A: Yes. Chickpeas and veggies are naturally gluten-free. Just use corn tortillas instead of flour ones.
Q: Can I make it ahead of time? A: Yes. Bake the filling up to two days before. Store it in the fridge. Assemble fajitas right before eating.
Q: What can I swap for zucchini? A: Try yellow squash or extra bell peppers. They cook the same way.
Q: Can I double the recipe? A: Yes. Use two baking sheets. Rotate them halfway through baking for even cooking.
Q: Any optional tips? A: Add a squeeze of lime before serving. It brightens the whole dish. Which tip will you try first?
A Warm Send-Off from Chloe
I hope you make these fajitas soon. Cooking with a can of chickpeas is so simple. It makes you feel good inside. *Fun fact: One can of chickpeas has more fiber than three slices of whole wheat bread.* That is a lot of fiber for your belly. Your body will thank you. Take a photo of your meal. Share it with someone you love. Or tag my blog on Pinterest. I love seeing your creations. Have you tried this recipe? Tag us on Pinterest! Happy cooking! —Chloe Hartwell.
Easy Chickpea Recipes Using One Can
Description
Discover quick & delicious easy chickpea recipes using one can! Perfect for simple, healthy meals in minutes.
Ingredients
Instructions
- Preheat oven to 400°F (204°C). Drain 2 15-oz cans chickpeas then spread them onto a few layers of paper towels to dry while you prepare the rest.
- Cut 2 medium bell peppers and 2 large portobello mushrooms into strips. Cut 1 medium zucchini into bite-sized halfmoons. Cut ½ medium red onion into slices.
- Transfer chickpeas onto half of a large unlined rimmed baking sheet. Add sliced veggies to the other half (keep chickpeas and veggies separate so that the chickpeas will get crispy). Drizzle everything evenly with ¼ cup olive oil and sprinkle on 1 Tbsp chili powder, 1 tsp each cumin and smoked paprika, and ½ tsp each salt, garlic powder, and onion powder. Toss to evenly coat.
- Bake for 20 to 25 minutes, or until veggies are tender and beginning to char at the edges. Turn oven to “broil” and continue cooking for 2 to 3 minutes, watching closely until edges are crispy and charred.
- Spoon mixture onto tortillas and finish with your favorite fajitas toppings, like guacamole, sour cream, cotija or feta cheese, and cilantro!
Notes
- Nutrition per serving (1 fajita): Calories: 337kcal, Carbohydrates: 37g, Protein: 14g, Fat: 16.9g, Saturated Fat: 2.2g, Polyunsaturated Fat: 2.8g, Monounsaturated Fat: 11.1g, Trans Fat: 0g, Cholesterol: 0mg, Sodium: 362mg, Potassium: 727mg, Fiber: 10.2g, Sugar: 8.2g, Vitamin A: 1767IU, Vitamin C: 96mg, Calcium: 76mg, Iron: 3.9mg
Drying and Chopping Like Grandma
First, drain those chickpeas and pat them dry with paper towels. This step is important. Dry chickpeas get crispy in the oven. Wet ones stay soft and sad. I learned this the hard way once when my filling turned mushy. My husband still jokes about “soggy fajita night.” Now I take an extra minute to dry them well. While they sit, slice your veggies into strips and half-moons. Keep everything bite-sized so it cooks evenly. Why does this matter? Crispy chickpeas are the star of this dish. They give you that satisfying crunch you expect from a good fajita. Take your time here. It makes a big difference. What is your trick for getting veggies crispy? Share it with me!The Magic of Spices
Now for the seasoning. In a small bowl, mix chili powder, cumin, smoked paprika, salt, garlic powder, and onion powder. Sprinkle this over your chickpeas and veggies on a baking sheet. Drizzle olive oil over everything. Use your hands to toss it all together. Get every piece coated. The smell of cumin and smoked paprika reminds me of my grandmother’s kitchen. She always said spices are the secret to a happy meal. I think she was right. Keep the chickpeas on one side and veggies on the other. They bake at different speeds. Chickpeas need the full heat to get crunchy. Veggies get tender and charred. This little trick helps everything turn out perfect. Have you ever tried roasting chickpeas before? They make a great snack all by themselves.Into the Oven They Go
Preheat your oven to 400 degrees. Slide in the baking sheet and let it bake for 20 to 25 minutes. Your kitchen will fill with a warm, toasty smell. When the veggies are tender and have dark edges, turn the oven to broil. Watch closely for 2 to 3 minutes. You want crispy, charred bits on the chickpeas and peppers. Do not walk away. Broiling happens fast. I once got distracted by a phone call and ended up with blackened mushrooms. Lesson learned. Why does this matter? That charred flavor is what makes fajitas taste like they came from a restaurant. It adds depth and a little smoky sweetness. When you bite into a charred pepper strip, it is like a tiny burst of joy. Do you like your veggies soft or with some crunch? Tell me your preference.Building Your Fajita
Warm up your tortillas in a dry skillet or microwave. Spoon the chickpea and veggie mixture right down the middle. Top with guacamole, a dollop of sour cream, crumbled cheese, and fresh cilantro. Fold it up and take a big bite. The warm tortilla, the crispy chickpeas, the creamy guacamole—it all comes together. I love how the flavors blend without being too heavy. This is a dinner that makes you feel good inside and out. Here is a fun way to serve it: Set up a little topping bar. Let everyone build their own fajita. Kids love choosing their own toppings. It turns dinner into a small party. What is your must-have fajita topping? Cheese? Hot sauce? I am curious to know.A Meal That Sticks With You
This recipe has 10 grams of fiber and 14 grams of protein per serving. That means you stay full longer and your body gets good fuel. No heavy feeling afterward, just happy energy. I like knowing that a simple can of chickpeas can do so much. It is proof that you do not need fancy ingredients to eat well. Sometimes the humble pantry star shines the brightest. So grab that can of chickpeas and give this a try. I bet you will make it again next week. Have you ever made fajitas with chickpeas before? I would love to hear how they turned out. Happy cooking, friend.Ingredients:
| Ingredient | Amount | Notes |
|---|---|---|
| Canned chickpeas | 2 (15-oz / 425 g) cans | Drained and rinsed |
| Bell peppers (any color) | 2 medium | Seeded and sliced |
| Portobello mushrooms | 2 large | Stems removed, sliced |
| Zucchini | 1 medium | Sliced |
| Red onion | ½ medium | Thinly sliced |
| Olive oil | ¼ cup (60 mL) | |
| Chili powder | 1 Tbsp | |
| Cumin | 1 tsp | |
| Smoked paprika | 1 tsp | |
| Salt | ½ tsp | |
| Garlic powder | ½ tsp | |
| Onion powder | ½ tsp | |
| Medium tortillas | 4 | For serving |
| Guacamole, sour cream, cheese, cilantro | To taste | For serving |
One Can, One Dinner, Happy Memories
I remember the first time I tried chickpeas. I was a little girl, and my grandma called them “little happy beans.” She was right. They are so friendly and easy to cook with. You will love this recipe because it uses just one can of chickpeas. Everything comes together on one baking sheet.
Doesn’t that smell amazing already? These fajitas are perfect for a busy weeknight. You don’t need a lot of fancy tools or ingredients. Just a can opener, a knife, and a pan. Let me show you how easy it is.
Let’s Make Crispy Chickpea Fajitas
Step 1: First, preheat your oven to 400°F. Grab your two cans of chickpeas and drain them in a colander. Pour the chickpeas onto a few layers of paper towels. Let them dry while you chop the vegetables. (Hard-learned tip: If the chickpeas are wet, they won’t get crispy. Pat them dry until they feel a little dry to the touch.)
Step 2: Now, cut the bell peppers and portobello mushrooms into long strips. Slice the zucchini into little half-moons. Cut the red onion into thin slices. I always cut my onion with my eyes squinted shut. I still laugh at how silly I must look!
Step 3: Take a large baking sheet. Put the dried chickpeas on one half. Put all the chopped veggies on the other half. Drizzle everything with the olive oil. Sprinkle all the spices on top: chili powder, cumin, smoked paprika, salt, garlic powder, and onion powder. Toss them with your hands until they are fully coated. What is your favorite spice to add to fajitas? Share below!
Step 4: Bake the sheet for 20 to 25 minutes. The veggies should be soft and the chickpeas should look a little golden. Then, turn your oven to “broil” for just 2 or 3 minutes. Watch it closely! The edges will get crispy and have little black char marks. That is where all the flavor hides.
Step 5: Warm your tortillas in the microwave or on a dry pan. Spoon the roasted chickpeas and veggies right down the middle. Top it all with guacamole, sour cream, some crumbled cheese, and fresh cilantro. Fold it up and take a big bite. That crunch is pure happiness.
Cook Time: 25–28 minutes
Total Time: 35 minutes
Yield: 4 fajitas
Category: Dinner, Fajitas
Three Fun Ways to Mix It Up
Sometimes I like to change this recipe to keep it interesting. Here are three of my favorite twists. They are all so good, it is hard to choose.
Spicy Mango Kick: Add some fresh mango chunks before baking. Drizzle a little hot honey on top at the end for a sweet and spicy surprise.
Cheesy Herb Dream: Sprinkle mozzarella cheese over the veggies in the last 5 minutes of baking. Add a handful of fresh basil when you serve it.
Smoky BBQ Swap: Replace the chili powder with a smoky BBQ rub. Serve with pickled red onions for a tangy crunch. Which one would you try first? Comment below!
What to Eat and Drink With It
These fajitas are wonderful all by themselves, but a little side dish never hurts. I love serving them with a simple corn salad or black beans on the side. A big squeeze of lime over everything makes it extra fresh.
For a drink, try an icy glass of horchata for the whole family. It is sweet and creamy, and it cools down the spice. For grown-ups, a cold Mexican lager beer is perfect. It is light and bubbles away the heat. Which would you choose tonight?
Storing and Reheating Your Chickpea Fajitas
This recipe makes a big batch. That is a good thing. You can eat it for lunch all week. Let the fajita filling cool down first. Then put it in a glass container with a lid. It stays good in the fridge for four days. I once forgot a container in the back of my fridge. I found it three days later. It was still tasty! That is why this matters. Batch cooking saves you time on busy nights. You just heat and eat. For the freezer, scoop the filling into a zip bag. Lay it flat to save space. It lasts for three months. To reheat, use a pan on the stove. A microwave works too. Sprinkle a little water on top first. This keeps it from drying out. Have you ever tried storing it this way? Share below!
Three Common Problems and Easy Fixes
Sometimes your chickpeas do not get crispy. This happens if they are wet. Pat them dry with a towel before baking. I learned this the hard way. I once had soggy chickpeas for dinner. It was still good, just not crispy. A second problem is watery veggies. Zucchini lets out a lot of water. Cut it into thick half-moons, not thin slices. Spread the veggies out on the pan. Give them room to breathe. Why does this matter? Dry veggies taste sweeter and char better. You get more flavor. A third problem is burnt edges. Watch your oven closely during broil. Ovens can be different. Set a timer for two minutes. Check and add more time if needed. I remember burning my first batch. The smoke alarm went off. That taught me to stay nearby. Which of these problems have you run into before?
Five Quick Questions and Answers
Q: Is this recipe gluten-free? A: Yes. Chickpeas and veggies are naturally gluten-free. Just use corn tortillas instead of flour ones.
Q: Can I make it ahead of time? A: Yes. Bake the filling up to two days before. Store it in the fridge. Assemble fajitas right before eating.
Q: What can I swap for zucchini? A: Try yellow squash or extra bell peppers. They cook the same way.
Q: Can I double the recipe? A: Yes. Use two baking sheets. Rotate them halfway through baking for even cooking.
Q: Any optional tips? A: Add a squeeze of lime before serving. It brightens the whole dish. Which tip will you try first?
A Warm Send-Off from Chloe
I hope you make these fajitas soon. Cooking with a can of chickpeas is so simple. It makes you feel good inside. *Fun fact: One can of chickpeas has more fiber than three slices of whole wheat bread.* That is a lot of fiber for your belly. Your body will thank you. Take a photo of your meal. Share it with someone you love. Or tag my blog on Pinterest. I love seeing your creations. Have you tried this recipe? Tag us on Pinterest! Happy cooking! —Chloe Hartwell.
The Night We Ran Out of Chicken
Sometimes the best dinners come from a pantry surprise. I remember one Tuesday when my grandson came over hungry. I opened the fridge and found only a few veggies and a lonely can of chickpeas. No chicken, no beef, nothing fancy. I laughed and said, “Well, we’re getting creative tonight.” That is how this fajita recipe was born. We ate every bite and asked for more. I still laugh at that memory. Doesn’t that smell amazing when it bakes? Why does this matter? Because you do not need meat for a hearty meal. Chickpeas are little protein powerhouses. They fill you up and taste wonderful when roasted crispy. Have you ever tried chickpeas in a tortilla before? I would love to know.What You Need in Your Kitchen
Let me walk you through the simple list. You need two cans of chickpeas. Grab two bell peppers in any color you like. Two big portobello mushrooms add a meaty texture. One zucchini and half a red onion round out the veggies. Olive oil and some spices make everything sing. Do not forget tortillas and your favorite toppings like guacamole or sour cream. Simple, right? *Fun fact: Portobello mushrooms are actually just big cremini mushrooms. They grow up to become these giant caps. I learned that from a farmer at the market and thought it was so neat.* Here is a question for you: Which bell pepper color is your favorite? Red ones are sweeter, but green have a sharper bite. I like using a mix for a rainbow on the plate.Drying and Chopping Like Grandma
First, drain those chickpeas and pat them dry with paper towels. This step is important. Dry chickpeas get crispy in the oven. Wet ones stay soft and sad. I learned this the hard way once when my filling turned mushy. My husband still jokes about “soggy fajita night.” Now I take an extra minute to dry them well. While they sit, slice your veggies into strips and half-moons. Keep everything bite-sized so it cooks evenly. Why does this matter? Crispy chickpeas are the star of this dish. They give you that satisfying crunch you expect from a good fajita. Take your time here. It makes a big difference. What is your trick for getting veggies crispy? Share it with me!The Magic of Spices
Now for the seasoning. In a small bowl, mix chili powder, cumin, smoked paprika, salt, garlic powder, and onion powder. Sprinkle this over your chickpeas and veggies on a baking sheet. Drizzle olive oil over everything. Use your hands to toss it all together. Get every piece coated. The smell of cumin and smoked paprika reminds me of my grandmother’s kitchen. She always said spices are the secret to a happy meal. I think she was right. Keep the chickpeas on one side and veggies on the other. They bake at different speeds. Chickpeas need the full heat to get crunchy. Veggies get tender and charred. This little trick helps everything turn out perfect. Have you ever tried roasting chickpeas before? They make a great snack all by themselves.Into the Oven They Go
Preheat your oven to 400 degrees. Slide in the baking sheet and let it bake for 20 to 25 minutes. Your kitchen will fill with a warm, toasty smell. When the veggies are tender and have dark edges, turn the oven to broil. Watch closely for 2 to 3 minutes. You want crispy, charred bits on the chickpeas and peppers. Do not walk away. Broiling happens fast. I once got distracted by a phone call and ended up with blackened mushrooms. Lesson learned. Why does this matter? That charred flavor is what makes fajitas taste like they came from a restaurant. It adds depth and a little smoky sweetness. When you bite into a charred pepper strip, it is like a tiny burst of joy. Do you like your veggies soft or with some crunch? Tell me your preference.Building Your Fajita
Warm up your tortillas in a dry skillet or microwave. Spoon the chickpea and veggie mixture right down the middle. Top with guacamole, a dollop of sour cream, crumbled cheese, and fresh cilantro. Fold it up and take a big bite. The warm tortilla, the crispy chickpeas, the creamy guacamole—it all comes together. I love how the flavors blend without being too heavy. This is a dinner that makes you feel good inside and out. Here is a fun way to serve it: Set up a little topping bar. Let everyone build their own fajita. Kids love choosing their own toppings. It turns dinner into a small party. What is your must-have fajita topping? Cheese? Hot sauce? I am curious to know.A Meal That Sticks With You
This recipe has 10 grams of fiber and 14 grams of protein per serving. That means you stay full longer and your body gets good fuel. No heavy feeling afterward, just happy energy. I like knowing that a simple can of chickpeas can do so much. It is proof that you do not need fancy ingredients to eat well. Sometimes the humble pantry star shines the brightest. So grab that can of chickpeas and give this a try. I bet you will make it again next week. Have you ever made fajitas with chickpeas before? I would love to hear how they turned out. Happy cooking, friend.Ingredients:
| Ingredient | Amount | Notes |
|---|---|---|
| Canned chickpeas | 2 (15-oz / 425 g) cans | Drained and rinsed |
| Bell peppers (any color) | 2 medium | Seeded and sliced |
| Portobello mushrooms | 2 large | Stems removed, sliced |
| Zucchini | 1 medium | Sliced |
| Red onion | ½ medium | Thinly sliced |
| Olive oil | ¼ cup (60 mL) | |
| Chili powder | 1 Tbsp | |
| Cumin | 1 tsp | |
| Smoked paprika | 1 tsp | |
| Salt | ½ tsp | |
| Garlic powder | ½ tsp | |
| Onion powder | ½ tsp | |
| Medium tortillas | 4 | For serving |
| Guacamole, sour cream, cheese, cilantro | To taste | For serving |
One Can, One Dinner, Happy Memories
I remember the first time I tried chickpeas. I was a little girl, and my grandma called them “little happy beans.” She was right. They are so friendly and easy to cook with. You will love this recipe because it uses just one can of chickpeas. Everything comes together on one baking sheet.
Doesn’t that smell amazing already? These fajitas are perfect for a busy weeknight. You don’t need a lot of fancy tools or ingredients. Just a can opener, a knife, and a pan. Let me show you how easy it is.
Let’s Make Crispy Chickpea Fajitas
Step 1: First, preheat your oven to 400°F. Grab your two cans of chickpeas and drain them in a colander. Pour the chickpeas onto a few layers of paper towels. Let them dry while you chop the vegetables. (Hard-learned tip: If the chickpeas are wet, they won’t get crispy. Pat them dry until they feel a little dry to the touch.)
Step 2: Now, cut the bell peppers and portobello mushrooms into long strips. Slice the zucchini into little half-moons. Cut the red onion into thin slices. I always cut my onion with my eyes squinted shut. I still laugh at how silly I must look!
Step 3: Take a large baking sheet. Put the dried chickpeas on one half. Put all the chopped veggies on the other half. Drizzle everything with the olive oil. Sprinkle all the spices on top: chili powder, cumin, smoked paprika, salt, garlic powder, and onion powder. Toss them with your hands until they are fully coated. What is your favorite spice to add to fajitas? Share below!
Step 4: Bake the sheet for 20 to 25 minutes. The veggies should be soft and the chickpeas should look a little golden. Then, turn your oven to “broil” for just 2 or 3 minutes. Watch it closely! The edges will get crispy and have little black char marks. That is where all the flavor hides.
Step 5: Warm your tortillas in the microwave or on a dry pan. Spoon the roasted chickpeas and veggies right down the middle. Top it all with guacamole, sour cream, some crumbled cheese, and fresh cilantro. Fold it up and take a big bite. That crunch is pure happiness.
Cook Time: 25–28 minutes
Total Time: 35 minutes
Yield: 4 fajitas
Category: Dinner, Fajitas
Three Fun Ways to Mix It Up
Sometimes I like to change this recipe to keep it interesting. Here are three of my favorite twists. They are all so good, it is hard to choose.
Spicy Mango Kick: Add some fresh mango chunks before baking. Drizzle a little hot honey on top at the end for a sweet and spicy surprise.
Cheesy Herb Dream: Sprinkle mozzarella cheese over the veggies in the last 5 minutes of baking. Add a handful of fresh basil when you serve it.
Smoky BBQ Swap: Replace the chili powder with a smoky BBQ rub. Serve with pickled red onions for a tangy crunch. Which one would you try first? Comment below!
What to Eat and Drink With It
These fajitas are wonderful all by themselves, but a little side dish never hurts. I love serving them with a simple corn salad or black beans on the side. A big squeeze of lime over everything makes it extra fresh.
For a drink, try an icy glass of horchata for the whole family. It is sweet and creamy, and it cools down the spice. For grown-ups, a cold Mexican lager beer is perfect. It is light and bubbles away the heat. Which would you choose tonight?
Storing and Reheating Your Chickpea Fajitas
This recipe makes a big batch. That is a good thing. You can eat it for lunch all week. Let the fajita filling cool down first. Then put it in a glass container with a lid. It stays good in the fridge for four days. I once forgot a container in the back of my fridge. I found it three days later. It was still tasty! That is why this matters. Batch cooking saves you time on busy nights. You just heat and eat. For the freezer, scoop the filling into a zip bag. Lay it flat to save space. It lasts for three months. To reheat, use a pan on the stove. A microwave works too. Sprinkle a little water on top first. This keeps it from drying out. Have you ever tried storing it this way? Share below!
Three Common Problems and Easy Fixes
Sometimes your chickpeas do not get crispy. This happens if they are wet. Pat them dry with a towel before baking. I learned this the hard way. I once had soggy chickpeas for dinner. It was still good, just not crispy. A second problem is watery veggies. Zucchini lets out a lot of water. Cut it into thick half-moons, not thin slices. Spread the veggies out on the pan. Give them room to breathe. Why does this matter? Dry veggies taste sweeter and char better. You get more flavor. A third problem is burnt edges. Watch your oven closely during broil. Ovens can be different. Set a timer for two minutes. Check and add more time if needed. I remember burning my first batch. The smoke alarm went off. That taught me to stay nearby. Which of these problems have you run into before?
Five Quick Questions and Answers
Q: Is this recipe gluten-free? A: Yes. Chickpeas and veggies are naturally gluten-free. Just use corn tortillas instead of flour ones.
Q: Can I make it ahead of time? A: Yes. Bake the filling up to two days before. Store it in the fridge. Assemble fajitas right before eating.
Q: What can I swap for zucchini? A: Try yellow squash or extra bell peppers. They cook the same way.
Q: Can I double the recipe? A: Yes. Use two baking sheets. Rotate them halfway through baking for even cooking.
Q: Any optional tips? A: Add a squeeze of lime before serving. It brightens the whole dish. Which tip will you try first?
A Warm Send-Off from Chloe
I hope you make these fajitas soon. Cooking with a can of chickpeas is so simple. It makes you feel good inside. *Fun fact: One can of chickpeas has more fiber than three slices of whole wheat bread.* That is a lot of fiber for your belly. Your body will thank you. Take a photo of your meal. Share it with someone you love. Or tag my blog on Pinterest. I love seeing your creations. Have you tried this recipe? Tag us on Pinterest! Happy cooking! —Chloe Hartwell.




Leave a Reply