
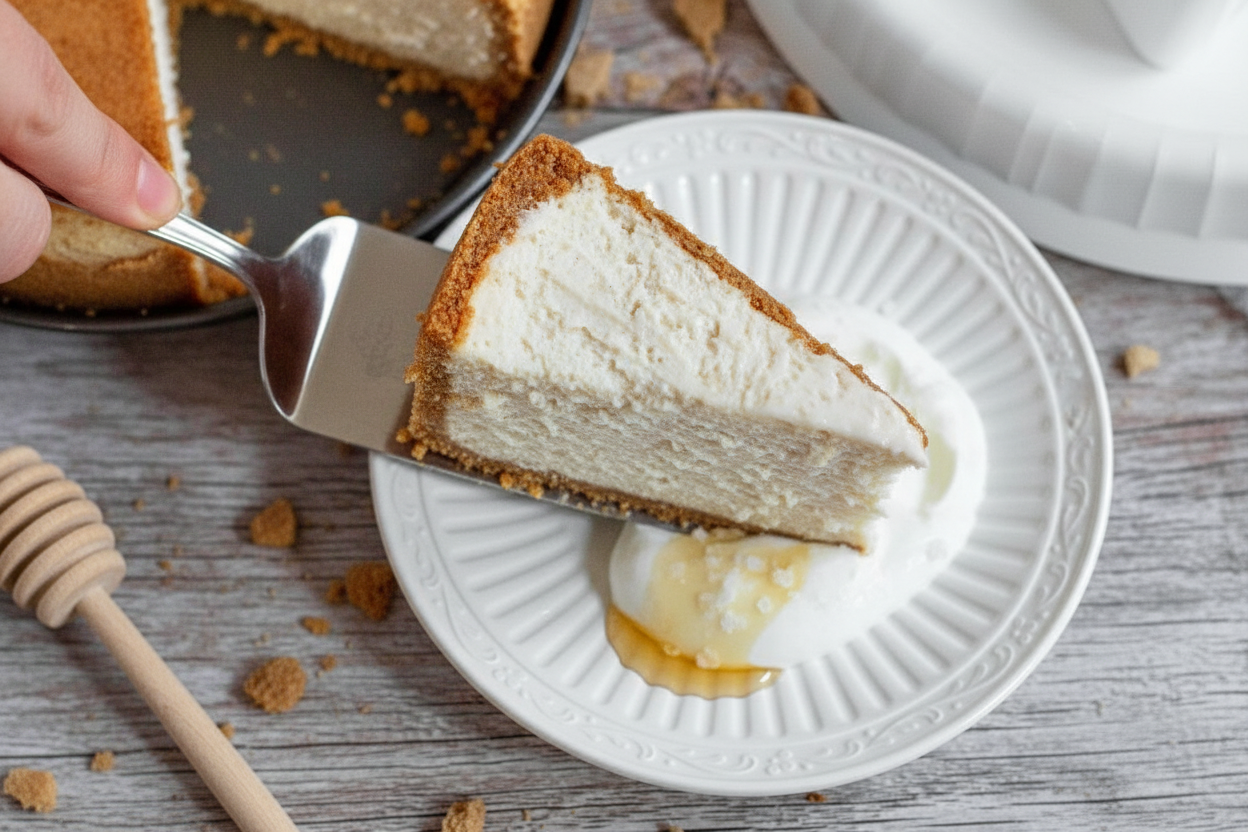
The First Time I Made This Cheesecake
I still remember the day I tried this recipe for the first time. My friend Mary had just gotten bees, and she showed up with a jar of honey so golden it looked like liquid sunshine. She said, “Make something special.” So I did. I pulled out my old springform pan, the one with a dent from when I dropped it in 1985, and got to work. The crust smelled like toasted cookies. Doesn’t that smell amazing? I had no idea if a honey cheesecake would even work. But when I pulled it out of the oven, it was perfect. My kitchen felt like a warm hug that day.
Have you ever baked something for the first time and hoped it would turn out okay? That is how I felt. This cheesecake is special because honey is not just sugar. It brings a flower taste, a little bit of the meadow right into your kitchen.
Why Honey Makes This Different
Honey is older than your grandmother’s grandmother. People have been eating it for thousands of years, and it never goes bad. *Fun fact: Archaeologists found honey in ancient Egyptian tombs that was still good to eat after 3,000 years.* That is why I love using it here. Honey does more than sweeten. It adds a soft, rich feeling to the cream cheese. It is like a slow song for your taste buds.
Here is why this matters: When you use honey instead of plain white sugar, you are eating something made by bees and flowers. It is a little gift from nature. Plus, if you have a friend who cannot eat dairy, you can use dairy-free cream cheese and butter, and the honey still makes it taste just as good. Have you ever tried a dairy-free cheesecake that actually tasted nice? This one does.
The Crust Is Like a Sandcastle
Making the crust is my favorite part. You mix the graham cracker crumbs with brown sugar and melted butter. It turns into a wet sand texture, just like building a sandcastle at the beach. My grandkids love to help press it into the pan with a flat-bottom cup. They always push too hard, and I laugh. “Easy now,” I tell them, “or you will have a rock for a crust.” The secret is to push it evenly, halfway up the sides. This matters because a strong crust holds the soft cheesecake inside. Without it, you get a mess on your plate.
You have to bake the crust for ten minutes first. Let it cool all the way. Then wrap the pan in tin foil. I learned this the hard way once. I skipped the foil, and water from the bath seeped in. My cheesecake looked like a sad soup. Do not be like me. Wrap it tight, twice. Have you ever had a baking mishap that made you laugh later?
The Water Bath Is a Warm Blanket
Here is another thing that matters: The water bath. It sounds fancy, but it is just a big pan of hot water that the cheesecake sits in while baking. The steam keeps the oven moist and gentle. This stops the top from cracking. I used to skip water baths when I was younger. My cheesecakes cracked like old pavement. Then a nice lady at a church potluck told me her secret. She said, “Treat it like a baby. Give it warmth and patience.” Now I always boil the water first, pour it carefully, and let the oven do the work.
After an hour, you turn off the oven and prop the door open with a wooden spoon. The cheesecake cools slowly inside. This is not a rush job. You need to let it think about what it just did. Then it sits on the counter, then in the fridge overnight. That long rest makes the texture silky and smooth. Do you have the patience to wait overnight for a dessert? I know it is hard, but the first bite makes you forget the wait.
A Little Story About the Topping
My neighbor once said, “Why put yogurt on a cheesecake? That is weird.” I just smiled and handed him a slice. The yogurt is not sour or heavy. It is a thin, creamy blanket that lets the honey soak in. Then you drizzle more honey on top, and sprinkle a little coarse salt. The salt makes the honey pop. It is like a tiny surprise that wakes up your mouth. He ate two slices and asked for the recipe.
Here is why this topping matters: It balances the sweet with a little tang and salt. Without it, the cheesecake is just sweet. With it, every bite feels complete. If you like salty-sweet things, this is your new best friend. I still laugh at how fast that neighbor changed his mind. What is a topping you love that most people think is strange?
Making It Fit for Everyone
I know some families have different needs. Maybe someone cannot eat gluten or dairy. I have written this recipe so you can swap in gluten-free graham crackers and dairy-free cream cheese and butter. It still works. I tested it myself with my friend who has a dairy allergy. She said it was the best cheesecake she had eaten in years. That made me happier than a clean kitchen.
This matters because food should bring people together, not leave anyone out. You do not need fancy ingredients. Just good honey, patience, and a little love. Tell me, do you cook for someone with a food allergy? What do you make for them?
Your Turn to Share
Now I want to hear from you. Have you ever made a cheesecake before? What was your biggest worry? Or maybe you have a favorite memory that involves honey. I would love to know. You can even share a tip you learned from your own kitchen adventures. Every cook has a story, and I want to hear yours.
One last question for you: If you could add one flavor to this cheesecake, what would it be? Lemon zest? A pinch of nutmeg? A swirl of raspberry? I think I might try lemon next time. Or maybe not. The honey is so good alone. What do you think?
Ingredients:
| Ingredient | Amount | Notes |
|---|---|---|
| Graham cracker crumbs | 2 1/4 cups (270g) | regular or gluten-free |
| Brown sugar | 1/4 cup (50g) | |
| Salted butter | 10 tablespoons (140g) | melted, regular or dairy-free |
| Cream cheese | 4 packages (32oz/900g) | room temperature, regular or dairy-free |
| Liquid honey | 1 cup (240ml/340g) | |
| Fine sea salt | 1 teaspoon | |
| Large eggs | 4 | room temperature |
| Vanilla extract | 1 teaspoon | |
| Cornstarch | 1/4 cup (32g) | |
| Ground cinnamon | 1 teaspoon | |
| Plain Greek yogurt | 1/2 cup (120g/120ml) | regular or dairy-free |
| Liquid honey (topping) | 1/2 cup (120ml/170g) | |
| Coarse sea salt | 1/2–1 teaspoon | to taste |
This Cheesecake Almost Got Me in Trouble
I still laugh at the first time I tried making a gluten-free cheesecake. It was for my neighbor Ruth’s birthday. She can’t have dairy, and I was so nervous. The crust crumbled everywhere like a sandy beach. I stood there, covered in graham cracker dust, wondering what went wrong. Doesn’t that smell amazing once it bakes, though? After a dozen tries, I figured out the trick. You have to press the crust down really firmly. Use a flat-bottom glass and really push. I promise it makes all the difference. Now this honey cheesecake is my go-to for anyone with food allergies. It feels fancy but it’s really just simple steps. Let me walk you through it so your first try is perfect.
Let’s Make the Crust and Filling Together
Step 1: Preheat your oven to 350°F. Grab a 9 or 10-inch springform pan and spray it with baking spray. This helps the crust release later without sticking. (Hard-learned tip: Don’t skip the spray, or your crust will become a permanent part of the pan. I learned that the hard way and had to eat cheesecake with a spoon!)
Step 2: In a big bowl, mix 2 1/4 cups graham cracker crumbs with 1/4 cup brown sugar. Whisk until it looks like light sand. Pour in 10 tablespoons of melted salted butter. Stir until it all feels like wet sand. My grandson always says it smells like a campfire at this stage.
Step 3: Dump the crust mixture into the pan. Press it evenly on the bottom and halfway up the sides. Use a flat-bottom glass to push down really hard. I like to sing a little song while I press. It makes the job feel less like work. Bake for 10 minutes, then let it cool completely on the counter. Once cool, wrap the bottom of the pan tightly in two layers of tin foil.
Step 4: Bring 4 cups of water to a boil on the stove or in the microwave. Set it aside for now. This will be the steam bath that keeps your cheesecake from cracking. In a large bowl, beat 4 packages of room-temperature cream cheese with 1 cup liquid honey and 1 teaspoon salt. Use medium speed for about 2-3 minutes until it’s smooth as silk. What’s your favorite kind of honey to bake with? Share below!
Step 5: Add the 4 eggs one at a time. Scrape down the bowl after each egg. It’s important to go slow here. If you dump them all in at once, the batter gets lumpy. Now mix in 1 teaspoon vanilla extract for another 2 minutes. Finally, stir in 1/4 cup cornstarch and 1 teaspoon cinnamon on low speed for 30 seconds. Pour the batter into the cooled crust. Tap the pan on the counter to pop any air bubbles. My daughter always taps it until she hears no more fizzing sounds.
Step 6: Place the foil-wrapped pan inside a larger 12-14 inch pan. Carefully pour the boiling water into the big pan until it reaches halfway up the cheesecake pan. This is the water bath. Slide it gently into the oven and bake for exactly 1 hour. When the timer goes off, turn the oven off. Prop the oven door open with a wooden spoon. Let the cheesecake cool inside for another hour. Then take it out, remove the foil, and cool on the counter for one more hour.
Step 7: Cover the cheesecake with plastic wrap and put it in the fridge. Let it chill for at least 6 hours, but overnight is better. I always make mine the day before. When you’re ready to serve, spread 1/2 cup plain Greek yogurt on top. Drizzle 1/2 cup honey over the yogurt. Sprinkle 1/2 to 1 teaspoon coarse sea salt. My friend Betsy says the salt is like a little surprise for your tongue. Store leftovers in the fridge for up to 5 days or freeze for 3 months.
Cook Time: 1 hour
Total Time: 8+ hours (includes chilling)
Yield: 12 servings
Category: Dessert
Three Fun Twists on This Cheesecake
Lemon Lavender Honey Cheesecake: Add 2 tablespoons fresh lemon zest and 1 teaspoon dried lavender to the batter. It tastes like a sunny garden in spring. Your kitchen will smell like a fancy spa.
Spiced Apple Honey Cheesecake: Fold 1 cup of finely chopped, sauteed apples into the batter. Add a pinch of nutmeg and ginger. It’s like having warm apple pie inside your cheesecake. Perfect for fall evenings.
Salted Caramel Honey Cheesecake: Swap the honey in the topping for 1/2 cup of homemade salted caramel sauce. Drizzle it thick over the yogurt. The caramel gets all gooey and wonderful. Which one would you try first? Comment below!
How to Serve This Beauty Up
I like to serve this cheesecake on a pretty white plate with a few fresh berries on the side. Sliced strawberries or blueberries add a pop of color. You can also sprinkle extra cinnamon on the plate for a pretty design. For a cozy drink, pour a glass of cold oat milk or chamomile tea. If you’re serving adults, a small glass of mead or a honey-sweetened white wine pairs beautifully. The honey flavors just sing together. Which would you choose tonight?
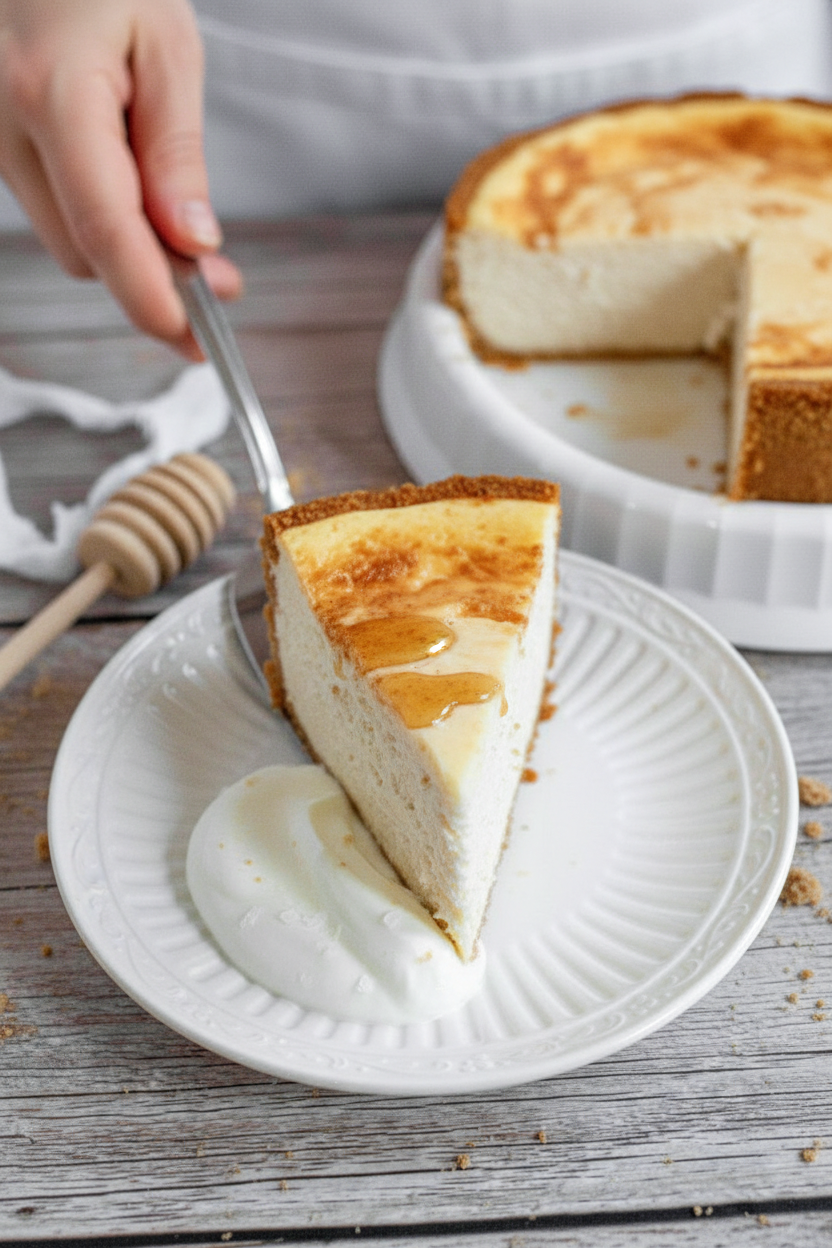
Storing Your Honey Cheesecake the Right Way
This cheesecake is a treasure. You will want to save every bite. I remember my first one. I left it on the counter overnight, and it got too soft. Learn from my mistake!
Always store leftovers in the fridge. Put them in an airtight container. They will stay fresh for up to five days. For longer storage, wrap slices tightly in plastic wrap. Then put them in a freezer bag. They keep for up to three months.
To reheat a frozen slice, let it thaw in the fridge overnight. Do not use the microwave. It will make the crust soggy. This matters because a good texture makes the whole dessert better. Batch cooking is smart too. Make two cheesecakes at once. Freeze one for a busy week. Then you always have a treat ready. Have you ever tried storing it this way? Share below!
Three Common Cheesecake Problems and Easy Fixes
Even I have made mistakes with cheesecake. The first problem is cracks on top. This happens when the oven is too hot or the cake cools too fast. To fix this, use a water bath. The steam keeps the cake gentle. I once forgot the water bath, and my cheesecake looked like a map of roads!
The second issue is a runny center. This means the cheesecake is underbaked. You must bake it for the full hour. Then let it cool slowly in the oven with the door propped open. Why does this matter? It makes your baking skills grow. You learn to trust the process.
The third problem is a crumbly crust. It happens when you do not press it hard enough. Use a flat glass to push it down firmly. Press it up the sides, too. This matters because a solid crust holds every creamy bite. Which of these problems have you run into before?
Your Top 5 Questions Answered
Q: Can I make this gluten-free?
A: Yes. Use gluten-free graham crackers for the crust. The rest of the recipe is already safe.
Q: Can I make it ahead of time?
A: Absolutely. Bake it a day early. It tastes better after chilling overnight.
Q: What can I swap for honey?
A: Use maple syrup instead. Your cheesecake will have a different, but lovely, flavor.
Q: How do I scale the recipe for a smaller pan?
A: Use a 6-inch pan. Cut all ingredients in half. Bake for 45 minutes instead.
Q: Can I skip the water bath?
A: It is risky. The water bath keeps the cake creamy. Skip it only if you like cracks. Which tip will you try first?
A Sweet Goodbye from My Kitchen
I hope you make this honey cheesecake and love it. It is soft, sweet, and just right for any day. That first bite reminds me of sunny mornings with my family. You can create those moments too. Share your lovely cheesecake photos with us. Have you tried this recipe? Tag us on Pinterest! I love seeing your baking wins. You are doing wonderfully. Keep stirring, keep tasting, and keep sharing. Happy cooking!
—Chloe Hartwell
*Fun fact: Honey never spoils. Archaeologists found edible honey in ancient Egyptian tombs.*
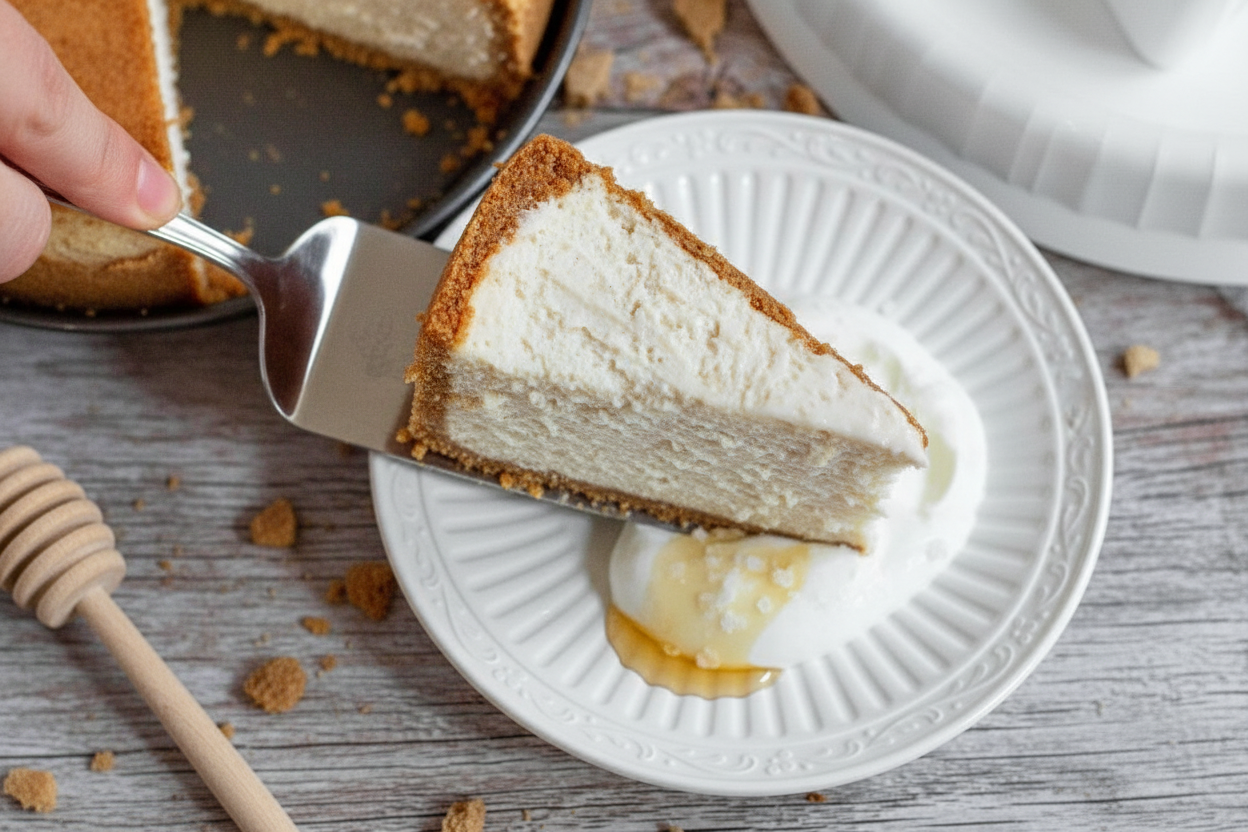
Gluten-Free Dairy-Free Honey Cheesecake Recipe
Description
Indulge in a creamy Gluten-Free Dairy-Free Honey Cheesecake – a luscious, allergy-friendly dessert that’s naturally sweetened and perfection.
Ingredients
Instructions
- Preheat the oven to 350°F and prepare a 9 or 10-inch springform pan with non-stick baking spray.
- In a large mixing bowl, add the graham cracker crumbs and sugar and whisk until well combined. Pour the melted butter into the bowl and mix until the butter until a wet sand-like texture is achieved.
- Add the crust mixture into pan and press it down evenly on the bottom and halfway up the side of the pan. Use a flat-bottom glass or measuring cup to press down firmly or else the crust will crumble.
- Bake for 10 minutes and then remove the crust from the oven and allow it to fully cool to room temperature before using. Once cooled, tightly wrap the bottom of the pan in two layers of tin foil.
- On the stove or in the microwave, bring 4 cups of water to a boil and set aside. This will be used as a steam bath for the cheesecake.
- With an electric hand mixer or a stand mixer fitted with the paddle attachment, blend the cream cheese, honey, and salt on medium speed until fully combined and smooth. This should take approximately 2-3 minutes.
- Add in the eggs, one at a time, scraping down the bowl after each addition.
- Add in the vanilla extract and mix again on medium speed for another 2 minutes.
- Measure in the cornstarch and cinnamon and combine at low speed for 30-45 seconds.
- Pour the honey cheesecake batter into the fully cooled crust and tap the pan against a countertop to pop any air bubbles in the batter.
- Place the tinfoil-wrapped pan into a 12-14″ pan, then pour the boiling water into the outer pan until it reaches about halfway up the cheesecake pan. This is the water bath.
- Gently place the pans in the preheated oven and bake for 1 hour.
- After the 1-hour mark, turn the oven off, and use a wooden spoon to prop the oven door open and allow the cheesecake to gradually cool in the oven for 1 hour.
- Carefully remove the cheesecake from the outer pan and discard the foil. Cool the cheesecake on the countertop for another hour.
- Cover the cheesecake with plastic wrap and transfer it to the refrigerator to cool for at least 6 hours or preferably overnight.
- When ready to serve the cheesecake, spread the Greek yogurt over the top, drizzle on the honey, and sprinkle on the salt. Enjoy!
Notes
- Store leftover cheesecake in an airtight container in the fridge for up to 5 days or frozen for up to 3 months.




Leave a Reply