
Why I Still Make Browning Sauce
I learned to make browning sauce from my grandmother. She called it “kitchen gold.” It was just sugar and water, but it made everything taste richer. I still laugh at that. Such simple things can be so special.
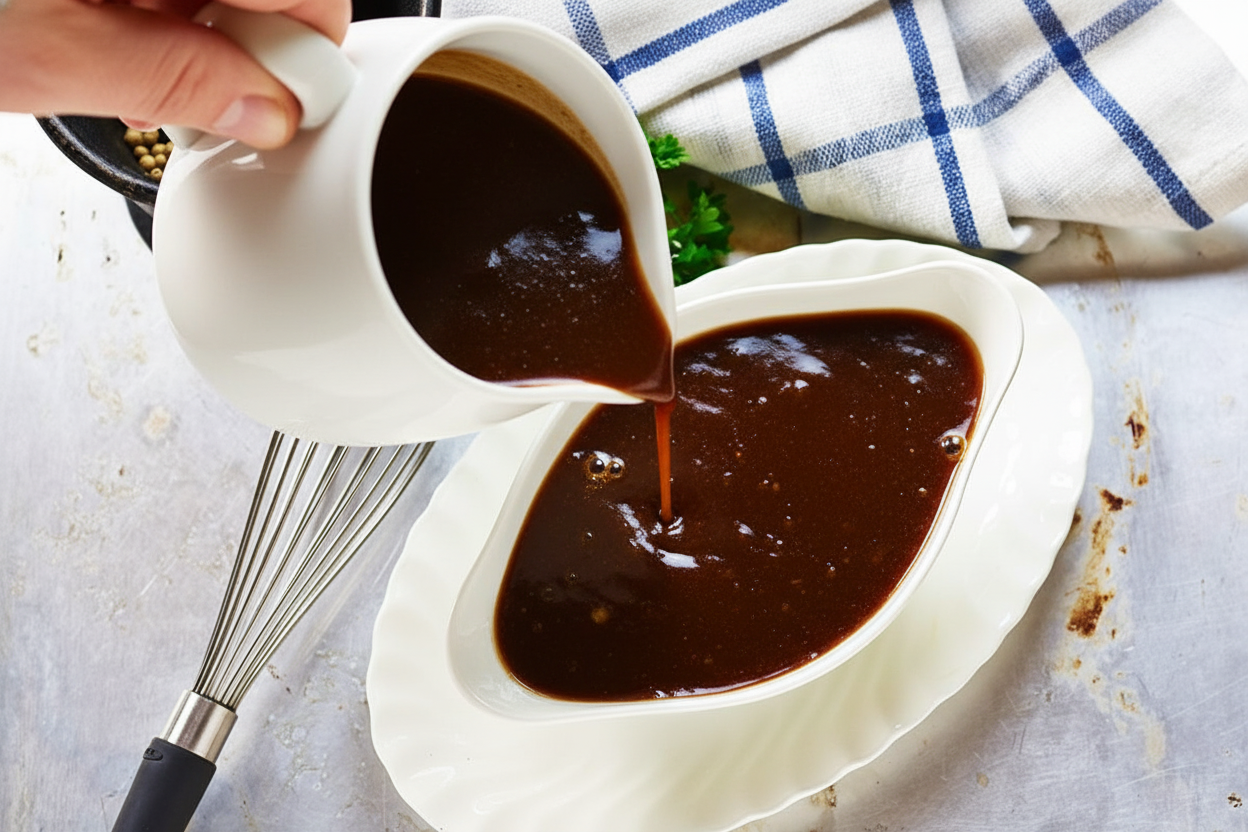
You might know it as gravy browning or caramel coloring. It’s what gives stews and sauces that deep, dark color. Have you ever seen a pot of brown gravy that looked almost black? That’s browning sauce at work.
Here is a little secret: does your gravy or soup ever look pale and sad? A few drops of this sauce fixes it. That’s why I always keep a jar in my fridge. Fun fact: This homemade version has no weird chemicals, just three things from your pantry.
My First Burn (A True Story)
The first time I made this, I was twelve. I put the sugar in the pan and walked away. Big mistake. The sugar turned black and started smoking. My mother ran in and yelled, “Sugar is a fireball waiting to happen!” She was right.
Now I stay right next to the stove. I stir slow and steady. It takes about ten minutes. The sugar turns from white grains into a clear syrup. Then it gets darker, like maple syrup, then like strong tea. That’s when you need to watch closely.
Does your nose catch a sweet, almost toasty smell? That means you’re almost there. It smells like a fairground caramel apple. But don’t wait too long, or it turns bitter.
Why This Matters for Your Kitchen
Store-bought browning sauce has stuff like ammonium sulfite. That sounds scary, right? This homemade version has just cane sugar, water, and salt. You control every bit of it. It’s a little thing, but it matters. You know exactly what you are eating.
Another reason? It saves money. A bag of sugar costs almost nothing. One cup of sugar makes one cup of sauce. A tiny bottle at the store costs twice as much. And this keeps in your fridge for six months. That is a good deal.
Reader prompt: Have you ever made something from scratch that changed your cooking? Tell me about it. I love hearing your stories.
The Tricky Part: Adding Water
Melting the sugar is easy. The scary part is when you add the hot water. I warn you, it will hiss and jump like a cat in a bath. Steam will puff up in your face. That steam is hotter than boiling water, so keep your hands back.
Add the water one tiny splash at a time. Use a long spoon. Stir after each splash. The sugar will harden into a lump at first. Do not worry. It will melt again as the water heats up. Just keep stirring. Soon it becomes a smooth, dark liquid.
Reader prompt: On a scale from 1 to 10, how confident do you feel about adding hot water to hot sugar? Be honest. I was a 2 my first time.
What This Sauce Does To Food
This is not a sauce you eat plain. That would be bitter and weird. You use it like a paintbrush. A splash adds color. Two splashes add color and a tiny bit of sweet-savory flavor. Three splashes, and your dish looks like it cooked all day.
I use it in stews, pot roasts, and soups. Sometimes I add a drop to baked beans. It makes them look darker and richer. It’s like a magic trick. Why does this matter? Because we eat with our eyes first. Brown food feels more comforting to most people.
How to Store It and Use It Later
Let the sauce cool completely first. Then pour it into a clean glass jar. I use an old jam jar. Screw the lid on tight. Put it in the fridge. It lasts up to six months, maybe longer if nobody uses it all.
One batch of this will last most families half a year. That’s not a lot of work for months of good meals. Reader prompt: What is the oldest jar in your fridge right now? Mine is a jar of pickle juice from last July. I still use it in potato salad.
One Last Thought
I love that this recipe is a tradition. My grandmother taught me, and I taught my daughter. Now you know it too. It’s not fancy. It’s not hard. But it feels good to make something useful from scratch.
So give it a try. Pick a quiet afternoon. Grab a cup of sugar. Don’t rush. And if it smokes? Just laugh, turn down the heat, and start over. That is how we all learn.
Ingredients:
| Ingredient | Amount | Notes |
|---|---|---|
| Cane sugar | 1 cup | |
| Hot water | 1/2 cup | |
| Salt | 1 teaspoon |
That Little Bottle of Magic in Your Fridge
My grandmother always kept a jar of dark, mysterious sauce in the back of her fridge. She called it “browning,” and I thought it was just for coloring gravy dark brown. But then she let me in on a secret: it is so much more. This simple mix of melted sugar, water, and salt is like a flavor hug for soups and stews. It adds a deep, toasty taste that plain caramel just cannot match. I still remember the first time I tasted her pot roast with a splash of this stuff—it was pure comfort.
Making your own browning sauce at home is easy, but you have to be patient. It is one of those recipes where watching and waiting matters most. The hardest part? Not burning the sugar, which I have done more times than I want to admit. Does not that smell amazing when it starts to toast? Let me walk you through it, step by step.
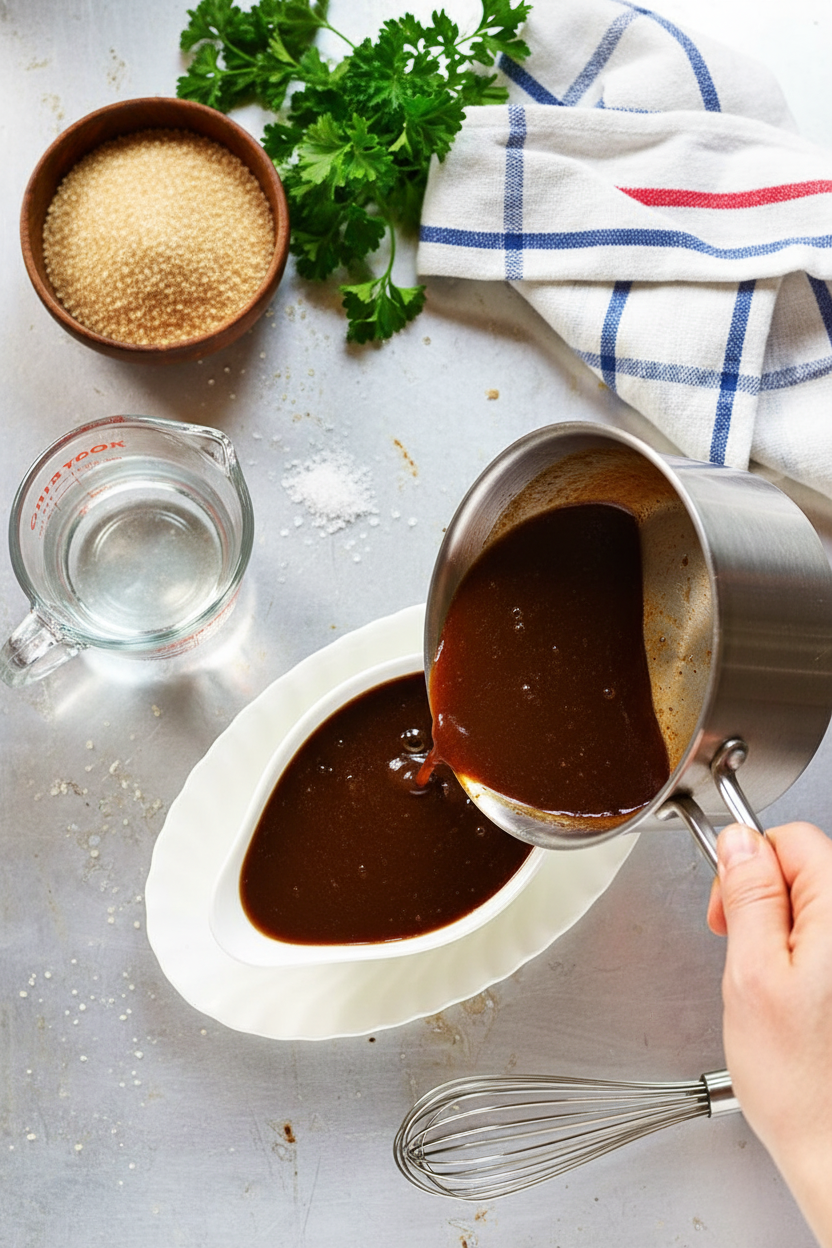
Here is what you need: 1 cup of cane sugar, 1/2 cup of hot water, and 1 teaspoon of salt. That is it. You probably have all three things in your kitchen right now. Remember, a teaspoon of this sauce has about 15 calories and 10 mg of sodium. It is small, but it packs a punch of flavor.
Steps to Make Browning Sauce
Step 1: Grab a heavy-bottomed saucepan or a cast-iron skillet. Pour in the sugar and turn the heat to medium-low. Stir slowly and steadily as the sugar melts into a clear, golden syrup. Do not walk away! (This is a hard-learned tip: if the sugar starts to smoke, you are too hot—turn the heat down fast.) Keep stirring until the color becomes a very dark brown, almost like dark amber.
Step 2: Once your sugar is dark but not black, pull the pan off the stove carefully. Now comes the fun part: add the boiling water one tablespoon at a time. The pan will steam and sputter like a tiny volcano, so keep your hands back. I got a small burn on my wrist the first time I tried this—learn from my mistake. Stir gently after each spoonful of water until you have added all 1/2 cup.
Step 3: With all the water stirred in, add the salt. Give it a good mix until everything is smooth and dissolved. Let the sauce cool completely on the counter. I sometimes set a timer so I do not forget it. While it cools, think about all the dishes you can use this in—stews, beans, even some barbecue glazes. What is your favorite recipe that needs a dark, rich flavor? Share below!
Step 4: When the browning sauce is cool, pour it into a clean, airtight jar or bottle. Pop it in the refrigerator, and it will keep for up to six months. I like to label mine with the date so I know when I made it. That way, I never have to guess if it is still good. It is like having a little jar of grandmother magic ready whenever you need it.
Cook Time: 10-15 minutes
Total Time: 30 minutes (includes cooling)
Yield: About 1 cup
Category: Condiment, Kitchen Staple
Three Fun Twists to Try at Home
Want to shake things up a little? Here are three easy ways to change your browning sauce. Each one adds a whole new personality to the same simple recipe.
Smoky Tear-jerker: Add a pinch of smoked paprika and a tiny splash of apple cider vinegar after the water. It gives a sweet, smoky, tangy taste perfect for pulled pork or baked beans.
Spicy Surprise: Stir in a small dried chili or a shake of cayenne pepper while the sugar melts. This makes a browning sauce with a little kick for chili or spicy stews.
Vanilla Dream: After the sauce cools, add a drop of pure vanilla extract. It sounds odd, but it creates a warm, almost caramel-like flavor for desserts like bread pudding or over ice cream.
Which one would you try first? Comment below!
How to Serve and Sip
This browning sauce is a star when you let it shine in the right dish. For serving ideas, try a splash in a bowl of hearty lentil soup to deepen the flavor. You can also brush it on roasted carrots or parsnips for a shiny, sweet glaze. For a classic move, stir one tablespoon into your next pot of beef stew just before serving.
Now, what about a drink to go with your meal? For a cozy night, pair a rich stew with a dark, malty ale. It matches the deep sweetness of the sauce perfectly. If you want something non-alcoholic, a tall glass of sparkling apple cider with a cinnamon stick works wonderfully. It cuts through the richness with a crisp fizz.
Which would you choose tonight?
Storing Your Browning Sauce
This sauce keeps well in the fridge for up to six months. Pour it into a clean glass jar or an airtight container. I remember my first batch turned rock hard in the fridge. I had forgotten to seal the lid tight. Always screw the lid on firmly to keep out moisture. You can also freeze it in ice cube trays. Pop out a cube whenever you need a little color in a stew or gravy. Batch cooking this sauce saves you time later. Why does this matter? Because having it ready means dinner comes together faster on busy nights. Have you ever tried storing it this way? Share below!
Three Common Issues and Easy Fixes
The first problem is the sugar burning. If it smokes, you have the heat too high. Turn it down right away and stir faster. I once left the pan for just ten seconds. The whole thing turned black and bitter. Second, the sauce can get too thick. Just stir in a tablespoon of hot water to thin it. Third, the sugar might seize into hard lumps. This happens if you add water too fast. Pour water slowly and stir between each tablespoon. Fixing these issues builds your cooking confidence. You stop fearing sugar and start mastering it. That confidence makes every meal taste better. Which of these problems have you run into before?
Quick Questions and Answers
Q: Is this sauce gluten-free?
A: Yes, absolutely. It is just sugar, water, and salt.
Q: Can I make it ahead of time?
A: Yes. Make it a month early and store it in the fridge.
Q: Can I swap white sugar for brown sugar?
A: You can, but the flavor will be richer and less neutral.
Q: How do I scale the recipe down?
A: Use half a cup of sugar and quarter cup of water. Keep the salt at half a teaspoon.
Q: Any tip to make it less bitter?
A: Stop cooking when the sugar is dark brown, not black. That simple trick saves the batch.
*Fun fact: This sauce is often called “kitchen bouquet” in old cookbooks.*
Which tip will you try first?
A Warm Goodbye from Chloe
I hope this little recipe brings color and flavor to your kitchen. It is one of those simple tricks that makes a big difference. Homemade browning sauce tastes better than store-bought, and you control every ingredient. I would love to see how yours turns out. Have you tried this recipe? Tag us on Pinterest! Share a photo of your jar or your finished dish. I read every comment and cheer for every cook. Happy cooking!
—Chloe Hartwell.

Browning Sauce Uses Flavor and Definition
Description
Discover delicious browning sauce uses for rich flavor and deep color in stews, gravies, and marinades. Enhance your cooking today! easy recipes, beef dishes, kitchen tips, savory meals, sauce ideas
Ingredients
Instructions
- Using a heavy-bottomed saucepan or a cast-iron skillet, heat the sugar over medium-low heat. Stir slowly and consistently as the sugar melts into a clear syrup. Continue stirring until the color become very dark brown. If the sugar begins to smoke, turn down the heat.
- When the sugar is dark but not black, remove the pan from the stove. Slowly add the boiling water one tablespoon at a time. The pan will steam and sputter, so take care to avoid burning your hands. Stir with each addition of water until the entire 1/2 cup is added.
- Once all the water has been added, stir in the salt. Allow the mixture to cool.
- When the browning sauce is cooled, pour it into an airtight container. Store it in the refrigerator for up to six months.
Notes
- Yield: Approximately 1 cup browning sauce. A teaspoon of it typically has about 15 calories, no fat and 10 mg of sodium.


Leave a Reply