
The First Time I Made This
I remember the first time I made this dish. It was a chilly Tuesday in November, and my kitchen smelled like a warm hug. I had a big, funny-looking butternut squash sitting on my counter. It looked like a fat, orange peanut. I had never roasted one before, and I was a little scared of cutting it. I still laugh at that memory. But the taste was so worth it.
Sometimes the best recipes come from being a little brave in the kitchen. Doesn’t that make you want to try something new today?
What You Need and Why
You only need a few simple things. A butternut squash, a bulb of garlic, some olive oil, and a block of cream cheese. That is it. The cream cheese is the secret. It makes the mash extra creamy and a little tangy. Why does this matter? Because simple ingredients can turn into something really special. You don’t need a dozen fancy things from the store.
The garlic gets roasted in foil until it is sweet and soft. It turns into a paste that you squeeze out like toothpaste. I always let my kids do this part. Have you ever squeezed roasted garlic out of its skin? It feels like magic.
Prep Is Not Scary
First, turn your oven to 375 degrees. Be careful when cutting the squash. It is hard. I use a big, sharp knife and cut the top off first. Then I slice it in half, long ways. Scoop out the seeds with a spoon. You can save the seeds and roast them later for a crunchy snack. Drizzle the squash with oil and put it cut-side down on a baking sheet.
For the garlic, cut the very top off the bulb. Wrap it in foil with a little oil. Set it right next to the squash on the pan. Pop it all in the oven for about 45 minutes. Your house will start to smell amazing. That is your first clue that good things are coming.
My Garlic Squeeze Story
Here is a little story. One time, I forgot to wrap my garlic in foil. It got all dried out and hard. I was so sad. Now I always check the foil twice. When it is done, the garlic looks like a little brown package of treasure. Let it cool for a minute. Then squeeze the bottom. The soft, roasted cloves will slide right out. It is so satisfying. My granddaughter calls it “garlic pudding.”
This matters because roasting changes the garlic completely. Raw garlic is sharp and spicy. Roasted garlic is sweet and buttery. It is a whole different vegetable. Have you ever tasted raw garlic versus roasted? It is like night and day.
Let’s Mash Together
Once the squash is cool enough to touch, scoop out the orange flesh. Put it in a big bowl. Add the roasted garlic cloves and the cream cheese. You can use a potato masher for a chunky mash. I like it chunky because it feels more like food. Or you can use a blender for a super smooth mash. Both are good. Season with a pinch of salt.
*Fun fact: Butternut squash has more fiber than a bowl of oatmeal.* That is why this dish fills you up and keeps you happy. It is also full of vitamin A, which is good for your eyes. So you are eating something delicious AND healthy. Doesn’t that feel good?
Why This Dish Sticks Around
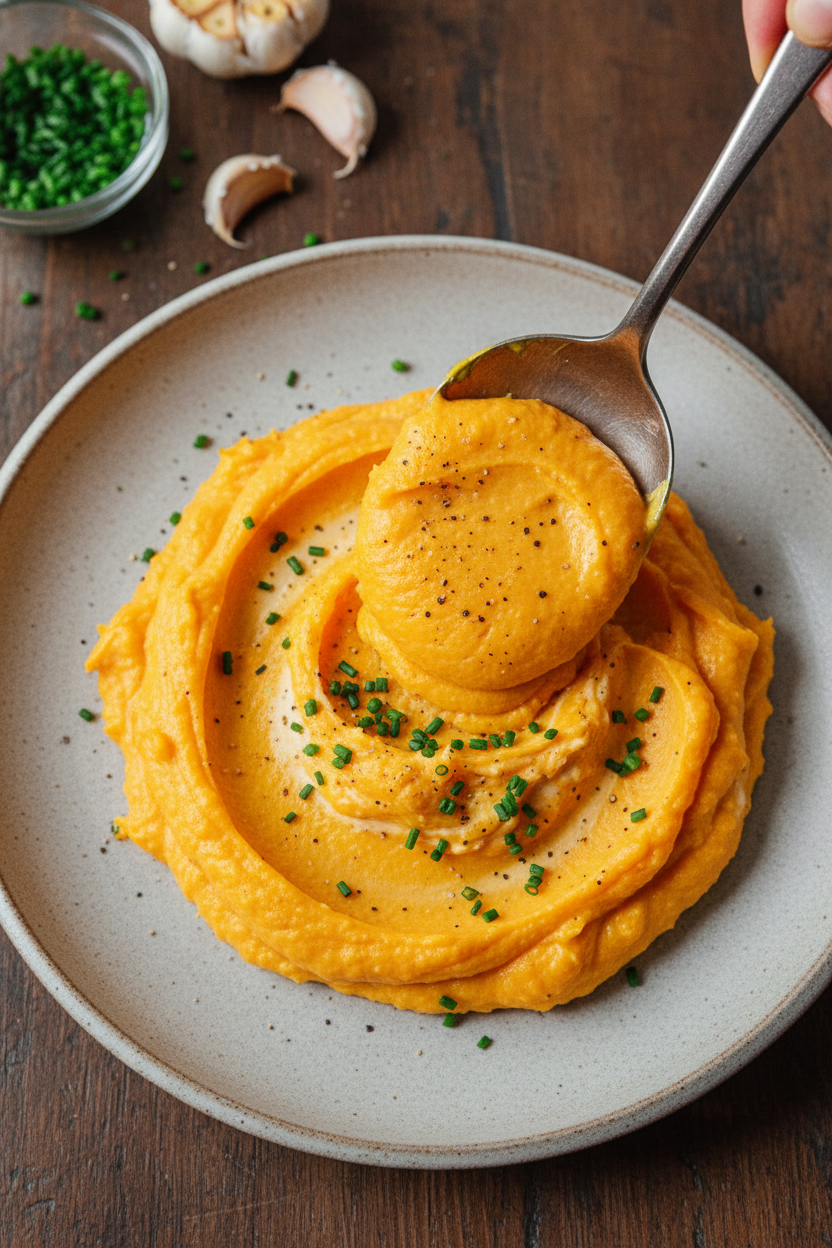
I have made this for Thanksgiving, for a Tuesday dinner, and for a rainy Sunday lunch. It fits everywhere. It is creamy and warm and tastes like fall in a bowl. The orange color is beautiful on the plate. It makes you want to take a big bite. I think that is why this recipe matters. It is comfort food that is good for you. It is simple enough for a kid to help make. And it makes the whole house smell like someone loves you.
I want to know: What is your favorite thing to eat when the weather gets cold? Do you like sweet or savory flavors more? Share your thoughts with me, I love hearing from you.
A Little Challenge for You
Next time you see a butternut squash at the store, pick one up. Give this recipe a try. It only takes a little bit of work, and the reward is huge. Taste the squash first before you add salt. Does it need it? Sometimes the squash is already sweet enough. Trust your own taste buds. You are the boss of your own kitchen.
Here is a question for you: Have you ever roasted a vegetable before? If not, I promise this is the easiest way to start. And if you have, what is your favorite one? I am always looking for new ideas to try.
Ingredients:
| Ingredient | Amount | Notes |
|---|---|---|
| Butternut squash | 1 medium | Peeled, seeded and cubed |
| Garlic | 1 bulb | Roasted |
| Olive oil | 2 to 4 Tbsp (30 to 60 mL) | For roasting |
| Cream cheese | 4 oz (113 g) | Room temperature |
How I Learned to Love Butternut Squash
I still remember my first time cooking butternut squash. I was scared of that big, hard thing! My grandma just laughed and showed me how to cut it safely. She said, “A sharp knife is your best friend, and a dull one is your worst enemy.” Now I make this Roasted Garlic Butternut Squash Mash for every holiday. Doesn’t that smell amazing when it roasts? The whole kitchen gets cozy and sweet.
This recipe is pure comfort. It’s creamy, a little sweet, and full of roasted garlic flavor. The cream cheese makes it extra rich and smooth. You can mash it chunky or blend it silky. I like it chunky, but my kids love it smooth. We always fight over the last bite! Have you ever tried roasted garlic straight from the bulb? It turns into buttery little gems. So good.
Let’s Make It Together
Here’s how to make this warm and creamy mash. Take your time and enjoy the process. I promise it is easier than it looks. (A hard-learned tip: Always use a big baking sheet. The squash needs room to breathe, or it steams instead of roasts.)
Step 1: Preheat your oven to 375°F. Carefully cut the top off your butternut squash. Now cut it in half lengthwise. Don’t peel it yet! Use a spoon to scoop out all those seeds. My cat loves to watch me do this part. I always make a little mess. Step 2: Drizzle olive oil all over the squash halves. Place them cut-side down on your baking sheet. Now take your garlic bulb. Cut a tiny bit off the top to show the cloves. Wrap it in aluminum foil with a drizzle of oil. Put it on the same sheet. (One time I forgot the foil. The garlic burned to a crisp. Learn from my mistake!) Step 3: Roast everything for about 45 minutes. The squash should feel soft when poked with a fork. The garlic will smell sweet and look golden. Let it cool for ten minutes. This is a good time to set the table or hum a song. Which song do you hum when you cook? Share below! Step 4: Scoop all the orange squash flesh into a big bowl. Squeeze those soft garlic cloves right out of their skins. Add the cream cheese. Now use a potato masher for a chunky mash. Or grab a blender for a silky, dreamy mash. Salt it to taste. Serve it warm, and watch the smiles appear. Cook Time: 45 minutesTotal Time: 1 hour
Yield: 4 servings
Category: Side Dish, Vegetarian
Fun Ways to Change It Up
This mash is wonderful just as it is. But sometimes I like to get creative. Here are three easy twists that my family loves.
Spicy Southwest Mash: Add a pinch of cumin, chili powder, and a little lime juice. It gives the sweet squash a warm, kicky flavor. Perfect with tacos! Herby Sage Delight: Stir in some chopped fresh sage and a sprinkle of nutmeg. It tastes like fall in a bowl. Great with roast chicken. Cheesy Garlic Dream: Swap the cream cheese for an equal amount of goat cheese. Add a handful of grated Parmesan. It gets tangy and extra creamy. Which one would you try first? Comment below!How to Serve and Sip
This mash is a star on any plate. Spoon it next to a juicy roast chicken or a seared steak. It also makes a lovely topping for toast topped with a fried egg. For a pretty look, drizzle a little olive oil and crack some black pepper on top. Sprinkle with fresh parsley if you have it.
For drinks, I love a warm mug of spiced apple cider. It matches the cozy squash perfectly. Grown-ups might enjoy a glass of dry white wine, like a Sauvignon Blanc. The crispness balances the creamy mash. Which would you choose tonight?
Storing and Reheating Your Squash Mash
Let your squash mash cool down before you put it away. Pop it in an airtight container for the fridge. It will stay good for up to five days. I remember the first time I made too much. I was sad thinking it would go to waste. But it tasted even better the next day! The flavors had time to get cozy together. Why does this matter? Storing leftovers saves time and money. You can enjoy a quick, healthy side dish later in the week.
You can also freeze this mash for up to three months. Spoon it into a freezer-safe bag or container. Lay it flat to save space. When you want it, thaw it in the fridge overnight. Reheat it gently on the stove or in the microwave. Add a splash of milk if it seems dry. I always make a double batch now. One for tonight, one for a busy Tuesday. Have you ever tried storing it this way? Share below!
This is called batch cooking. It is a smart habit for any home cook. Why does this matter? It gives you a head start on dinner. You will feel proud when you pull a homemade side from the freezer.
Common Problems and Easy Fixes
Sometimes the mash turns out watery. This happens when the squash is too wet. The fix is simple. After roasting, let the squash sit on a paper towel for a few minutes. This soaks up extra moisture. I once skipped this step and ended up with soup! Now I remember every time. Why does this matter? Good texture makes the dish feel more special. It builds your confidence in the kitchen.
Another problem is bland flavor. If your mash tastes flat, the garlic might need more time. Make sure your garlic is soft and golden brown. That is where all the sweet, rich flavor comes from. I remember burning a garlic bulb once. It smelled terrible. But I learned to wrap it tight in foil so it steams gently. A little patience goes a long way.
The last issue is lumpy mash. Some people like it chunky. That is fine! But if you want silky smooth, use a blender. A potato masher leaves small lumps. A blender gives you that creamy restaurant texture. Which of these problems have you run into before?
Quick Answers to Your Questions
Q: Is this recipe gluten-free? A: Yes, it is naturally gluten-free. Just check your cream cheese label to be sure.
Q: Can I make it ahead of time? A: Absolutely. Make it a day before and reheat gently. It tastes even better.
Q: What can I swap for cream cheese? A: Try plain Greek yogurt or soft goat cheese. Both work great.
Q: Can I double the recipe? A: Yes, just use a larger baking sheet. Roast time stays the same.
Q: Any optional tips? A: Sprinkle roasted pumpkin seeds on top for crunch. A little cinnamon adds warmth too. Which tip will you try first?
A Warm Goodbye from Chloe
Thank you for cooking with me today. I hope this mash becomes a cozy favorite in your home. It is perfect for chilly nights or holiday tables. *Fun fact: Butternut squash is actually a fruit, not a vegetable!* Have you tried this recipe? Tag us on Pinterest! I love seeing your beautiful dishes. Happy cooking! —Chloe Hartwell.

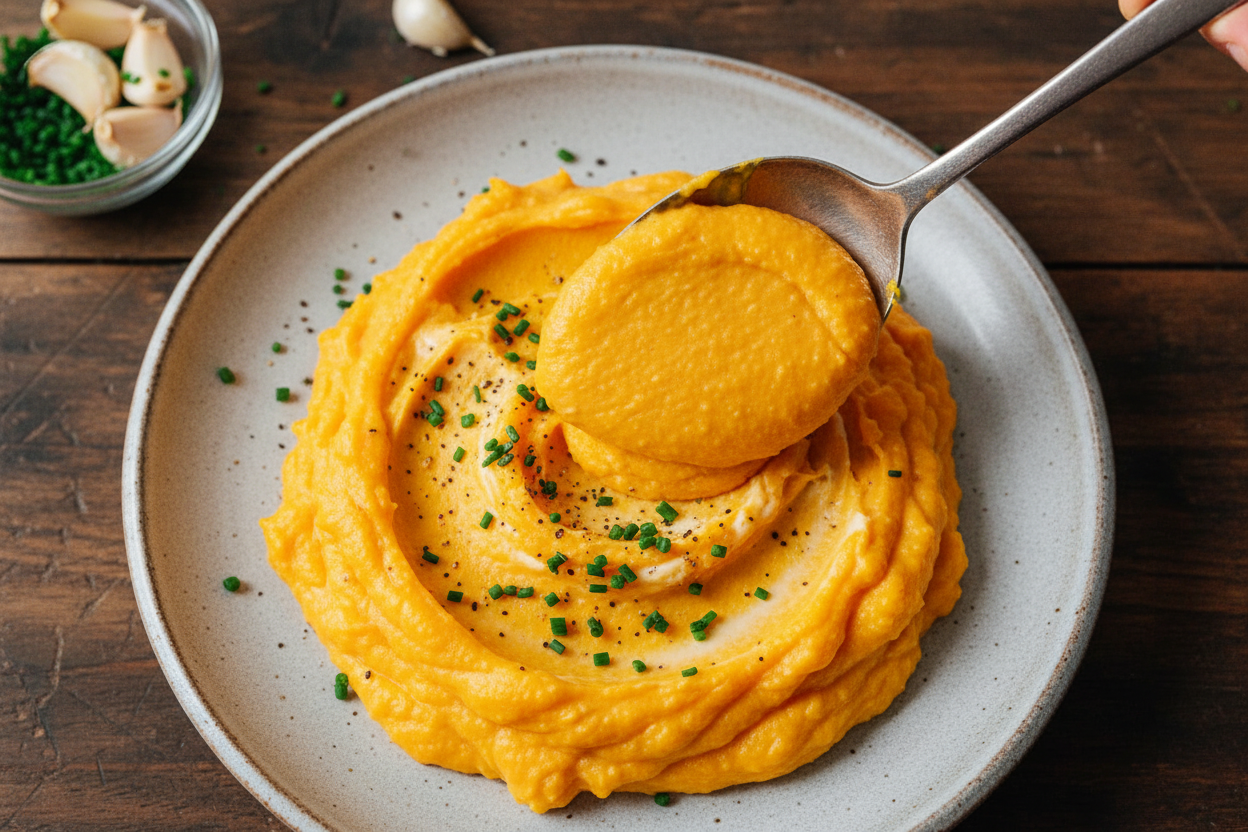
Roasted Garlic Butternut Squash Mash
Description
Creamy roasted garlic butternut squash mash, an easy healthy side dish perfect for fall dinners and holiday feasts. Low carb, gluten free, vegan friendly.
Ingredients
Instructions
- Preheat oven to 375°F (204°C). Cut the top off 1 medium butternut squash, then carefully cut it in half lengthwise (the skin can stay on). Use a spoon to scoop out the seeds. Drizzle the entire squash with olive oil, then place cut side down on a baking sheet. Cut the top portion off 1 bulb garlic to expose the cloves underneath. Add the garlic to a piece of foil large enough to wrap it up. Drizzle the top with oil then close it up tightly. Set it on the baking sheet.
- Cook for about 45 minutes, or until squash is tender and garlic is soft and caramelized.
- Allow butternut to cool slightly, then scoop out the orange flesh and place in a large bowl. Squeeze out caramelized garlic cloves and add them to the bowl, along with 4 oz cream cheese. Use with a potato masher (for chunkier mash) or a blender (for silky smooth mash). Season with salt, as needed, then serve warm!




Leave a Reply