
The Day I Fell in Love with a Little Lime
The first time I made these bars, I was trying to impress a friend from Florida. I thought key limes were just tiny, sad regular limes. Boy, was I wrong. They smell like sunshine in a bottle. I still laugh at how nervous I was, squeezing each tiny lime by hand. Doesn’t that smell amazing? The zest alone fills your whole kitchen with happy. Tell me, what’s a flavor that always takes you back to a happy memory? *Fun fact: Key limes are actually smaller, more yellow, and way more tart than the green ones at the grocery store. They got their name from the Florida Keys, where they grow wild.*Why We Use a Spoon for the Crust
This crust is simple. You grind up graham crackers until they look like sand. Then you mix in melted butter. The trick is pressing it down hard with the back of a spoon or a measuring cup. You want it tight, like a firm little bed for your filling. If it’s loose, the bars will fall apart when you cut them. That’s a lesson I learned the hard way, and I still have the crumbs in my sweater to prove it. Have you ever had a dessert that fell apart on your plate? Why this matters: A good crust holds everything together. It’s the foundation, just like having a solid friend who keeps you steady. When you press that crust down, you’re making sure every bite has that perfect crunch. It’s a small step, but it makes a big difference. Take your time here. It’s worth it.The Filling Is a Little Science Experiment
This part is like making a magic potion. You whisk the sweetened condensed milk with the lime juice and zest. The sour cream or yogurt makes it creamy, not too heavy. When you add the egg yolks, the mixture turns into something that bakes up soft and wobbly. I always start with half the lime juice and taste it first. Some like it super tart, some like it sweeter. You can adjust, just like you adjust how much sugar goes in your coffee. What’s your favorite level of sour? A little or a lot? Why this matters: Baking is about trusting your senses. The filling should jiggle in the middle when you shake the pan. That’s how you know it’s done. If you wait until it’s firm, you’ll end up with dry, rubbery bars. Learning to trust that little jiggle is a skill that helps with all custards and cheesecakes. It’s like learning to listen to your grandma when she says “just a little more.”Patience Is the Secret Ingredient
Here’s the hard part. You have to wait. After you bake the bars, you put them in the fridge overnight. I know, I know. You want to eat them right now. But trust me, they get so much better. The chill sets the filling into a smooth, creamy slice. It’s like letting a story settle in your mind before you tell it. The flavors blend together and become one happy family. Have you ever made something that tasted better the next day? I remember one time I had a slice of these bars that sat in the fridge for two days. It was the best one I ever ate. The lime flavor had calmed down and the sweetness was just right. Patience gives the sour cream time to do its job. It’s a small lesson in waiting for good things. Plus, it gives you time to wash the dishes, which is never fun, but somebody’s got to do it.The Fluffy Cloud on Top
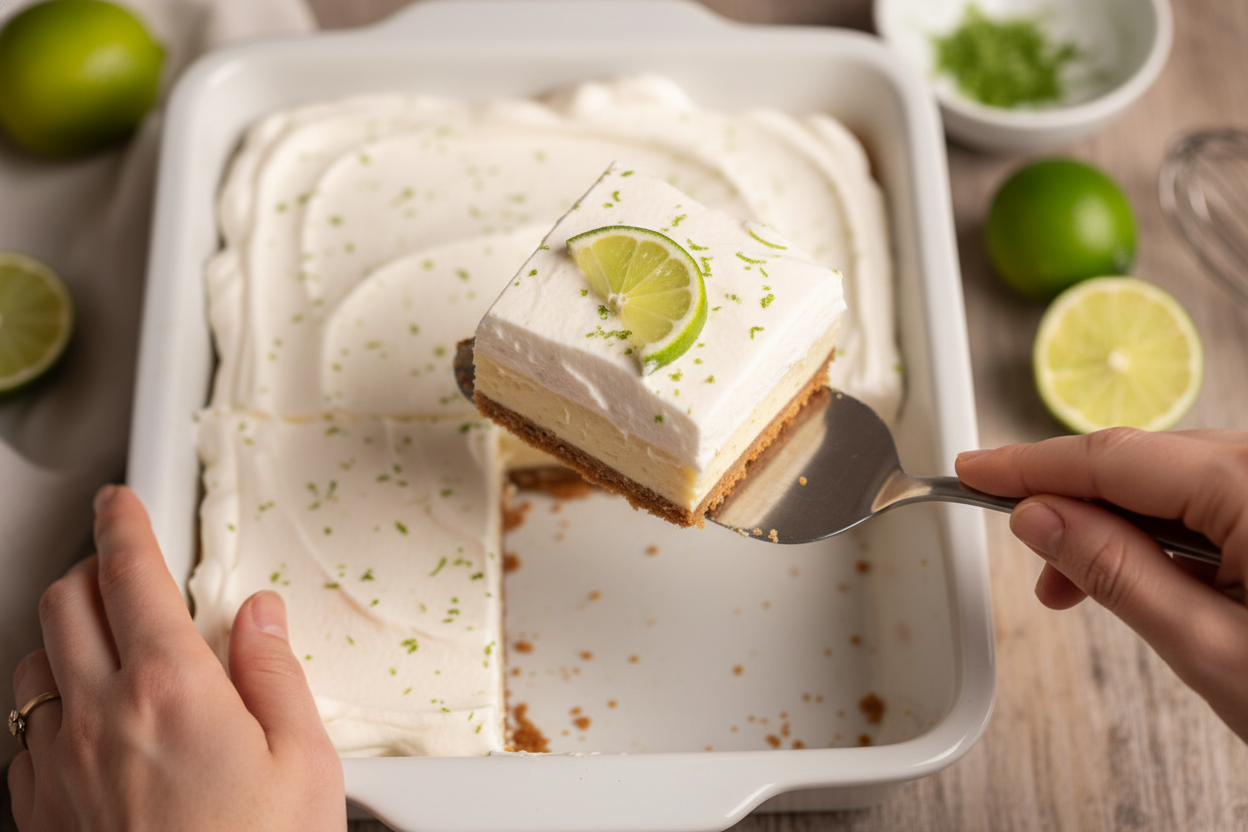
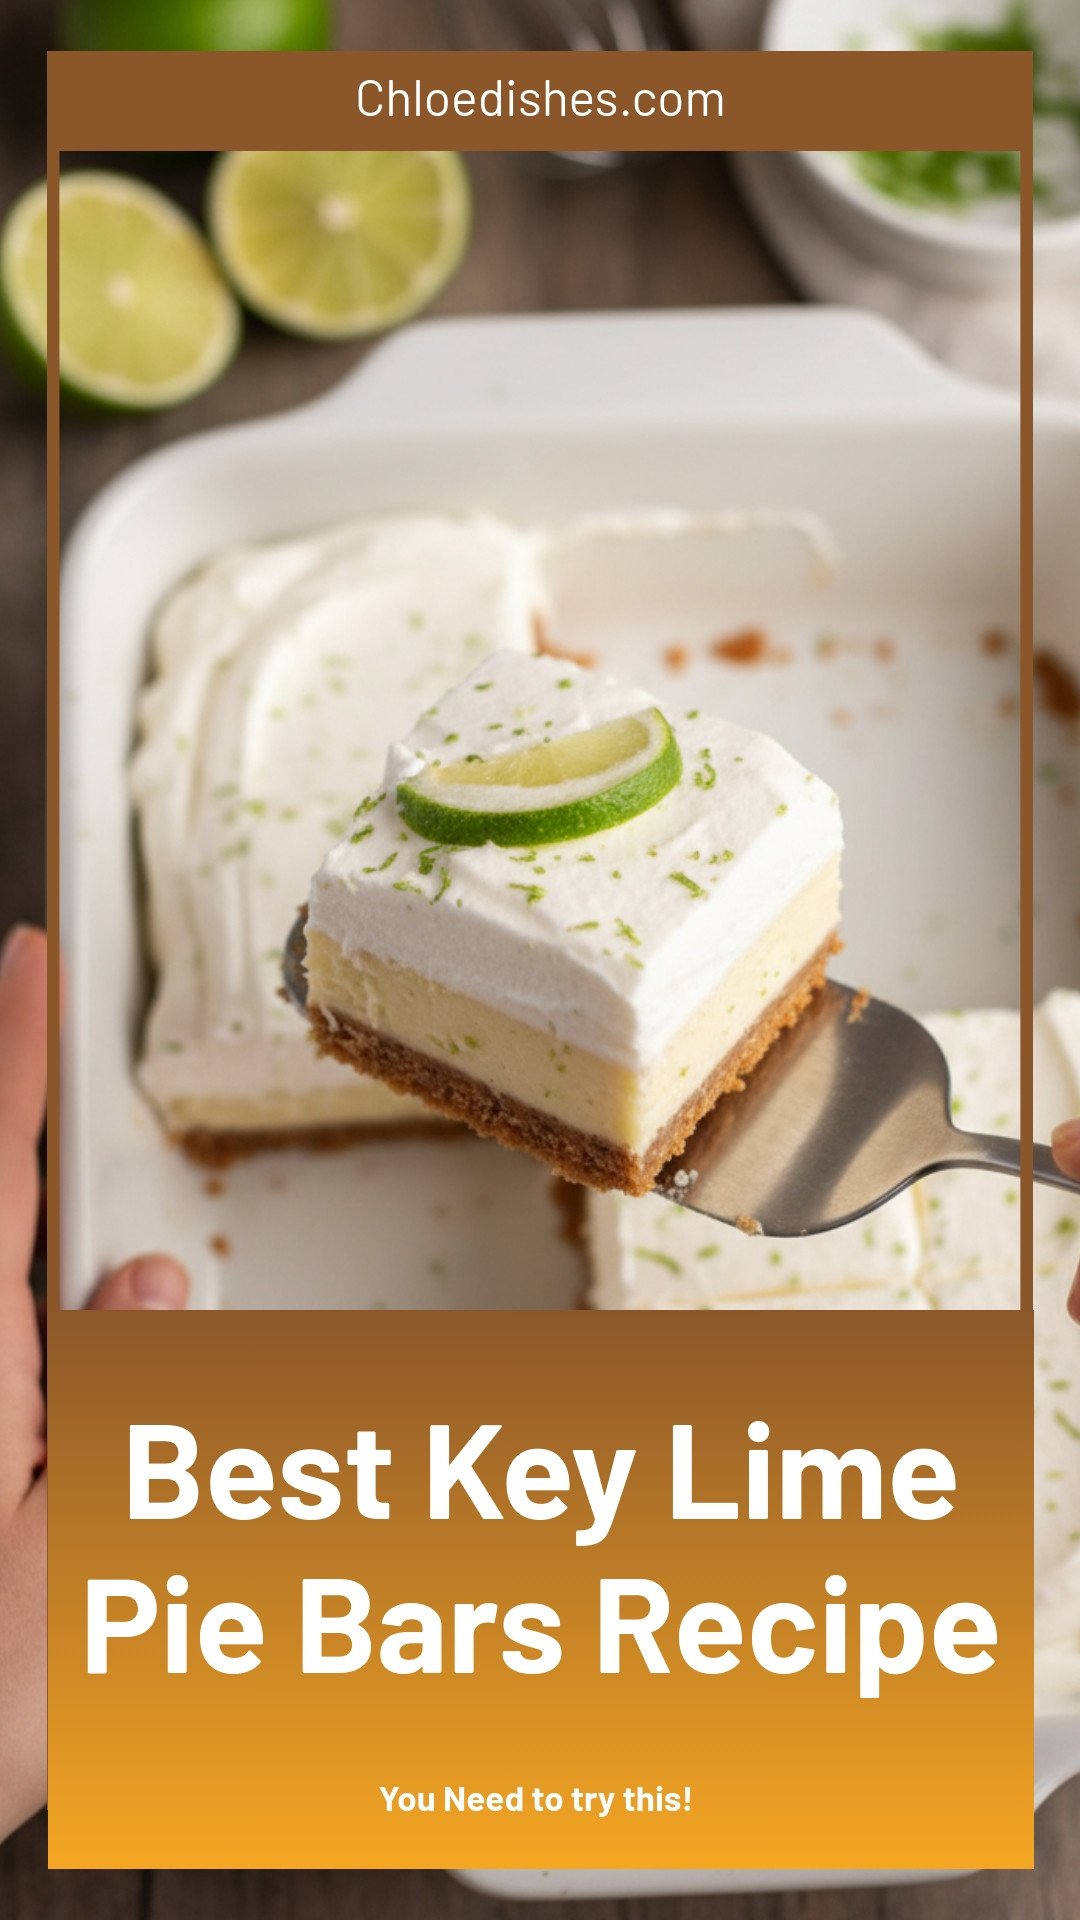
Now for the best part. The whipped cream. You pour cold heavy cream into a bowl with a little sugar. Then you whisk until it turns into soft, fluffy peaks. Don’t overdo it, or you’ll end up with butter. I’ve done that before. It’s a sad day when you’re eating butter on top of your key lime bars. Not that it’s bad, but it’s not what we’re going for. Slather that cream on thick, like frosting. It’s the perfect balance to the tangy filling. Why this matters: The cream cuts the sour and makes the whole dessert feel light and airy. It’s like putting a soft blanket on a sunny day. Every bite should have a little crust, a little filling, and a little cloud on top. That’s the perfect bite. Tell me, do you like a lot of whipped cream, or just a dollop?How to Cut Them Like a Pro
Once your bars are fully chilled and the cream is on top, you lift them out using the parchment paper. This is why we put that paper in the pan in the first place. You just grab the edges and pull. Then you transfer the whole slab to a cutting board. Use a sharp knife and cut cleanly. Don’t saw back and forth, or you’ll mess up the layers. I like to dip the knife in hot water and wipe it dry between cuts. That gives you sharp, beautiful edges. It makes you look like you know what you’re doing. These bars are perfect for a picnic, a birthday, or just a Tuesday. They keep well in the fridge for a few days, but they never last that long in my house. My grandkids sneak pieces when I’m not looking, and I pretend not to notice. I just smile and ask if they want another one. What’s the best dessert you’ve ever shared with someone you love?Ingredients:
| Ingredient | Amount | Notes |
|---|---|---|
| Graham crackers | 230g (~16 full sheets) | Crust |
| Melted butter | ½ cup (113g) | Crust |
| Sweetened condensed milk | 2 cans (28oz) | Key Lime Filling |
| Key lime juice | ¾ cup (180g) | Key Lime Filling |
| Key lime zest | 1 tbsp (2-3 limes) | Key Lime Filling |
| Vanilla | 2 tsp | Key Lime Filling |
| Sour cream or yogurt | ⅔ cup (160g) | Key Lime Filling |
| Egg yolks | 2 | Key Lime Filling |
| Heavy cream, chilled | 1 ½ cups (360g) | Topping |
| Granulated sugar | 2 tbsp | Topping |
The First Time I Made These Bars
I still remember the summer I first baked these key lime bars. My grandkids had just come back from a trip to Florida, and they wouldn’t stop talking about the lime pies they ate there. I wanted to surprise them with something that tasted just as sunny. So I grabbed my juicer and got to work. Doesn’t that smell amazing when lime zest hits the air?
How to Build Your Bars
Step 1: Preheat your oven to 350F. Line a 9×9 square pan with two strips of parchment paper, crisscross style. Let the paper hang over the edges like little handles. This will help you lift the bars out later without a mess. (Hard-learned tip: if your parchment slips, dab a tiny bit of butter under each corner to hold it in place.)
Step 2: Grind 16 full graham cracker sheets into a fine crumb using a food processor. Pour the crumbs into a bowl and mix them with 1/2 cup of melted butter. I always stir with a fork because it feels like making tiny sandcastles. Press the mixture really firmly into the bottom of your pan. Use the back of a measuring cup to make it flat and even.
Step 3: Bake the crust for 8 to 10 minutes, then turn your oven down to 325F. While it bakes, zest and juice your key limes. This is where the real fun begins. You will need 3/4 cup of that bright, tart juice and about a tablespoon of the green zest. My fingers always smell like sunshine after this step.
Step 4: In a large bowl, whisk together the lime zest, lime juice, two cans of sweetened condensed milk, 2 teaspoons of vanilla, and 2/3 cup of sour cream. Start with half the juice and taste it first. You want it to lean a little sweet and a little sour. Add the two egg yolks and whisk until everything is smooth and yellow.
Step 5: Pour the filling onto your baked crust. Shake the pan gently and tap it on the counter a few times to pop any hidden air bubbles. Bake at 325F for about 17 to 18 minutes. The edges should look set, but the middle will still jiggle a bit. That wobble means it will turn creamy when chilled. What makes your favorite dessert taste perfect? Share below!
Step 6: Let the pan cool on the counter, then put it in the fridge overnight. I know it is hard to wait, but this is the most important part. It needs at least 4 hours to set up firmly. Patience is the secret ingredient here.
Step 7: When the bars are fully set, whip 1 and 1/2 cups of cold heavy cream with 2 tablespoons of sugar. Beat until it forms stiff peaks that stand up tall. Be careful not to overmix, or it will turn into butter. Slather the whipped cream over the filling, lift the bars out by the parchment edges, and cut them into neat squares. Serve right away and watch everyone smile.
Cook Time: 4 to 6 hours (mostly for chilling)
Total Time: 4 hours 30 minutes
Yield: 9 to 16 squares, depending on size
Category: Dessert
Three Fun Twists to Try
Mango-Lime Twist: Swap half the lime juice for smooth mango puree. It makes the bars taste like a tropical beach day. Berry Swirl: Drop spoonfuls of raspberry jam on top of the filling before baking. Use a knife to swirl it gently into pretty pink ribbons. Coconut Crunch: Toast 1/2 cup of shredded coconut and sprinkle it on top of the whipped cream. It adds a chewy, sweet bite. Which one would you try first? Comment below!
How I Serve These Little Sunshine Bars
I like to plate each square on a small white dish with a thin slice of fresh lime on top. A tiny pinch of sea salt makes the sweet filling pop even more. For drinks, a tall glass of cold iced tea with a lemon round fits perfectly. If the grown-ups want something fun, a fizzy lime soda with mint is just right. Which would you choose tonight?

How to Store and Reheat Your Key Lime Pie Bars
These bars love the fridge. Keep them covered in the pan for up to five days. The filling gets firmer and tastes even better the next day. I once made a batch for a Sunday picnic. We ate half that night, and the rest was gone by Tuesday morning. My grandson claimed they were creamier on day two. He was right.
You can freeze them too. Wrap each bar in plastic wrap, then foil. They will keep for two months. Just thaw them in the fridge overnight. Do not reheat them. The creamy filling does not like heat. Cold is best. If you want a quick treat, eat them straight from the freezer. They taste like frozen key lime custard. *Fun fact: Cold desserts hold their shape better for slicing.*
Batch cooking matters because you save time and have dessert ready. You can make these bars on a Sunday and enjoy them all week. Why this matters: It gives you a homemade treat without rushing. Have you ever tried storing it this way? Share below!
Troubleshooting Your Key Lime Pie Bars
Sometimes the filling cracks. This happens if you bake it too long. Bake until the edges are set but the middle jiggles. I remember when I first made these bars. I left them in ten minutes too long. The top looked like a dry lake bed. It still tasted good, but it was not pretty. Next time, watch the timer closely.
Another common issue is a soggy crust. This happens if the butter is too hot. Let your melted butter cool for a minute before mixing with the crumbs. Why this matters: A crisp crust gives you a nice crunch against the smooth filling. It makes every bite better.
Sometimes the bars stick to the pan. Always use parchment paper that hangs over the edges. That way you can lift the whole block out. I once tried to cut bars right in the pan. The crust crumbled everywhere. Now I lift them out first, and it works every time. Which of these problems have you run into before?
Five Quick Q and A for Key Lime Pie Bars
Q: Can I make these bars gluten-free?
A: Yes. Use gluten-free graham crackers or crushed gluten-free cookies.
Q: Can I make them ahead of time?
A: Yes. Make them one day before you serve them. They need at least 4 hours to chill.
Q: Can I swap the sour cream for something else?
A: Yes. Plain full-fat yogurt works well. Greek yogurt also works, but it makes the filling a little thicker.
Q: Can I double the recipe?
A: Yes. Use a 9×13 inch pan and double all the ingredients. Bake for about 22 minutes instead of 18.
Q: Can I use regular limes?
A: Yes. Use 3 to 4 regular limes. The flavor will be a bit less tangy, but still good. Which tip will you try first?
A Warm Send-Off from Chloe Hartwell
I hope these bars bring you as much joy as they bring my family. There is something special about a cold, tangy bite of key lime on a warm day. It feels like summer in a square. I love seeing your baking adventures. Have you tried this recipe? Tag us on Pinterest!
Remember, cooking does not have to be perfect. It just has to be made with love. If your bars crack or your crust crumbles, that is okay. You still made something delicious from scratch. Thank you for spending time in my little kitchen today. Happy cooking!
—Chloe Hartwell


Leave a Reply