
My First Lava Cake Surprise
The first time I made these, I was so nervous. I thought I had messed up, for sure. I pulled them out of the oven and they looked like little brown muffins. My heart sank. But then I flipped one onto a plate, and a river of warm chocolate came pouring out. I still laugh at that first happy surprise. Have you ever had a cooking accident turn into something wonderful? Tell me about it in the comments below.Why Good Chocolate Matters
This is not the time for cheap chocolate chips. You want a real bar of dark chocolate, between 60 and 70 percent cocoa. That is why the recipe calls for 300g of chopped dark chocolate. Good chocolate melts smooth and tastes deep, not sugary. It makes the middle of your cake gooey like a hug. Why this matters: The chocolate is the star of the show, so treat it like one. *Fun fact: The first lava cake was made by accident in 1987 when a chef pulled a chocolate cake out of the oven too early. He liked the runny center so much he put it on the menu.The Secret to That Gooey Middle
The trick is in the eggs and the timing. You whisk the eggs, egg yolks, and sugar until they are thick and pale. Almost like a fluffy cloud. This takes about three minutes. Then, you do not overmix when you add the flour. You fold it gently with a rubber spatula. Overmixing makes the cake tough, and the center might cook all the way through. Why this matters: We want a soft cake with a secret liquid heart, not a solid muffin. Doesn’t that smell amazing when the chocolate and butter melt together? I could stand over the bowl with a spoon all day.My Butter-Painting Disaster
Let me tell you a little story. One time, I forgot to brush the ramekins with butter. I also forgot the cocoa powder dusting. I flipped those cakes out, and they looked like little chocolate blobs that had given up. They tasted fine, but they were not pretty. Now I always prep the pans first. Softened butter, a good coat, then a sprinkle of cocoa powder. It helps the cakes slide right out and adds a tiny extra chocolate flavor on the outside. Have you ever skipped a step in a recipe and learned a hard lesson? Share your kitchen oops moment with me.Watch the Jiggle
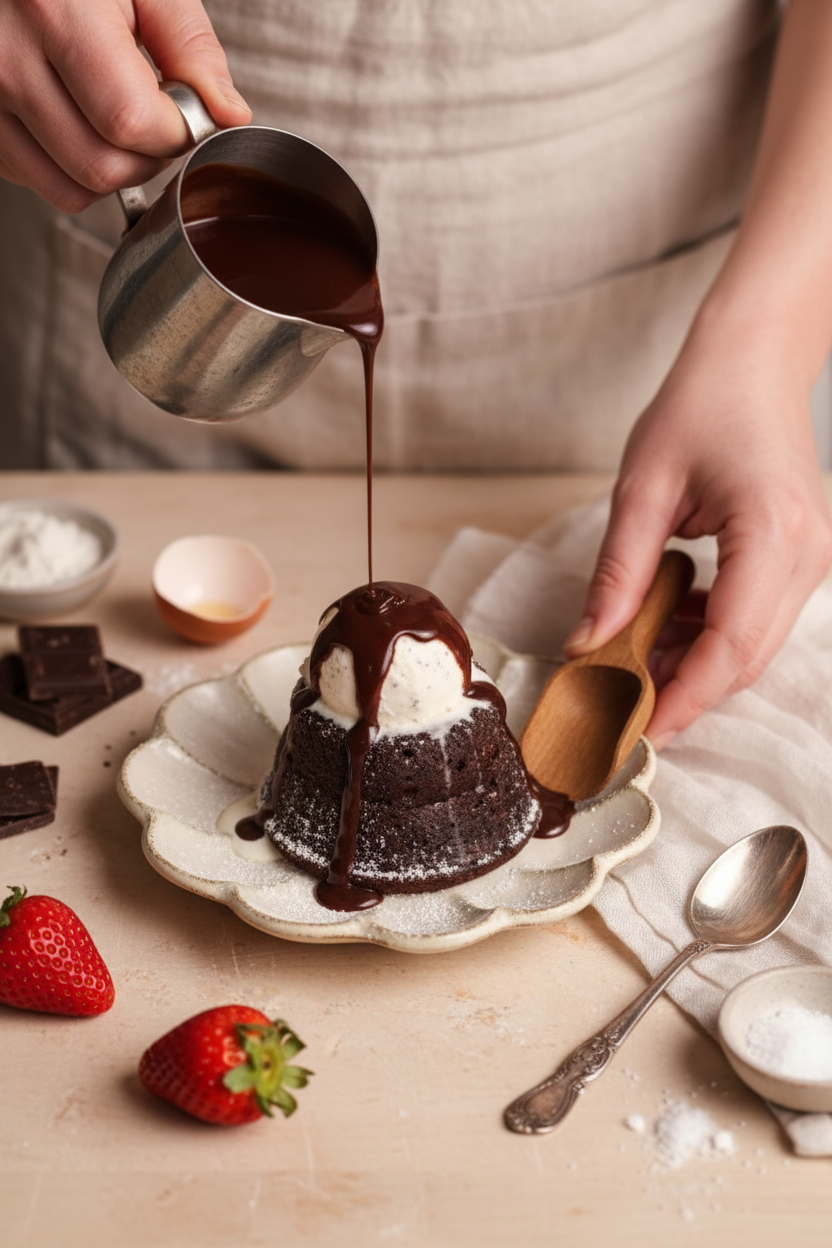
The oven needs to be very hot, at 450 degrees Fahrenheit. You only bake these for 8 to 12 minutes depending on your pan. That is a short time, so do not walk away. Look for the edges pulling away from the pan. The top should look set, but the whole cake should still jiggle when you shake it gently. That jiggle is your promise of a molten center. A toothpick inserted in the middle should come out with gooey chocolate, not raw batter. I always set a timer for 8 minutes and peek through the oven window. It feels like watching a magic trick happen.Serving and Sharing the Warmth
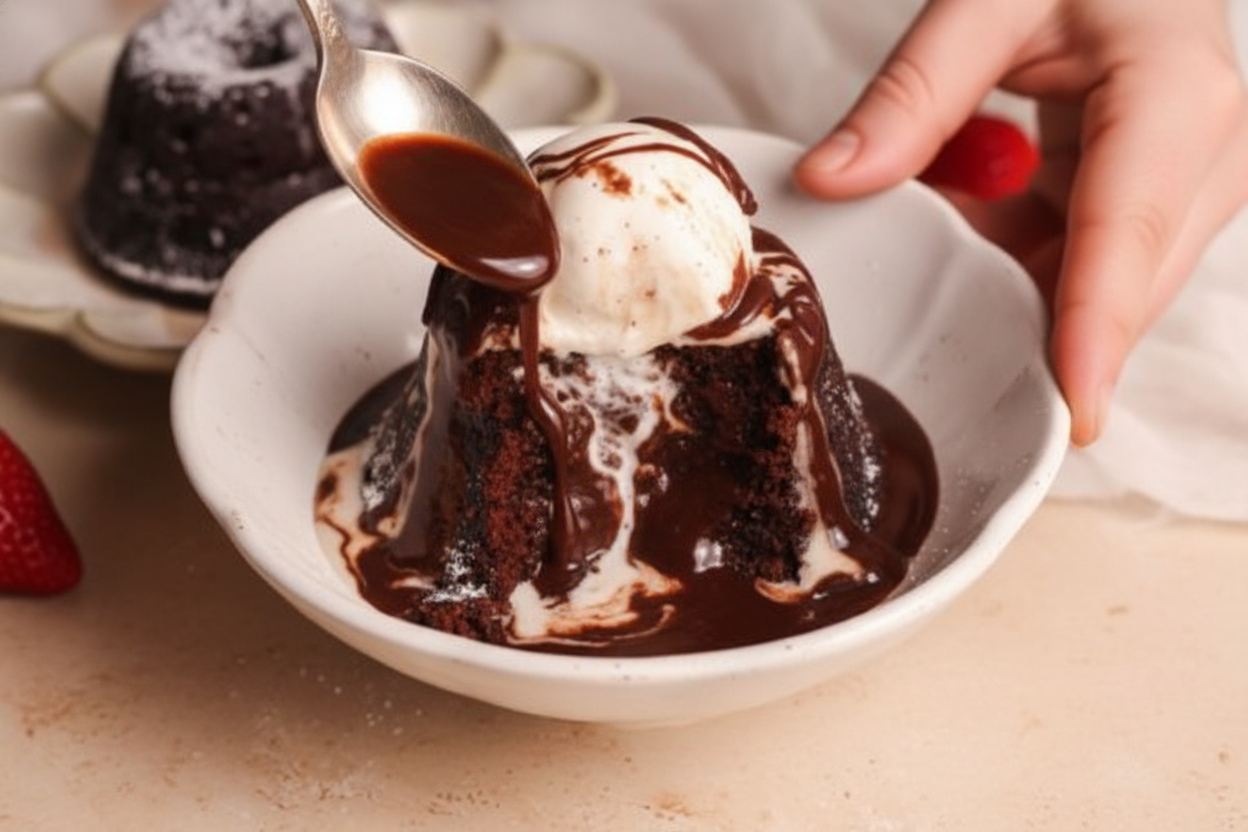
Let the cakes rest for one minute after baking. Then run a butter knife around the edge and flip them onto a plate. They should pop right out if you buttered the pans well. Serve them hot, hot, hot. A dusting of powdered sugar is nice. A scoop of vanilla ice cream is even better. The cold ice cream with the warm chocolate is a little bit of heaven. You can even drizzle chocolate fudge sauce on top if you are feeling fancy. Here is a mini-poll for you: Powdered sugar, ice cream, or both? Which one do you pick?Make It Your Own
This recipe makes five cakes, which is perfect for a small family or two very happy people. You can add a pinch of cinnamon to the batter or a tiny pinch of chili powder for a kick. I once added a few raspberries to the middle of each cake before baking. The tart berry with the sweet chocolate was incredible. Why this matters: Recipes are just a starting point. Once you know the rules, you can play with them. What would you put inside your lava cake? I would love to hear your wild ideas. Share them below before you head to the kitchen.Ingredients:
| Ingredient | Amount | Notes |
|---|---|---|
| Dark chocolate (60-70% cocoa bar) | 300g | Chopped |
| Unsalted butter | 12 tbsp (170g) | |
| Large eggs | 4 | |
| Egg yolks | 2 | |
| Granulated sugar | ½ cup (100g) | |
| All purpose flour | ⅓ cup (45g) | |
| Salt | ½ tsp |
The Day I First Pulled a Lava Cake Out of the Oven
I still laugh when I think about my first lava cake. It was a gooey, chocolatey mess, but my kids loved every bite. You know that feeling when you crack open a cake and warm chocolate pours out? That is pure magic. This recipe is my favorite because it looks fancy but is so simple to make. Trust me, if I can do it, you can too.
Doesn’t that smell amazing? Just thinking about melting butter and dark chocolate makes my heart happy. Start by gathering all your ingredients. You will need a good dark chocolate bar—60 to 70 percent cocoa is perfect. Do not use chocolate chips; they have wax in them and will not melt smoothly. I learned that the hard way one Christmas Eve.
Preheat your oven to 450 degrees Fahrenheit. Get out a jumbo muffin pan or five 8-ounce ramekins. Brush the inside with softened butter—really get in all the nooks and crannies. Then dust with cocoa powder and tap out the extra. (Hard-learned tip: If you leave excess cocoa on the rim, it will burn and fill your kitchen with smoke. Ask me how I know.)
Now, here is a little challenge for you. Before you start mixing, look at your ingredients. What is the most important step to get that liquid center? Hint: It is all about the eggs and sugar. Share below!
Chop your chocolate bar into small pieces and put it in a microwave-safe bowl with the butter. Microwave in short bursts—20 seconds each—and stir between each one. Keep going until it is smooth and shiny. Set it aside to cool for just a minute. In another bowl, crack those eggs and add the extra yolks and sugar.
Whisk the eggs and sugar on medium-high speed for about three minutes. Watch the mixture turn pale, thick, and fluffy. It should look like a soft, yellow ribbon when you lift the whisk. This is the secret to a perfect lava cake. Pour in your melted chocolate and whisk on low just until combined. Sift the flour and salt over the top, then fold it gently with a rubber spatula.
Divide the batter into your prepared cups. Bake for 8 to 10 minutes in the muffin pan, or 10 to 12 minutes in the ramekins. Watch for the edges to pull away from the sides. The top should look set, but the cake should still jiggle. Let them rest for exactly one minute, then run a knife around the edge and flip them onto a plate. Serve hot with powdered sugar or ice cream.
Step 1: Chop 300g of dark chocolate and 12 tablespoons of butter into small pieces. Put them in a microwave-safe bowl. Microwave in 20-second bursts, stirring each time, until fully melted and smooth. Set it aside to cool slightly.
Step 2: In a separate large bowl, whisk 4 large eggs, 2 egg yolks, and 100g of sugar on medium-high speed. Whisk for three minutes until the mixture is pale, fluffy, and thick. It should almost triple in volume and fall in ribbons from the whisk. This is the part that makes your friends think you are a pro.
Step 3: Pour the melted chocolate mixture into the egg mixture. Whisk on low speed just until combined. Do not overmix or the cake will get tough. (Hard-learned tip: Stop the moment you see the last streak of chocolate disappear. I once whisked too long and got a muffin instead of a lava cake.)
Step 4: Sift 45g of all-purpose flour and half a teaspoon of salt over the batter. Use a rubber spatula to gently fold everything together. Fold slowly, scraping the bottom and sides, until no flour streaks remain. The batter should look dark, thick, and glossy.
Step 5: Divide the batter evenly among your five prepared muffin cups or ramekins. Fill them almost to the top, leaving just a tiny margin. Bake at 450°F for 8 to 10 minutes in the muffin pan, or 10 to 12 minutes in ramekins. Look for set tops and jiggly centers. Insert a toothpick to check—the outer part should be firm, but the middle should still be molten.
Step 6: Remove the cakes from the oven and let them rest for exactly one minute. Run a butter knife gently around the edges to loosen them. Carefully flip each cake onto a plate. They should slide out easily and smell like heaven. Dust with powdered sugar or serve with a scoop of vanilla ice cream. Drizzle fudge sauce on top if you are feeling extra fancy.
Cook Time: 10 minutes
Total Time: 20 minutes
Yield: 5 servings
Category: Dessert
Three Fun Twists on Your Lava Cake
Sometimes I like to play with flavors. It makes the same recipe feel brand new. Here are three of my favorite twists to try. Each one takes the basic recipe and adds a little surprise. Which one would you try first? Comment below!
Peppermint Holiday Lava Cake: Crush three candy canes into tiny pieces. Fold them into the batter just before baking. Sprinkle a little extra on top before serving. The mint cuts through the dark chocolate like winter magic.
Salted Caramel Surprise: Freeze five small spoonfuls of caramel sauce. Place one frozen caramel blob in the center of each cup before baking. The caramel stays gooey and pools with the chocolate. Sprinkle flaky sea salt on top right after flipping.
Orange Zest Delight: Add the zest of one whole orange to the egg and sugar mixture. Squeeze in a tablespoon of fresh orange juice as well. The bright citrus flavor pairs beautifully with the deep chocolate. It tastes like a sunny afternoon in a mug.
How to Serve Your Lava Cake Perfectly
Presentation matters, even if you are just eating on the couch. Place your hot lava cake on a small plate or in a shallow bowl. Dust the top with powdered sugar through a fine strainer. Add a small scoop of vanilla bean ice cream right next to the cake. The cold and hot together create a little party in your mouth. You can also drizzle warm chocolate fudge sauce or caramel over the whole thing.
For a pretty garnish, add a few fresh raspberries or mint leaves on the side. The red berries add a pop of color and a tart burst. If you want a crunch, sprinkle toasted sliced almonds or crushed cookies on top. Which would you choose tonight?
Pair your lava cake with a cold glass of milk for a cozy night in. For adults, a small cup of strong coffee or a tiny glass of port wine works beautifully. The bitterness of coffee or the sweetness of port balances the rich chocolate. Grab a fork and dig in while it is still warm. That molten center waits for no one.
Storing Your Lava Cakes for Later
I remember the first time I baked too many lava cakes. It was a rainy Sunday and my grandkids were all full. I felt so bad tossing any out. Now I know better. You can store these cakes in the fridge or freezer. Just bake them for the full time, let them cool, and wrap each one tightly in plastic wrap. They keep in the fridge for three days. In the freezer, they last one month. To reheat, pop a frozen cake in a 350F oven for about 12 minutes. It will stay gooey and warm inside.
This matters because you can make a big batch on a lazy day. Then you have a fancy dessert ready anytime company comes. Batch cooking saves time and stress. Have you ever tried storing it this way? Share below!
Fixing Common Lava Cake Problems
Three things can go wrong with lava cakes. The first is a cake that is totally cooked through. That means you baked it too long. Next time, take it out a minute or two sooner. I once forgot and baked mine for twelve minutes in a muffin pan. It turned into a sad chocolate muffin. The second problem is the cake sticks to the pan. Make sure you butter and cocoa powder the cups very well. Do not skip that step. The third issue is a runny, raw center. This happens if the batter is too cold or you underbake it. The inside should jiggle like jelly, not slosh like soup.
Fixing these problems matters because it builds your confidence in the kitchen. You learn to trust your eyes and hands instead of just the timer. Which of these problems have you run into before?
Your Top Lava Cake Questions Answered
Q: Can I make this gluten-free?
A: Yes. Swap the all-purpose flour for a 1-to-1 gluten-free blend. It works great.
Q: Can I make the batter ahead of time?
A: Yes. Fill the ramekins and keep them in the fridge for up to 24 hours. Add one minute to the bake time.
Q: Can I swap the dark chocolate?
A: Yes, but do not use milk chocolate. It is too sweet and will not set right. Use semi-sweet or bittersweet.
Q: Can I scale the recipe up or down?
A: Yes. Just keep the same ratio. For two cakes, use two-fifths of each ingredient.
Q: Can I add extra flavor?
A: Yes. Add a pinch of cinnamon or a teaspoon of instant coffee to the chocolate mixture. It deepens the taste.
Which tip will you try first?
A Warm Goodbye from Chloe
Thank you for spending time in my little kitchen today. I hope these tips help you make the perfect lava cake. Remember, it is okay if the first one is not perfect. My very first one stuck to the pan and I ate it with a spoon. It was still delicious. *Fun fact: Lava cakes were invented by accident when a chef pulled a chocolate cake out of the oven too early.*
I would love to see your creations. Have you tried this recipe? Tag us on Pinterest! Share your photos and stories. I read every single one. Happy cooking!
—Chloe Hartwell.
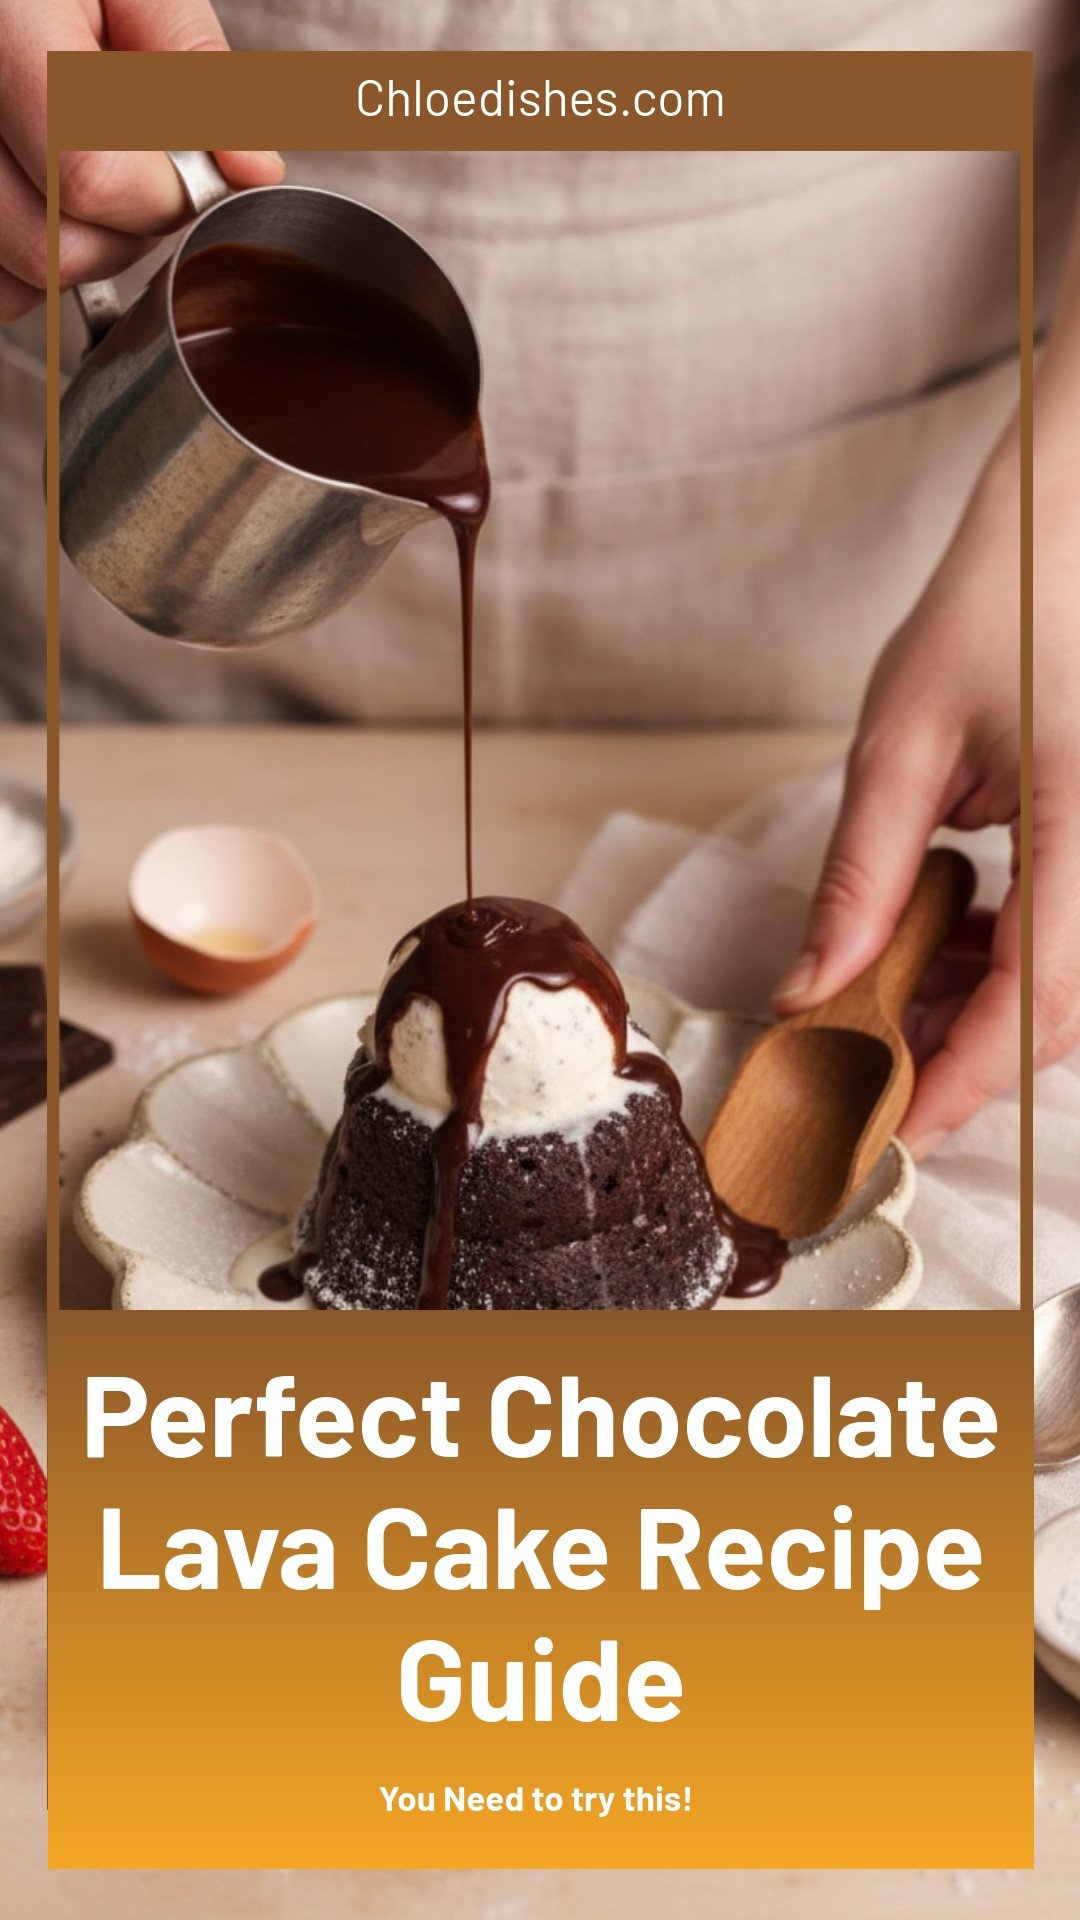
Perfect Chocolate Lava Cake Recipe Guide
Description
Perfect chocolate lava cake recipe guide for a rich, gooey dessert. Easy molten cake recipe with simple ingredients.
Ingredients
Instructions
- Pre-heat oven to 450F (conventional, no fan). Prepare 5 muffin cups in a non-stick jumbo muffin pan, or 5 8oz ramekins, by generously brushing them with softened butter and then dusting with cocoa powder. Shake out any excess cocoa powder and clean the edges (otherwise the excess cocoa powder on the edges or on the muffin pan can burn and create smoke in the oven).
- Place the chopped dark chocolate and unsalted butter in a microwave safe bowl. Microwave in 20 second increments, stirring in between, until the chocolate and butter are fully melted and mixed together. Set aside.
- In a separate bowl, add the eggs, egg yolks and sugar. Whisk on medium-high speed for ~3 minutes until the mixture becomes really light in color, thick, fluffy and ribbony. It should almost triple in volume.
- Pour the chocolate mixture into the egg mixture, and whisk on medium-low speed just until combined. Do not overmix.
- Sift in the flour and salt. Use a rubber spatula to very gently fold the dry ingredients into the batter, taking care not to overmix.
- Divide the batter evenly between the 5 prepared muffin cups or the ramekins. The batter will almost reach the top with a little margin left.
- Bake in the pre-heated oven for 8-10 minutes if using the muffin tray, or 10-12 minutes if using the ramekins. Be sure to keep an eye on the cakes and look for signs of doneness. They are done baking when the top looks set and the edges pull away from the pan, but the cakes still jiggle when lightly shaken. You can also insert a toothpick in the middle to ensure it is molten but not completely liquid / raw.
- Remove the cakes from the oven. Rest them for 1 minute, then use a butter knife to gently separate them from the edges of the muffin cups / ramekins. Carefully flip the cakes out of their molds; they should come out easily.
- Serve hot with a dusting of powdered sugar and / or a scoop of vanilla ice cream. You can even drizzle over some chocolate fudge sauce. Enjoy!
Notes
- For best results, use high-quality chocolate. You can prepare the batter in advance and refrigerate in the molds; bake directly from the fridge adding 1-2 extra minutes.


Leave a Reply