
My First Knish Memory
I was ten years old when I bit into my first knish. It was at my grandmother’s kitchen table. The outside was golden and a little flaky. The inside was warm, soft mashed potatoes with tiny bits of sweet onion. I thought it was a strange little pillow of dough at first. Then I tasted it. I still laugh at that memory because I ate three in a row. Have you ever tried a food you thought looked funny, but it turned out amazing?What Is a Knish, Really?
A knish is a baked or fried pocket of dough stuffed with filling. It comes from Eastern Europe. Jewish cooks brought it to America over a hundred years ago. The most classic filling is mashed potatoes and onions. But here is the thing: a knish is not a dumpling or a pie. It is hand-rolled and pinched shut. That shape keeps all the cozy filling inside. *Fun fact: In New York City, people once sold knishes from little pushcarts on the street.*Why Potato Is King in Knishes
The potato filling in this recipe is simple but perfect. You boil the potatoes until they are fork-tender. Then you mash them smooth. The key is to cook the onions slowly until they are soft and sweet. This matters because the onions bring a little magic. They make the plain potatoes taste rich and comforting. Without that step, the filling would be boring. Doesn’t that smell amazing when onions hit a hot pan?Rolling the Dough Feels Like a Hug
Making the dough is easy. You mix flour, baking powder, salt, sugar, egg, oil, and warm water. Then you knead it for just a minute. It feels soft and a little stretchy, like play dough for grown-ups. This matters because homemade dough tastes so much better than store-bought. It wraps around the filling like a snug blanket. The egg wash on top makes it shine like a treasure. Would you rather make dough from scratch or use store-bought?Little Tricks for Perfect Knishes
When you roll the dough, make it thin but not see-through. About as thick as a coin works well. Place the potato filling in a log shape at the bottom edge. Then roll it up tight, like a sleeping bag. Here is a tip my grandma taught me: pinch the ends firmly or the filling might peek out. Then twist each piece into a little ball. It is okay if they look a bit messy. Homemade food is supposed to look loved.Baking Until Golden and Crispy
Pop the knishes into a 400°F oven. Bake them for 40 to 45 minutes. Turn the pan halfway so they brown evenly. Your kitchen will smell like a cozy bakery. Let them sit for five minutes before you bite in. This is the hardest part. The waiting keeps the filling from burning your tongue. I always burn my tongue anyway. Do you have a food you get impatient for, too?Share a Knish, Share a Story
Knishes are best eaten warm with friends or family. They keep for a few days in the fridge. You can even freeze them and reheat later. That makes them perfect for a rainy afternoon snack. I love that one little dough pocket can hold so much memory. Every time I make these, I think of my grandmother’s hands rolling the dough. Tell me: what food from your family makes you feel warm inside?Ingredients:
| Ingredient | Amount | Notes |
|---|---|---|
| All-purpose flour | 2-1/2 cups | For the dough |
| Baking powder | 1 teaspoon | For the dough |
| Kosher salt | 1 teaspoon | For the dough |
| Sugar | 1/2 teaspoon | For the dough |
| Egg | 1 | For the dough |
| Warm water | 3/4 cup | For the dough |
| Canola oil | 1/3 cup | For the dough |
| Egg yolk | 1 | Whisked with 1 tablespoon water for egg wash |
| Russet potatoes | 1-1/2 pounds | Peeled, cut into 1-inch pieces for filling |
| Kosher salt and pepper | To taste | For filling |
| Canola oil | 1 tablespoon | For cooking onion in filling |
| Yellow onion | 1 small | Small diced for filling |
My Grandma’s Knish Secret
When I was a little girl, my grandma would let me pinch the dough for her knishes. She’d say, “Chloe, don’t be shy—give it a good squeeze!” I still laugh at that memory. A knish is a soft, baked Jewish pastry with a warm potato filling inside. It’s like a cozy pocket of yum. Doesn’t that sound amazing? Let me show you how to make these from scratch.
You will need simple things like flour, potatoes, and an onion. The dough is soft and easy to work with. The filling is creamy and savory. It takes a little time, but it’s so worth it. Trust me, your kitchen will smell like a hug.
Here’s a fun fact: My grandma called these “little pillows of love.” I always thought that was the cutest name. Now, let’s roll up our sleeves and get baking. I’ll walk you through each step slowly.
Let’s Make Knishes Together
Step 1: First, preheat your oven to 400°F. In a large bowl, mix the flour, baking powder, salt, and sugar. Make a little well in the middle, like a volcano. Drop in the egg, oil, and warm water. Stir with a spoon until it gets messy, then use your hands to knead it into a ball. Divide the dough in two and wrap it in plastic wrap so it doesn’t dry out.
Step 2: Now for the filling. Put your potato pieces in a big pot and cover them with cold water. Add a pinch of salt and bring it to a boil. Cook until a fork pokes through easily—about 10 to 15 minutes. Drain them and mash them up smooth. While they cook, fry your diced onion in a pan with oil until it’s soft and golden, about 15 minutes. Mix the onion into the potatoes and add salt and pepper. (Here’s a hard-learned tip: Don’t skip the onion—it makes the filling taste magical!)
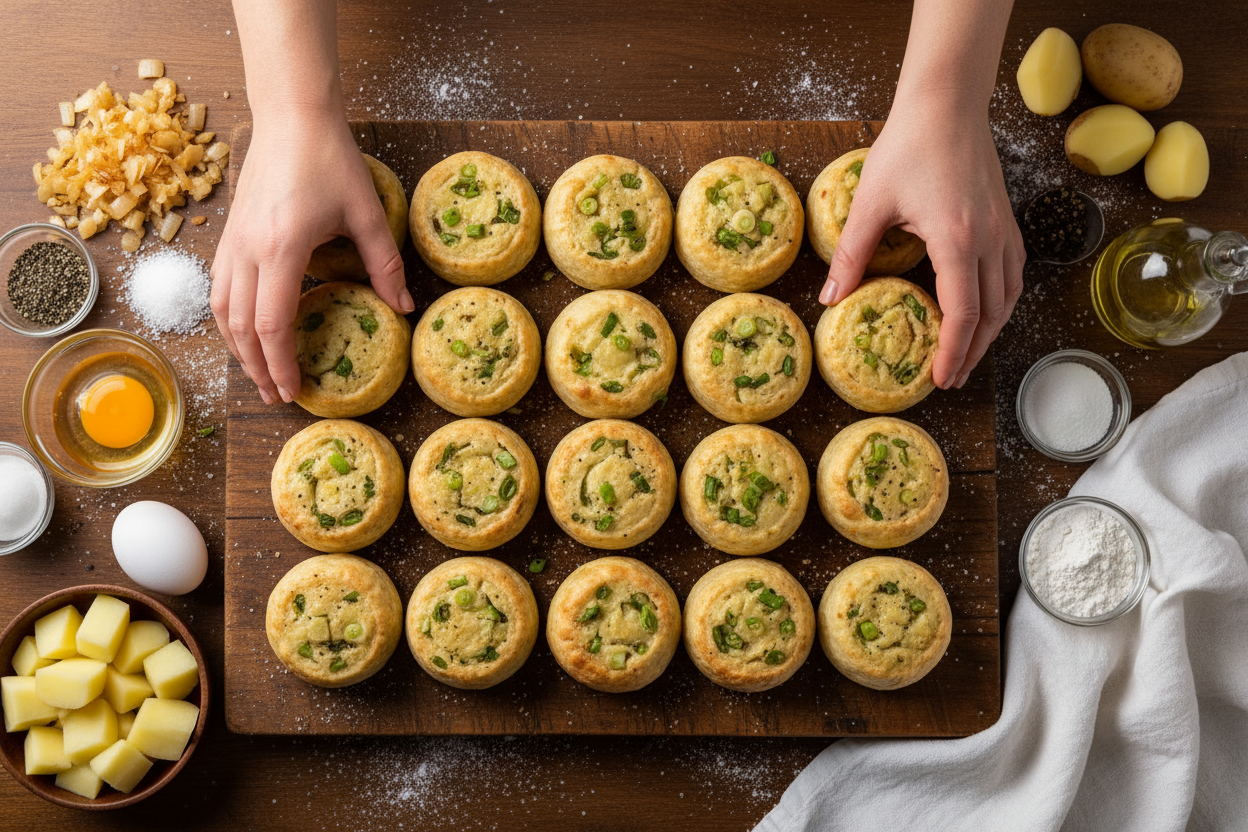
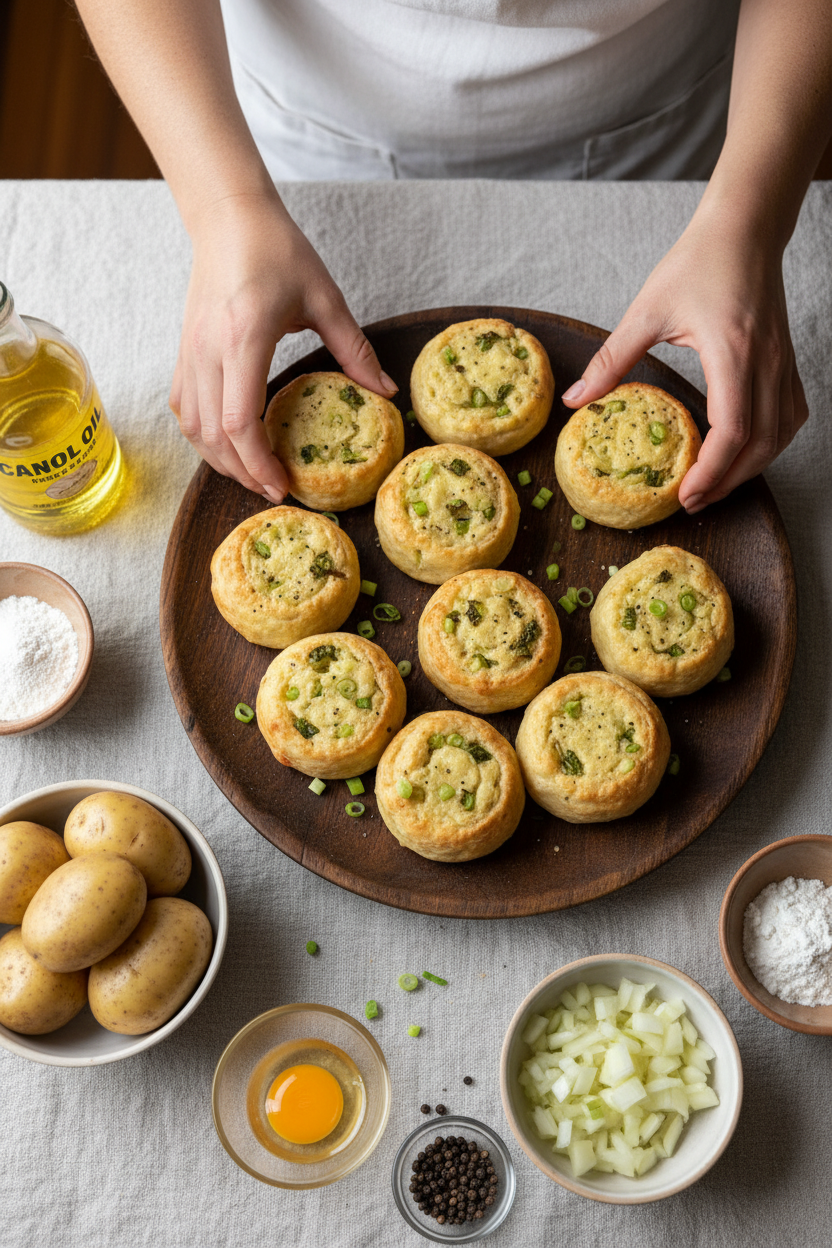
Step 3: Sprinkle some flour on your counter. Take one piece of dough and roll it into a big rectangle, about 10 inches by 15 inches. It should be thin, like a pancake. Place half the potato filling in a long log near the bottom edge. Fold the bottom over the filling and roll it up tight, tucking the ends in as you go. Cut the log into six pieces. Pinch and twist each piece into a little ball. Place them on a baking sheet with parchment paper and brush each one with the egg yolk and water mix. What shape do you think your first knish will be? Share below!
Step 4: Pop the knishes into the oven and bake for 40 to 45 minutes. Turn the pan halfway through so they brown evenly. When they’re golden and crispy, take them out. Let them rest for at least 5 minutes before you bite in. I always burned my tongue as a kid because I couldn’t wait. Don’t be like me!
You did it! Look at those beautiful knishes. They are perfect for sharing or hiding in your lunchbox.
Cook Time: 40–45 minutes
Total Time: 1 hour 15 minutes
Yield: 12 knishes
Category: Snack, Side Dish
Three Fun Twists to Try
Cheesy Potato Knish: Add a handful of shredded cheddar cheese to the mashed potatoes before filling. It gets gooey and dreamy inside.
Spicy Buffalo Knish: Mix a tablespoon of hot sauce into the potato filling. Serve with a side of ranch dip for a kick.
Sweet Potato & Herb Knish: Swap the russet potatoes for sweet potatoes. Add a pinch of cinnamon and fresh rosemary. It tastes like fall in a pastry.
Which one would you try first? Comment below!
How to Serve Your Knishes
Knishes are lovely on their own, but they love company too. Serve them with a dollop of sour cream or a side of tangy applesauce. A crisp green salad with lemon dressing makes a nice crunchy buddy. For a cozy meal, pair them with a warm bowl of tomato soup.
For drinks, try a cold glass of apple cider for a non-alcoholic treat. If you want something grown-up, a light lager beer goes perfectly with the golden crust. Which would you choose tonight?
How to Store and Reheat Your Knishes
Knishes taste best fresh from the oven. But they also store very well. Let them cool completely first. Then place them in an airtight container. They will stay good in the fridge for up to four days.
For longer storage, wrap each knish tightly in plastic wrap. Put them in a freezer bag. They will keep for up to three months. I remember my first time freezing knishes. I was worried they would get soggy. But they came out just as flaky and golden.
To reheat, place them on a baking sheet in a 350°F oven. Heat for about 10 minutes if from the fridge. Add 5 minutes if from the freezer. This keeps the crust crisp. Reheating in the microwave makes them soft. That is fine for a quick snack, but the oven is better for that first bite.
Batch cooking is a smart habit. You make one big batch on a Sunday. Then you have a warm treat ready all week. It saves time and energy. Plus, homemade food tastes better than anything from a store. Have you ever tried storing it this way? Share below!
Common Knish Problems and Easy Fixes
Sometimes the dough cracks while you roll it. That happens if the dough is too dry. Fix this by adding a tiny splash of water. Knead it in gently. I once had a batch where every knish cracked open. My filling leaked everywhere. Now I always check the dough first.
Another issue is a tough, chewy crust. This usually means you over-kneaded the dough. Knead just until it comes together. No more than a minute. That is why this matters: overworking makes gluten too strong. A gentle hand keeps the pastry tender.
Finally, the filling might taste bland. Potatoes need plenty of salt and pepper. Taste it before you fill the dough. Add more seasoning if needed. I remember forgetting to season my filling once. The knishes were so boring. A little salt makes everything sing. Which of these problems have you run into before?
Fixing these small issues builds your cooking confidence. You learn to trust your hands. Your food will taste better each time. That is the real joy of cooking at home.
Your Knish Questions, Answered
Q: Can I make this gluten-free?
A: Yes. Use a 1-to-1 gluten-free flour blend. The dough will be a bit more delicate, but it works well.
Q: Can I make the dough ahead?
A: Absolutely. Make the dough the night before. Wrap it in plastic and keep it in the fridge. Let it sit at room temperature for 15 minutes before rolling.
Q: What if I don’t have a food mill for the potatoes?
A: A potato masher works fine. Just mash until smooth. A fork works in a pinch too.
Q: Can I double the recipe?
A: Yes. This recipe doubles easily. Just use two bowls for the dough. You will have about two dozen knishes.
Q: Any fun add-ins for the filling?
A: Yes! Try adding shredded cheddar cheese or chopped fresh dill. A little caramelized onion on top is lovely too. Which tip will you try first?
From My Kitchen to Yours
I hope these knishes bring you warmth and comfort. They remind me of my grandmother’s kitchen. Every bite tastes like a hug. Cooking this recipe is a way to slow down and share something special.
I would love to see your knishes. Take a photo and share it with us. Tag my blog, The Cozy Pantry, on Pinterest. Your version might look even better than mine. Have you tried this recipe? Tag us on Pinterest!
Happy cooking!
—Chloe Hartwell.
*Fun fact: Knish is the Yiddish word for a small pastry pocket. Bakeries in New York have sold them for over a hundred years.*


Knish Explained A Traditional Jewish Pastry
Description
Discover the history and taste of Knish, a savory traditional Jewish pastry filled with potato or meat.
Ingredients
Instructions
- Preheat the oven to 400°F. In a large bowl, combine the flour, baking powder, salt and sugar. Make a well in the center of the dry ingredients and add the eggs, oil and warm water. Stir until the dough comes together, and knead it briefly with your hands. Form the dough into a large ball and divide it in half. Wrap the dough in plastic wrap to keep it from drying out while you prepare the filling.
- Place the potatoes in a large pot and cover them with an inch of cold water. Season the water with salt and bring the mixture to a boil. Cook until the potatoes are tender when pierced with a fork, about 10 to 15 minutes. Drain the potatoes and mash them using a food mill or potato ricer. Meanwhile, heat the canola oil in a skillet over medium-high heat. Add the onions and cook until they’re tender, about 15 minutes. Mix the onions into the mashed potatoes and season with salt and pepper, to taste.
- Dust a work surface with a little flour. Working with one piece of dough at a time, roll the dough out into a large rectangle that’s about 10×15 inches and 1/8 inch thick. Leaving about 1/4 inch between the filling and the bottom of the rectangle, place half the mashed potato filling onto the dough and form it into a large log. Pull the bottom edge of the dough over the filling and roll, folding the ends in as you go. Finish with the roll’s seam at the bottom. Using your hands, stretch and press the rolled dough so the filling is evenly distributed throughout the log. Cut the dough into six pieces. Twist and pinch in the sides of each piece to form a ball. Place the balls on a parchment-lined baking sheet and brush each knish with the egg wash.
- Bake the knish for 40 to 45 minutes until they’re golden brown, turning the pan halfway through to ensure the knish bake evenly. Let them sit for at least 5 minutes before serving.


Leave a Reply