
Why I Love These Little Clouds of Joy
I remember the first time I tried a Pavlova. I was at a friend’s house, and she put this giant, snowy white thing on the table. It looked like a big, puffy cloud. She smashed it with a spoon, and everyone cheered. I thought she was crazy at first. Then I tasted it. The outside was crispy and light, like a sugar shell. The inside was soft and chewy, like a marshmallow. It was pure magic. These Pavlova Bombs are the same magic, just in a little package just for you. They are perfect for a party or a quiet night in. Doesn’t that sound fun? Have you ever smashed a dessert before? I still laugh at the look on people’s faces when they get to break one open.What You Need to Know About the Ingredients
The main player here is the egg white. It needs to be room temperature to get really fluffy. That means taking it out of the fridge for about 15 minutes before you start. The secret friends are cornflour and a tiny splash of white vinegar. They help the meringue stay soft on the inside and crisp on the outside. Don’t skip them, even if they seem weird. The fillings are a tangy lemon curd and a sweet raspberry coulis. They keep the whole thing from being too sugary. My grandma always said a little sour makes the sweet taste even better. She was right. *Fun fact: The leftover egg yolks go right into the lemon curd, so nothing gets wasted.* Isn’t that a happy ending?How to Make the Meringue Shells
First, you whip the egg whites until they are frothy. Then you add the sugar, very slowly, while the mixer is running. This is the most important step. If you dump it all in at once, the meringue will be flat and sad. Keep beating for about five minutes until it is thick, glossy, and feels completely smooth between your fingers. After that, you pipe the meringue into little domes on a baking tray. They don’t have to be perfect. You will cover them with cream and berries later. Then you bake them low and slow for an hour and a half, then let them cool in the oven overnight. This dries them out. It is like giving them a little nap. Do you like to bake things and forget about them until morning? It is my favorite trick.My Little Anecdote About a Wobbly Bomb
The first time I made these, I tried to fill one too fast. I shoved the piping bag in too deep, and the whole shell cracked right in half. I just stared at it. My daughter asked if I was going to cry. I laughed instead. We scooped the broken pieces into a bowl, added cream and fruit, and called it a “Pavlova Parfait.” It tasted just as good. This is why I tell you: go gently with the chopstick. You just need to make a little room for the fillings. Think of it like a cave, not a tunnel. Have you ever had a kitchen mishap that turned into a happy accident? I bet you have a good story to share.Why Smashing Your Food Matters
When you smash these Pavlova Bombs, you get a little bit of everything in one bite. You taste the crunchy shell, the soft marshmallow inside, the tart lemon, and the sweet raspberry. If you just slice it neatly, you lose that nice mix. The smash is part of the fun. This matters because food is about more than just eating. It is about sharing a moment. It is about laughing with the people around you. A smash makes everyone happy and a little messy. Which sounds better for a party: a perfectly sliced cake or a dessert that goes *CRUNCH*? I know which one I choose.How to Put It All Together and Serve
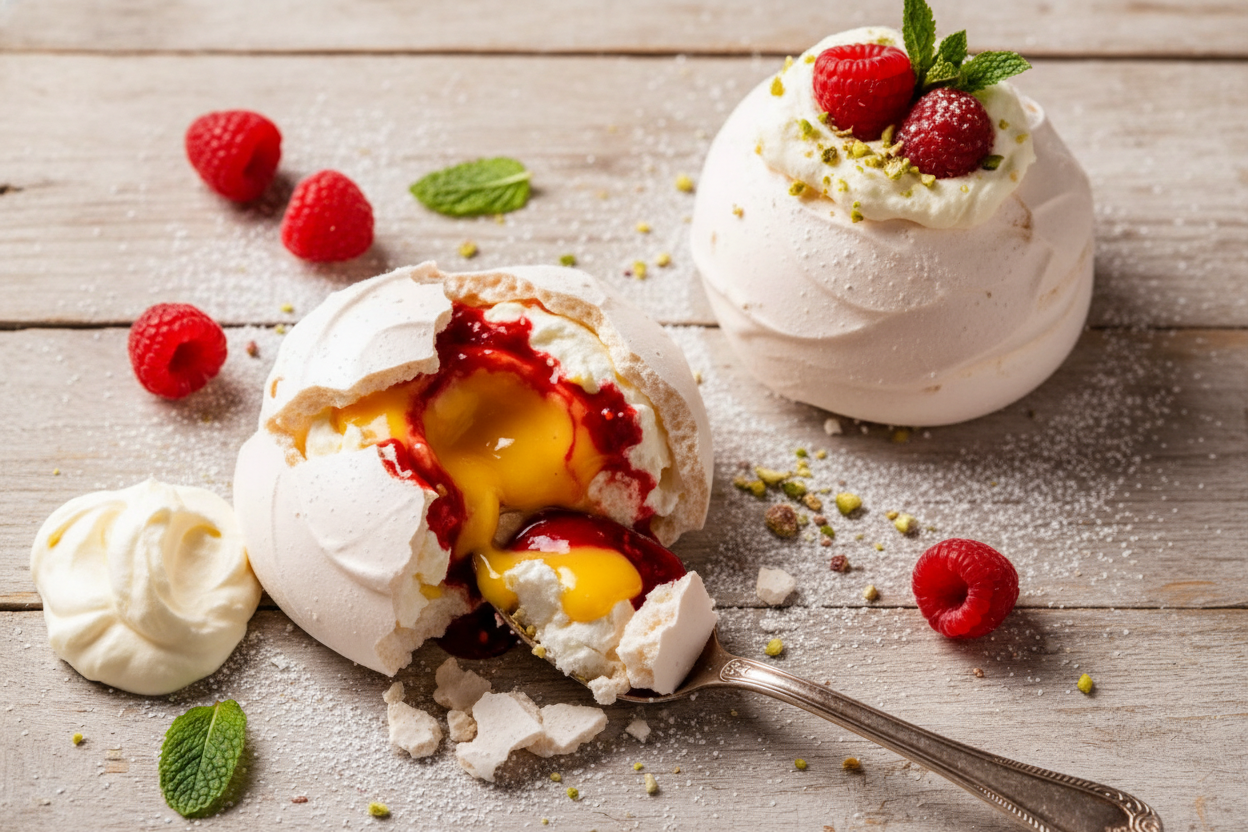
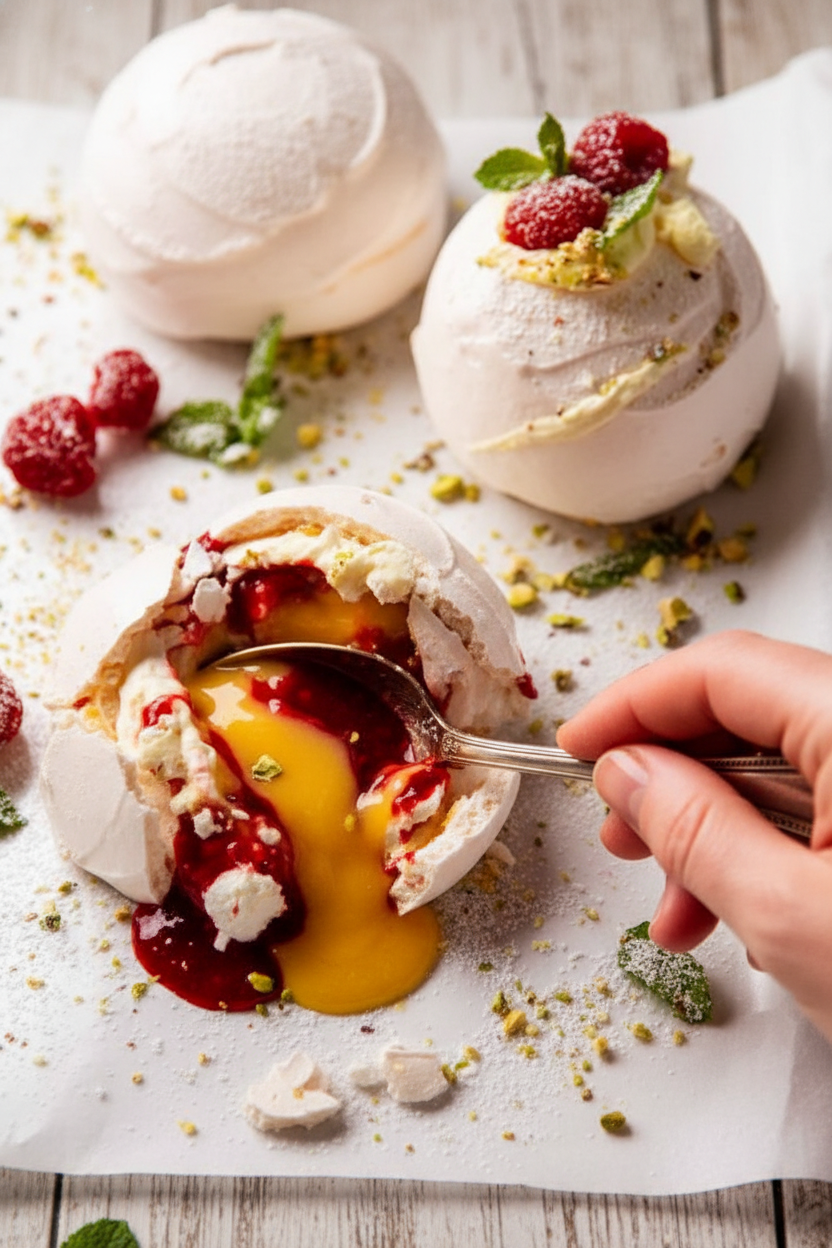
Once the shells are cool, you flip them upside down. You cut a small hole in the bottom and wiggle a chopstick inside to make space. Then you pipe in the raspberry coulis and the lemon curd. Plug the hole with a little whipped cream. Turn it right side up on a plate, pile on more cream, and add a raspberry and a mint leaf. Serve them right away. They don’t wait for anyone. The magic happens when your guests grab their spoons and crack through the top. It is a tiny event on every plate. Does that sound like a dessert you would want to try? I bet the kids in your life would love to do the smashing part.A Little Insight on Patience and Joy
It takes a long time to make these. Over an hour in the oven and then a whole night to cool. But that slow time is what gives you that perfect texture. You cannot rush a meringue. This matters because some of the best things in life need a little waiting. A garden needs time to grow. A friendship needs time to grow. So does a good dessert. When you finally smash that little white bomb, all that waiting feels worth it. The sound is a reward. The taste is a hug. So take your time, and when you are ready, share the joy. I would love to hear about your first smash. What was your favorite part?Ingredients:
| Ingredient | Amount | Notes |
|---|---|---|
| Egg whites | 80 ml / 1/3 cup (from 3 large eggs) | Note 1 |
| Caster sugar (superfine sugar) | 2/3 cups | Do not cut down, it will affect result! |
| Cornflour / cornstarch | 1 1/4 tsp | Note 2 |
| White vinegar | 1/2 tsp | Note 2 |
| Raspberry Coulis | As needed | For filling |
| Lemon Curd | As needed | Uses 3 leftover yolks from Pav |
| Heavy/thickened cream (or other whipping cream), COLD | 1 cup | For whipped cream |
| Caster sugar / superfine sugar | 1 1/2 tbsp | For whipped cream |
| Vanilla extract | 1/2 tsp | For whipped cream |
| Option to stabilise cream | – | See Note 3 for whip cream day before |
| Unsalted pistachios, finely chopped | 1 1/2 tbsp | For garnish |
| Mint sprigs, small | 5 | For garnish |
| Raspberries | 20 | For garnish |
| Icing sugar / powdered sugar | For dusting | For garnish |
My Grandma’s Little Secret for Pavlova Bombs
I remember the first time I tried making meringue. I was maybe your age, standing on a stool in my grandma’s kitchen. She told me to “beat it until your arm hurts, then beat it some more.” I still laugh at that memory. These little Pavlova Bombs have that same old-fashioned love in every bite. They look fancy, but they are really just sweet, crispy clouds hiding a tangy surprise inside.
Let’s get started. We will make five little bombs, enough to share with the whole family. The trick is to be patient while they bake low and slow. Trust me, your whole house will smell like sugar and vanilla. Doesn’t that smell amazing?
How to Make Pavlova Bombs (Step by Step)
Step 1: First, separate your eggs while they are still cold from the fridge. Cold eggs split easier, and you don’t want any yolk in the whites. Measure out exactly 1/3 cup of egg whites. Let them sit on the counter for 15 minutes to warm up. Room-temperature egg whites fluff up much better.
Step 2: Pour egg whites into a big mixing bowl. Start beating them on high with an electric mixer. While the mixer is running, slowly pour in the sugar, a little at a time. Keep beating for five whole minutes until the mixture is thick, glossy, and feels smooth when you rub a tiny bit between your fingers. (Hard-learned tip: If it feels grainy, keep beating! Grainy sugar will make your meringue weep later.)
Step 3: Now add the cornflour and vinegar. Beat for another 30 seconds. This helps the meringue stay soft and chewy in the middle. Scoop the mixture into a piping bag and snip the end to make a big hole. Pipe five tall domes onto a baking tray lined with paper. Smooth them gently with a knife.
Step 4: Put the tray in a cold oven, then set it to 225 degrees Fahrenheit. Bake for 1 hour and 30 minutes. The outside should feel dry and firm. If the bottom is sticky, bake a little longer. Then turn the oven off and let the bombs sit inside for at least 3 hours, or even overnight. I always do this before bed, so they are ready when I wake up. What’s your favorite thing to bake while you sleep? Share below!
Step 5: While they cool, make your fillings. Whip the cold cream with sugar and vanilla until soft peaks form. Make the lemon curd and raspberry coulis. Let everything get cold in the fridge. Now turn a pavlova bomb upside down. Cut a small hole in the bottom. Use a chopstick to gently push a little space inside for the fillings.
Step 6: Pipe the raspberry coulis into the hole, then the lemon curd. Plug the hole with whipped cream. Flip it right side up onto a plate. Pipe more cream on top. Add a raspberry, a tiny mint leaf, and a sprinkle of chopped pistachios. Dust with powdered sugar. Now the fun part: smash it open with your spoon and swoon!
Cook Time: 1 hour 30 minutes
Total Time: About 5 hours (including cooling)
Yield: 5 Pavlova Bombs
Category: Dessert
Three Fun Twists to Try
Chocolate Lover’s Dream: Swap the raspberry coulis for warm chocolate sauce. Add a sprinkle of sea salt on top. It tastes like a fancy candy bar.
Tropical Sunshine: Use mashed ripe mango and passionfruit pulp instead of lemon curd. Top with toasted coconut flakes. It feels like a vacation on a plate.
Berry Blast: Mix chopped strawberries and blueberries into your whipped cream. Skip the lemon curd and use extra berry sauce. So bright and fresh. Which one would you try first? Comment below!
How to Serve and What to Drink
Serve these bombs on a big platter so everyone can grab their own. A little pile of extra berries on the side looks pretty. For a fun party, let each person smash their own bomb with a small wooden spoon.
For a grown-up drink, a tiny glass of sweet sparkling wine goes nicely. Kids will love a tall glass of cold milk or a fizzy lemonade. Both drinks cut through the sweetness perfectly. Which would you choose tonight?
Storing and Batch Cooking Your Pavlova Bombs
The magic of these Pavlova Bombs is they wait for you. You can bake the meringue shells days ahead. Just cool them fully in the oven, then store them in an airtight container at room temperature. Do not put them in the fridge. The fridge makes them sticky and sad.
I remember my first time making these for a family picnic. I baked them the night before and left them in the oven to cool while I slept. It worked like a charm. The next day, I filled them fresh and we smashed them under a big tree.
The lemon curd and raspberry coulis can be made three days ahead. Keep them in the fridge in sealed jars. Whip the cream the day you serve, unless you stabilise it. This matters because it lets you enjoy the party without rushing. Have you ever tried storing it this way? Share below!
For batch cooking, double the meringue recipe easily. Just use six egg whites and double everything else. Pipe twelve little domes. Bake them on two trays, swapping trays halfway through. You will have a dessert ready for any surprise guest. That is a cozy feeling.
Common Problems and Easy Fixes
Sometimes your meringue cracks. Do not worry. That happens when the oven is too hot or you open the door early. Fix it next time by turning the oven down to 110°C right after you put the trays in. Let them cool slowly in the oven for hours. This keeps them smooth and tall.
Another issue is sticky meringue. If the base feels soft after baking, pop them back in the oven at 110°C for ten more minutes. Dry is good. Sticky is not. I once forgot to check the base and ended up with a chewy mess. Now I always test with my finger.
A third problem is filling that leaks out. Cut a small hole and squidge gently with a chopstick. Do not make the hole too big. This matters because a neat bomb holds all the surprise inside. It makes the smash more fun. Which of these problems have you run into before?
Fixing these little issues builds your cooking confidence. You learn that recipes are friends, not rules. When you know how to save a meringue, you feel brave in the kitchen. That is a gift you give yourself.
Quick Answers to Your Questions
Q: Are these gluten-free?
A: Yes. Meringue, lemon curd, and coulis have no flour. Check your vinegar is gluten-free. Most are.
Q: Can I make them a day ahead?
A: Bake the shells ahead. Fill and assemble just before serving. The cream will make them soft if left too long.
Q: What can I swap for the pistachios?
A: Try crushed almonds, toasted coconut, or even crushed freeze-dried raspberries. Any crunchy garnish works.
Q: Can I scale the recipe for one person?
A: Yes. Use one egg white and about 2 tablespoons of sugar. Bake just one little bomb. Adjust the time to about 45 minutes.
Q: Do I need a piping bag?
A: No. Use a sturdy zip-top bag with the corner snipped off. It works just as well. Which tip will you try first?
A Warm Send-Off from Chloe
Thank you for spending time in my little kitchen corner. These Pavlova Bombs are my favorite way to say “I love you” with dessert. The smash at the end always makes everyone laugh. I hope you try them and hear that happy crunch.
Please share your own stories or photos. Tag me on Pinterest so I can see your beautiful bombs. Cooking is better when we do it together, even from far away. Have you tried this recipe? Tag us on Pinterest!
*Fun fact: Pavlova is named after a Russian ballerina. It is light and airy, just like her dancing.*
Keep your oven warm and your heart full. Happy cooking!
—Chloe Hartwell.
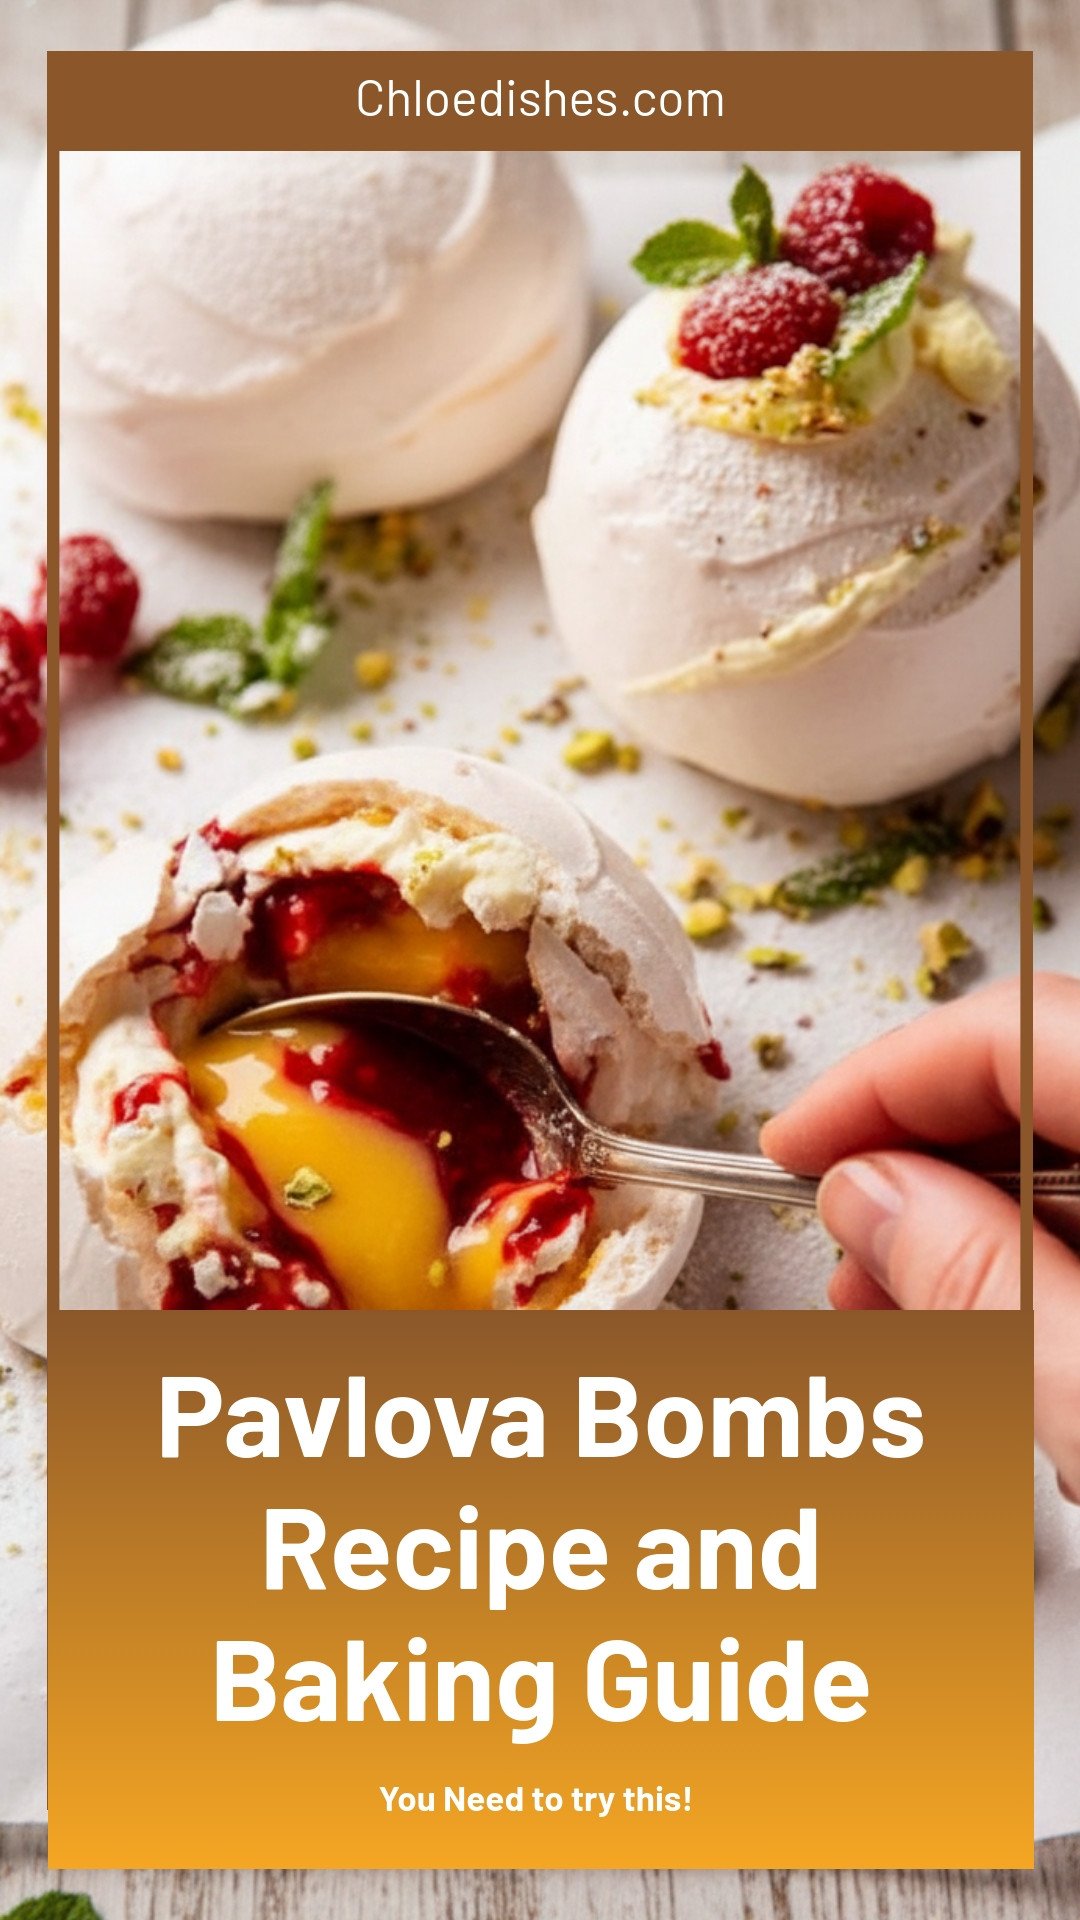

Pavlova Bombs Recipe and Baking Guide
Description
Crispy, chewy Pavlova Bombs with a soft marshmallow center. Easy baking guide for perfect mini pavlovas every time.
Ingredients
Pavlova Balls:
Fillings
Whipped cream:
Garnishes
Instructions
- Pipe then shape meringues into 5 domes. Bake 1 1/2 hours at 110°C/225°F (100°C fan), cool 3 hours / overnight in oven. Cut small hole in Pav bomb base, squidge around with chopstick to make room for fillings. Fill with coulis then curd, plug hole with cream. Decorate, SMASH!
- Preheat oven to 150°C / 325°F (all oven types).Egg whites – Separate the egg yolks from egg whites while fridge cold (it’s easier). Measure out 1/3 cup (80 ml) egg whites then set aside to come to room temperature for 15 minutes (fluffs better at room temp).Add sugar – In a stand mixer or using an electric beater, beat the egg whites on high for 1 minute. While still beating, slowly pour the sugar in over 1 minute.Beat 5 minutes – Continue to beat for 5 minutes on high until it’s fluffy, glossy, and there are no sugar grains remaining when you rub a bit between your fingers. Add vinegar and cornflour then beat for a further 30 seconds.Line tray – Dab a bit on the corner of 2 trays then cover with baking paper (parchment).Pipe mounds Transfer meringue mixture into a large piping bag. Snip the end to make a large 2cm / 0.8″ hold. Pipe 5 mounds on the tray, then smooth into domes that are taller than they are wide (they flatten slightly when baked). Mine are about 4 cm / 1.6″ wide and 6.5cm /2.6″ tall. Use a small offset spatula or butter knife to smooth into a dome shape (no need to be perfect, it gets decorated later).Bake 1 hour 30 minutes – Place both trays in the oven, immediately turn oven DOWN to 110°C/225°F (100°C fan) and bake for 1 hour 30 minutes or until they are dry to touch (check base). Keep baking if still sticky – exact times may vary. (Note 4)Cool in oven – Turn oven OFF and leave to fully cool for 3 hours or overnight around 10 hours (I often do this while I sleep so handy!).
- Make the Lemon Curd and Raspberry Coulis while the pavlovas are in the oven. Very easy – simmer to thicken, strain, then chill before using.Whipped cream – Beat cream ingredients in a large bowl on high until soft peaks form (45 seconds using a stand mixer, 1 – 1 1/2 minutes with hand held beater). Do this just prior to serving, unless you stabilise the cream (which can be done the day before). Note: if making stabilised whipped cream, follow the steps for your chosen method (there’s multiple ways to do it).
- Piping bags – Transfer the raspberry coulis, lemon curd and cream into separate piping bags. Snip a small 5 mm / 1/5″ off the end of the raspberry coulis, and a larger 1cm / 0.4″ off the cream piping bag. (No piping bag? See Note 5)Access hole! Place a pavlova bomb upside down in a muffin tin, to hold in place as you work. Carefully cut a 1cm / 0.4″ hole in the middle using a small sharp knife. Stick a chopstick into the hole and squidge around GENTLY to move some pavlova marshmallow centre out of the way to make room for the fillings.Pipe some raspberry coulis in (~ 1 1/2 tsp), then lemon curd (~ 2 – 3 tsp). Plug the hole with cream.Plate up – Pipe ~2 tbsp cream on a plate, top with pavlova bomb (stops it from sliding). Pipe then spread more cream on the top of the pavlova bomb. Top with a raspberry, mint sprig, sprinkle of pistachio, dust with icing sugar.Smash! Serve immediately – pavs don’t wait around once assembled! Encourage everyone to smash into their Pavlova Bombs so you get a bit of everything in your first bite – delicate crispy meringue, marshmallow centre, tangy lemon curd, bright raspberry coulis. SWOON!
Notes
- Cups / Metric options available. For best results, do not cut down sugar. Pavlovas can be stored unfilled in an airtight container for up to 2 weeks.


Leave a Reply