
My Focaccia Garden Adventure
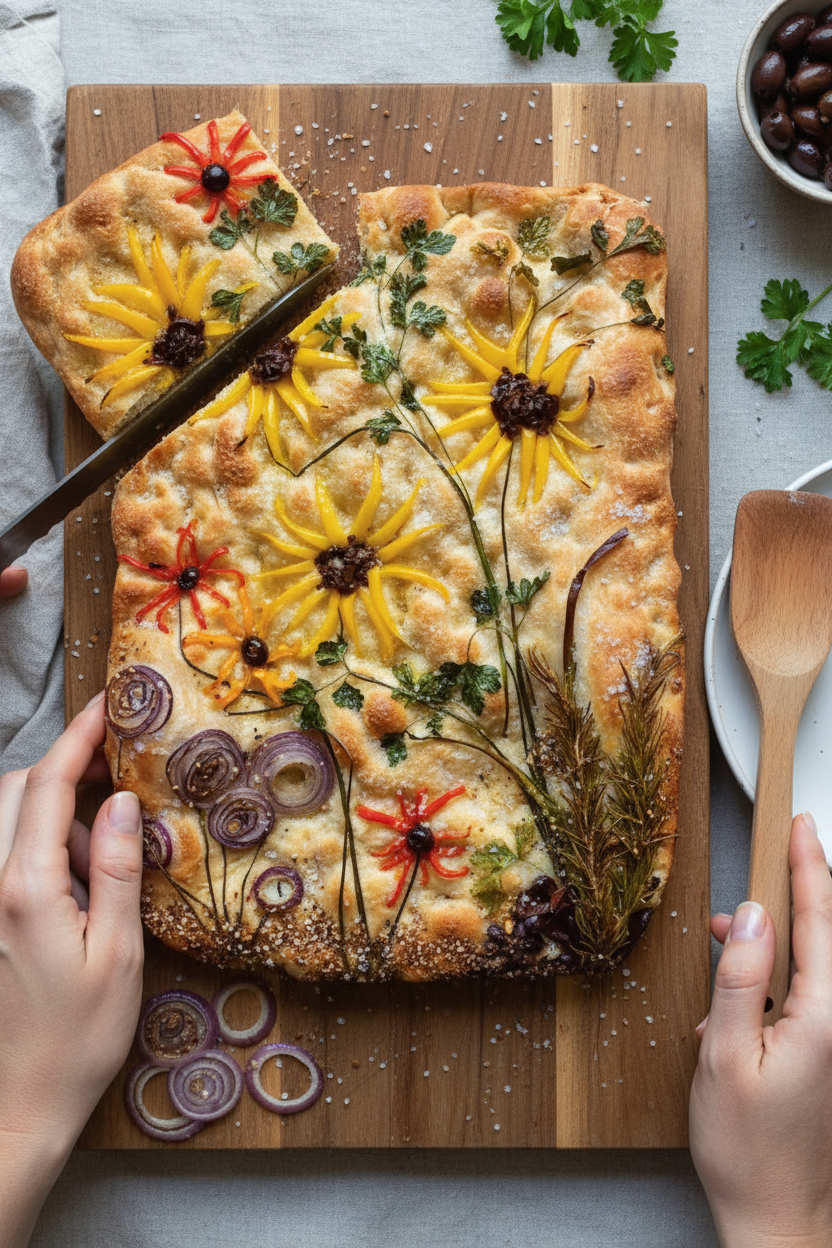
I tried painting with food last week. I made a bread garden. It’s called botanical focaccia. You press herbs and veggies right into the dough. Mine had little rosemary trees and tomato suns. I still laugh at that. It looked so cheerful.
Why does this matter? Cooking should be fun, not perfect. This recipe is like playing with your food. It turns a simple loaf into a story. What would you plant in your bread garden? Tell me your ideas.
The Magic of Letting It Rest
The dough needs a long nap. You mix it and then walk away. For hours! This was hard for me. I wanted to peek under the cloth. But patience is a secret ingredient.
That rest lets the yeast do its work. The dough puffs up full of air. This makes the bread light inside. *Fun fact*: that poking step is called “docking.” It stops big bubbles from forming. Isn’t that a funny word?
Your Thumbs Are the Best Tool
You don’t need fancy gear. Your own two hands are perfect. Kneading the dough is like giving it a hug. You feel it change from shaggy to smooth. Then you press your toppings in with your fingertips.
Why this matters? You connect with your food. You learn its texture. You make it yours. My mini-anecdote: I used petals from my pansies. They looked so pretty. Have you ever eaten a flower?
The Best Part is the Smell
While it bakes, your whole house changes. The smell of rosemary and warm bread fills the air. Doesn’t that smell amazing? It is the coziest smell I know. It makes everyone gather in the kitchen.
Waiting for it to cool is the final test. You must be strong! Cutting into warm bread is tempting. But letting it wait makes the crust perfect. Do you like the soft middle or the crispy edge best?
Lessons From My Loaf
My garden bread was not flawless. Some “trees” got a little dark. But it tasted wonderful. The olive oil makes the crust sing. Each bite had a little surprise.
Why this matters? The beauty is in the making. Not just the eating. It’s a gift you make with your hands. So, grab some flour. What will your first creation be? A smiley face or a starry night? I’d love to see.
Ingredients:
| Ingredient | Amount | Notes |
|---|---|---|
| 00 flour | 1 cup plus 1 Tbsp. | |
| All-purpose flour | 1 cup plus 1 Tbsp. and 2 tsp. | |
| Fine sea salt | 1 tsp. | For the dough |
| Active dry yeast | 3/4 tsp. | |
| Extra-virgin olive oil | 1 tsp. | For the dough |
| Olive oil | As needed | For coating pan and drizzling |
| Salt and pepper | To taste | For seasoning before baking |
| Toppings of your choice | As desired | For botanical or other designs |
My Garden on a Pan: Baking Storybook Focaccia
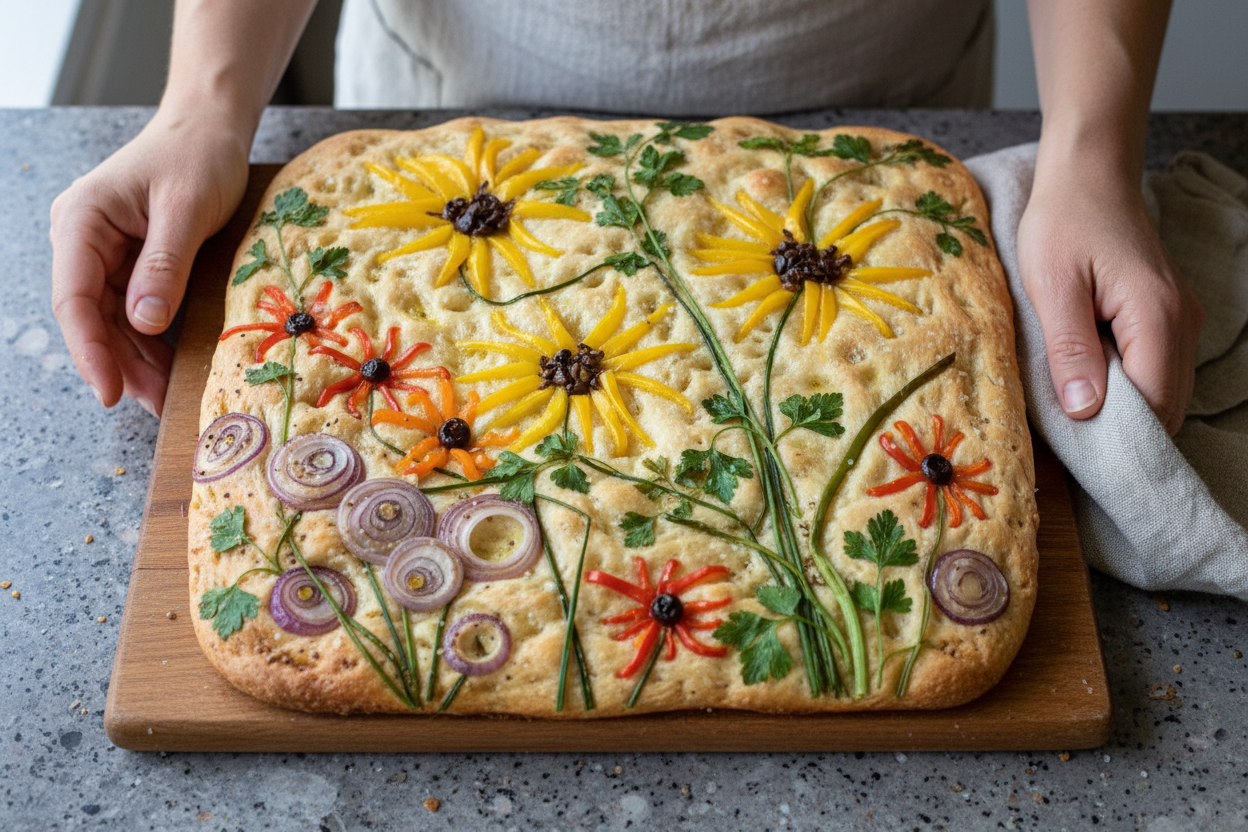
Hello, my dear. Come sit. Let’s make a bread canvas. This is my botanical focaccia. It’s like a garden you can eat. I love making pictures with herbs and veggies. My first one looked like a happy sun. I still laugh at that.
It’s not hard, just cozy. You get to poke the dough with your fingers. That part is my favorite. It’s like giving the bread little dimples. Then we press in our toppings. The smell in your kitchen will be wonderful. Let’s begin our baking story.
Step 1: First, we wake up the yeast. Mix it with warm water and a glug of olive oil. It should look a little creamy. Pour this into your bowl of mixed flours and salt. Now, get your hands in there. Knead it just until it comes together. It will be shaggy, and that’s fine. Let it take a fifteen-minute nap on the counter.
Step 2: After its rest, knead the dough for three more minutes. Feel it become smoother. Then, cut it into two equal balls. Tuck the edges under to make them nice and round. Cover them with a damp cloth. Now, we wait. Let them rise for three or four hours. They will get nice and puffy. (Hard-learned tip: If your kitchen is chilly, it might take longer. Be patient with it!).
Step 3: Coat your pan with a good amount of olive oil. Press and stretch each dough ball into the pan. Now, have fun. Poke deep dents all over with your fingertips. This stops big bubbles. Doesn’t that feel funny? What’s your favorite garden veggie to draw with? Share below!
Step 4: Time to create your masterpiece. Arrange your toppings prettily. Think rosemary sprigs for trees, or onion slices for flowers. Press each piece gently into the dough. This helps them stay put. Drizzle everything with more golden oil. A sprinkle of salt and pepper finishes it.
Step 5: Bake at 400°F for about thirty minutes. Watch it turn a perfect golden brown. Oh, the smell is amazing. Let it cool on a rack. Then, show it off before you slice it. Ooh and aah, just like the recipe says. Then, devour your delicious art.
Cook Time: 30 minutes
Total Time: 4–5 hours (includes rising)
Yield: 2 small loaves
Category: Baking, Bread
Three Twists for Your Next Loaf
Once you know the basics, you can paint any picture you like. Here are three of my favorite ideas. They make the kitchen smell different every time.
Sunshine & Lemon: Use thin lemon slices and fresh thyme. It tastes bright and cheerful, like a summer day.
Pizza Party: Press in cherry tomato halves, torn basil, and little cheese bits. It’s a bubbly, cheesy delight.
Autumn Harvest: Thin apple slices, sage leaves, and a drizzle of honey. Sweet, savory, and perfectly cozy.
Which one would you try first? Comment below!
Serving Your Masterpiece
Tear this bread warm from the oven. It’s perfect for sharing. I love it with a bowl of tomato soup for dipping. Or, slice it for sandwiches. Try it with mozzarella and fresh tomatoes. So good.
For drinks, a crisp white wine pairs beautifully. My grandson loves it with sparkling lemonade. We call it our “fancy dinner” drink. Which would you choose tonight? Either way, it’s a meal made with love. Just the way I like it.
Keeping Your Focaccia Fresh
Let’s talk about keeping your bread lovely. Cool your focaccia completely first. Wrap it tight in foil for the fridge. It will stay good for two days.
For the freezer, slice it first. Wrap each piece in plastic wrap. Then pop them all in a freezer bag. You can toast slices straight from frozen. I once forgot a loaf for a month. It toasted up perfectly for soup!
Batch cooking saves busy days. Make the dough balls and freeze them before they rise. Thaw in the fridge overnight. Then let them rise and bake. This matters because fresh bread should be a joy, not a chore. Have you ever tried storing it this way? Share below!
Focaccia Fixes for Happy Bakers
Is your dough not rising? Your kitchen might be too cold. Place the bowl in a warm spot. Near the oven is often perfect. I remember when my first loaf stayed flat. My kitchen was just too drafty!
Are your toppings burning? Press them into the dough well. This helps them stick and cook evenly. A light drizzle of oil protects them too. Is the bread too dense? You might have over-kneaded it. Gentle kneading is the secret.
Fixing small problems builds your kitchen confidence. It also makes your food taste so much better. Good flavor comes from happy, relaxed baking. Which of these problems have you run into before?
Your Focaccia Questions, Answered
Q: Can I make this gluten-free? A: Try a 1-to-1 gluten-free flour blend. The texture will be a bit different but still tasty.
Q: Can I make the dough ahead? A: Yes! Let it rise in the fridge overnight. This actually gives it more flavor.
Q: What are easy topping swaps? A: Use rosemary and sea salt. Thin slices of onion or cherry tomatoes work great too.
Q: Can I double the recipe? A: You can. Just use two pans so the bread bakes evenly.
Q: Any optional tips? A: Add a spoonful of honey to the water. It gives the yeast a nice little snack. Fun fact: That’s why the yeast gets so bubbly and active! Which tip will you try first?
Share Your Kitchen Creations
I hope you try this recipe. Baking bread is a wonderful, simple pleasure. I love seeing what you create in your own kitchen.
Please share your beautiful focaccia art with me. I would love to see your flowery designs or tasty toppings. It makes my day to see your bakes. Have you tried this recipe? Tag us on Pinterest!
Happy cooking! —Chloe Hartwell.

Home Baker Attempts Botanical Focaccia With Results
Description
A home baker’s stunning botanical focaccia art is easier than it looks! Get inspired to create your own edible masterpiece with simple tips.
Ingredients
Instructions
- In a mixing bowl, combine flours and salt. In a small mixing bowl, stir together a little less than 1 cup lukewarm tap water, yeast and olive oil; pour it into flour mixture. Knead with your hands until combined, approximately 3 minutes, then let the mixture rest for 15 minutes. Knead rested dough for 3 minutes. Cut into 2 equal pieces and shape each into a ball. Place on floured surface, cover with dampened cloth, and let rest and rise for 3 to 4 hours at room temperature.
- Coat a pan with olive oil and spread dough evenly. Dock (or poke) the dough well with your fingertips. Decorate however you want, making sure that you press the ingredients into the dough to slightly adhere them. Drizzle with olive oil and season with salt and pepper.
- Bake at 400°F for 30 minutes or until golden brown. Let it cool on a wire rack; then ooh, aah and devour.


Leave a Reply