

My First Marshmallow Mess
I tried making marshmallows years ago. It was a sticky disaster. My kitchen looked like a cloud had exploded. I still laugh at that.
This recipe is different. It uses agar, from seaweed, not gelatin. That makes it vegan. It is a game-changer. It matters because everyone gets a fluffy treat. No one is left out.
The Secret in the Seaweed
Let’s talk about agar powder. It is our magic ingredient. It comes from red algae. It makes things set, like gelatin does.
You mix it with cold water first. This is very important. It needs to dissolve before the hot sugar comes. Fun fact: Agar was first used in Asia centuries ago, for jellies and desserts.
Patience is Your Friend
The hardest part is waiting. You must let them sit overnight. Then, chill them for an hour. This waiting matters. It gives them that perfect, chewy texture.
Trust me, it is worth it. Waking up to a pan of fluffy marshmallows is a joy. Doesn’t that smell amazing? What is the hardest recipe for you to wait for?
A Fluffy Blanket of Sugar
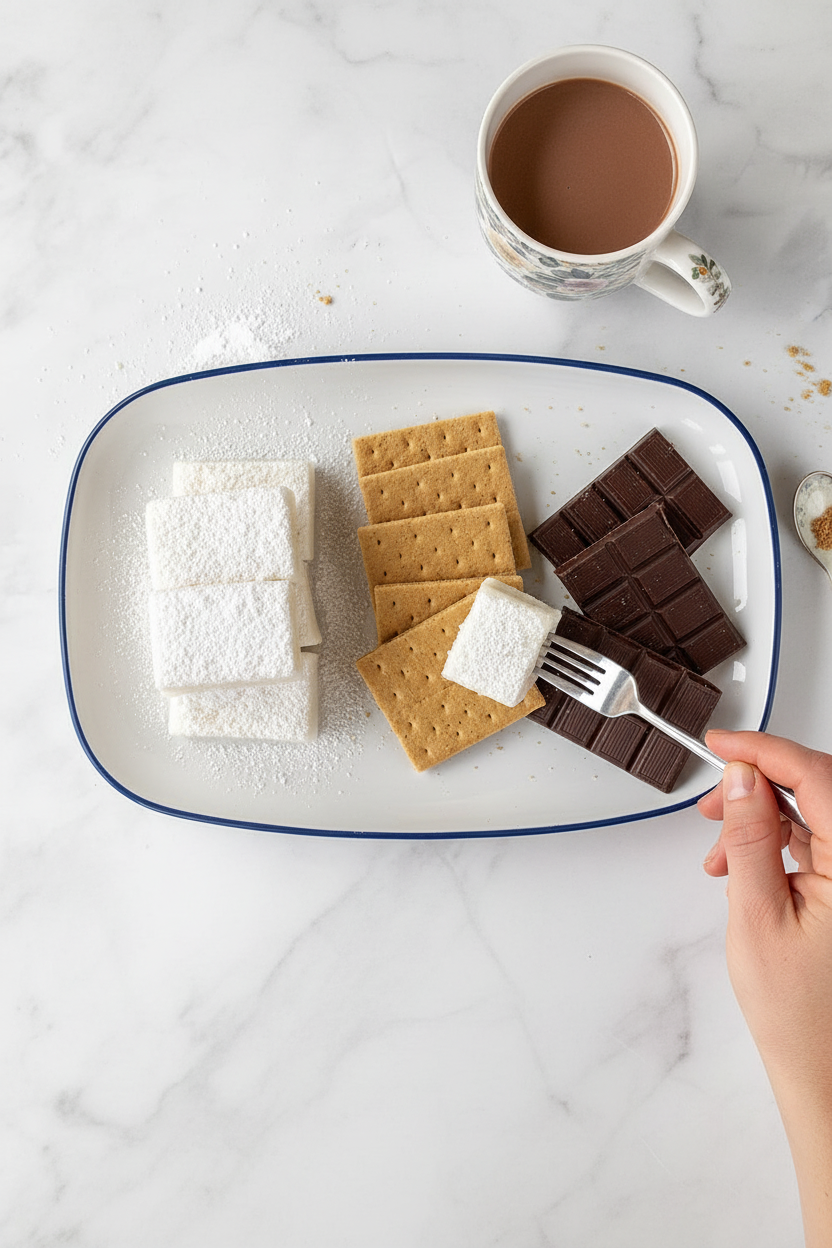
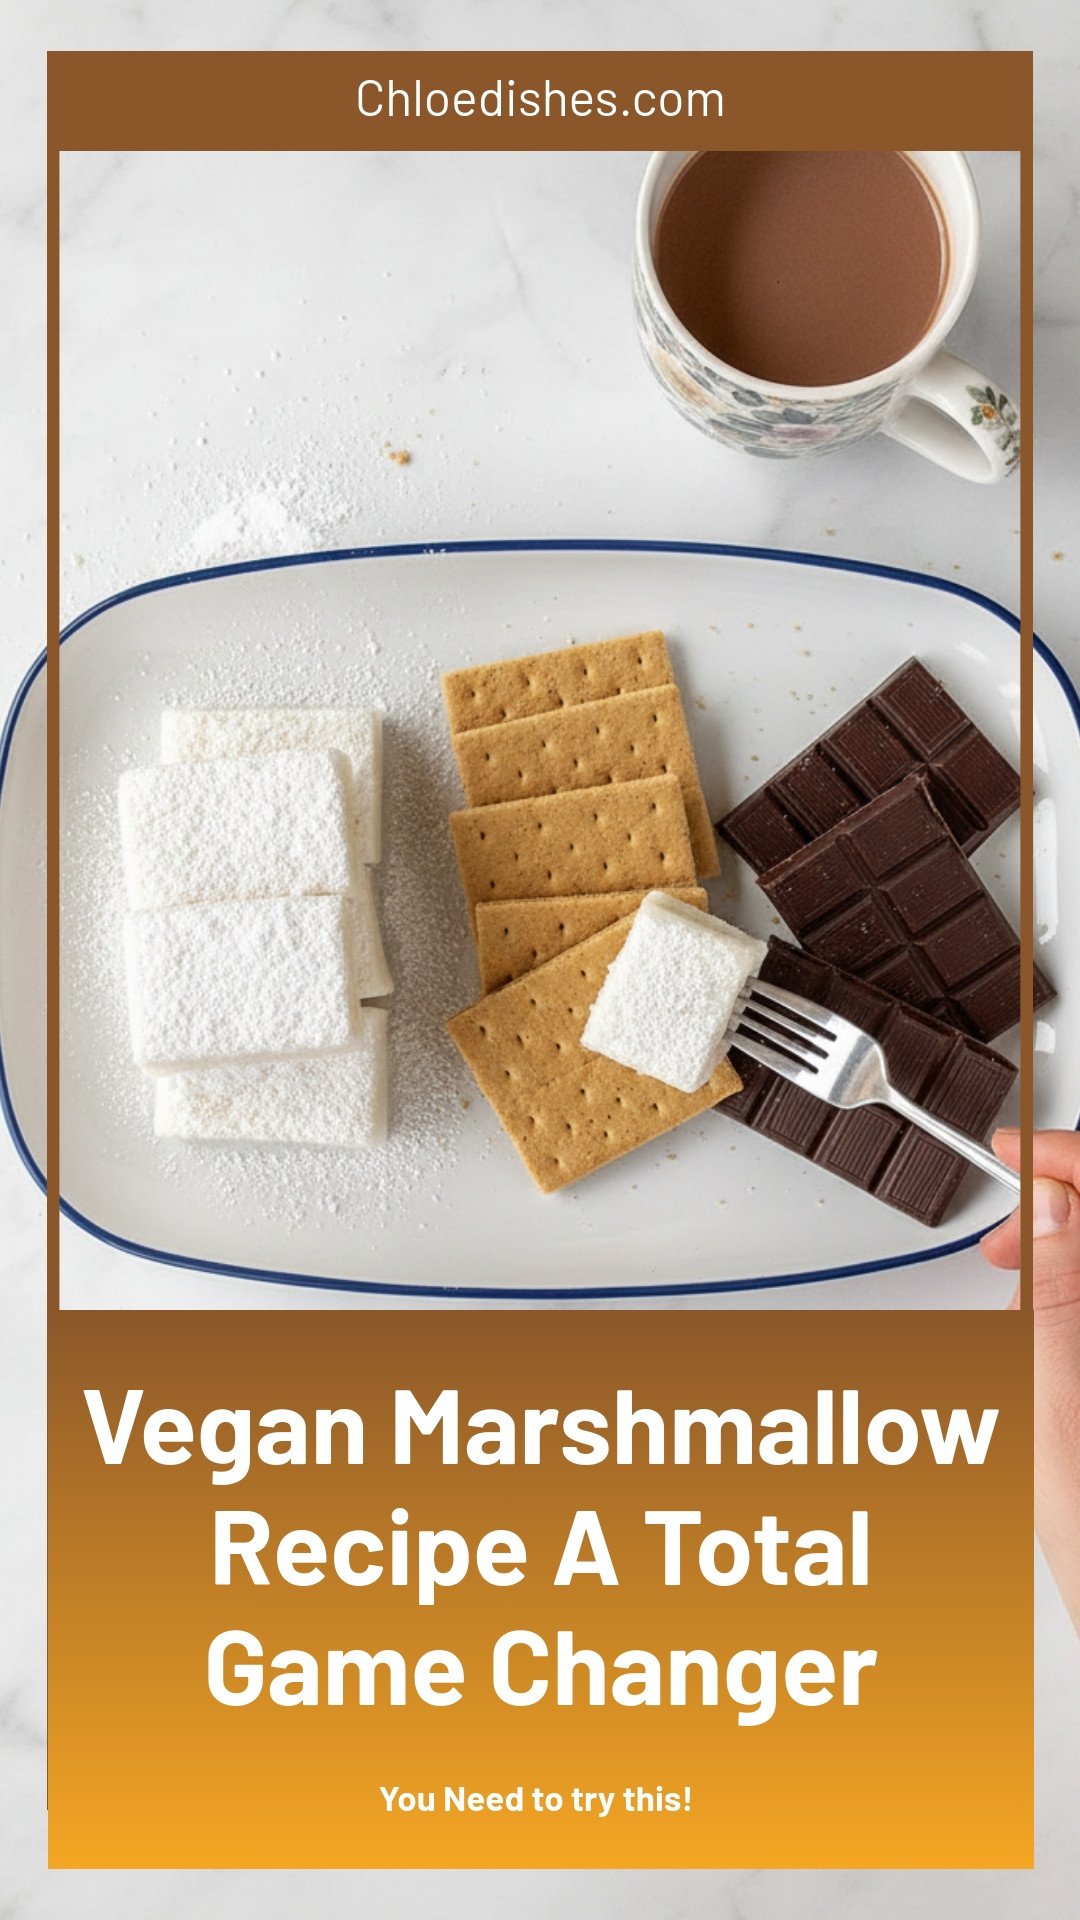
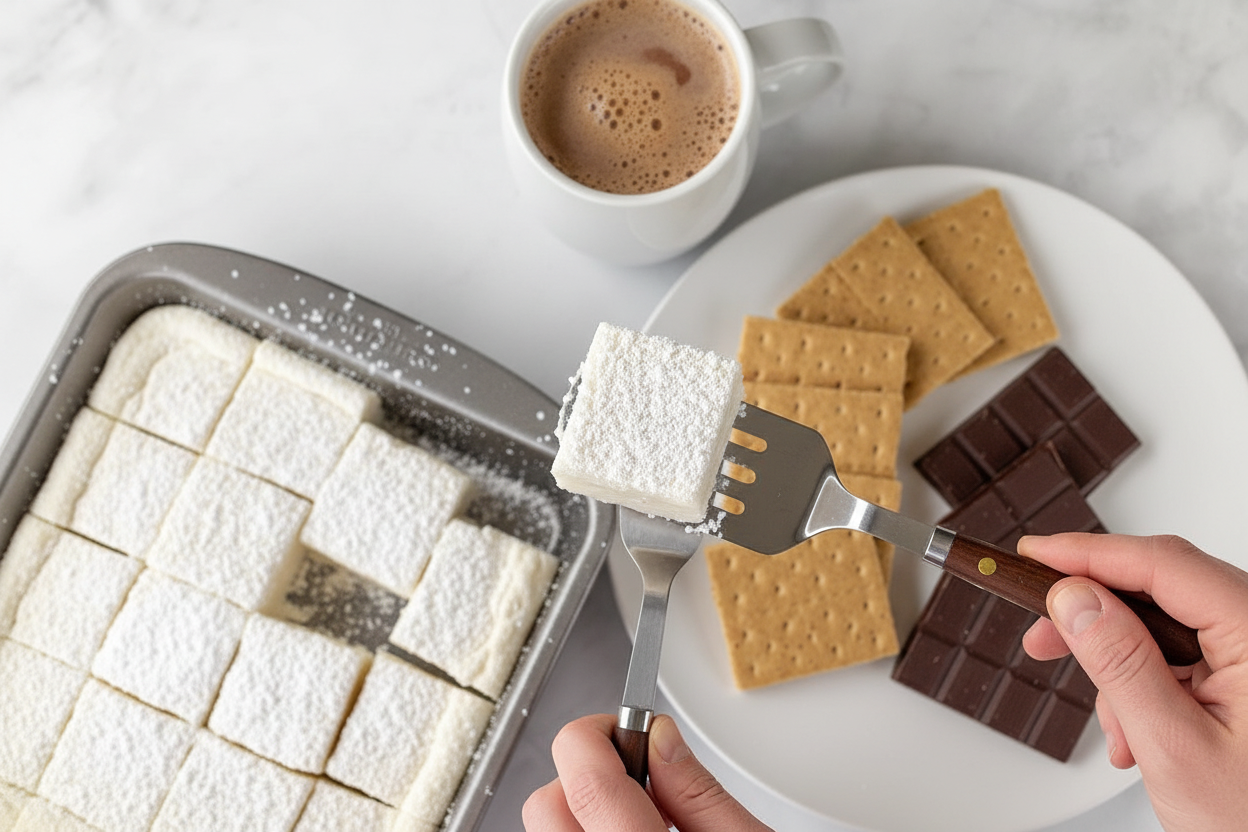
Grease your pan well with vegan butter. Dust it with powdered sugar. This is like putting a fluffy blanket in the pan. It stops the marshmallows from sticking.
You will use more sugar to coat them after cutting. This keeps them from being sticky friends. Roll each piece well. Do you prefer your marshmallows plain, or with a flavor like peppermint?
Your Sweet Creation
Cut them into big squares. Or use cookie cutters for fun shapes. Hearts for Valentine’s Day are my favorite. Store them in the fridge in a tight container.
They are perfect for hot cocoa. Or just for sneaking from the jar. Making them yourself feels so special. What will you do with your homemade marshmallows first? Tell me your plans.
Ingredients:
| Ingredient | Amount | Notes |
|---|---|---|
| vegan butter | 2 teaspoons | |
| powdered sugar | 1/2 cup, divided | |
| agar powder | 3 tablespoons | |
| cold water | 1 cup, divided | |
| sugar | 2 cups | |
| light corn syrup | 1 cup | |
| salt | 1/8 teaspoon | |
| peppermint extract | 1/2 teaspoon | optional |
My Magical, Fluffy Vegan Marshmallows
Hello, my dear! Come sit at the counter. Let’s make clouds you can eat. I remember trying my first vegan marshmallow. It was like a sweet, chewy miracle. I still laugh at that. Now, we make our own. Doesn’t that smell amazing? The peppermint is like a winter breeze. You’ll love this.
Step 1: First, get your pan ready. Line it with foil and rub it with vegan butter. Dust it with powdered sugar like a light snow. Now, for the magic powder: agar. Sprinkle it over cold water in your mixer bowl. Gently whisk it until it vanishes. (Hard-learned tip: Make sure no agar lumps hide! They won’t dissolve later.)
Step 2: Next, we make the syrup. In a big pot, mix water, sugar, corn syrup, and salt. Don’t stir it. Just let it come to a rolling boil. Watch it bubble and swirl. You need a candy thermometer here. Wait for it to reach 240°F. That’s the soft-ball stage. It’s the secret to perfect fluff.
Step 3: Careful, this is hot! Pour the syrup into the mixer bowl. Turn it on high. Let it beat for a long time. It will turn white and glorious. My old mixer hums a happy song. After about 12 minutes, add peppermint if you like. Do you prefer classic vanilla or a hint of mint? Share below!
Step 4: Quickly, scrape the fluffy mix into your pan. Smooth the top. Now, patience is key. Let it sit out overnight, uncovered. It forms a lovely crust. The next day, chill it for an hour. This makes cutting so much easier.
Step 5: Lift your marshmallow slab out. Use a big knife to cut squares. Have fun with shapes! Now, toss each piece in more powdered sugar. This keeps them from sticking. They look like little sugar-dusted pillows.
Step 6: Finally, tuck them into an airtight container. Keep them in the fridge. They stay perfect for weeks. If you can resist eating them all at once! I know I can’t.
Cook Time: 30 minutes
Total Time: 13 hours 30 minutes (includes setting)
Yield: One 8×8 pan
Category: Dessert, Candy
Three Fun Twists to Try
Once you master the basic cloud, try playing! Here are my favorite twists. They make every batch a new adventure.
Berry Pink Clouds: Add two tablespoons of raspberry powder. It turns them a beautiful pink. They taste like summer.
Campfire Swirl: Swirl in two tablespoons of melted vegan chocolate. Just fold it in at the end. You’ll get pretty chocolate ribbons.
Toasty Coconut Pillows: Roll the finished marshmallows in toasted coconut flakes. It adds a lovely crunch and flavor.
Which one would you try first? Comment below!
Serving Your Sweet Creations
These aren’t just for eating plain! Though that is a wonderful idea. For hot cocoa, drop two in your mug. Watch them melt. You can also toast them over a campfire. They get gooey and perfect. For a fancy treat, layer them with chocolate and graham crackers. Make indoor s’mores!
What to drink? A rich, dark hot chocolate is their best friend. For a grown-up pairing, try a creamy coffee liqueur on the rocks. The flavors dance together so nicely. Which would you choose tonight?
Keeping Your Marshmallows Perfect
These marshmallows keep best in the fridge. Store them in an airtight container. They will stay good for about two weeks. You can also freeze them for a month. Just layer them between parchment paper.
I once left a batch out on the counter. They became sticky and sad. The fridge keeps them fluffy and dry. Batch cooking is wonderful for holidays. Make a double batch and freeze half.
This saves you time later. You will always have a sweet treat ready. Good storage keeps food from going to waste. That matters for your wallet and our planet. Have you ever tried storing marshmallows this way? Share below!
Common Troubles and Easy Fixes
First, the syrup might not reach 240 degrees. Your marshmallows will be too soft. Use a candy thermometer for accuracy. I remember when I guessed the temperature. My marshmallows were soup!
Second, the mixture may not get thick. Keep beating for the full time. It feels like forever, but trust the process. Third, they can stick when you cut them. Coat your knife in powdered sugar first.
Fixing these issues builds your kitchen confidence. You learn that recipes are guides, not rules. Getting the texture right makes them melt-in-your-mouth good. That is the best feeling. Which of these problems have you run into before?
Your Marshmallow Questions Answered
Q: Are these marshmallows gluten-free?
A: Yes, all the ingredients are naturally gluten-free.
Q: Can I make them ahead?
A: Absolutely! They need to set overnight anyway.
Q: What can I use instead of corn syrup?
A: Try agave syrup. The texture might be a little different.
Q: Can I double the recipe?
A: Yes, but use a much bigger pan. A 9×13 pan works well.
Q: Is the peppermint necessary?
A: Not at all! Use vanilla for classic flavor. *Fun fact: The first marshmallows were made from a plant root!* Which tip will you try first?
Share Your Sweet Creations
I hope you love making these fluffy treats. It is a fun kitchen project. Seeing the syrup turn into clouds is magic. I would love to see your results.
Share a photo of your marshmallow squares. You can tag my blog on Pinterest. Use the handle @ChloesCozyKitchen. Let’s build a community of happy bakers. Have you tried this recipe? Tag us on Pinterest!
Happy cooking! —Chloe Hartwell.
Vegan Marshmallow Recipe A Total Game Changer
Description
Discover the ultimate vegan marshmallow recipe! Fluffy, sweet, and surprisingly easy to make. A total game-changer for plant-based treats.
Ingredients
Instructions
- Line an 8×8 pan with foil and grease with vegan butter. Using half of the powdered sugar, dust the pan and set aside. Then, in the bowl of a stand mixer, sprinkle agar powder over 1/2 cup water. Gently mix with the whisk attachment until dissolved, then set aside.
- In a large saucepan, combine remaining water with sugar, corn syrup and salt. Bring to a rapid boil without stirring until a candy thermometer reads 240° F.
- Remove the mixture from heat and carefully add it to the stand mixer. Beat on high speed until mixture is thick, about 10-15 minutes. Mix in peppermint extract, if using.
- Immediately transfer to the prepared pan and let sit uncovered for at least 12 hours. Once the tops are completely dried out, place in refrigerator for 1 hour.
- Lift the marshmallows out of the pan and cut them with a knife. Coat each marshmallow with remaining powdered sugar.
- Store in an airtight container in the refrigerator until ready to eat.
Notes
- Nutrition information is not provided in the text.


Leave a Reply