
A No-Bake Surprise
My grandson Leo calls this his “magic trick” dessert. You just mix a few things. Then you pop it in the cold. A few hours later, it’s a real pie. I still laugh at that.
It is the easiest treat for a hot day. You don’t even have to turn on the oven. Doesn’t that sound nice? What is your favorite no-bake dessert to make?
The Chocolate Layer
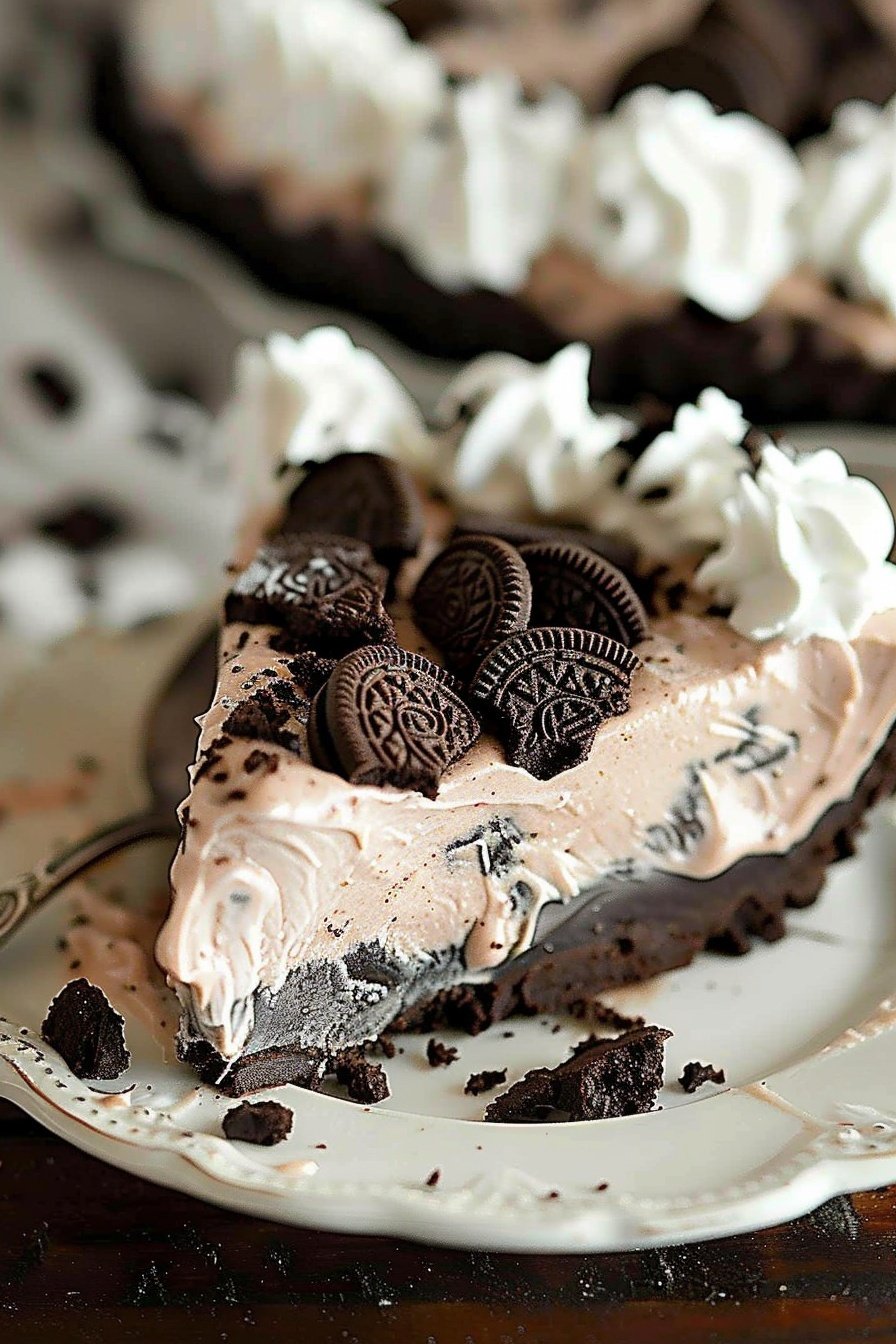
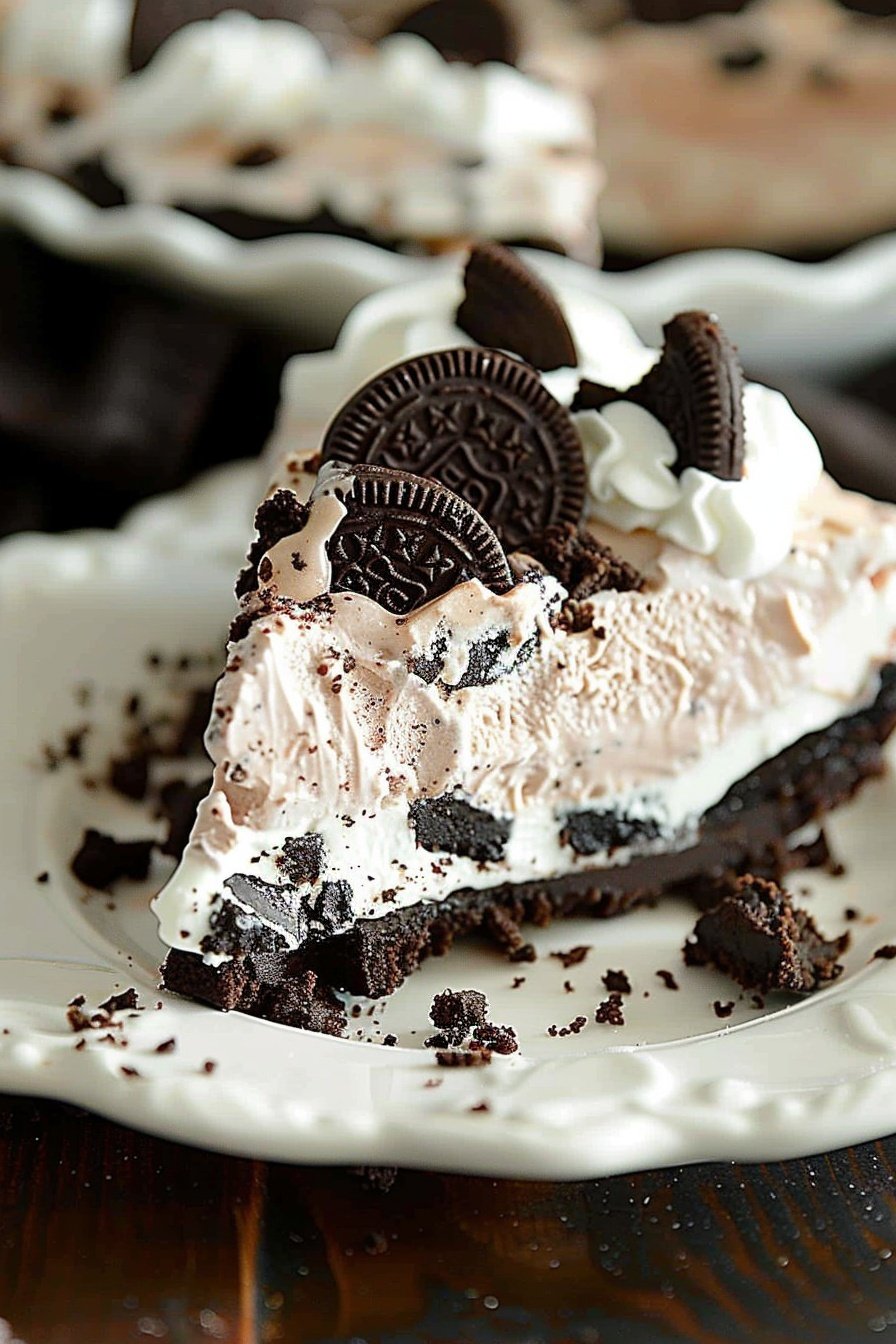
First, we make the chocolate part. You whisk the pudding powder and milk. It gets thick and shiny. Then you fold in that fluffy whipped topping.
It becomes like a chocolate cloud. You pour it into the cookie crust. Spreading it out is my favorite part. It feels so smooth and cool.
A Little Story for You
I first made this for a summer picnic. I was in a big hurry. I forgot to add the broken cookies on top.
My friend Betty took a bite. She said, “Chloe, where are the cookies?” We all had a good laugh. Now I never forget them. This matters because cooking should be fun, not perfect.
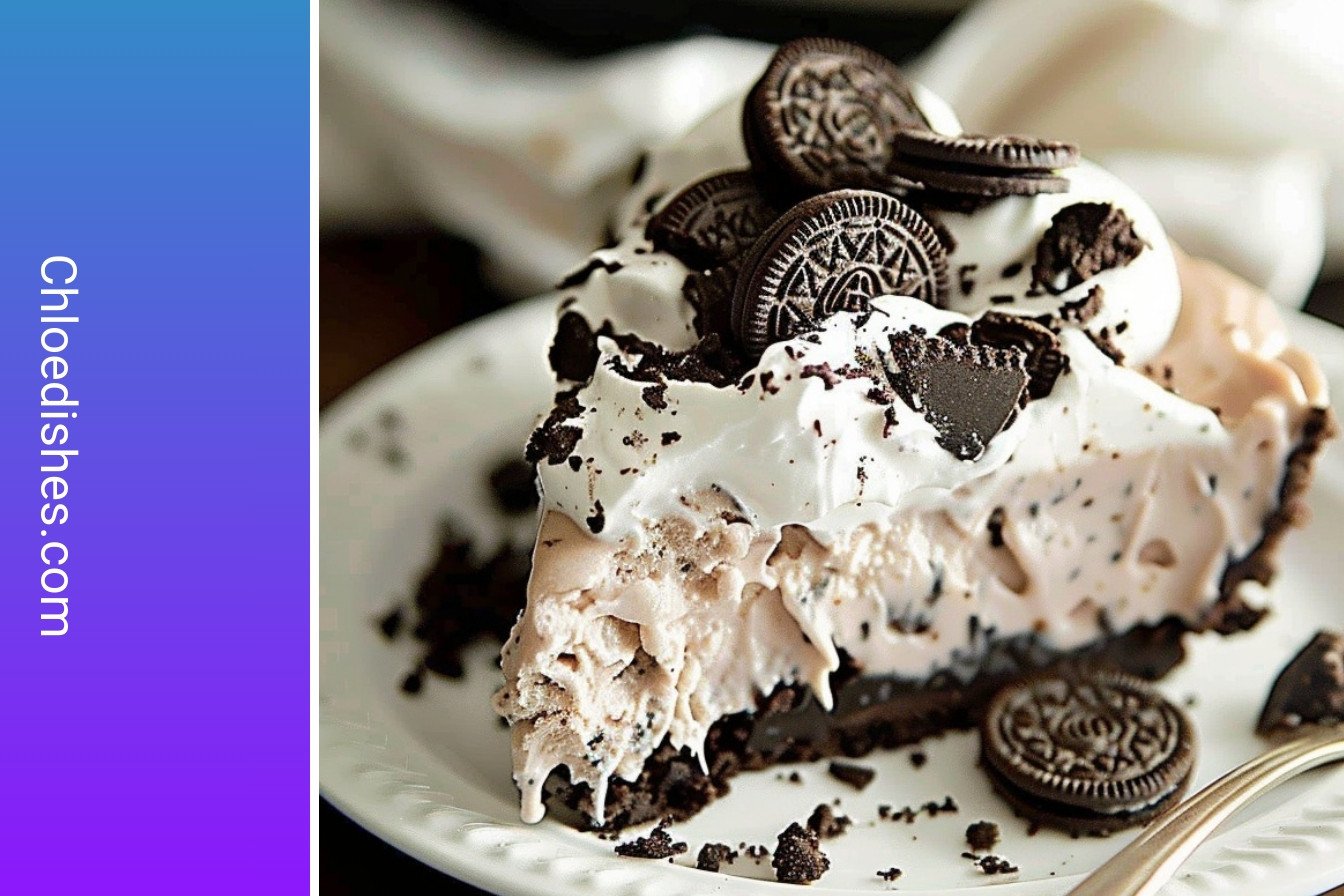
The Crunchy Top
Now for the best part. Take your broken Oreos. Gently mix them into the other tub of fluffy topping. You want little cookie bits in every bite.
Spread this over the chocolate layer. Sprinkle the last cookie pieces on top. *Fun fact: The Oreo was created in 1912. That’s over a hundred years of cookie crunch!
Why This Pie is Special
This pie is more than just sweet. It is about sharing. It is a dessert you can make with a friend or your kids.
Working together in the kitchen makes memories. That is why this matters. The time together is the real treat. Do you like to cook with someone special?
Time to Chill
The last step takes patience. You must let the pie get cold and firm. This takes at least two hours. I know, it’s hard to wait!
But trust me, it is worth it. The cold makes all the layers come together. When you slice it, everyone will smile. What is the hardest part of a recipe for you? Is it the waiting?
Ingredients:
| Ingredient | Amount | Notes |
|---|---|---|
| Prepared Oreo crust | 1 | |
| Instant chocolate pudding | 2 (3.9-ounce) boxes | |
| Milk | 2 cups | |
| Frozen whipped topping (thawed) | 2 (8-ounce) containers | e.g., Cool Whip |
| Oreo cookies | 12 | Coarsely broken |
My No-Bake Frozen Oreo Delight
Oh, this recipe takes me back. My grandson Leo calls it “cookie cloud pie.” He asks for it every summer. It’s so easy to make, with no oven needed. You just mix, spread, and chill. The hardest part is waiting for it to get cold! I promise it’s worth the wait.
Let’s get our bowls ready. You’ll need a big one for mixing. I still laugh at the time I used a tiny bowl. Pudding mix went everywhere! Let’s avoid that mess today.
- Step 1: Grab your big bowl. Whisk the chocolate pudding mix and milk together. Keep whisking until it’s all smooth. You’ll see it start to get thick. That’s how you know it’s working. Now, fold in one container of the whipped topping. Mix it gently until it’s one lovely, creamy chocolate cloud.
- Step 2: Pour that creamy mixture right into your Oreo crust. Spread it out evenly with a spoon. I like to make the top nice and smooth. Now, take your broken Oreo pieces. Gently fold most of them into the other container of whipped topping. (A hard-learned tip: Don’t stir too hard or the cream will deflate!).
- Step 3: Spread the Oreo-cream layer over the chocolate one. Isn’t that looking pretty? Sprinkle the last cookie pieces on top. They add a nice little crunch. Now, the pie needs a long nap in the fridge. Let it chill for at least two hours. What’s your favorite no-bake dessert? Share below!
Cook Time: 2 hours (chilling)
Total Time: 2 hours 15 minutes
Yield: 8 servings
Category: Dessert, No-Bake
Three Fun Twists to Try
This recipe is like a blank canvas. You can play with it! Here are some of my family’s favorite ways to change it up. Each one brings a different kind of happy.
- Peanut Butter Cup: Add chopped peanut butter cups to the chocolate layer. It’s a classic combo that always wins.
- Mint Chocolate Chip: Use mint Oreos instead of regular ones. It tastes fresh and cool, like a fancy ice cream pie.
- Birthday Party: Mix rainbow sprinkles into the top cream layer. It makes any day feel like a celebration. Which one would you try first? Comment below!
Serving It Up Just Right
This pie is a dream straight from the fridge. I like to let it sit on the counter for just five minutes before slicing. It makes cutting through the crust so much easier. A drizzle of chocolate sauce on the plate looks so fancy. A little extra whipped cream on top never hurt anybody, either.
For drinks, a tall glass of cold milk is the perfect partner. It just is! For the grown-ups, a little coffee liqueur over ice is a nice treat. The chocolate and coffee flavors dance together so well. Which would you choose tonight?
Keeping Your Frozen Oreo Delight Perfect
This dessert loves the cold. You must keep it in the freezer. It will stay good for about three days.
Cover it loosely with plastic wrap. This stops it from picking up other food smells. I once forgot to cover a slice. It tasted like my leftover onion dip!
You can also freeze the whole pie. Wrap it tightly in two layers of plastic. It will keep for up to a month. This is great for making desserts ahead of time.
Planning ahead makes busy days easier. You always have a sweet treat ready for guests. Have you ever tried storing it this way? Share below!
Easy Fixes for Common Oreo Delight Troubles
Is your pudding too runny? Make sure you use instant pudding. The cook-and-serve kind will not set right. This matters for a perfect, sliceable pie.
Is the whipped topping deflating? Be gentle when you fold it. I remember when I mixed too hard. My topping became soupy. A light hand keeps it fluffy.
Are the Oreo crumbs getting soggy? Make the pie the same day you serve it. The cookies stay nice and crunchy. A perfect texture makes every bite joyful.
Fixing small problems builds your kitchen confidence. You learn that mistakes are okay. Which of these problems have you run into before?
Your Oreo Delight Questions, Answered
Q: Can I make this gluten-free?
A: Yes! Use a gluten-free Oreo crust and cookies. It works just as well.
Q: How far ahead can I make it?
A: You can assemble it one day before. This is perfect for parties.
Q: Can I use a different pudding?
A: Vanilla or cheesecake flavor are wonderful swaps. Fun fact: My grandson loves it with banana pudding!
Q: Can I double the recipe?
A: Absolutely. Use a 9×13-inch pan for a bigger crowd.
Q: Any extra tips?
A: Add mini chocolate chips on top. It looks so pretty. Which tip will you try first?
A Sweet Note From My Kitchen to Yours
I hope you love making this Frozen Oreo Delight. It is a simple joy to share. I have made it for my family for years.
I would love to see your creation. Your photos always make me smile. Have you tried this recipe? Tag us on Pinterest!
Happy cooking!
—Chloe Hartwell.
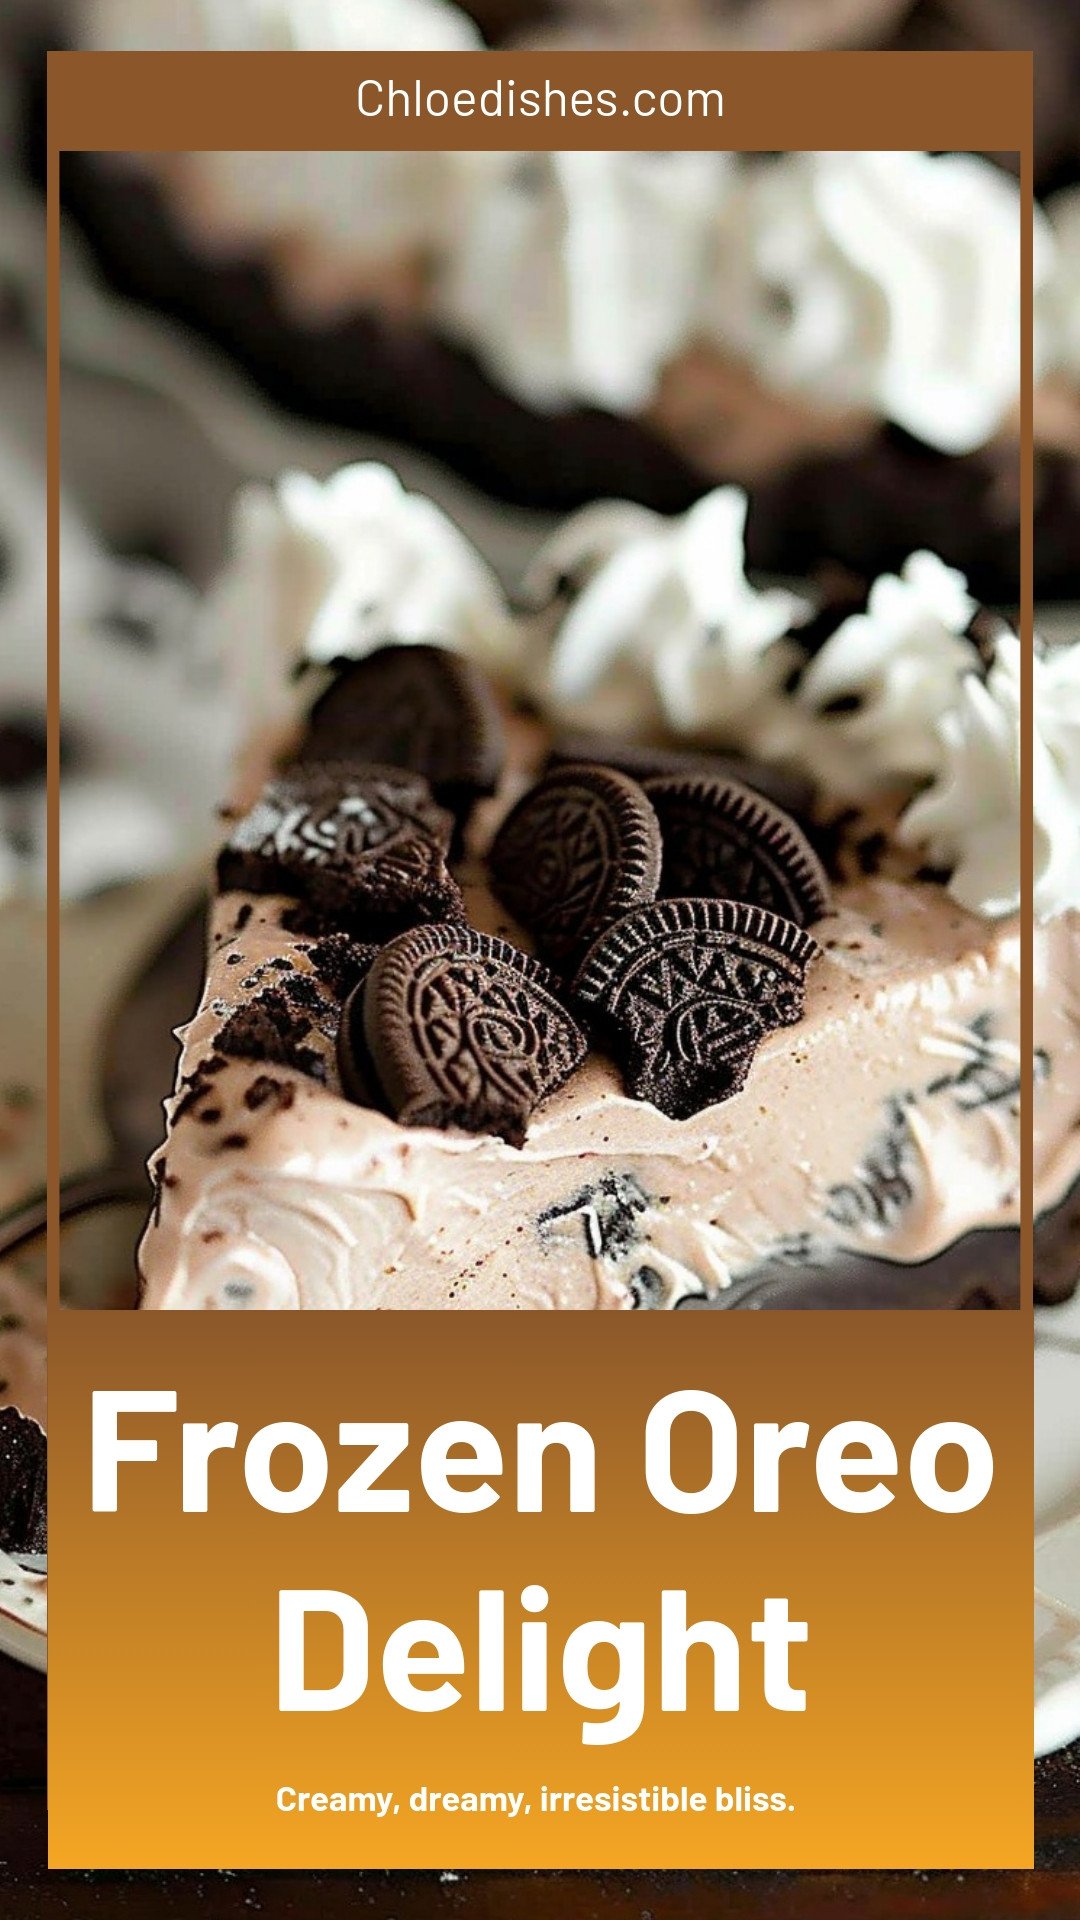
Frozen Oreo Delight: Creamy, dreamy, irresistible bliss.
Description
No-bake Frozen Oreo Delight! A creamy, layered dessert with an Oreo crust. Easy to make, always a crowd-pleaser, and perfect for any occasion.
Ingredients
Instructions
- In a large bowl, whisk the pudding mix and milk together until the pudding mix has dissolved. The mixture will start to thicken. Add one container of the whipped topping and mix until well combined. Pour the mixture into the prepared crust. Spread evenly.
- Add the broken Oreos to the other container of whipped topping and gently fold together, saving a few Oreo pieces for the top of the pie. Spread the mixture over the chocolate layer and sprinkle the remaining Oreo pieces on the top.
- Chill for at least 2 hours to allow the pie to set. Keep chilled.
Notes
- For best results, ensure the whipped topping is fully thawed before using.


Leave a Reply