

The Secret in the Batter
Let me tell you about red velvet. It’s not just a chocolate cookie. It’s a feeling. That deep red color makes any day feel special. The secret is a little vinegar with the cocoa. It makes the flavor sing.
I learned this from my friend Margie years ago. She brought a red velvet cake to a picnic. One bite and I had to know her secret. She winked and said, “A splash of magic.” I still laugh at that. Now you know the magic is just vinegar. It makes the cookie so soft.
Mixing Up Memories
Making these is messy fun. That red food coloring gets everywhere. My grandson once had red hands for two days. He didn’t mind one bit. He felt like a wizard.
Cream your butter and sugar well. This matters. It makes the cookie light and fluffy. Doesn’t that smell amazing already? Then add your egg and that “magic” vinegar. The dough will be a bright, happy red. Fun fact: The red color used to come from beets a long time ago!
A Rest and a Bake
Here’s a key step. Chill the dough. I know, waiting is hard. But it matters. It keeps your cookies from spreading too thin. It gives you a thick, bakery-style cookie. Patience makes perfect here.
While the dough rests, heat your oven. Scoop big balls of dough. Leave lots of space between them. They need room to breathe. Save a tiny piece of dough. We’ll use it for pretty crumbs later. What’s your favorite part of baking? Is it the mixing or the waiting?
The Sweetest Swirl
Let the cookies cool completely. This is important. If you frost them warm, it will melt into a puddle. While they cool, make the frosting. Soft butter and cream cheese are key. They must be room temperature.
Mix them until creamy. Then add the sugar and vanilla. Whisk until it’s smooth and dreamy. This frosting is the best part. Do you like a lot of frosting or just a little? I always make extra for my spoon.
Putting It All Together
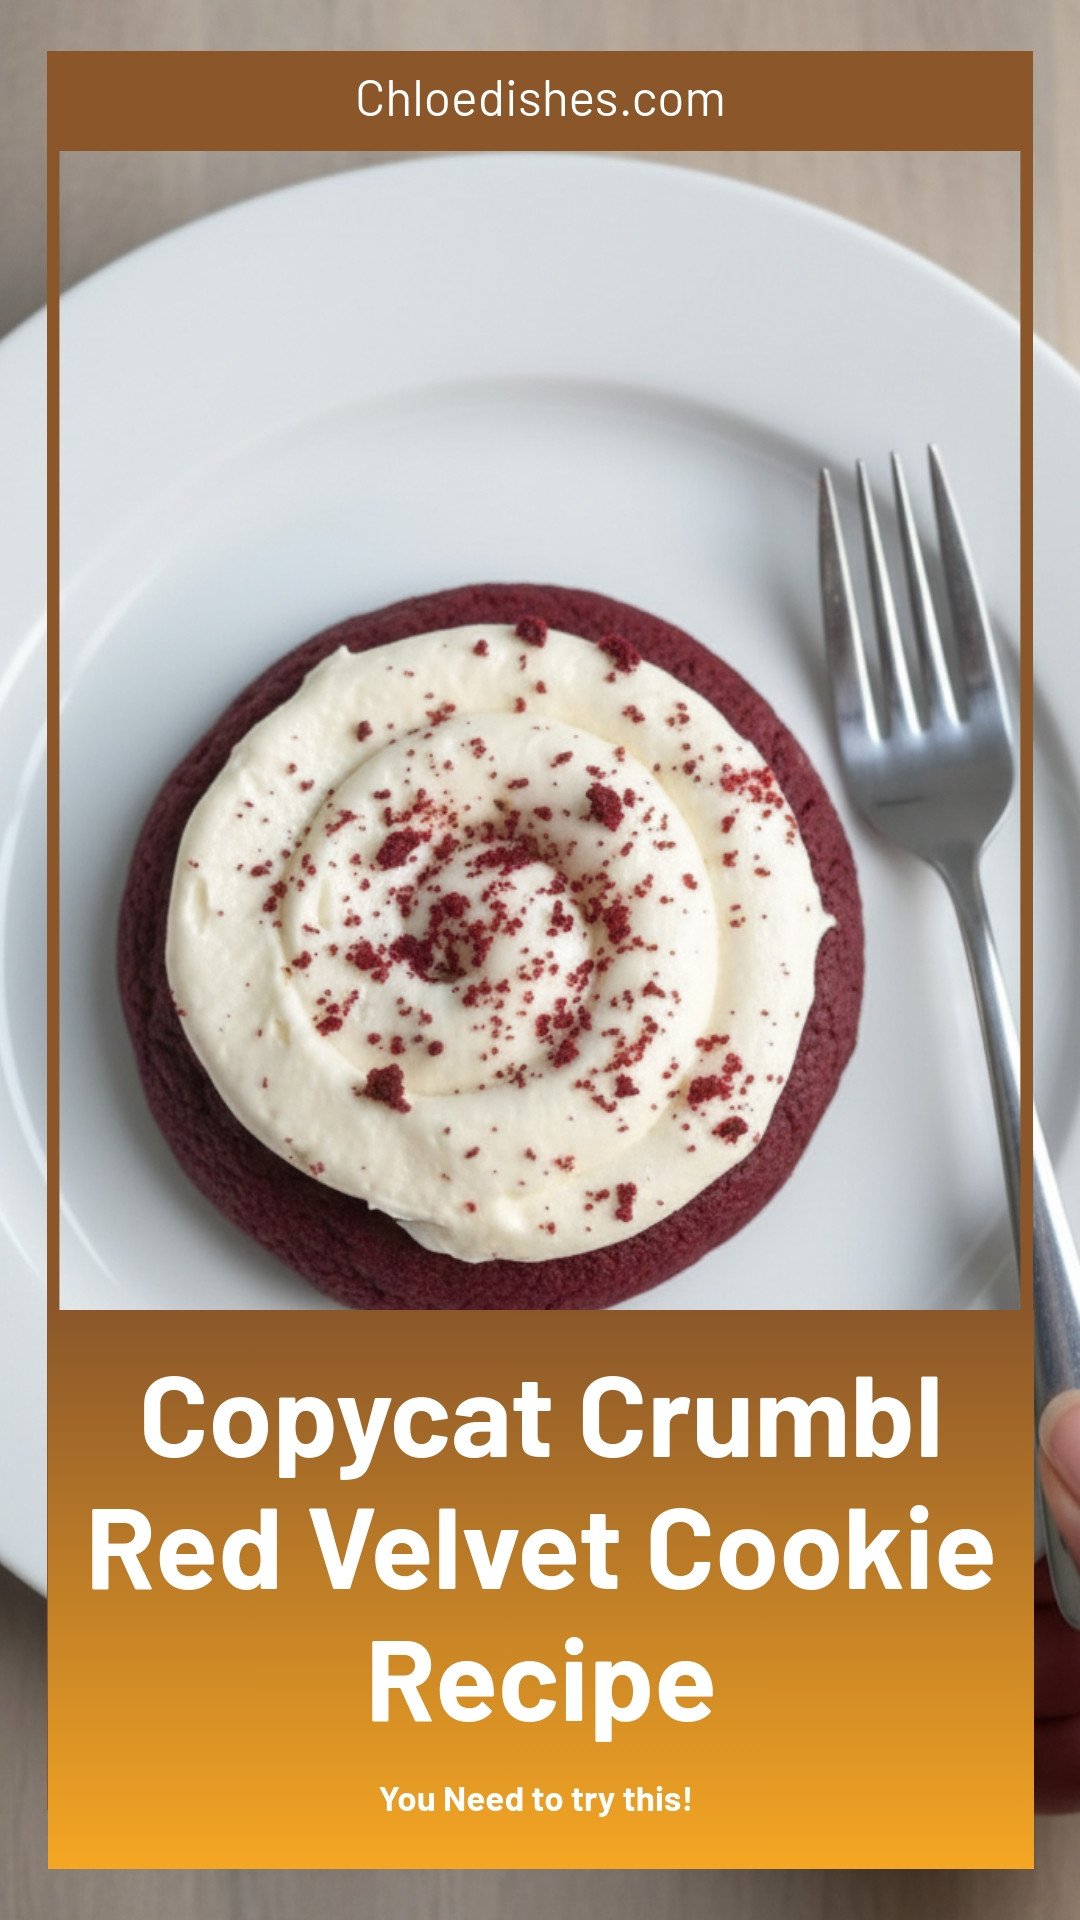
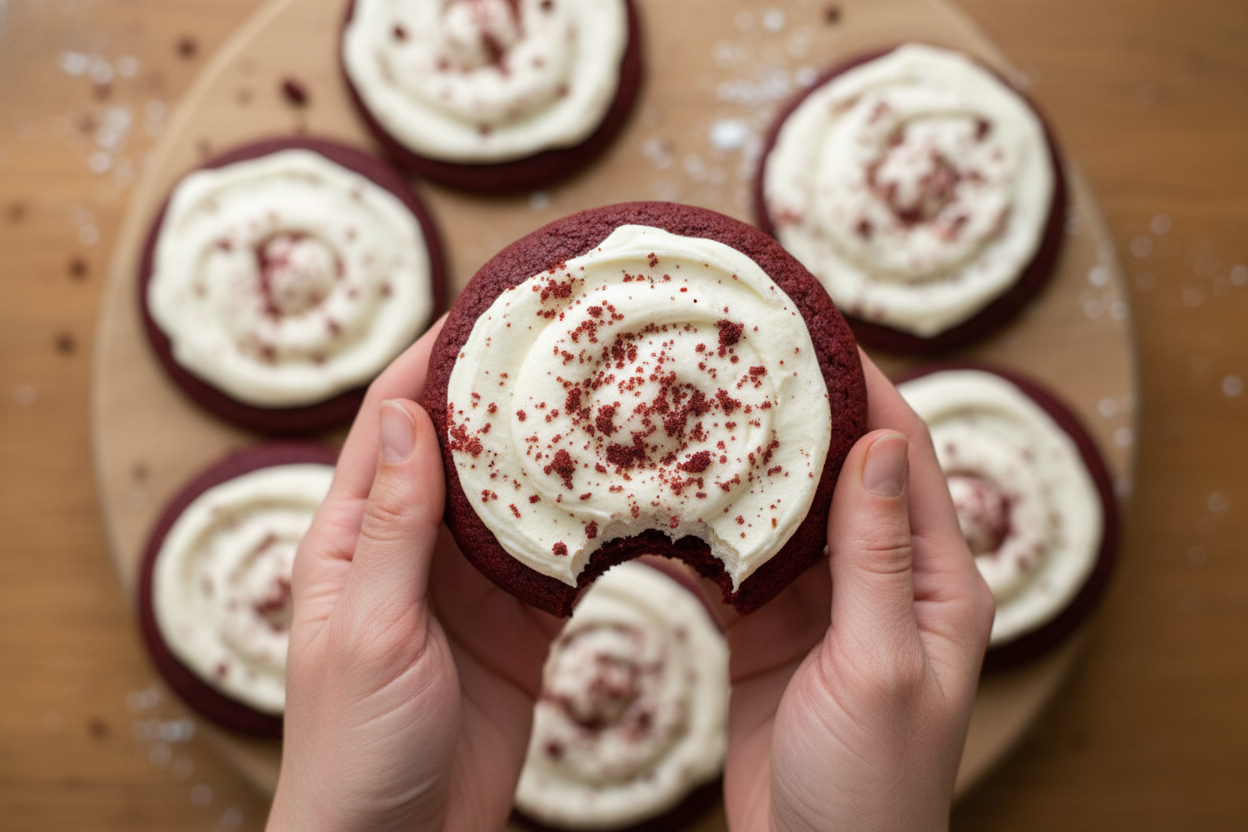
Now for the fun. Pipe that frosting in a big, beautiful swirl. It looks so fancy. Then, take that tiny baked cookie piece. Crumble it in your fingers. Sprinkle those crumbs right on top. It looks just like the bakery cookies!
These cookies are for sharing. They tell someone you think they’re special. That’s why we bake, isn’t it? To make moments sweeter. What’s the last special treat you baked for someone? I’d love to hear your story.
Ingredients:
| Ingredient | Amount | Notes |
|---|---|---|
| unsalted butter, softened | ½ cup (113g) | For the cookie dough |
| granulated sugar | ⅓ cup (70g) | |
| light brown sugar, packed | ⅓ cup (65g) | Reduce to ¼ cup for less sweet cookies |
| large egg | 1 | |
| vinegar | 1 tsp | |
| red gel food color | 1-2 teaspoon | |
| vanilla | 1 tsp | |
| all purpose flour | 1 ¼ cup (163g) | |
| natural cocoa powder | 2-3 tablespoon | Start with 2 and add more if you want more chocolatey cookies |
| baking soda | ½ tsp | |
| baking powder | ¼ tsp | |
| salt | ¼ tsp | |
| unsalted butter, softened | 6 tbsp (85g) | For the cream cheese frosting |
| cream cheese, room temperature | 6 oz (170g) | |
| icing sugar, sifted | 1 cup | |
| vanilla | ½ tsp |
My Granddaughter’s Favorite Copycat Crumbl Cookies
My granddaughter begged me to make these. She loves that fancy cookie shop. So, we got to work in my kitchen. The red dough made us both giggle. Doesn’t that smell amazing? It’s like a little chocolate cake. But better, because it’s a cookie. Here is exactly how we make them.
Step 1: Grab your big mixing bowl. Whisk the soft butter and both sugars together. Do this for a few minutes. It will get light and fluffy. I still laugh at that. It looks like sweet, pale clouds.
Step 2: Crack in the egg. Add the vinegar, vanilla, and red food color. Whisk it all up. It will be a bright, shocking red. Scrape the bowl sides with a spatula. Give it one more quick mix. Now it’s ready for the dry stuff.
Step 3: Sift your flour and cocoa right into the bowl. Add baking soda, powder, and salt too. Gently fold it all together. Stop as soon as you see no dry flour. (A hard-learned tip: overmixing makes tough cookies!). Then pop the bowl in the fridge.
Step 4: Heat your oven. Line a baking sheet. Scoop the dough into five big balls. Save a tiny bit of dough for later. Gently press each ball down a little. Give them lots of space on the sheet. They grow so much while baking!
Step 5: Bake them until the edges are set. Let them cool completely. They are very soft in the middle. That’s perfect. While they cool, make the frosting. Just whisk the soft butter and cream cheese. Then add the sugar and vanilla. So creamy!
Step 6: Crush that tiny baked cookie piece into crumbs. Pipe your frosting on the big cookies. Sprinkle the crumbs on top. Do you like your cookies warm or totally cool? Share below! Now, take a big bite. You did it.
Cook Time: 10–11 minutes
Total Time: About 45 minutes
Yield: 5 large cookies
Category: Dessert, Cookies
Let’s Mix It Up Next Time!
These cookies are wonderful as they are. But sometimes, a little change is fun. It makes the recipe your own. Here are three simple twists we love. Try one next baking day.
Confetti Party: Add a handful of rainbow sprinkles to the dough. It’s so cheerful.
Chocolate Pocket: Hide a few white chocolate chips inside each dough ball. A sweet surprise.
Orange Zest: Add a teaspoon of orange zest to the frosting. It tastes like a creamsicle.
Which one would you try first? Comment below!
The Perfect Plate & Sip
These cookies are a treat all by themselves. But a little presentation is nice. Serve one on a small plate. Add a few fresh raspberries on the side. The tart fruit is lovely with the sweet frosting. For a real diner feel, crumble one over a scoop of vanilla ice cream.
What to drink? A cold glass of milk is always the classic choice. It just is. For the grown-ups, a glass of creamy sherry or port pairs beautifully. It feels so fancy. Which would you choose tonight?

Keeping Your Cookies Cozy
Let’s talk about keeping these cookies happy. They are best eaten the day you make them. But I know life gets busy. You can store them in a sealed container for 2 days. Keep the frosting chilled until you are ready to serve.
You can freeze the unfrosted cookie dough balls. Just wrap them tightly. They will keep for a month. Bake them straight from the freezer, adding a minute or two. I once forgot I had a batch frozen. Finding them was a lovely surprise for unexpected guests.
Batch cooking saves time and brings joy. Making a double batch means treats are always ready. This matters because homemade goodness should be easy to share. Have you ever tried storing cookie dough this way? Share below!
Cookie Troubles? Easy Fixes!
Sometimes cookies don’t turn out as planned. That’s okay. First, if your cookies spread too much, your dough was too warm. Chilling the dough is a very important step. It helps the cookies keep their lovely shape.
Second, if the frosting is runny, your butter was too soft. All ingredients must be just room temperature. I remember when my frosting looked like soup. I popped the bowl in the fridge for ten minutes. It fixed everything.
Third, for a more vibrant red, use gel food color. Liquid color can make the dough wet. Getting the color right makes the cookie special. It shows you cared about the little details. Which of these problems have you run into before?
Your Quick Cookie Questions
Q: Can I make these gluten-free? A: Yes. Use a good 1-to-1 gluten-free flour blend. The texture will be slightly different but still tasty.
Q: Can I make the dough ahead? A: Absolutely. Shape the dough balls and chill them overnight. Bake them when you are ready.
Q: What if I don’t have vinegar? A: Use lemon juice instead. It does the same job in the red velvet reaction.
Q: Can I make smaller cookies? A: Of course. Use a smaller scoop. Just bake them for less time, about 8-9 minutes.
Q: Any optional tips? A: Add a handful of white chocolate chips to the dough. It is a sweet little surprise. Which tip will you try first?
From My Kitchen to Yours
I hope you love making these cookies. Baking is about sharing love and creating memories. My grandkids always fight over who licks the frosting bowl. Fun fact: The first red velvet cakes got their color from a chemical reaction, not food dye!
I would love to see your beautiful creations. Sharing pictures makes our kitchen community stronger. Have you tried this recipe? Tag us on Pinterest! I can’t wait to see your swirls of frosting.
Happy cooking! —Chloe Hartwell.
Copycat Crumbl Red Velvet Cookie Recipe
Description
Bake the viral Crumbl Red Velvet Cookies at home! This easy copycat recipe yields soft, creamy cookies with perfect white chocolate chips.
Ingredients
Red Velvet Cookies:
Cream Cheese Frosting:
Instructions
- Whisk the butter with the granulated sugar and brown sugar for 2-3 minutes until the mixture is light in color and fluffy and creamy in texture.
- Add the egg, vinegar, red food color and vanilla, and whisk until combined. Scrape down the sides of the bowl and whisk again.
- Sift in the flour, cocoa powder, baking soda, baking powder and salt, and very gently fold with a rubber spatula until just combined. Do not overmix.
- Refrigerate the dough for 15-20 minutes, or until it becomes firmer so you can scoop it.
- Pre-heat your oven to 375F, and line a large cookie sheet with parchment paper.
- Divide the dough into 5 balls (about ⅓ cup each), leaving a tiny piece aside. Gently shape into balls and lightly flatten them (just a gentle press in the center). Place them onto the cookie sheet leaving at least 3″ of space between each (including the tiny piece; this will be used to make crumbs).
- Bake for 10-11 minutes, and let the cookies cool down.
- Meanwhile, whisk the cream cheese and butter in a bowl until creamy. Add the icing sugar and vanilla, and whisk until a creamy frosting forms.
- Transfer the frosting to a piping bag fit with a round piping tip.
- Once the cookies have cooled, pipe the frosting on top in swirls.
- Crush the tiny cookie and use the crumbs to decorate the cookies.
- Serve & enjoy!
Notes
- For less sweet cookies, reduce the brown sugar to ¼ cup. Start with 2 tablespoons of cocoa powder and add a third if you want a more chocolatey flavor.


Leave a Reply