

My Kitchen Helper
I love making these protein balls. They are so easy. My grandson helps me sometimes. He is the best crusher of granola.
He puts it in a bag and rolls it with a pin. He laughs when it makes a crunching sound. I still laugh at that. Working with your hands is good for the soul.
The Sticky, Happy Part
Next, you mix the sticky things. Use a big bowl. Put in the cashew butter and date syrup. Add the vanilla too.
Mix it all up. Doesn’t that smell amazing? Now, add your crushed granola. This is where I use my hands. It feels wonderful and messy. What kitchen job do you love most? Is it mixing or something else?
Making Little Balls of Joy
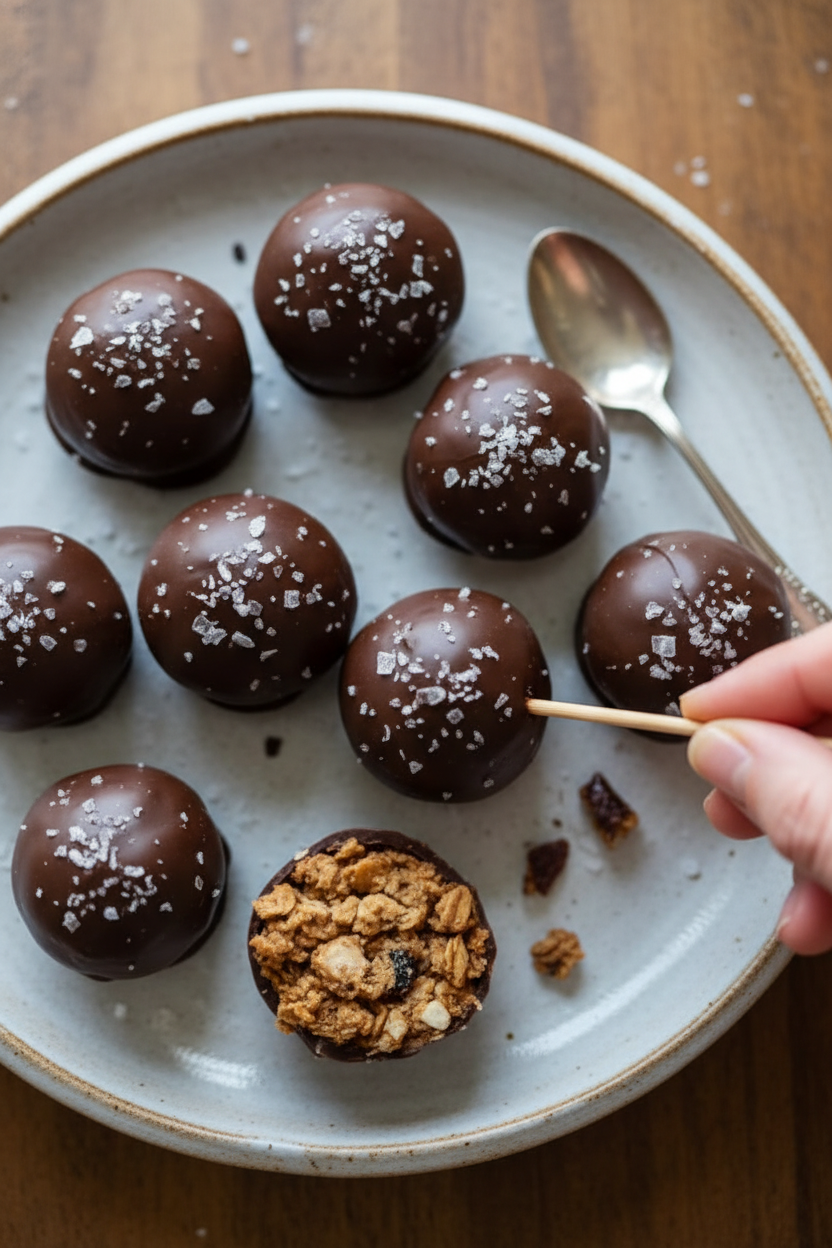
Roll the mix into small balls. You should get about twelve. I make them the size of a big marble. Place them on a plate.
This step matters. Making food with your own hands connects you to it. You appreciate every bite more. It’s a little life lesson in a snack.
The Chocolate Coat
Now for the magic coat. Melt the chocolate chips with coconut oil. Do it slowly so it doesn’t burn. Stir it well.
Dip each ball in the chocolate. Cover it all over. Fun fact: The coconut oil makes the chocolate harden with a nice snap. Let them cool in the fridge.
Why We Make These
These aren’t just snacks. They are little pockets of ready energy. I keep them for busy afternoons. They stop me from reaching for a cookie.
Using simple, whole foods matters. It makes your body feel strong and happy. Do you have a favorite healthy treat? I would love for you to tell me about it.
Time to Share
Once the chocolate is hard, they are ready. Store them in the fridge. They will last about a week. If they last that long!
I like to put a few in a small jar. I give them to a neighbor. Sharing food is sharing love. Will you make these for yourself or to share with someone special?
Ingredients:
| Ingredient | Amount | Notes |
|---|---|---|
| Granola | 1 ½ cups | Crushed, gluten-free |
| Cashew butter | ½ cup | Spread Love brand |
| Date syrup | ¼ cup | |
| Vanilla extract | ½ teaspoon | Alcohol-free, Singing Dog brand |
| Chocolate chips | 1 cup | Dairy-free, refined sugar-free |
| Coconut oil | 1 tablespoon |
My No-Bake Chocolate Cashew Energy Balls
Hello, my dear! Come sit at the counter. Let’s make a treat. These little balls are my secret energy boost. They taste like a candy bar, but they’re good for you. I always keep some in my fridge. My grandkids sneak them after school. I still laugh at that.
Making them is simple and fun. You don’t even need the oven. We’ll use our hands to mix everything. Doesn’t that smell amazing? It reminds me of my own grandma’s kitchen. She taught me that good food is simple. Let’s begin.
- Step 1: First, let’s crush our granola. Put it in a zip-top bag. Use a rolling pin to crush it down. I like a bit of texture. My mortar and pestle is my favorite tool for this. It makes a lovely crunching sound. (A hard-learned tip: Crush it well, or your balls won’t stick!)
- Step 2: Now, grab a medium bowl. Scoop in that lovely cashew butter. Add the date syrup and vanilla. Stir it all together. It will get thick and shiny. I use my hands sometimes to feel the mix. It’s ready when it’s all one color.
- Step 3: Pour your crushed granola into the bowl. Mix it very, very well. I put on gloves and squish it with my fingers. You can use a spoon too. Make sure no dry spots are left. It should look like a sticky dough. Do you think we should add raisins next time? Share below!
- Step 4: Time to roll! Pinch off some dough. Roll it between your palms. Make twelve little balls. Place them on a plate. If they feel too soft, don’t worry. The fridge will firm them up later. I think this is the most fun part.
- Step 5: Let’s melt the chocolate. Put chips and coconut oil in a bowl. Microwave it for 30 seconds. Stir, then repeat. Stop when it’s smooth. Now, dunk each ball in the chocolate. Use a spoon to coat it all. Place it on parchment paper. A little mess is just fine.
- Step 6: Finally, pop the tray in the fridge. Let the chocolate get hard and snappy. This takes about an hour. Try to be patient! Then, you can enjoy your creation. Store them in the fridge in a container. They never last long at my house.
Cook Time: 1 hour (chill time)
Total Time: 1 hour 15 minutes
Yield: 12 energy balls
Category: Snack, No-Bake
Three Fun Twists to Try
Once you know the basic recipe, you can play! Here are some of my favorite changes. They make the treat feel new again. My grandson loves the birthday cake version. It’s his special request.
- Birthday Cake: Use vanilla granola. Roll the finished balls in colorful sprinkles. It’s a party!
- Tropical Escape: Add chopped dried mango to the mix. Use coconut butter instead of cashew. So sunny.
- Salty Pretzel: Swap half the granola for crushed gluten-free pretzels. That sweet and salty taste is perfect.
Which one would you try first? Comment below!
Serving Them Up With Style
These balls are perfect all on their own. But sometimes, I like to make them fancy. For a pretty plate, place them in a small cupcake liner. It keeps fingers clean. You could also drizzle a little extra melted chocolate on top. It looks so professional.
What to drink? For a cozy afternoon, I love a glass of cold oat milk. It’s so creamy. For the grown-ups, a small glass of amaretto or coffee liqueur is nice. It echoes the nutty flavor. Sip it slowly. Which would you choose tonight?
Keeping Your Energy Balls Happy
These little balls love the cold. Store them in the fridge for up to a week. I keep mine in a glass container. This keeps them fresh and the chocolate shiny.
You can also freeze them for a month. Just lay them on a tray first. Once frozen, pop them into a bag. This stops them from sticking together. I once forgot a batch in the freezer for weeks. They were still a perfect treat!
Batch cooking saves so much time. Double the recipe on a quiet Sunday. You will have snacks ready for the whole week. This matters because good food should be easy. Have you ever tried storing it this way? Share below!
Little Fixes for Big Flavor
Is your mixture too dry? Add a tiny bit more date syrup. One teaspoon can make all the difference. Is it too sticky to roll? Wet your hands lightly with water. The dough will not stick to your palms.
Is your chocolate seizing up? Make sure your bowl is completely dry. Even a drop of water can make it clumpy. I remember when my grandson added a wet spoon. We had to start the chocolate again!
Fixing small problems builds your cooking confidence. It also makes your food taste just right. Getting the texture perfect matters for that satisfying bite. Which of these problems have you run into before?
Your Quick Questions, Answered
Q: Are these really gluten-free? A: Yes, if you use certified gluten-free granola. Always check the package label.
Q: Can I make them ahead? A: Absolutely! They are perfect for make-ahead snacks. The flavor gets even better after a day.
Q: What can I swap for date syrup? A: Maple syrup or honey work well too. The taste will be a little different, but still yummy.
Q: Can I make a smaller batch? A: You can easily cut all the ingredients in half. Then you will get six balls instead of twelve.
Q: Any optional add-ins? A: A pinch of cinnamon is lovely. Fun fact: cinnamon can help balance your sweetness! Which tip will you try first?
From My Kitchen to Yours
I hope you love making these energy balls. Cooking is about sharing joy and simple goodness. I would love to see your creations.
Share a picture of your snack plate. Tell me what your family thought of them. Have you tried this recipe? Tag us on Pinterest! Your stories make my day brighter.
Happy cooking!
—Chloe Hartwell.
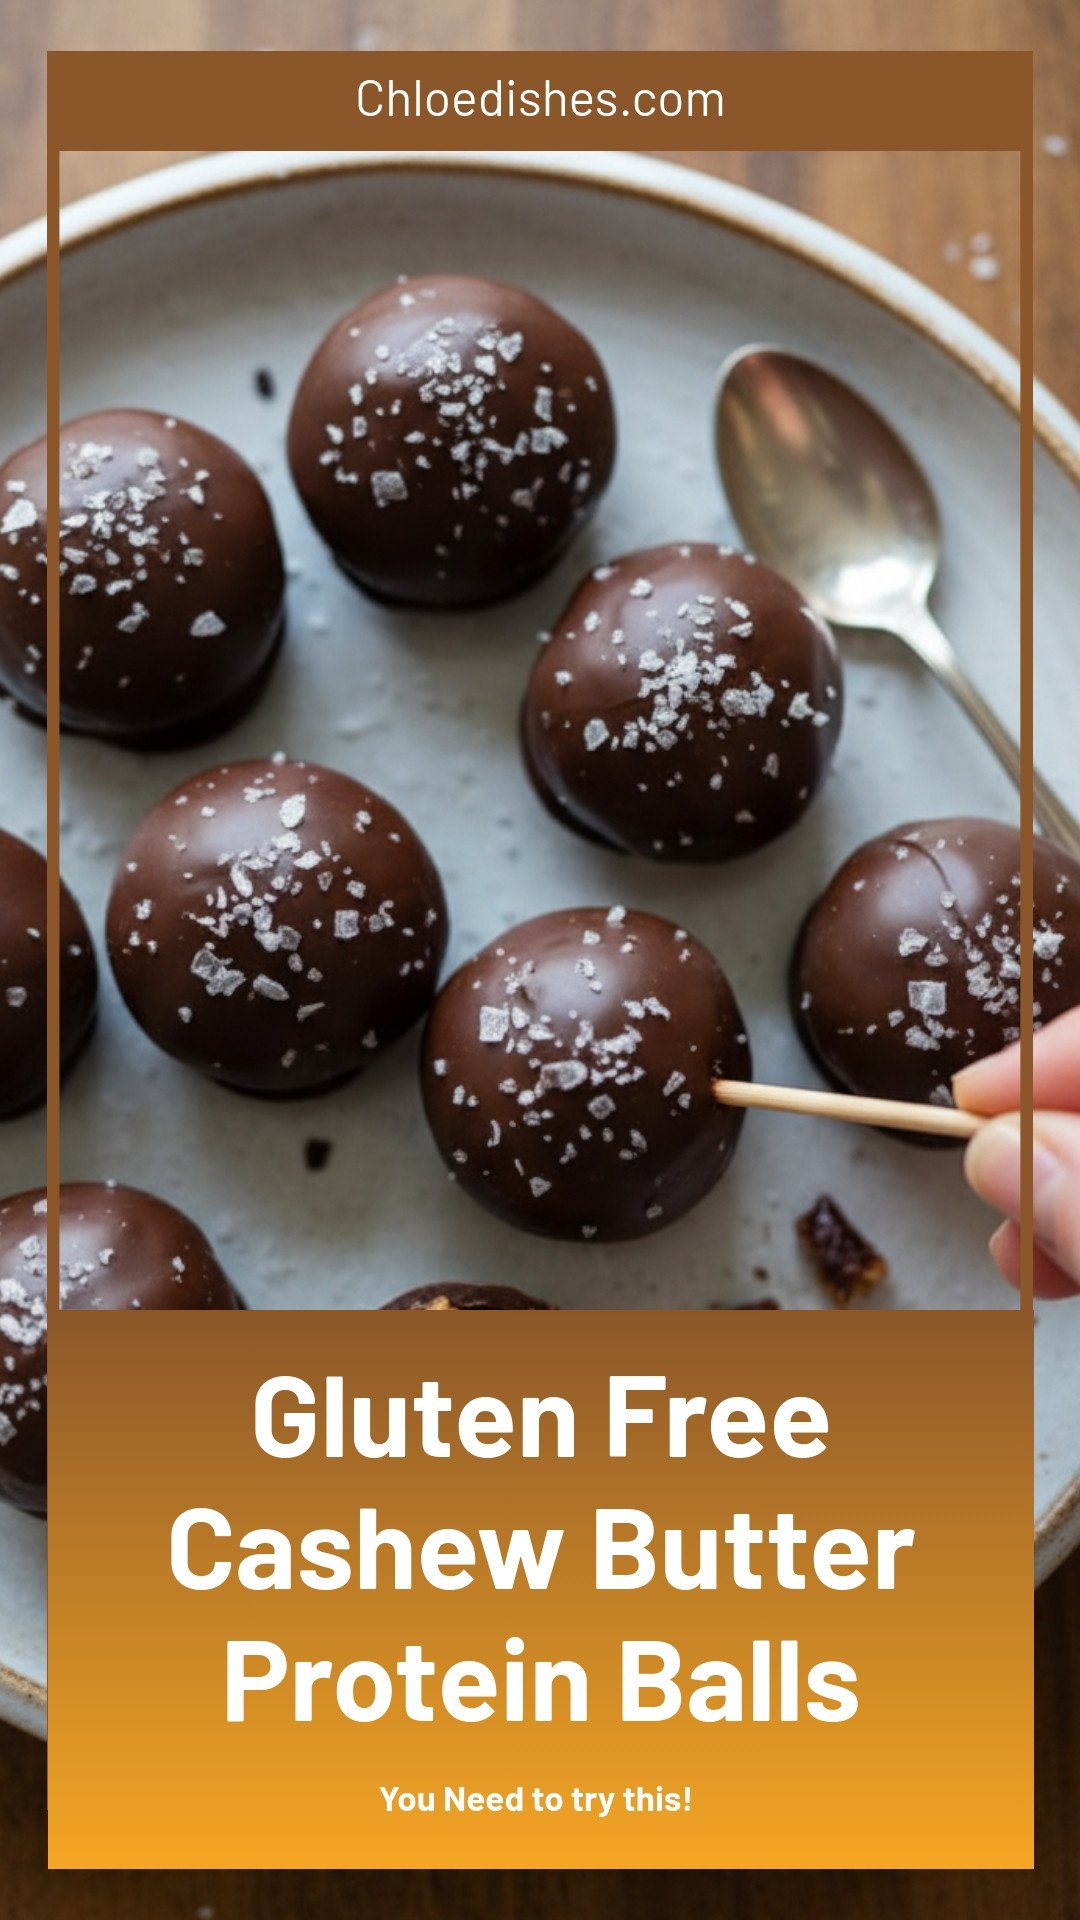
Gluten Free Cashew Butter Protein Balls
Description
Easy no-bake gluten free protein balls with creamy cashew butter! Perfect healthy snack or energy bite for any time of day.
Ingredients
Instructions
- First, make sure your granola is crushed down. I like to use a mortar and pestle for this step. However, you can always place it in a ziploc bag and crush with a rolling pin.
- Next, in medium bowl, combine the cashew butter and vanilla extract with the date syrup. Mix well.
- Then, add granola to the bowl mix together very well. Be certain to stir the mixture well. I like to put on a pair of gloves and use my hands. Although You can certainly use a rubber spatula.
- Next, either by using your hands or a meatball maker, roll mixture into small balls. (Mixture will make 12 balls, for a smaller recipe you can easily half the ingredients.)
- Once you have all 12 balls, place to the side. In a clean bowl, combine chocolate chips and coconut oil. Place into microwave and melt on the chocolate setting in 30 second increments. Stir well after each one until fully melted.
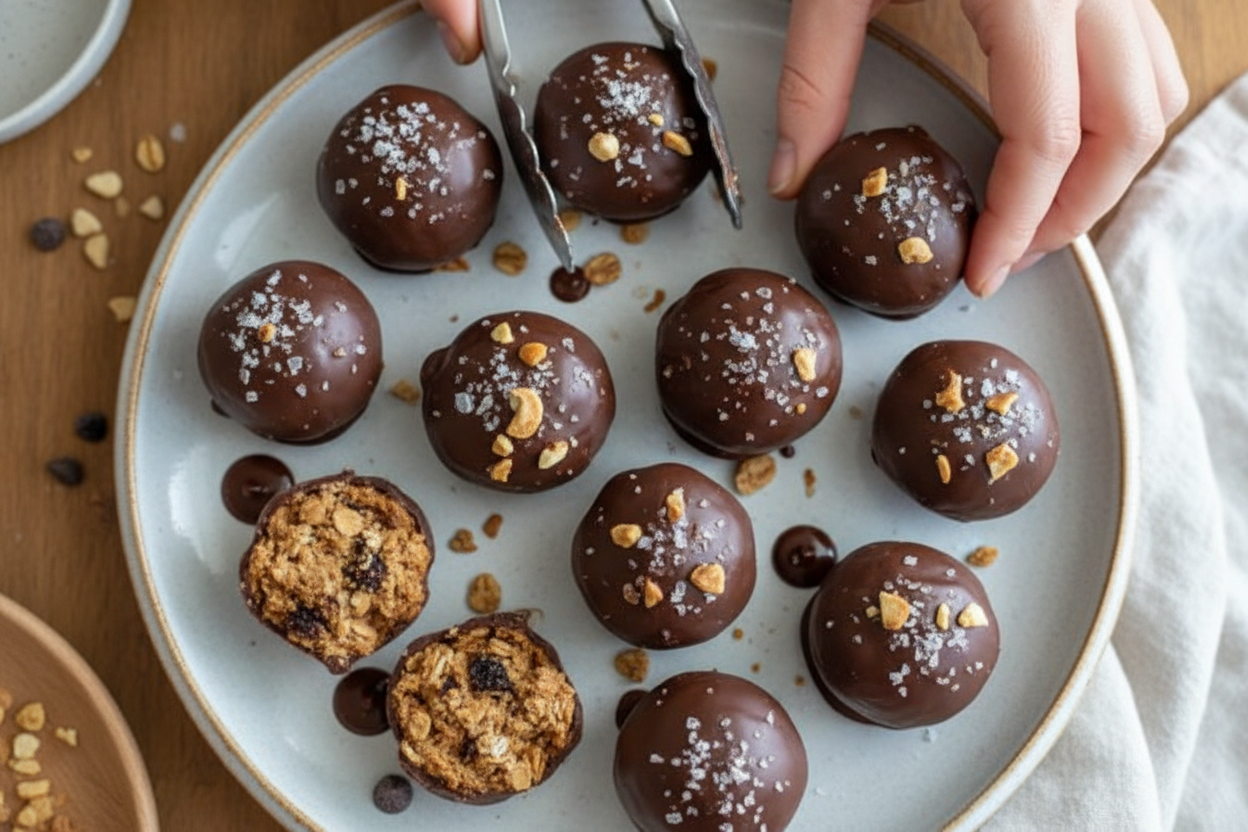
- Line a baking tray or large plate with parchment paper. Using a spoon, place cashew balls one by one into the chocolate mixture. Make sure all sides are covered, remove and place onto the tray. Once all 12 have been coated with chocolate you can sprinkle with flake salt if you wish.
- Lastly, place the tray of energy balls into the fridge until chocolate hardens. This usually takes 30 minutes to an hour. Keep energy balls stored in the fridge for up to 7 days.
Notes
- For a smaller recipe, you can easily half the ingredients.


Leave a Reply