
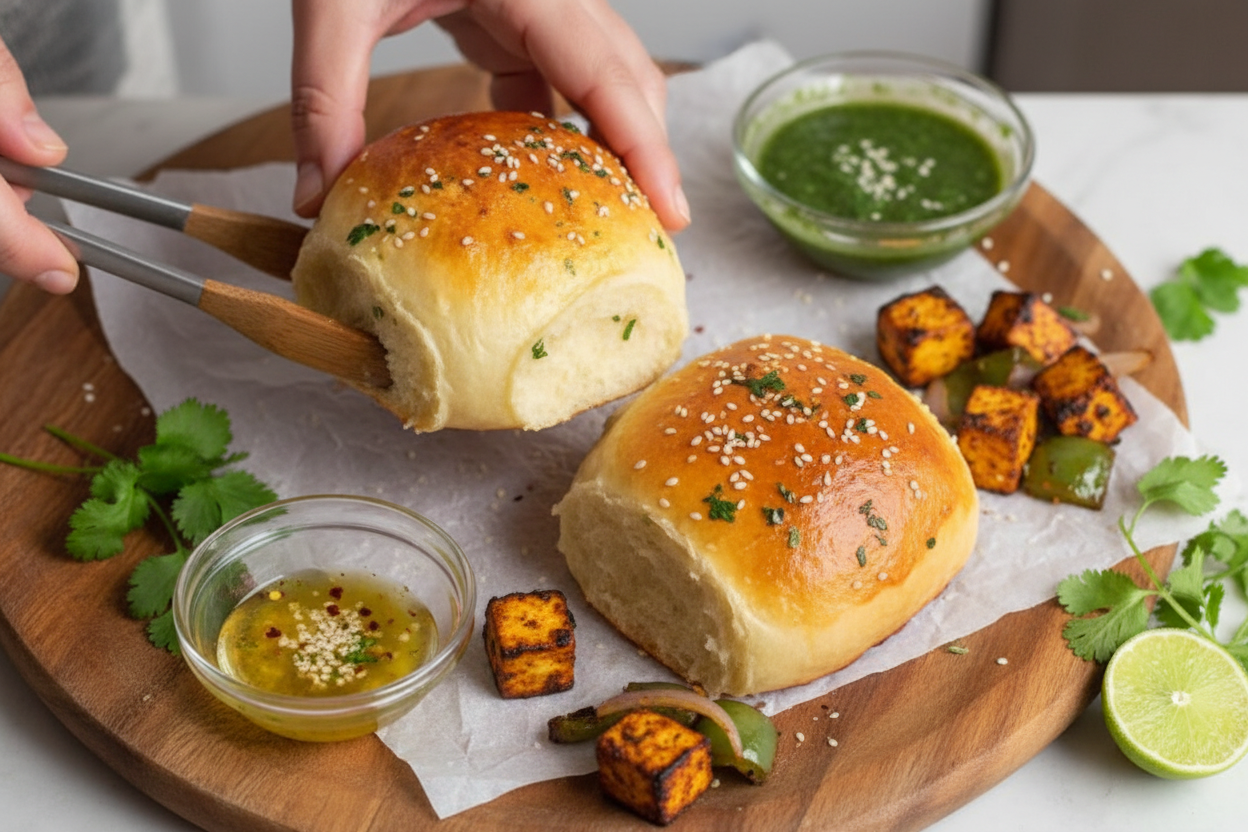
The Day I Fell in Love with a Bun
I remember the first time I made these Paneer Tikka Naan Buns. It was a rainy Tuesday, and I had leftover paneer in the fridge. I wanted something cozy, something that tasted like my favorite restaurant but felt like home. I mixed the dough while listening to old Bollywood songs, and the whole kitchen smelled like magic. Have you ever cooked something that just felt right from the start? That was this recipe for me. I still laugh at how I forgot the sesame seeds that first time, but the buns were so soft and buttery, nobody cared. These little buns are like a hug in bread form. They take the flavors of paneer tikka, that smoky, tangy, spicy filling we all love, and wrap them up in a fluffy naan bun. The best part? You get all the taste without needing a tandoor or a grill. Isn’t that wonderful?Why the Dough Matters (and Why You Shouldn’t Be Scared)
I know making dough from scratch can feel tricky. My own grandmother used to warn me, “Don’t fight the dough, just listen to it.” That advice stuck with me. The dough for these buns starts sticky, and that is okay. It means your buns will be soft and pillowy. The trick is patience and a little bit of elbow grease. If you knead by hand, think of it as a tiny arm workout. Your buns will thank you, and so will your arms! *Fun fact: The yogurt in the dough does two jobs. It makes the buns tender, and it helps them stay fresh longer. Yogurt is a secret baking hero.* Why this matters: When you make bread at home, you control what goes in. No weird preservatives, just simple ingredients you can name. That is a beautiful thing.The Filling That Steals the Show
Now, let’s talk about the filling. This is where all the color and flavor live. I love how the onions turn golden, and the bell peppers get soft and sweet. The ginger and garlic paste smells so good, it makes your tummy rumble even before you eat. When you add the spices, take a moment to breathe it in. Smell the cumin and coriander? Doesn’t that smell amazing? It’s like a warm blanket for your senses. I once made this filling for my neighbor who said she didn’t like Indian food. She ate three buns in one sitting. The secret is balance. The yogurt makes the masala creamy, and the paneer soaks up all those flavors like a little sponge. You can adjust the spice to your liking, but do not skip the chaat masala. That tangy sprinkle is what makes it taste like street food from a faraway market. Why this matters: When you cook with real spices, you are not just making food. You are making memories. Each spice has a story, and every bite tells it.Rolling, Filling, and Tucking Like a Pro
This part is my favorite. It feels like a little art project. You roll out a circle of dough, drop a spoonful of that golden paneer filling in the center, and maybe a pinch of mozzarella if you want it extra stretchy. Then you gather the edges like you are wrapping a tiny present. Pinch them shut, roll it into a smooth ball, and place it in the pan. It is simple and satisfying. Does your family love cheese as much as mine does? If yes, add that mozzarella. It makes the buns gooey and fun. My youngest nephew calls them “cheese surprise buns,” and honestly, that is the perfect name.The Golden Finish and Garlic Butter Magic
After the second rise, your buns will look plump and happy. Brush them with egg wash, sprinkle sesame seeds on top, and pop them in the oven. Watch them turn golden and puffy. The smell that fills your kitchen is pure happiness. While they bake, make the garlic butter. Just melt butter with a little garlic powder. That’s it. When the buns come out, brush them with that warm garlic butter and shower them with fresh cilantro. I dare you not to eat one immediately. I have never succeeded. Have you ever tried warm bread with garlic butter? It is one of life’s simple joys.How to Serve Them and Make Them Your Own
These buns are perfect on their own, but they love a good dip. Try them with mint chutney, ketchup, or a side of yogurt. They are also great for lunches, picnics, or when you want to impress someone without too much fuss. You can even freeze them after baking. Just reheat in the oven, and they taste almost as fresh as the first day. I would love to hear from you. What is your favorite thing to eat with paneer? Do you like it spicy or mild? Tell me in your heart, or write it down and try this recipe. I promise it will become a favorite.A Little Encouragement for Your Kitchen Adventure
Cooking is not about being perfect. It is about trying, tasting, and sharing. My first batch of these buns was a little lopsided, but they tasted like love. That is what matters. So roll up your sleeves, get your hands a little floury, and make something beautiful. You can do this, and your kitchen will thank you. Here are three questions for you, dear reader. First, have you ever made bread from scratch? If not, what scares you about it? Second, what is your favorite spice to cook with at home? Third, would you try these buns with a different filling, or do you love paneer too much to change a thing? I am smiling just thinking about your answers. Happy baking, my friend.Ingredients:
| Ingredient | Amount | Notes |
|---|---|---|
| Whole milk, warmed to 110F | ⅔ cup (160g) | For naan buns |
| Instant yeast | 2 tsp | For naan buns |
| All purpose flour | 2 ½ cups (325g) | For naan buns |
| Sugar | 3 tbsp (40g) | For naan buns |
| Salt | 1 tsp | For naan buns |
| Unsalted butter, softened | ¼ cup (60g) | For naan buns |
| Plain yogurt, preferably full fat | ¼ cup (60g) | For naan buns |
| Olive oil | 2 tbsp | For paneer tikka filling |
| Onion, finely diced | ½ | For paneer tikka filling |
| Ginger & garlic paste | 2 tsp | For paneer tikka filling |
| Bell pepper, finely diced | 1 (to taste) | For paneer tikka filling |
| Salt, to taste | 1 to 1.5 tsp | For paneer tikka filling |
| Cumin powder | 1 tsp | For paneer tikka filling |
| Coriander powder | 1 tsp | For paneer tikka filling |
| Chili powder or cayenne | 1 tsp | For paneer tikka filling |
| Kashmiri red chili or cayenne | ½ tsp | For paneer tikka filling |
| Chaat masala | ½ tsp | For paneer tikka filling |
| Garam masala | ¼ tsp | For paneer tikka filling |
| Turmeric powder | ¼ tsp | For paneer tikka filling |
| Plain yogurt mixed in ½ cup warm water | ⅓ cup (80g) | For paneer tikka filling |
| Paneer, shredded | 340g | For paneer tikka filling |
| Shredded mozzarella cheese | 1 cup | Optional, for assembly |
| Egg yolk + milk (egg wash) | 1 yolk + 1 tbsp milk | For assembly |
| Sesame seeds | 1-2 tbsp | For assembly |
| Butter | 2 tbsp | For garlic butter |
| Garlic powder or minced garlic | 1 tsp | For garlic butter |
| Chopped cilantro | To taste | For garnishing |
The Day I Fell in Love with Stuffed Buns
I still remember the first time I made these. My kitchen smelled like a warm hug from a faraway place. The dough was soft and the filling was spicy. I almost ate all the filling before it made it into the buns. Doesn’t that smell amazing?
This recipe is special because it takes two great things and puts them together. You get the buttery softness of naan bread. Then you get the tangy, smoky flavor of paneer tikka. It is like a little pocket of joy. Every bite makes you want to close your eyes and smile.
I learned this from a friend who runs a tiny food stall. She showed me how to pinch the dough just right. She said the secret is in the second rise. Don’t rush it, she told me. Let the yeast do its little happy dance. So worth the wait.
Making the Magic Happen
Step 1: Start with the naan buns dough. Pour the warm milk into a big bowl. Add the yeast, flour, sugar, salt, butter, and yogurt. Mix it all together until a soft, stretchy dough forms. (Hard-learned tip: The dough will feel sticky at first. Do not panic and dump in extra flour. Trust your hands, it will come together just fine.)
Step 2: Place the dough in a lightly oiled bowl. Cover it with plastic wrap. Set it in a warm, quiet spot for 60 to 90 minutes. Let it double in size. When you poke it gently, it should spring back a little. That is how you know it is ready. I like to set my timer and peek every ten minutes.
Step 3: While the dough rests, make the paneer tikka filling. Heat oil in a pan and cook the diced onion until it turns golden brown. Toss in the bell pepper and ginger-garlic paste. Cook for a few minutes until the pepper softens. Add a splash of water if the pan looks dry.
Step 4: Sprinkle in all the spices: cumin, coriander, chili powder, chaat masala, garam masala, and turmeric. Stir for a minute until the kitchen smells like a spice market. Pour in the yogurt mixed with water. Stir until a creamy, rich masala forms. Turn off the heat and mix in the shredded paneer. Taste it. Do you think it needs a pinch more salt? Share below!
Step 5: Now comes the fun part. Punch down the risen dough. Divide it into 12 equal pieces. Roll each piece into a ball. On a floured surface, flatten one ball into a small circle, about 3 inches wide. Place a spoonful of the paneer filling in the center. Add a little mozzarella if you like it extra melty.
Step 6: Lift the edges of the dough and pinch them together at the top. Seal it tight like a little coin purse. Roll it gently between your palms to make a smooth ball. Place each bun in a 9×13 baking pan lined with parchment paper. Leave space between them because they will grow.
Step 7: Let the buns rest for another 30 minutes. That is their second rise. Preheat your oven to 350 degrees. Brush each bun with egg wash and sprinkle sesame seeds on top. Bake for 20 to 22 minutes until they are golden brown. While they bake, melt butter and mix in garlic for brushing later.
Step 8: Pull the buns out of the oven. Brush them right away with the warm garlic butter. Sprinkle fresh chopped cilantro over the top. Serve them warm. Watch them disappear in minutes. That is the best part.
Cook Time: 25 minutes
Total Time: 2 hours 15 minutes
Yield: 12 buns
Category: Appetizer, Snack
Three Fun Twists to Try
Spinach and Corn Swap: Replace the paneer with a handful of frozen corn and chopped spinach. It makes the filling green, sweet, and super mild. Perfect for picky eaters.
Spicy Mango Kick: Add a few spoonfuls of diced ripe mango to the filling. The sweet fruit with the spicy masala is a total surprise. My grandkids went wild for this one.
Cheesy Mushroom Mash: Swap the paneer for finely chopped mushrooms. Cook them down until they are dark and rich. Mix in extra mozzarella for a gooey, earthy bite. Which one would you try first? Comment below!
How to Serve and What to Sip
These buns are wonderful all on their own. But I love to serve them with a bowl of cool mint chutney. A little squeeze of lemon on top wakes up all the flavors. You can also put them next to a simple cucumber salad for crunch.
For a drink, try a tall glass of cold mango lassi. It is creamy and sweet and cools down the spice. Grown-ups might like a light, crisp beer like a lager. The bubbles cut through the buttery bread nicely. Which would you choose tonight?
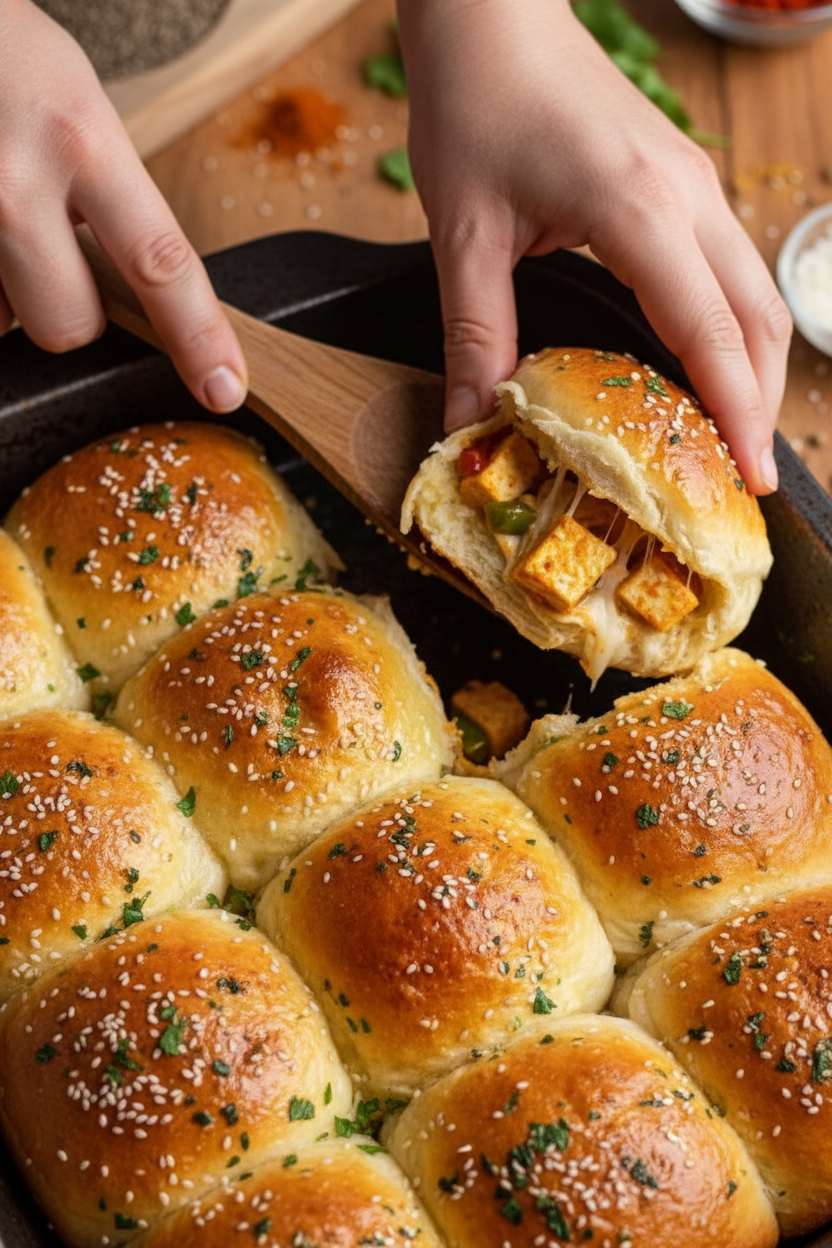
Storing and Reheating Your Buns
These buns are perfect for making ahead. After they cool, store them in a sealed container in the fridge for three days. I once forgot a batch on the counter overnight. They were still tasty, but the fridge keeps them fresher longer.
For the freezer, wrap each bun in plastic wrap. Then put them in a freezer bag. They keep for up to two months. To reheat, pop a frozen bun in the microwave for 30 seconds. Then toast it in a pan with a little butter.
Why does this matter? It saves you time on busy days. You can make a double batch on Sunday and have lunches ready all week. Have you ever tried storing it this way? Share below!
I always make extra. It feels like a hug from the fridge when I am tired. Batch cooking gives you freedom. You can enjoy a warm, homemade meal without the rush.
Common Problems and Easy Fixes
Sometimes the dough feels too sticky. Do not panic. Just keep kneading. It will come together after a few minutes. I remember my first time. I added too much flour and the buns were tough. Learn from me and trust the sticky dough.
The filling can be too dry. If that happens, add a splash of water or a spoonful of yogurt. This keeps everything moist. Another issue is buns that do not rise. Make sure your yeast is fresh and your milk is warm, not hot. Hot milk kills the yeast.
Why does this matter? Fixing these small problems builds your cooking confidence. You learn to trust your hands and your eyes. The flavor improves because you adjust as you go. Which of these problems have you run into before?
One fun fact: Paneer is a fresh cheese that does not melt. That is why it stays soft and creamy inside the bun. It is a wonderful surprise when you bite in.
Your Questions, Answered
Q: Can I make this gluten-free?
A: Yes. Use a gluten-free all-purpose flour blend. The dough will be slightly more crumbly, so handle it gently.
Q: Can I prepare the filling a day ahead?
A: Absolutely. Make the filling the night before and keep it in the fridge. Let it come to room temperature before stuffing the buns.
Q: Can I swap the paneer with something else?
A: Sure. Firm tofu works well. Just press it dry and crumble it like paneer. The spices will taste just as good.
Q: How do I scale the recipe for fewer buns?
A: Cut all ingredients in half for six buns. Keep the baking time the same. Check them at 18 minutes.
Q: Is the egg wash necessary?
A: No. You can skip it or brush the buns with milk. The sesame seeds will still stick. Which tip will you try first?
A Warm Goodbye from Chloe
Thank you for cooking with me today. I hope these buns bring warmth to your table. They are perfect for sharing with family or keeping all to yourself. I will not tell anyone.
When you make them, take a picture. Share it with me. It makes my heart so happy to see your kitchen adventures. Have you tried this recipe? Tag us on Pinterest!
Keep stirring, keep tasting, and keep making memories. Happy cooking!
—Chloe Hartwell.

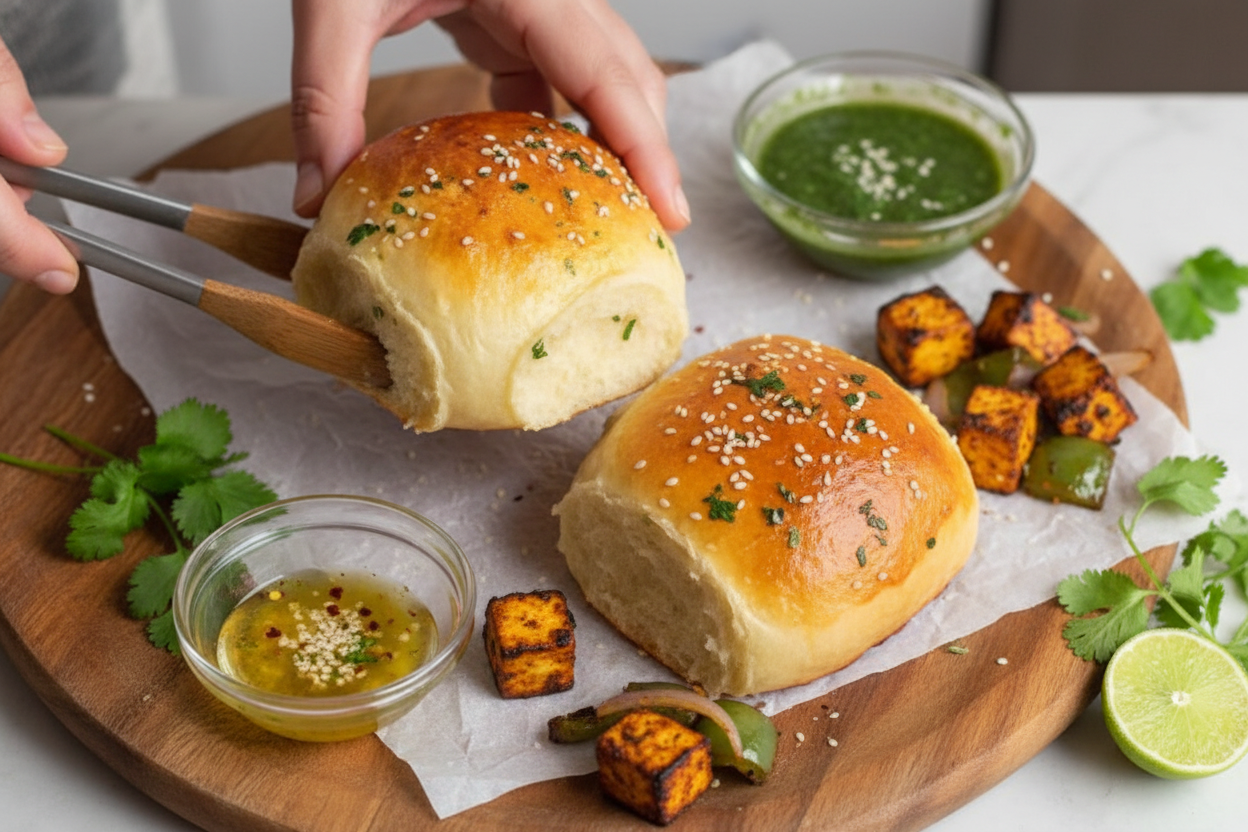
Paneer Tikka Stuffed Naan Buns Recipe
Description
Fluffy naan buns stuffed with spicy paneer tikka, baked to golden perfection. Perfect party appetizer or easy dinner recipe.
Ingredients
⅔ cup whole milk, warmed to 110F (160g)2 tsp instant yeast2 ½ cups all purpose flour (325g)3 tbsp sugar (40g)1 tsp salt¼ cup unsalted butter, softened (60g)¼ cup plain yogurt, preferably full fat (60g)
2 tbsp olive oil½ onion, finely diced2 tsp ginger & garlic paste1 bell pepper (or to taste), finely diced1 to 1.5 teaspoon salt, to taste1 tsp cumin powder1 tsp coriander powder1 tsp chili powder (or cayenne)½ tsp Kashmiri red chili (or cayenne)½ tsp chaat masala¼ tsp garam masala¼ tsp turmeric powder⅓ cup plain yogurt (80g) mixed in ½ cup warm water340g paneer, shredded
1 cup shredded mozzarella cheese (optional)Egg wash (1 yolk + 1 tablespoon milk)1-2 tablespoon sesame seedsGarlic butter: 2 tablespoon butter, 1 tsp garlic powder or minced garlicChopped cilantro for garnishing
Instructions
Add all the ingredients to the bowl of a stand mixer. Knead using the dough hook attachment for 7-10 minutes on medium high speed until a smooth, soft and stretchy dough forms which pulls away from the edges of the bowl. If kneading by hand, first mix all ingredients into a shaggy dough with a spoon. Then turn onto a clean surface and knead for 10-15 minutes with your palm in a push-pull motion. The dough will be sticky at first but avoid adding too much more flour and it will come together!Place in a clean bowl sprayed with oil, cover with cling wrap and place in a warm, humid environment for 60-90 minutes until the dough doubles in size. It is done when it springs back part of the way when lightly poked with a finger. While the dough is rising, work on the filling.
Prep all the ingredients if you haven’t alreadyHeat oil in a large nonstick pan. Add the onion and saute for ~5 minutes until it becomes goldenAdd the bell pepper and ginger garlic paste and cook for another 3-5 minutes until the pepper softens. Add a splash of water if neededAdd the spices and cook for 1-2 minutes to toast them. Add a splash of water to deglaze the pan if neededAdd the yogurt mixed with the water and stir. A creamy masala should formTurn the off and mix in the shredded paneer. If the mixture feels too dry, add more water and / or yogurt. Taste and adjust seasonings
Once the dough has risen and the filling is not hot any more, start assembly. Prepare a 9×13″ pan with parchment paper and a spray of oilPunch down the dough to remove large air pockets. Divide into 12 equal pieces, and roll each into a bowlUse a rolling pin on a lightly floured surface to roll a ball into a 3-4″ diameter circle. Place a scoop of filling (about 2 tbsp) in the center of the circle so the edges are uncovered. Add mozzarella cheese if usingLift the edges and meet them in the middle to seal and turn into a ball. Pinch together the edges firmly, and lightly shape into a ball using your palms. Place the ball into the prepared baking sheetRepeat until all 12 buns are done. Keep an even spacing between them, they shouldn’t be touching at this timeLeave the tray in a warm spot for 30 minutes for the second rise.In the last 20 minutes, preheat your oven to 350F (conventional)After the second rise, brush the buns generously with egg wash using a pastry brush, and sprinkle over some sesame seeds. Transfer to the pre-heated oven (350F), and bake for ~20-22 minutes or until the buns are golden in colorWhile the buns are baking, melt the butter in a pan or the microwave. Add the garlic powder or minced garlic to the hot butter and mix. Chop up cilantro for garnishRemove the buns from the oven, and brush with the garlic butter. Sprinkle the cilantro, and serve!
Notes
- Cook Mode Prevent your screen from going dark




Leave a Reply