
The Day I Burned Butter on Purpose
My grandkids still tease me about the first time I tried making brown butter. I stood over the stove, stirring, and sniffing, and wondering if I had ruined my favorite pan. The butter started to bubble and turn a warm, golden brown. Then the smell hit me — like toasted nuts and caramel, all at once. I still laugh at that moment. I called my neighbor in a panic, and she said, “Chloe, that’s exactly what you want!” Now I know that browning butter is like waking up the flavor. It makes everything taste deeper and richer, without any extra work. *Fun fact: Brown butter was invented by accident when a French chef let his butter get a little too toasty, and he loved the result so much he kept doing it.* Have you ever burned butter on purpose? I bet you have a funny kitchen story, too. Share it in the comments if you want!Sugar and Coffee, A Secret Pair
Now, here is why this recipe feels so special. You add brown sugar and white sugar to the warm butter, and then you whisk in a tiny bit of instant coffee. Yes, coffee! But don’t worry, you will not taste it. The coffee does something wonderful. It makes the chocolate taste more like itself — richer and darker. It is like how a little salt makes sweet things taste sweeter. This is why bakers have used coffee for ages. It is a quiet helper that makes everything better. This insight matters: small ingredients can change everything. A pinch of this, a splash of that. You do not need fancy tools or expensive stuff. Just a little know-how and a willingness to try. So, what is a tiny ingredient you love to sneak into recipes?The Stirring Secret
When you add the egg and the yolk to the warm butter-sugar mix, something magical happens. You have to whisk fast and steady for a minute or two. The mixture turns smooth and creamy, just like a soft caramel sauce. I always stop to smell it at this step. Doesn’t that smell amazing? It is buttery and sweet and warm. This is the heart of the cookie. If you see little sugar clumps, just press them with your spoon. They will melt right in. This step matters because it builds the chewy, fudgy texture you want. No shortcuts here, friend.Chocolate and Patience
You chop the chocolate into little chunks — some milk, some dark. Or all semi-sweet, if that is your way. Fold them gently into the flour and cocoa powder. Do not overmix! Just fold until you do not see dry flour anymore. Overmixing makes cookies tough, and we want them soft. Here is where patience comes in. You roll the dough into balls, place them on a plate, and then you must wait. Refrigerate them for at least two hours, but overnight is best. I know, I know. It is hard to wait. But this step changes everything. The cold dough lets the flavors settle. The cookies spread less and stay thick and gooey inside. Why does this matter? Because good things take time. Rushing a cookie is like rushing a hug. It is just not the same. Have you ever tried baking a cookie from cold dough? Or are you a “bake it right now” kind of person?The Test Cookie Trick
When you are ready to bake, preheat your oven to 375F. Use a light-colored baking sheet if you have one. Dark sheets can make the bottoms burn. Place the cold cookie balls three inches apart. They will spread, so give them room to breathe. Now, here is the trick I learned from my own mistakes: bake one test cookie first. Just one. That way you can see if your oven runs hot or cool. You can see if you like the cookie at ten minutes or twelve. It saves the whole batch. I still do this every time, and I never regret it. When they come out, sprinkle a tiny bit of flaky salt on top if you like. Let them cool for ten or fifteen minutes — if you can wait that long. Then bite into one while it is still warm. That first bite is why we bake.Share Your Cookie Story
These cookies remind me of rainy afternoons in my grandma’s kitchen. She always had a batch ready, wrapped in a tea towel. I hope they feel just as cozy for you. So, I have three little questions for you before you go. First: What is your favorite kind of chocolate to bake with? Second: Do you add anything secret to your cookies, like a pinch of cinnamon or extra vanilla? Third: Who do you bake cookies for most often? Is it family, friends, or just yourself? I would love to hear. Go ahead and share in the comments.Ingredients:
| Ingredient | Amount | Notes |
|---|---|---|
| Unsalted butter | 10 tbsp (140g) | |
| Brown sugar | ⅔ cup (133g) | |
| White sugar | ¼ cup (50g) | |
| Large egg | 1 | |
| Egg yolk | 1 | |
| Instant coffee | 1 tsp | Dissolved in 1 tsp hot water |
| Vanilla | 1 tsp | |
| All purpose flour | 1 cup (130g) | |
| Cocoa powder | ⅓ cup (33g) | Dutch processed preferred |
| Salt | ¾ tsp | |
| Baking soda | ½ tsp | |
| Baking powder | ¼ tsp | |
| Milk chocolate, chopped | 5 oz (113g) | Plus 3 oz (85g) dark chocolate, chopped; or use all semi-sweet or milk chocolate |
Why I Love These Cookies (And You Will Too)
I still remember the first time I made these cookies. It was a rainy Sunday, and my kitchen smelled like a warm hug. Does that smell amazing? Oh, yes. The secret is browning the butter. It makes everything taste like caramel and toasted nuts. My little grandson once said they taste like “fudge that got hugged by a cookie.” I still laugh at that. You are about to make the fudgiest, most soft-centered cookies from scratch. Don’t let the steps scare you. I promise, each one is worth it.
I love how simple the ingredients are. Butter, sugar, eggs, flour, cocoa powder, and lots of chocolate. You probably have most of them already. This recipe makes ten big, gorgeous cookies. But here is a little secret. You will want to double it. Trust me. I have never met a person who could eat just one. (That includes me!)
Let’s Bake Together: Step-by-Step
Step 1: Melt the 10 tablespoons of butter in a non-stick pan over medium-low heat. Keep stirring gently. In a few minutes, it will turn a lovely golden-brown color and smell like toasted nuts. Watch it carefully. (Hard-learned tip: If it turns black, toss it out and start over. Burnt butter tastes bitter, like a sad mistake.) Once it smells amazing, turn the heat to the lowest setting.
Step 2: Add the brown sugar and white sugar to the warm butter. Whisk them together on the lowest flame for one to two minutes. You are not trying to melt the sugar, just warm it up. The mixture might look a little grainy, like wet sand. That is perfectly fine. Remove the pan from the heat and let it cool for five minutes. It should feel warm, not hot, when you touch the side of the pan.
Step 3: Crack one whole egg and one extra egg yolk into the warm sugar mixture. Whisk quickly until everything is yellow and smooth. Then add the vanilla and the coffee dissolved in hot water. Whisk for one to two minutes more. The mixture will turn creamy, like shiny caramel sauce. If you see a sugar lump, just press it with the back of your spoon. It will melt right in. What is your favorite cookie texture—chewy or crispy? Share below!
Step 4: In another bowl, sift together the flour, cocoa powder, salt, baking soda, and baking powder. Sifting gets rid of any lumps and makes the cookies extra soft. Add the chopped milk chocolate and dark chocolate. Stir them around so every bit of chocolate gets a little flour coat. Reserve a small handful of chocolate chunks to press on top of the cookies later.
Step 5: Make sure your wet mixture is not hot anymore. Then add the dry ingredients in two batches. Use a rubber spatula to fold everything together gently. “Fold” means you scrape the bottom and bring the mixture up and over. Stop the moment you cannot see any more white flour. Overmixing makes cookies tough, like a hockey puck. Nobody wants that.
Step 6: Use a two-tablespoon cookie scoop to make ten dough balls. Place them on a plate or small baking sheet. Do not squish them flat. Leave them as tall, bumpy balls. Press a few of your reserved chocolate chunks right on top of each ball. Now comes the hardest part. You must refrigerate them for at least two hours. Overnight is best. The cold rest makes the cookies thick and chewy instead of flat like pancakes.
Step 7: When you are ready to bake, preheat your oven to 375 degrees Fahrenheit. Use a light-colored cookie sheet lined with parchment paper. Place the cold cookie balls at least three inches apart. Bake for ten to twelve minutes. For soft and gooey centers, pull them out at ten minutes. Let them cool on the sheet for ten to fifteen minutes. Sprinkle a little flakey sea salt on top if you like. Serve while they are still warm.
Cook Time: 10–12 minutes
Total Time: 2 hours 20 minutes (plus 2 hours chill time)
Yield: 10 large cookies
Category: Dessert
Three Fun Twists to Try
Peppermint Crunch Cookies: Swap half the vanilla for peppermint extract. Stir in one tablespoon of crushed candy canes or peppermint candies. The coating stays so pretty on top. These are perfect for winter holidays.
Peanut Butter Swirl Fudgies: Warm up two tablespoons of peanut butter and drizzle it over the dough before baking. Use a toothpick to swirl it gently. The peanut butter gets all melty and baked into chocolate heaven.
Orange Dream Delight: Add one teaspoon of orange zest to the wet ingredients. It brightens the chocolate flavor. Pair it with a glass of cold milk, and you will feel like a sunny day. Which one would you try first? Comment below!
How to Serve and What to Sip
These cookies are wonderful all on their own. But I love to serve them warm with a big scoop of vanilla ice cream. The hot cookie melts the ice cream into a little puddle of cream. Another idea is to crumble one over a bowl of yogurt or oatmeal for a quick dessert-for-breakfast treat. For a fancy look, dust them with a pinch of flakey sea salt and a drizzle of melted white chocolate.
For a drink, pour yourself a cold glass of milk. It is the classic pairing, and it never fails. If you want something for grown-ups, a small glass of red wine, like a fruity Merlot, goes beautifully with the dark chocolate. My neighbor swears by hot cocoa with a splash of coffee. Which would you choose tonight?
How to Store and Reheat Your Cookies
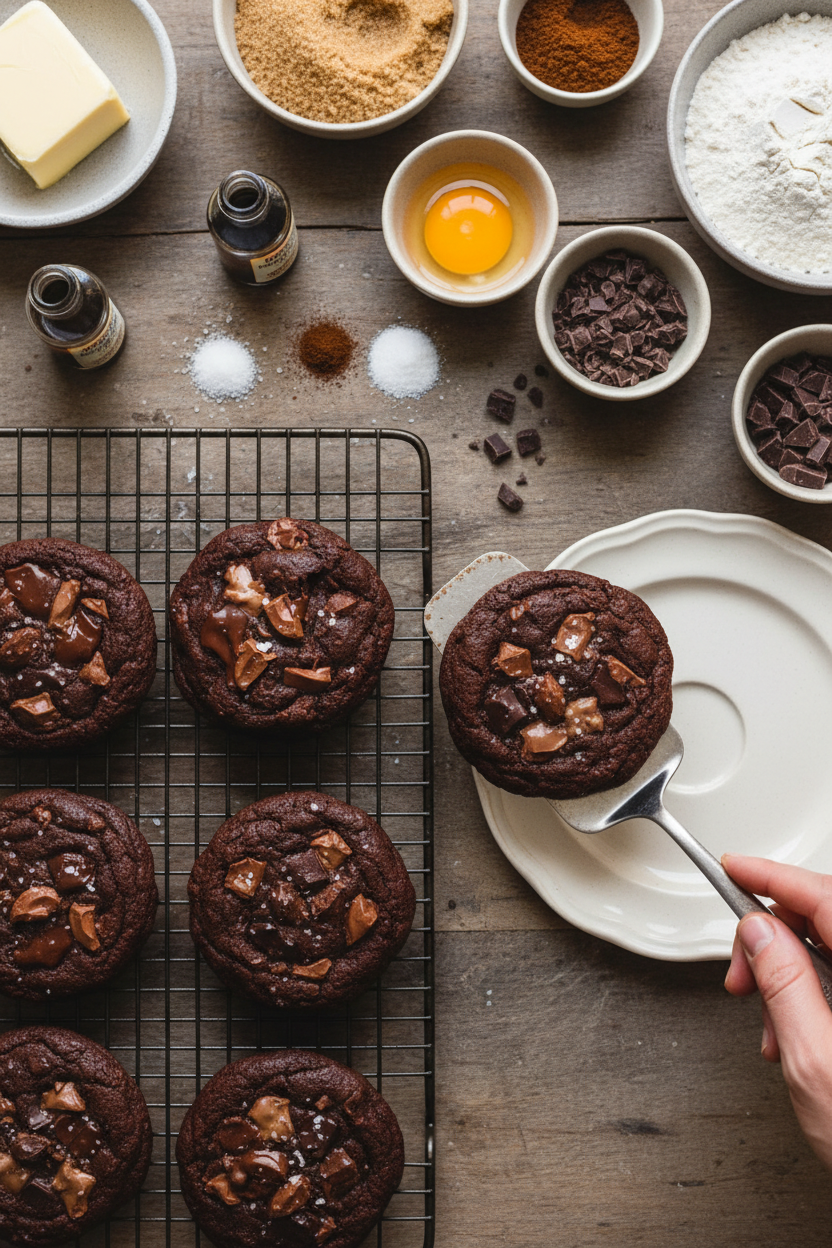
These fudgy chocolate cookies taste best warm. The first time I made them, I ate three right out of the oven. Then I had to figure out how to save the rest. Here is what I learned.
You can store baked cookies in an airtight container at room temperature for up to three days. Put a slice of bread in the container. It keeps the cookies soft. For longer storage, freeze the unbaked cookie dough balls.
To freeze, place the dough balls on a tray. Freeze them until solid. Then put them in a freezer bag. They keep for up to three months. When you want fresh cookies, bake them straight from frozen. Just add two extra minutes to the baking time.
To reheat a baked cookie, pop it in a 300°F oven for five minutes. Or microwave it for ten seconds. It will taste just like fresh. Batch cooking saves time and gives you cookies anytime. Have you ever tried storing it this way? Share below!
Why this matters: When you freeze dough, you always have a treat ready. It stops you from eating a whole batch in one day. That is good for your belly and your kitchen happiness.
Three Common Problems and Easy Fixes
Sometimes cookies spread too thin. I remember the first time I baked these. They turned into flat, crispy pancakes. The fix is simple. Chill the dough for at least two hours. Cold butter holds the shape better.
Another problem is dry cookies. This happens when you overmix the dough. Stir just until the flour disappears. Stop right away. Overmixing makes the gluten tough. That gives you a hard cookie.
The third issue is uneven baking. Some cookies burn while others are raw. The fix is to use a light-colored baking sheet. Dark sheets absorb more heat. Also, bake one test cookie first. I do this every time now.
Why this matters: Fixing these problems builds your confidence. You learn what to look for. Soon, you will know exactly when the dough is right. Which of these problems have you run into before?
Your Top 5 Questions Answered
Q: Can I make these gluten-free? A: Yes. Swap the all-purpose flour for a 1-to-1 gluten-free baking blend. Add a pinch of xanthan gum if the blend does not have it.
Q: Can I make the dough ahead of time? A: Absolutely. The dough keeps in the fridge for up to three days. The flavor gets even better.
Q: What if I don’t have instant coffee? A: Skip it. The cookies will still taste rich. The coffee just deepens the chocolate flavor.
Q: Can I double the recipe? A: Yes. Just use a larger bowl. The baking time stays the same.
Q: Can I use only milk chocolate? A: Yes. The cookies will be sweeter. Use all milk chocolate for a milder taste. Which tip will you try first?
*Fun fact: Dutch-processed cocoa makes the cookies darker and smoother. It is worth finding at the store.*
A Warm Goodbye from Chloe
Thank you for baking with me today. I hope your kitchen smells like butter and chocolate. These cookies are made for sharing. Give some to a neighbor or a friend. It makes the world a little sweeter.
If you try this recipe, I would love to see your photos. Take a picture of your first batch. Have you tried this recipe? Tag us on Pinterest! Look for @ChloeHartwellEats. Happy cooking!
—Chloe Hartwell.
Fudgy Double Chocolate Chip Cookies Recipe
Description
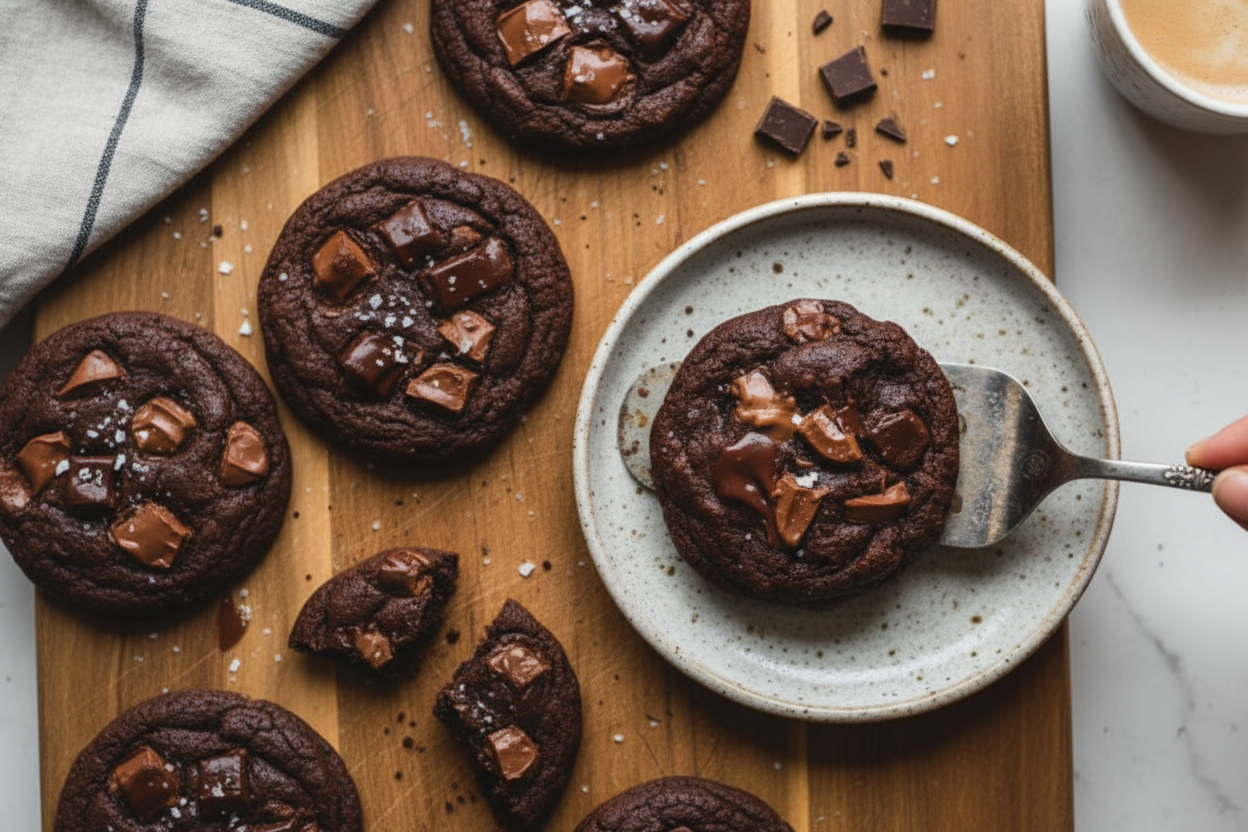
Indulge in rich, fudgy double chocolate chip cookies. This easy recipe creates perfectly soft, bakery-style treats.
Ingredients
Instructions
- Place the butter in a non-stick pan and melt it on medium-low heat. Keep stirring for a few minutes until the butter starts to look brown and develops a caramel-y nutty aroma
- Turn the heat all the way to the lowest setting, and add the brown and white sugars. Whisk on the lowest flame for 1-2 minutes, then remove from the heat. The heat facilitates the dissolving of the sugars and starts breaking them down for a deeper flavor. You are not trying to caramelize or melt the sugars. The mixture may look somewhat grainy, don’t worry
- Remove from heat and cool the mixture for 5 minutes. It should be warm, but not hot anymore
- Add the egg and yolk, and quickly whisk to incorporate. Add the vanilla and instant coffee dissolved in hot water, and whisk for 1-2 minutes until the mixture becomes very smooth and creamy like caramel. If you see any clumps of sugar, press them down with the back of a spoon and they should mix in
- Sift all the dry ingredients (flour, cocoa powder, salt, baking soda, baking powder) into a separate bowl. Add the chopped chocolate and mix everything together. You can reserve some chocolate to add on top of each cookie
- Make sure the wet ingredients aren’t hot (they shouldn’t be at this point). Add the dry ingredients to the wet in 2 batches and fold with a rubber spatula until just combined. Do not overmix!
- Use a 2 tablespoon cookie scoop to divide the dough into 10 balls. Don’t apply pressure onto the balls
- Place the cookie balls onto a plate or baking sheet, and add a few chocolate chunks on top (you can add more chocolate or reserve some of the chopped chocolate from earlier)
- Refrigerate for a minimum of 2 hours, but overnight for best results
- Pre-heat oven to 375F (conventional / no fan) and prepare a large cookie sheet with parchment paper. It is best to use a lighter colored cookie sheet
- Transfer the balls to the sheet, keeping at least 3″ between them
- Bake for 10-12 minutes depending on how soft and gooey you want the cookies to be. I always recommend baking 1 test cookie first!
- Sprinkle the cookies with some flakey sea salt (optional) and let them cool down at room temperature for 10-15 minutes
- Serve and enjoy while still warm!
Notes
- For best results, refrigerate the dough overnight. Sprinkle with flaky sea salt before serving.




Leave a Reply