

The Night I Learned to Play with Pizza
I still laugh at the first time I made these. I had leftover chicken fajita filling and some sad little slider buns. I thought, “Why not mash them together?” My granddaughter walked in and said, “Grandma, you’re a genius!” That’s how this recipe was born. Sometimes the best meals come from a happy accident, not a fancy plan. Have you ever made a meal on a whim that turned out amazing?
This recipe is like a secret handshake between your favorite taco night and pizza Friday. It’s a way to use up what you have without any stress. Doesn’t that smell amazing when it all cooks together? The peppers and onions get sweet and soft in the hot pan.
Why Fajitas Make Everything Better
Fajitas were a big deal back in Texas ranching days. Cooks would grill leftover steak strips with peppers for a fast, tasty meal. I love how that same simple idea works here. The seasoning mix—paprika, cayenne, and chili flakes—gives the chicken a warm, happy kick. You don’t need to be a chef to make it taste special. Just toss everything in a bowl and mix it with your hands. That’s part of the fun.
*Fun fact:* The word “fajita” comes from the Spanish word “faja,” which means belt or strip. That’s why we cut the meat into little strips. So every bite is like a tiny party in your mouth. Do you have a favorite spice blend you always reach for?
My Secret for Not Burning the Buns
Here is a little story from my kitchen. One time I got distracted by a phone call and left the buns in the oven too long. They came out like little black hockey pucks. Now I always set a timer for that first toast. Five minutes at 350F is just enough to make them crispy on the bottom but still soft inside. Then you bump the heat to 400F to melt the cheese fast. That way, the buns stay golden, not crunchy or burnt.
Why does this matter? A good base makes all the difference. Think of these buns like a little pillow for your toppings. If the pillow gets too hard, the whole thing falls flat. Have you ever had a pizza that was ruined by a soggy or burned crust?
How the Toppings Tell a Story
Every time I cook these peppers and onions, I think about my mother’s garden. She grew bell peppers in bright yellow and green. They looked like jewels in the dirt. When you slice them thin and cook them with olive oil, they turn sweet and a little charred. That caramelized taste is a little bit like candy, but better. The lemon juice at the end brightens everything up. It’s like adding a splash of sunshine.
This recipe also teaches you a handy skill. You can make extra topping and use it for tacos or sandwiches later. That saves time on busy nights. Why does this matter? It means less waste and more yummy meals. Do you like cooking once and eating twice?
Putting It All Together Like a Puzzle
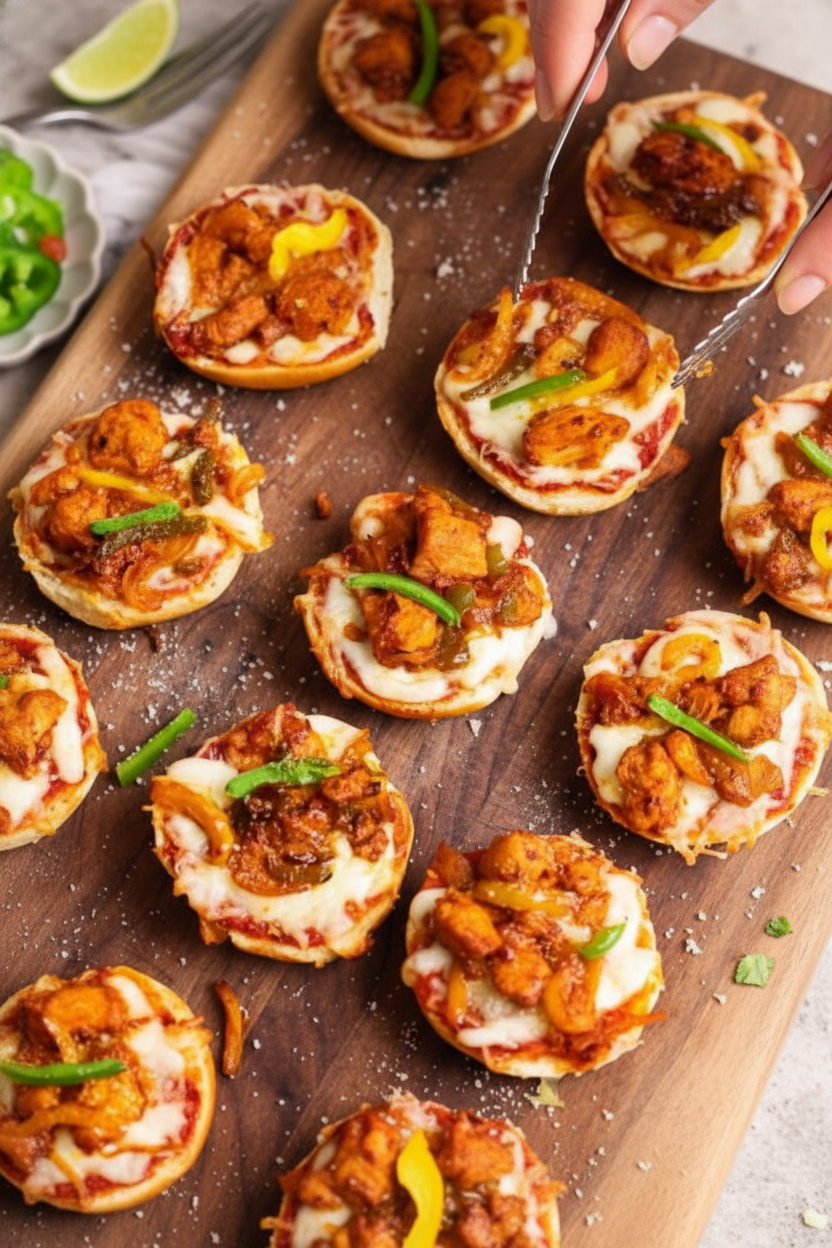
Assembling these mini pizzas feels like playing with food in the best way. You spread a tiny bit of pizza sauce on each bun half. Too much sauce will make them soggy, so be gentle. Then you sprinkle cheese, and pile on that fajita mix. I always add a few extra pepper strips on top for color. That way, they look pretty before they go in the oven. My grandson calls them “jewel pizzas.”
You only bake them for a few minutes at 400F. Watch them closely. The cheese should melt and bubble, but the bottoms stay light. Pull them out when the cheese looks gooey and happy. That’s your signal. What is your favorite part of making pizza at home?
The Little Things That Make It Special
I love that these are small enough for little hands. Kids can help sprinkle cheese or arrange the peppers. It’s a recipe that brings people into the kitchen together. My neighbor once made these for a potluck, and they disappeared in five minutes. Everyone asked for the recipe. That’s the kind of food that builds connections, one tiny pizza at a time.
Another reason this recipe matters: it’s forgiving. If you don’t have all the spices, don’t worry. Use what you have. Cooking is about feeling confident, not being perfect. Would you ever try making these with different toppings, like mushrooms or zucchini?
Ingredients:
| Ingredient | Amount | Notes |
|---|---|---|
| Chicken tenders | 1 lb | Cubed |
| Yellow onion | 1 small or ½ large | Thinly sliced |
| Green bell pepper | 1 | Thinly sliced |
| Yellow bell pepper | 1 | Thinly sliced |
| Olive oil | 2 tbsp + more to fry | |
| Salt | 1-2 tsp | |
| Cayenne | 1½ tsp | |
| Paprika | 1½ tsp | |
| Chili flakes | 1 tsp | |
| Garlic powder | 2 tsp | |
| Lemon | ½ | Juice |
| Pizza sauce | ~¾ cup | |
| Shredded cheese (Mozzarella & Mexican Blend) | 2 cups | |
| King’s Hawaiian Original Hawaiian Slider Buns | 12 | Separated into 24 halves |
The Dinner That Snuck Up on Us
I remember the first time I made these mini pizzas. My grandson walked into the kitchen, and his eyes got real big. He asked if I was making dessert. I laughed and told him to wait and see. Doesn’t that smell amazing already?
This little recipe started on a busy Tuesday. I had leftover chicken fajita filling from a party. The slider buns were just sitting there. Well, you know me. I can’t stand wasting good food. So I stuck them together and hoped for the best.
The result was a crispy, cheesy, slightly spicy bite of heaven. My family ate every single one before I could sit down. I still laugh at that. Now these pizzas show up for game nights, sleepovers, and even school lunches. Here is how to make them.
Your Step-by-Step Mini Pizza Adventure
Step 1: Grab a big bowl. Toss in your cubed chicken, thinly sliced onion, and both bell peppers. Drizzle with the olive oil. Sprinkle in the salt, cayenne, paprika, chili flakes, and garlic powder. Use your hands to mix it all up. (The smell will make your tummy rumble.)
Step 2: Heat a splash of oil in a large frying pan over medium-high heat. Dump in the whole fajita mixture. Cook it for about 10 minutes, stirring now and then. You want the chicken cooked through and the veggies a little charred. (Hard-learned tip: don’t crowd the pan too much, or the veggies will steam instead of getting those yummy brown spots.)
Step 3: Taste your fajita filling. Add a pinch more salt if it needs it. Squeeze the juice of half a lemon over the top and stir. That little bit of sour brings the whole thing to life. Now set it aside and get your buns ready.
Step 4: Preheat your oven to 350F. Separate your King’s Hawaiian slider buns into 24 halves. Lay them flat on a light-colored baking sheet. Pop them in the oven for 5 minutes. This toasts them just enough so they don’t get soggy later. My grandma taught me that trick, and it never fails.
Step 5: Crank the oven up to 400F. Take out the toasted buns. Spread a tiny spoonful of pizza sauce on each one. Don’t overdo it. Too much sauce makes the buns soft and sad. Sprinkle on the shredded cheese. Pile a little of your chicken fajita mixture on top. If you want, add a thin slice of bell pepper for color.
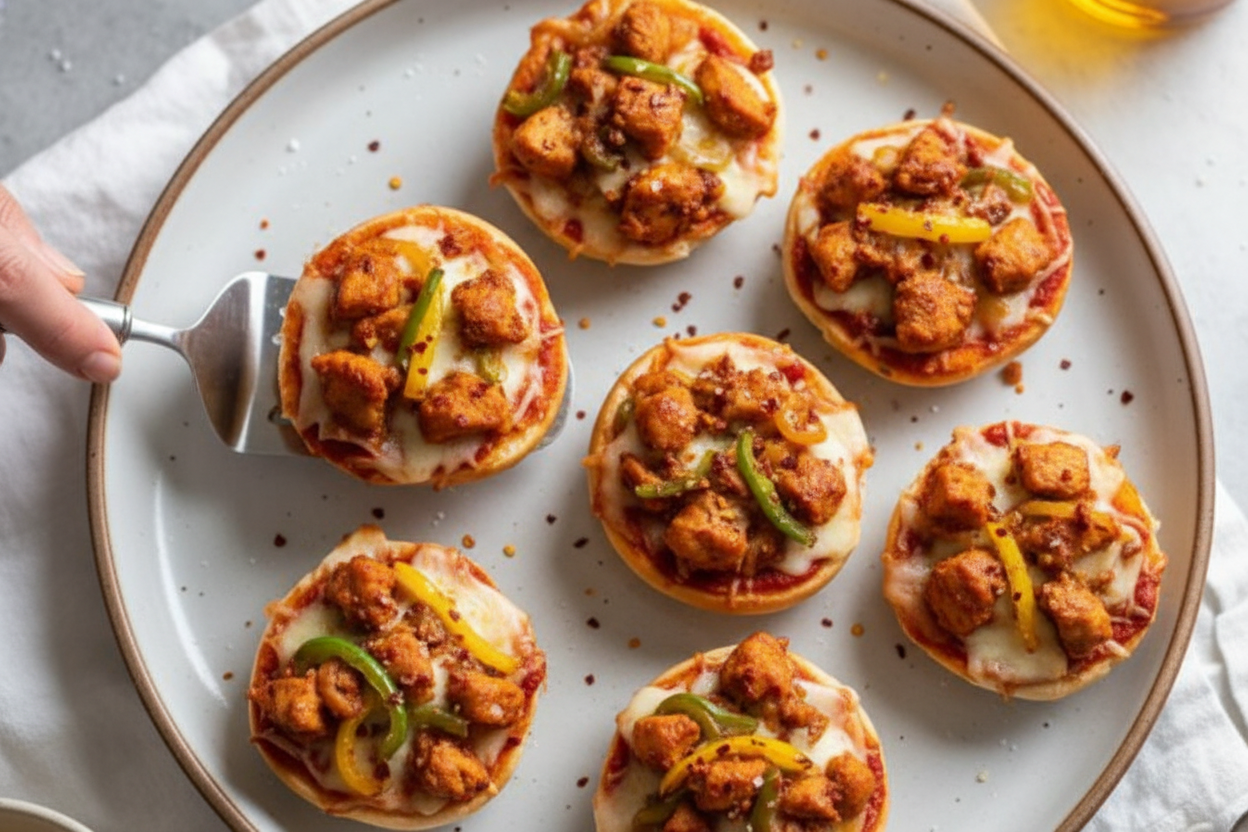
Step 6: Slide the baking sheet back into the hot oven. Bake for just a few minutes. Watch closely. You only need the cheese to melt. The buns can burn fast on the bottom. Pull them out, sprinkle with parmesan if you like, and serve. I bet you can’t eat just one. What is your favorite pizza topping? Share below!
Cook Time: 15 minutes
Total Time: 30 minutes
Yield: 24 mini pizzas
Category: Dinner, Snack
Three Fun Twists to Try
Vegetarian Swap: Skip the chicken and use extra bell peppers, zucchini, and mushrooms. The fajita seasoning makes vegetables taste like a party.
Spicy Kick: Add sliced jalapenos on top before baking. Or mix a spoonful of hot honey into the pizza sauce. Your tongue will tingle.
Breakfast Pizza Surprise: Scramble an egg and crumble it on top instead of the chicken. Add a little crumbled bacon. Perfect for a lazy Saturday morning. Which one would you try first? Comment below!
How to Serve and Sip
These mini pizzas are perfect with a simple side salad. Just lettuce, cucumber, and a squeeze of lime. Or serve them with a bowl of chunky guacamole for dipping. For a fun touch, arrange the pizzas on a big wooden board and let everyone grab their own.
For drinks, a cold glass of lemonade or iced tea cools down the spice. Grown-ups might enjoy a light Mexican beer or a margarita. The citrus goes so nicely with the fajita flavors. Which would you choose tonight?
Storing and Reheating Your Mini Fajita Pizzas
These little pizzas are perfect for busy nights. You can make a big batch and store them. Let the pizzas cool completely first. Then place them in a single layer in a freezer bag.
I once forgot to let them cool before stacking. They turned into a sticky, soggy mess. Learn from my mistake! For the fridge, keep them in an airtight container for up to three days.
To reheat, pop them in a toaster oven at 350F for about 5 minutes. This keeps the buns crispy. A microwave will make them soft and sad. Batch cooking saves time on hectic weeknights. You always have a hot meal ready. Have you ever tried storing it this way? Share below!
Why this matters: Storing correctly means zero food waste. You get to enjoy every last bite you worked hard to make.
Three Common Problems and Easy Fixes
First, soggy buns. The fix is simple. Toast the buns for five minutes before adding toppings. I learned this the hard way during a sloppy pizza night.
Second, burnt bottoms. Use a light-colored baking sheet. Dark sheets cook faster and burn the bottoms. I remember burning an entire batch for a party. Everyone was polite, but the pizzas were crunchy.
Third, bland flavor. Taste your fajita mix before baking. Add more salt or cayenne if needed. Seasoning is the heart of any dish. Which of these problems have you run into before?
Why this matters: Fixing these mistakes builds your cooking confidence. You learn to trust your own taste buds. That skill makes every meal better. Plus, no more sad, burnt pizzas.
Your Top 5 Questions Answered
Q: Can I make this gluten-free?
A: Yes. Use gluten-free slider buns or small corn tortillas. Bake them the same way.
Q: Can I prep the topping ahead?
A: Absolutely. Cook the fajita mix and store it in the fridge for up to three days. Assemble when ready.
Q: What if I don’t have Hawaiian buns?
A: Use any soft dinner roll or even English muffins. They all work great.
Q: How do I scale this for a crowd?
A: Double the topping recipe. Use two baking sheets and bake in batches. Your oven has limits.
Q: Can I skip the pizza sauce?
A: Yes. Try sour cream or guacamole on the side instead. It changes the flavor completely.
Which tip will you try first?
A Warm Goodbye from Chloe
Thank you for cooking with me today. These mini pizzas are a joy to share. They remind me of family dinners with laughter and sticky fingers. I hope they bring the same warmth to your table.
Take a photo of your creation. Share it with someone you love. Cooking is about connection, not perfection. Have you tried this recipe? Tag us on Pinterest! My handle is ChloeHartwellEats. I can’t wait to see your beautiful pizzas.
*Fun fact: Hawaiian buns were first created in the 1950s. They add a touch of sweetness that balances spicy fajita flavors perfectly.*
Happy cooking!
—Chloe Hartwell.

Mini Chicken Fajita Pizzas: Mini Chicken Fajita Pizza Recipe
Description
Crispy mini pizzas topped with zesty chicken fajita flavors. An easy 30-minute dinner recipe perfect for busy weeknights!
Ingredients
Instructions
- Mix the cubed chicken, onion, and bell peppers with olive oil and all the seasonings in a bowl.
- Heat a little more oil in a large frying pan. Add the fajita mixture and cook on medium-high heat for ~10 minutes until the chicken is cooked and the veggies are slightly charred and caramelized. Taste to adjust seasonings, and end with the lemon juice.
- Pre-heat your oven to 350F and place the slider bun halves onto a large baking sheet (light colored recommended). Bake for 5 minutes to lightly toast the buns, then increase the oven temperature to 400F.
- Top each bun with a little pizza sauce (avoid too much as it will make the pizzas soggy). Then add the shredded cheese, and top off with the chicken fajita topping. Optionally, add thinly sliced bell peppers on top for decoration.
- Place the sheet back in the oven for just a few minutes until the cheese melts. Be careful not to overbake as the buns can burn on the bottom. Garnish with parmesan cheese (optional), serve and enjoy!
Notes
- This makes a little extra topping so you can either make more pizzas, or save the topping for other uses like tacos, quesadillas or sandwiches.


Leave a Reply