

Why Breakfast Sliders Make Me Smile
I remember the first time I made these sliders. It was a sleepy Saturday morning, and the house was full of cousins. Everyone was hungry, and I wanted something easy. I pulled out my old baking dish and started layering. The trick is keeping things simple. You don’t need fancy tools or hard-to-find spices. Just eggs, some meat, cheese, and soft buns. That’s it. I still laugh at how fast those sliders disappeared. Have you ever made breakfast for a big group?Little Details That Make a Big Difference
One thing I learned the hard way: don’t overcook the scrambled eggs. You want them just set but still soft and creamy. When you bake them again in the oven, they finish cooking perfectly. That’s why this recipe works so well. The eggs stay tender, not rubbery. Another little secret is brushing melted butter with garlic powder on top. It sounds small, but that golden, crispy top is what everyone loves. Does that smell amazing or what? It fills your whole kitchen with goodness. *Fun fact: Hawaiian rolls are slightly sweet. That sweetness balances the salty bacon and sausage in a way that surprises your taste buds.*Why This Matters More Than You Think
These sliders teach a gentle lesson about sharing. When you make food that’s easy to grab and eat together, people sit down and talk. You don’t need fancy plates. Just hold a warm slider in your hand and take a bite. This also matters because breakfast can be stressful. Mornings are rushed. But this recipe lets you prep everything ahead. You can cook the meat and eggs the night before. Then just layer and bake in the morning. It takes fifteen minutes of real work. Have you ever tried prepping breakfast the night before? I’d love to hear your best tip.The Little Anecdote About My First Batch
The first time I made these, I forgot the cheese. I put the tops on and wondered why they looked so flat. My grandson looked at me and said, “Grandma, where’s the yellow?” We all laughed, and I pulled the tops off and sprinkled cheddar everywhere. That batch still tasted wonderful, but now I always check twice. Every time I make them, I remember his little face. It’s funny how mistakes turn into the best memories. What’s a cooking mistake that made you laugh?How the Layers Work Together
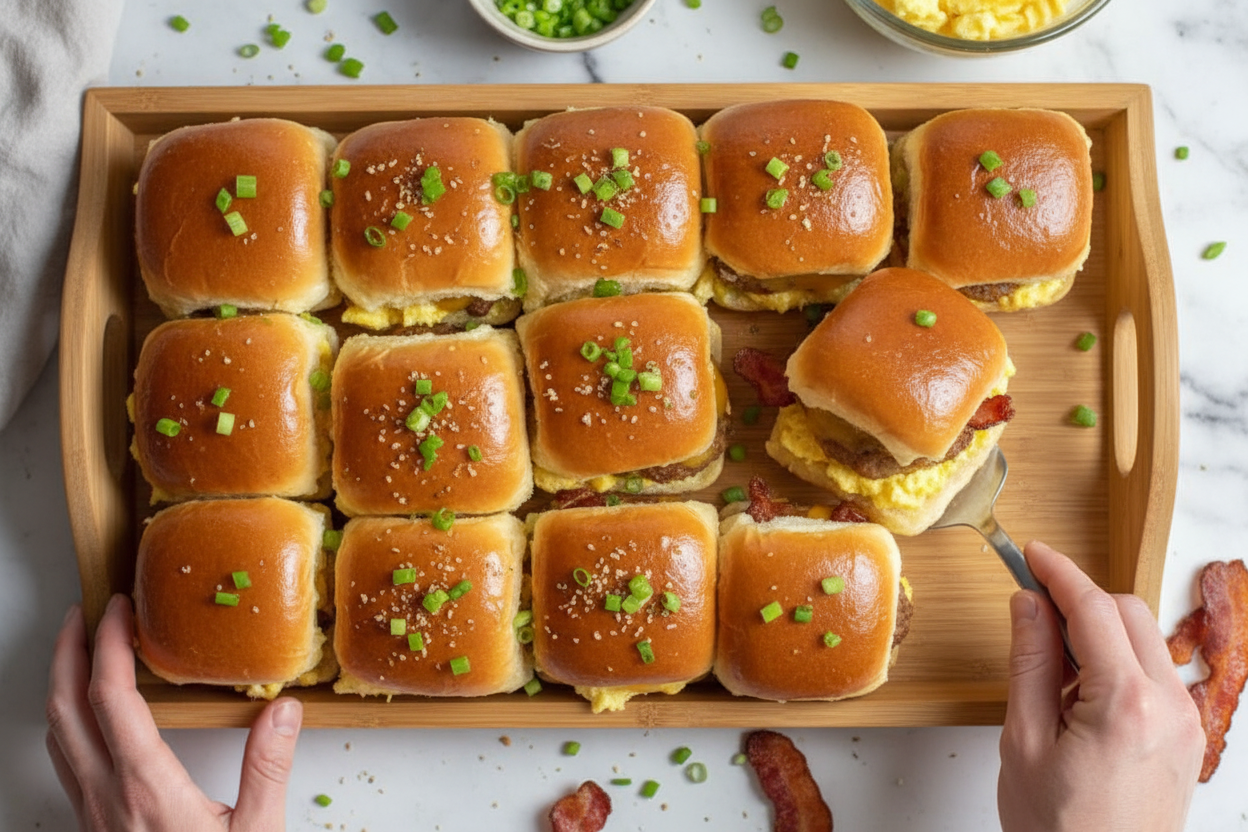
Start with the bottom bun. Then add the soft scrambled eggs. Next comes the bacon and crumbled sausage. Sprinkle cheese on top so it melts into everything. Finally, put the top bun on and brush with butter. Each layer has a job. The eggs give fluffiness. The meat adds salt and crunch. The cheese holds it all together. The butter top makes it look fancy. You can also add sliced green onions for a little fresh pop. Do you like green onions on your breakfast?A Warm Thought for Your Morning
When you pull these sliders out of the oven, let them sit for just two minutes. That’s all. It keeps them from falling apart when you cut them. Then slice them into squares and watch everyone grab one. I love how this recipe fits any morning. Busy school days, lazy weekends, family visits. It’s like a hug on a plate. I hope you try it and make your own little memory. Would you add anything different to yours?Ingredients:
| Ingredient | Amount | Notes |
|---|---|---|
| Slider buns or Hawaiian rolls | 12 | Base |
| Large eggs | 6 | Egg Mixture |
| Milk | ¼ cup | Egg Mixture |
| Salt and pepper | To taste | Egg Mixture |
| Cooked bacon | 8 slices | Chopped or halved |
| Breakfast sausage patties | 6 | Cooked and crumbled |
| Shredded cheddar cheese | 1 cup | |
| Butter | 2 tablespoons | Melted, for topping |
| Garlic powder | ½ teaspoon | For topping |
| Sliced green onions | Optional | For garnish |
Why These Sliders Make Mornings Feel Like a Hug
I remember the first time I made breakfast sliders for a big family gathering. My kitchen smelled like butter and bacon, and everyone kept peeking in to see what was happening. Doesn’t that smell amazing? These little sandwiches are perfect for feeding a crowd without stress. Even my picky nephew asked for seconds, and I still laugh at that.
The best part is how simple everything comes together. You just layer scrambled eggs, meat, and cheese between soft buns. Then you brush the tops with garlic butter and bake until golden. It feels like a warm hug on a plate. Plus, you can make them ahead of time and pop them in the oven when guests arrive.
Here is my favorite tip from years of making these: do not overcook the scrambled eggs. They will finish cooking in the oven, so keep them soft and a little bit moist. (Hard-learned tip: If eggs look dry in the pan, they will be tough in the final slider. Go gentle, like you are tucking them into bed.) That little trick makes all the difference between good sliders and unforgettable ones.
Step 1: Preheat your oven to 350 degrees Fahrenheit. Grease a 9×13-inch baking dish lightly with butter or nonstick spray. This stops the buns from sticking and burning on the bottom.
Step 2: Slice 12 slider buns in half like you are opening a little book. Place the bottom halves evenly in the dish. They should fit snugly, like puzzle pieces.
Step 3: Crack 6 large eggs into a bowl. Add one-quarter cup of milk, a pinch of salt, and a shake of pepper. Whisk until the mixture is smooth and pale yellow.
Step 4: Heat a nonstick skillet over medium heat. Pour in the egg mixture and stir gently with a spatula. Stop when the eggs are just set but still look a little soft and shiny.
Step 5: Spread the scrambled eggs evenly over the bottom buns. Sprinkle on 8 slices of chopped bacon and 6 crumbled sausage patties. Top everything with 1 cup of shredded cheddar cheese.
Step 6: Place the top bun halves over the fillings, like putting a blanket over a sleeping child. In a small bowl, mix 2 tablespoons of melted butter with half a teaspoon of garlic powder. Brush this butter mixture all over the bun tops.
Step 7: Cover the dish with foil and bake for 15 minutes. The cheese will melt and everything gets warm and cozy inside. Then remove the foil and bake for 5 to 7 more minutes until the tops turn golden brown and crispy.
Step 8: Take the sliders out of the oven and let them sit for 2 minutes. This resting time keeps them from falling apart when you slice them. Cut into squares and serve warm, with green onion sprinkles if you want.
Cook Time: 25 minutes Total Time: 35 minutes Yield: 12 sliders (serves 6 people) Category: Breakfast, Brunch
Now, here is a fun little question for you: What is your favorite breakfast meat—bacon, sausage, or something else? Share below!
Three Fun Twists to Change Up Your Sliders
Sometimes I like to play with flavors and surprise my family. These three twists are easy and bring new life to the same recipe. Which one would you try first? Comment below!
Veggie Sunrise Sliders: Skip the meat and add sautéed mushrooms, bell peppers, and spinach. Use pepper jack cheese for a little kick. Even meat-lovers ask for this version.
Spicy Southwestern Sliders: Mix in cooked chorizo instead of bacon and sausage. Add a few spoonfuls of salsa and a sprinkle of jalapeño slices on top. Serve with a side of sour cream for dipping.
Fall Harvest Sliders: Swap the meat for crumbled cooked breakfast sausage and add thin apple slices. Use sharp white cheddar and a drizzle of maple syrup on the buns before baking. Tastes like autumn morning on a plate.
What to Serve Alongside Your Sliders
These sliders are hearty enough to stand alone, but I love adding a few extras. A bowl of fresh fruit with orange slices and grapes makes a bright side. Crispy hash browns or roasted potato wedges are always a hit, too.
For drinks, I pour a tall glass of cold milk or apple juice for the kids. Grown-ups enjoy a simple mimosa made with orange juice and sparkling wine. Which would you choose tonight?

Storing Your Sliders Right (So They Taste Good Tomorrow)
These sliders are perfect for a busy morning. But what if you have leftovers? Let me tell you how to store them so they stay soft and tasty. First, let the sliders cool completely on the counter. This keeps them from getting soggy in the fridge.
Wrap each slider tightly in plastic wrap or foil. Then put them all in a big zip-top bag. They will keep in the fridge for three days. I once forgot a batch in the fridge for a whole week. They were still good! That is why wrapping them well matters. It locks in the flavor.
For the freezer, wrap them even tighter. Use a layer of foil and then a freezer bag. They will last for one month. To reheat, pop them in a 350°F oven for 10 minutes. The tops get crispy again. Have you ever tried storing it this way? Share below!
Batch cooking is a lifesaver. Make two pans at once. Freeze one pan for a crazy morning. This matters because it saves you time and stress. You have a hot breakfast ready when you need it most.
Three Common Slider Problems and Easy Fixes
Sometimes things go wrong in the kitchen. That is okay. I have burned my share of sliders. Here are three common issues and how to fix them.
Problem 1: Soggy bottoms. The bun gets wet from the eggs. To fix this, toast the bottom buns for two minutes before adding fillings. It creates a crunchy barrier. I remember when my grandkids called them “mushy sandwiches.” Toasting changed everything. This matters because a crisp bottom makes eating fun.
Problem 2: Dry eggs. Scrambled eggs can turn rubbery if cooked too long. Cook them gently on low heat. Take them off the stove when they are still a little wet. The oven finish will cook them just right. Why this matters: moist eggs keep the whole slider tender.
Problem 3: Burnt tops. The butter topping can burn fast. Check your sliders after five minutes of uncovered baking. Cover with foil if they brown too quickly. Which of these problems have you run into before? Tell me in the comments!
Fixing these small mistakes builds your cooking confidence. You learn to trust your eyes and nose. That is the heart of home cooking.
Your Top Questions Answered
Q: Can I make these gluten-free?
A: Yes. Use gluten-free slider buns and check your sausage label. Everything else is naturally gluten-free.
Q: How far ahead can I make them?
A: Assemble the whole dish the night before. Keep it covered in the fridge. Bake fresh in the morning.
Q: What if I don’t have bacon or sausage?
A: Use leftover ham, turkey, or even cooked crumbled tofu. Any protein works.
Q: How do I double the recipe?
A: Use two 9×13 pans. Do not crowd one pan. Bake them side by side, adding a few extra minutes.
Q: Can I skip the garlic butter topping?
A: Yes, but it adds a golden crunch. Try a sprinkle of sesame seeds instead. Which tip will you try first?
A Warm Goodbye from Chloe
Well, my dear, I hope these sliders bring joy to your table. They are simple to make and full of love. That is what breakfast should be. A meal shared with people you care about.
*Fun fact: Slider buns were invented to be eaten with one hand. That leaves the other hand free for coffee.*
I would love to see your creations. Have you tried this recipe? Tag us on Pinterest! Your photos make my heart smile. Keep cooking with kindness. Happy cooking! —Chloe Hartwell.

Easy Breakfast Sliders Recipe: Easy Breakfast Sliders Recipe for a Crowd
Description
Easy breakfast slider recipe for a crowd, perfect for feeding a hungry group fast. Quick, cheesy, and delicious.
Ingredients
Instructions
- Preheat and Prepare: Preheat your oven to 350°F (175°C) and lightly grease a 9×13-inch baking dish to prevent sticking.
- Arrange Buns: Slice the slider buns in half horizontally and place the bottom halves evenly in the prepared baking dish, creating a base for the layers.
- Mix Eggs: In a bowl, whisk together the eggs, milk, salt, and pepper until well combined for a smooth mixture.
- Cook Scrambled Eggs: Heat a nonstick skillet over medium heat, then pour in the egg mixture and scramble gently until the eggs are just set but still moist.
- Layer Fillings: Spread the scrambled eggs evenly over the bottom bun halves in the baking dish. Sprinkle the chopped bacon and crumbled sausage over the eggs, then top with shredded cheddar cheese.
- Cover with Tops: Place the tops of the slider buns over the layered fillings, covering the ingredients.
- Butter Topping: In a small bowl, combine melted butter and garlic powder; brush this mixture generously over the tops of the slider buns for added flavor and browning.
- Bake Covered: Cover the baking dish with foil and place in the preheated oven; bake for 15 minutes to heat through and melt the cheese.
- Bake Uncovered: Remove the foil and continue baking for an additional 5 to 7 minutes until the tops are golden brown and crispy.
- Serve: Take the sliders out of the oven, allow them to cool slightly for easy handling, then slice and serve warm. Garnish with sliced green onions if desired.


Leave a Reply