

The Apples That Started It All
I have a funny memory of my first pie. I was about twelve, standing on a wobbly stool in my grandma’s kitchen. I peeled apples so slowly my grandmother laughed and said I was “polishing them, not peeling them.” I still laugh at that. The trick is to use a mix of apples, like Granny Smith and Honeycrisp. The tart ones give a little zing, and the sweet ones melt in your mouth.
*Fun fact:* An apple tree can live for over 100 years. Some even keep making fruit for generations! Doesn’t that make you want to plant one?
The Sprinkle That Saves the Day
Right after you slice your apples, splash them with lemon juice. This is a little secret my grandma taught me. It stops the apples from turning brown while you get everything else ready. It adds a tiny bit of shine, too. Think of it like sunscreen for your fruit.
Why this matters: Brown apples won’t taste bad, but the pie won’t look as pretty. And we eat with our eyes first!
The Magic Dust in the Bowl
Now, grab a separate bowl. Mix the sugar, brown sugar, flour, cinnamon, nutmeg, allspice, and salt. Watch how the white and brown sugars swirl together. It smells like a hug in a bowl, doesn’t it? My grandpa used to say the cinnamon was the “warm sweater” of the pie.
Here’s a reader prompt for you: What is a smell that reminds you of a happy time? Think about it while you stir.
Gentle Tossing and a Warm Pan
Pour that sweet dust over your apple slices. Gently toss them with a big spoon until every slice is coated. I like to use my clean hands. It feels like I’m tucking them in. Then, put everything into a big saucepan over medium heat. Add the little cubes of butter. Watch the butter melt and make everything glossy.
Why this matters: Cooking the apples first on the stove makes sure they are soft but not mushy. It helps the pie keep its shape and not get soupy. Trust me, nobody likes a runny pie.
The Sweetest Smell in the Kitchen
Stir the apples now and then for about 10 to 15 minutes. The kitchen will fill with the most wonderful smell. You will hear a soft bubbling sound. That is the syrup thickening and the sugars doing their happy dance. When the apples are soft but still a little firm, take the pan off the heat. Stir in the vanilla extract last. This is like the final bow in a play.
Another reader prompt: Do you like your apple pie with ice cream on top, or just a fork? Tell me what makes it perfect for you.
Waiting Is the Hardest Part
Let the filling cool all the way down. I know it’s hard. You want to scoop it up right away. But if you put hot filling in a pie crust, it will make the crust soggy. Patience gives you a flaky, golden crust. That matters a lot. You can even make this filling a day early and keep it in the fridge.
Doesn’t it feel good to make something from scratch? You just created magic from simple things like flour and apples.
Share the Filling, Share the Love
This filling is not just for pies. You can spoon it over pancakes, ice cream, or oatmeal. You can even put it in little jars and give it as a gift. I once gave a jar to my mailman, and he said it made his whole week.
Here is one last reader prompt: Who is the first person you would share this pie with? A friend? A grandparent? Your mailman? Let me know.
Ingredients:
| Ingredient | Amount | Notes |
|---|---|---|
| Apples (mix of tart and sweet) | 6 cups | Peeled, cored, and sliced; use Granny Smith and Honeycrisp |
| Lemon juice | 1 tablespoon | |
| Granulated sugar | 3/4 cup | |
| Brown sugar | 1/4 cup | Packed |
| All-purpose flour | 1/4 cup | |
| Ground cinnamon | 1 teaspoon | |
| Nutmeg | 1/4 teaspoon | |
| Allspice | 1/8 teaspoon | |
| Salt | 1/8 teaspoon | |
| Unsalted butter | 2 tablespoons | Cubed |
| Vanilla extract | 1 teaspoon |
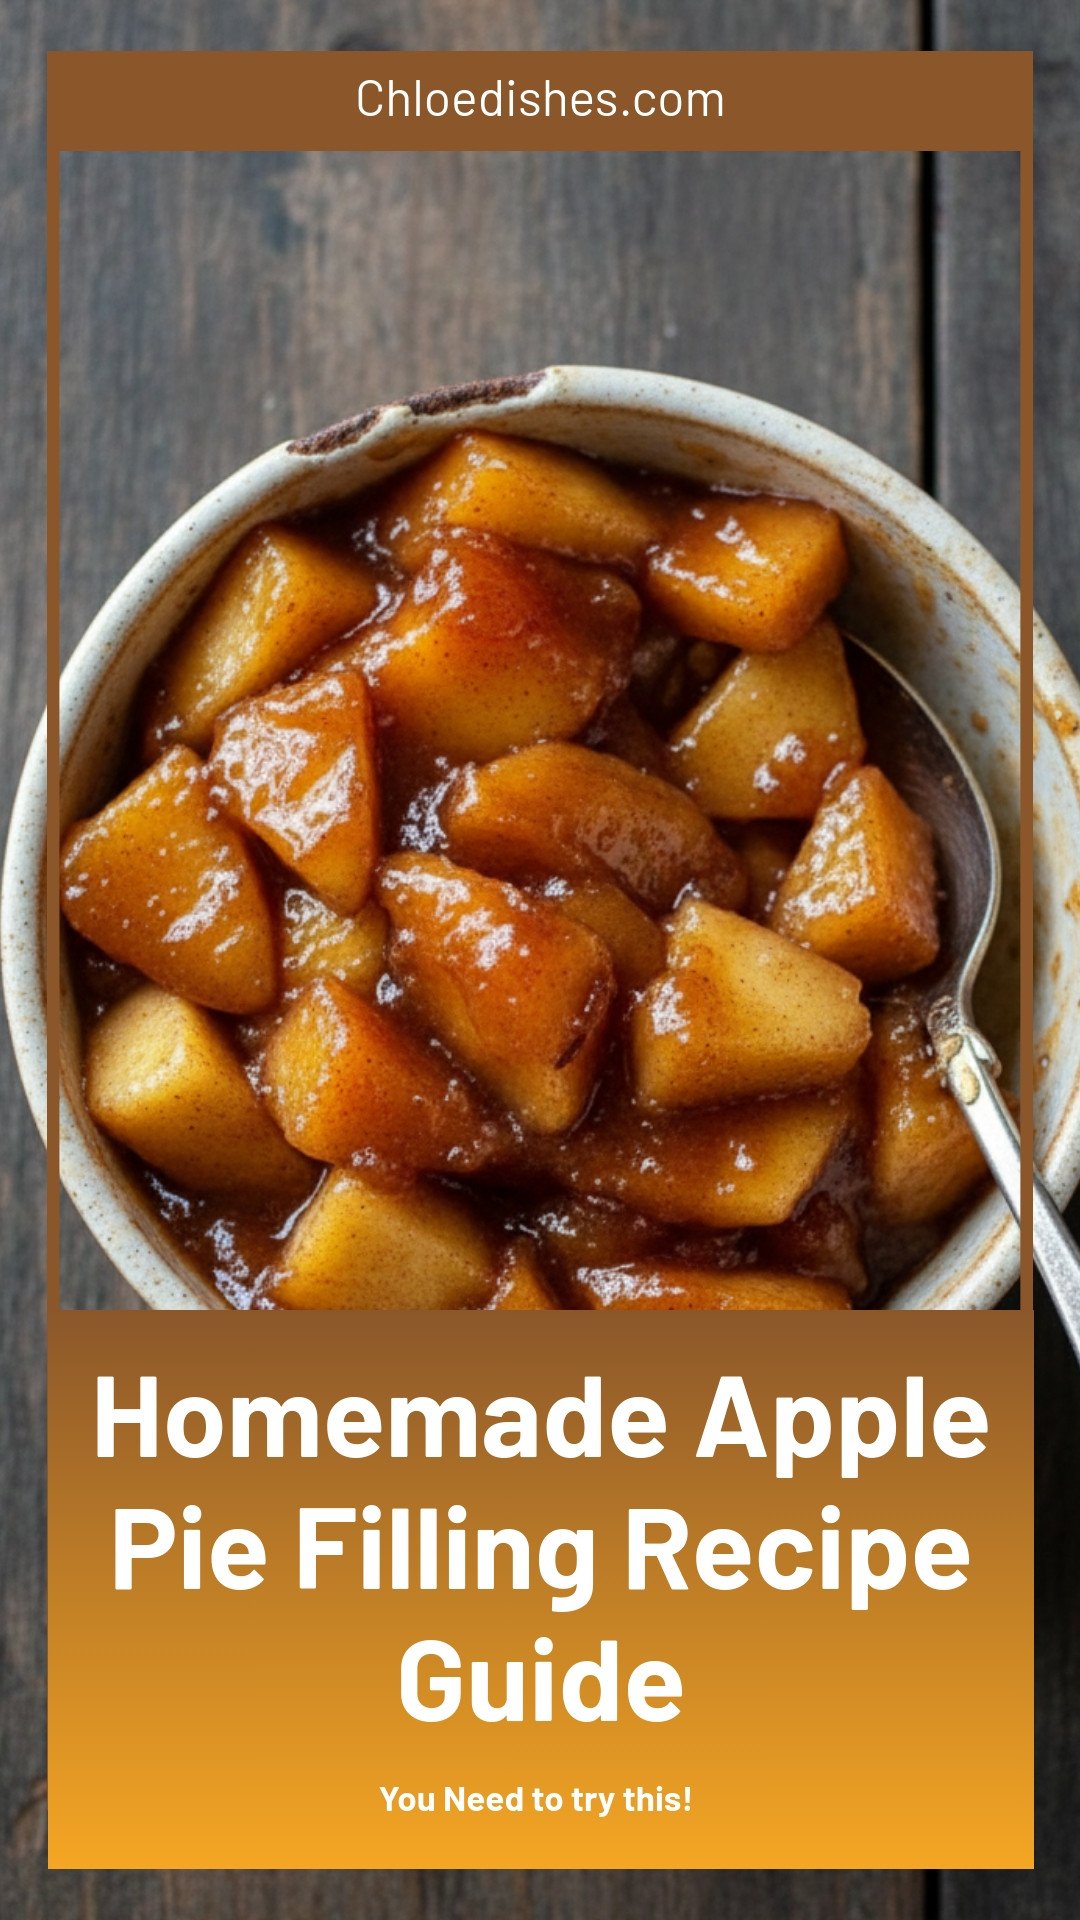
Grandma’s Apple Pie Filling (The One That Never Fails)
My grandmother always said a good pie starts with the filling. I still hear her humming while she stirred a pot of apples on the stove. The smell of cinnamon and sugar would drift through the whole house. Doesn’t that smell amazing? Let me show you how she did it.
Step 1: Start with six cups of peeled, cored, and sliced apples. Use a mix of tart Granny Smith and sweet Honeycrisp for the best flavor. Toss them in a big bowl with one tablespoon of lemon juice. This keeps them from turning brown and adds a little zing.
Step 2: In a separate bowl, whisk together three-quarters cup of granulated sugar, a quarter cup of packed brown sugar, and a quarter cup of all-purpose flour. Add one teaspoon of cinnamon, a quarter teaspoon of nutmeg, an eighth teaspoon of allspice, and an eighth teaspoon of salt. Stir it all up until it looks like cozy magic. (Hard-learned tip: if you skip the salt, the filling tastes flat. Trust me on this one.)
Step 3: Pour the dry mixture over your apples and toss gently with your hands. Make sure every slice gets a sugary coat. I remember licking a bit of the raw mix off my finger once—it was so good I almost didn’t want to cook it. What’s your favorite part of baking? Share below!
Step 4: Transfer the coated apples into a large saucepan over medium heat. Add two tablespoons of cubed unsalted butter. Stir the apples occasionally as the butter melts and the sugar turns into a syrupy glaze. Watch closely so nothing burns on the bottom.
Step 5: Cook the filling for about ten to fifteen minutes. The apples should soften but still hold their shape. The syrup will thicken just a little. Once it looks shiny and smells like heaven, pull it off the heat. Stir in one teaspoon of vanilla extract and let it cool completely before using or storing.
Cook Time: 15 minutes
Total Time: 30 minutes
Yield: enough for one 9-inch pie
Category: Dessert, Pie Filling
Three Fun Twists to Try
Sometimes I like to shake things up a little. These three twists are easy and make the filling feel brand new. Which one would you try first? Comment below!
Maple Walnut: Swap the white sugar for maple syrup and toss in a half cup of chopped walnuts. It tastes like fall in a spoon.
Ginger Pear: Replace half the apples with ripe pears and add a teaspoon of grated fresh ginger. It’s bright and a little bit fancy.
Spiced Berry: Fold in a cup of frozen mixed berries right before cooking. The juices turn the syrup a beautiful purple color.
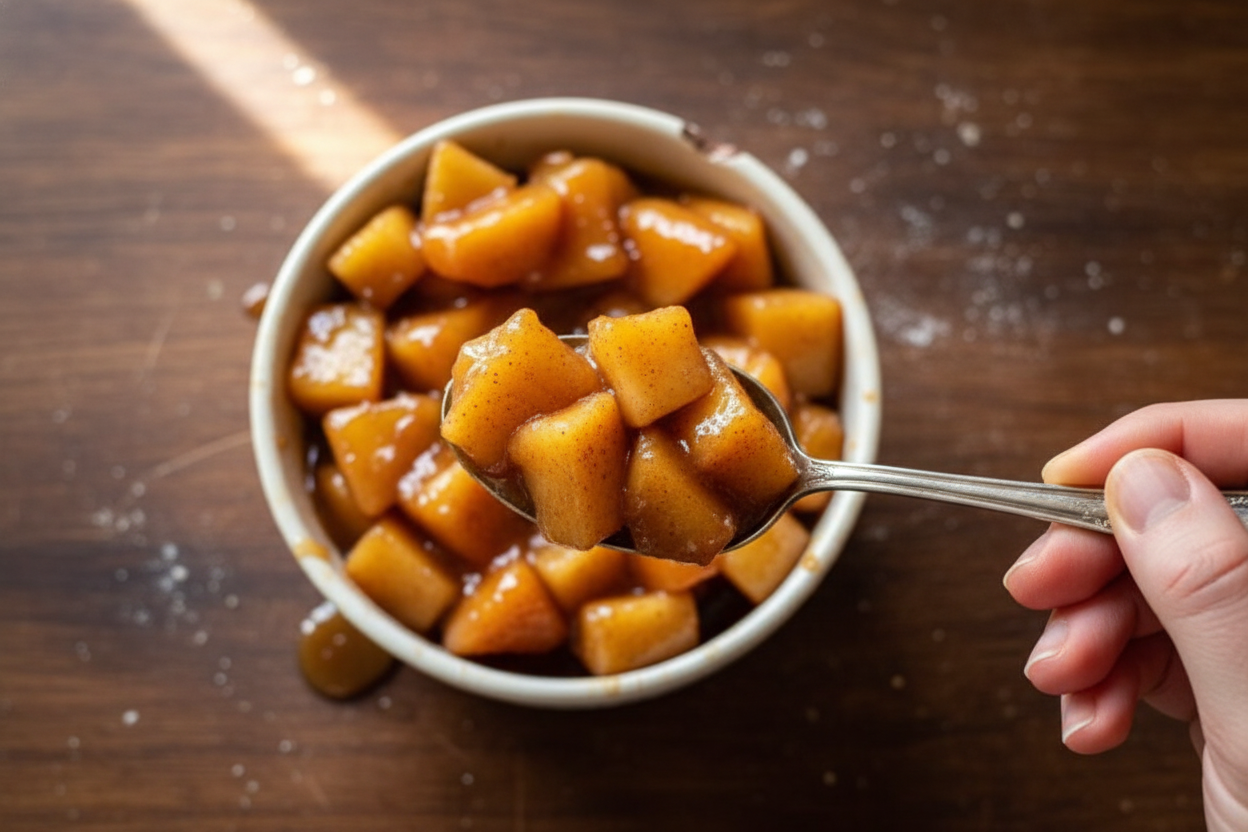
How to Serve This Filling
Of course, you can bake it into a classic double-crust pie. But sometimes I spoon it warm over vanilla ice cream. It also tastes amazing on top of pancakes or stirred into oatmeal for breakfast.
For drinks, pour a tall glass of cold milk—it cuts the sweetness just right. Grown-ups might enjoy a hot mug of spiced apple cider with a splash of bourbon. Which would you choose tonight?

Storing Your Apple Pie Filling
Let me tell you about the first time I made extra filling. I was so proud, I put it straight in the fridge. It lasted a full week, and we had pie on Tuesday and again on Sunday. That was a happy week.
For the fridge, use a tight jar or container. The filling stays good for about 5 to 7 days. For the freezer, let it cool fully first. Then put it in a freezer bag. Lay it flat to save space. This filling will last six months in there.
When you want to use it, do not thaw it on the counter. Put it in the fridge overnight. To reheat, just warm it in a saucepan over low heat. Stir gently so it does not burn. Batch cooking this filling saves you time later. It means you can make pie on a busy Tuesday without a fuss.
Have you ever tried storing it this way? Share below!
Three Common Problems (And Easy Fixes)
I once had a pie that was runny like soup. It broke my heart. The fix is easy: cook the filling a few minutes longer. Let the flour and sugar really thicken up. This matters because a runny pie makes a soggy crust. No one wants a soggy crust.
Another problem is apples that turn to mush. I remember when my apples turned to applesauce. Not good. The fix is to use a mix of tart and sweet apples. Granny Smith holds its shape. Honeycrisp gives sweetness. This matters because nice apple slices make the pie look beautiful and taste better.
Last problem is a filling that tastes flat. The fix is simple. Taste your apples before you add the sugar mix. If they are too tart, add a pinch more sugar. If they are too sweet, add a tiny splash of lemon juice. Cooking is about your taste buds, not just the recipe.
Which of these problems have you run into before?
Your Top 5 Questions Answered
Q: Can I make this gluten-free?
A: Yes. Swap the all-purpose flour for a gluten-free baking flour. It works just the same.
Q: Can I prepare this a day ahead?
A: Absolutely. Make the filling the night before. Keep it in the fridge. Your pie will taste even better.
Q: What if I don’t have allspice?
A: Leave it out. Or add a tiny pinch of ground cloves instead. No need to run to the store.
Q: Can I double this recipe?
A: Yes. Just use a bigger pot. The cooking time stays about the same. Double it for a big family dinner.
Q: Do I have to peel the apples?
A: I think so. Peels get tough when cooked. But if you like them, leave them on. It is your kitchen.
Which tip will you try first?
One Last Slice of Advice
Well, my friend, I hope you try this filling soon. It makes the house smell like love. The best part of cooking is sharing it with people you care about. I would love to see your pie. *Fun fact: The lemon juice keeps apples from turning brown, but it also makes the flavor pop.*
When you make your pie, snap a photo. Share it online. Your kitchen stories mean a lot to me. Have you tried this recipe? Tag us on Pinterest!
Happy cooking!
—Chloe Hartwell
Homemade Apple Pie Filling Recipe Guide
Description
Learn how to make the best homemade apple pie filling with this easy recipe guide. Perfect for canning, baking, and freezing.
Ingredients
Instructions
- Prepare the apples by peeling, coring, and slicing them into uniform pieces. Place the apple slices into a large mixing bowl.
- Sprinkle the apple slices with lemon juice to prevent browning and mix thoroughly.
- In a separate bowl, combine granulated sugar, brown sugar, flour, cinnamon, nutmeg, allspice, and salt. Stir until well blended.
- Pour the dry mixture over the apples and gently toss to ensure the apples are evenly coated with the sugar mixture.
- Transfer the spiced apple mixture into a large saucepan over medium heat.
- Add the cubed butter to the saucepan. Stir the apples occasionally as the butter melts and the sugar mixture begins to create a syrup.
- Cook the apple mixture for about 10-15 minutes or until the apples soften but still maintain their shape and the syrup thickens slightly.
- Remove the saucepan from heat and stir in the vanilla extract.
- Allow the apple pie filling to cool completely before using it in your favorite pie crust or storing it for later use.


Leave a Reply