

The Cake That Started With a Surprise
I still laugh when I remember the first time I made this cake. It was a rainy Tuesday, and I had a bag of cranberries sitting in my fridge. I thought, “What do I do with these?” My neighbor knocked on the door with a big bag of oranges from her tree. That was my sign. I mixed them together, and the smell that filled my kitchen was pure magic. Sometimes the best recipes come from happy accidents. Doesn’t that smell amazing? Tell me about a time you made something wonderful by surprise. This cake is special because it uses both orange juice and orange zest. The zest gives you that bright, punchy flavor. The juice keeps the cake soft and moist. Why does this matter? Because using the whole fruit means nothing gets wasted. Every part of the orange has a job to do.Why This Cake is for Everyone
I love that this cake works for so many different folks. You can use regular milk and butter, or you can swap them for plant-based versions. My friend Sarah has a gluten allergy, so I use a gluten-free 1:1 baking blend. She says it tastes just like the real thing. That makes my heart happy. The trick is to coat your cranberries in a little flour before folding them into the batter. This stops them from sinking to the bottom of the cake. When you take a bite, every slice has little bursts of tart fruit. Why does this matter? Because nobody wants a cake where all the good stuff is hiding at the bottom. We want every single person to get a fair share of the berries. Have you ever made a cake where the fruit sank? I would love to hear your story.My Grandma’s Mixing Secret
Here is a little trick I learned from my grandma. When you add the sugar and orange zest together first, you rub them with your fingers before mixing. This wakes up the oils in the zest. The whole kitchen starts to smell like a sunny grove. It is a simple step, but it makes a big difference. The cake tastes brighter and more orangey. *Fun fact: Orange zest has more flavor oils than the juice itself. That is why a little bit of zest packs such a big punch.* The mixing method here is also special. You beat the butter into the dry ingredients first until it looks like coarse sand. Then you add the wet ingredients in two parts. This helps the cake rise tall and fluffy. It sounds fancy, but it is really just about giving everything time to get along. Do you have a favorite kitchen trick someone taught you?The Frosting That Feels Like a Hug
Now let us talk about the frosting. It is an orange cream cheese buttercream. Cream cheese makes it tangy and not too sweet. The butter makes it smooth and creamy. You beat them together for a full five to ten minutes. That might seem like a long time, but trust me. You want it light and fluffy, like a cloud you can eat. I once forgot to let my cream cheese come to room temperature. The frosting turned out lumpy. I still ate it, but it was not as pretty. So remember: room temperature is your friend. It helps everything blend together smoothly. Why does this matter? Because a lumpy frosting can ruin the whole look of your beautiful cake. But even lumpy, it still tastes good. Would you rather have a perfect-looking cake or a perfect-tasting one? I am curious what you think.Putting It All Together
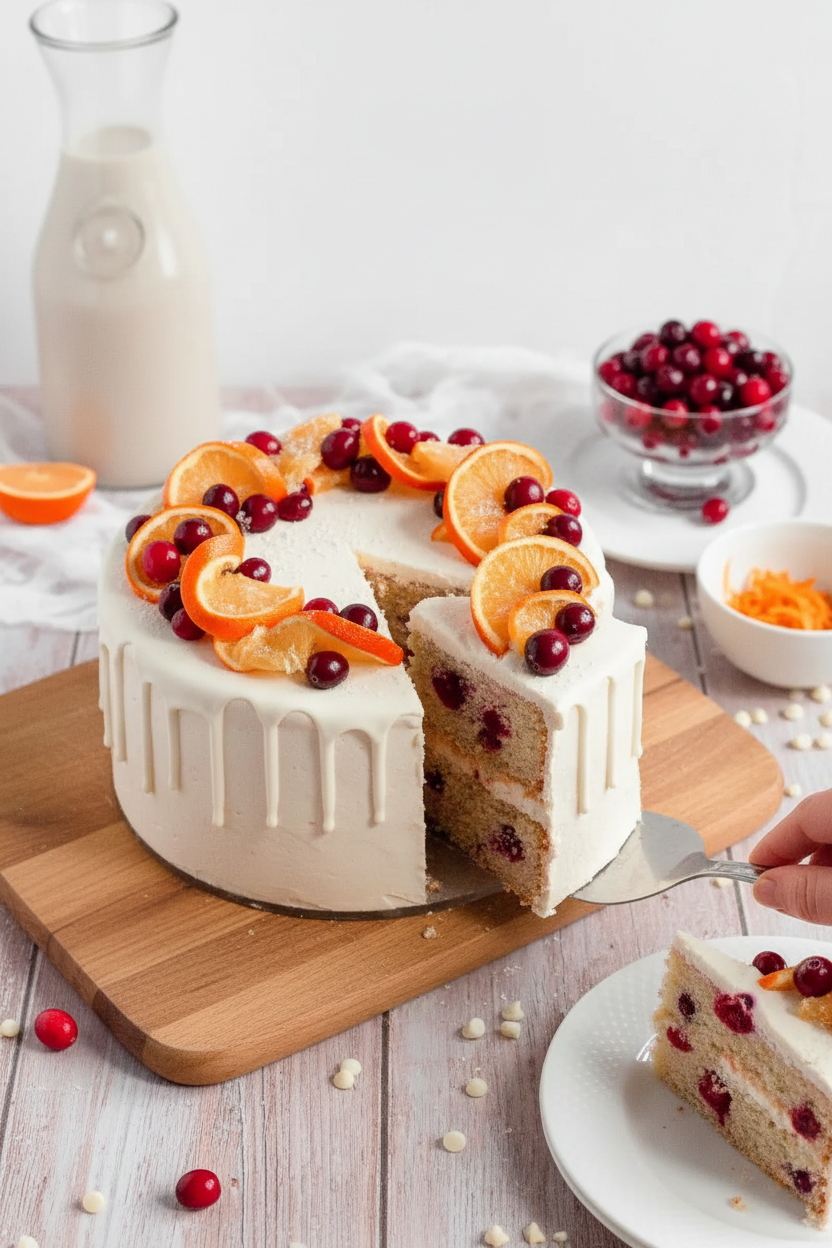
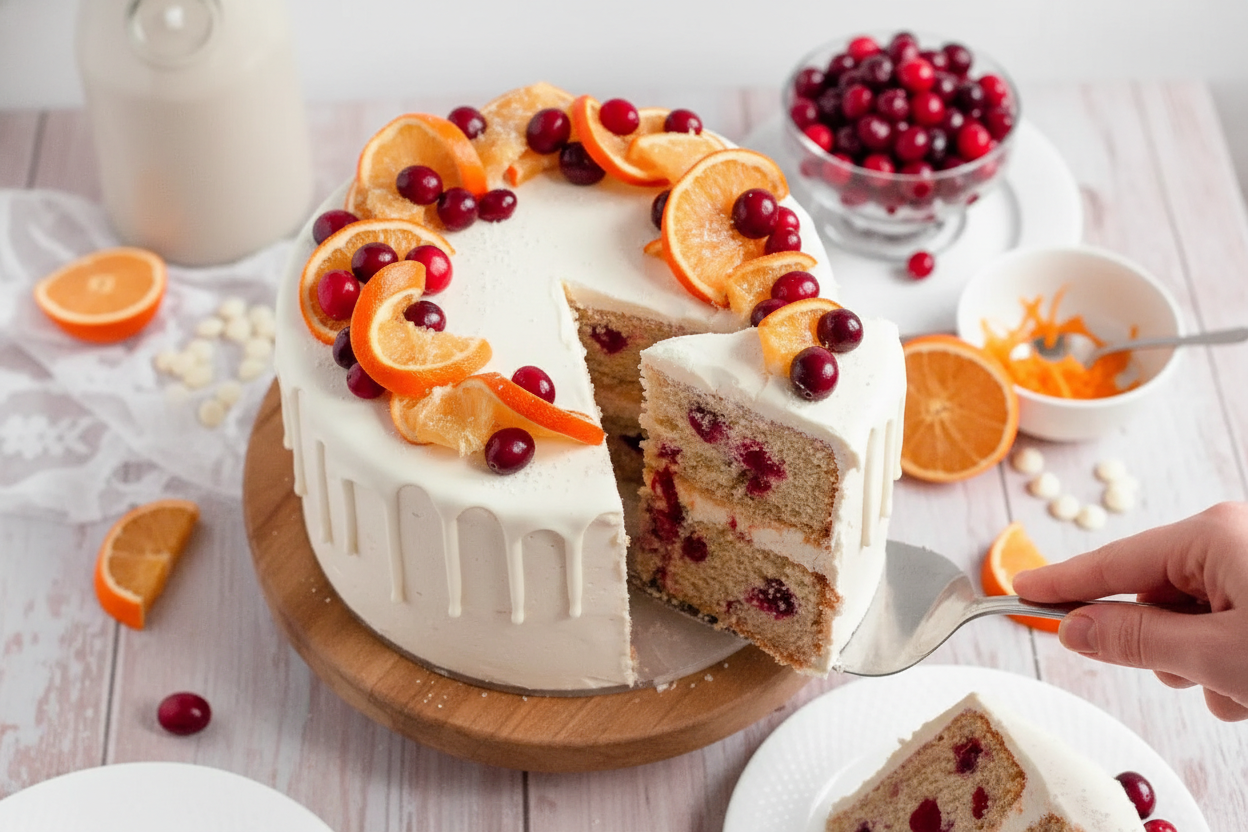
Assembly is my favorite part. You level the cakes so they sit flat. Then you spread a thin crumb coat all over. Pop it in the fridge for ten minutes. That catches all the loose crumbs. Then you add the final layer of buttercream and smooth it until it shines. The white chocolate ganache drip is the final touch. You spoon it gently over the edges and watch it fall in little rivulets. It looks like artwork. I like to top mine with fresh orange slices and a few extra cranberries. Some coarse sanding sugar makes it sparkle like a winter morning. This cake is perfect for holidays, birthdays, or just a Tuesday that needs a little cheer. If you make it, snap a picture and tell me how it turned out. I want to hear all about your kitchen adventures.Ingredients:
| Ingredient | Amount | Notes |
|---|---|---|
| Milk (room temperature) | 3/4 cup | Plant-based or regular |
| Orange juice (freshly squeezed) | 1/2 cup | |
| Vegetable oil | 1/3 cup | |
| Vanilla | 1 tablespoon (15ml) | |
| Large eggs (room temperature) | 3 | |
| Flour (gluten-free 1:1 baking blend or all-purpose) | 3 1/4 cups (390g) | |
| Granulated sugar | 1 3/4 cups (350g) | |
| Baking powder | 1 tablespoon | |
| Fine sea salt | 1 teaspoon | |
| Baking soda | 1/4 teaspoon | |
| Orange zest | 1 tablespoon | |
| Salted butter (room temperature) | 1 cup (227g) | Plant-based or regular |
| Cranberries (coated in 1 tbsp flour) | 2 cups (200g) | |
| Salted butter (room temperature) for buttercream | 1 cup (227g) | Plant-based or regular |
| Cream cheese (room temperature) | 1 package (227g/8oz) | Plant-based or regular |
| Powdered sugar | 5 cups (600g) | |
| Orange zest for buttercream | 1 tablespoon | |
| Fine sea salt for buttercream | 1 teaspoon | |
| White chocolate chips | 1/2 cup (84g) | Plant-based or regular |
| Heavy cream | 2 1/2 tablespoons (37ml) | Plant-based or regular |
| Coarse sanding sugar (optional) | As desired | For decor |
| Cranberries (optional) | As desired | For decor |
| Orange slices (optional) | As desired | For decor |
Why This Cake Feels Like a Hug
I still remember the first time I made this cake. It was a chilly November afternoon, and the whole kitchen smelled like sunshine and Christmas. The cranberries were so tart they made my eyes water, but the orange zest made everything feel cozy. Doesn’t that smell amazing already?
This cake is special because it works for so many people. You can use regular milk or plant-based milk. You can swap the butter for a dairy-free version too. I love that no one has to feel left out when this cake comes to the table. It’s like a big warm hug for everyone.
The white chocolate ganache drip on top looks fancy, but it’s actually super easy. You just pour warm cream over chips and stir. My grandson once tried to lick the bowl before the ganache was ready. I still laugh at that! Just be patient, and it will turn out smooth and shiny.
Let’s Bake Together, Step by Step
I’ll walk you through every part. Take your time, and don’t rush. Baking is meant to be fun, not stressful. Which step do you think is the trickiest? Share below!
Step 1: Preheat your oven to 350°F. Grease two 8-inch round pans with non-stick spray and line the bottoms with parchment paper. This little trick stops your cake from sticking. I learned that the hard way after a very sad cake flipped onto the floor once.
Step 2: In a stand mixer, mix the sugar and orange zest together on medium speed for two minutes. The sugar will pick up all that lovely orange oil and smell like a sunny grove. This is called “sugaring the zest,” and it makes the flavor pop.
Step 3: Add the flour, baking powder, salt, and baking soda to the mixer. Turn it on low. Then add the butter in small chunks. Mix until it looks like coarse sand. (Here’s a hard-learned tip: make sure your butter is really soft, or you’ll get lumps that never go away.)
Step 4: In a separate bowl, whisk together the milk, orange juice, oil, eggs, and vanilla until they are completely combined. Make sure your eggs are room temperature or the batter may curdle. I once cracked cold eggs in and ended up with a lumpy mess.
Step 5: Pour half the liquid into the flour mixture and mix on medium-high for two minutes. Scrape the sides of the bowl well. Then pour in the rest and mix for thirty seconds. Scrape again, then mix for another two minutes. The batter should be smooth and fluffy.
Step 6: Gently fold in the cranberries that you coated in one tablespoon of flour. This keeps them from sinking to the bottom. Divide the batter evenly between your two pans. My aunt always said, “A little extra in each pan makes for a happy cake.”
Step 7: Bake for 40 to 50 minutes. You’ll know they’re done when the edges pull away from the pan, and a toothpick inserted in the center comes out clean. Let them cool in the pans for ten minutes, then move to a wire rack to cool completely. Don’t rush this part!
Step 8: For the buttercream, beat the butter, cream cheese, and orange zest together on high for about five to ten minutes until fluffy. Add the powdered sugar and salt, mix on low, then beat on high for another five minutes. This makes the frosting silky and dreamy.
Step 9: For the ganache drip, put white chocolate chips in a bowl. Heat the heavy cream until bubbles form around the edges. Pour it over the chips and let it sit for five minutes. Stir gently until smooth. If it’s too thick, add a tiny splash more cream.
Step 10: To assemble, level your cooled cakes with a knife. Place one layer on your plate, top with 1½ cups of buttercream, then the second layer. Cover the whole cake with a thin frosting layer and chill for ten minutes. This is the crumb coat, and it makes the final cake look neat.
Step 11: Apply a second, thicker layer of frosting and smooth it out. Chill for another ten minutes. Then drizzle the ganache over the edges with a spoon or squeeze bottle. Chill again. Top with orange slices, cranberries, and sanding sugar if you like. Store leftovers in the fridge for up to five days.
Cook Time: 40–50 minutes
Total Time: about 2 hours (including cooling)
Yield: 1 two-layer cake (about 12 slices)
Category: Dessert, Cake
Three Fun Twists to Try
Sometimes I like to change things up. Here are three ideas that my family loves. Which one would you try first? Comment below!
Lemon-Berry Swap: Replace the orange juice and zest with lemon. Use blueberries instead of cranberries. It tastes like a sunny spring picnic.
Spiced Winter Cake: Add one teaspoon of cinnamon and half a teaspoon of nutmeg to the flour. It makes the cake taste like gingerbread’s sweeter cousin.
Chocolate-Cranberry Dream: Fold in half a cup of mini chocolate chips along with the cranberries. The chocolate melts into little pockets of happiness.
How to Serve and Sip
This cake is a star all by itself, but a few little extras make it even better. Serve a slice with a dollop of whipped cream or a scoop of vanilla ice cream. The cold creaminess balances the tart cranberries perfectly.
For a pretty plate, add a few fresh mint leaves next to the cake. It makes the orange color pop. You can also drizzle a little extra orange sauce on the plate for a fancy touch. My kids always loved licking the plate clean.
For drinks, try a warm cup of spiced apple cider if you want something cozy. Or pour a tall glass of cold oat milk for a simple, sweet match. Grown-ups might enjoy a glass of sparkling white wine. Which would you choose tonight?
Storing Your Cake the Right Way
This cake stays moist for days if you store it right. Pop leftovers in an airtight container and keep them in the fridge. It will be good for up to five days. You can also freeze it for up to six months. Just wrap each slice in plastic wrap, then foil. I once forgot a slice in the freezer for three months. It thawed like a dream, and my grandson ate it for breakfast. Batch baking is a lifesaver for busy weeks. Make two cakes and freeze one for later. It saves time and gives you cake on a rainy Tuesday. Why does this matter? Because you deserve a sweet treat without starting from scratch every time. Have you ever tried storing it this way? Share below!
Common Cake Problems and Quick Fixes
Problem one: the cake sticks to the pan. This happens when you skip the parchment paper. Always line your pans with parchment and use non-stick spray. Problem two: the buttercream is too runny. I remember when my first batch turned into soup. I had used warm cream cheese by accident. Make sure your butter and cream cheese are cool, not hot. Problem three: the cake sinks in the middle. That means your oven is too cool. Use an oven thermometer to check the temperature. Why do these fixes matter? They turn a sad mess into a proud, beautiful cake. Fixing these little things builds your cooking confidence. Which of these problems have you run into before?
Here is a fun fact: fresh cranberries float in batter. That is why you coat them with flour first. It keeps them spread evenly through the cake.
Your Top 5 Questions Answered
Q: Can I make this cake gluten-free? A: Yes, use a 1:1 gluten-free baking blend. It works perfectly every time.
Q: Can I make it dairy-free? A: Yes, swap the butter and milk for plant-based versions. Use dairy-free cream cheese too.
Q: Can I bake this ahead of time? A: Yes, bake the cakes a day early. Cool them, wrap in plastic, and frost the next day.
Q: Can I use frozen cranberries? A: Yes, but do not thaw them first. Toss them frozen in flour before adding to the batter.
Q: Can I cut the recipe in half? A: Yes, use a single 8-inch pan and check for doneness after 25 minutes. Which tip will you try first?
A Warm Farewell From My Kitchen to Yours
I hope this cake brings you as much joy as it brings my family. I love hearing how your bakes turn out. Take a photo of your beautiful creation and share it with us. Have you tried this recipe? Tag us on Pinterest! Your kitchen is your happy place, and mistakes are just learning steps. Keep baking, keep sharing, and keep making memories around the table. Happy cooking! —Chloe Hartwell.
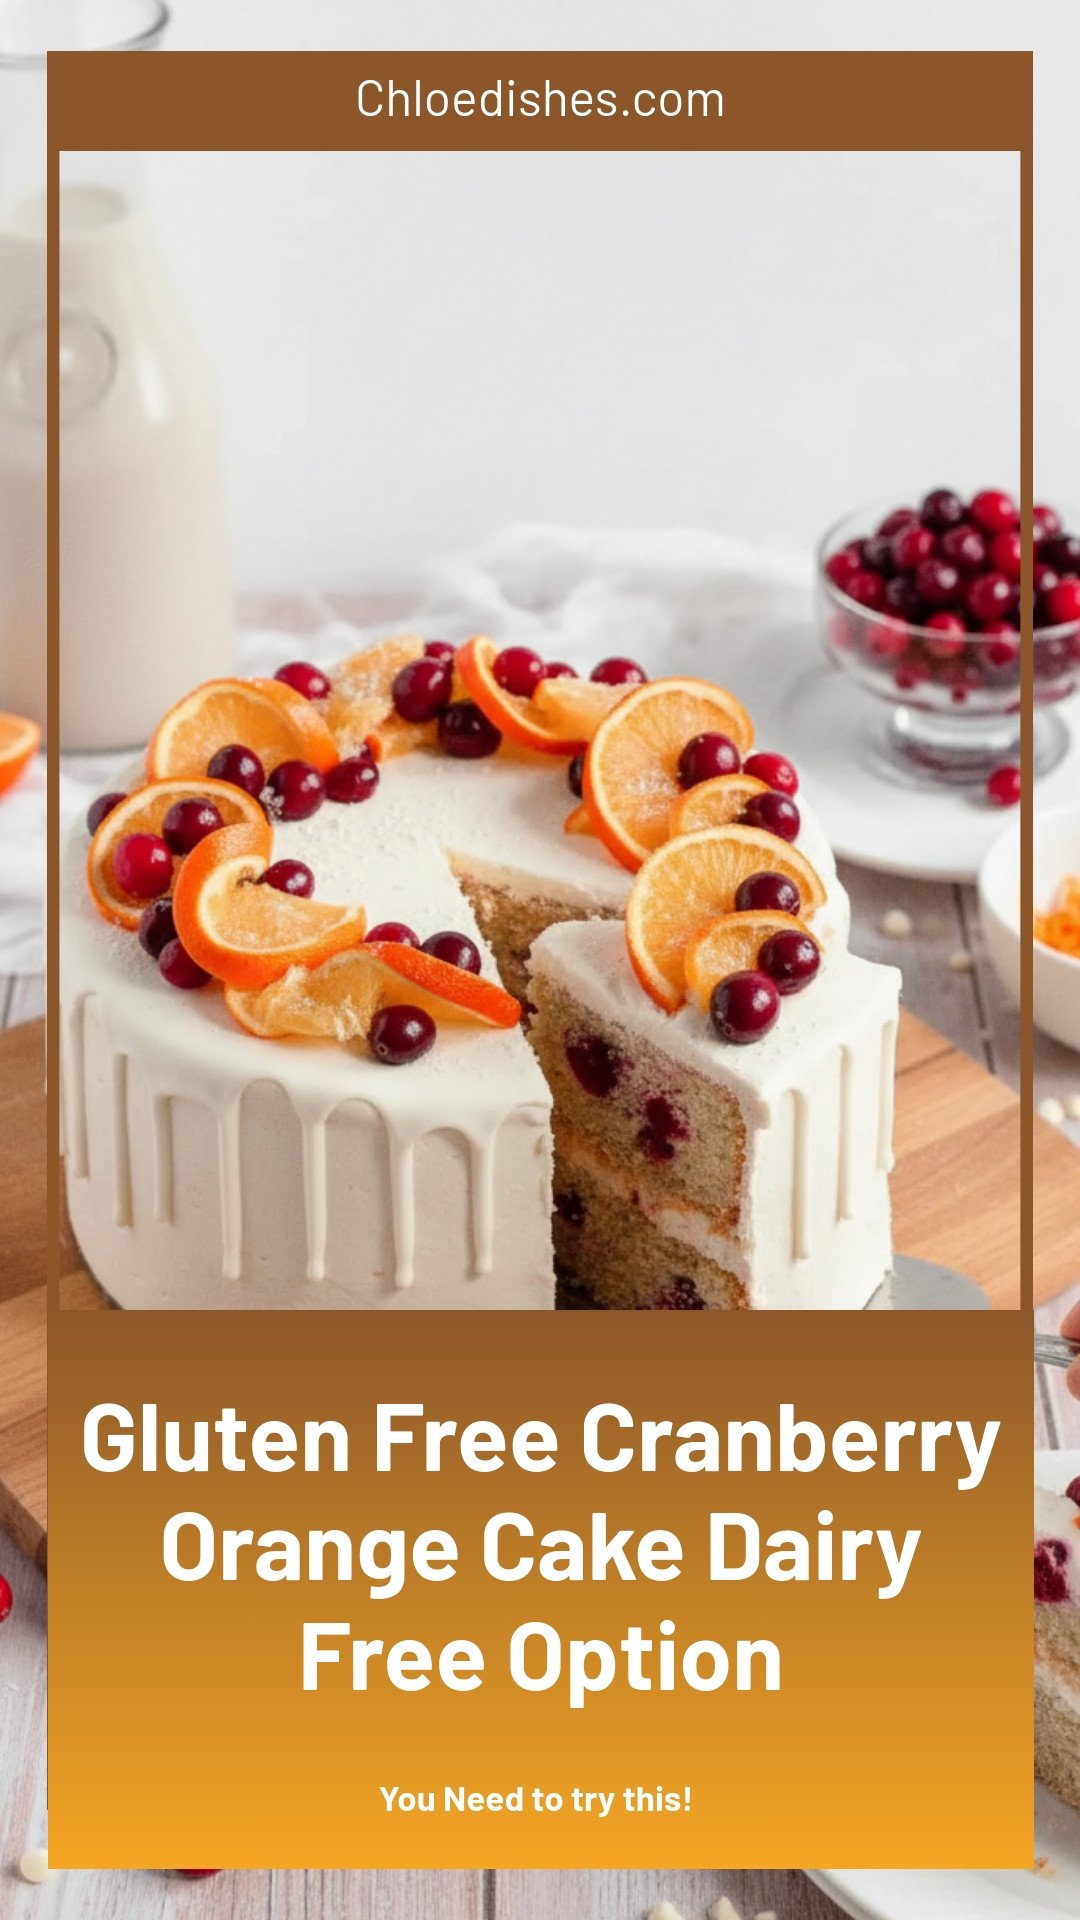
Gluten Free Cranberry Orange Cake Dairy Free Option
Description
This moist gluten free cranberry orange cake is perfect for the holidays with a dairy free option.
Ingredients
1 cup (227g) salted butter, room temperature *plant-based or regular
1/2 cup (84g) white chocolate chips *plant-based or regular
Instructions
- Add the granulated sugar and orange zest into the stand mixer and mix on medium for 2 minutes.
- Measure in the flour, baking powder, salt, and baking soda and begin to mix on low.
- Add the butter, in small chunks, to the mixer and mix on low until a coarse sand-like texture is achieved.
- In a bowl or large measuring cup, combine the milk, orange juice, oil, eggs, and vanilla extract and whisk together vigorously until fully combined and smooth.
- Slowly pour in half of the liquid mixture and mix on medium-high for 2 minutes. Scrape down the sides of the bowl.
- Pour in the remaining half of the liquid mixture and mix for 30 seconds. Scrape down the sides of the bowl. Mix on medium-high for another 2 minutes.
- Gently fold the flour-coated cranberries into the cake batter and divide evenly into the prepared cake pans.
- Bake for approximately 40-50 minutes or until the edges pull away from the pan and are lightly golden brown, the top springs back to the touch, and a toothpick inserted in the center comes out clean.
- Remove from the oven and allow to cool in the pans for 10 minutes before removing to fully cool.
- Add in the powdered sugar and salt and mix on low until combined.
- Turn the mixer on high and allow it to beat for 5 minutes.
- If not using the buttercream immediately, cover it with plastic wrap and place it in the fridge.
- Heat the heavy cream in the microwave or stovetop until it bubbles around the edges.
- Pour the heavy cream over the chocolate chips and allow it to sit for 5 minutes.
- Gently stir the heavy cream and white chocolate chips until fully combined and smooth.
- Place one cake layer on a plate, board, or turntable. Top with approximately 1½ cups of buttercream. Top with the remaining layer.
- Cover the outside of the cake with a thin layer of buttercream and chill in the refrigerator for 10 minutes.
- Cover the cake with a second layer of buttercream and smooth the sides and top with an offset spatula or cake smoother tool. Place in the fridge to chill for another 10 minutes. Prepare the chocolate ganache at this time.
- Drip the chocolate ganache over the edges of the cake with a spoon, piping bag, or squeeze bottle. Place back in the fridge to chill for another 10 minutes.
- Top the cake with orange slices, fresh cranberries, and coarse sanding sugar if desired. Enjoy! Leftover cake should be stored in an airtight container in the fridge for up to 5 days or frozen for up to 6 months.


Leave a Reply