
Filling the Jar
Take a clean one-quart jar. Put your lemon quarters inside. Pour vodka over them until the jar is full. If you want sweetness, add one or two tablespoons of superfine sugar. It dissolves faster than regular sugar. Screw the lid on tight. Shake it gently to mix the sugar. Then put the jar in a cool, dark spot. I use my pantry. A cupboard works too. Just keep it out of sunlight. Do you have a special spot in your kitchen for things like this? I’d love to hear where you store your jars.The Waiting Game
Now you wait. Let it rest for seven to ten days. I know that sounds long. But the flavor needs time to grow. Think of it like waiting for a garden to bloom. After a week, take a tiny taste. Dip a clean spoon and try it. If you want more lemon, let it sit two or three more days. Keep tasting. When it’s perfect for you, move to the next step. Why this matters: Waiting lets the lemon oils and vodka become friends. Rushing gives you weak flavor. Patience gives you something special.Time to Strain and Bottle
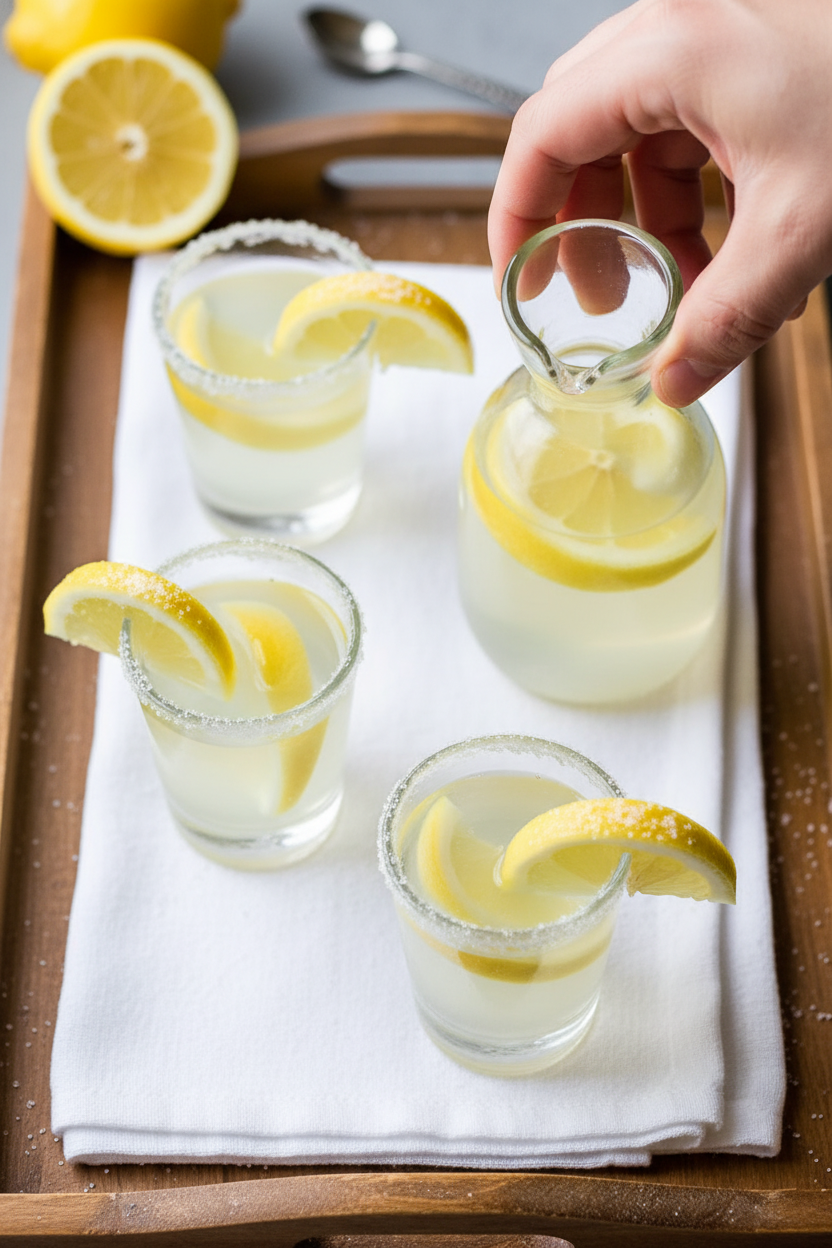
Once your vodka tastes like happy lemons, it’s time to strain. Place a fine-mesh strainer over a bowl or pitcher. Pour everything through. The lemon quarters will stay behind. Pour the clean lemon vodka into a pretty bottle. I use an old glass bottle with a cork. It feels fancy. You can refrigerate it or keep it in the pantry. It stays good for months. Have you ever made your own flavored drink before? What would you try next?How to Enjoy It
This lemon vodka is lovely chilled, all by itself. Pour a small glass over ice. Or mix it with soda water for a light, bubbly drink. Add a slice of fresh lemon if you’re feeling fancy. I also use it in baking. A splash in lemon cake batter? Yes, please. Or drizzle it over fresh fruit for adult dessert. Just remember, it still has alcohol. So save it for grown-up treats. Tell me: would you sip it cold, or bake with it? I’m curious what you’d choose.Ingredients:
| Ingredient | Amount | Notes |
|---|---|---|
| Vodka | 1 pint | |
| Lemons | 3 | |
| Superfine sugar | 1-2 tablespoons |
My Very First Lemon Vodka
I still remember the first time I made lemon vodka. My grandmother handed me a jar of sunshine, and I thought she had bottled summer itself. Doesn’t that smell amazing? This simple recipe is perfect for a rainy afternoon when you want to make something bright. You only need three ingredients and a little patience. Let me walk you through it like I would for my own grandkid.
First, find a clean one-quart jar, like a pickle jar washed well. If you have a bigger or smaller jar, just change the amount of vodka and lemons to fit. Imagine the lemons hugging the vodka inside, getting cozy. Step 1: Wash three lemons under cool water, scrubbing away any dirt. Then slice off the hard ends and cut each lemon into four wedges. I sometimes sneak a sniff of the lemons, closing my eyes.
Step 2: Pop those lemon wedges into your jar, squeezing them just a little. Fill the jar to the top with vodka. If you like a touch of sweetness, add one to two tablespoons of superfine sugar now. It dissolves faster than regular sugar, trust me on this. (Hard-learned tip: Regular sugar will settle at the bottom like stubborn sand, so use superfine or give it a good daily shake.)
Step 3: Screw the lid on tightly, then shake it gently to help the sugar mix. Place the jar in a cool, dark spot, like a pantry or a cupboard. Now, the hardest part is waiting. Let it sit for one week, then take a tiny taste. Do you like a strong lemon punch, or a subtle hint? Share below! If it tastes too weak, let it sit a few more days until it’s just right.
Step 4: Once the lemon flavor makes you smile, strain the vodka through a fine sieve or cheesecloth. Throw away the sad, used lemon wedges. Pour your golden lemon vodka into a clean bottle. I love watching it catch the light. That is it — you made your own homemade lemon vodka, perfect for sharing stories.
Cook Time: 5 minutes prep
Total Time: 7 to 10 days
Yield: 1 pint
Category: Beverages, Homemade Liqueur
Three Fun Twists to Try
Once you master the basic lemon vodka, you can play around. This is where the kitchen becomes your playground. I once added a sprig of rosemary by accident, and it was a happy mistake. These twists are simple and fun for curious taste buds.
Spicy Lemon Kick: Drop in a small sliced jalapeño or three black peppercorns. The heat sneaks up on you like a tiny surprise party. Great for brave adults.
Herb Garden Twist: Add a handful of fresh thyme or a big sprig of lavender. It smells like a summer garden after rain. My neighbor calls this her “afternoon sipping” favorite.
Sweet Berry Lemon: Toss in a handful of fresh raspberries or strawberries along with the lemons. It turns the vodka a pretty pink and tastes like candy. Kids love watching the color change. Which one would you try first? Comment below!
Serving Ideas and Pairings
This lemon vodka is a star all on its own, but it loves company. Serve it chilled in a small glass over ice, with a thin lemon wheel floating on top. For a fancy touch, add a sprig of mint or a sugared rim. It feels like a party in your mouth.
For a grown-up drink, mix it with sparkling water and a splash of elderflower cordial. For a family-friendly option, use the lemon vodka to drizzle over vanilla ice cream (the alcohol cooks off, leaving only flavor). My grandkids beg for that dessert. Which would you choose tonight?
Storing Your Lemon Vodka for Best Flavor
Once your lemon vodka is ready, store it in the fridge. A cold bottle keeps the bright taste fresh for months. I keep mine right next to the pickle jar. You can also freeze it. Vodka does not freeze solid, but it gets nice and chilly. That makes it perfect for a cold sip on a hot day. I once left a bottle in the freezer for a month. It tasted even better and smoother. For reheating, you do not really reheat this drink. But you can use it in warm tea or a hot toddy. Just stir a splash into your mug.
Batch cooking is easy here. Make two jars at once. One for sipping, one for gifts. It saves time and spreads joy. Have you ever tried storing it this way? Share below! Storing your own lemon vodka matters because you control the sugar and lemon flavor. You skip the store brands that use fake stuff. It feels good to make something pure and simple yourself.
Three Common Problems and Easy Fixes
Problem one: your vodka tastes too bitter. That happens when you include the white pith. Next time, peel the lemons first. Use only the yellow zest and the juicy inside. I did this wrong my first time. My vodka tasted like a sour old shoe. Problem two: the flavor is too weak. You did not let it sit long enough. Give it a full two weeks. Taste it every few days until it sings. Problem three: sugar sinks to the bottom. Just shake the jar every day. That mixes it all up evenly.
Fixing these issues makes you a better cook. Why does this matter? First, you learn to trust your taste buds. You become the boss of your own kitchen. Second, you save money by not throwing out a failed batch. Every fix builds your confidence. Which of these problems have you run into before? I remember when I forgot to shake the sugar. My first sip was plain vodka, and the last sip was syrupy sweet. Now I shake like a maraca player.
*Fun fact: Lemon vodka was a favorite of sailors. They used it to prevent scurvy on long trips.*
Five Quick Questions About Lemon Vodka
Q: Is this recipe gluten-free?
A: Yes, pure vodka made from potatoes or grains is gluten-free. Always check the label to be sure.
Q: Can I make this ahead?
A: Yes. It tastes better after resting for two weeks. Make it a month before a party.
Q: Can I swap the sugar for honey?
A: Yes. Use 2 tablespoons of honey instead. Shake well to dissolve it.
Q: How do I scale the recipe?
A: Use one lemon for every cup of vodka. Adjust your jar size to fit.
Q: Any optional tips?
A: Add a sprig of rosemary or a vanilla bean for a fancy twist. Which tip will you try first?
A Warm Send-Off From Chloe
I hope you enjoy making your own lemon vodka. It feels like capturing sunshine in a bottle. Share your photos with me. Tag us on Pinterest so I can see your creation. Every batch is a little story. Have you tried this recipe? Tag us on Pinterest! Remember, the best cooking happens when you take your time. Be patient, taste often, and share with people you love. Happy cooking!
—Chloe Hartwell.

Homemade Lemon Vodka Recipe Guide
Description
Learn how to make homemade lemon vodka with this easy recipe guide. Perfect for cocktails and gifts!
Ingredients
Instructions
- For this recipe, the ingredients are based on a one-quart container. However, if you have a different size vessel, simply adjust the amount of vodka and lemons accordingly.
- Wash the lemons. Once the lemons are clean, cut off the ends and quarter them.
- Put the lemons in the container. Fill to the top with vodka. If you’re adding sugar, include it now. You can shake it all up to allow for even distribution after you seal it. Seal the jar tightly and place it in a cool, dark location.
- Let your lemon vodka rest for a week to 10 days. Then, give it a taste to see if it’s lemony enough for you. If you’d like it to have a stronger lemon flavor, let it sit a few days longer until it reaches the lemon level you’re looking for. Once it gets there, strain the vodka, discard the lemon quarters and rebottle your vodka.
Notes
- Nutrition information is not provided in the text.
Why I Love Making Lemon Vodka
I first made lemon vodka one rainy afternoon. My grandma had a big jar of it under her sink. She called it “sunshine in a bottle.” I still laugh at that memory. This recipe is simple, but special. You only need three things: vodka, lemons, and a little sugar. It tastes like summer, even in winter. Doesn’t that smell amazing? *Fun fact: People have been flavoring vodka with fruit for hundreds of years. It started in Eastern Europe as a way to make plain vodka taste better.*Picking Your Lemons
Go for bright yellow lemons that feel heavy in your hand. Heavy means juicy. I once used sad, old lemons from the back of my fridge. The vodka tasted flat. Lesson learned! Wash them well. You’ll be soaking the peels in the vodka. Soap or dirt would ruin the flavor. Cut off the ends and quarter each lemon. This lets the oils come out slowly. Why this matters: The lemon peel has oils that give the vodka its bright taste. The white pith can make it bitter if you let it sit too long. So we watch it closely.Filling the Jar
Take a clean one-quart jar. Put your lemon quarters inside. Pour vodka over them until the jar is full. If you want sweetness, add one or two tablespoons of superfine sugar. It dissolves faster than regular sugar. Screw the lid on tight. Shake it gently to mix the sugar. Then put the jar in a cool, dark spot. I use my pantry. A cupboard works too. Just keep it out of sunlight. Do you have a special spot in your kitchen for things like this? I’d love to hear where you store your jars.The Waiting Game
Now you wait. Let it rest for seven to ten days. I know that sounds long. But the flavor needs time to grow. Think of it like waiting for a garden to bloom. After a week, take a tiny taste. Dip a clean spoon and try it. If you want more lemon, let it sit two or three more days. Keep tasting. When it’s perfect for you, move to the next step. Why this matters: Waiting lets the lemon oils and vodka become friends. Rushing gives you weak flavor. Patience gives you something special.Time to Strain and Bottle
Once your vodka tastes like happy lemons, it’s time to strain. Place a fine-mesh strainer over a bowl or pitcher. Pour everything through. The lemon quarters will stay behind. Pour the clean lemon vodka into a pretty bottle. I use an old glass bottle with a cork. It feels fancy. You can refrigerate it or keep it in the pantry. It stays good for months. Have you ever made your own flavored drink before? What would you try next?How to Enjoy It
This lemon vodka is lovely chilled, all by itself. Pour a small glass over ice. Or mix it with soda water for a light, bubbly drink. Add a slice of fresh lemon if you’re feeling fancy. I also use it in baking. A splash in lemon cake batter? Yes, please. Or drizzle it over fresh fruit for adult dessert. Just remember, it still has alcohol. So save it for grown-up treats. Tell me: would you sip it cold, or bake with it? I’m curious what you’d choose.Ingredients:
| Ingredient | Amount | Notes |
|---|---|---|
| Vodka | 1 pint | |
| Lemons | 3 | |
| Superfine sugar | 1-2 tablespoons |
My Very First Lemon Vodka
I still remember the first time I made lemon vodka. My grandmother handed me a jar of sunshine, and I thought she had bottled summer itself. Doesn’t that smell amazing? This simple recipe is perfect for a rainy afternoon when you want to make something bright. You only need three ingredients and a little patience. Let me walk you through it like I would for my own grandkid.
First, find a clean one-quart jar, like a pickle jar washed well. If you have a bigger or smaller jar, just change the amount of vodka and lemons to fit. Imagine the lemons hugging the vodka inside, getting cozy. Step 1: Wash three lemons under cool water, scrubbing away any dirt. Then slice off the hard ends and cut each lemon into four wedges. I sometimes sneak a sniff of the lemons, closing my eyes.
Step 2: Pop those lemon wedges into your jar, squeezing them just a little. Fill the jar to the top with vodka. If you like a touch of sweetness, add one to two tablespoons of superfine sugar now. It dissolves faster than regular sugar, trust me on this. (Hard-learned tip: Regular sugar will settle at the bottom like stubborn sand, so use superfine or give it a good daily shake.)
Step 3: Screw the lid on tightly, then shake it gently to help the sugar mix. Place the jar in a cool, dark spot, like a pantry or a cupboard. Now, the hardest part is waiting. Let it sit for one week, then take a tiny taste. Do you like a strong lemon punch, or a subtle hint? Share below! If it tastes too weak, let it sit a few more days until it’s just right.
Step 4: Once the lemon flavor makes you smile, strain the vodka through a fine sieve or cheesecloth. Throw away the sad, used lemon wedges. Pour your golden lemon vodka into a clean bottle. I love watching it catch the light. That is it — you made your own homemade lemon vodka, perfect for sharing stories.
Cook Time: 5 minutes prep
Total Time: 7 to 10 days
Yield: 1 pint
Category: Beverages, Homemade Liqueur
Three Fun Twists to Try
Once you master the basic lemon vodka, you can play around. This is where the kitchen becomes your playground. I once added a sprig of rosemary by accident, and it was a happy mistake. These twists are simple and fun for curious taste buds.
Spicy Lemon Kick: Drop in a small sliced jalapeño or three black peppercorns. The heat sneaks up on you like a tiny surprise party. Great for brave adults.
Herb Garden Twist: Add a handful of fresh thyme or a big sprig of lavender. It smells like a summer garden after rain. My neighbor calls this her “afternoon sipping” favorite.
Sweet Berry Lemon: Toss in a handful of fresh raspberries or strawberries along with the lemons. It turns the vodka a pretty pink and tastes like candy. Kids love watching the color change. Which one would you try first? Comment below!
Serving Ideas and Pairings
This lemon vodka is a star all on its own, but it loves company. Serve it chilled in a small glass over ice, with a thin lemon wheel floating on top. For a fancy touch, add a sprig of mint or a sugared rim. It feels like a party in your mouth.
For a grown-up drink, mix it with sparkling water and a splash of elderflower cordial. For a family-friendly option, use the lemon vodka to drizzle over vanilla ice cream (the alcohol cooks off, leaving only flavor). My grandkids beg for that dessert. Which would you choose tonight?
Storing Your Lemon Vodka for Best Flavor
Once your lemon vodka is ready, store it in the fridge. A cold bottle keeps the bright taste fresh for months. I keep mine right next to the pickle jar. You can also freeze it. Vodka does not freeze solid, but it gets nice and chilly. That makes it perfect for a cold sip on a hot day. I once left a bottle in the freezer for a month. It tasted even better and smoother. For reheating, you do not really reheat this drink. But you can use it in warm tea or a hot toddy. Just stir a splash into your mug.
Batch cooking is easy here. Make two jars at once. One for sipping, one for gifts. It saves time and spreads joy. Have you ever tried storing it this way? Share below! Storing your own lemon vodka matters because you control the sugar and lemon flavor. You skip the store brands that use fake stuff. It feels good to make something pure and simple yourself.
Three Common Problems and Easy Fixes
Problem one: your vodka tastes too bitter. That happens when you include the white pith. Next time, peel the lemons first. Use only the yellow zest and the juicy inside. I did this wrong my first time. My vodka tasted like a sour old shoe. Problem two: the flavor is too weak. You did not let it sit long enough. Give it a full two weeks. Taste it every few days until it sings. Problem three: sugar sinks to the bottom. Just shake the jar every day. That mixes it all up evenly.
Fixing these issues makes you a better cook. Why does this matter? First, you learn to trust your taste buds. You become the boss of your own kitchen. Second, you save money by not throwing out a failed batch. Every fix builds your confidence. Which of these problems have you run into before? I remember when I forgot to shake the sugar. My first sip was plain vodka, and the last sip was syrupy sweet. Now I shake like a maraca player.
*Fun fact: Lemon vodka was a favorite of sailors. They used it to prevent scurvy on long trips.*
Five Quick Questions About Lemon Vodka
Q: Is this recipe gluten-free?
A: Yes, pure vodka made from potatoes or grains is gluten-free. Always check the label to be sure.
Q: Can I make this ahead?
A: Yes. It tastes better after resting for two weeks. Make it a month before a party.
Q: Can I swap the sugar for honey?
A: Yes. Use 2 tablespoons of honey instead. Shake well to dissolve it.
Q: How do I scale the recipe?
A: Use one lemon for every cup of vodka. Adjust your jar size to fit.
Q: Any optional tips?
A: Add a sprig of rosemary or a vanilla bean for a fancy twist. Which tip will you try first?
A Warm Send-Off From Chloe
I hope you enjoy making your own lemon vodka. It feels like capturing sunshine in a bottle. Share your photos with me. Tag us on Pinterest so I can see your creation. Every batch is a little story. Have you tried this recipe? Tag us on Pinterest! Remember, the best cooking happens when you take your time. Be patient, taste often, and share with people you love. Happy cooking!
—Chloe Hartwell.


Leave a Reply