
The Cookie That Started It All
My grandmother made these cookies every Sunday afternoon. The whole house would smell like butter and sugar. I still remember peeking into the oven, watching the edges turn golden. She never wrote the recipe down. She just knew it by heart. When I asked her for it, she laughed and said, “Watch my hands, honey.” I still laugh at that memory. Have you ever watched someone you love cook from memory? What did they make?Why Butter Matters So Much
You need one cup of unsalted butter at room temperature. That part is important. If the butter is too cold, the dough won’t mix right. If it’s too soft, the cookies will spread flat. Room temperature butter traps air when you beat it. That air makes the cookies light and puffy. *Fun fact: One stick of butter has about the same amount of water as half a banana.* Doesn’t that smell amazing when you open the wrapper? That buttery smell is pure comfort.Sugar Helps You Get the Perfect Chew
This recipe uses two kinds of sugar. Granulated sugar makes the edges crispy. Light-brown sugar keeps the center soft and chewy. Together, they give you that perfect bite. I once tried making these with only white sugar. The cookies came out hard like crackers. My husband still teases me about it. That is why this matters: the right blend of sugars gives you the texture you crave. What texture do you like best? Crunchy edges or soft centers?Mix Gently, Not Too Much
When you add the flour, mix just until you can’t see it anymore. If you keep stirring, the dough gets tough. The cookies will turn out hard instead of tender. My friend Sarah used to beat her cookie dough for five full minutes. She wondered why they came out like rocks. This is why it matters: overmixing wakes up the gluten, which makes baked goods chewy and tough. Have you ever overmixed something by accident? I sure have.The Chocolate Chip Secret
You can use semisweet chips, milk chocolate chips, or a mix of both. I like to use half and half. The dark chips add a little bitter taste, while the milk chips keep it sweet. Fold them in with a wooden spoon. Don’t use the mixer for this step. You want the chips to stay whole, not get crushed. I always sneak a few chips before they go in the oven. Don’t you? If you could pick only one kind of chocolate chip, which one would it be?Watch Them Like a Hawk
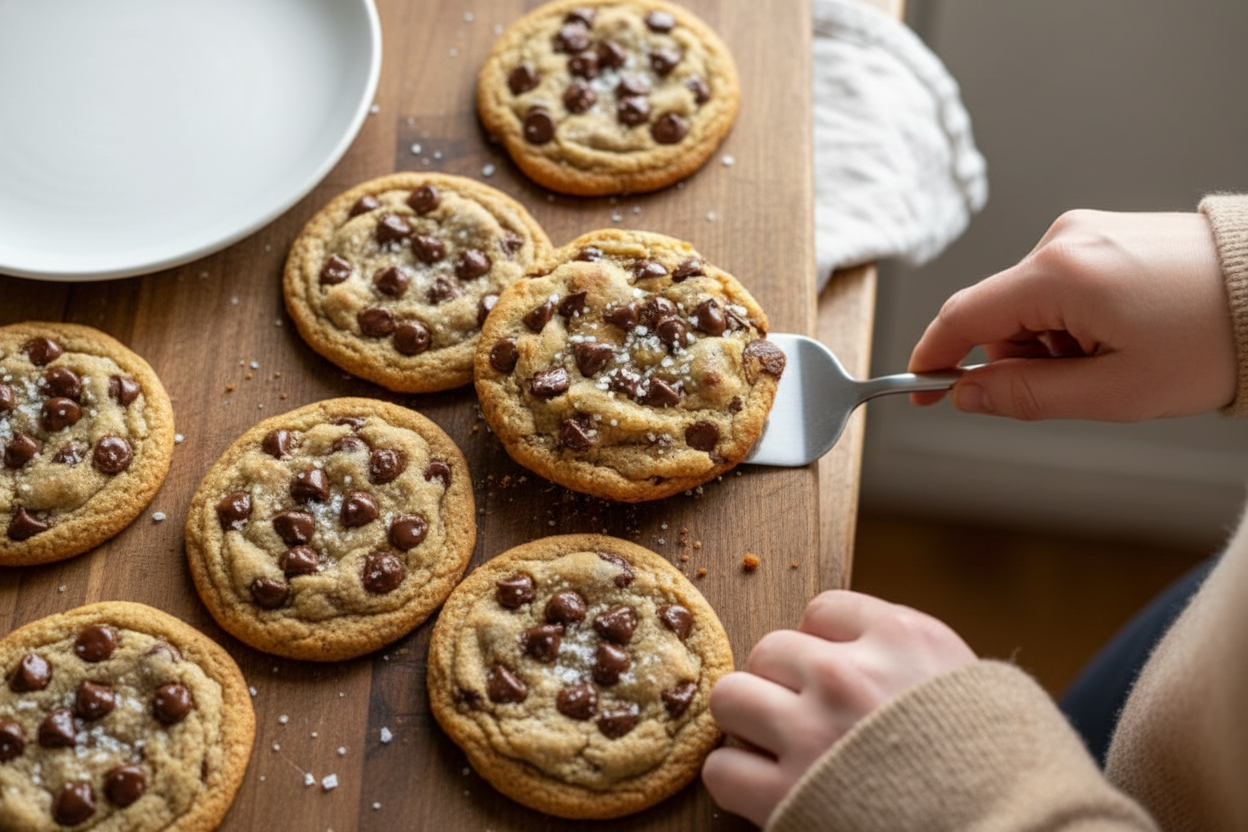
Bake for ten to twelve minutes. Pull them out when the edges are golden brown and the center looks a little soft. They will keep cooking on the hot pan after you take them out. The first time I made these alone, I baked them for fifteen minutes. They came out dark and crunchy. I learned that lesson hard. Now I always set a timer for ten minutes and peek through the oven door. What is the one thing you always burn by accident? For me, it used to be toast.A Cookie to Share
Let them cool on the pan for five minutes. Then move them to a wire rack. If you try to pick them up too soon, they will fall apart. Patience is hard, but it pays off. These cookies taste best when you share them. I always put a few in a tin for my neighbor. She leaves an empty tin on my porch when she needs more. That little back-and-forth makes me happy. Who will you share your first batch with? Think about their face when you hand them a warm cookie.Ingredients:
| Ingredient | Amount | Notes |
|---|---|---|
| All-purpose flour | 2 1/4 cups | |
| Baking soda | 1/2 teaspoon | |
| Unsalted butter, at room temperature | 1 cup | |
| Granulated sugar | 1/2 cup | |
| Packed light-brown sugar | 1 cup | |
| Salt | 1 teaspoon | |
| Pure vanilla extract | 2 teaspoons | |
| Large eggs | 2 | |
| Semisweet and/or milk chocolate chips | 2 cups |
The Cookie That Started It All
I still remember the first batch of cookies I made all by myself. I was maybe ten, standing on a wobbly stool in my grandma’s kitchen. The smell of butter and sugar filled the whole house. Doesn’t that smell amazing? It still makes me smile every single time.
These chocolate chip cookies are my go-to recipe for any day that needs a little warmth. The secret is using room-temperature butter and not overmixing the dough. I learned that the hard way after making tough cookies once. My grandma just laughed and handed me a fresh stick of butter.
Fun fact: If your cookies spread too flat, your butter was too soft. Pop the dough in the fridge for 10 minutes before baking. That little trick saves every batch!
Now let’s bake together. Grab your mixing bowls and get ready for the best cookie smell in the world. Here’s how to make them perfect, step by step.
Step 1: Preheat your oven to 350°F (175°C). Line two baking sheets with parchment paper. This stops the cookies from sticking and makes cleanup easy. My kids used to fight over who got to lick the spatula.
Step 2: In a medium bowl, whisk together 2 1/4 cups all-purpose flour and 1/2 teaspoon baking soda. Set that bowl aside for now. (Hard-learned tip: always whisk the flour before you measure it. Scooping straight from the bag packs it down and makes cookies dry!)
Step 3: In a large bowl, beat 1 cup unsalted butter, 1/2 cup granulated sugar, 1 cup packed light-brown sugar, and 1 teaspoon salt. Use an electric mixer on medium speed for about 2-3 minutes. You want the mixture light and fluffy, like clouds. I always stop and smell the vanilla before I add it.
Step 4: Add 2 teaspoons pure vanilla extract and 2 large eggs, one at a time. Mix well after each egg until everything is smooth and shiny. The batter should look like soft yellow silk. What’s your favorite cookie memory? Share below!
Step 5: Gradually mix in the flour mixture from Step 2. Beat just until combined — a few flour streaks are okay! Stop the mixer now. Overmixing makes cookies tough, and nobody wants a tough cookie.
Step 6: Fold in 2 cups semisweet and/or milk chocolate chips using a spatula or wooden spoon. Stir gently until the chips are everywhere in the dough. I always sneak a few extra chips on top of each dough ball before baking. Don’t tell anyone.
Step 7: Scoop rounded balls of dough onto your prepared baking sheets. Leave about 2 inches between each ball — they spread while baking. Use a cookie scoop or a tablespoon for even sizes. My first batch was all different shapes, and they were still delicious.
Step 8: Bake for 10-12 minutes. The edges should be golden brown, but the centers should still look a little soft and puffy. That’s how you get chewy cookies. Pull them out when they look slightly underdone — they keep cooking on the hot sheet.
Step 9: Let the cookies cool on the baking sheets for 5 minutes. Then transfer them to wire racks to cool completely. Or don’t wait and eat one warm. I always eat the first one right away. It’s the cook’s reward.
Cook Time: 10-12 minutes
Total Time: 25-30 minutes
Yield: About 3 dozen cookies
Category: Dessert
Three Ways to Switch It Up
Once you master the basic recipe, it’s fun to try new flavors. These three twists are my personal favorites for different moods. They all start with the same dough, so you can make one batch and split it.
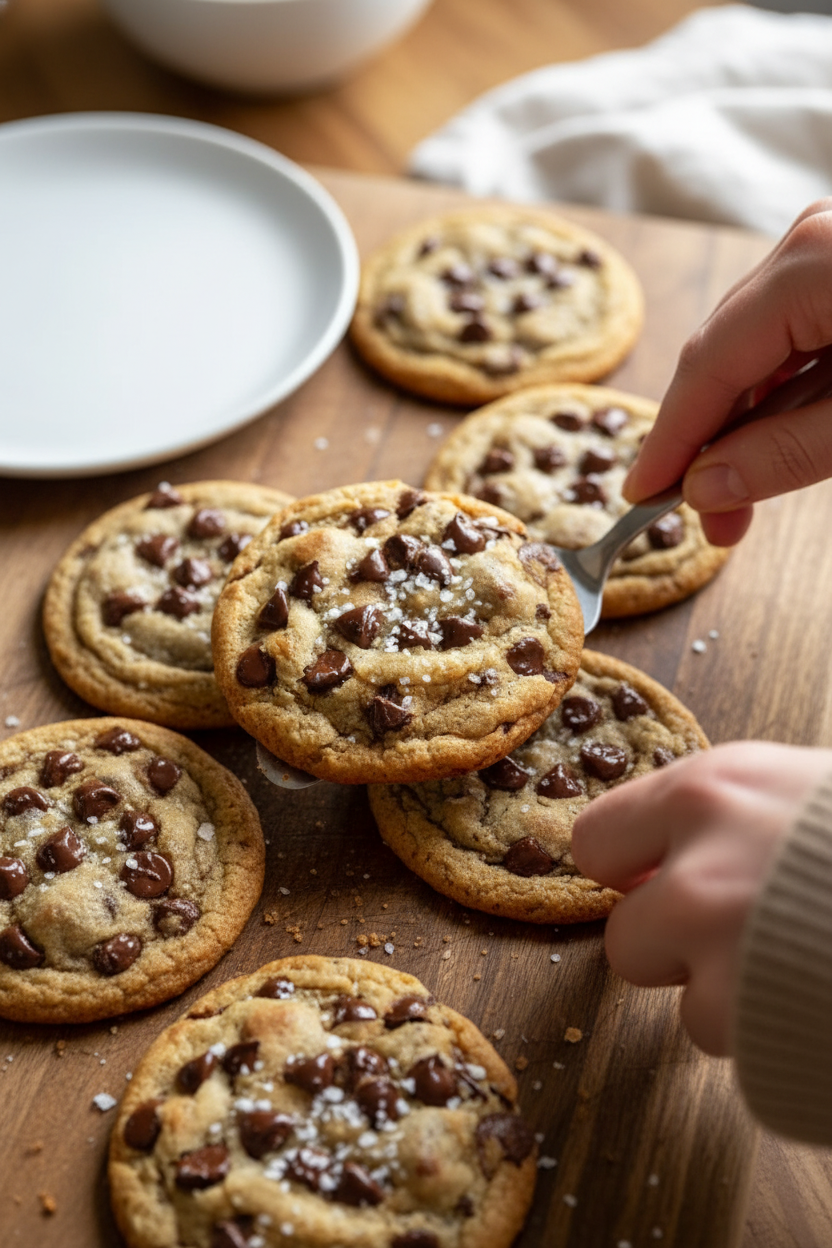
Sea Salt and Dark Chocolate: Use only dark chocolate chips and sprinkle a little flaky sea salt on top right when they come out of the oven. The salty crunch is magic against the sweet cookie.
Oatmeal Raisin Twist: Swap 1 cup of the flour for 1 cup of old-fashioned oats. Add 1/2 cup raisins along with the chocolate chips. It feels like a cozy sweater in cookie form.
Peppermint Holiday Crunch: Fold in 1/2 cup crushed candy canes or peppermint candies along with the chips. Bake as usual, and the kitchen smells like Christmas morning. Which one would you try first? Comment below!
How to Serve and Sip
Warm cookies are wonderful on their own, but a little something extra makes them feel special. Try serving them with a scoop of vanilla ice cream on top. Or sandwich two cookies with a dollop of whipped cream for a tiny ice cream sandwich.
For a nice plating trick, dust a plate with a pinch of cinnamon and arrange three cookies in a triangle. It looks fancy with zero extra effort. My neighbor brings cookies to every potluck, and they vanish in minutes.
For drinks, a tall glass of cold milk is the classic choice. It just works. For grown-ups, a small glass of dark coffee or a creamy latte pairs perfectly with the sweet chocolate. Which would you choose tonight?
Storing and Saving Your Cookies
Fresh cookies are wonderful. But knowing how to store them is just as important. I remember the first time I baked these for a school bake sale. I stacked them warm in a tin, and they turned into one giant cookie blob!
Once your cookies are completely cool, place them in an airtight container. They will stay soft for up to three days at room temperature. For longer storage, you can freeze the baked cookies for up to three months.
Here is a great batch-cook tip. You can freeze the raw dough balls on a baking sheet. Once they are solid, pop them into a freezer bag. Bake them straight from the freezer, just add two extra minutes to the bake time. This means fresh cookies anytime you want.
Have you ever tried storing it this way? Share below! Storing cookies well means less waste and more happy snacking. That is why this matters—you get to enjoy your hard work for days.
Fixing Common Cookie Problems
Even good bakers hit trouble sometimes. Don’t worry. Most problems have simple fixes. I once had a batch spread so thin they looked like pancakes. The kitchen was a mess, but we learned together.
Problem one: cookies spread too much. Your butter might be too soft. Chill the dough for thirty minutes before baking. This helps them hold their shape.
Problem two: cookies are too hard. You likely baked them a minute too long. Pull them out when the edges are golden and the center looks underdone. They will finish cooking on the hot pan.
Problem three: cookies taste dry. This happens if you add too much flour. Spoon the flour into your measuring cup, then level it off. Do not scoop with the cup.
Which of these problems have you run into before? Fixing these issues builds your cooking confidence. It also makes every batch taste perfect. That is why this matters—you become the baker you want to be.
Your Cookie Questions Answered
Q: Can I make these gluten-free?
A: Yes. Swap the all-purpose flour for a 1-to-1 gluten-free baking flour. The texture will be slightly different, but still delicious.
Q: Can I make the dough ahead of time?
A: Absolutely. Wrap the dough tightly in plastic wrap and refrigerate for up to three days. Let it sit at room temperature for ten minutes before scooping.
Q: Can I swap ingredients?
A: Yes. Use coconut oil instead of butter, but chill the dough longer. Swap chocolate chips for chopped nuts or dried fruit.
Q: How do I scale the recipe?
A: You can halve or double it easily. Just adjust the eggs carefully—half an egg means whisk one egg and use half of it.
Q: Any optional tips?
A: A sprinkle of flaky sea salt on top before baking makes them special. Which tip will you try first?
A Warm Goodbye
You have everything you need to make the best chocolate chip cookies. Remember, baking is about sharing joy. I want to see your beautiful results.
Have you tried this recipe? Tag us on Pinterest! Send your photos and stories my way. Each cookie tells a little story of love and warmth.
Happy cooking!
—Chloe Hartwell

Ultimate Chocolate Chip Cookie Recipe Guide
Description
Discover the secrets to baking the perfect Ultimate Chocolate Chip Cookies: chewy, gooey, and irresistibly delicious. Get the recipe now.
Ingredients
Instructions
- Preheat your oven to 350°F (175°C) and line two baking sheets with parchment paper.
- In a medium bowl, whisk the all-purpose flour and baking soda together; set aside.
- In a large bowl, using an electric mixer, beat the unsalted butter, granulated sugar, light-brown sugar, and salt on medium speed until the mixture is light and fluffy, about 2-3 minutes.
- Add the vanilla extract and eggs to the butter mixture, one at a time, mixing well after each addition until fully combined.
- Gradually mix in the flour mixture, beating just until combined; do not overmix.
- Fold in the chocolate chips with a spatula or wooden spoon until they are evenly distributed throughout the dough.
- Using a cookie scoop or tablespoon, drop rounded balls of dough onto the prepared baking sheets, leaving about 2 inches between each ball.
- Bake in the preheated oven for 10-12 minutes or until the edges are golden brown and the center is still slightly soft.
- Remove from the oven and let the cookies cool on the baking sheets for 5 minutes before transferring them to wire racks to cool completely.


Leave a Reply