
The Day I Found a Grinch in My Kitchen
I was looking for a Christmas dessert that was silly and fun. My grandkids love the Grinch, you know? They watch that cartoon every single year. I wanted to make something green, creamy, and delicious. That is how this no-bake cheesecake was born in my kitchen. Doesn’t that smell amazing? It tastes like a happy holiday hug.
I still laugh at the first time I made it. My grandson said it looked like the Grinch’s heart grew three sizes. Then we put the little red hearts on top. He said, “Nana, now it has his heart!” That memory is so sweet. Please tell me: Do you have a funny food memory from your family?
Why Pistachio Is the Real Star
Pistachio spread is magical stuff. It is sweet, nutty, and a beautiful light green. You can find it near the peanut butter or chocolate spreads at the store. I use it twice in this recipe. Once inside the creamy filling, and once on top as a shiny coat.
This matters because the spread does all the work. You do not need to add green food coloring. The pistachio gives it a natural Grinch color. *Fun fact: Pistachios are actually related to mangoes and cashews. Who knew?* Now I want to ask you: Have you ever tried pistachio spread before?
Biscuit Crust You Can Trust
The crust is the foundation of any good cheesecake. For this one, you crush up simple biscuits or graham crackers. Mix them with melted butter until the crumbs look like wet sand. Press it into your pan firmly with your fingers or a glass bottom. Pop it in the fridge to set while you do the filling.
This is a good job for small helpers. Kids love smashing the biscuits. Let them put the crackers in a big zip-top bag and whack it with a rolling pin. Just make sure the bag does not open! I speak from messy experience. What is your favorite kitchen job to share with a child?
The Filling Is Soft Like a Cloud
This filling is not baked. That is why we call it a no-bake cheesecake. You mix the room-temperature cream cheese with the pistachio spread until it is smooth. Then you whip the heavy cream with a little powdered sugar. Whip it until it forms soft peaks that hold their shape. Gently fold them together until no white streaks are left.
This matters because you want a light texture, not a heavy brick. Folding is just gently stirring from the bottom up. Take your time. It feels like mixing a cloud into a dream. That might sound silly, but it is true. What is your favorite creamy dessert topping or filling?
Patience Is a Tasty Teacher
Once you pour the filling into the crust, you cannot eat it right away. I know that is hard. The cheesecake needs to sit in the fridge for at least eight hours. Overnight is even better. This waiting time lets it set up firm and clean. If you rush, it will be a green puddle, not a pretty slice.
I remember one Christmas my brother snuck a piece after only two hours. It was a goopy mess. He still laughs about his “Grinch soup.” This is a good lesson. Some things get better when you let them rest. Does your family have patience in the kitchen, or are you all snackers like my brother?
Decorating With a Little Heart
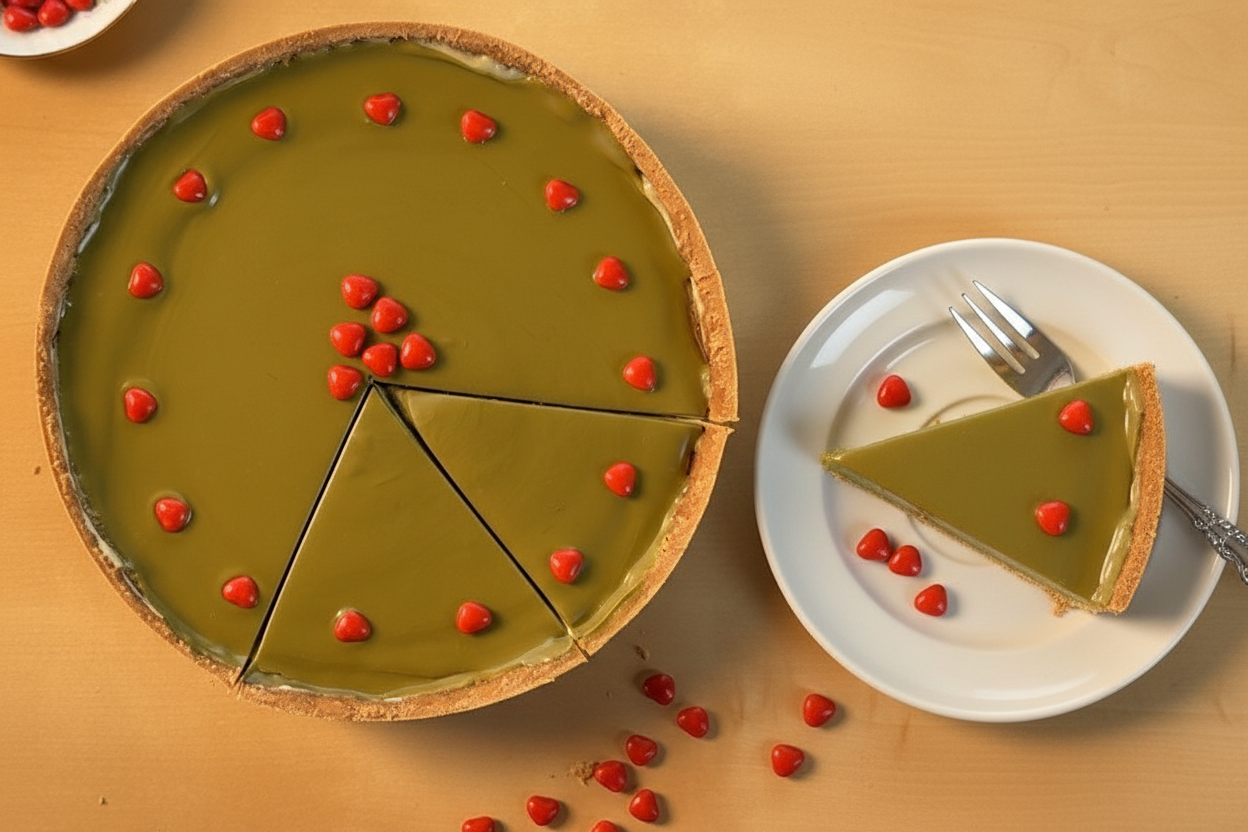
After your cheesecake is fully set, it is time to make it look like the Grinch. Warm up the rest of the pistachio spread a little bit so it pours easily. Drizzle it over the top of the cheesecake and spread it gently. Then quickly place the small red heart candies on top before the spread gets cool.
This is the fun part. The green top with the bright red hearts looks so cheerful. I let the kids place the hearts however they like. Some make a smiley face. Others just scatter them around. Every cake turns out different and beautiful. Do you think you will add more hearts or keep it simple like the story?
A Slice of Kindness
This cheesecake is more than just a dessert. It reminds us that even grumpy days can become sweet. The Grinch’s heart grew when he saw kindness. This cake does the same for our kitchen. It brings people together to laugh, decorate, and share a bite.
When you serve this, watch the smiles appear. It tastes like pistachio, cream, and happy memories all in one forkful. I hope you make it soon. I would love to hear one thing that makes your heart feel bigger this holiday season. Please share your story with me.
Ingredients:
| Ingredient | Amount | Notes |
|---|---|---|
| Biscuits | 300 g (2 ½ cups fine crumbs) | For the crust |
| Butter | 100–120 g (½ cup or 1 stick) | For the crust |
| Cream cheese | 500 g (2 ¼ cups or two 8-oz blocks) | For the filling |
| Pistachio spread | 290 g (1 cup) | For the filling |
| Powdered sugar | 50 g (½ cup) | For the filling |
| Heavy whipping cream | 230 g (1 cup) | For the filling |
| Pistachio spread | 200 g (¾ cup) | For decoration |
| Small red heart-shaped candies | 15 | For decoration |
The Story Behind This Grinch Cheesecake
I remember the first time I made this for my grandkids. They had just watched the old Grinch cartoon, and their eyes got so wide when I pulled this green cheesecake from the fridge. Doesn’t that color just make you smile? The pistachio spread does all the magic here. It turns everything a pretty, Grinch-y green without any weird food coloring. My youngest grandson said, “Nana, his heart grew three sizes that day, and my belly will too!” I still laugh at that.
The best part is you don’t even turn on the oven. This is a no-bake recipe, which means it’s perfect for busy holiday weeks. You just mix, press, and let the fridge do the hard work. I once tried to rush the chilling time because I was impatient. Let me tell you, that cheesecake turned into a beautiful green puddle on the plate. Learn from my mistake, sweetie. Be patient!
Here’s a hard-learned tip: Make sure your cream cheese is truly at room temperature. If it’s cold, your filling will be lumpy like tiny cottage cheese clumps. Nobody wants that in a pretty cheesecake. Take it out of the fridge about an hour before you start baking—er, I mean, before you start mixing.
Mini-quiz question: What do you think is the trickiest part of making a no-bake cheesecake? Is it the crust, the filling, or the waiting? Share below!
Let’s Make It Step by Step
Step 1: Start with the crust. Grab your biscuits (any plain cookie works great) and crush them into fine crumbs. You can use a food processor, or put them in a zip-top bag and go to town with a rolling pin. It’s a great way to let out some stress from school or work. Mix those crumbs with melted butter until they look like wet sand. Press this mixture firmly into the bottom of a springform pan, and a little bit up the sides if you can. Pop it in the fridge to harden while you make the filling.
Step 2: Now for the filling, which is the heart of this recipe. In a large bowl, mix your room-temperature cream cheese with the pistachio spread. Use a rubber spatula and stir until it’s completely smooth and green. (This step smells wonderful, like a fancy bakery.) In a separate cold bowl, whip the heavy cream with the powdered sugar. Whip until soft peaks form—that means when you lift the whisk, the cream makes a little mountain that droops gently at the tip.
Step 3: Here comes the gentle part. Take your whipped cream and fold it into the cream cheese mixture. “Folding” means you cut through the middle with your spatula, scoop from the bottom, and flip it over. Do this slowly until no white streaks are left. It should look like a fluffy green cloud. I always let my grandkids do this step, and they always try to sneak a taste. I pretend not to notice.
Step 4: Pour the filling into your chilled crust and smooth the top with the back of a spoon. Cover the pan with plastic wrap or foil. Now comes the hardest part: you have to wait. Put it in the fridge for at least 8 hours, but overnight is better. One time I checked on it every hour like a nervous hen. Don’t do that. Just trust the fridge.
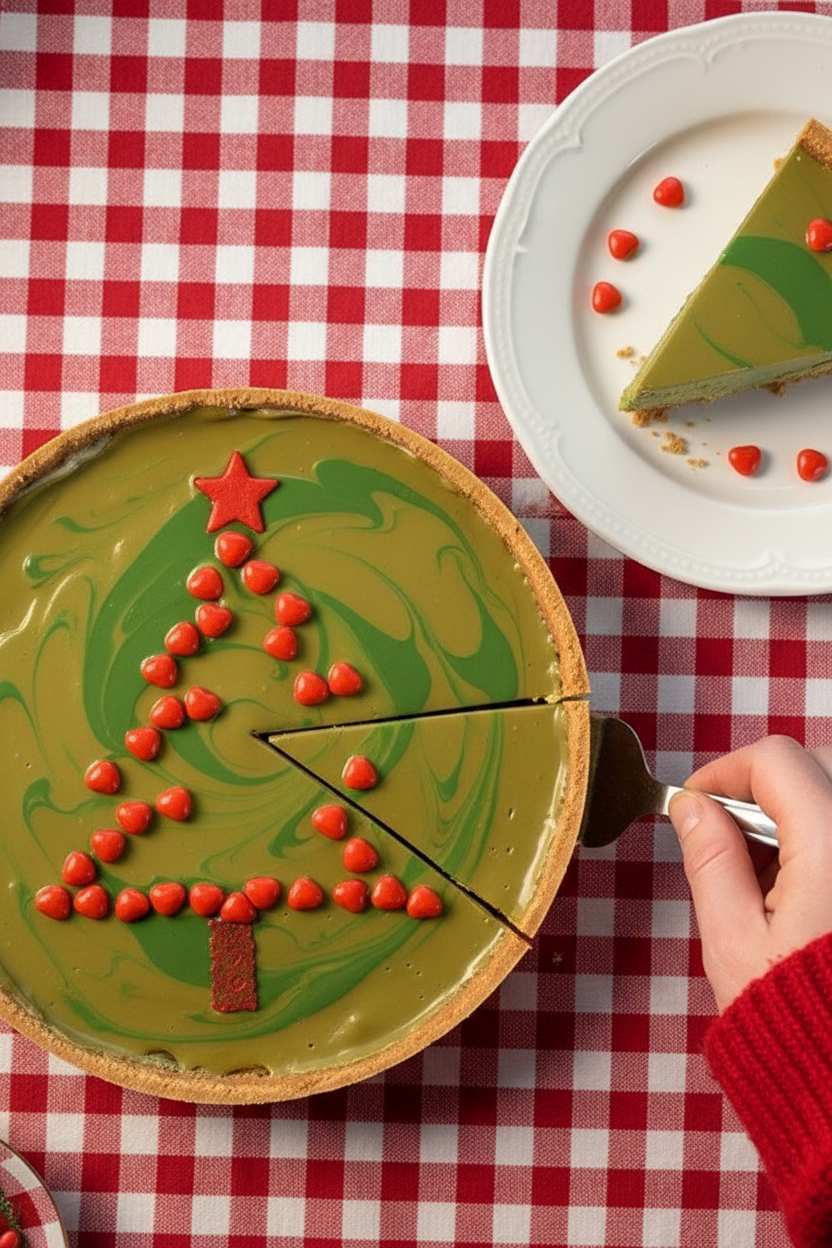
Step 5: Time to decorate! Carefully run a knife around the edge of the pan, then unlock the springform. Warm up the extra pistachio spread in the microwave for about 10 seconds so it’s pourable but not hot. Pour it over the top and spread it gently. Immediately place those little red heart candies on top before the spread sets. This is where the Grinch’s heart shines. Slice, serve, and enjoy the happy faces!
Cook Time: 20 minutes
Total Time: 8 hours 20 minutes
Yield: 8–10 servings
Category: Dessert
Three Fun Twists to Try
Chocolate Mint Grinch: Swap the pistachio spread for mint chocolate chip spread. Add a drop of green food coloring for that classic Grinch look. Crush some chocolate sandwich cookies into the crust too. It tastes like a cool winter breeze.
Berry Bright Grinch: After you pour the pistachio spread on top, dot the surface with spoonfuls of raspberry jam. Use a toothpick to swirl it into little red hearts or stripes. The tart fruit cuts the sweetness perfectly.
Gingerbread Grinch: Use ginger snaps for the crust instead of plain biscuits. The spicy gingerbread flavor makes the green filling taste extra cozy. Add a pinch of cinnamon to the cream cheese mixture for a warm hug in every bite.
Which one would you try first? Comment below!
How to Serve and Sip Along
This cheesecake is rich, so serve thin slices. Place each slice on a small plate with a tiny dollop of whipped cream on the side. You can also dust the plate with a little crushed candy cane for a crunchy, minty surprise. For a pretty platter, arrange fresh mint leaves around the cheesecake like a holiday wreath.
As for drinks, try a warm mug of peppermint hot cocoa on a cold night. The chocolate and mint play so nicely with the pistachio. For the grown-ups, a glass of cold sparkling apple cider with a splash of vanilla liqueur is lovely and festive. It’s light and bubbly, just like the joy of sharing dessert.
Which would you choose tonight?
How to Store Your Grinch Cheesecake
This cheesecake keeps well in the fridge for up to five days. Just cover it tightly with plastic wrap or a lid. Do not freeze it once decorated. The heart candies get sticky and the pistachio spread changes texture. I learned this the hard way when I tried freezing a slice for later. It turned into a sad, watery mess.
If you want to make this ahead, prepare the cheesecake a day before serving. It needs eight hours to set anyway. You can crush the biscuits and mix the crust the night before. Keep the crust in the fridge, then finish the filling the next day. Make extra crust if you are batch cooking for a party. It presses easily into mini cups for single servings. Have you ever tried storing it this way? Share below! Storing it right keeps the flavor fresh and the texture creamy. That matters because a soggy cheesecake is no fun for anyone.
Three Common Problems and Easy Fixes
First, the crust can fall apart when you slice it. This happens if you did not pack it firmly enough. Use the bottom of a glass to press the crumbs down hard. I remember my first time making this. The crust crumbled everywhere, and I had to scoop it up with a spoon.
Second, the filling might have lumps. Always let your cream cheese sit out for thirty minutes before mixing. Cold cream cheese does not blend smoothly. Which of these problems have you run into before? Fixing lumps makes the filling silky and rich. That matters because smooth cheesecake tastes more like a special treat.
Third, the top layer can crack. Do not overmix the whipped cream. Stop when it forms soft peaks that hold their shape. Overwhipping turns it into butter. *Fun fact*: Overwhipped cream is actually just one step away from homemade butter! Fixing these small mistakes builds your confidence in the kitchen.
Your Top 5 Questions Answered
Q: Can I make this gluten free? A: Yes. Use gluten-free biscuits or cookies for the crust. The filling is already gluten free.
Q: Can I swap the pistachio spread? A: You can use Nutella or cookie butter instead. The color and taste will change, but it still works.
Q: How do I scale the recipe for a smaller pan? A: Halve all the ingredients. Use a 6-inch springform pan instead of a 9-inch one.
Q: Can I make it without heavy cream? A: Yes. Use full-fat coconut cream chilled and whipped. The texture will be slightly different but still good.
Q: Can I skip the decorating step? A: Yes. The cheesecake tastes great plain. Add fresh berries instead of heart candies if you like. Which tip will you try first?
A Warm Goodbye from Chloe
Thank you for spending time in the kitchen with me today. I hope this recipe brings smiles to your table. It is perfect for holidays, birthdays, or a rainy afternoon. Have you tried this recipe? Tag us on Pinterest! I love seeing your creations, even the messy ones. Each one tells a story. Happy cooking! —Chloe Hartwell.


Grinch No Bake Christmas Cheesecake Recipe
Description
Easy Grinch No Bake Christmas Cheesecake Recipe! Festive green dessert perfect for holiday parties. No oven needed.
Ingredients
300 g biscuits ( 2 ½ cups of fine crumbs)
500 g cream cheese ( 2 ¼ cups or two 8-oz blocks)
200 g pistachio spread (¾ cup)
Instructions
Crush the biscuits into fine crumbs using a food processor or a zip-top bag and rolling pin.Mix the crumbs with the melted butter until they resemble wet sand. Press the mixture firmly into the bottom and up the sides of a springform pan.Place it in the fridge to set while you make the filling.
In a large bowl, mix the room-temperature cream cheese and pistachio spread with a spatula until completely smooth.In a separate, cold bowl, whip the heavy cream and sifted powdered sugar together until soft peaks form.Gently fold the whipped cream into the cream cheese mixture until no white streaks remain.
Pour the filling into the chilled crust and smooth the top.Cover and refrigerate for at least 8 hours, or overnight, until completely set.
Once set, carefully remove the cheesecake from the springform pan.Warm the pistachio spread slightly so it’s pourable, then pour it evenly over the top of the cheesecake.Immediately place the red heart candies on top before the spread sets. Slice, serve, and enjoy!
Notes
- For best results, let the cheesecake chill overnight. You can use store-bought pistachio spread or make your own.


Leave a Reply