
The Day I Fell in Love with a Dessert
I remember the first time I made this dessert. It was a rainy Sunday, and my kitchen smelled like coffee and chocolate. I had a little bit of tiramisu left from my trip to Italy, and a whole cheesecake I baked for my neighbor. Then I thought, why not put them together? I still laugh at that silly idea. It was the best kitchen mistake I ever made. Doesn’t that smell amazing? Just thinking about the warm chocolate crust and creamy filling makes my heart happy. Have you ever mixed two desserts into one before? I would love to hear your wildest kitchen experiment.Why the Crust Matters
We start with the chocolate crust. You take those chocolate creme cookies and grind them up with melted butter. It is like making a sandy, chocolatey beach in your pan. You have to pack it tight. Use a measuring cup and push down hard. I like to push a little up the sides, just for fun. Bake it for seven or eight minutes. The smell will make you want to eat it then and there. But wait. This crust is important because it holds everything together. If it is too loose, your cheesecake will fall apart. A strong base makes a strong dessert. Isn’t that true for a lot of things in life?The Secret to a Creamy Filling
Now comes the soft, dreamy part. You beat the cream cheese and mascarpone with sugar and salt until it is smooth like butter. Be gentle. You do not want to whip air into it. Air makes the cheesecake puffy like a sponge. We want it dense and creamy, like a cloud that melts on your tongue. Here is a little trick I learned from my grandma. Break your eggs in a separate bowl first. Whisk them lightly, then pour them slow into the batter. *Fun fact: if you add cold eggs to warm batter, the fat can seize up and make lumps.* So keep everything at room temperature. It makes a big difference.Putting It Together Like a Puzzle
Pour half the batter into the crust. Then comes the fun part. You take those ladyfinger biscuits and dip them quickly in strong coffee. Do not hold them too long or they get soggy. Just a quick dip on each side. Then lay them in the pan like little soldiers. Cut some pieces to fill the gaps. This is why this dessert is so special. Each bite has a surprise. You get the creamy cheesecake, then a soft coffee-soaked cookie, then more cheesecake. It is like a treasure hunt on your plate. What is your favorite part of a layered dessert? The middle or the top?The Water Bath Secret
Here is where my first cheesecake cracked. I did not use a water bath. A water bath is simply a big tray of hot water you put your pan in while it bakes. The steam keeps the cheesecake moist and prevents cracks. Wrap your pan tight with foil so no water sneaks in. Bake it for about 80 minutes. Do not peek. I know it is hard. The kitchen will smell like heaven. But opening the oven lets cold air in and your cheesecake can sink. Why does this matter? Because a smooth, crack-free top is the canvas for your pretty decorations. Patience is worth it.Coffee Cream Clouds
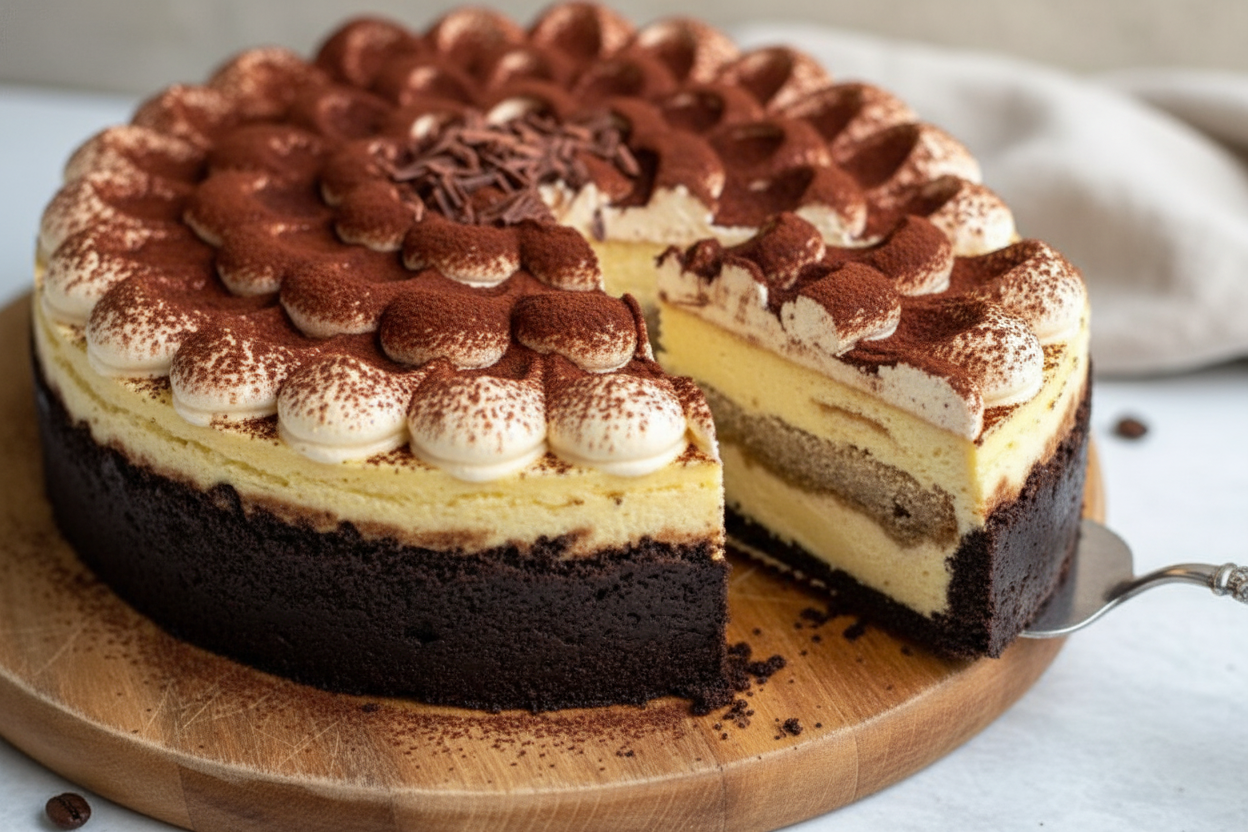
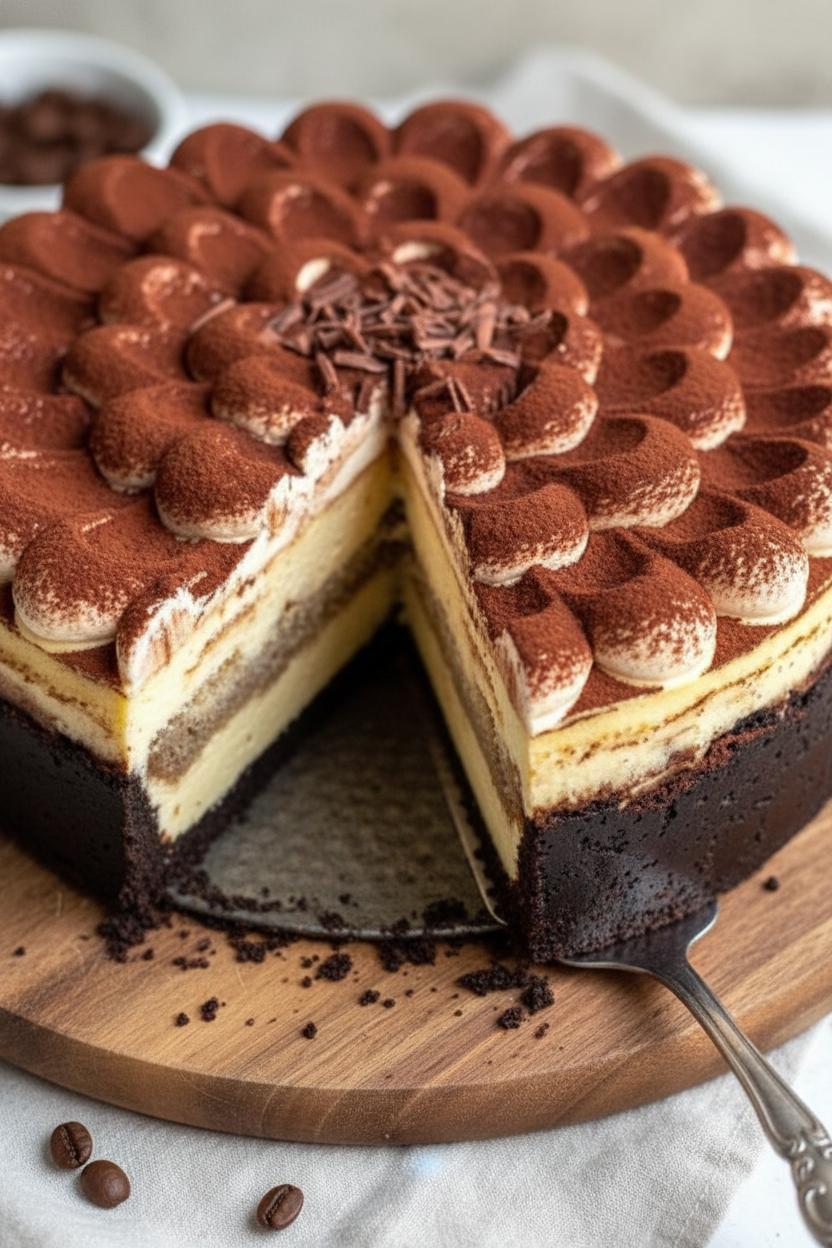
The next day is when the magic happens. Your cheesecake has rested all night in the fridge. Now you make a fluffy coffee mascarpone cream. Whisk mascarpone, sugar, and instant coffee together until it is smooth. Then add cold heavy cream and whip until it forms stiff peaks. This cream is like a soft hat for your cheesecake. You spread a thin layer all over, then pipe the rest on top in swirls or stars. Dust it with cocoa powder. It looks like a fancy bakery dessert, but you made it at home. I still feel proud every time I bring this to a party.Sharing the Sweetness
The best part of this dessert is not just eating it. It is watching someone take their first bite. Their eyes get big, and they smile with their mouth full. That is why I love cooking. It is not about being perfect. It is about sharing something warm and delicious with people you care about. Now I have a question for you. What dessert makes you feel like a kid again? For me, it is this one. And if you try this recipe, I want to know. Did your crust hold? Did you get the perfect jiggle? Write me a little note about your baking adventure. I read every single one.Ingredients:
| Ingredient | Amount | Notes |
|---|---|---|
| Chocolate creme cookies | 455 g (35 cookies) | For chocolate crust |
| Unsalted butter, melted | 85 g (5 tbsp) | For chocolate crust |
| Full-fat cream cheese, room temperature | 680 g (3 x 8 oz blocks) | For cheesecake filling |
| Good quality mascarpone, room temperature | 226 g (8 oz) | For cheesecake filling |
| Granulated sugar | 325 g (1 ½ cups) | For cheesecake filling |
| Salt | ½ tsp | For cheesecake filling |
| Vanilla essence | 1 tsp | For cheesecake filling |
| Large eggs, room temperature | 4 | For cheesecake filling |
| Heavy cream | 120 g (½ cup) | For cheesecake filling |
| Sour cream | 240 g (1 cup) | For cheesecake filling |
| Cornstarch | 1 tbsp | For cheesecake filling |
| Ladyfinger biscuits | 12 | For assembly |
| Strong coffee | ½ cup | For assembly |
| Mascarpone cheese, cold | 113 g (4 oz) | For coffee mascarpone cream |
| Granulated sugar | 2-4 tbsp | For coffee mascarpone cream |
| Instant coffee + water | 1 tsp + 1 tsp | For coffee mascarpone cream |
| Heavy whipping cream, chilled | 240 g (1 cup) | For coffee mascarpone cream |
| Cocoa powder | 2 tbsp | For decoration |
The Story Behind This Baked Tiramisu Cheesecake
I remember the first time I tried tiramisu. I was visiting my aunt in a tiny Italian bakery. The smell of coffee and cocoa filled the whole shop. Doesn’t that smell amazing? I knew I had to bring those flavors into my kitchen. This cheesecake is my love letter to that day. It’s rich, creamy, and a little bit fancy, but I promise you can make it at home.
The secret is patience. Cheesecake wants to be treated gently, like a sleepy kitten. You have to let it cool slowly and rest overnight. I learned this the hard way after a cracked cheesecake disaster. I still laugh at that crumbly mess. But now, this recipe is foolproof if you follow each step. Trust me, the wait is worth every bite.
My grandson helped me test this version. He loves crushing the cookies for the crust. It is the best job for little hands. We used chocolate creme cookies because they add a deep, dark flavor. The coffee mascarpone cream on top? That is my favorite part. It is like a fluffy cloud with a coffee kick. What is your favorite part of a layered dessert? Share below!
Step-by-Step: Your Baked Tiramisu Cheesecake
Step 1: Make the chocolate crust first. Preheat your oven to 350F. Butter the bottom of a 10-inch springform pan. Grind 35 chocolate creme cookies with melted butter until fine. (Hard-learned tip: Pack the crumbs very tightly with a measuring cup or your cheesecake will fall apart when you cut it.)
Step 2: Bake the crust for 7 to 8 minutes, then let it cool. Now, turn your oven down to 320F. Get your cream cheese and mascarpone out of the fridge early. They need to be soft and room temperature. Cold cream cheese makes lumpy batter, and nobody wants that.
Step 3: Beat the cream cheese, mascarpone, sugar, vanilla, and salt for 2 to 3 minutes. Use a paddle attachment on medium-low speed. Scrape the bowl well. In a separate bowl, whisk the four eggs lightly. Remember my aunt’s tip: do not overbeat the eggs or your cheesecake will turn spongy instead of creamy.
Step 4: Add the eggs slowly to the cheese mixture on low speed. Mix just until combined, then stop. Add the heavy cream, sour cream, and sifted cornstarch. Mix again on low until everything is smooth. Keep scraping the sides of your bowl. Your batter should look silky, like pudding.
Step 5: Wrap your springform pan tightly in aluminum foil on the outside. This keeps water out during the water bath. Pour half the batter into the crust. Tap the pan gently on the counter to pop any air bubbles. Dip your ladyfinger biscuits quickly in strong coffee, just a dip on each side, and lay them on top of the batter.
Step 6: Gently pour the rest of the batter over the ladyfingers. Tap again. Place your pan in a large tray filled with 1 to 2 inches of boiling water. Bake for about 80 minutes at 320F. Do not open the oven door for 75 minutes. The edges will be firm but the center will jiggle when done. Cool at room temp for 15 minutes, then run a knife around the edge. Let it cool for 2 to 3 hours, then chill overnight in the fridge.
Step 7: The next day, make the coffee mascarpone cream. Whisk cold mascarpone, sugar, and instant coffee dissolved in water until creamy. Add chilled heavy cream and whisk until stiff peaks form. Spread a thin layer on the cheesecake, then pipe the rest on top. Dust everything with cocoa powder. Have you ever used a piping bag before? Share below!
Cook Time: 1 hour 20 minutes
Total Time: 4 hours 15 minutes (plus overnight chilling)
Yield: 12 to 16 servings
Category: Dessert
Three Fun Twists to Try
Chocolate Orange Twist: Add the zest of one orange to the cheesecake batter. It makes the coffee and chocolate taste brighter. My neighbor adds a splash of orange liqueur to the coffee, too, but skip that if you want it kid-friendly.
Berry Tiramisu Cheesecake: Swap the coffee for a berry syrup. Dip the ladyfingers in warm raspberry or strawberry syrup instead. Top the finished cheesecake with fresh berries. This is perfect for summer picnics.
Spiced Chai Cheesecake: Replace the coffee with strong chai tea for dipping the ladyfingers. Add a teaspoon of cinnamon and a pinch of cardamom to the crust. It smells like a cozy fall afternoon. Which one would you try first? Comment below!
How to Serve and Sip
Serve this cheesecake cold, straight from the fridge. A tiny dusting of extra cocoa powder on the plate looks beautiful. Add a few coffee beans or chocolate shavings on top for crunch. It also pairs nicely with a handful of fresh raspberries on the side to cut the richness.
For a drink, try a chilled glass of creamy milk. It balances the coffee flavor perfectly. For grown-ups, a small cup of espresso or a dark rum cocktail is wonderful. The sweet, creamy cake loves a slightly bitter drink. Which would you choose tonight?
Storing and Reheating Your Tiramisu Cheesecake
This cheesecake tastes even better the next day. That is why we chill it overnight. The flavors have time to get cozy together. Store leftovers in the fridge, tightly covered, for up to five days. Just wrap the pan or a plate in plastic wrap. I once forgot to cover a slice, and it dried out like a desert. A sad mistake! You can also freeze slices for up to a month. Wrap each piece in plastic, then foil. To thaw, just move a slice to the fridge the night before. Batch cooking is a lifesaver for busy weeks. Make two cheesecakes at once, and freeze one for later. Why does this matter? You get a fancy dessert ready with zero work on a crazy day. Have you ever tried storing it this way? Share below!
Three Common Problems and Easy Fixes
The first problem is a cracked top. This happens when the cheesecake cools too fast. I remember my first cheesecake looked like a map of rivers. The fix is simple. Let it cool slowly on the counter for a few hours. Then put it in the fridge. The second problem is a soggy crust. Ladyfingers can get too wet if you soak them. A quick dip on each side is all you need. I once held a ladyfinger in coffee for ten seconds. It turned into mush. Learn from my mess. The third problem is a lumpy batter. Cold cream cheese makes lumps. Always let your cream cheese sit out for an hour first. Why does this matter? Fixing these small things makes you feel like a pro. It also makes every bite smooth and perfect. Which of these problems have you run into before? Tell me in the comments.
Your Top 5 Questions Answered
Q: Can I make this gluten-free? A: Yes. Use gluten-free chocolate cookies for the crust. Check the labels on ladyfingers, too.
Q: Can I make it ahead of time? A: Absolutely. Make it two days before you serve it. The flavor gets deeper.
Q: Can I swap mascarpone for something else? A: You can use more cream cheese. It will taste less rich, but still good.
Q: How do I scale the recipe for a smaller pan? A: Halve all the ingredients. Bake for about 50 minutes instead of 80.
Q: Do I have to use instant coffee for the cream? A: Strong brewed espresso works too. Just cool it first. Which tip will you try first?
A Warm Goodbye from Chloe
Well, my dear, I hope this recipe brings you joy. There is something special about a dessert you make with your own hands. I love hearing from you all. It feels like we are baking together in one big kitchen. *Fun fact: Tiramisu means “pick me up” in Italian. This cheesecake will do just that.* Have you tried this recipe? Tag us on Pinterest!
Happy cooking!
—Chloe Hartwell.
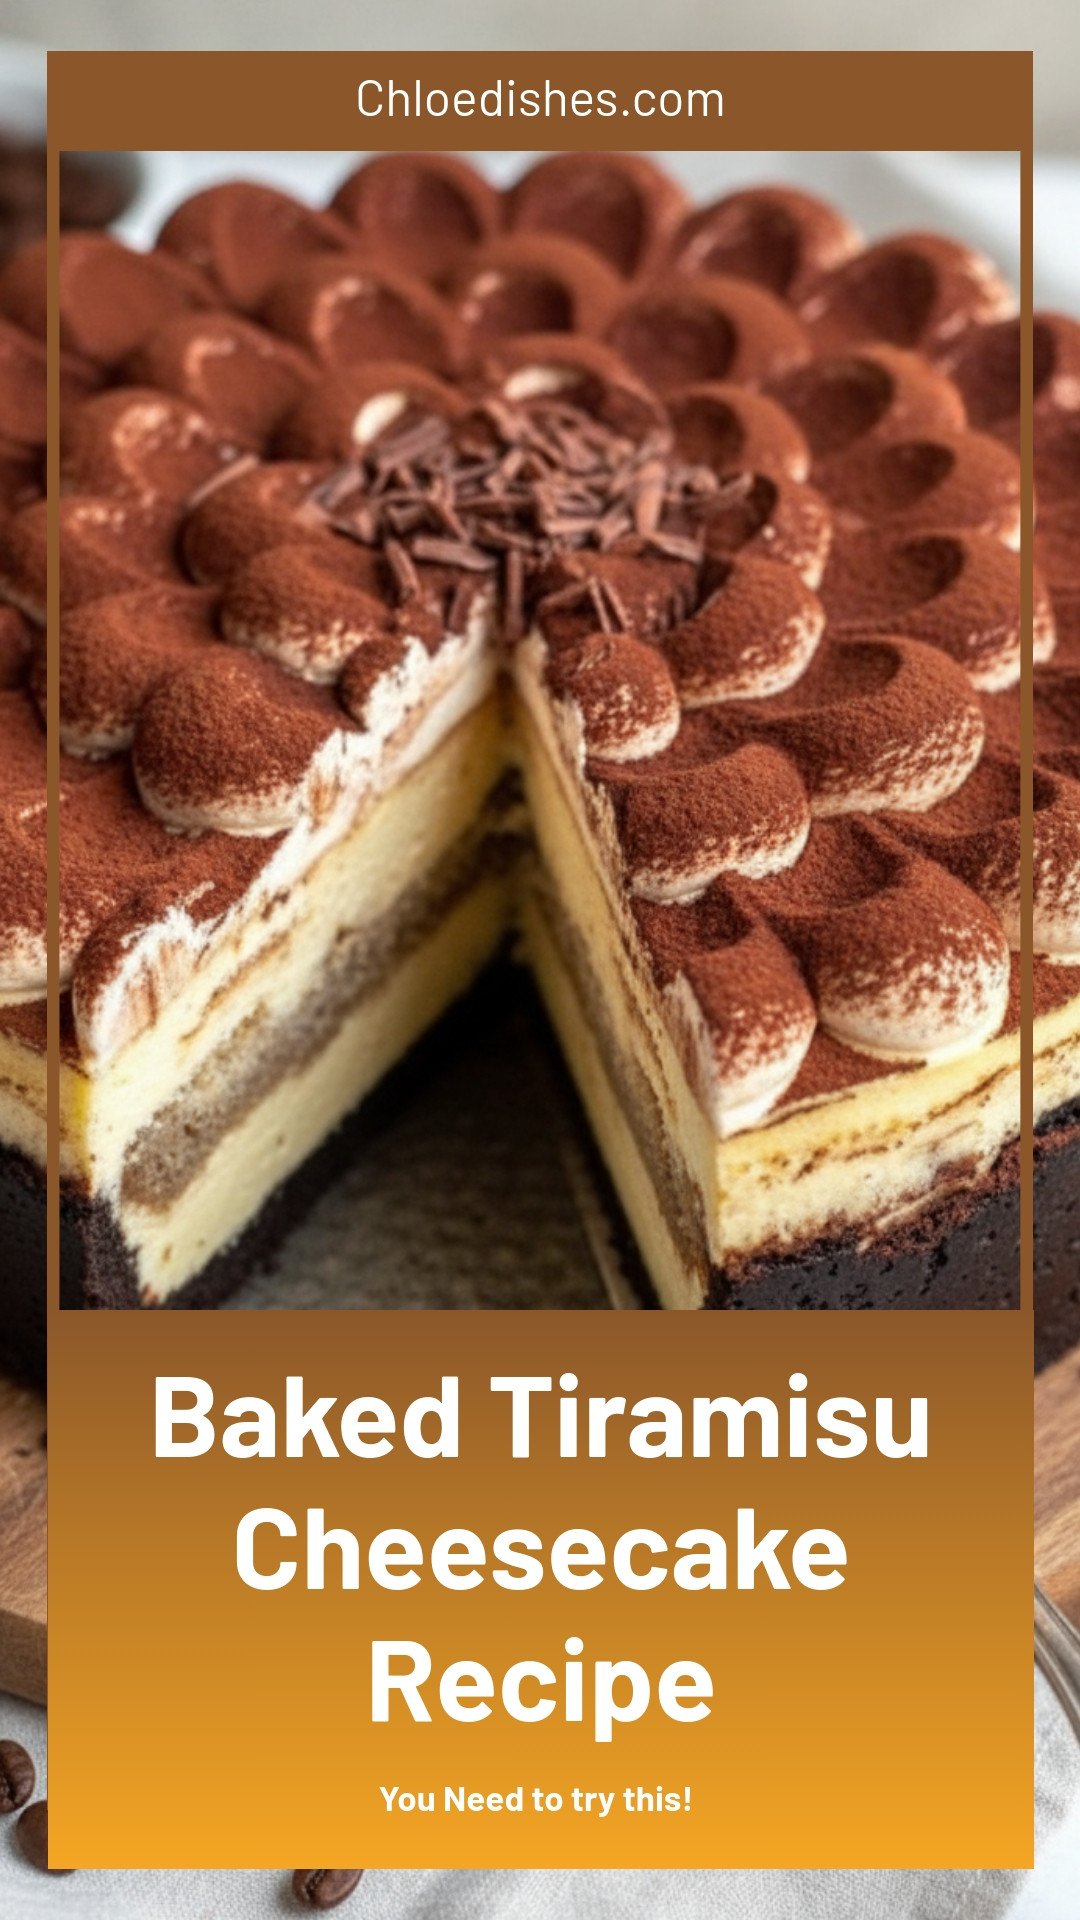

Baked Tiramisu Cheesecake
Description
Indulge in creamy baked tiramisu cheesecake with espresso-soaked layers. Easy dessert recipe for coffee lovers.
Ingredients
Chocolate crust:
Cheesecake filling:
Assembly:
Coffee mascarpone cream:
Decoration:
Instructions
- Preheat oven to 350F (conventional) and butter the bottom of a 10″ springform pan (3″ tall). Grind the chocolate creme cookies and melted butter in a food processor until they form a fine crumb. Transfer to the pan, and pack very tightly using a measuring cup. You can push a little up the edges but keep most on the bottom. Bake for 7-8 min.
- Adjust the oven temperature to 320F (conventional). Add the cream cheese and mascarpone cheese to the bowl of your stand mixer along with the sugar, vanilla and salt. Use the paddle attachment to beat for 2-3 minutes on medium-low speed until creamy. Keep scraping the sides of the bowl to ensure everything combines evenly. Break your eggs in a separate bowl and whisk lightly. Don’t overbeat because if the eggs get airy they will give a spongy texture to the cheesecake. Add them to the batter slowly and mix at a low speed until JUST combined. Add the cream, sour cream, and cornstarch (sifted), and mix at low speed until just combined. Keep scraping sides of the bowl.
- Seal your pan tightly with aluminum foil on the outside (not on the top). Pour half of the batter into the crust and gently shake to spread it. Tap the pan a few times on the counter to get rid of any air bubbles. Soak the ladyfingers in the coffee quickly (just a quick dip on each side, don’t hold them in), and layer in the cheesecake pan gently. Try to get them as close as possible, and cut some ladyfingers into smaller pieces to fill in the gaps. Gently add the remaining cheesecake batter (you can fill the pan until just under the brim) and lightly shake and tap again.
- Place a large tray in your oven and fill it with 1-2 inches of boiling water. Place the springform pan in the water and bake for about ~80 min. Don’t open the oven until at least 75 minutes in. When done, the cheesecake should have firm edges but a jiggly center. Remove from the oven, and cool at room temp for 15 min. Then run a butter knife between the cheesecake and the walls of the pan to separate them (don’t open the pan), and cool for 2-3 hours at room temp. After this, place in the fridge and chill overnight (no cover needed).
- The next day, add the mascarpone, sugar and coffee to a bowl, and whisk until creamy. Then add the heavy cream, and whisk on low speed until the mixture forms stiff peaks.
- Carefully remove the chilled cheesecake from the pan and transfer to a serving stand. Spread on a thin layer of the coffee mascarpone cream. Transfer the remaining to a piping bag and pipe it on top of the cheesecake using any pattern you like. Dust the cheesecake with cocoa powder, and you’re ready to enjoy!
Notes
- For best results, ensure all dairy ingredients are at room temperature before mixing. Chill the cheesecake overnight for clean slices.


Leave a Reply