

Why I Love These Little Pastries
A long time ago, I made these for a neighbor who was feeling sad. She took one bite and smiled. I still laugh at that. A warm pastry can fix so many small troubles. This recipe is made with puff pastry. That means it gets all flaky and buttery in the oven. It feels fancy, but it is actually very simple. Even a beginner can make these. Have you ever baked something that made someone smile? Tell me about it!The Cream Cheese Secret
The filling is just cream cheese, sugar, vanilla, and a bit of lemon zest. That little lemon zest is the secret. It makes the whole thing taste bright and fresh. You want the cream cheese to be soft before you mix it. That means leaving it on the counter for a while. It blends much easier when it is soft. I learned that the hard way once. My filling had little lumps. Why does this matter? Soft cream cheese makes a smooth filling. A smooth filling makes every bite even yummier.Puff Pastry Tricks
Frozen puff pastry is a real helper. You just let it thaw in the fridge overnight. Then you cut it into six squares. *Fun fact: Puff pastry has 729 layers of dough and butter. That is what makes it so puffy!* Do not skip the part where you poke the middle with a fork. That keeps the center flat. That way, your filling has a nice little nest to sit in. The edges puff up all golden. Doesn’t that smell amazing when it bakes? The butter melts and fills your kitchen.Berries Are Bursting With Joy
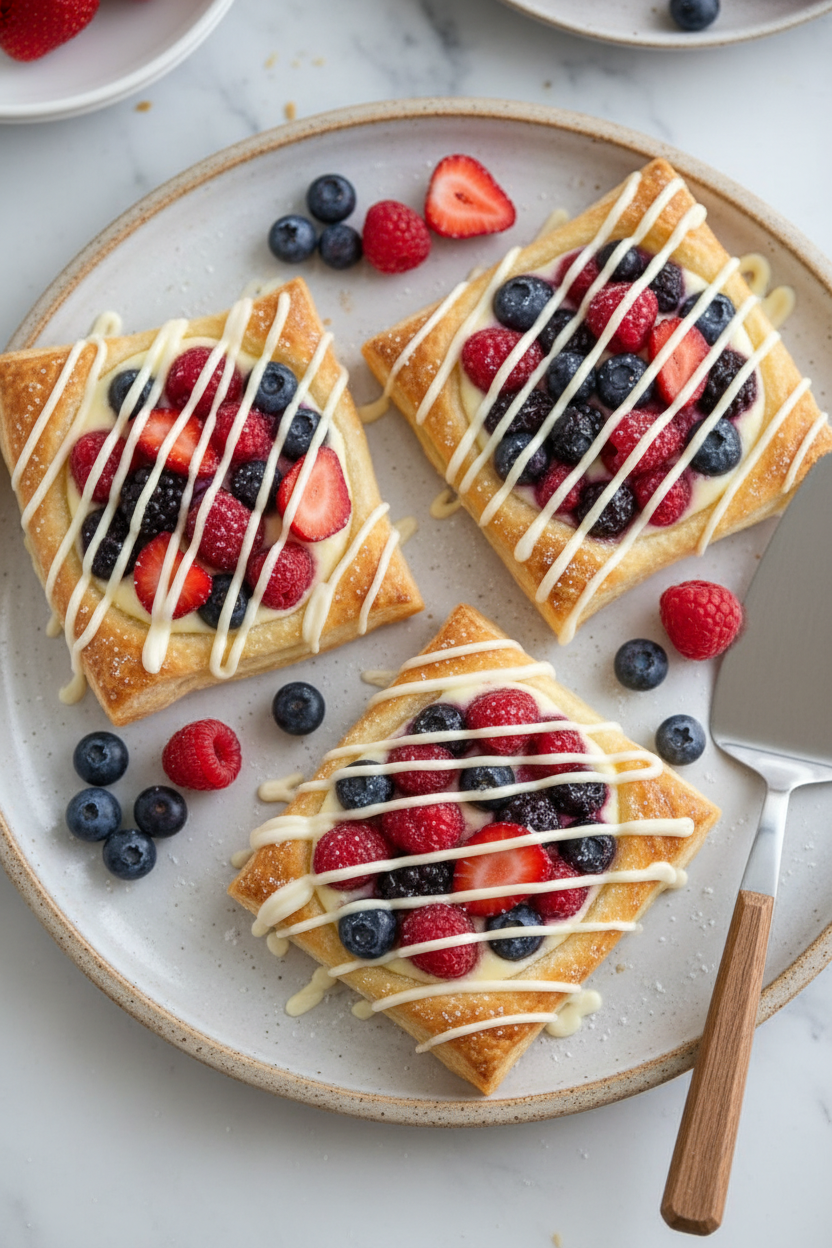
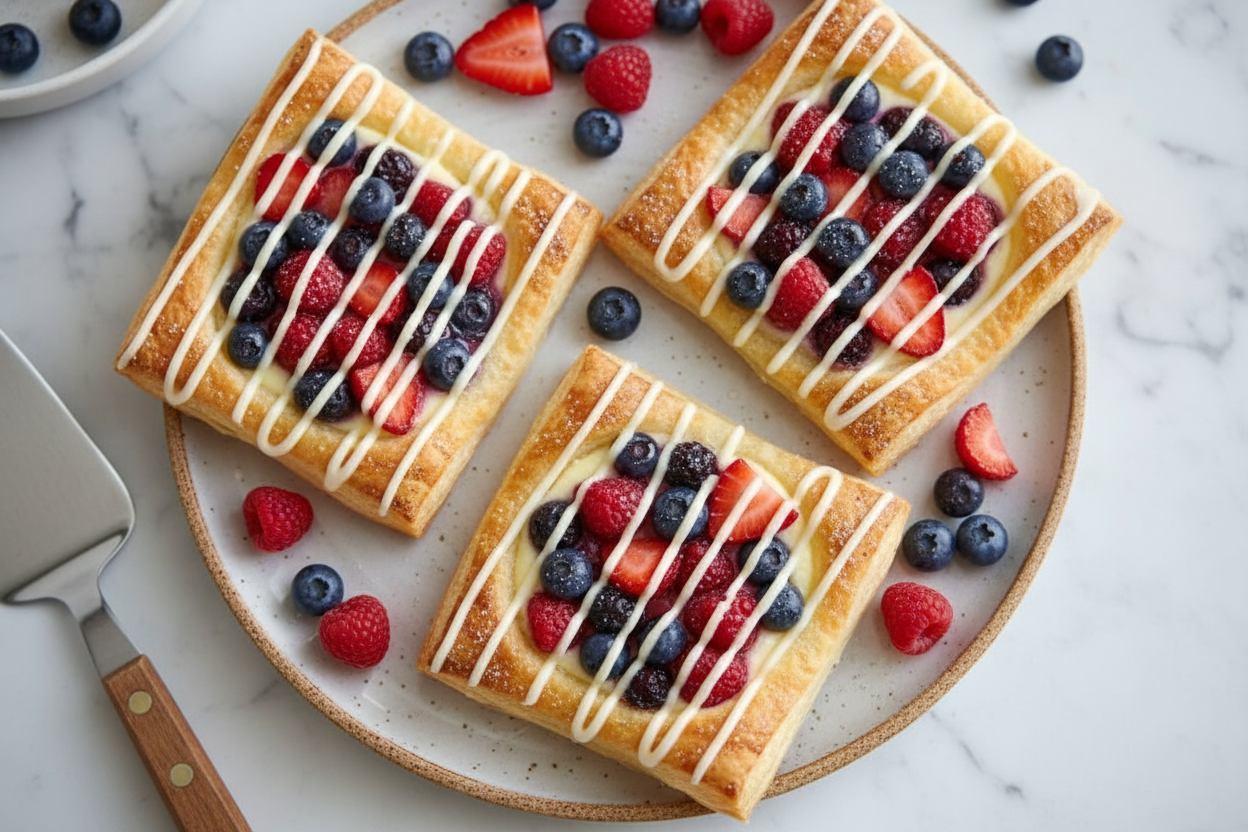
I like to use blueberries, raspberries, and sliced strawberries. You can pick your favorite kind. The berries get warm and soft in the oven. They pop a little when you bite them. Why does this matter? Fresh berries add a little tangy sweetness. It balances the creamy cheese perfectly. It is like a little party in your mouth. What is your favorite berry? I love blueberries best.The Egg Wash and The Shiny Glaze
The egg wash is just one egg beaten with a little water. You brush it on the edges. This makes them turn a beautiful golden brown. It looks like they came from a bakery. The apricot jam glaze is optional. I add it when I want them to look extra fancy. You warm the jam and brush it on the berries. It makes them shine like little jewels. Do you have a trick to make your food look pretty? I love hearing ideas.A Little Lesson About Waiting
When they come out of the oven, let them sit for a few minutes. I know it is hard. They smell so good. But the filling is very hot. If you eat them too fast, you might burn your tongue. I did that once when I was young. I still laugh at that memory. Patience is worth it. After they cool a bit, dust them with powdered sugar. It makes them look like they are wearing a light snow.Share, Don’t Just Eat
These pastries are best when you share them. Call a friend or a grandparent. Bring them a little plate with two pastries. You will see their face light up. Why does this matter? Food tastes better when you make someone happy. That is the real secret ingredient. How would you share your Danish pastries? With a neighbor? A teacher? I would love to hear.Ingredients:
| Ingredient | Amount | Notes |
|---|---|---|
| Puff pastry | 1 sheet | Thawed |
| Cream cheese | 4 ounces | Softened |
| Granulated sugar | 2 tablespoons | |
| Vanilla extract | 1 teaspoon | |
| Lemon zest | 1/2 teaspoon | |
| Mixed fresh berries (blueberries, raspberries, sliced strawberries) | 1/2 cup | |
| Egg | 1 | Beaten, for egg wash |
| Water | 1 tablespoon | For egg wash |
| Powdered sugar | For dusting (optional) | |
| Apricot jam | 1 tablespoon | Optional, for glaze |
The Morning We Made These Danishes Together
I remember the first time I made these cream cheese danishes. My granddaughter, Lily, sat on the counter swinging her legs. She kept asking if they were done yet. I told her good things take a little patience. Doesn’t that smell amazing when they bake?
These pastries are perfect for a lazy weekend breakfast. Or for when you want to surprise someone special. The puff pastry does all the hard work for you. Fresh berries make them taste like summer in a bite. I still laugh at how fast they disappeared that morning.
Here is one hard-learned tip: make sure your cream cheese is really soft before mixing. Cold cream cheese makes lumpy filling. Set it out on the counter for 20 minutes first. Your fingers should sink into it like butter.
Step 1: Preheat your oven to 400°F. Line a baking sheet with parchment paper. This stops the pastries from sticking. It also helps them brown evenly. I once forgot this step and used wax paper instead. What a sticky mess that was!
Step 2: In a small bowl, beat the softened cream cheese with sugar, vanilla, and lemon zest. Mix until it looks smooth and creamy. The lemon zest adds a tiny bright flavor. You can skip it if you don’t have a lemon handy. But I think it makes the berries sing.
Step 3: On a lightly floured counter, unfold your thawed puff pastry sheet. Cut it into 6 equal squares with a sharp knife. Score a half-inch border around each square. Be careful not to cut all the way through. This little fence keeps the filling from running out.
Step 4: Use a fork to poke the center of each square several times. This stops the middle from puffing up too high. You want a little dent for the filling. My uncle Skip never does this step. His danishes look like puffy pillows with no filling!
Step 5: Spoon about one tablespoon of cream cheese mixture into the center of each square. Spread it gently inside the scored border. Top each with a few fresh berries. Blueberries, raspberries, or sliced strawberries all work great. Don’t overload them or they’ll leak.
Step 6: Beat the egg with one tablespoon of water. Brush this egg wash on the edges of each pastry square. This gives them a shiny, golden-brown crust. It looks like they came from a bakery. Your kitchen will smell like butter and toast.
Step 7: Place the pastries on your lined baking sheet. Bake for 15 to 18 minutes. Watch for the edges to turn golden and puffy. The berries might look a little juicy. That’s a good sign. Quick quiz: What temperature do you preheat the oven to? Share below!
Step 8: While the pastries are still warm, you can brush the berries with warmed apricot jam. This gives them a pretty glossy shine. Let them cool for a few minutes. Dust with powdered sugar if you like. Then serve and watch everyone smile.
Cook Time: 15-18 minutes
Total Time: 35 minutes
Yield: 6 pastries
Category: Breakfast, Brunch
Three Fun Twists to Try
Sometimes I switch things up depending on the season or my mood. Here are three easy twists you can try at home. They all start with the same simple recipe. Just swap out the fruit or add a little something extra.
Savory Spin: Skip the berries and lemon zest. Add a pinch of salt and some chopped fresh chives to the cream cheese. Top with a tiny slice of tomato before baking. It’s like a fancy breakfast pocket.
Winter Warmth: Use sliced pears or apples instead of berries. Sprinkle a little cinnamon and brown sugar on top. The house will smell like Christmas morning. Add a drizzle of caramel after baking if you’re feeling fancy.
Chocolate Dream: Stir one tablespoon of cocoa powder into the cream cheese mixture. Top with raspberries instead of mixed berries. The chocolate and raspberry combo is a classic. My grandson calls these “breakfast brownies.” Which one would you try first? Comment below!
How to Serve and Sip
These danishes are wonderful all on their own. But a few little extras make them feel extra special. Place them on a pretty plate with a handful of fresh berries on the side. A small dollop of whipped cream never hurts. The contrast of warm pastry and cool cream is lovely.
For a crunchy garnish, sprinkle some sliced almonds over the top before baking. They toast up golden and add a nice texture. You could also dust them with a little extra lemon zest right before serving. It makes them look fancy without any extra work.
For drinks, a warm mug of spiced chai tea is perfect. The cinnamon and cardamom match the berries beautifully. If you want something grown-up, a cold glass of sparkling white wine pairs nicely. It cuts through the buttery pastry. Which would you choose tonight?
Storing Your Danish Pastries Like a Pro
These little pastries taste best the day you bake them. But you can save extras for later. Let them cool completely first. Then place them in an airtight container. They will stay fresh at room temperature for about two days.
For longer storage, pop them in the fridge. They will keep for up to four days. I remember my first batch of danishes. I was so proud, but I made too many. I wrapped them in foil and froze them. They were just as lovely a week later.
To reheat, warm them in a 350°F oven for five minutes. This brings back the flaky texture. If you want to batch-cook, make the pastries but stop before baking. Freeze them on a tray, then bag them up. Bake straight from the freezer, adding a few extra minutes. This matters because you get fresh pastries any morning without all the work. Have you ever tried storing it this way? Share below!
Fixing Common Danish Problems
Sometimes the filling leaks out while baking. This happens if you spread it too close to the edge. Leave that half-inch border I mentioned. It acts like a little wall. I once forgot this and ended up with a sticky mess. The flavor was still good, though.
Another issue is a soggy bottom. This means the berries released too much juice. Toss the berries in a tiny bit of cornstarch before adding them. It soaks up the extra liquid. Why does this matter? Because a crisp pastry is much more enjoyable to eat.
The third problem is uneven puffing. Your oven might run hot or cold. Use an oven thermometer to check. Also, do not skip pricking the center with a fork. This lets steam escape evenly. Fixing these small issues builds your cooking confidence. You start knowing you can handle any recipe. Which of these problems have you run into before?
Quick Answers to Your Danish Questions
Q: Can I use gluten-free puff pastry?
A: Yes, many stores sell gluten-free puff pastry. Follow the package directions for baking time.
Q: Can I make these the night before?
A: Yes. Assemble them on the tray, cover with plastic wrap, and bake in the morning.
Q: What if I don’t have fresh berries?
A: Use frozen berries. Do not thaw them first. Add them straight from the bag.
Q: Can I double the recipe?
A: Yes. Just use two sheets of puff pastry and bake on two trays. Swap the trays halfway through.
Q: Do I have to use apricot jam for the glaze?
A: No. You can skip it or use honey thinned with a drop of water. Which tip will you try first?
A Sweet Goodbye from My Kitchen to Yours
I hope these danishes bring a little joy to your table. They are perfect for a lazy weekend breakfast or a teatime treat. My grandkids love helping me place the berries on top. It makes the kitchen smell wonderful.
*Fun fact: Puff pastry was invented in France by accident. A baker forgot to add butter the right way, and a new pastry was born.*
I would love to see your creations. Share a photo with us. Have you tried this recipe? Tag us on Pinterest! Your baking makes me smile. Happy cooking! —Chloe Hartwell.
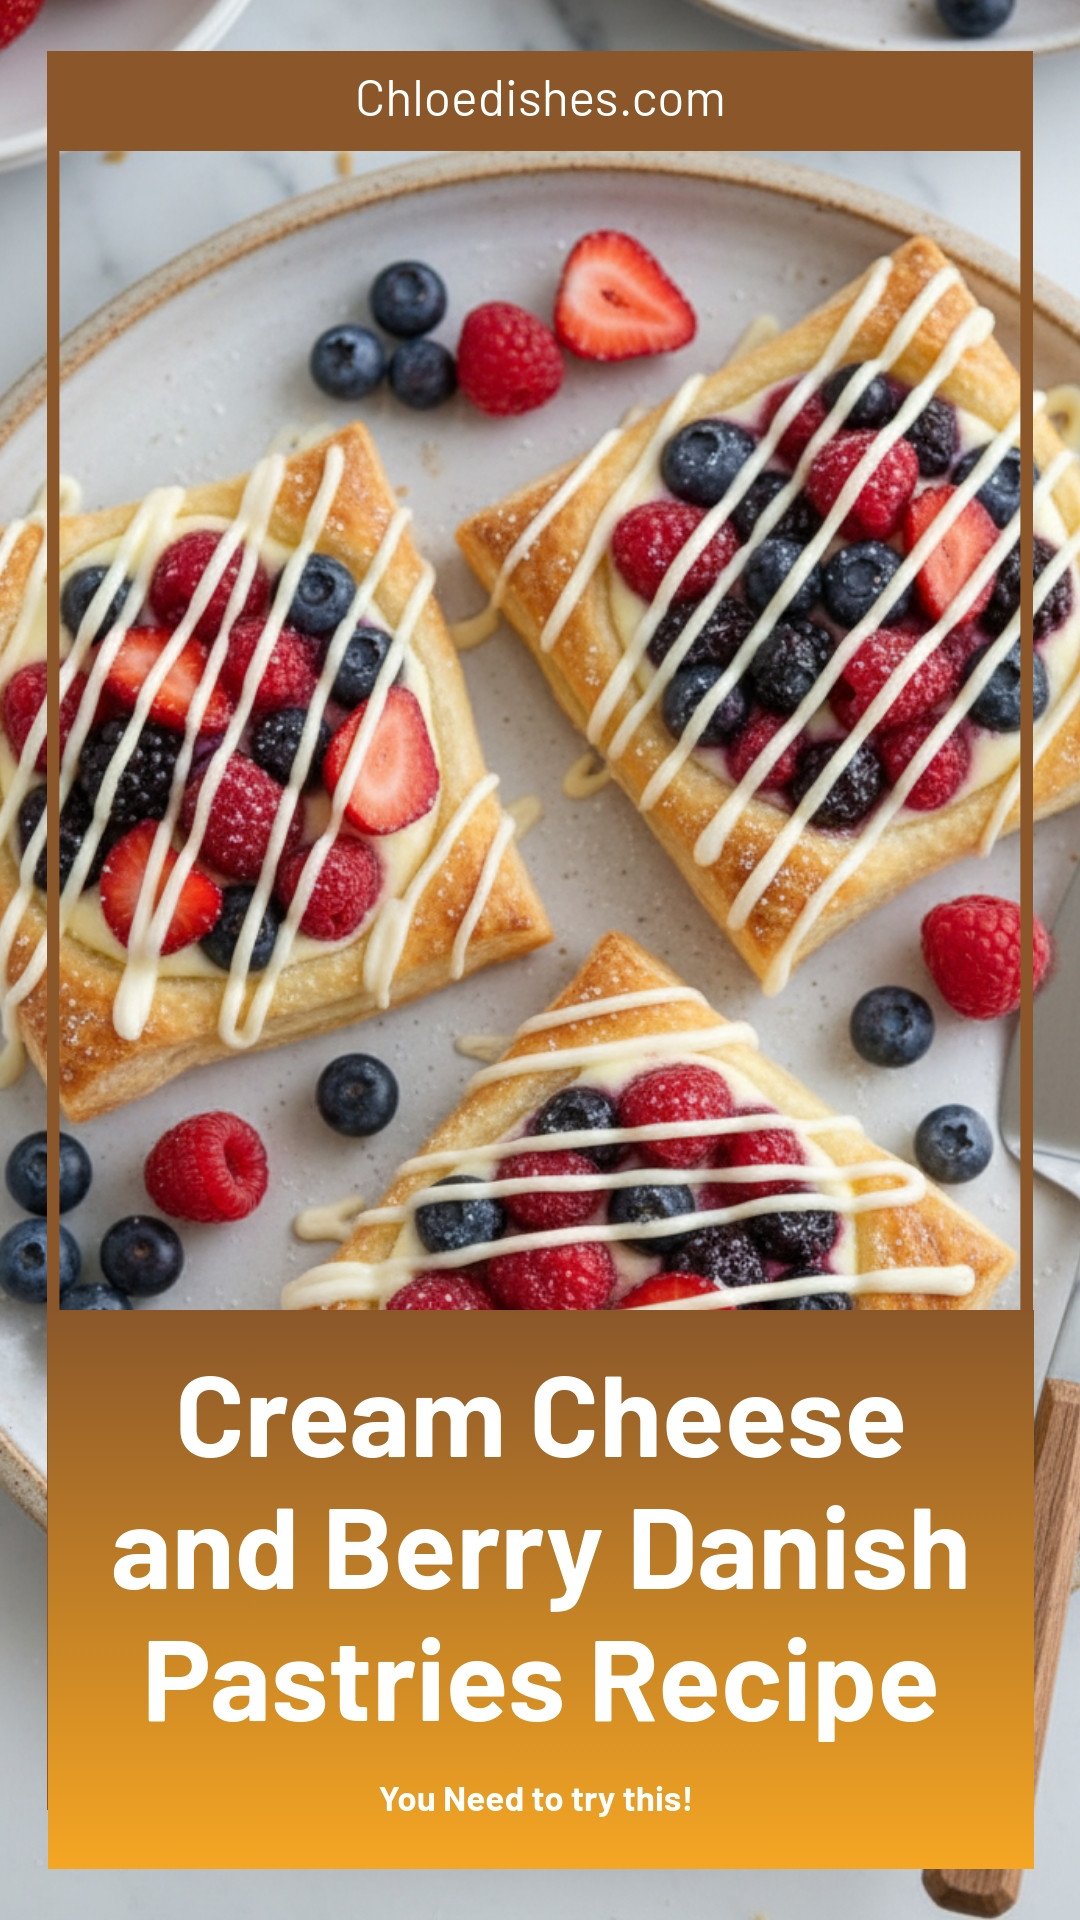
Cream Cheese and Berry Danish Pastries Recipe
Description
Indulge in flaky cream cheese and berry danish pastries, perfect for brunch. Easy homemade recipe with sweet fruit filling.
Ingredients
Instructions
- Preheat Oven: Preheat your oven to 400°F (200°C) and line a baking sheet with parchment paper to prevent sticking and ensure even baking.
- Prepare Cream Cheese Mixture: In a small bowl, beat the softened cream cheese with granulated sugar, vanilla extract, and lemon zest until the mixture is smooth and creamy.
- Cut Puff Pastry: On a lightly floured surface, unfold the thawed puff pastry sheet and cut it into 6 equal squares. Lightly score a ½-inch border around each square, being careful not to cut all the way through, to help contain the filling during baking.
- Prick Pastry Centers: Use a fork to prick the center of each square to prevent the pastry from puffing up too much in the middle.
- Add Filling and Toppings: Spoon about 1 tablespoon of the cream cheese mixture onto the center of each square, spreading it gently within the scored border. Top each with a few fresh mixed berries for a burst of fruity flavor.
- Apply Egg Wash: Beat the egg with water and brush the edges of each pastry square with the egg wash to promote a shiny, golden-brown finish during baking.
- Bake Pastries: Place the prepared pastries on the lined baking sheet and bake for 15–18 minutes, or until the pastries are puffed and beautifully golden brown.
- Optional Glazing and Serving: While still warm, brush the berries gently with warmed apricot jam for a glossy finish. Allow the pastries to cool slightly before dusting with powdered sugar, then serve and enjoy.
Notes
- For best results, use fresh berries and serve warm for the flakiest texture.


Leave a Reply