
My First Cookie Disaster
Let me tell you about my first time baking alone. I was about ten. I mixed everything up in a big bowl. I was so proud. Then I forgot the sugar. Completely! The cookies tasted like sweetened cardboard. I still laugh at that.
We all make mistakes in the kitchen. It’s how we learn. That’s why this matters. Baking teaches us to try again. Now, I always taste my dough. Do you have a funny kitchen mistake story? I’d love to hear it.
Why These Cookies Feel Like a Hug
These cookies are pure joy. They have soft butter and two kinds of sugar. The vanilla makes your kitchen smell like a bakery. Doesn’t that smell amazing? The sprinkles add a happy crunch.
*Fun fact*: The cornstarch is a secret trick. It makes the cookies extra soft and chewy. They stay that way for days. That’s another reason this matters. A good cookie should bring comfort long after it’s baked.
Mixing with Heart (Not Just a Mixer)
Start with room-temperature butter. Press your thumb into it. It should make a gentle dent. This creams perfectly with the sugar. Mix it for two full minutes. This puts tiny air bubbles in the dough.
Those bubbles make the cookies light. Then add your egg and vanilla. Scrape the bowl sides well. This ensures every bit gets loved. Do you prefer using a stand mixer or mixing by hand? Tell me your style.
The Magic of Gentle Folding
Now, add your dry ingredients. Mix just until the flour disappears. Over-mixing makes tough cookies. We don’t want that. Then, the best part comes. Gently fold in the sprinkles and chocolate chips.
Use a big spoon or your hands. Be kind to the dough. You want colorful bits in every bite. I like to save a few sprinkles for the top. It makes them look so pretty. What’s your favorite add-in besides chocolate chips?
Knowing When They’re Perfect
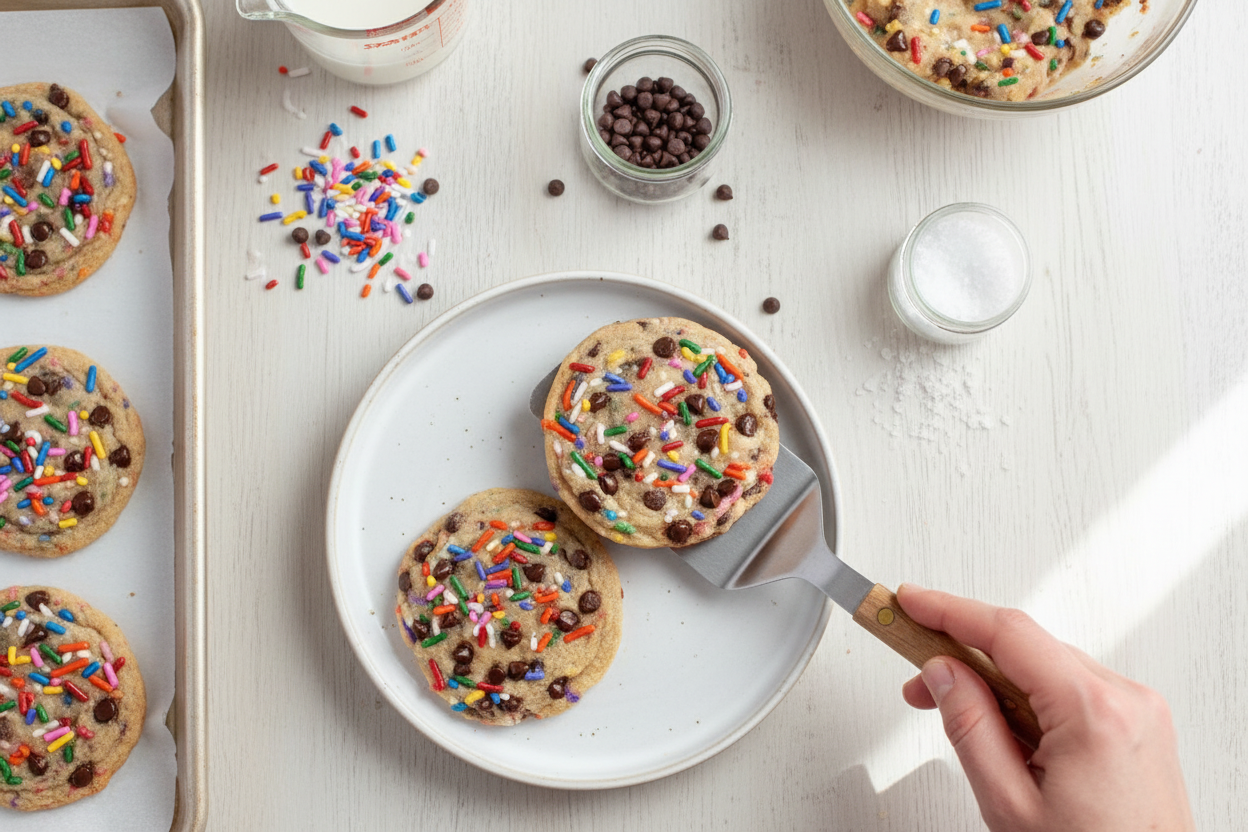
Baking time is key. Set your timer for 9 minutes. Peek at them. The edges should be just turning gold. The centers will look a little soft. That is perfect. They keep baking on the hot tray after you take them out.
This gives you a chewy middle and a crisp edge. Let them cool right on the sheet. It feels like a long wait. But it’s worth it. Then, enjoy your little bites of happiness.
Ingredients:
| Ingredient | Amount | Notes |
|---|---|---|
| butter, room temperature | 3/4 cup (170g) | plant-based or regular |
| light brown sugar | 3/4 cup (150g) | |
| granulated sugar | 1/4 cup (50g) | |
| large egg | 1 | can sub 1 flax egg |
| vanilla extract | 1 tablespoon (15ml) | |
| flour | 2 cups (240g) | all-purpose or gluten-free 1:1 baking blend |
| cornstarch | 2 tablespoons (16g) | |
| coarse sea salt | 1 teaspoon (6g) | |
| baking soda | 3/4 teaspoon | |
| sprinkles | 1/2 cup (84g) | |
| chocolate chips | 1/2 cup (84g) | plant-based or regular |
My Favorite Happy Cookie Recipe
Hello, my dear. It’s Chloe. Come sit at the table. I want to share my happiest cookie recipe. These are my chocolate chip sprinkle cookies. They always make me smile. I first made them for my grandson’s birthday. He said they looked like a party. I still laugh at that. They are soft, sweet, and full of joy. Let’s bake some sunshine together. Doesn’t that sound nice?
First, we gather our happy ingredients. You’ll need butter, two kinds of sugar, and an egg. Vanilla is a must for good smell. Flour, cornstarch, salt, and baking soda make the dough. Now for the fun part. We need sprinkles and chocolate chips. The more color, the better. I like to use the rainbow sprinkles. They remind me of confetti. Are you ready to start mixing?
Step 1: Warm your oven to 350ºF. Line your cookie sheets with parchment paper. This keeps them from sticking. I learned that the hard way once. What a mess that was! Now, put your soft butter and both sugars in a bowl. Mix them on high for two whole minutes. It will get light and fluffy. This makes the cookies tender.
Step 2: Crack in your egg. Pour in that lovely vanilla. Mix it all together. Doesn’t that smell amazing? It already smells like cookies. Now, add your flour, cornstarch, salt, and baking soda. Mix on low speed. Scrape the bowl’s sides with a spatula. A dough will form. (My hard-learned tip: measure your flour carefully. Too much makes dry cookies!).
Step 3: Time for the party! Gently fold in your sprinkles and chocolate chips. I use a big wooden spoon. Watch the colors swirl. It’s so pretty. Scoop the dough into big mounds. Use about three tablespoons each. Place them far apart on your sheet. They spread out as they bake. Why do we leave space between them? Share below!
Step 4: Bake for 9 to 11 minutes. Watch for light golden edges. The centers will look a little soft. That’s perfect. They keep baking on the hot tray. This makes them chewy. Take them out and let them cool right there. I always sneak one while it’s warm. The chocolate is so melty. It’s the best little treat.
Cook Time: 9-11 minutes per batch
Total Time: About 30 minutes
Yield: About 16 big cookies
Category: Dessert, Cookies
Let’s Make It Your Own
This recipe is like a good friend. You can dress it up for any occasion. Here are three of my favorite twists. They are all so simple and fun. Try one next time you bake. It feels like creating a new tradition.
Birthday Cake Fun: Use cake batter flavored chips. Add extra rainbow sprinkles. It tastes just like a birthday.
Peanut Butter Joy: Swap half the chocolate chips for peanut butter chips. The salty-sweet mix is wonderful.
Summer Berry: Use white chocolate chips. Fold in freeze-dried strawberry pieces. It’s sweet and a little tart.
Which one would you try first? Comment below!
The Perfect Little Plate
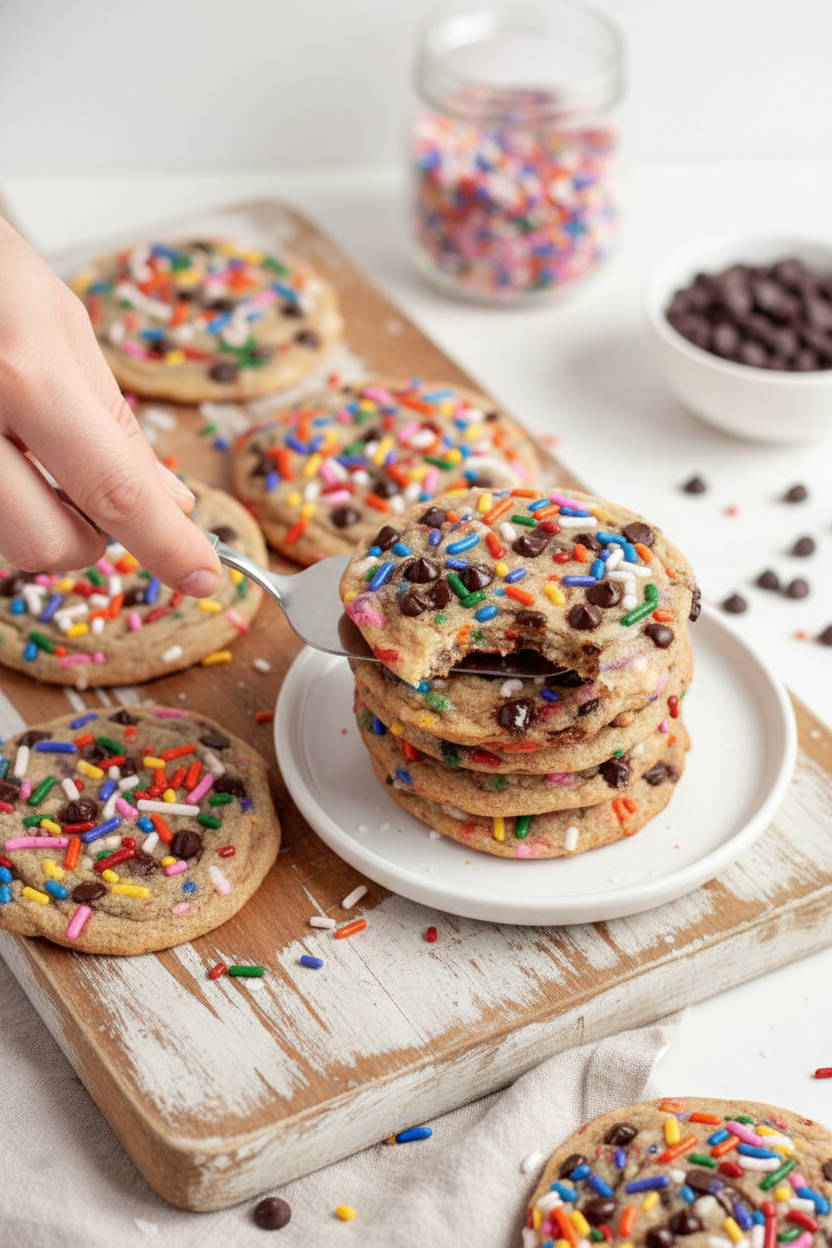
These cookies are stars all on their own. But I love making a special moment. For a treat, place one on a small plate. Add a tiny bowl of cold milk for dipping. It’s classic. For a party, stack them high on a cake stand. It looks so cheerful. You could even crumble one over vanilla ice cream. Now that’s a sundae!
What to drink? A cold glass of milk is always right. It cuts the sweetness. For the grown-ups, a cup of coffee with cream is lovely. The bitter coffee tastes great with sweet chocolate. Which would you choose tonight?
Keeping Your Cookies Happy
Let’s talk about keeping these cookies tasty. First, cool them completely. A warm cookie in a container gets soggy. I store mine in a tin with a tight lid. They stay soft for five days.
You can freeze the dough or baked cookies. For dough, roll balls and freeze on a sheet. Then bag them up. Bake straight from the freezer, adding a minute or two. *Fun fact: My grandson calls our freezer the “cookie vault.” He loves finding a sweet surprise.
Batch cooking saves time and energy. Making a double batch means treats are always ready. This matters for busy families. A homemade cookie can turn a tough day around. Have you ever tried storing it this way? Share below!
Cookie Troubles? Easy Fixes!
Sometimes cookies spread too thin. Your butter was probably too warm. Chill your dough for 30 minutes before baking. This helps them keep a nice shape.
If cookies are too cakey, you may have over-measured flour. Spoon flour into your cup. Then level it off with a knife. I once made puffy little cookie cakes this way. They were still eaten, of course!
Flat, greasy cookies mean your butter was too soft. Room temperature butter should dent slightly when pressed. Getting this right matters for perfect texture. It builds your baking confidence. Which of these problems have you run into before?
Your Cookie Questions, Answered
Q: Can I make these gluten-free? A: Yes! Use a good 1:1 gluten-free baking flour blend. It works perfectly.
Q: Can I make the dough ahead? A: Absolutely. Keep it in the fridge for up to three days. Let it soften a bit before scooping.
Q: What can I swap for an egg? A: A flax egg works great. Mix 1 tablespoon ground flax with 3 tablespoons water. Let it sit for 5 minutes.
Q: Can I double the recipe? A: You sure can. Just mix everything in a bigger bowl.
Q: Any optional tips? A: Use coarse sea salt. It gives little bursts of flavor. Which tip will you try first?
From My Kitchen to Yours
I hope you love baking these cheerful cookies. They always make my kitchen feel brighter. I would love to see your creations. Share a photo of your cookie sheet.
It makes my day to see your baking adventures. Have you tried this recipe? Tag us on Pinterest! You can find me at @ChloesCozyKitchen. Thank you for baking with me today.
Happy cooking! —Chloe Hartwell.


Chocolate Chip Sprinkle Cookies
Description
The ultimate soft & chewy chocolate chip cookies with colorful sprinkles! Easy recipe for birthdays, holidays, or any sweet celebration.
Ingredients
Instructions
- Preheat the oven to 350ºF and prepare two large cookie sheets with parchment paper.
- In a stand mixer or mixing bowl with an electric mixer, combine the butter, brown sugar, and granulated sugar and cream on high speed for 2 minutes.
- Add in the egg and vanilla extract and mix until combined.
- Measure in the flour, cornstarch, salt, and baking soda and mix on low until a dough forms. Scrape down the sides of the bowl when needed.
- Gently fold in the sprinkles and chocolate chips.
- Scoop the cookie dough into 3 tablespoon portions and place on the prepared cookie sheets approximately 2-3 inches apart. If desired, top with additional sprinkles and chocolate chips.
- Bake for approximately 9-11 minutes or until the edges are a light golden brown and the center appears slightly underbaked.
- Remove from the oven. If desired, push in any errant cookie edges and allow to cool fully on the sheet. Enjoy!
Notes
- Store leftover cookies in an airtight container at room temperature for up to 5 days or in the freezer for up to 3 months.


Leave a Reply