
The Magic of Three Ingredients
Some of the best things are the simplest. I learned that from my own grandma. She could make magic with just a few things. These brownies are like that. Only three ingredients! It feels like a little kitchen trick.
You get rich brownie mix, water, and peanut butter. That’s it. The peanut butter becomes a secret frozen layer. It bakes right into the middle. Doesn’t that sound fun? What’s your favorite simple recipe to make?
A Peanut Butter Surprise
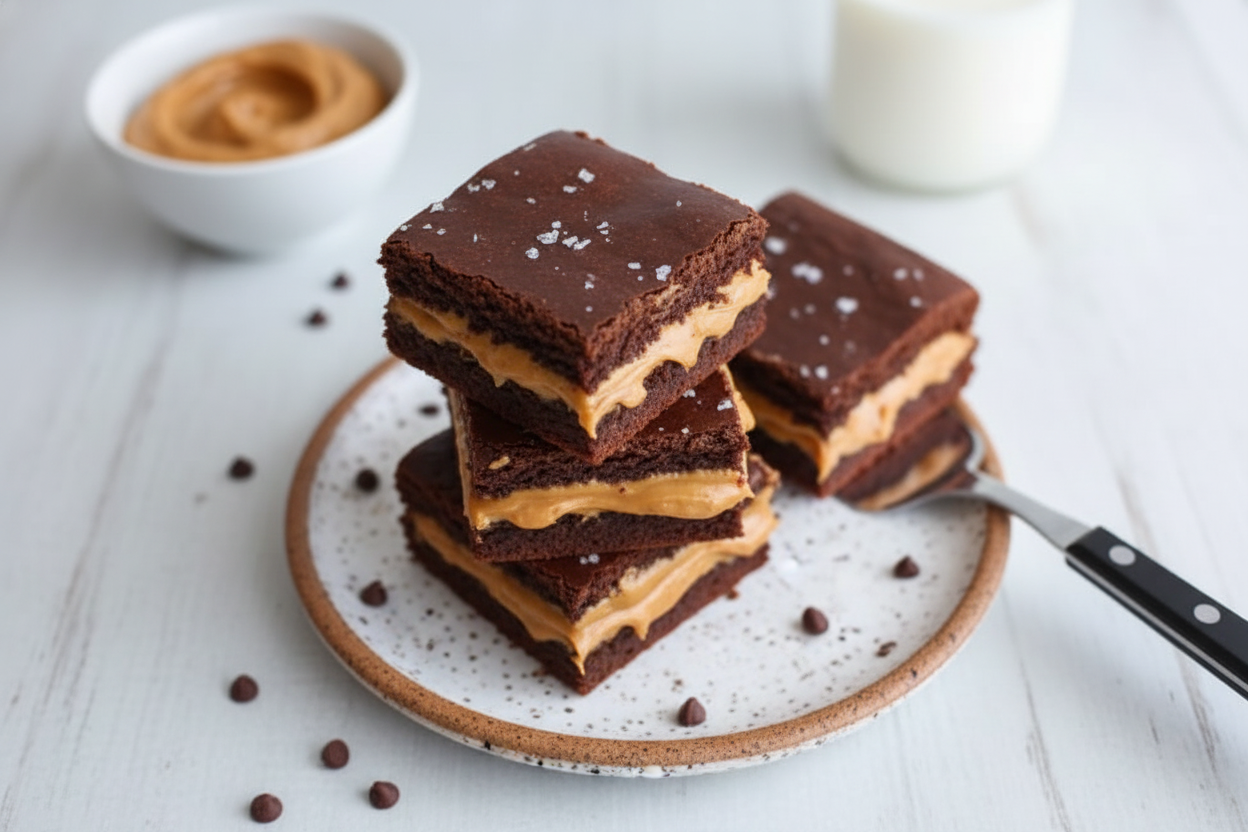
Here’s the fun part. You freeze the peanut butter first. This matters because a frozen slab won’t just sink. It stays put in the middle. You get a perfect creamy layer in every bite.
I remember the first time I tried this. My grandson thought I’d hidden a candy bar inside! I still laugh at that. Melting and freezing it is like making a little peanut butter treasure map. Fun fact: Freezing peanut butter makes it easier to handle. It won’t stick to everything!
Putting It All Together
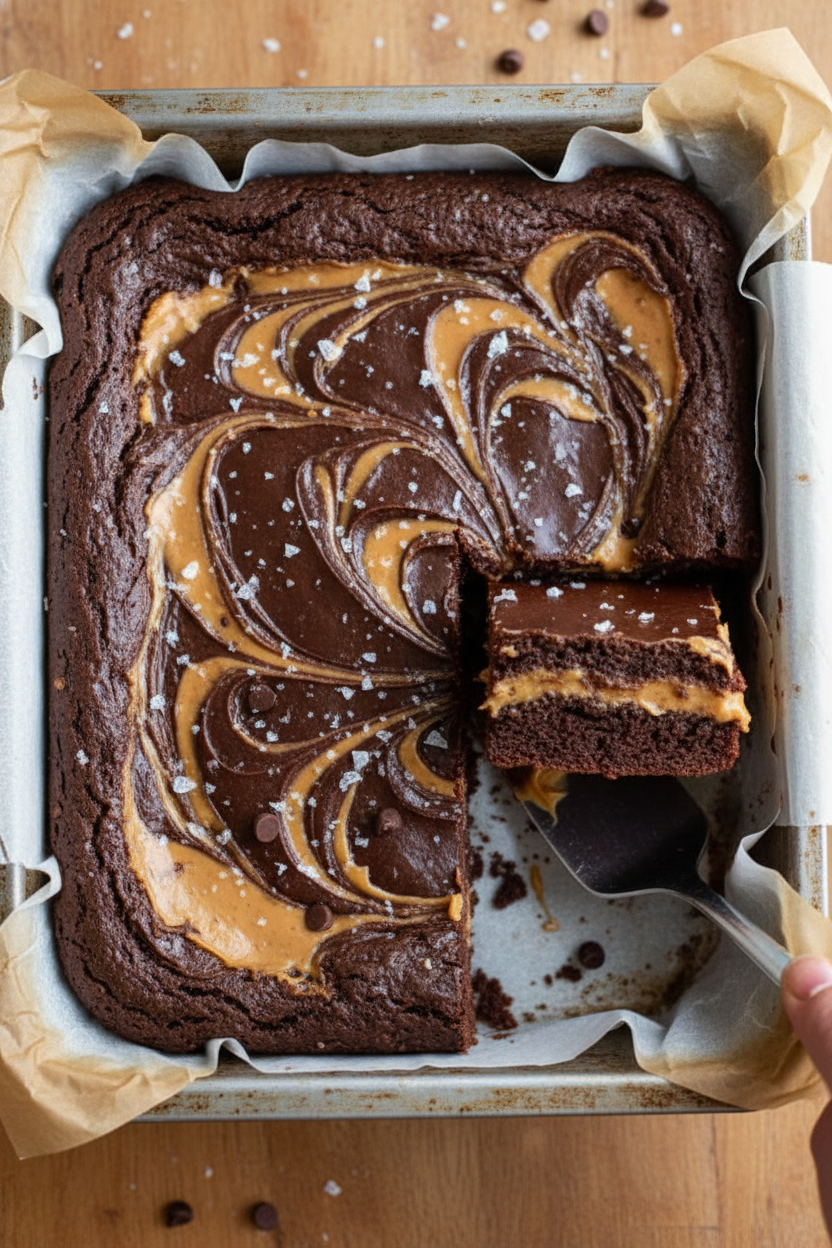
Making these is like building a sandwich. First, you pour half the brownie batter. Then you lay down your peanut butter treasure. Last, you cover it with the rest of the batter. The oven does the rest of the work.
As it bakes, your kitchen will smell amazing. Like chocolate and roasted nuts. That smell is part of the joy. It makes everyone gather, wondering what’s for dessert. Do you love the smell of baking as much as I do?
Why This Little Recipe Matters
This recipe matters because it builds confidence. You can’t mess it up. It shows you that cooking is just following small, happy steps. Anyone can do it, even if you’re new in the kitchen.
It also matters because it creates a moment. Sharing warm brownies is sharing happiness. It’s a small act of love. Food made with simple care always tastes better. Don’t you think so?
Your Turn to Bake & Share
Now it’s your turn. Grab your three ingredients and start. The hardest part is waiting for them to bake! Let them cool a bit before you cut them. The gooey middle is worth the wait.
I’d love to hear how yours turn out. Did your peanut butter layer stay perfectly in the middle? What did your family or friends say when they tried one? Tell me all about your baking adventure!
Ingredients:
| Ingredient | Amount | Notes |
|---|---|---|
| Naked Nutrition Naked Brownie mix | 15 scoops | |
| Water | 9 & ½ ounces | |
| Peanut butter | 2 tablespoons |
My Magical Peanut Butter Brownie Trick
Hello, my dear! Let’s make something special today. These brownies are like a little kitchen secret. They only need three things. I love recipes like this. They remind me of baking with my grandkids. We always made a happy mess.
The trick is freezing the peanut butter first. It creates a wonderful surprise inside. You get a soft, melty ribbon in every bite. Doesn’t that sound wonderful? It’s so simple, but it feels like magic. I still laugh at how easy it is. Let’s begin.
Step 1: An hour before baking, melt your peanut butter. Use a small pot on the lowest heat. Stir it until it’s completely smooth and runny. Then pour it onto a wax paper-lined pan. Pop the whole pan into the freezer. This will make it firm up nicely. (My hard-learned tip: Use creamy peanut butter for this. The chunky kind doesn’t melt as evenly!). Step 2: Now, get your brownie batter ready. Preheat your oven to 350 degrees. It needs to be warm and waiting. Combine your brownie mix and water in a big bowl. Stir it until no dry spots remain. The batter will be thick and shiny. Doesn’t that smell amazing already? Step 3: Time for the fun part! Take the pan from the freezer. Peel the frozen peanut butter off the wax paper. It will come off in one lovely sheet. Line your pan with new parchment paper. Pour in half of your brownie batter. Can you guess what comes next? Step 4: Lay that peanut butter sheet right on the batter. It’s like giving the brownies a hidden blanket. Then cover it with the rest of the batter. Gently spread it to the edges. Now the peanut butter is secretly tucked inside. Ready for a mini-quiz? Why do we freeze the peanut butter first? Share below! Step 5: Bake for 20 to 23 minutes. Your kitchen will smell like a dream. Let them cool a bit before you cut them. The peanut butter inside will be perfectly soft. Serve them with a big glass of milk. Enjoy every gooey, chocolatey bite! Cook Time: 20–23 minutesTotal Time: 1 hour 30 minutes (includes freezing)
Yield: 9 brownies
Category: Dessert, Snack
Three Fun Twists to Try
Once you master the basic recipe, you can play! Here are my favorite simple twists. They make the brownies feel new again. My grandson loves the “cookie” idea. It’s his special request now.
Cookie Swirl: Add a tablespoon of cookie butter to the melted peanut butter. Swirl it gently for a marbled look.Berry Surprise: Press a few fresh raspberries into the top batter before baking. They get wonderfully jammy.
Salty Sweet: Sprinkle a tiny pinch of flaky sea salt on top after baking. It makes the chocolate taste richer.
Each one brings a little joy. Which one would you try first? Comment below! I love reading your ideas.
Serving Them Up Right
These brownies are wonderful all on their own. But you can make them extra special. For a treat, top a warm square with vanilla ice cream. The cold and hot mix is heavenly. A dollop of whipped cream and a strawberry looks pretty too.
What to drink? A cold glass of milk is always my first choice. For the grown-ups, a small glass of tawny port is lovely. It sips like liquid raisins. It goes so well with chocolate. Which would you choose tonight? I think I can guess the kids’ answer!
Keeping Your Brownies Fresh and Ready
Let’s talk about keeping these brownies yummy. Once cool, cover the pan tightly. They stay fresh on the counter for two days. For longer, pop them in the fridge. They will last a week there.
You can freeze them too. Wrap each square in plastic wrap. Then place them in a freezer bag. They keep for three months. Thaw on the counter when you want one.
I once forgot a whole batch in the freezer. My grandson found them a month later. It was a sweet surprise for us both! Storing food well means no waste. It also means a treat is always ready.
You can easily double this recipe. Just use a 9×13 inch pan. Bake for a few extra minutes. Have you ever tried storing it this way? Share below!
Simple Fixes for Common Brownie Troubles
Even easy recipes can have little hiccups. Do not worry. Here are some easy fixes. First, if your brownies are too crumbly, you baked them a bit too long. Next time, check them at 20 minutes.
Second, is the peanut butter layer sinking? Make sure it is frozen solid. I remember when mine wasn’t fully frozen. It swirled into the batter instead of staying layered. It still tasted great though!
Third, the top might look dry. This often happens if you over-mix. Just stir until you see no dry mix. Getting these steps right builds your confidence. It also makes the flavor and texture perfect.
Fun fact: The first brownie recipe was published in a cookbook in 1896! Which of these problems have you run into before?
Your Quick Brownie Questions Answered
Q: Can I make these gluten-free? A: Yes! Just use a gluten-free brownie mix. The rest of the steps are the same.
Q: Can I make them ahead? A: Absolutely. Bake them a day before you need them. They taste even better the next day.
Q: What can I use instead of peanut butter? A: Any nut butter works well. Try almond or cashew butter for a change.
Q: Can I double the recipe? A: You can. Use a bigger pan. Add about five minutes to the bake time.
Q: Any extra tips? A: A pinch of salt on top before baking is lovely. It makes the chocolate taste richer. Which tip will you try first?
From My Kitchen to Yours
I hope you love making these brownies. Cooking should be fun and simple. It is about creating small moments of joy. I would love to see your creation.
Share a photo of your baking adventure. You can tag my blog on Pinterest. Let’s build a little community of kitchen friends. Have you tried this recipe? Tag us on Pinterest!
Happy cooking!
—Chloe Hartwell.

Easy 3 Ingredient Peanut Butter Brownies
Description
Craving fudgy brownies? These 3-ingredient peanut butter brownies are incredibly easy, no mixer needed! Rich, gluten-free, and perfect for a quick dessert fix.
Ingredients
Instructions
- An hour before baking: Place peanut butter into a pot and heat on low. Stir well until melted and remove from heat.
- Line an 8×8 baking pan with wax paper. Pour melted peanut butter into the lined baking pan and place into the freezer. Freeze for at least one hour.
- Preheat oven to 350℉. In a large bowl, combine Naked Nutrition Naked Brownie mix and water. Stir until combined.
- Remove the 8×8 pan from the freezer and then remove the wax paper with peanut butter. Line the 8×8 pan with parchment paper.
- Pour half of the brownie batter into the pan. Remove the peanut butter from the wax paper and place on top of the brownie batter.
- Pour the remaining brownie batter on top of the peanut butter. Bake at 350℉ for 20-23 minutes. Serve and enjoy!


Leave a Reply