

A Sneaky Way to Eat Your Veggies
Let me tell you a little secret. My grandson used to turn his nose up at cauliflower. One day, I made this “pizza.” He ate three slices! I still laugh at that. He had no idea his crust was made of veggies.
This matters because food should be fun, not a fight. Hiding veggies in yummy dishes is a smart trick. It makes everyone happy. What vegetable did you dislike as a kid? Did you ever learn to like it?
The Magic of a Dry Squeeze
The most important step is squeezing that cauliflower dry. Use a clean kitchen towel. Squeeze it like you’re wringing out a wet swimsuit! Get all the water out.
If you skip this, your crust will be soggy. A dry squeeze gives you a crispy, sturdy base. It makes all the difference. Trust your grandma on this one.
Mixing Up Your “Dough”
Now, mix everything in a bowl. The cheese, egg, and herbs all go in. Doesn’t that smell amazing? The garlic and fresh basil make it so good. Mix it with your hands. Feel the dough come together.
Fun fact: The egg is the glue. It holds our veggie crust together so it doesn’t crumble. What’s your favorite pizza topping? I’d love to know what you’ll put on yours.
Patience for a Perfect Crust
Shape your dough on parchment paper. Bake it alone first. This is the secret step. You must let the crust get golden before adding toppings.
This matters because it builds a strong foundation. It keeps your pizza from getting mushy. Do you prefer a thin, crispy crust or a thick, soft one?
The Grand Finale
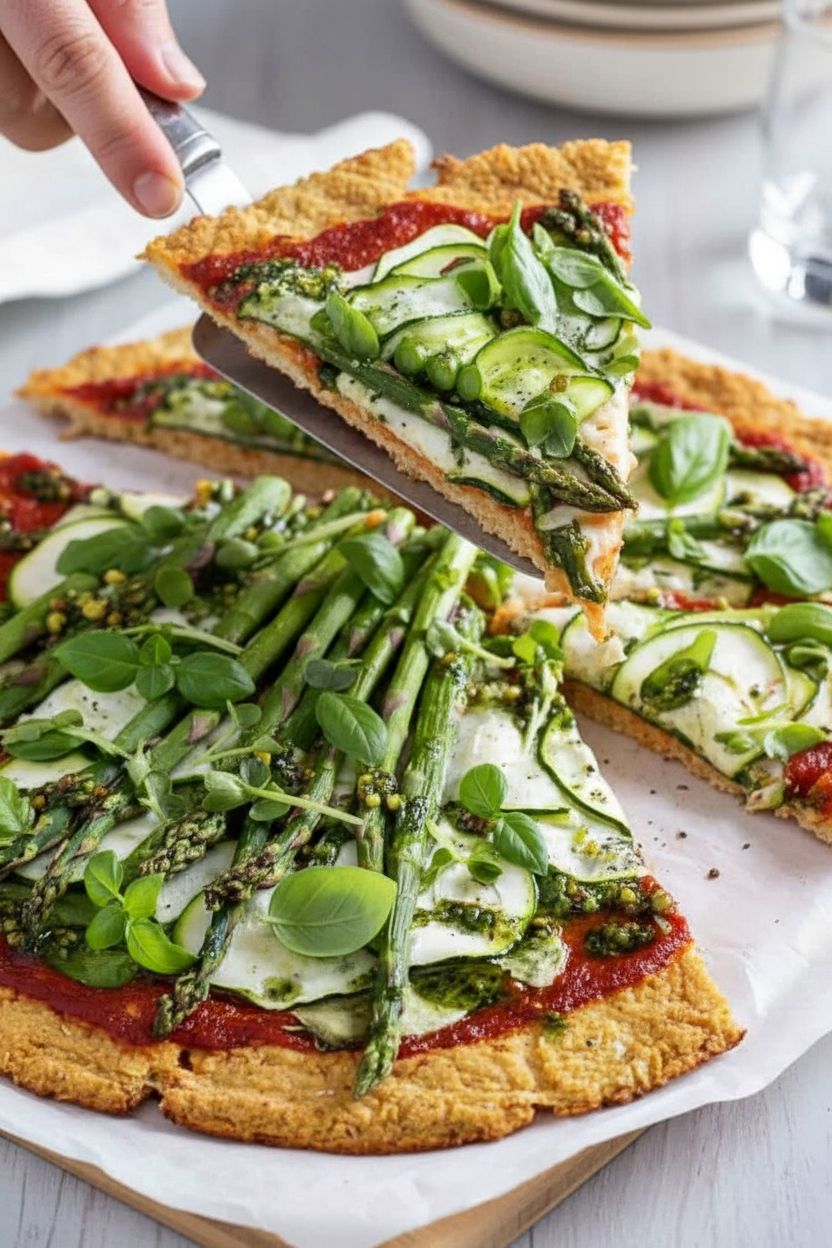
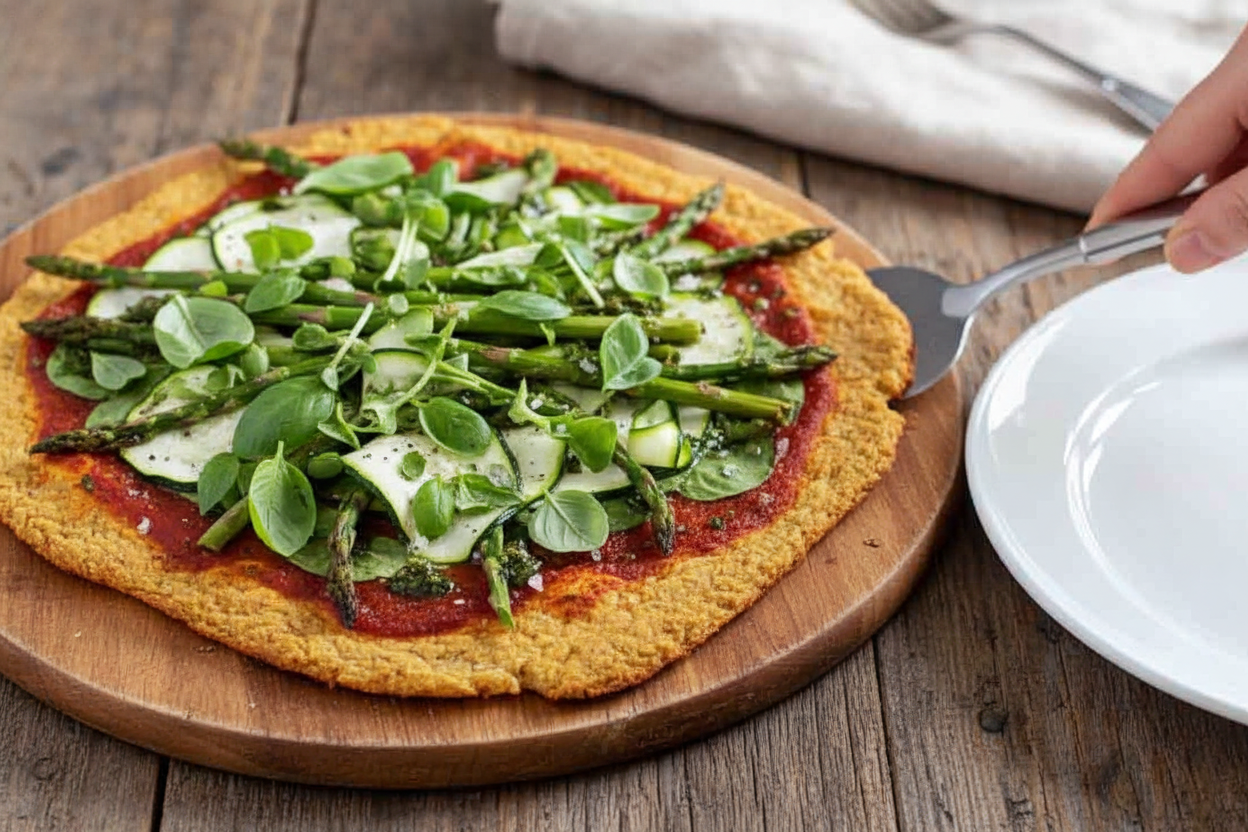
Now for the fun part! Add your sauce and toppings. Pop it back in the oven. Watch that cheese melt and bubble. It’s the best sight in the world.
Let it cool for just a minute before you slice. This helps it set. Then, share it with someone you love. Food always tastes better that way.
Ingredients:
| Ingredient | Amount | Notes |
|---|---|---|
| Cauliflower florets | 1 medium head (about 6 cups) | Cut into 1-inch pieces |
| Part-skim mozzarella cheese | 1/4 cup | Shredded |
| Parmesan cheese | 1/4 cup | Grated |
| Cheddar cheese | 1/4 cup | Shredded |
| Egg | 1 large | |
| Fresh basil | 1/4 cup | Chopped |
| Fresh parsley | 1/4 cup | Chopped |
| Garlic | 1 clove | Minced |
| Salt | 1 teaspoon | |
| Pepper | 1/2 teaspoon |
My Magical Cauliflower Pizza Crust
Hello, my dear! It’s Chloe. Let’s make some pizza magic today. This crust is made from cauliflower. I know, it sounds wild! My grandson didn’t believe me either. He took one bite and his eyes got so wide. Now he asks for it every Friday. Doesn’t that smell amazing already? It’s a fun little kitchen project. You’ll feel so clever when it’s done.
This recipe turns simple veggies into a crispy, cheesy base. You can top it with anything you love. I still laugh at that first time I made it. I was so proud! The key is getting the cauliflower very, very dry. (My hard-learned tip: squeeze it twice! Once warm, then once after it cools a bit more. You’ll get more water out.) Ready to start our adventure?
- Step 1: First, heat your oven to 425°F. Chop the cauliflower into little trees. Buzz them in the food processor until it looks like snow. Do this in small batches. Then, microwave it for 8 minutes. Let it cool just until you can touch it. Now, the fun part! Wrap it in a clean kitchen towel. Squeeze every drop of water out you can. Be strong!
- Step 2: Put that dry cauliflower in a big bowl. Add all three cheeses. Crack in the egg. Throw in the basil, parsley, garlic, salt, and pepper. Now mix it all together with your hands. Feel it come together? It will be a bit sticky. That’s just right. What’s your favorite cheese for pizza? Share below!
- Step 3: Line a pan with parchment paper. Plop your dough in the middle. Pat it into a rectangle. Make it nice and even. Bake it for about 20 minutes. Watch for golden edges. It should feel set in the middle. This bakes the crust all by itself. Your kitchen will smell so good now.
- Step 4: Time for toppings! Spread on some pizza sauce. Add more cheese, of course. Use any toppings you like. Just make sure meats are already cooked. Slide it back into the oven. Bake until everything is bubbly and happy. That takes about 10 more minutes. I love watching the cheese melt.
- Step 5: Patience, my dear! Let it sit for 5 minutes. This helps the slices hold together. Then, cut it up with a pizza cutter. Serve it right away. Enjoy your creation. You made a veggie into a pizza. How clever is that?
Cook Time: 40-45 minutes
Total Time: About 1 hour
Yield: 1 pizza (about 4 slices)
Category: Dinner, Snack
Three Fun Twists to Try
This crust is like a blank canvas. You can paint it with so many flavors! Here are my favorite ideas. They make pizza night new again.
- The Garden Party: Skip the red sauce. Spread creamy ricotta cheese instead. Top with thin zucchini ribbons and fresh peas.
- The Spicy Fiesta: Mix chopped jalapeños right into the crust dough. Top with pepper jack cheese and chorizo after baking.
- Autumn Harvest: Use sweet potato sauce. Add roasted apples, crispy sage, and a sprinkle of goat cheese.
Which one would you try first? Comment below!
Serving It Up Just Right
This pizza is a full meal by itself. But I love adding a little something extra. A simple green salad with lemon dressing is perfect. It’s fresh and crunchy. You could also serve it with carrot sticks and dip. That makes a great lunch the next day, too.
What to drink? For a cozy night, I love a glass of Chianti wine. It tastes like Italy! For a fun family treat, make sparkling lemonade. Just mix lemon juice, a little honey, and fizzy water. Which would you choose tonight?
Keeping Your Cauliflower Crust Perfect
Let’s talk about keeping your pizza fresh. First, cool your slices completely. Then, store them in the fridge for up to three days. Use a sealed container to keep moisture out.
You can freeze this crust too. I wrap each piece in parchment paper. Then, I put them all in a freezer bag. They keep for a month. This is a great batch-cook trick.
I once reheated a slice in the microwave. It got soggy. Now I always use the oven or toaster oven. It makes the crust crispy again. This matters because good food shouldn’t go to waste.
Have you ever tried storing it this way? Share below!
Simple Fixes for Common Crust Troubles
Is your crust too wet? Squeeze the cauliflower more. I remember when mine was soggy. A dry towel is your best friend here. A dry crust holds together better.
Does it fall apart? Add one more tablespoon of cheese. The cheese acts like glue. This helps bind everything. Your pizza will be sturdy for toppings.
Is it not browning? Let it bake a few minutes longer. Ovens can be different. A golden crust tastes nutty and sweet. Fixing these small issues builds your cooking confidence.
Which of these problems have you run into before?
Your Cauliflower Pizza Questions, Answered
Q: Is this crust gluten-free?
A: Yes, it is naturally gluten-free. That’s a big bonus for many families.
Q: Can I make the crust ahead?
A: Absolutely. Bake the plain crust, cool it, and freeze. Top it later.
Q: What cheese can I swap?
A: Try all mozzarella. Any hard, dry cheese like Asiago works well too.
Q: Can I double the recipe?
A: You can. Just make two separate crusts on two pans. They need space.
Q: Any optional tips?
A: A pinch of Italian seasoning in the dough is lovely. Fun fact: Cauliflower is in the same plant family as broccoli and cabbage!
Which tip will you try first?
From My Kitchen to Yours
I hope you love this recipe. It’s a fun way to eat your veggies. I feel proud when I see folks try it. Cooking should be joyful and simple.
I would love to see your creation. Share a photo of your finished pizza. It makes my whole day. Let’s build a little community of kitchen friends.
Have you tried this recipe? Tag us on Pinterest!
Happy cooking!
—Chloe Hartwell.

Easy Homemade Cauliflower Pizza Crust Recipe
Description
Crispy, healthy, and delicious low-carb pizza! This easy homemade cauliflower crust is gluten-free and perfect for a guilt-free dinner the whole family will love.
Ingredients
Instructions
- First, preheat your oven to 425°F. Then, add the cauliflower florets to a food processor and pulse until finely ground. To get a good texture, be sure to process the florets in batches, about 2 cups at a time. Add the ground cauliflower to a microwave-safe bowl and microwave on high for 8 minutes, or until tender. Once the cauliflower has cooled enough to touch, wrap the ground cauliflower in a clean kitchen towel or cheesecloth and squeeze until it’s as dry as possible. When it’s nice and dry, transfer back into the bowl.
- Add the cheeses, egg and spices to the bowl of cauliflower. Mix until completely combined.
- Line a baking sheet with parchment paper. Then, shape the cauliflower dough into an 11×9-in. rectangle. Pop in your preheated oven for about 20-22 minutes, or until the edges are golden brown and the center is just set.
- Top the crust with your favorite pizza sauce, cheeses and fixings. Then, put it back into the oven and bake until the cheese is nice and melty, about 10-12 minutes. If you’re topping with any meats, like Italian sausage or bacon, be sure they’re fully cooked before adding them to your pizza.
- Allow the pizza to cool slightly, then cut into slices.
Notes
- Nutrition information is not provided in the text.


Leave a Reply