

My First Cookie Cake Fiasco
Let me tell you about my first cookie cake. It was for my grandson’s birthday. I was so nervous. I pulled it from the oven too soon.
The whole middle was gooey dough. We had to eat it with spoons! I still laugh at that. Getting the timing just right matters. It makes the difference between a mess and a masterpiece.
Why We Mix This Way
You’ll mix the butter and sugars first. This step is important. It makes the cake chewy and sweet. Doesn’t that smell amazing already?
Then you add the dry stuff. Mix it gently. Just until you see no more flour. Over-mixing makes a tough cake. Trust me on this.
The Secret to Perfect Baking
Here is my big tip. The cake is done when the top just browns. The middle will look soft. That is perfect. It keeps cooking on the counter.
Let it cool completely in the pan. This is the hard part! Waiting matters. It lets the cake set up. Then it won’t crumble when you slice it. What’s the hardest part of baking for you? Is it the waiting?
Make It Your Own
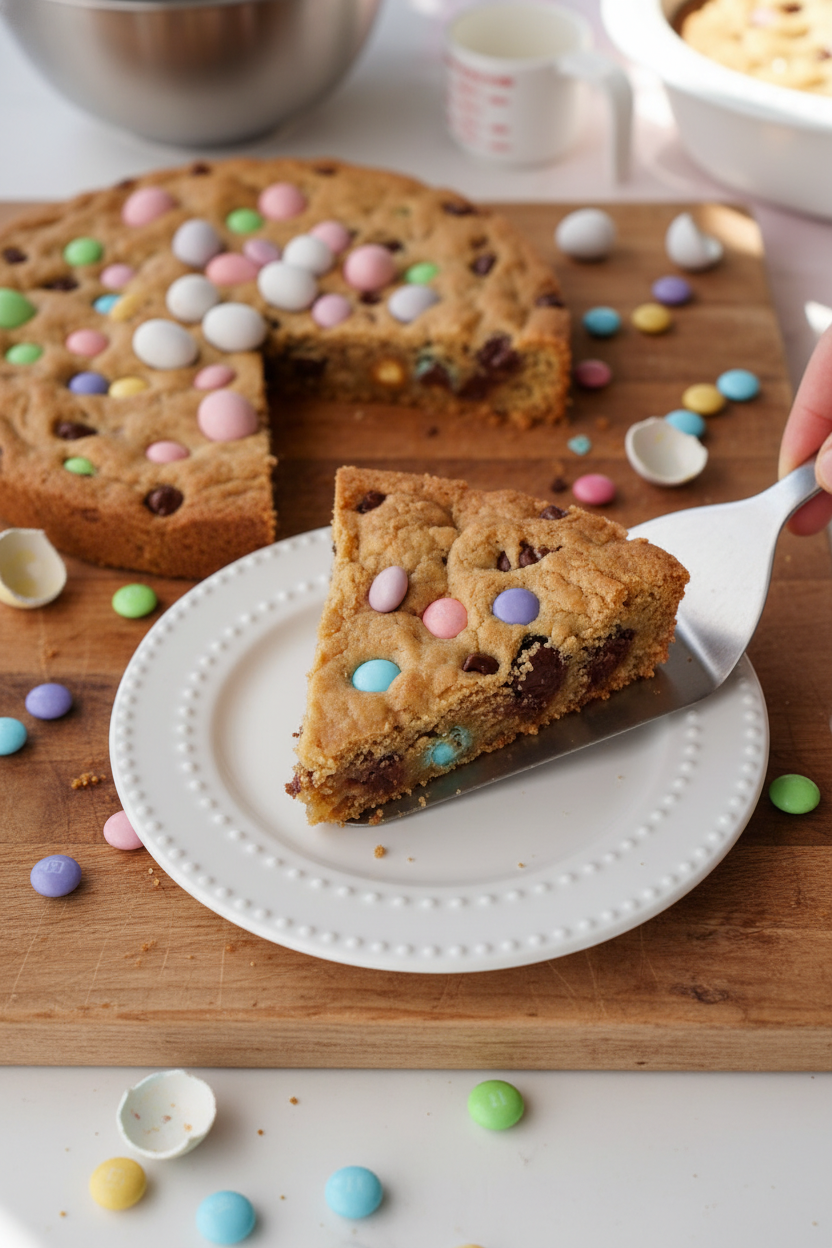
I used a spring pan with little bunnies. You can use any pan. The candies are fun too. I used pastel eggs and M&Ms for spring.
*Fun fact: The first chocolate chip cookie was an accident! A baker ran out of nuts.* You can use any mix-ins you love. Try peanut butter chips or sprinkles. What are your favorite candy mix-ins? Tell me, I’d love to know.
A Cake for Everyone
This cake is gluten and dairy free. That means more friends can have a slice. Food tastes better when we share it. That’s a life lesson from my kitchen.
It’s a simple joy. A big, soft cookie you can slice. It brings people together. Will you make this for a special day? Or just a happy Tuesday? Share a picture if you do!
Ingredients:
| Ingredient | Amount | Notes |
|---|---|---|
| Gluten free 1:1 flour | 1 ⅓ cups | Dry Ingredients |
| Baking soda | ½ teaspoon | Dry Ingredients |
| Salt | ¼ teaspoon | Dry Ingredients |
| Chocolate chips | ½ cup | Dry Ingredients |
| Pastel chocolate eggs | ⅓ cup | Dry Ingredients |
| M&M candies | ½ cup | Dry Ingredients |
| Dairy free butter | ½ cup | Wet Ingredients, melted and cooled |
| Egg | 1 large | Wet Ingredients, at room temperature |
| Vanilla extract | 2 teaspoons | Wet Ingredients |
| Brown sugar | ¾ cup | Wet Ingredients |
| Granulated sugar | ¼ cup | Wet Ingredients |
My Giant Cookie Cake: A Sweet Story & How-To
Hello, my dear. Come sit at the table. Let me tell you about my giant cookie cake. It all started with my grandson, Leo. He wanted a birthday cake, but also cookies. I thought, why not both? This recipe is our happy solution. It’s soft, chewy, and packed with candy. It always makes me smile.
We make it gluten-free and dairy-free so more friends can enjoy it. But you’d never know! It tastes like pure joy. The pastel eggs make it so cheerful. Doesn’t that smell amazing already? Let’s get baking together. I’ll walk you through it, step by cozy step.
Step 1: First, say hello to your oven. Turn it on to 350°F. It needs to get nice and warm. Grab your 9-inch pan. I use a special one for spring. A little grease or spray keeps everything from sticking. This is the easy part. I still laugh at the time I forgot to grease the pan. What a sticky mess that was!
Step 2: Now, let’s mix the wet things. Put your melted butter in a big bowl. Add both sugars, the vanilla, and one egg. Stir it all with a spatula. Mix until it looks smooth and happy. It will smell like caramel. This is the sweet heart of our cookie.
Step 3: Time for the dry team. In a smaller bowl, put your flour, baking soda, and salt. Give them a little whisk. This makes sure every bite is perfect. (Here’s a hard-learned tip: measure your flour carefully. Too much makes a dry cake!).
Step 4: Pour the dry mix into the wet mix. Stir gently. Just until you see no more white flour. Now the fun part! Fold in all the chocolate chips and candies. The dough will be thick. That’s good! What’s your favorite candy to bake with? Share below!
Step 5: Press the dough into your prepared pan. Smooth the top with your fingers. This helps it bake evenly. Pop it in the oven. Bake for 24 to 27 minutes. Turn the pan halfway through. Pull it out when the top just starts to brown. It will look a bit soft inside. That’s the secret! It keeps cooking as it cools.
Step 6: Patience is key here. Let the pan cool for 10 minutes. Then, run a knife around the edge. This loosens the cake. But don’t take it out yet! Let it cool completely on a rack. This waiting is the hardest part. But it keeps your cake from crumbling. Then, slice and share!
Cook Time: 27 minutes
Total Time: 1 hour (with cooling)
Yield: 8 big slices
Category: Dessert, Cookie
Three Fun Twists to Try
This cake is like a blank canvas. You can dress it up for any day. Here are a few of my favorite ideas. They are simple and full of flavor.
Birthday Blast: Use rainbow sprinkles and colorful M&Ms. It’s a party on a plate!
Peanut Butter Dream: Swap half the butter for peanut butter. Add peanut butter cups. So rich and yummy.
Winter Wonderland: Use white chocolate chips and dried cranberries. It feels festive and cozy.
Which one would you try first? Comment below! I love hearing your ideas.
Serving It Up With Style
A warm slice is wonderful all by itself. But a little extra love makes it special. Try a scoop of vanilla ice cream on top. The melt is magical. Or add a dollop of whipped cream. A drizzle of caramel sauce is also a fine idea.
What to drink? A cold glass of milk is my classic choice. It’s the perfect partner. For the grown-ups, a little sweet dessert wine is lovely. It sips nicely with the chocolate. Which would you choose tonight? A cold milk or a fancy sip?
Keeping Your Cookie Cake Fresh & Happy
Let’s talk about keeping your cookie cake yummy. First, let it cool completely. Then wrap it tightly in plastic wrap. It will stay good on the counter for two days.
You can freeze it for later, too. I slice it into pieces first. I wrap each piece in plastic, then put them in a freezer bag. I once forgot a slice in the back for a month. It was still a sweet surprise!
To reheat, just warm a slice in the microwave for 10 seconds. It makes the chocolate chips soft again. Batch cooking matters because life gets busy. A ready-made treat brings instant joy. Have you ever tried storing it this way? Share below!
Cookie Cake Troubles? Easy Fixes Right Here
Sometimes baking has little bumps. Your cookie cake might be too crumbly. This often means it was cut too warm. Letting it cool fully fixes this. It gives the cake time to set.
The edges might get too brown. I remember when my oven made one side dark. Now I always rotate the pan halfway. This simple step makes everything bake evenly. It matters for a perfect, golden treat.
Is your cake too soft in the middle? Just bake it a few minutes longer. Pull it when the top looks set. *Fun fact: it keeps cooking from its own heat as it cools!* Fixing small issues builds your cooking confidence. Which of these problems have you run into before?
Your Quick Cookie Cake Questions, Answered
Q: Can I use regular flour? A: Yes! Use the same amount of all-purpose flour instead.
Q: Can I make the dough ahead? A: You can mix it, cover the bowl, and chill it overnight.
Q: What if I don’t have pastel eggs? A: Use more chocolate chips or any small candy you like.
Q: Can I make a bigger cake? A: Double the recipe. Use a 9×13 inch pan. Bake a bit longer.
Q: Any extra tips? A: Let the melted butter cool. This keeps your egg from cooking. Which tip will you try first?
Bake, Share, and Enjoy the Sweetness
I hope you love making this cookie cake. It is full of sweet, happy memories for me. I love seeing your kitchen creations too. It makes my day.
Please share your beautiful results with everyone. A picture of your slice would be wonderful. Have you tried this recipe? Tag us on Pinterest! I can’t wait to see your version.
Happy cooking!
—Chloe Hartwell.


Gluten-Free Cookie Cake: Gluten Free Cookie Cake Recipe Delicious
Description
Indulge in the ultimate gluten-free dessert! This easy cookie cake recipe is deliciously soft, perfectly sweet, and ideal for celebrations.
Ingredients
Dry Ingredients:
Wet Ingredients:
Instructions
- Preheat your oven to 350°F. Prepare a 9 inch round cake pan by lightly greasing, or using non stick spray.
- Combine melted and cooled butter, both sugars, vanilla extract, and egg. Mix with a rubber spatula until well combined.
- In a small bowl, whisk together the gluten free flour, baking soda, and salt.
- Add the dry ingredients into the wet ingredients and stir gently, just until combined.
- Fold in the chocolate chips and candies with a spatula.
- Place the thick dough into the prepared pan and smooth the top to ensure even baking.
- Bake for 24-27 minutes, rotating the pan 180° halfway through, until the top just starts to brown. It will look moist but will continue to cook while cooling.
- Let the cookie cake cool in the pan for about 10 minutes, then gently run a knife around the edge to loosen it. Do not remove it from the pan yet.
- Cool the cookie cake completely on a wire rack before slicing to prevent crumbling.
Notes
- You will most assuredly get the best end result by pulling the cookie cake when it still looks moist, as it will continue to cook while it is cooling.


Leave a Reply