

My First Cornbread Cake
I once tried to make a cornbread cake for a summer picnic. I was so nervous. I thought, “Can cake taste like sunshine?” It can. This one does.
That first cake was a little lopsided. I still laugh at that. But the taste? Pure gold. It’s sweet, but with a cozy cornmeal hug. Doesn’t that smell amazing while it bakes?
Why This Recipe Works
This cake mixes two worlds. You get soft cake crumbs and a tiny bit of grit from the cornmeal. That texture matters. It makes each bite interesting and warm.
The buttermilk and sour cream are the secret. They keep the cake super moist for days. This matters because no one likes dry cake. Trust me.
The Magic Frosting
Let’s talk about that frosting. Salted honey cream cheese buttercream. It sounds fancy. It’s not. It’s just perfect. The salt cuts the sweet, and the honey whispers of flowers.
Fun fact: Cream cheese frosting was invented in the United States around the 1800s. It was made for a very fancy New York hotel. Now we can all enjoy it!
Do you like your frosting very sweet or a little tangy? This one is both. You must tell me what you think.
Putting It All Together
My best tip is to chill the cake layers. Warm cake makes the frosting melt. A cool cake is a happy cake. It’s easier to frost.
If your layers dome a little, just slice the top off. This is called leveling. Don’t throw that piece away! The cook gets to taste it. That’s the rule.
Your Turn in the Kitchen
This cake is for everyone. Use the gluten-free flour and dairy-free options listed. It will still be wonderful. Food should bring people together.
What fruit preserve would you use in the middle? I love raspberry. My grandson swears by peach. Share your favorite filling idea with me.
Remember, your cake does not need to be perfect. It just needs to be made with love. Are you going to try this recipe this weekend?
Ingredients:
| Ingredient | Amount | Notes |
|---|---|---|
| flour | 1 1/2 cups (180g) | cake flour or gluten-free 1:1 baking blend |
| fine cornmeal | 1 cup (160g) | |
| baking powder | 1 tablespoon (14g) | |
| fine sea salt | 1 teaspoon | |
| granulated sugar | 2 cups (400g) | |
| sour cream | 1 cup (240ml) | room temperature, regular or dairy-free |
| vegetable oil | 1/4 cup (60ml) | |
| salted butter, melted | 1/4 cup (60ml) | regular or dairy-free |
| large eggs | 2 | room temperature |
| vanilla extract | 1 tablespoon (15ml) | |
| buttermilk | 1 cup (240ml) | room temperature, regular or dairy-free |
| salted butter | 1 cup (227g) | room temperature, regular or dairy-free |
| cream cheese | 1 cup (226g) | room temperature, regular or dairy-free |
| powdered sugar | 4 cups (480g) | |
| honey | 3 tablespoons (60g) | |
| fine sea salt | 1–2 teaspoons | to taste |
| fruit preserves (optional) | 1/2 cup | for filling |
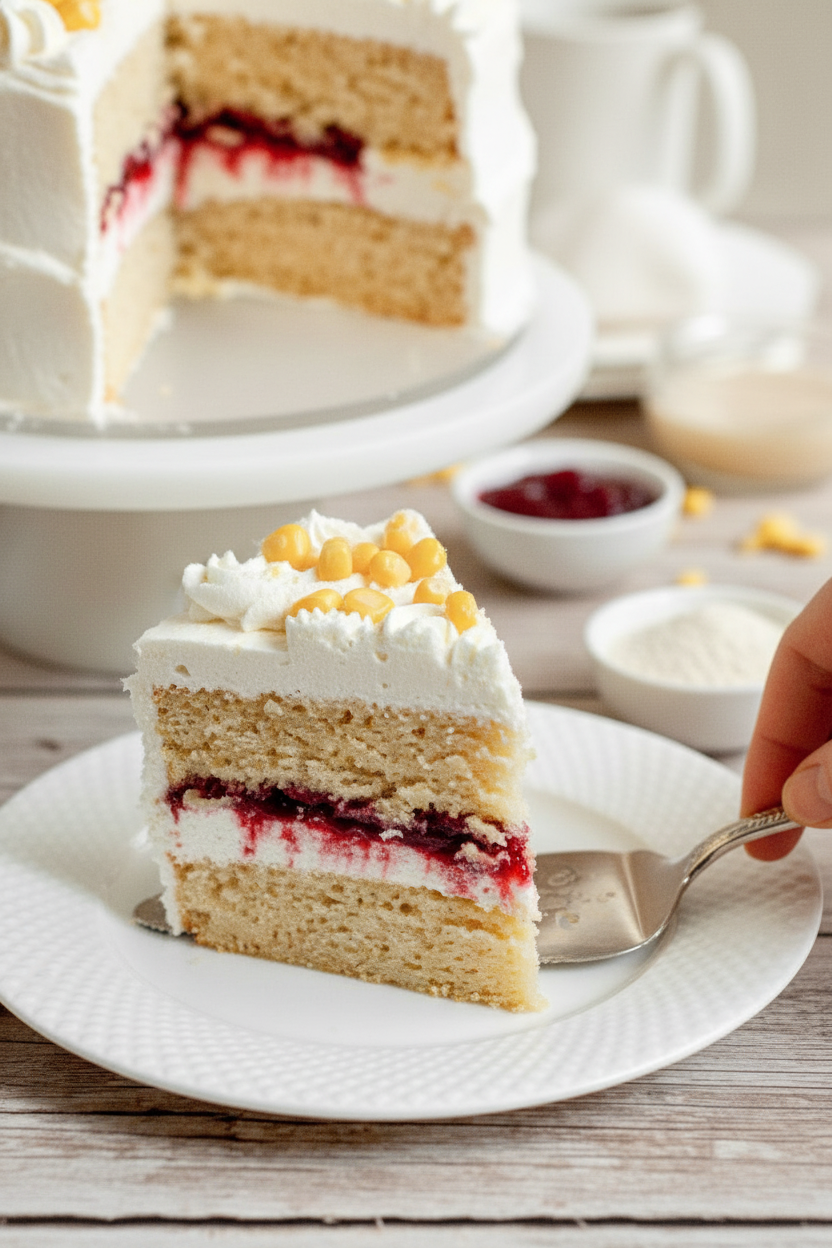
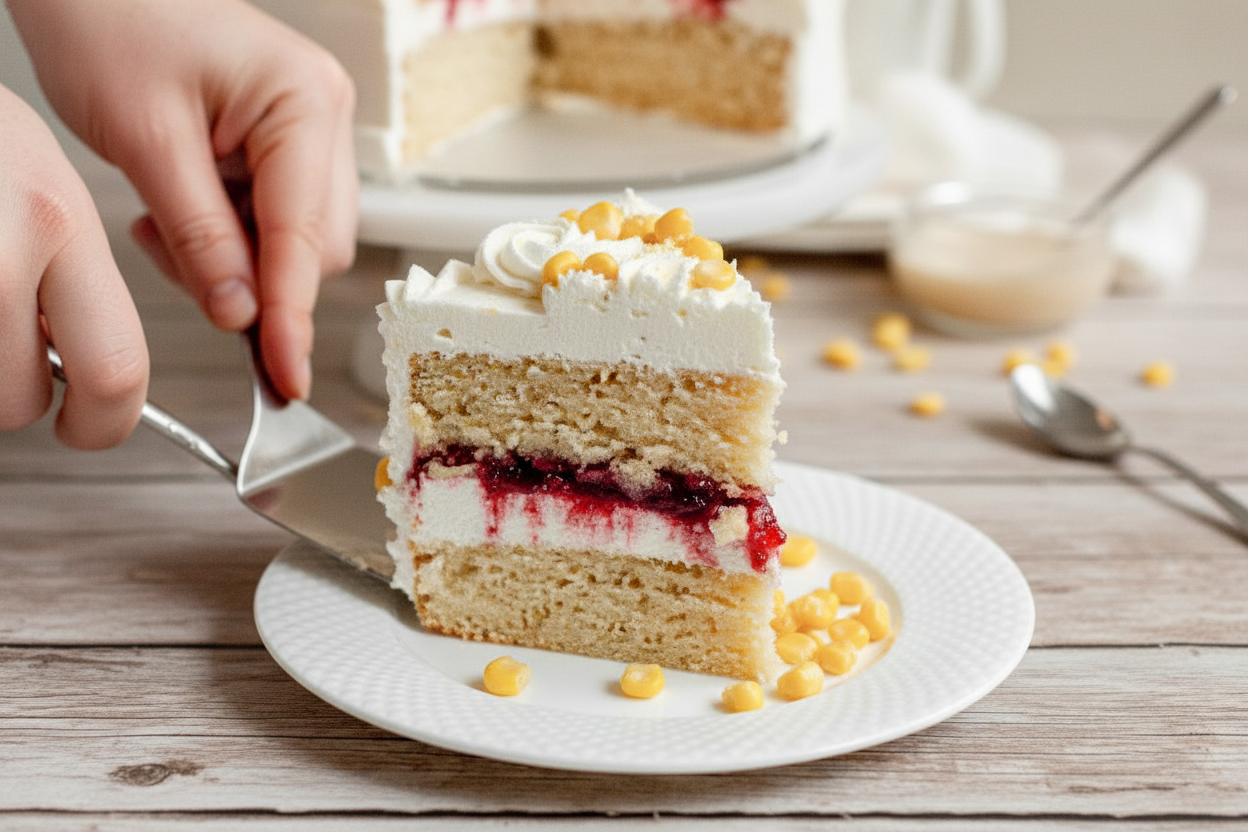
A Cozy Cake with a Cornbread Heart
Hello, my dear! Come sit. Let’s bake a cake that tells a story. This one is special. It tastes like sweet summer cornbread dressed up for a party. I first made it for my grandson’s birthday. He needed a treat without gluten or dairy. We all loved it so much. Now it’s our favorite. Doesn’t that smell amazing? It fills the whole kitchen with warmth.
You can make it with regular ingredients, too. The choice is yours. The secret is in the cornmeal. It gives the cake a lovely, sunny color and a little gentle crunch. I still laugh at that first time. I was so nervous it wouldn’t rise. But it baked up beautifully, golden and proud. Let me show you how.
Step 1: First, get your oven ready. Heat it to 350°F. Grease two round cake pans and line them with parchment paper. This little paper circle is a lifesaver. It guarantees your cake will come out in one piece. Trust me on this. Step 2: Now, mix your dry friends. Whisk the flour, cornmeal, baking powder, and salt in a bowl. Set it aside. In another bowl, whisk the sugar, sour cream, oil, melted butter, eggs, and vanilla. Mix until it’s smooth and happy. Step 3: Time to bring everyone together. Add half of your dry mix to the wet. Stir gently. Then pour in half of the buttermilk. Stir again. Repeat with the rest of the dry and the milk. (A hard-learned tip: A few lumps are just fine. Overmixing makes a tough cake!). Step 4: Pour the batter evenly into your pans. Slide them into the oven. Bake for about 30 to 35 minutes. They’re done when the edges are golden and a toothpick poked in the middle comes out clean. What’s your favorite smell from the oven? Share below! Step 5: Let the cakes cool in the pan for 10 minutes. Then, carefully turn them out onto a wire rack. They need to cool completely before we frost them. Patience is a baker’s best friend. Step 6: For the frosting, beat the butter, cream cheese, and honey together. Beat it until it’s fluffy and light. This takes a few minutes. Then add the powdered sugar and salt. Whip it all up for another five minutes. It becomes so silky! Step 7: The fun part! Stack the first cake layer. Spread on a thick blanket of frosting. Add fruit preserves if you like. Top with the second layer. Give the whole cake a thin “crumb coat” of frosting. Chill it for a bit. Then, cover it with the rest of the frosting and decorate. Just have fun with it. Cook Time: 35 minutesTotal Time: 1 hour 30 minutes (with cooling)
Yield: One 8-inch layer cake
Category: Dessert, Baking
Three Sweet Twists to Try
This cake is like a blank canvas. You can paint it with so many flavors. Here are a few ideas I love. They make it feel new every time.
Berry Patch: Stir a cup of fresh blueberries into the batter. Use blueberry preserves in the filling. It’s a burst of summer in every bite. Spiced Apple: Add a teaspoon of cinnamon to the dry ingredients. Fill the layers with spiced apple butter instead of plain preserves. So cozy. Lemon Sunshine: Add the zest of one lemon to the batter. Use lemon curd for the filling. It’s bright and cheerful.Which one would you try first? Comment below!
Serving with a Smile
This cake is wonderful all on its own. But you can make it a full celebration. For a simple treat, serve a slice with fresh berries on the side. A little drizzle of extra honey is nice, too. For a fancier plate, add a scoop of dairy-free vanilla ice cream. It melts so beautifully into the warm cake.
What to drink? A glass of cold, creamy oat milk is just perfect. It complements the corn flavor. For a grown-up pairing, a sweet riesling wine is lovely. It dances with the honey in the frosting. Which would you choose tonight?
Keeping Your Cornbread Cake Fresh and Happy
This cake keeps well in the fridge. Just cover it tightly. It will stay tasty for up to five days. You can also freeze it for three months. Wrap slices well in plastic wrap first.
I love making two cakes at once. I freeze one for a busy week. It feels like a gift from my past self. This saves so much time and stress.
My first time, I didn’t wrap the cake tightly. It tasted like my freezer smelled! Now I use two layers of wrap. Storing food well means less waste and more joy.
Have you ever tried storing it this way? Share below!
Simple Fixes for Common Cake Troubles
Is your cake dry? You may have baked it too long. Check it five minutes before the timer rings. A few moist crumbs on the toothpick is perfect.
Is your frosting too soft? Chill it! I remember a sunny day. My frosting melted into a puddle. Now I chill the bowl for ten minutes first.
Does the cake stick to the pan? Always use parchment paper. It is a magic trick for bakers. This simple step builds your confidence in the kitchen.
Getting the texture right matters for a tender bite. A stable frosting makes decorating fun, not fussy. Which of these problems have you run into before?
Your Cornbread Cake Questions, Answered
Q: Can I make this gluten-free?
A: Yes! Use a good 1:1 gluten-free baking blend. It works perfectly in this recipe.
Q: Can I bake the cakes ahead?
A: Absolutely. Bake them, cool completely, and wrap tightly. They freeze beautifully for a month.
Q: What if I don’t have buttermilk?
A: Mix one cup of milk with one tablespoon of lemon juice. Let it sit for five minutes.
Q: Can I make a smaller cake?
A: You can halve the recipe. Use two 6-inch round pans. Bake time will be a little less.
Q: Is the fruit filling needed?
A: No, it’s a lovely extra. The cake is wonderful with just the honey frosting. Fun fact: Cornmeal gives this cake its golden color and cozy taste.
Which tip will you try first?
From My Kitchen to Yours
I hope you love making this special cake. It brings a smile to everyone’s face. Share your baking adventure with us.
I would love to see your creation. Your version might give me a new idea. Have you tried this recipe? Tag us on Pinterest!
Thank you for baking with me today. Remember, the best ingredient is always a happy heart.
Happy cooking!
—Chloe Hartwell.
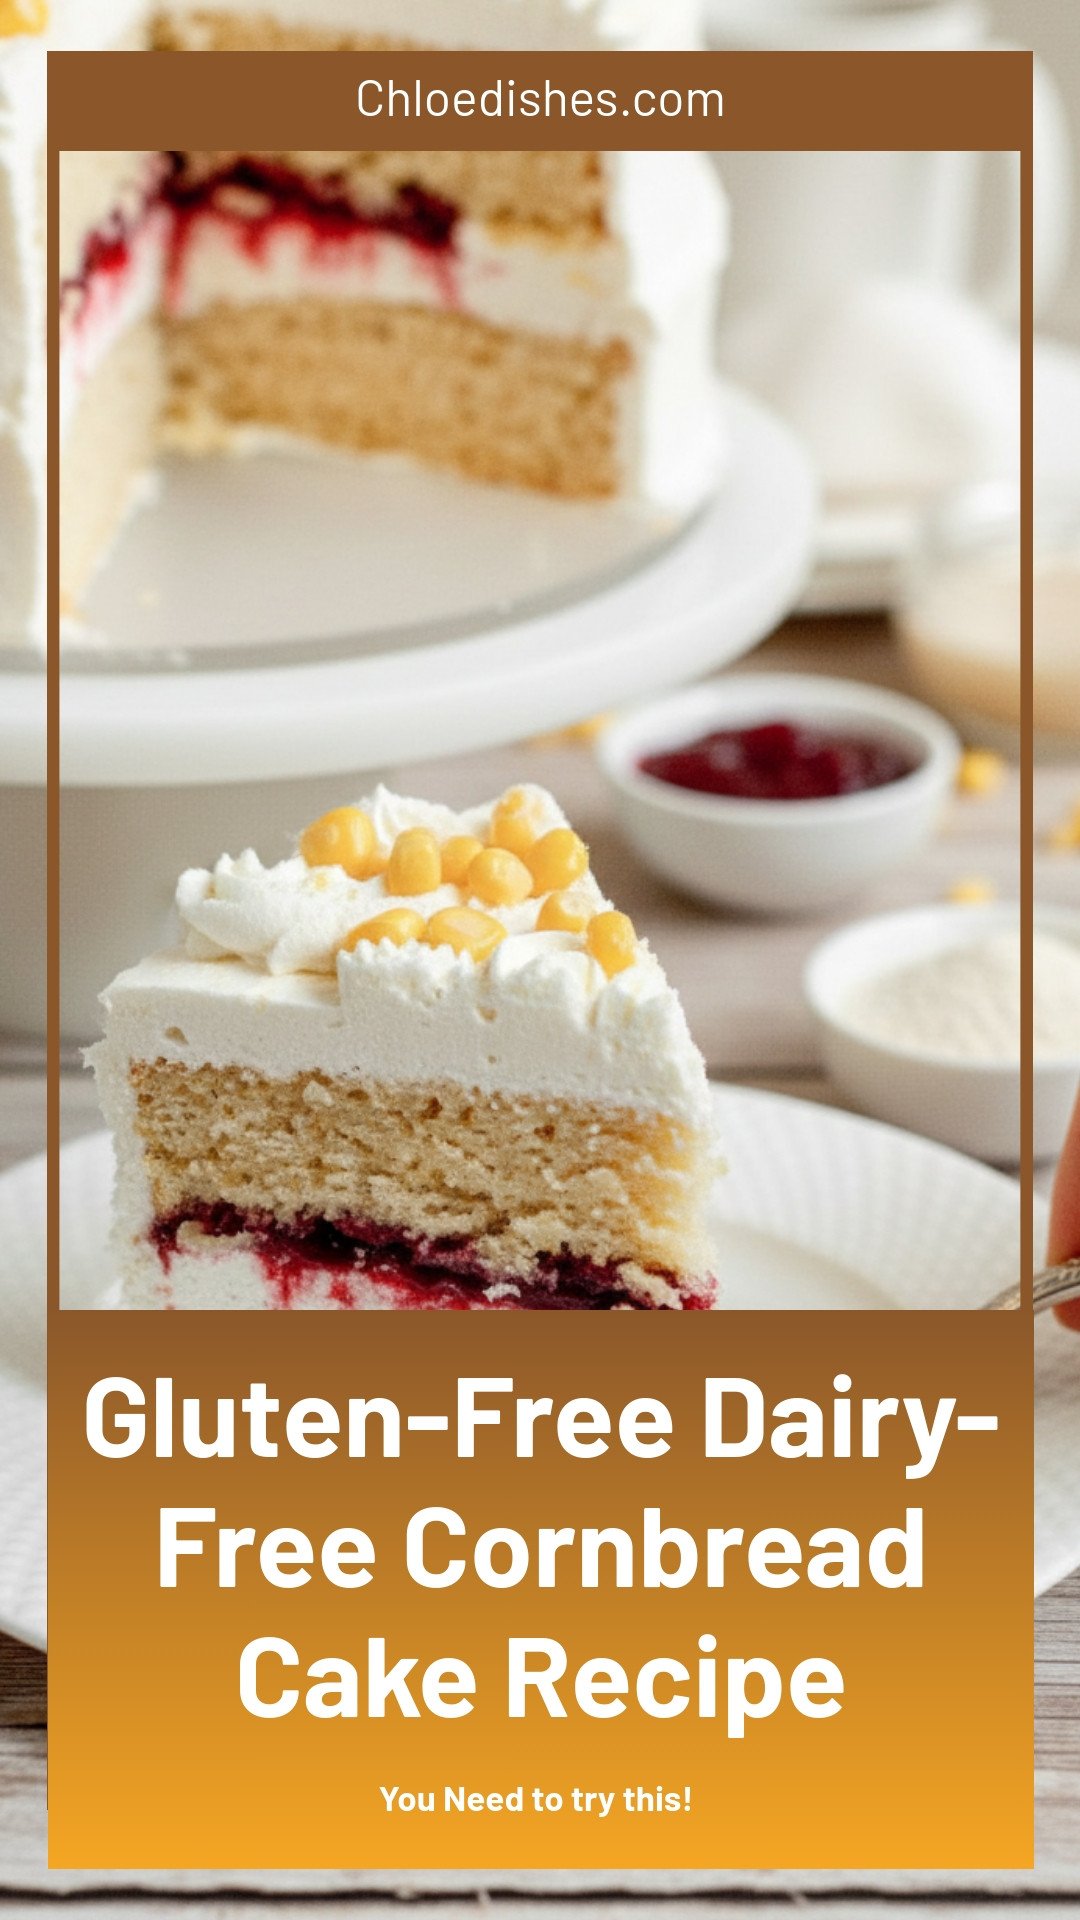
Gluten-Free Dairy-Free Cornbread Cake Recipe
Description
Moist, fluffy cornbread cake that’s both gluten and dairy-free. Perfect for holidays or cozy weeknights, this easy recipe is a crowd-pleaser everyone can enjoy.
Ingredients
Salted Honey Cream Cheese Buttercream
Instructions
- Preheat the oven to 350ºF and prepare two 8-inch round cake pans with non-stick baking spray and parchment paper.
- In a small mixing bowl, whisk together the flour, cornmeal, baking powder, and salt. Set aside.
- In a medium mixing bowl, whisk together the sugar, sour cream, oil, butter, eggs, and vanilla until smooth.
- Add half of the dry ingredients and mix, followed by half of the milk and mix.
- Add the remaining half of the dry ingredients and again, the remaining half of the milk mixture, and mix until just combined. It’s okay if there are a few lumps in the batter.
- Divide the batter into the prepared cake pans and bake for approximately 30-35 minutes. The edges of the cakes should be light golden brown and slightly pulled away from the cake pan. A toothpick inserted in the middle should come out with a few moist crumbs.
- Allow the cakes to cool in the pan for 10 minutes before removing to a wire rack to fully cool.
- In a stand mixer or large mixing bowl with electric beaters, combine the butter, cream cheese, and honey and beat together on high until light and fluffy. This should take approximately 5-10 minutes.
- Add in the powdered sugar and salt and mix on low until combined.
- Turn the mixer up to high and allow it to beat for 5 minutes.
- Place in the fridge if not using right away.
- Place one leveled layer of cake on a cake board, plate, and/or cake turntable and top with approximately 2 cups of buttercream.
- If using a filling, pipe a small buttercream border around the top edge and spread the fruit preserves evenly.
- Top with the remaining cake layer and very gently apply a thin coat of buttercream to the entire cake. Chill the cake for 10-20 minutes. *If the cake feels unstable or the buttercream becomes too soft at any point while stacking, stop and chill the cake and frosting for 15 minutes.
- Cover the cake with a final layer of buttercream and smooth the sides with a cake smoother and/or offset spatula. I used the tip of my offset spatula to run horizontal lines around the cake.
- Decorate the cake as you please. I piped rosettes on top with a Wilton 1M piping tip, dollops with a wilton, and sprinkled on some sprinkles and corn. Enjoy!
Salted Honey Cream Cheese Buttercream
Assembly
Notes
- Store leftovers in an airtight container in the fridge for up to 5 days or in the freezer for up to 3 months.


Leave a Reply