

My First Cookie Disaster
Let me tell you about my first sugar cookies. I was about ten. I forgot the sugar. Can you believe it? They tasted like sweetened cardboard. I still laugh at that.
This recipe is different. It works. It uses simple swaps. Everyone can enjoy a cookie. That matters to me. No one should feel left out at the cookie jar.
Why Room Temperature Butter is Key
Your butter must be soft. Not melted, just soft. Like a cozy pillow. This makes it fluffy when you mix it with sugar. Doesn’t that smell amazing?
Fluffy butter means a tender cookie. Cold butter won’t mix right. Your dough will be sad and lumpy. Trust your grandma on this one. It makes all the difference.
The Magic of the Glass Smash
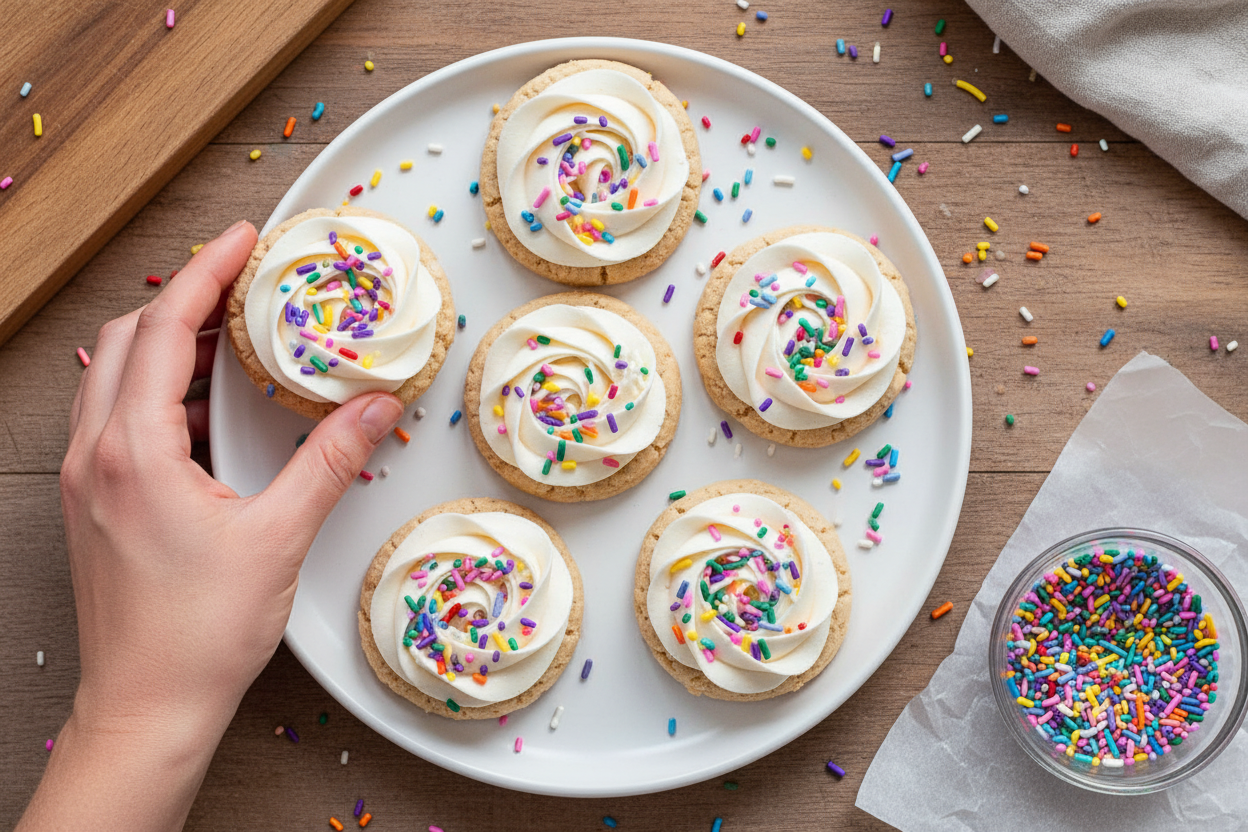
Here is the fun part. Bake the cookies for just 8 minutes. They will look puffy. Take them out. Now, get a heavy glass. Gently press each warm cookie flat.
This gives you that perfect shape. It also makes the edges a little crinkly. *Fun fact: pressing them makes the centers extra chewy.* Do you like your cookies soft or crispy?
Patience for the Buttercream
The frosting needs patience too. Beat that dairy-free butter for five whole minutes. Set a timer. It will turn pale and creamy. Like a sweet, fluffy cloud.
This step matters. It makes the frosting smooth. No one wants gritty icing. What color sprinkles would you use? I love the bright rainbow ones.
Sharing is the Best Part
I make these for my neighbor’s boy, Leo. He can’t have dairy. His smile is worth every minute. Food is about sharing joy. That is the real secret ingredient.
These cookies keep well. You can freeze them for a happy day. What is your favorite cookie to share? Tell me about it. I love hearing your stories.
Ingredients:
| Ingredient | Amount | Notes |
|---|---|---|
| dairy-free salted butter | 1/2 cup (113g) | room temperature |
| granulated sugar | 1/2 cup (100g) | |
| brown sugar | 1/3 cup (67g) | |
| dairy-free milk | 1/4 cup (59ml) | room temperature |
| vanilla extract | 1 tablespoon | |
| gluten-free flour 1:1 baking blend | 1 1/2 cups (240g) | |
| cornstarch | 1/4 cup (30g) | |
| fine sea salt | 1 teaspoon | |
| baking powder | 1/2 teaspoon | |
| baking soda | 1/2 teaspoon | |
| dairy-free salted butter | 1/2 cup (113g) | room temperature (for buttercream) |
| powdered sugar | 1 1/2 cups (180g) | |
| vanilla extract | 1/2 teaspoon | (for buttercream) |
| fine sea salt | 1/2 teaspoon | (for buttercream) |
| sprinkles | optional | for decoration |
My Favorite Gluten-Free, Dairy-Free Sugar Cookies
Hello, my dear! Come sit at the counter. I want to share my special cookie recipe. These sugar cookies are soft and sweet. Everyone can enjoy them, which makes my heart happy. I remember my grandson’s first bite. His smile was the best thank you. Let’s make some memories together, shall we?
First, get everything ready. This is called “mise en place.” It just means less fussing later. I still laugh at that fancy term. My kitchen is always a cozy mess. But this little tip saves me every time. Now, let’s get baking.
Step 1: Warm your oven to 350°F. Line your baking sheets with parchment paper. This keeps the cookies from sticking. I learned that the hard way once. What a sticky situation that was! Step 2: Cream your butter and sugars. Use a mixer for about 2 minutes. It should look light and fluffy. Doesn’t that smell amazing already? Then mix in your milk and vanilla. It will look a bit curdled, but that’s okay. Step 3: Add all your dry ingredients. Mix on low just until a dough forms. (A hard-learned tip: don’t over-mix gluten-free dough. It can make cookies tough.) The dough will be soft and lovely. It reminds me of playdough from my teaching days. Step 4: Scoop the dough onto your sheets. I use a tablespoon scoop. Bake them for just 8 minutes. The edges will be set, but centers soft. This is the secret to a chewy cookie! Step 5: Take them out and press them flat. Use a heavy glass right away. Let them cool completely on the sheet. What’s your favorite cookie texture: chewy or crispy? Share below! Now, for the fun part—the frosting! Step 6: Make the buttercream. Whip that butter for a full 5 minutes. It gets so pale and creamy. Then add the sugar, vanilla, and salt. Whip it again until it’s dreamy and light. Step 7: Decorate your hearts out! I use a piping bag for pretty swirls. My grandkids love adding bright sprinkles. Their creations are always full of joy. Then, share them with someone you love. Cook Time: 8-10 minutes per batchTotal Time: About 1 hour (with cooling)
Yield: About 2 dozen cookies
Category: Dessert, Cookies
Three Fun Twists to Try
Once you master the basic cookie, try a little twist. It’s like giving the recipe a new dress. Here are three of my favorite ideas. They always bring a smile.
Lemon Sunshine: Add lemon zest to the dough. Use lemon juice in the frosting instead of milk. It tastes like a sweet summer day. Almond Joy: Use almond extract instead of vanilla. Press a sliced almond on top before baking. So simple and so elegant. Cinnamon Sparkle: Roll the dough balls in cinnamon sugar. Skip the frosting for a sparkly, spicy treat. Perfect with a cup of tea. Which one would you try first? Comment below!Serving Them Up with Style
These cookies are wonderful all on their own. But sometimes, you want to make it special. For a lovely plate, mix frosted and plain cookies. Add a few fresh berries for a pop of color. It looks so pretty on a cake stand.
What to drink? For a cozy night, I love oat milk hot chocolate. The vanilla cookies dip perfectly. For a grown-up gathering, a sweet Riesling wine pairs beautifully. It complements the buttercream so well.
Which would you choose tonight?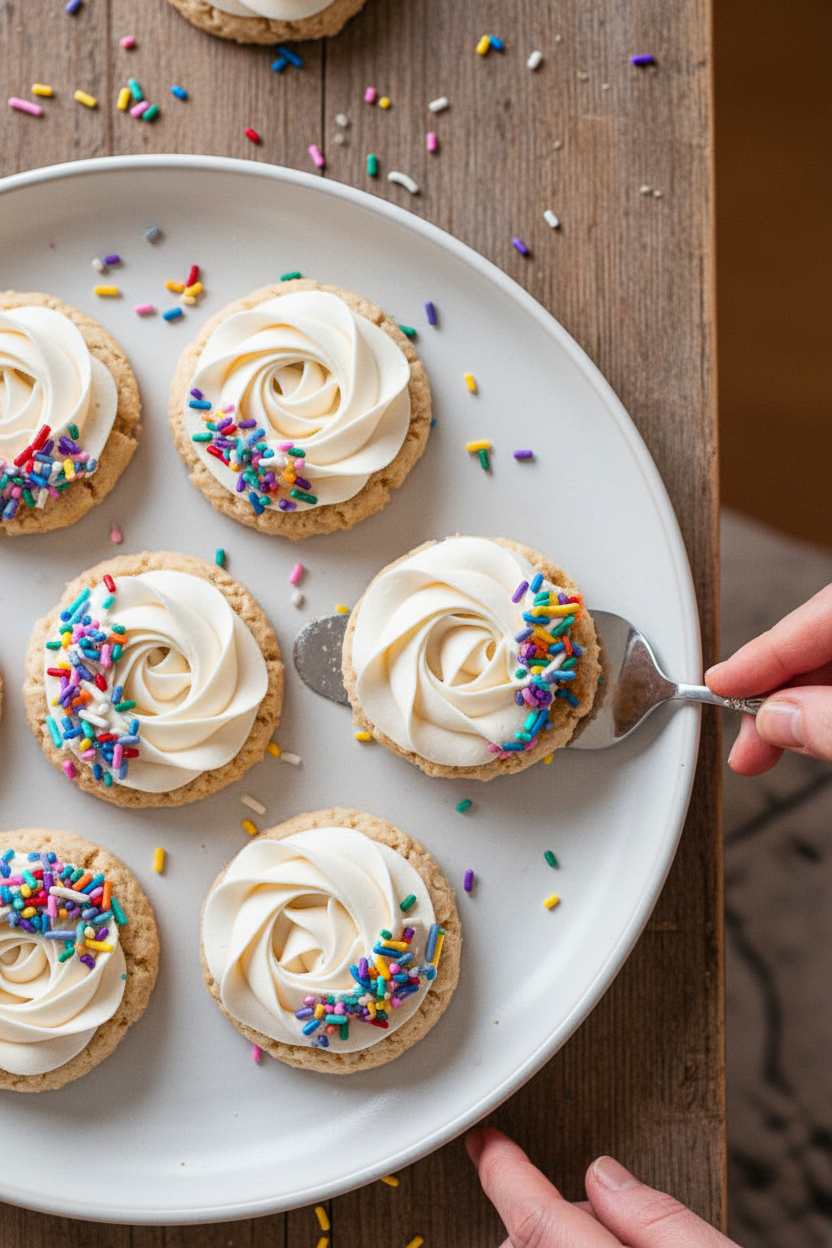
Keeping Your Cookies Happy and Fresh
Let’s talk about keeping these sweet treats. Store cooled cookies in a tin at room temperature. They stay perfect for about five days. You can also freeze them for a big day later. I freeze them flat on a tray first. Then I pop them into a bag for up to six months.
I learned this the hard way. I once put warm cookies in a container. They got all soft and sad. Letting them cool completely first makes all the difference. This matters because a good cookie is a little gift to your future self. Batch cooking lets you have joy ready anytime.
You can even freeze the dough balls. Just scoop them onto a pan and freeze solid. Then bag them up. Bake a few fresh cookies anytime you want! Have you ever tried storing it this way? Share below!
Cookie Troubles? Easy Fixes Right Here
Sometimes cookies don’t turn out as planned. That’s okay. Here are simple fixes. First, if your cookies spread too much, your butter was too warm. I remember my first batch looked like one giant cookie! Just chill your dough for 30 minutes before baking.
Second, if they are too crumbly, you might need more moisture. Add one extra tablespoon of dairy-free milk. This helps the gluten-free flour blend better. Getting the texture right matters. It makes you feel like a confident baker.
Third, if the buttercream is runny, your butter was too soft. Your icing sugar might also be old. Fun fact: Powdered sugar can soak up moisture from the air. Just mix in a little more powdered sugar until it’s fluffy. This matters for pretty, tasty cookies. Which of these problems have you run into before?
Your Quick Cookie Questions Answered
Q: Can I use a different gluten-free flour? A: Stick to a 1:1 baking blend for best results. Others can be gritty.
Q: Can I make the dough ahead? A: Yes! Keep it wrapped in the fridge for two days. Let it soften a bit before scooping.
Q: What can I use instead of cornstarch? A: Try arrowroot powder. It works the same way to make cookies tender.
Q: Can I double this recipe? A: Absolutely. Just mix in a very large bowl. You’ll have plenty to share.
Q: Are sprinkles necessary? A: Never! But they do add a happy, colorful crunch. Use what makes you smile. Which tip will you try first?
From My Kitchen to Yours
I hope you love making these cookies. Baking should be fun and full of sweet moments. I would love to see your creations. Share a picture of your decorated cookies with everyone.
It makes my day to see your kitchen adventures. You can tag my blog’s Pinterest page. Let’s build a little community of friendly bakers. Have you tried this recipe? Tag us on Pinterest!
Happy cooking!
—Chloe Hartwell.

Gluten Free Dairy Free Sugar Cookies Recipe
Description
Easy, delicious gluten free dairy free sugar cookies that are soft and perfectly sweet. No one will guess they’re allergen-friendly! Great for holidays and everyday treats.
Ingredients
Sugar Cookies
Vanilla Buttercream
Instructions
- Preheat the oven to 350ºF and prepare two large cookie pans with parchment paper.
- In the bowl of a stand mixer or large mixing bowl with electric beaters, cream the butter, granulated sugar, and brown sugar together on high for 2 minutes or until light and fluffy.
- Add in the milk (or egg if using) and vanilla extract and mix until smooth and combined.
- Add in the flour, cornstarch, salt, baking powder, and baking soda and mix on low until a dough forms.
- With a 1 ½ tablespoon cookie scoop, place the cookie dough on the prepared cookie pans and bake for 8 minutes or until the edgers are set but the center is still slightly underbaked.
- Remove from the oven and with a flat heavy bottomed jar or glass, gently press down to flatten each cookie while still hot. Allow to fully cool on the cookie sheet before decorating.
- In the bowl of a stand mixer or large mixing bowl with electric beaters, cream the butter on high speed for 5 minutes or until light and fluffy.
- Add in the icing sugar, vanilla extract, and salt and mix on low until combined. Turn the mixer up to high and allow to beat for 5 minutes.
- Decorate the cookies as you desire. I used a piping bag fitted with a Wilton 1m piping tip and piped a buttercream frosting rosette on each cookie and decorated it with bright sprinkles. Enjoy!
Sugar Cookies
Vanilla Buttercream
Notes
- Store leftover cookies in an airtight container at room temperature or in the fridge for up to 5 days or frozen for up to 6 months.


Leave a Reply