
The Secret is in the Crush
Let me tell you about my first try with these cookies. I was so gentle with the mini eggs. I placed them in the bag and gave a little tap. My grandson saw me and laughed. He took the rolling pin and gave one big whack. The sound was wonderful. Crunch, crackle, pop.
That crush makes all the difference. Big pieces and tiny dust mix into the dough. Every bite gets a little crunch and a burst of color. It feels playful. It makes the cookie special. *Fun fact: The first chocolate eggs were made in the 1800s. They were solid, not filled with candy!
Why Cold Butter Matters
I know it seems odd. Most cookie recipes want soft butter. This one wants it cold and cubed. Trust this old kitchen grandma. The cold butter melts slowly in the hot oven. This makes the edges crispy. The center stays soft and chewy.
This matters because texture is everything. A perfect cookie should have both crisp and chew. It should make you close your eyes to enjoy it. Do you prefer crispy edges or a gooey middle? I love hearing what people like best.
A Cookie for Everyone
See those little stars by the ingredients? They are important. My neighbor cannot have dairy. My friend cannot have gluten. I want them at my table too. So this recipe works with plant-based butter and gluten-free flour. Everyone gets a warm, happy cookie.
Food is about sharing. It is about making room for everyone. That is a lesson I hold dear. Have you tried baking with gluten-free flour? What was your experience like? I still learn new things every day.
The Shape of a Bakery Cookie
Do not just make a ball. Shape the dough into a little cylinder. Like a thick hockey puck. This gives you those pretty, rippled edges. It makes the cookie look like it came from a fancy bakery. I still laugh at that. Such a small change makes me feel like a pro.
Bake them at that high heat. Just 8 to 10 minutes. They will look a bit underdone in the middle. That is perfect. They keep baking on the pan. This keeps them soft for days. Doesn’t that smell amazing? It fills the whole house with joy.
The Final Press
Here is my favorite little step. When the cookies come out, they are puffed and wild. Take a butter knife. Gently press any stray chocolate or egg piece back into the warm cookie. It tidies them up. It makes them look loved.
This matters because we eat with our eyes first. A little care makes food beautiful. It is a quiet moment after the busy baking. What is your favorite part of the baking process? Is it mixing, shaping, or that first taste test? Tell me all about it.
Ingredients:
| Ingredient | Amount | Notes |
|---|---|---|
| salted butter, cubed & cold | 1 cup (227g) | regular or plant-based |
| brown sugar | 1 cup (200g) | |
| granulated sugar | 3/4 cup (150g) | |
| large eggs, cold | 2 | |
| vanilla extract | 2 teaspoons | |
| flour | 2 3/4 cups (330g) | all-purpose or gluten-free 1:1 baking blend |
| cornstarch | 2 tablespoons (16g) | |
| baking soda | 1 teaspoon | |
| coarse sea salt | 1 1/2 teaspoon | |
| mini eggs, crushed | 2 cups | regular or plant-based |
| chocolate chips | 1/2 cup (84g) | regular or plant-based |
| sprinkles | 1/4 cup |
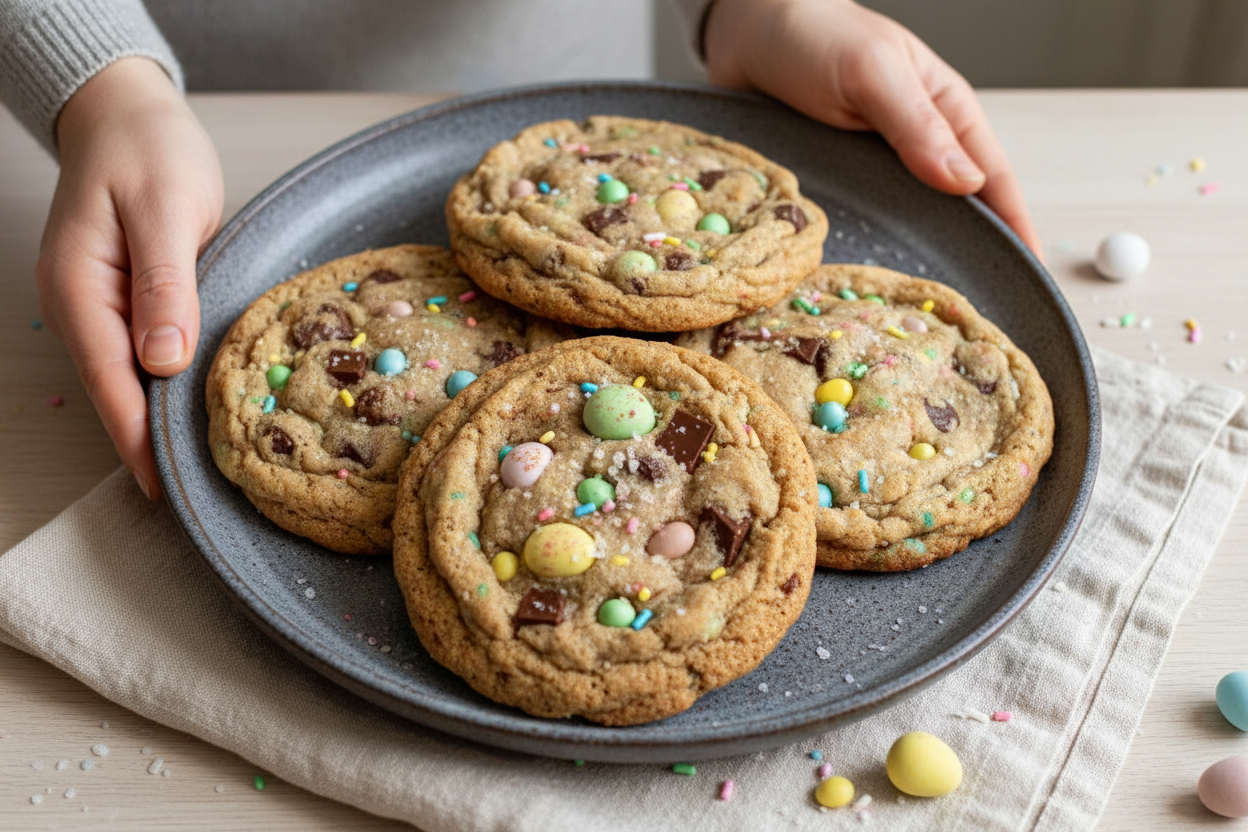
My Mini Egg Cookie Secret
Hello, my dear. Come sit at the counter. I want to share my favorite cookie recipe with you. These cookies are big, chewy, and full of little candy eggs. They remind me of springtime with my grandkids. We would always hunt for eggs, then bake something sweet. Doesn’t that smell amazing?
This recipe is very special. It works with regular flour or a gluten-free blend. You can use regular butter or a plant-based kind. Everyone gets to enjoy a treat. The secret is using cold butter and eggs. It makes the cookies bake up just right. I still laugh at my first batch. They spread all over the pan! Now I know better.
Step 1: First, heat your oven to 410ºF. Line your baking sheets with parchment paper. This keeps the cookies from sticking. I learned that the hard way once. Trust me, it saves a big mess.
Step 2: Put your cold, cubed butter and both sugars in a bowl. Mix them on high for a minute or two. You want it to look light and fluffy. My mixer makes a happy humming sound. It tells me it’s working hard.
Step 3: Crack in the two cold eggs. Add the vanilla too. Mix it all together until it’s smooth. The vanilla smell fills my whole kitchen. It makes me think of my own grandma’s baking.
Step 4: Now, add the flour, cornstarch, baking soda, and salt. Mix it gently until the flour disappears. (A hard-learned tip: don’t overmix! It makes cookies tough). Just stir until you don’t see white powder anymore.
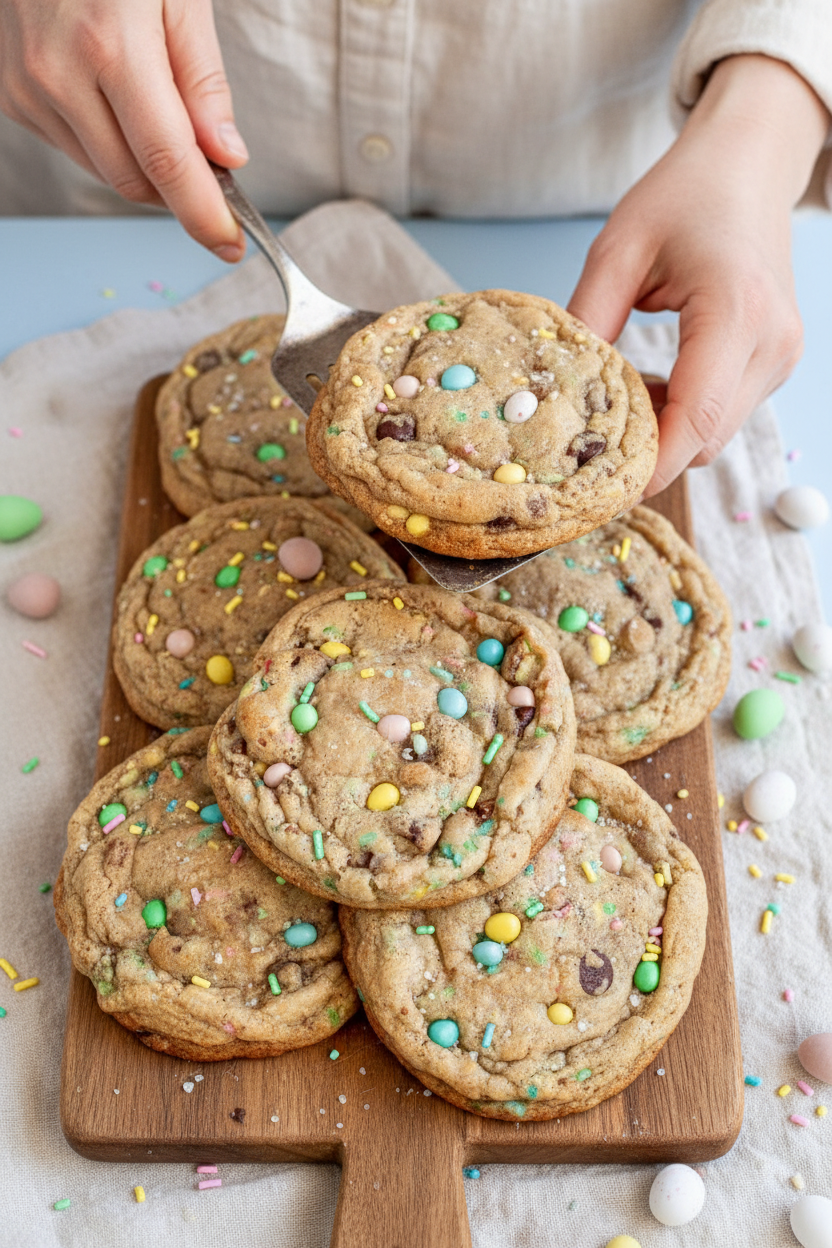
Step 5: Here’s the fun part. Put the mini eggs in a bag. Crush them with a rolling pin. Then, fold them into the dough with chocolate chips and sprinkles. What’s your favorite candy to crush? Share below!
Step 6: Scoop big 5-ounce balls of dough. Shape them into little cylinders, not perfect circles. This helps them bake tall. For smaller cookies, use a tablespoon scoop. Bake the big ones for 8-10 minutes. The edges will be golden.
Step 7: Take them out. They will look a bit soft in the middle. That’s perfect! Gently push any stray chips back in. Let them cool completely on the pan. This is the hardest part—waiting!
Cook Time: 8-10 minutes per batch
Total Time: About 30 minutes
Yield: 8 large cookies or 45 small ones
Category: Dessert, Cookies
Three Fun Twists to Try
Once you master the basic recipe, you can play! I love changing things up. It keeps baking exciting. Here are three of my favorite twists. They are all simple and delicious.
The Peanut Butter Cup Switch: Swap the mini eggs for chopped peanut butter cups. Use peanut butter chips instead of chocolate chips. It’s so rich and wonderful.
The Citrus Sunshine: Add the zest of one orange or lemon to the dough. Use white chocolate chips instead of regular ones. It tastes like a sunny spring day.
The Salty Pretzel Crunch: Fold in a cup of crushed pretzel pieces with the candy. Use only half the chocolate chips. The sweet and salty mix is just magic.
Which one would you try first? Comment below! I’d love to hear your pick.
Serving Them Up Right
These cookies are a treat all by themselves. But I like to make them extra special. For a party, serve them on a big platter. Pile them high so everyone can see. You could also crumble one over a scoop of vanilla ice cream. The warm cookie and cold cream is heaven.
What to drink? For the grown-ups, a glass of cold milk or a creamy stout beer is lovely. For everyone else, a frosty glass of milk is always best. Or try a sparkling lemonade. The bubbles cut through the sweetness so nicely. Which would you choose tonight? I think I’ll have mine with milk, just like when I was twelve.
Keeping Your Cookies Happy
Let’s talk about keeping these treats fresh. First, cool them completely. A warm cookie in a container gets soggy. I learned that the hard way with my first batch.
Store them in an airtight container at room temperature. They will stay yummy for about five days. You can also freeze the dough balls or baked cookies.
Frozen dough balls bake straight from the freezer. Just add a minute or two. This batch-cook trick saves so much time for surprise guests.
Why does this matter? Good storage means no waste. You can always have a little joy ready. Have you ever tried storing cookie dough this way? Share below!
Cookie Troubles? Easy Fixes!
Sometimes cookies spread too thin. Your butter might be too warm. Always use cold, cubed butter right from the fridge. I once used soft butter. My cookies turned into one giant sheet!
If your cookies are cakey, you might have over-mixed. Mix the dry ingredients just until combined. This keeps them chewy and dense, just like a bakery cookie.
Crunchy mini eggs can be hard to chop. Put them in a freezer bag first. Then use a rolling pin to crush them. It’s fun and stops pieces from flying.
Fixing small problems builds your cooking confidence. It also makes your food taste just right. Which of these problems have you run into before?
Your Quick Questions, Answered
Q: Can I make these truly gluten-free? A: Yes! Use a good 1:1 gluten-free baking blend. It works perfectly.
Q: Can I make the dough ahead? A: Absolutely. Shape the dough balls and freeze them on a tray. Then bag them up.
Q: What ingredient swaps work? A: Use plant-based butter and eggs. Any festive candy or chips will do.
Q: Can I make a smaller batch? A: You can halve the recipe easily. Just use one egg and mix well.
Q: Are sprinkles necessary? A: No, but they add joy! *Fun fact: Sprinkles are sometimes called “jimmies” in some parts of the country.* Which tip will you try first?
From My Kitchen to Yours
I hope you love making these cookies. Baking is about sharing sweetness with others. It is one of life’s simple pleasures.
I would love to see your creations. Your kitchen stories make my day. Have you tried this recipe? Tag us on Pinterest!
Thank you for baking with me today. Happy cooking!
—Chloe Hartwell.
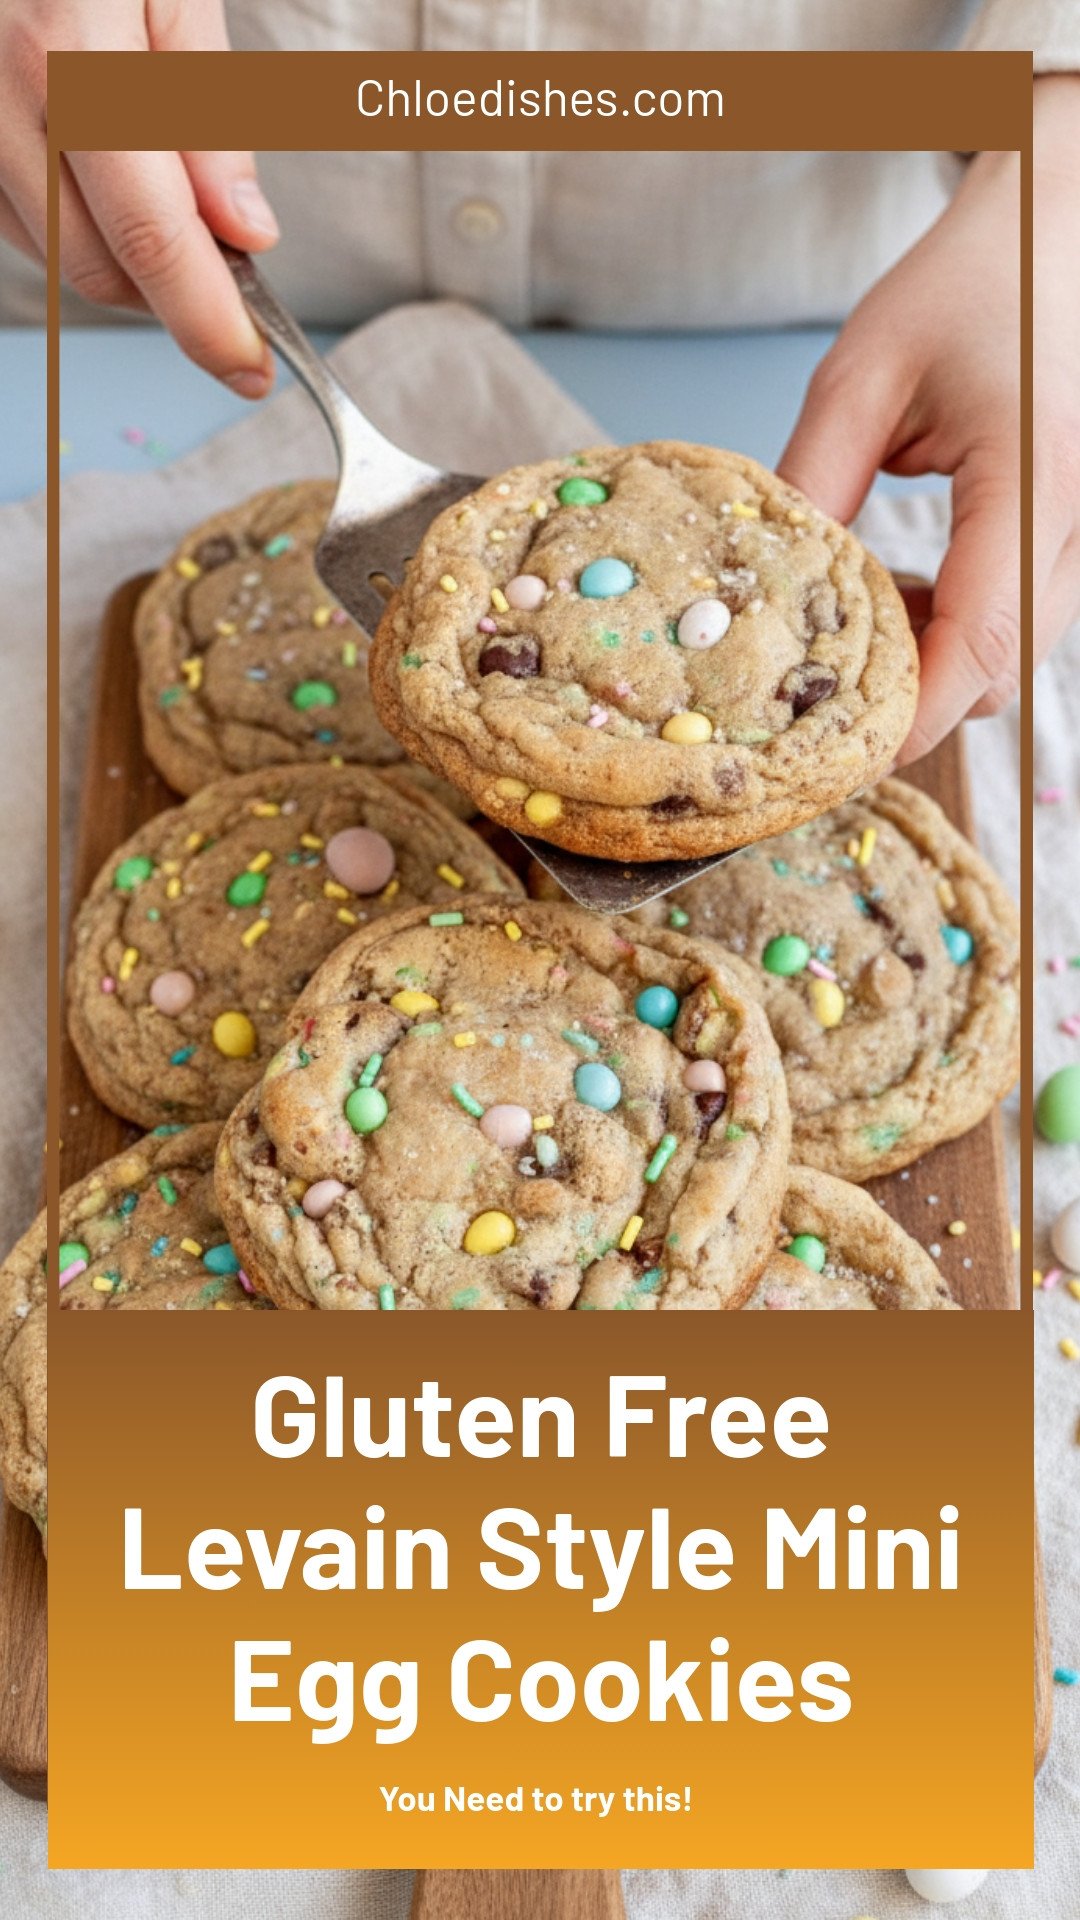

Gluten Free Levain Style Mini Egg Cookies
Description
Indulge in bakery-style gluten free cookies! Our levain-inspired mini egg cookies are thick, chewy & packed with colorful candy shell chocolate eggs. Perfect for Easter or any treat.
Ingredients
Instructions
- Preheat the oven to 410ºF and prepare 2 baking sheets with parchment paper.
- Cream the cold and cubed butter, brown sugar, and granulated sugar together on high for 1-2 minutes.
- Add in eggs and vanilla and mix until combined.
- Measure in flour, cornstarch, soda, and salt and mix until just combined.
- Place the mini eggs in a freezer bag and crush them with a rolling pin. Then, fold them into the batter with the chocolate chips and sprinkles.
- Make 5oz cookie dough balls and shape them into cylinders. Bake for 8-10 minutes. The edges should be a light golden brown and the center appears slightly underbaked. For smaller cookies, scoop about 1.5 tbsp of dough and bake at 350ºF for 8-10 minutes. This smaller portion will yield about 45 cookies.
- Remove from the oven and gently press in any errant cookie or chocolate edges with a butter knife.
- Allow the cookies to fully cool on pans. Enjoy!
Notes
- Store leftover cookies in an airtight container at room temperature for up to 5 days or frozen for up to 3 months.


Leave a Reply