
The Little Cookie That Could
Let’s start with the shortbread. It is the quiet base of our cookie. It holds everything up. I love how simple it is. Just butter, sugar, and flour.
You roll it out between parchment paper. This trick saves so much mess. I still laugh at the time I used wax paper. It stuck to everything. Parchment is our friend.
A Sticky, Sweet Story
Now for the coconut. Toasting it is the secret. It makes your whole kitchen smell like a tropical vacation. Doesn’t that smell amazing? It turns plain coconut into something magical.
Fun fact: Toasting coconut brings out its natural oils. This gives it a much richer, nuttier flavor. It matters because that flavor is what makes these cookies so special.
The Fun, Messy Part
Unwrapping the caramels is a job. I put on a short show and just get it done. Then you mix the gooey caramel with the toasted coconut. This part is sticky. You will get it on your fingers.
That is okay. Good cooking is sometimes messy. You press the coconut mix onto the cookie base. Making food with your hands feels wonderful. It connects you to what you are making.
A Chocolate Raincoat
Finally, we dip and drizzle. The dark chocolate is like a raincoat for the cookie. It keeps everything inside neat and tidy. Melting the wafers is so easy. They get smooth and shiny.
I like to drizzle the extra chocolate on top. It looks so pretty. It shows you took that extra step. What is your favorite part? Is it the dipping or the drizzling?
Why We Make These
This recipe has many steps. But each one is simple. Doing one small step at a time is less scary. This is a good lesson for baking and for life.
These cookies are a treat to share. They tell people you care. Have you ever made a special treat for someone? What was it? I would love to hear your stories.
Your Turn in the Kitchen
So there you have it. A cookie with a crunchy base, a chewy middle, and a chocolate shell. It has everything. Which layer do you think you would like the most?
I hope you try making them. The best part is seeing the happy faces when you share them. That is why we do this. It is about sharing a little bit of sweet joy.
Ingredients:
| Ingredient | Amount | Notes |
|---|---|---|
| unsalted butter | 1/2 cup | room temperature |
| salt | 1/4 tsp. | |
| granulated sugar | 1/3 cup | |
| powdered sugar | 2 Tbsp. | |
| whole milk | 1 Tbsp. | |
| vanilla extract | 1/2 tsp. | |
| all purpose flour | 1 cup | spooned and leveled |
| baking soda | 1/4 tsp. | |
| shredded sweetened coconut flakes | 3 1/2 cups | |
| caramels | 15 oz. | e.g., Wether’s soft caramels |
| heavy cream | 2-3 Tbsp. | |
| dark chocolate melting wafers | 10 oz. bag | e.g., Ghirardelli |
| oil (canola or vegetable) | 1 tsp. |
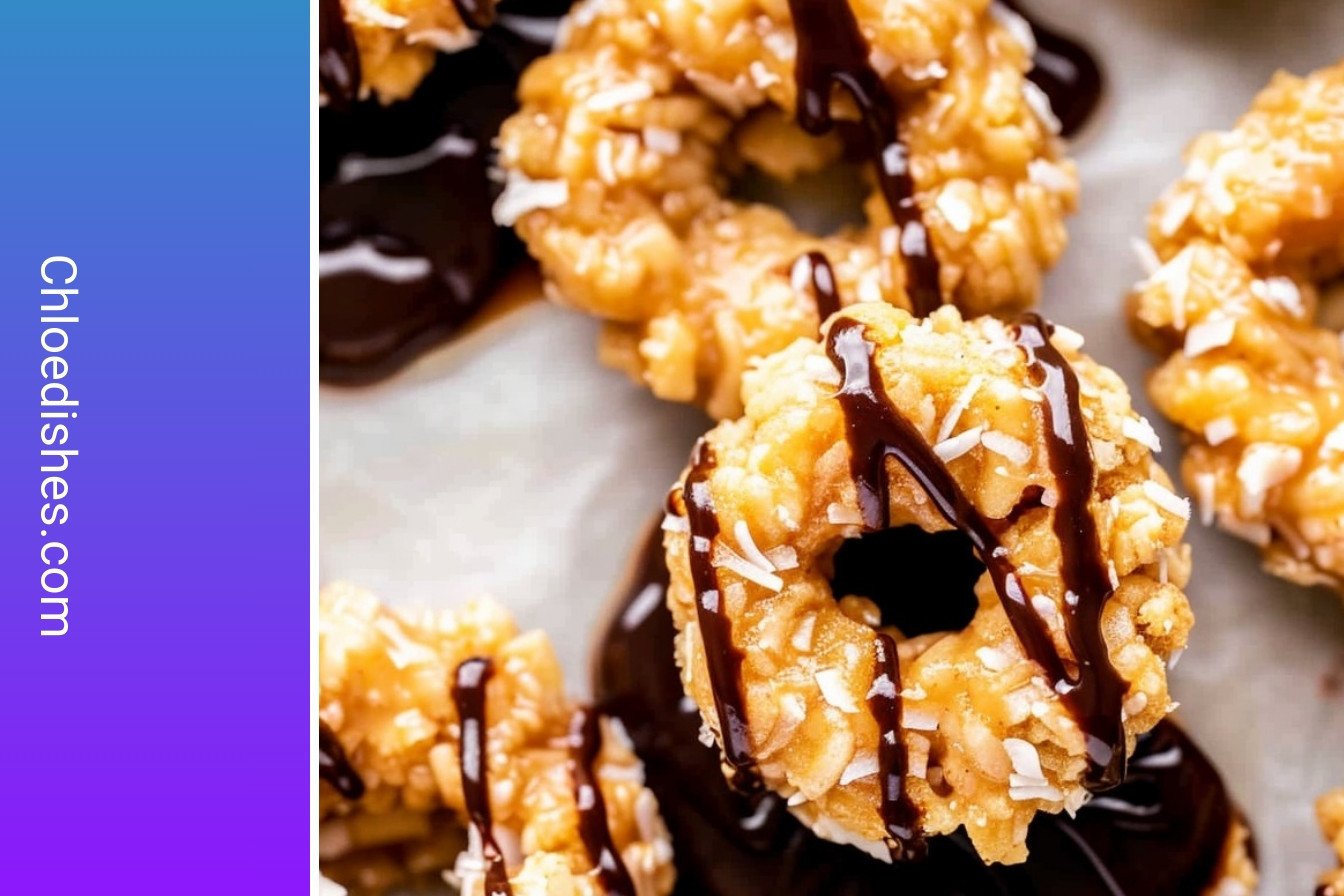
My Caramel Coconut Delights
Hello, my dear! Come sit with me. Let’s make my favorite little cookies. I call them my Caramel Coconut Delights. They have a crunchy base, a chewy middle, and a chocolate coat. Doesn’t that sound wonderful? My grandson adores them. I think you will, too.
We start with a simple shortbread. It’s the perfect foundation for all the goodness to come. Creaming the butter is the first step. It makes the cookie light and tender. I still laugh at that. I once used cold butter straight from the fridge. The dough was so crumbly! Let’s do it right this time.
Step 1: Beat the room-temperature butter and salt together. Do this for a few minutes until it’s smooth. Then add both sugars, the milk, and vanilla. Mix it all up again. It will look pale and fluffy. This is a very good sign.
Step 2: Now, add your flour and baking soda. Just mix on low speed. Stop as soon as the dough forms. You don’t want to over-mix it. Over-mixing makes tough cookies. We want them to melt in your mouth.
Step 3: Shape the dough into a flat disk. Roll it out between two sheets of parchment paper. This trick saves so much mess. No extra flour needed! Chill the dough for at least an hour. This helps the cookies keep their shape.
Step 4: Heat your oven to 350°F. Now, let’s toast the coconut. Spread it on a baking sheet. Put it in the oven for about 10-15 minutes. Stir it often so it doesn’t burn. You want it to be a lovely golden color. Doesn’t that smell amazing?
Step 5: Take your chilled dough and cut out circles. A small piping tip is perfect for making the hole. (A hard-learned tip: If the dough gets soft, pop it back in the fridge. Warm dough is hard to work with!). Bake them for 8-10 minutes. Let them cool completely.
Step 6: Unwrap the caramels with some cream. Melt them in the microwave. Be careful, the bowl will be hot. Mix most of the caramel with the toasted coconut. Save a little bit for later. This gets a bit sticky, but that’s part of the fun.
Step 7: Spread a thin layer of the reserved caramel on each cookie. This is our “glue.” Then, press a mound of the coconut mixture on top. Use your fingers for this. It’s okay to get a little messy. I always do.
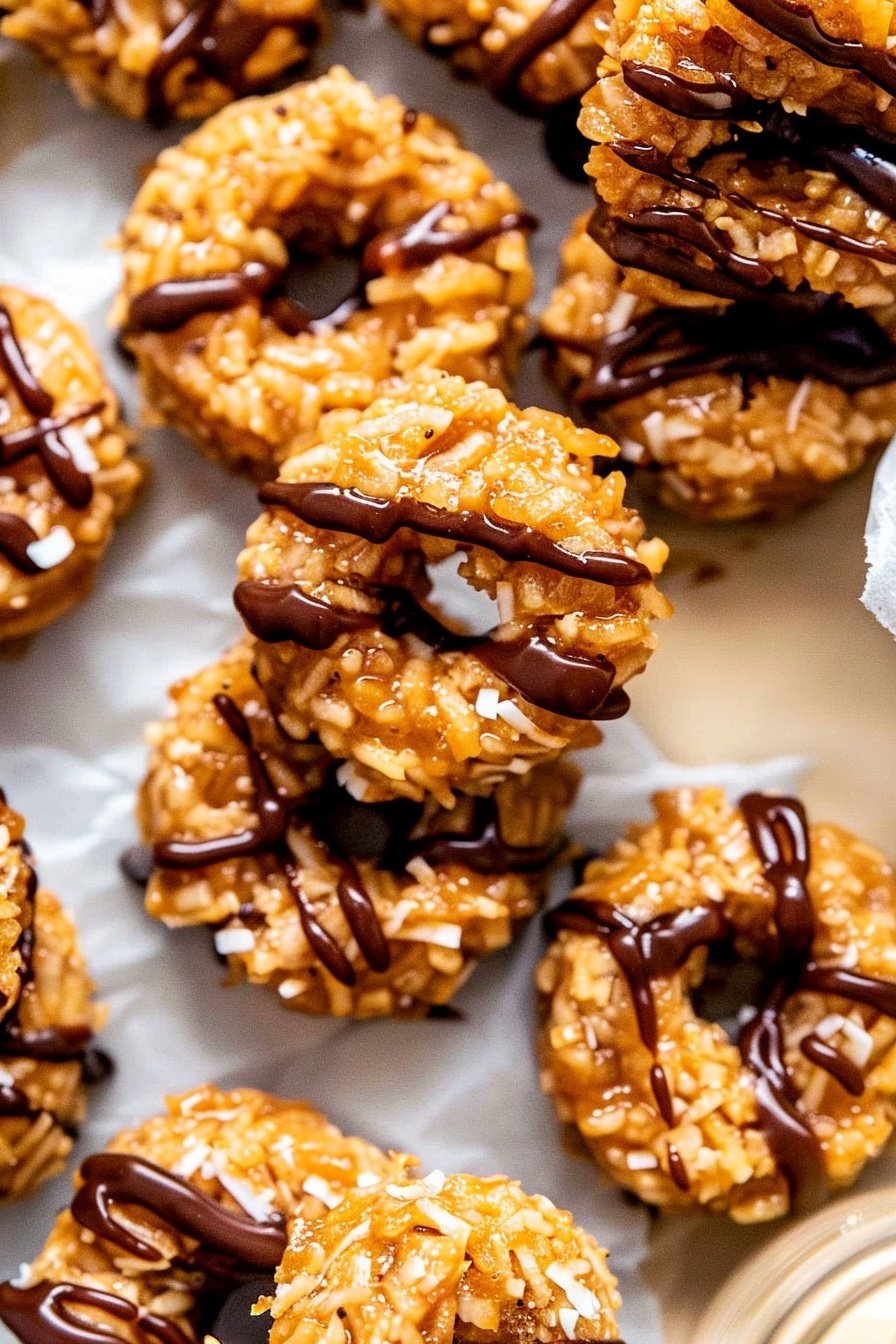
Step 8: Melt the chocolate wafers with a tiny bit of oil. Dip the bottom of each cookie in the chocolate. Let the extra drip off. Place them on a tray. Drizzle more chocolate on top if you like. Then, we wait for them to set. This is the hardest part! What’s your favorite part of baking? Share below!
Cook Time: 30-40 minutes
Total Time: About 2 hours (with chilling)
Yield: About 22-25 cookies
Category: Dessert, Cookies
Three Fun Twists to Try
These cookies are wonderful as they are. But sometimes, it’s fun to play with your food. I like to change them up for the seasons. It keeps things interesting in the kitchen. Here are a few ideas I’ve tried over the years.
Salty Surprise: Sprinkle a little flaky sea salt on top of the chocolate. It makes the sweet flavors pop even more. My neighbor taught me that trick.
Nutty Buddy: Mix some chopped pecans or almonds into the coconut layer. It adds a lovely little crunch. It reminds me of the candy bars I loved as a girl.
Fruity Fun: Add a few dried cranberries or cherries to the coconut mix. It gives a little tartness that is just so good. Perfect for the holidays.
Which one would you try first? Comment below!
Serving Your Sweet Creations
Now, how should we enjoy these treats? They are perfect all on their own. But I love making a little occasion out of it. It turns a simple cookie into a tiny celebration. Here are my favorite ways to serve them.
Place them on a fancy plate for guests. They look so special. For a real treat, serve them slightly warm. The caramel gets a little soft. A cold glass of milk is the best partner. Or a cup of hot tea with a little honey.
For the grown-ups, a small glass of dark rum pairs beautifully. It has those same caramel notes. For a non-alcoholic option, a creamy latte is just the thing. Which would you choose tonight?
Keeping Your Delights Delicious
These cookies are perfect for making ahead. You can freeze them before the chocolate step. Just layer them in a container with parchment paper between layers. I once forgot I had a batch in the freezer. Finding them a month later felt like a sweet treasure.
Store finished cookies in a sealed container. They will stay fresh for about a week. The fridge can make the chocolate sweat, so the counter is best. Batch cooking lets you share sweet treats with friends anytime.
This matters because a ready-made treat brings joy on busy days. It is a little gift from your past self. Have you ever tried storing it this way? Share below!
Simple Fixes for Common Hiccups
Is your coconut burning? Ovens can be tricky. I remember when I burned my first batch. It taught me to stir it often and watch it like a hawk. This keeps your treats from tasting bitter.
Is the caramel too thick? Just add a tiny bit more cream. This makes it easier to mix with the coconut. Getting the consistency right matters for the best flavor and texture. Is your dough too soft? Chilling it is the secret. A firm dough is much easier to cut.
Fixing small problems builds your cooking confidence. You learn that mistakes are just stepping stones. Which of these problems have you run into before?
Your Quick Questions, Answered
Q: Can I make these gluten-free?
A: Yes! Just use your favorite gluten-free flour blend. It works wonderfully.
Q: How far ahead can I make them?
A: You can make the shortbread disks up to two days ahead. Keep them chilled in the fridge.
Q: What if I don’t have heavy cream?
A: Whole milk will work in a pinch. The caramel might be a little less rich.
Q: Can I double the recipe?
A: Absolutely! These are great for parties. Just use two baking sheets.
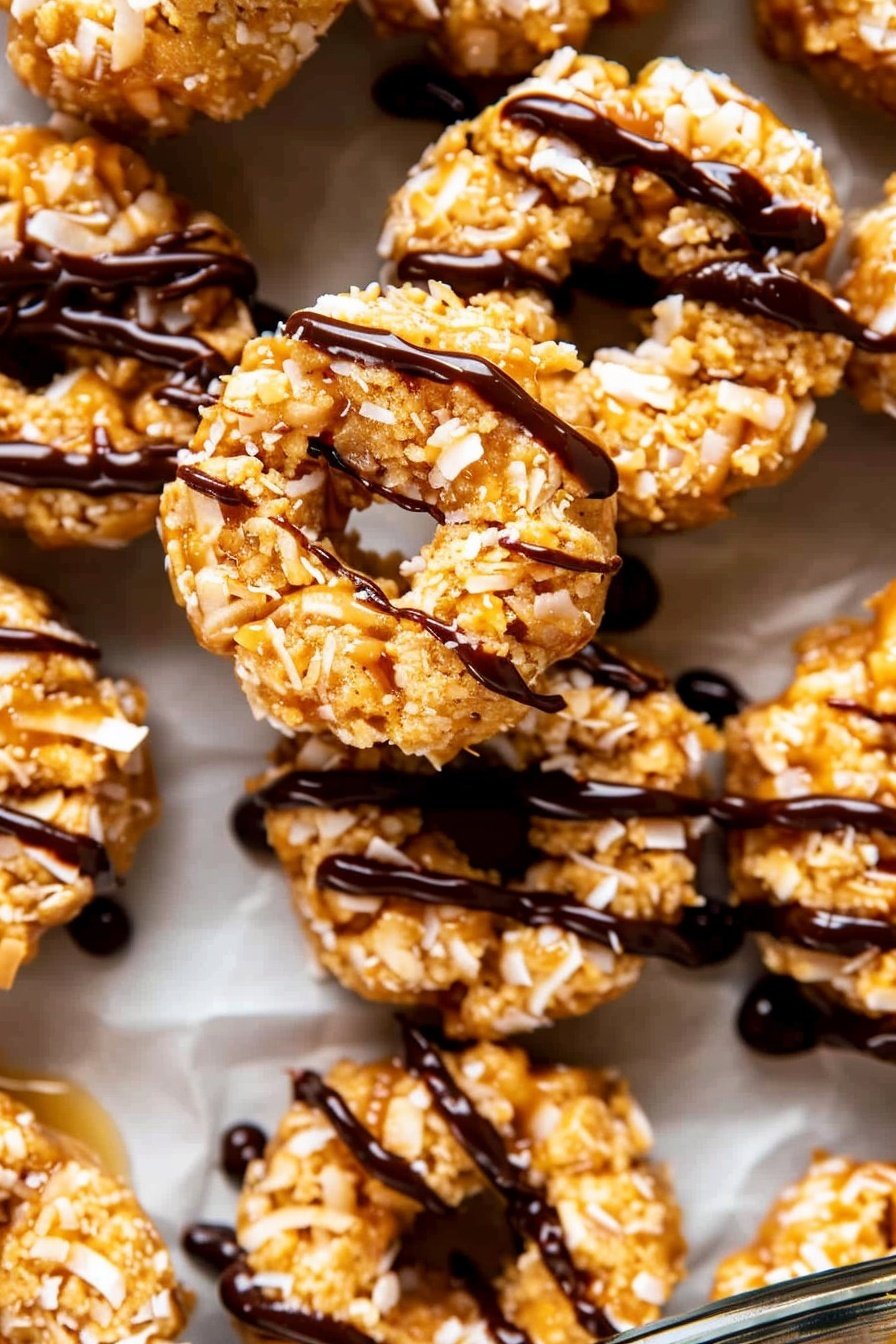
Q: Is the donut shape necessary?
A: Not at all. A solid circle is just as tasty. Fun fact: The hole lets you see all the yummy layers inside! Which tip will you try first?
A Sweet Send-Off from My Kitchen to Yours
I hope you love making these caramel coconut delights. They always fill my kitchen with a wonderful smell. It reminds me of my own grandmother’s baking days.
I would be so thrilled to see your creations. Sharing food is one of life’s greatest joys. Have you tried this recipe? Tag us on Pinterest!
Happy cooking!
—Chloe Hartwell.
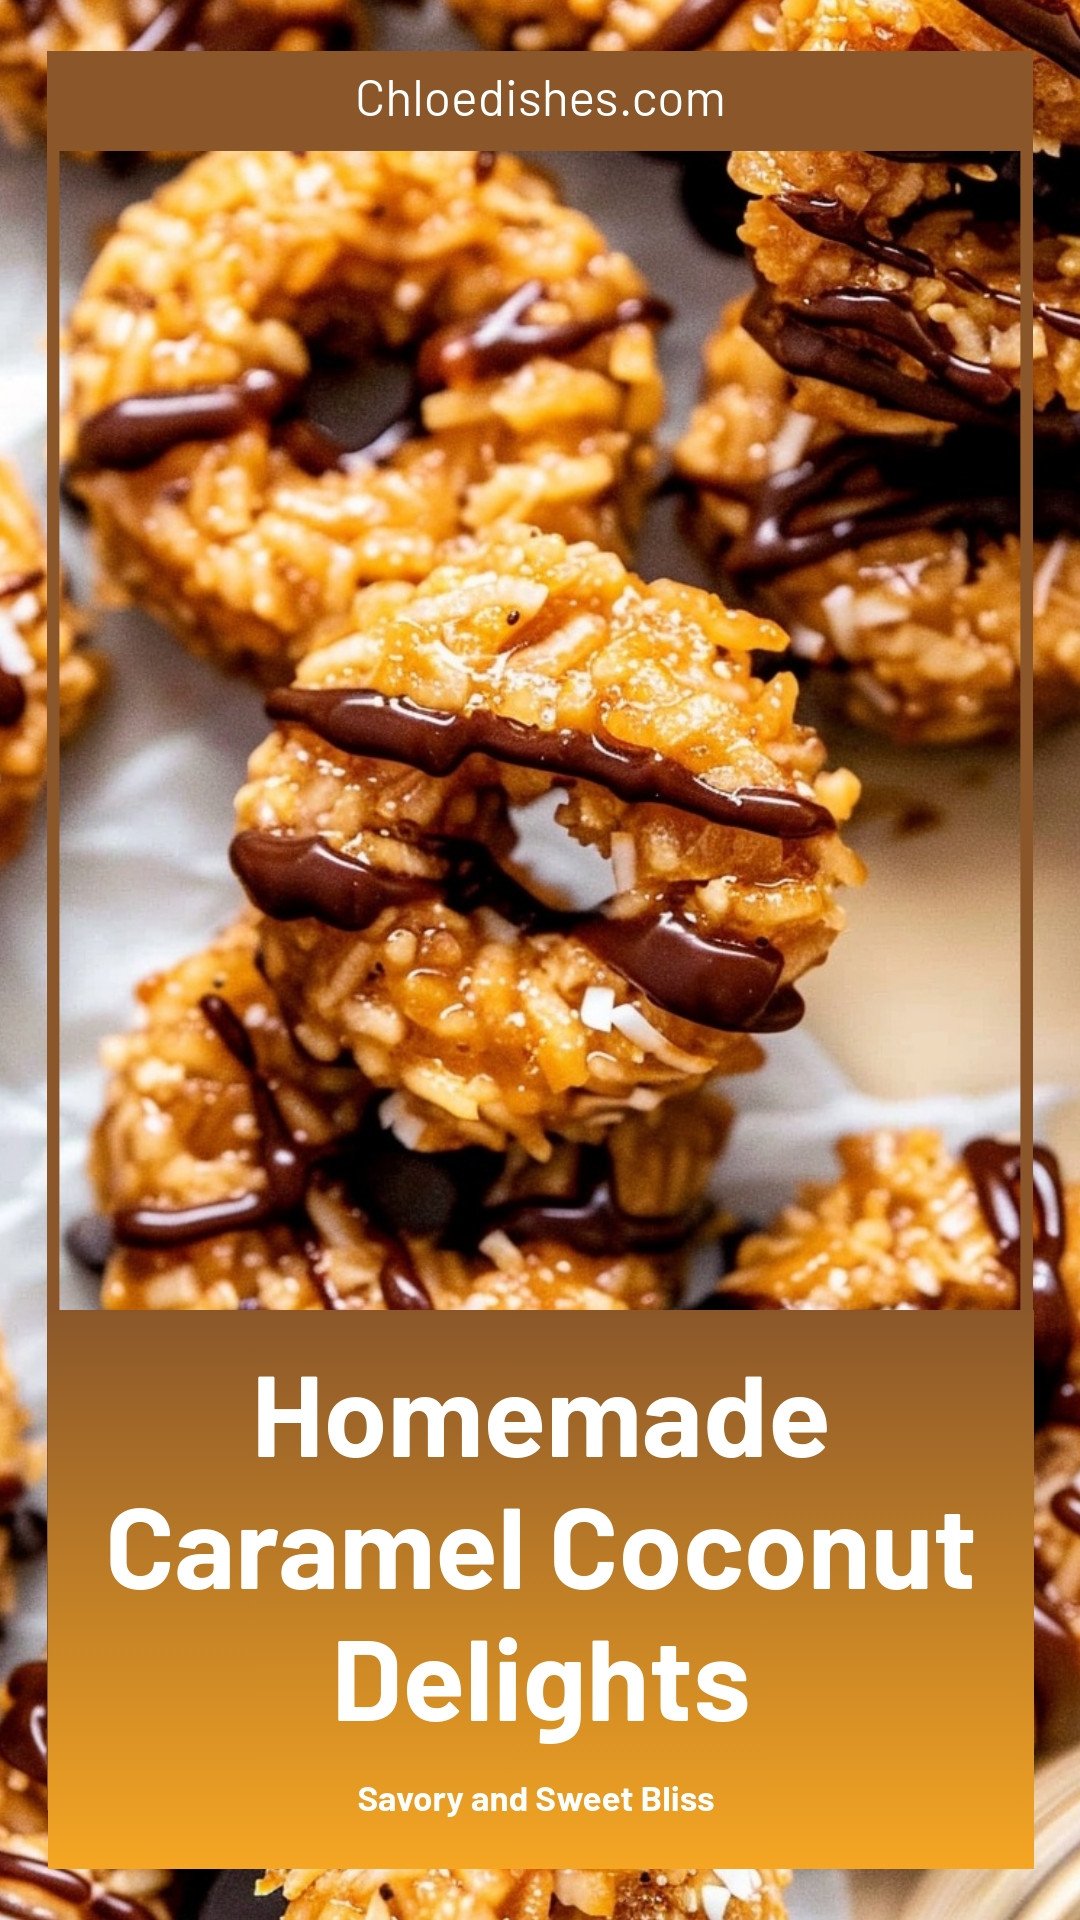
Homemade Caramel Coconut Delights: Savory and Sweet Bliss
Description
Easy, no-bake caramel coconut bliss balls! This simple 4-ingredient recipe is the perfect healthy vegan snack or sweet energy bite. Make them in just 10 minutes!
Ingredients
=== Shortbread cookie ===
=== Coconut layer ===
=== Chocolate ===
Instructions
- Cream the butter and salt in a stand mixer with the paddle attachment, for 2-4 min. Add both sugars, milk, and vanilla extract. Beat again for 1-2 minutes.
- Add the flour and baking soda on low speed just until the dough comes together.
- Bring the dough together into a disk. Place on a sheet of parchment paper, place another sheet of parchment on top and roll out the dough between the parchment. Roll it out about ¼ inch thick. Place on a cookie sheet, and chill for at least 1 hour or up to overnight in the fridge.
- Preheat the oven to 350°F.
- Toast the coconut. Pour the coconut onto a baking sheet and place it in the oven to toast for ~10-15 minutes, stirring frequently to prevent burning. Depending on your oven, this may take longer or faster so be sure to keep a close eye on it! Once toasted, remove to a parchment-lined baking sheet to cool. You want to move it to another sheet pan so the residual heat doesn’t continue to toast the coconut.
- Once the cookie dough has chilled, peel back the top piece of parchment. Cut out the cookies using a 2-inch circular cookie cutter or a donut-shaped cookie cutter.If using just a regular 2-inch circular cookie cutter, you’ll need to use a piping tip to cut out a small circle in the middle.
- Place the cut-out cookies on a parchment-lined baking sheet and bake for ~8-10 minutes or until the edges just start to become golden. Cool on the cookie sheet for a few minutes, then place on a wire cooling rack.
- Rework the scraps, re-roll between the parchment, and chill again until firm enough to make more cutouts. You should be able to yield ~22-25 cookies.
- Unwrap the caramels and place in a microwave-safe bowl. Add the heavy cream. Melt in the microwave in increments until melted. Add a touch more heavy cream if needed to get a good consistency.
- Pour a majority of the caramel into the toasted coconut. Reserve just about ¼-⅓ cup to the side. Mix the caramel into the toasted coconut. It will be nice and sticky but thoroughly combined.
- Add a thin layer of the reserved caramel to the shortbread cookie to act as the glue for the coconut caramel mixture so it can stick. Use a spoon to spread it around evenly. This process can get a bit messy, take your time.
- Add a mound of the coconut mixture to each cookie ring, pressing it down slightly. I use my fingers for this process. Once again, a little messy, but not bad. Wash your fingers if they get too sticky and then continue mounding the coocnut on. Allow the coconut to set up ~15-30 minutes.
- Melt the chocolate and oil in the microwave.
- Using a fork, dunk the bottom half of each cookie into the melted chocolate. Tap off excess and then place cookies on a Silpat-lined baking sheet. Repeat with remaining cookies.
- Drizzle chocolate on top of cookies. I like to get a fine drizzle over the tops by just placing the remaining chocolate in a ziplock baggie, cutting off one of the corners, and drizzling it over the top.
- Allow to set up, and enjoy! Yay you did it!
Notes
- For a faster version, you can use pre-made shortbread cookies and skip the cookie-making steps.


Leave a Reply