
A Fun Little Kitchen Trick
Have you ever wanted a warm, salty snack? I make these little knots all the time. They are so easy and fun.
My grandson calls them magic bread. His face lights up when they come out of the oven. I still laugh at that. It makes my kitchen feel happy.
The Secret is in the Dip
The recipe uses a simple can of biscuit dough. You roll the dough into little balls. Then you give them a quick bath.
You dip them in water mixed with baking soda. This is the magic step! It gives them a unique crust. Fun fact: This is the same trick used to make soft pretzels so shiny and chewy!
Why We Make Food With Our Hands
Rolling the dough is my favorite part. It feels good in your hands. It is not about being perfect.
This matters because cooking with your hands is calming. You are making something real. It is a small moment of peace in a busy day.
Getting Them Ready for the Oven
After their bath, place them on a baking sheet. Give them a little slit on top. Then you brush them with melted butter.
Now, sprinkle on that coarse salt. Be generous! Doesnt that smell amazing already? This is when I know something good is coming.
The Best Part is Sharing
They only bake for about eight minutes. Watch them turn a deep, golden brown. You must eat them right away, while they are warm.
This matters because food tastes better when shared. I love seeing people reach for a second one. It is a small way to show you care.
What is your favorite quick snack to make? Tell me about it! I would love to know.
A Little Story for You
I once made these for a friend who was feeling sad. We sat at my kitchen table and ate the whole batch. We didnt talk much, just ate.
She told me later it was the best medicine. Sometimes, a warm, salty bite can say more than words. Have you ever cooked for someone to cheer them up?
Your Turn in the Kitchen
This recipe is hard to mess up. That is the best kind of recipe. It is perfect for a first-time baker.
Would you try adding other toppings? Maybe some garlic powder or everything bagel seasoning? What do you think would taste good on them?

Ingredients:
| Ingredient | Amount | Notes |
|---|---|---|
| refrigerated biscuit dough | 1 (16.3-ounce) can | 8 biscuits; I use Pillsbury Grands! Buttermilk Southern Homestyle |
| warm water | 2 cups | |
| baking soda | 1/4 cup | |
| butter | 4 tablespoons | melted |
| coarse salt | for topping |
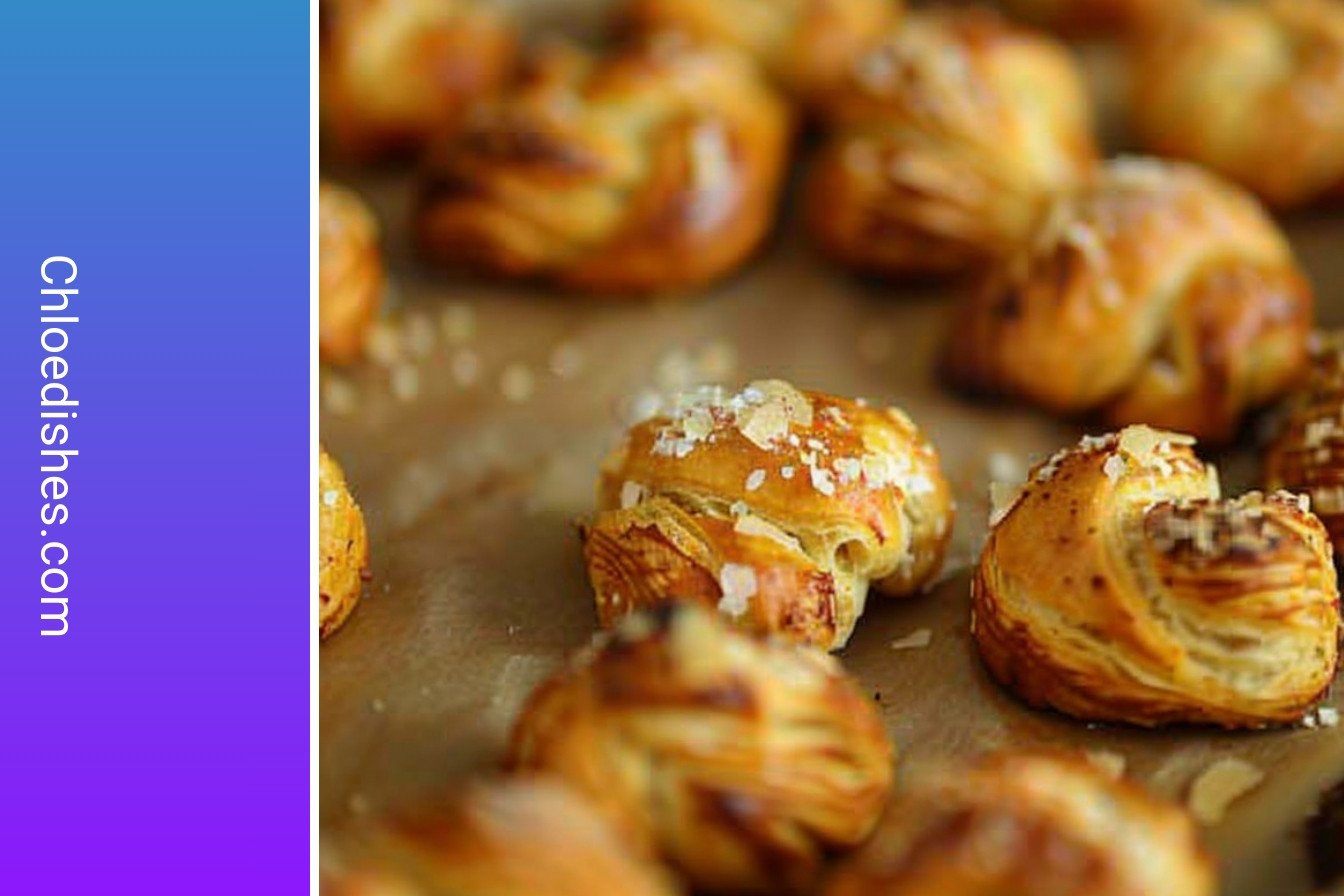
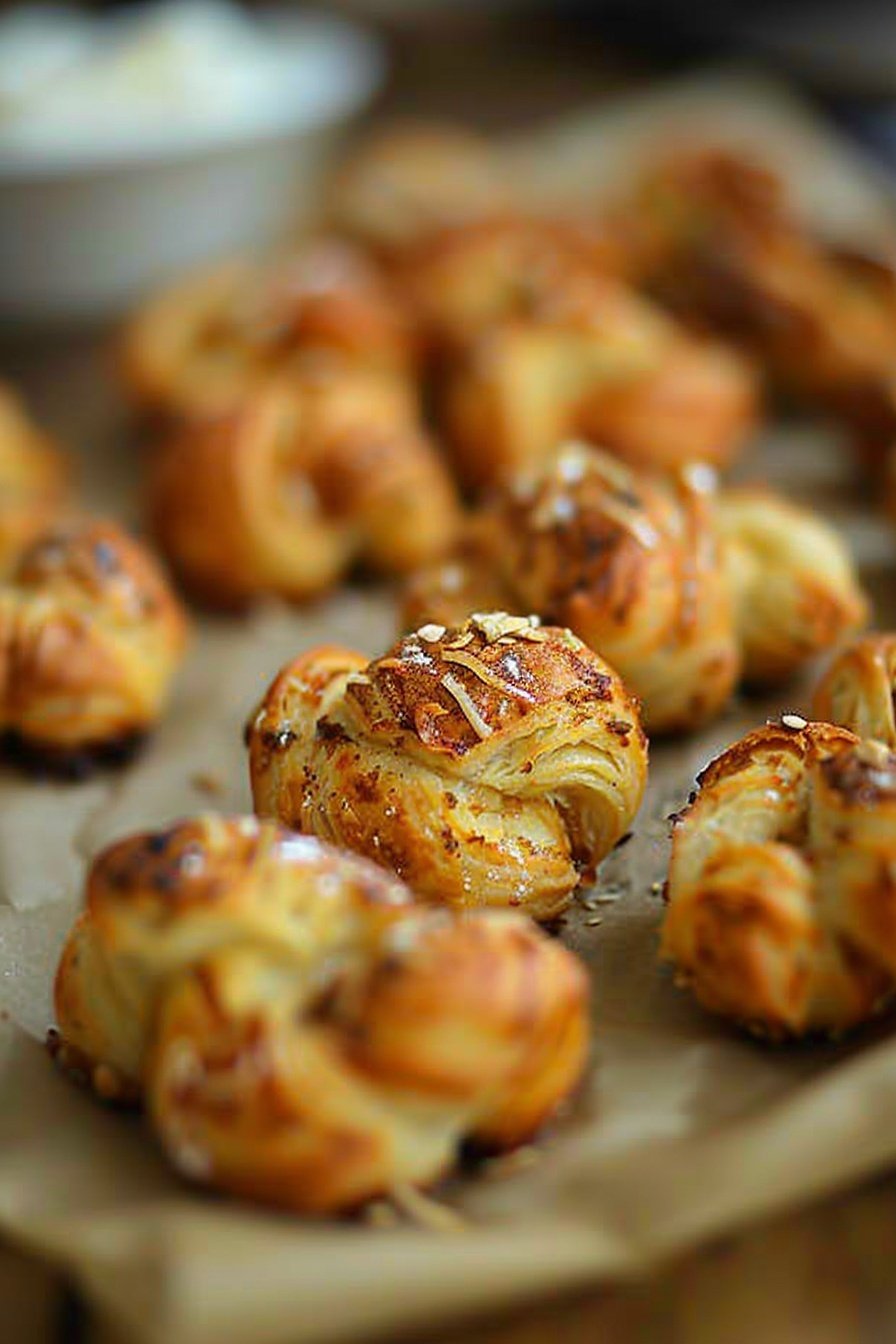
My Cheesy, Salty Snack Knots
Hello, my dear! Come sit with me in the kitchen. I want to share my favorite quick snack. These little knots are warm, salty, and so fun to pull apart. They remind me of the soft pretzels my grandpa bought me at the fair. Making them fills the whole house with the most wonderful smell. Doesn’t that sound lovely?
We are going to use a simple can of biscuit dough. It makes everything so easy. I still laugh at the first time I tried this. My grandson thought I had baked all day! Our secret is a quick dip in baking soda water. It gives them that special chewy crust. Are you ready to begin?
- Step 1: First, turn your oven on to 425°F. Get out a big baking sheet. I always line mine with parchment paper. It makes cleanup so simple. This is my favorite part because I know a treat is coming soon.
- Step 2: Open your can of biscuits. Now, cut each biscuit into four little pieces. Roll each piece into a small ball in your hands. Then, take a knife and make a tiny slit on top of each ball. This helps them look like proper little knots.
- Step 3: Pour two cups of warm water into a bowl. Now, whisk in the baking soda. Keep stirring until it disappears into the water. (A hard-learned tip: Make sure the water is warm, not hot. Hot water can make the dough a bit funny.)
- Step 4: Time for the magic dip! Drop each dough ball into the baking soda water. Then, place it on your baking sheet with the slit facing up. I like to line them up in neat little rows. They look like happy little soldiers waiting to be baked.
- Step 5: Melt your butter in a small bowl. Use a brush to paint each dough ball with the melted butter. Be generous! Then, sprinkle them right away with the coarse salt. It sticks to the butter perfectly. Doesn’t that smell amazing already?
- Step 6: Slide the pan into your hot oven. Bake them for about 8 to 9 minutes. Watch for a deep, golden brown color. They puff up so beautifully! I love how they look when they’re done.
What’s your favorite quick snack to bake? Share below!
Cook Time: 8–9 minutes
Total Time: 20 minutes
Yield: 32 snack knots
Category: Snack, Appetizer
Three Tasty Twists to Try
Once you master the basic recipe, you can get creative. I love adding new flavors. It makes each batch a little surprise. Here are three of my favorite twists. They are all so simple and delicious.
- Garlic & Herb: Mix some garlic powder and dried parsley into the melted butter. It tastes so fancy.
- Everything Bagel: Sprinkle the knots with everything bagel seasoning instead of just salt. So good!
- Cinnamon Sugar Sweet: Skip the salt. Brush with butter and roll in cinnamon sugar after baking. A sweet treat!
Which one would you try first? Comment below!
Serving Your Snack Knots
These knots are wonderful all on their own. But they are even better with friends. For a real treat, serve them with a side of warm marinara sauce for dipping. A simple cheese dip is also a big hit in my house. I just melt some cheddar with a splash of milk.
What should we drink with them? On a cozy night, a cold glass of milk is just perfect. For the grown-ups, a crisp lager beer pairs wonderfully with the salty dough. It reminds me of a night out at a beer garden. Which would you choose tonight?
Keeping Your Snack Knots Fresh
These snack knots are best eaten right away. But I know you might have leftovers. Let them cool completely first. Then pop them into an airtight container. They will stay good on the counter for a day.
You can also freeze them for later. I learned this after making a triple batch for my grandson’s party. Place the cooled knots in a single layer on a baking sheet. Freeze them for one hour. This stops them from sticking together.
After that, put them all in a freezer bag. They will keep for a month. This matters because a ready-made snack is a lifesaver on busy days. To reheat, just warm them in a 350°F oven for five minutes. Have you ever tried storing it this way? Share below!
Easy Fixes for Perfect Snack Knots
Sometimes the dough can be tricky. If your knots are too dense, you might have overworked the dough. I remember when I used to roll the dough too hard. Just handle it gently for a lighter bite.
If the salt does not stick, your butter might be too cool. Always brush on the butter right after melting it. This helps the salt cling to the dough. This small step makes a big difference in flavor.
Are your knots not golden brown? Your oven might not be hot enough. Let it fully preheat before baking. Fixing these little issues builds your confidence in the kitchen. Fun fact: The baking soda bath gives them their classic soft texture and golden color. Which of these problems have you run into before?
Your Snack Knot Questions Answered
Q: Can I make these gluten-free? A: Yes, just use a gluten-free biscuit dough from the store.
Q: Can I make the dough balls ahead? A: You can shape them and keep them in the fridge for a few hours.
Q: What can I use instead of coarse salt? A: Flaky sea salt works great. Garlic salt is tasty too.
Q: Can I double this recipe? A: Of course! Just use two baking sheets so they are not crowded.
Q: Any extra tips? A: Try brushing them with garlic butter after baking for more flavor. Which tip will you try first?
From My Kitchen to Yours
I hope you love making these little knots. They always remind me of happy afternoons with my family. Food is best when it is shared with people we love.
I would be so thrilled to see your creations. Please share a picture of your snack knots. Show me how your baking adventure turned out. Have you tried this recipe? Tag us on Pinterest!
Happy cooking! —Chloe Hartwell.

Homemade Savory Snack Knots: Creamy, dreamy, irresistible indulgence.
Description
Twist, bake, and enjoy! These easy homemade savory snack knots are the perfect flaky, buttery treat for any occasion. Ready in minutes!
Ingredients
Instructions
- Preheat the oven to 425°F and line a large baking sheet with parchment or a silicone baking mat.
- Cut each biscuit into 4 pieces and carefully roll each piece into a ball. Use a knife to make a small slit in the top of each ball of dough.
- Pour the water into a medium bowl and whisk the baking soda in until it has dissolved.
- Dip each dough ball into the baking soda water and place it, slit side up, onto the prepared pan.
- Brush the dough balls with the melted butter and immediately sprinkle with coarse salt.
- Bake for 8 to 9 minutes or until deep golden brown. Serve immediately.


Leave a Reply