
My First Pavlova Mishap
Let me tell you about my first pavlova. It was a flat, sticky mess. I was so sad. I learned a big lesson that day. Your bowl must be spotless. Not one speck of egg yolk can be in the whites.
It matters because egg whites are shy. Any grease stops them from growing tall and fluffy. Now I wipe my bowl with lemon juice first. It always works. Have you ever had a baking disaster? I would love to hear your story.
Little Clouds of Sweetness
These mini pavlovas are like edible cups. You pipe them with raised edges. They bake low and slow. This makes them crispy outside and soft inside. It is pure magic.
*Fun fact*: Pavlova is named for a ballet dancer. People say it is as light as her dancing. Isn’t that lovely? The slow bake is key. It dries them out without browning them too much. Your kitchen will smell amazing.
The Cheesecake Surprise
The filling is my favorite part. It is not baked. You just mix cream cheese, sugar, and cream. A little lemon juice makes it taste bright. It whips up so thick and dreamy.
I think the lemon is the secret. It cuts the sweet richness. Do you prefer your desserts very sweet or a little tangy? This filling is the perfect balance. It matters because it makes the treat feel special. It is not just plain whipped cream.
Berry Happy Finish
The glaze is so simple. You warm jam with a little water and sugar. It becomes shiny and beautiful. I use strawberry jam most times. But any berry jam works.
You add a spoonful in the shell first. This keeps the bottom from getting soggy. Then you pipe in the cheesecake filling. A drizzle of glaze and fresh berries on top finishes it. What is your favorite berry? I still laugh at that time I used blueberry jam. My grandson had a purple smile for hours.
Sharing the Joy
These are perfect for sharing. Everyone gets their own little cup. They look fancy but are fun to make. The crunch of the shell with the creamy filling is wonderful.
It matters because food made with care brings people together. That is the best part of cooking. Would you make these for a special day or just a Tuesday treat? Serve them right away for the best texture. I hope you try them.
Ingredients:
| Ingredient | Amount | Notes |
|---|---|---|
| Egg whites | 5 large | For pavlova shells |
| Cream of tartar | ½ teaspoon | For pavlova shells |
| Salt | ½ tsp | For pavlova shells |
| Granulated sugar | 1 cup + 2 tbsp (225g) | For pavlova shells |
| Pure vanilla extract | 1 teaspoon | For pavlova shells |
| Cream cheese | 12oz (340g) | Room temp, for filling |
| Sugar | ½ cup (100g) | For filling |
| Vanilla | 1 tsp | For filling |
| Salt | ¼ tsp | For filling |
| Lemon juice | 2-3 tablespoon | For filling |
| Heavy cream | 1 cup (240g) | For filling |
| Berry jam | 4 tbsp | Of choice, for glaze |
| Water | 2 tbsp | For glaze |
| Sugar | 1 tbsp | For glaze |
| Fresh berries | As needed | Of choice, for decoration |
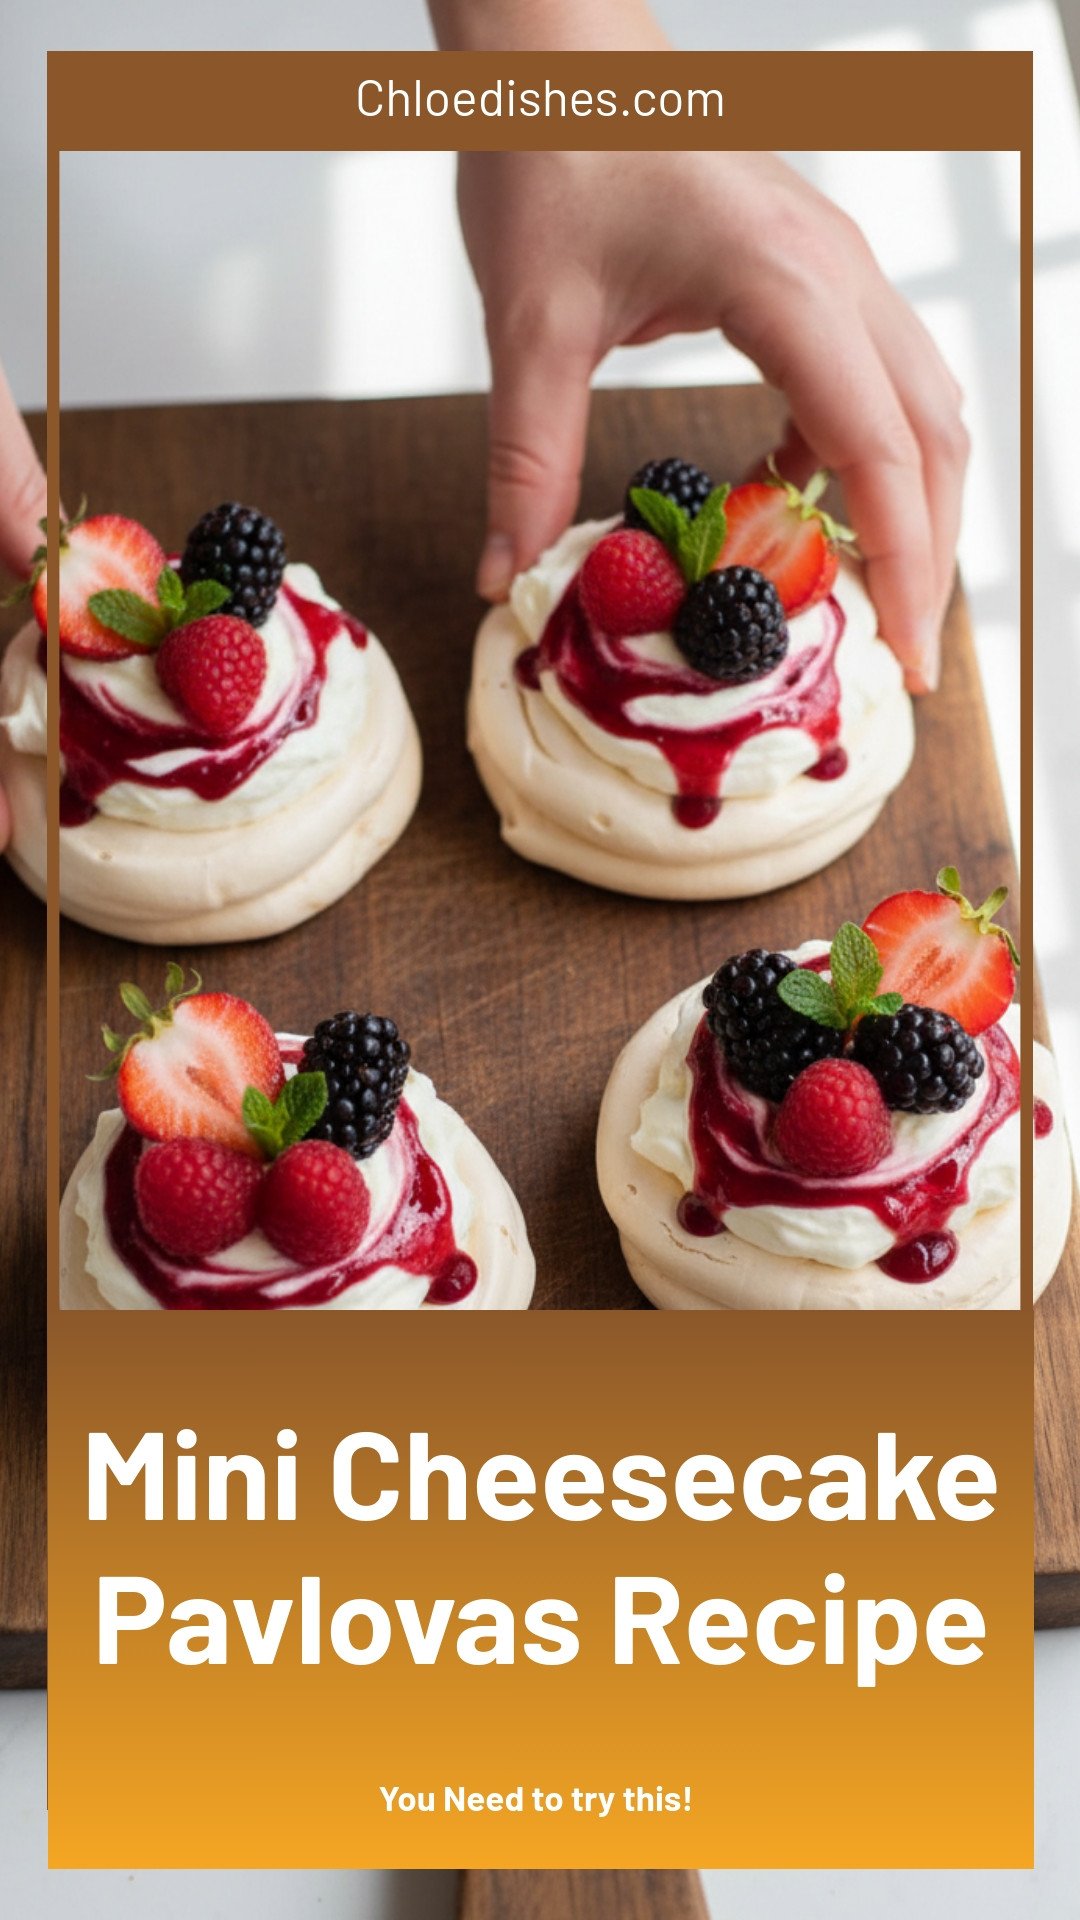
My Mini Cheesecake Pavlovas: A Sweet Little Cloud
Hello, my dear! It’s Chloe. Let’s make something magical today. These are like little edible clouds. They are crisp, sweet shells filled with creamy cheesecake. I think of my granddaughter every time I make them. Her eyes get so wide! Doesn’t that sound fun?
We’ll start with the pavlova shells. They need patience, but it’s worth it. My first time, I was in a rush. The shells wept sticky tears! I still laugh at that. So, we’ll go slow. Ready your mixer and a happy heart. Let’s begin.
Step 1: Heat your oven to 220°F. Line a baking sheet with parchment paper. Now, separate your egg whites. Be very careful! No yolk can sneak in. A clean, dry bowl is your best friend here. (My hard-learned tip: wipe the bowl with lemon juice first. It chases away any grease!).
Step 2: Put the whites in that clean bowl. Add the cream of tartar and salt. Start whisking on medium speed. Watch them turn frothy and white, like sea foam. This takes a few minutes. It’s a good time to take a deep breath. Smell the promise of sugar?
Step 3: Now, add the sugar. Do it one spoonful at a time. Let each spoonful disappear before adding the next. This makes the meringue strong. Towards the end, pour in the vanilla. Keep whisking until the mixture is glossy and stiff. How do you know it’s ready? Lift the whisk. Does a sharp peak stand up straight? Share below!
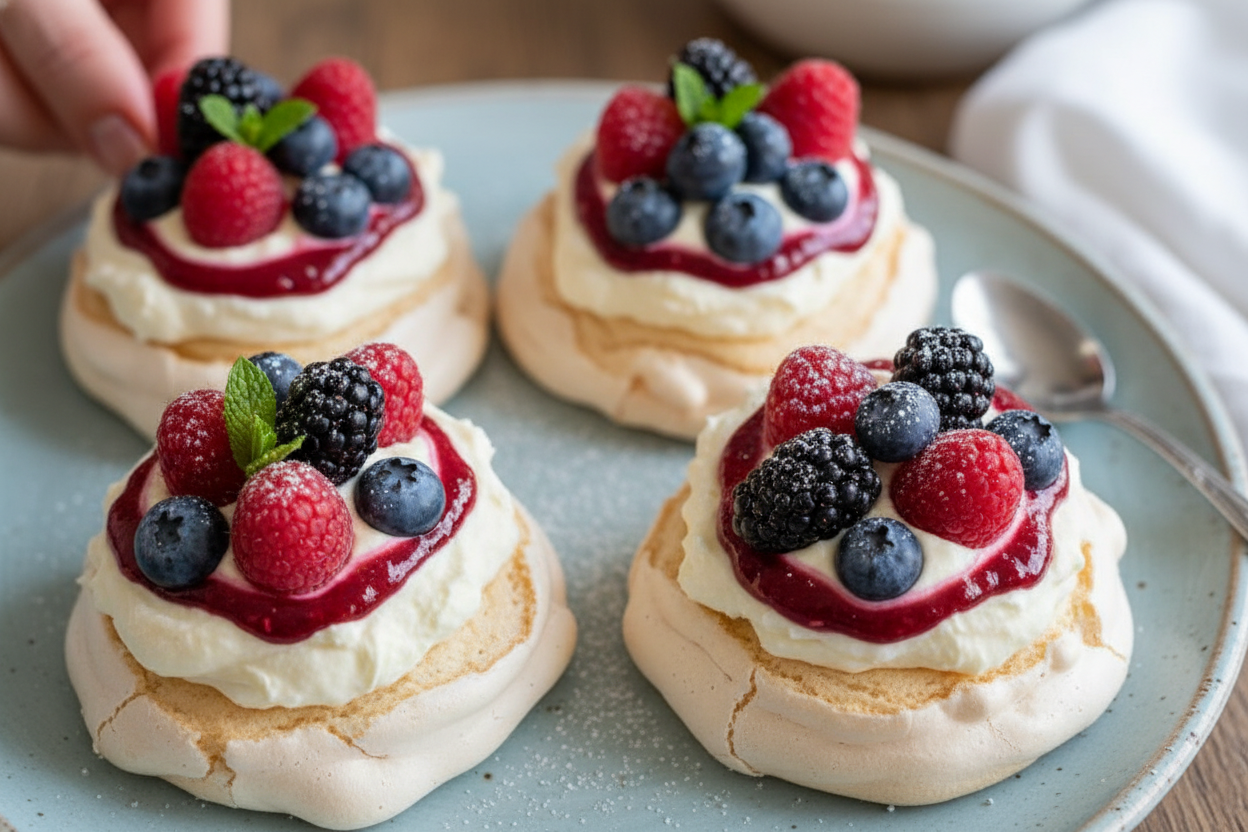
Step 4: Spoon the meringue into a piping bag. Snip a half-inch hole. Pipe little nests onto your tray. Make the edges taller than the middle. You want a cup to hold the filling! You should get about ten. Bake them for about an hour and a half. They will be firm and pale gold.
Step 5: Let the shells cool completely. They will get wonderfully crisp. Now, make the filling. Beat the cream cheese, sugar, vanilla, salt, and lemon juice. Scrape the bowl well. Pour in the heavy cream. Whisk just until it’s thick and dreamy. Pop it in the fridge.
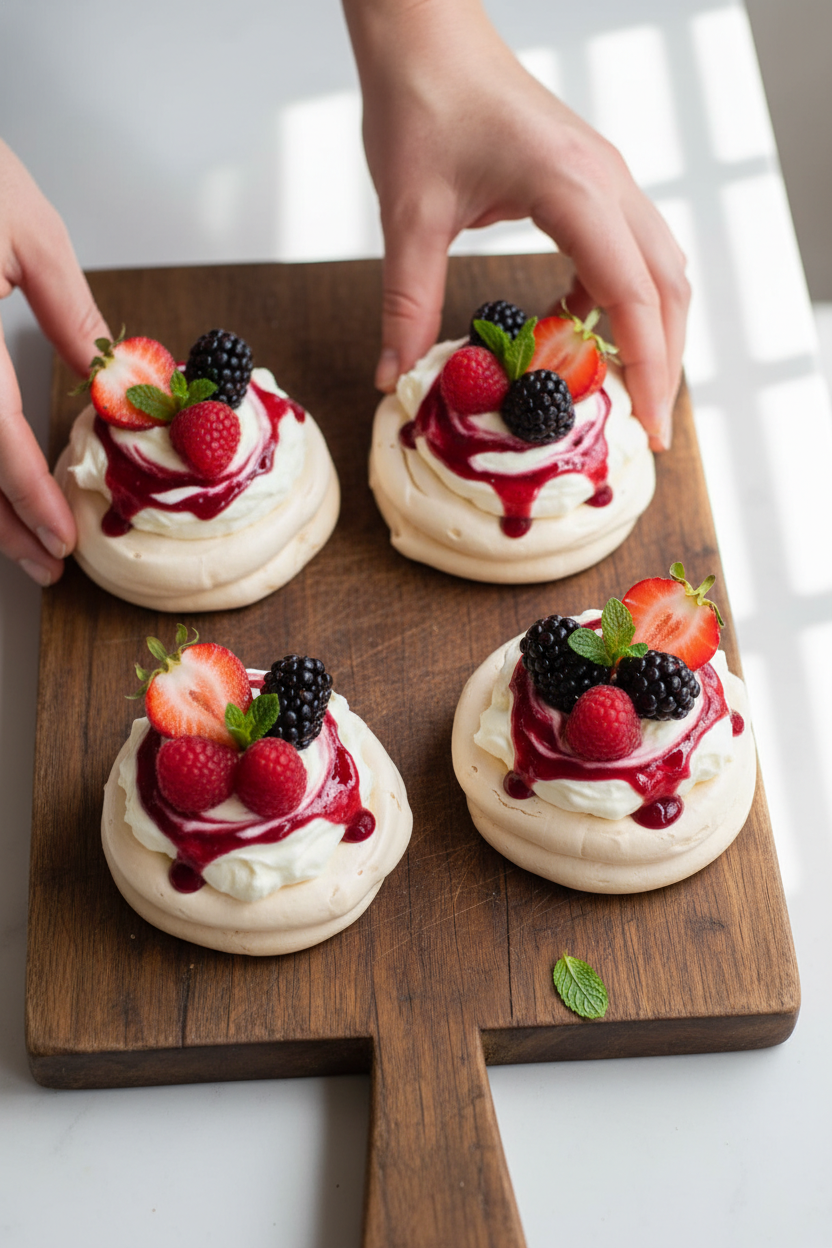
Step 6: For the glaze, warm the jam, water, and sugar. Stir until it’s smooth. Let it cool. Now, the best part! Assembly. Dab a bit of glaze in each shell. Pipe in a big swirl of cheesecake filling. Drizzle more glaze on top. Crown it all with fresh berries. Serve right away and enjoy the smiles.
Cook Time: ~90 minutes (baking)
Total Time: ~2 hours 15 minutes
Yield: About 10 mini pavlovas
Category: Dessert, Baking
Three Sweet Twists to Try
These little clouds are a perfect canvas. You can dress them up for any season or whim. Here are a few of my favorite ways to play.
Lemon Sunshine: Add lemon zest to the meringue. Use lemon curd instead of jam. Top with a blueberry.
Chocolate Dream: Fold mini chocolate chips into the filling. Drizzle with chocolate sauce. Skip the berries.
Autumn Spice: Use apple butter for the glaze. Add a pinch of cinnamon to the filling. Top with a thin apple slice.
Which one would you try first? Comment below! I’m leaning towards the lemon myself.
Serving with a Smile
Presentation is part of the joy. Serve these on a big platter. Let everyone pick their own. The different berries make it so colorful. It’s like a edible garden.
For a drink, I love a crisp sparkling wine with these. It cuts the sweetness. For the kids, a fizzy lemonade is perfect. The tartness is a wonderful match. Which would you choose tonight? I think I’ll have the lemonade, with a sprig of mint.
Keeping Your Mini Cheesecake Pavlovas Perfect
These treats are best eaten right away. But life happens! You can store them for a bit. Keep assembled pavlovas in the fridge for a few hours.
Do not freeze them after filling. The meringue gets soggy. I learned this the hard way at my granddaughter’s party. We had leftovers and tried freezing them. It was a sad, soft mess the next day!
You can batch-cook the empty shells, though. Bake a big batch of plain meringue cups. Let them cool completely. Store them in an airtight container at room temperature for up to three days. This matters because it makes a fancy dessert easy for a busy week.
Fill them with cream and berries just before serving. Have you ever tried storing it this way? Share below!
Fixing Common Pavlova Problems
Sometimes meringue can be tricky. Here are easy fixes. First, if your egg whites won’t get fluffy, check your bowl. Any tiny bit of grease or egg yolk will stop them. I remember once using a bowl I thought was clean. The whites just would not whip!
Second, if your pavlova shells are sticky after baking, they need more time. Bake them until they are firm and sound hollow when tapped. This patience matters for that perfect crisp texture. Third, if your filling is too runny, your cream cheese was likely too warm. Make sure it is truly room temperature, not warm.
Chilling your bowl before whipping the cream also helps. This small step matters for a filling that holds its shape. Which of these problems have you run into before?
Your Quick Pavlova Questions Answered
Q: Is this recipe gluten-free? A: Yes, it is naturally gluten-free. Just check your jam labels to be sure.
Q: Can I make any part ahead? A: Yes! Make the shells and glaze up to three days ahead. Make the filling the day you serve.
Q: What if I don’t have cream of tartar? A: You can use 1 teaspoon of lemon juice or white vinegar instead. *Fun fact: Cream of tartar just helps stabilize the egg whites!*
Q: Can I make one big pavlova? A: Absolutely. Pipe or spread the meringue into one big circle. Just bake it longer, about 1.5 to 2 hours.
Q: Do I need a piping bag? A: No. You can use a spoon to shape the shells. Which tip will you try first?
A Sweet Note From My Kitchen
I hope you love making these little clouds of joy. They always feel like a celebration. Cooking is about sharing joy and making memories.
I would love to see your creations. Have you tried this recipe? Tag us on Pinterest at @ChloesKitchen! Your photos make my day. Thank you for baking with me today.
Happy cooking! —Chloe Hartwell.

Mini Cheesecake Pavlovas
Description
Mini Cheesecake Pavlovas! Creamy cheesecake filling atop crisp, chewy meringue nests. An elegant, easy dessert that’s perfect for any occasion.
Ingredients
Mini pavlova shells:
Cheesecake filling:
Berry glaze:
Instructions
- Mini pavlova shells: Pre-heat oven to 220F and line a large baking sheet (light colored preferred) with parchment paper. Add the egg whites to the clean bowl of a stand mixer. Make sure there are no yolk specks in the egg whites, and make sure the bowl and whisk are completely clean with no grease on them. Add the cream of tartar and salt.
- Use the balloon whisk attachment (or standard paddle beaters of an electric mixer) to whisk on medium speed for a few minutes until the egg whites look frothy and white. Add the sugar one spoon at a time while continuing to whisk on medium speed. Towards the end, add the vanilla extract too.
- Keep whisking until the egg whites turn into a stiff and glossy meringue that starts to collect in ripples around the whisk and leaves a stiff peak when the whisk is lifted out of it. This process can take several minutes. Do not overmix, as that will cause the meringue to separate and leak water.
- Transfer the meringue to a piping bag and cut a ~½” hole in it. Pipe mini pavlova cups onto the baking sheet, about ~3″ in diameter. Make sure to pipe raised edges so the pavlovas can hold the cheesecake filling, and ensure there aren’t any large gaping holes in them. You should get ~10 mini pavlovas.
- Bake at 220F for ~90 minutes or until the pavlovas look a light golden color and are firm to touch (i.e., not sticky). Remove from the oven and let them cool down fully. Once cooled, they should become crispy and should easily come off the parchment paper.
- Cheesecake filling: Make the filling while the pavlovas are baking. Add the cream cheese, sugar, salt, vanilla and lemon juice to a bowl and whisk until the mixture looks creamy. Scrape the bowl along the way.
- Add the heavy whipping cream and whisk for a few seconds until a thick, pipeable mixture forms. Transfer to a piping bag and keep refrigerated.
- Berry glaze: Add the jam, water and sugar to a saucepan. Cook and stir on low heat for a few minutes until a smooth glaze forms that just starts to thicken up. Remove from heat and let cool down.
- Assembly: Once the pavlovas have completely cooled down, it’s time to assemble. Add a small spoon of the glaze to the bottom of each pavlova. Then pipe a generous swirl of the cheesecake filling into each pavlova (I like to use a star piping tip for this). Decorate with a drizzle of the berry glaze and top off with fresh berries. Serve immediately & enjoy!
Notes
- Ensure your mixing bowl and whisk are completely grease-free for the best meringue. Pavlova shells are best assembled just before serving to maintain their crisp texture.


Leave a Reply