
My Summer Secret
I have a secret for hot days. You don’t need an oven. This mango cheesecake is cool and creamy. It tastes like a sunny afternoon.
I first made it for my grandson’s birthday. His face lit up like a firefly. I still laugh at that. Now, it’s our summer tradition. What’s your favorite treat for a hot day?
The Crunchy First Step
Let’s start with the crust. It’s the cozy bed for our creamy filling. Crush those vanilla wafers until they look like sand. Mix them with melted butter.
Press it tight into your pan. This matters because a firm crust holds everything together. No one wants a crumbly mess! Pop it in the fridge. The cold makes it strong.
The Magic of Melting
Now for the magic. Soft cream cheese and melted mango ice cream. Doesn’t that sound amazing? Whip them until they’re smooth and happy together.
Here’s the fun part. We use gelatin to make it set. Fun fact: Gelatin comes from animal bones, but it makes our dessert wonderfully wobbly! Sprinkle it on cold water. It will look like a little sponge. This step matters. It turns our soft mix into a sliceable dream.
A Layer of Sunshine
The mango pulp cream is like pure sunshine. You cook the pulp down. It gets thicker and sweeter. Then mix it with more melted ice cream.
Wait for the cheesecake layer to set first. Test it with a spoonful of the pulp. If it sits on top, you’re ready! This gives you two beautiful layers. Do you prefer one flavor or two mixed together?
The Pretty Finale
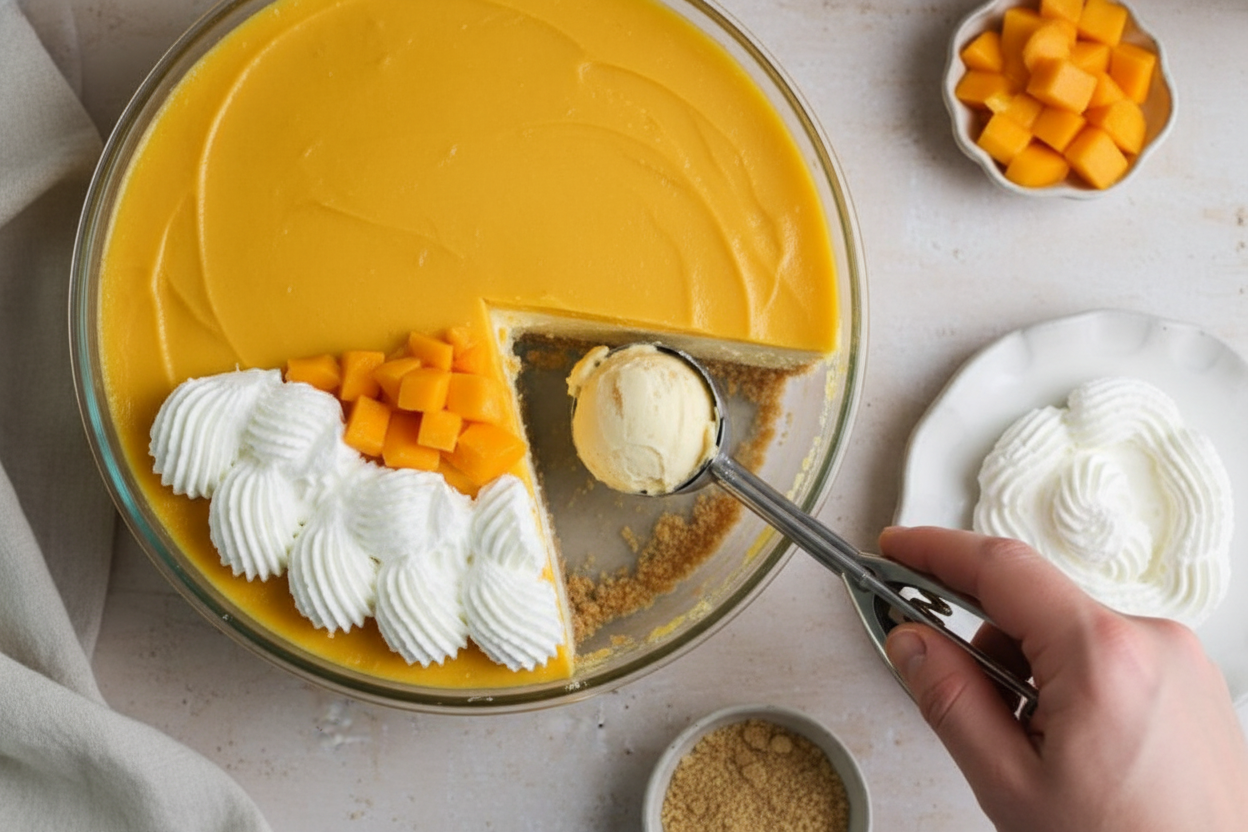
Patience, my dear. Let it sleep in the fridge overnight. In the morning, it will be perfect. Now for the fun. Whip some cream until it’s fluffy.
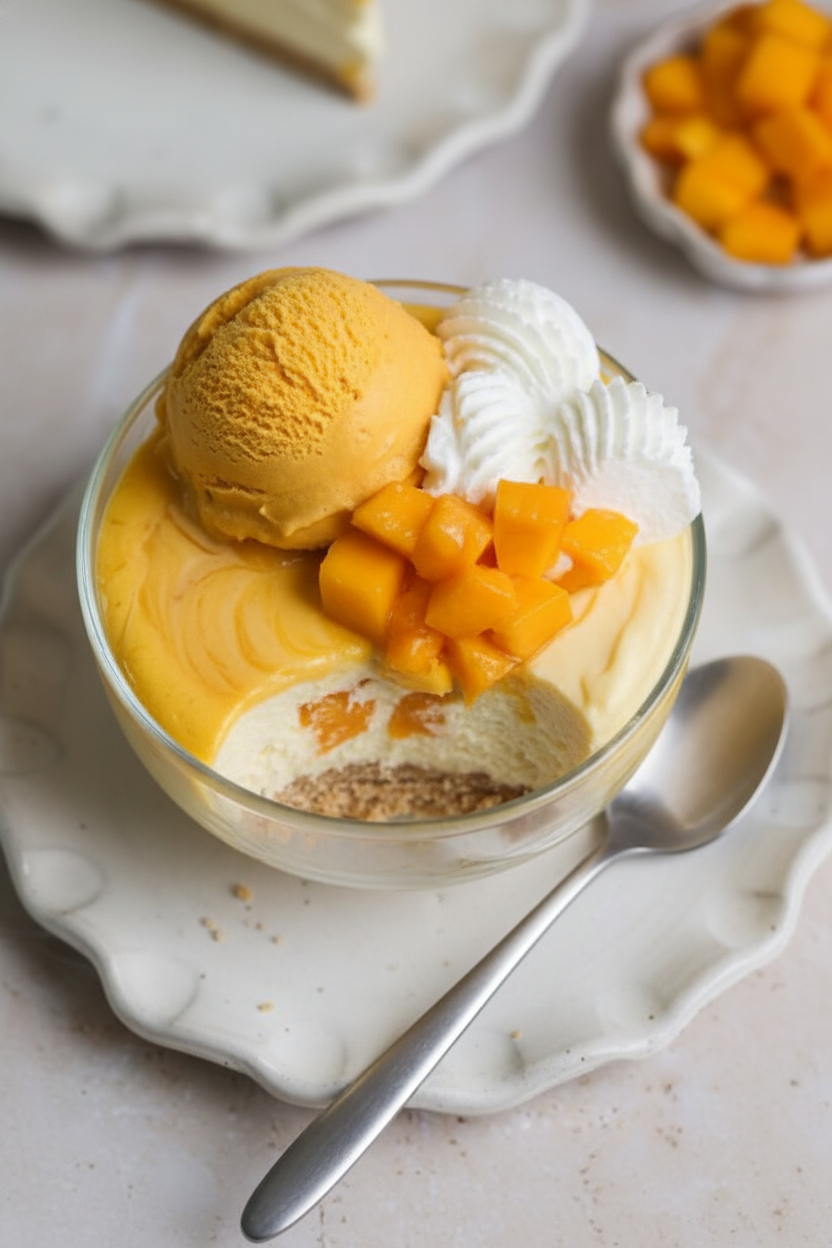
Take the cake out of its pan. Pipe on the whipped cream. Add fresh mango cubes on top. It looks like a party. The first slice is always the best. What would you name this cheerful dessert?
Ingredients:
| Ingredient | Amount | Notes |
|---|---|---|
| Nilla Wafers or Graham Crackers | 200g | For the crust |
| Unsalted butter, melted | 5 tbsp (70g) | For the crust |
| Cream cheese | 24 oz (680g) | Room temperature, for mango cheesecake |
| Mango ice cream | 28 fl oz (700g / 3 ⅓ cups) | Fully melted at room temperature, for mango cheesecake |
| Gelatin powder | 6 tsp | For mango cheesecake |
| Ice cold water | 6 tbsp (90g) | For mango cheesecake gelatin |
| Mango ice cream | 1 cup (210g) | Fully melted, for optional mango pulp cream |
| Mango pulp | 1 cup (230g) | Cooked down to ½ cup, for optional mango pulp cream |
| Gelatin powder | 2 tsp | For optional mango pulp cream |
| Ice cold water | 2 tbsp (30g) | For optional mango pulp cream gelatin |
| Fresh mangoes | 1-2 | Cubed, for optional decoration |
| Heavy whipping cream | 1 cup | Whipped to stiff peaks, for optional decoration |
My No-Bake Mango Dream Cake
Hello, my dear! Come sit. Let’s make a cool, creamy treat. It tastes like sunshine and happy afternoons. I first made this for my grandson’s summer birthday. He still asks for it every year. Doesn’t that smell amazing? We use melted mango ice cream. It makes everything so smooth and fruity. You don’t even need an oven. Just a little patience while it sets. I still laugh at that time I tried to rush it. What a mess! But we learn. Ready? Let’s begin.
Step 1: The Crust
First, we make the crust. Grab your springform pan. Brush it with a little soft butter. Line it with parchment paper. This is our magic trick for easy removal later. Now, blitz those Nilla wafers in the food processor. They should look like fine sand. Pour in the melted butter. Give it another quick blitz. Press this sandy mix firmly into your pan. I use the bottom of a cup. It works perfectly. Pop the pan in the fridge. Let the crust get nice and firm.
Step 2: The Mango Cheesecake Filling
Time for the mango cheesecake magic. Your cream cheese must be soft. Room temperature is key. Beat it until it’s creamy and smooth. Scrape the bowl well. Now, pour in your fully melted mango ice cream. Mix it just until combined. It will look so dreamy and pale orange. (A hard-learned tip: Don’t overmix here! Too much air makes it puffy, not creamy).
Step 3: Setting with Gelatin
Now, the gelatin. This helps our cake hold its shape. Sprinkle the gelatin powder over ice-cold water in a small bowl. Let it sit for 10 minutes. It will become a wobbly, solid blob. Then, microwave it in short bursts. Stir until it’s a clear liquid. Gently pour this into your cheesecake mix. Whisk it in quickly. Now, pour this lovely mixture over your chilled crust. Gently shake the pan to level it. Back into the fridge it goes for a few hours.
Step 4: The Mango Pulp Cream (Optional)
The mango pulp cream is optional, but oh-so-good. Cook the mango pulp in a pan. Stir until it thickens and reduces by half. Let it cool a bit. Mix it with more melted mango ice cream. Prepare more gelatin just like before. Stir the liquid gelatin into the pulp mix. Now, test your cheesecake layer. Is it set? Drop a tiny spoonful of pulp on it. If it sits on top, you’re golden! Gently pour all the pulp cream over the cheesecake. Smooth the top. The fridge waits again, this time overnight. What’s your favorite fruit to eat with mango? Share below!
Step 5: Decorating & Serving
The fun part! Decorating. Chop fresh mango into little cubes. Whip the heavy cream until it forms soft peaks. Carefully remove your cake from the pan. Peel off the parchment paper. Pipe or dollop the whipped cream around the edges. Scatter those bright mango cubes on top. Each slice is a creamy, fruity paradise. I love seeing everyone’s face light up at the table.
| Cook Time: | 30 minutes |
| Total Time: | 12+ hours (includes setting) |
| Yield: | 10-12 servings |
| Category: | Dessert, No-Bake |
Three Tasty Twists to Try
This recipe is like a blank canvas. You can paint it with different flavors. Here are my favorite ideas. They are all so simple and fun.
- Strawberry Swirl: Use strawberry ice cream instead of mango. Swirl in some strawberry jam before it sets.
- Tropical Party: Mix shredded coconut into the crust. Use passionfruit or pineapple ice cream for the filling.
- Cookie Dough Bliss: Use cookies-and-cream ice cream. Fold in mini chocolate chips and bits of edible cookie dough.
Which one would you try first? Comment below!
Serving It Up Just Right
Presentation makes everything taste better, I think. For a special touch, drizzle a little honey or caramel sauce on the plate first. Place the slice on top. A sprinkle of crushed pistachios adds a nice crunch and pretty green color. It’s lovely with a simple side of shortbread cookies for dipping.
For drinks, a cup of strong iced tea with mint is perfect. It’s so refreshing. For a grown-up treat, a little glass of sparkling Moscato wine pairs beautifully. The bubbles cut through the creaminess. Which would you choose tonight?
Keeping Your Mango Cheesecake Ice Cream Dreamy
This treat lives happily in your freezer. Cover it tightly with plastic wrap. It will stay perfect for up to two weeks. No reheating needed. Just slice and enjoy it cold.
You can make the crust and filling ahead. Assemble it the day you want to serve. I once made two for a big family picnic. It was so nice to have one ready in the freezer.
Batch cooking saves time for fun. It also means dessert is always ready for surprise guests. Good planning makes happy memories around the table. Have you ever tried storing it this way? Share below!
Simple Fixes for Common Hiccups
First, a soggy crust. Press your crumbs very firmly into the pan. Use the bottom of a cup. A tight crust won’t get soft.
Second, lumpy cream cheese. Let it sit out until soft. I remember rushing this once. We had little white lumps in our slice. Mixing at room temperature fixes everything.
Third, gelatin that won’t dissolve. Always sprinkle it on cold water. Let it sit to become jelly first. Then heat it gently. This matters because smooth gelatin means a perfect, sliceable cake. Solving small problems builds your kitchen confidence. Which of these problems have you run into before?
Your Quick Questions, Answered
Q: Can I make this gluten-free? A: Yes! Use gluten-free graham crackers for the crust. It works just the same.
Q: How far ahead can I make it? A: Make the whole thing up to two weeks ahead. Keep it frozen until the day before.
Q: I don’t have mango ice cream. A: Any fruity ice cream works well. Strawberry or peach would be lovely.
Q: Can I make a smaller one? A: Sure. Just cut all the ingredients in half. Use a smaller pan.
Q: Is the mango pulp step needed? A: No, but it adds a pretty layer and extra flavor. Fun fact: Cooking the pulp makes the mango taste even stronger and sweeter. Which tip will you try first?
A Sweet Note From My Kitchen to Yours
I hope this recipe brings you joy. It is a cool, creamy hug on a plate. I love seeing your kitchen creations.
Please share your beautiful desserts with us. Your photos always make my day. Have you tried this recipe? Tag us on Pinterest! I can’t wait to see your version.
Happy cooking!
—Chloe Hartwell.
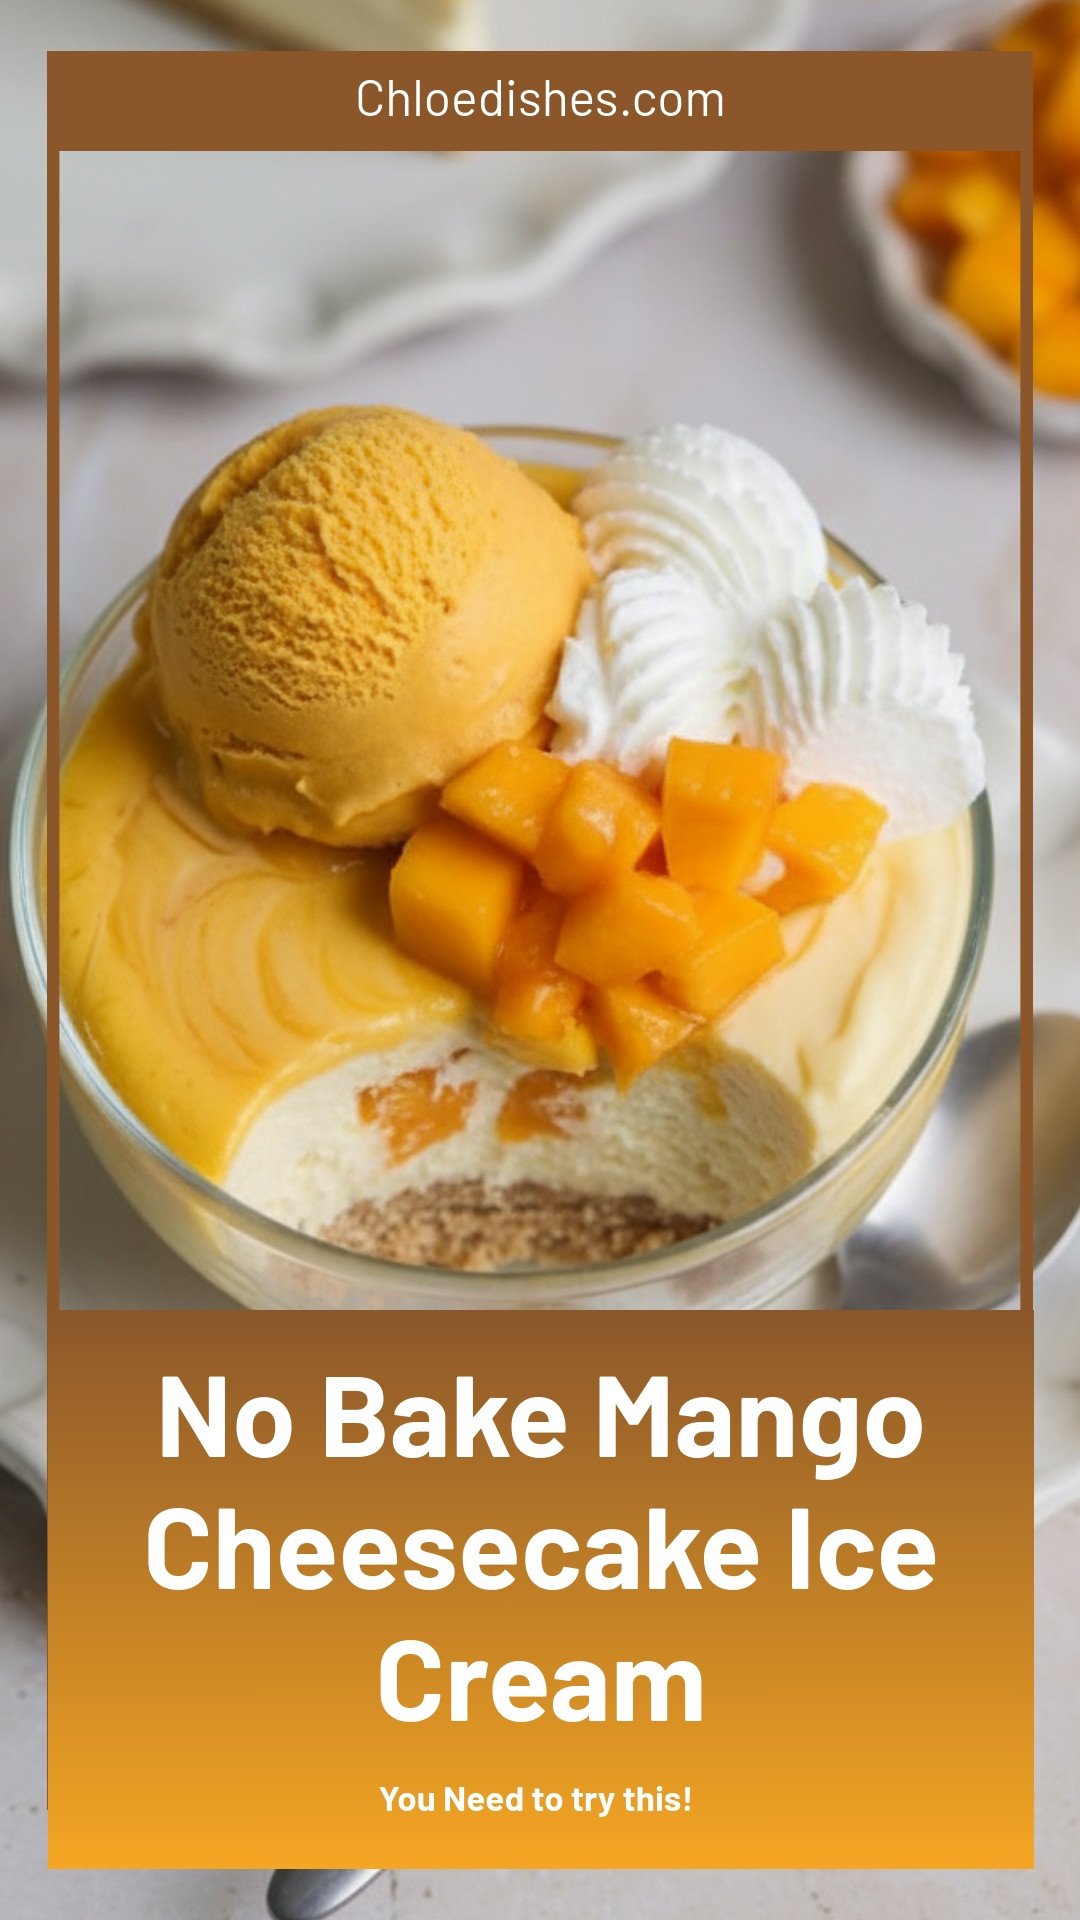

No Bake Mango Cheesecake Ice Cream
Description
Creamy no-bake mango cheesecake ice cream! This easy frozen dessert is the perfect refreshing summer treat with a delicious graham cracker crust. No ice cream maker needed!
Ingredients
Crust:
Mango cheesecake:
Mango pulp cream (optional):
Decoration (optional but recommended):
Instructions
- Crust: Brush a 9″ springform pan with softened butter, and line it with a circle of parchment paper on the bottom, and strip(s) of parchment paper along the edges. Set aside.
- Blitz the Nilla wafers in a food processor until they form a fine crumb. Add the melted butter and blitz again to combine.
- Transfer the crumbs to the prepared pan, and press down tightly using the back of a measuring cup or large spoon to form a tight, even crust. Place in the fridge to set while you work on the cheesecake layer.
- Mango cheesecake: Add the cream cheese to a bowl, and use an electric mixer to whisk until it is creamy, taking care not to overmix. Scrape the bowl once or twice to ensure there are no unmixed lumps.
- Add the melted mango ice cream, and whisk again for ~1-2 minutes on medium speed. Scrape the bowl in the middle to ensure all the cream cheese mixes with the ice cream. The mixture should be smooth and slightly fluffy. Do not overmix.
- Separately, prepare the gelatin. Pour the ice cold water to a small bowl with a wide surface area. Sprinkle over the gelatin. Gently stir once to ensure all the gelatin is soaked. Place in the fridge for ~10 minutes until the mixture becomes fully sets. Then microwave in 15 second increments, stirring in between, until the gelatin has completely dissolved in the water and there are no lumps remaining.
- Pour the dissolved gelatin mixture into the cheesecake mixture, and whisk until just combined.
- Pour the cheesecake mixture on top of the crust in the springform pan. Gently shake the pan to spread the mixture, and place back in the fridge to set.
- Mango pulp cream (optional): Add the mango pulp to a saucepan, and cook and stir on low heat until the pulp reduces to approximately half its original volume. Let it cool down for 5 minutes.
- Mix the pulp with the melted mango ice cream.
- Prepare the 2 teaspoon gelatin in 2 tablespoon water just like you did in step 3 of the mango cheesecake above.
- Add the dissolved gelatin to the pulp mixture and whisk to combine.
- Make sure the cheesecake layer has set for at least 2 hours so when you pour the pulp mixture on top, it does not mix with the cheesecake layer. You can test this by gently pouring a spoonfull of the pulp mixture onto the cheesecake and making sure it is sitting on top instead of mixing in. Gently pour the entire pulp mixture on top of the cheesecake, then place the whole thing back in the fridge.
- Decoration & serving: Let the cheesecake set overnight for 12+ hours until it is fully set.
- Chop the fresh mangoes and whip up the heavy cream.
- Remove the cheesecake from the fridge. Open the sides of the pan and carefully peel off the parchment paper.
- Carefully transfer the cheesecake to a serving stand. Pipe on the whipped cream around the edges, and garnish with the chopped mangoes. Slice, serve & enjoy!
Notes
- *Ensure the mango ice cream is fully melted to room temperature for a smooth mixture. The optional mango pulp cream layer adds an extra burst of mango flavor.


Leave a Reply