

My First Kitchen Disaster
I once tried to make a fancy dessert for a party. It was a hot day. The whole thing melted into a puddle. I still laugh at that.
That’s why I love no-bake treats. No oven means no stress. You just mix, chill, and enjoy. It feels like magic, doesn’t it?
Why This Recipe Matters
This recipe is about sharing. Anyone can eat these bars, with plant-based or regular butter. That matters to me. Food should bring people together.
It also teaches patience. The chilling time is important. It lets the layers set up right. Good things come to those who wait.
The Fun Part: Making the Layers
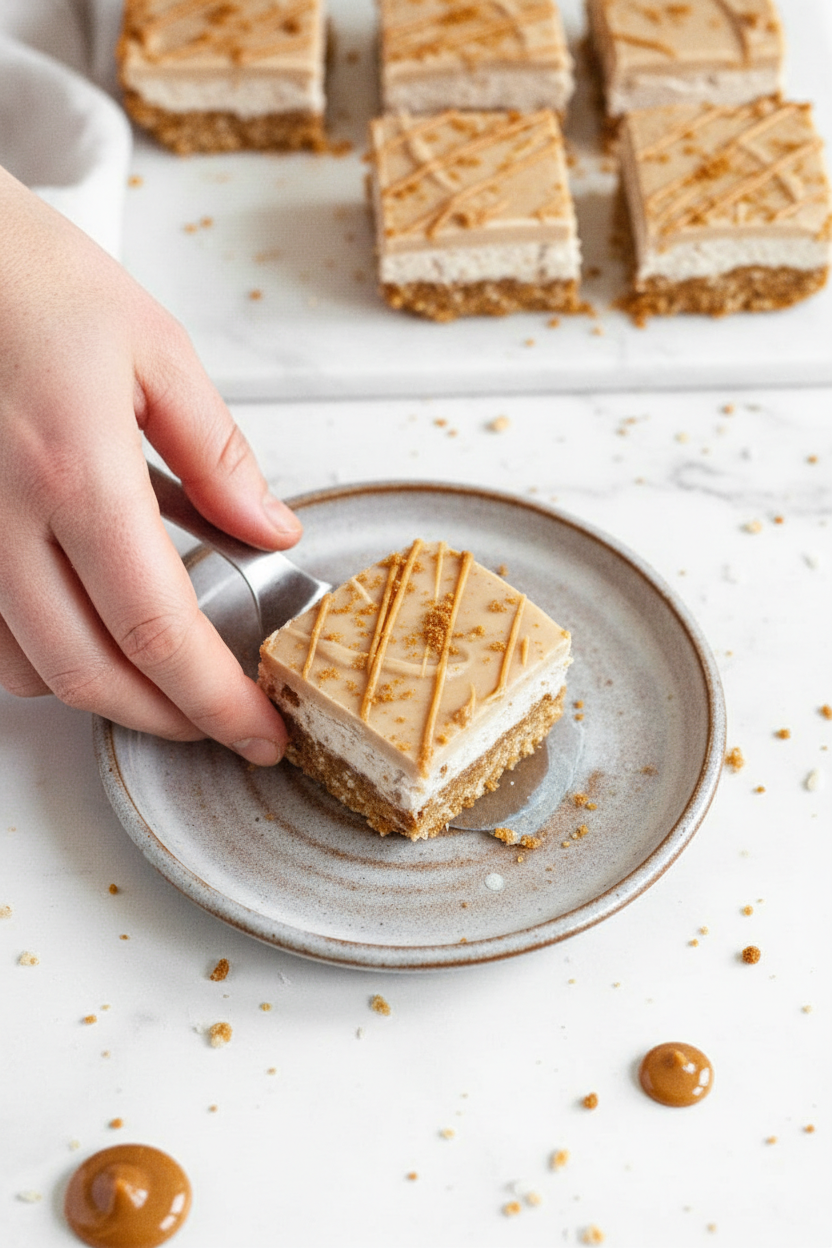
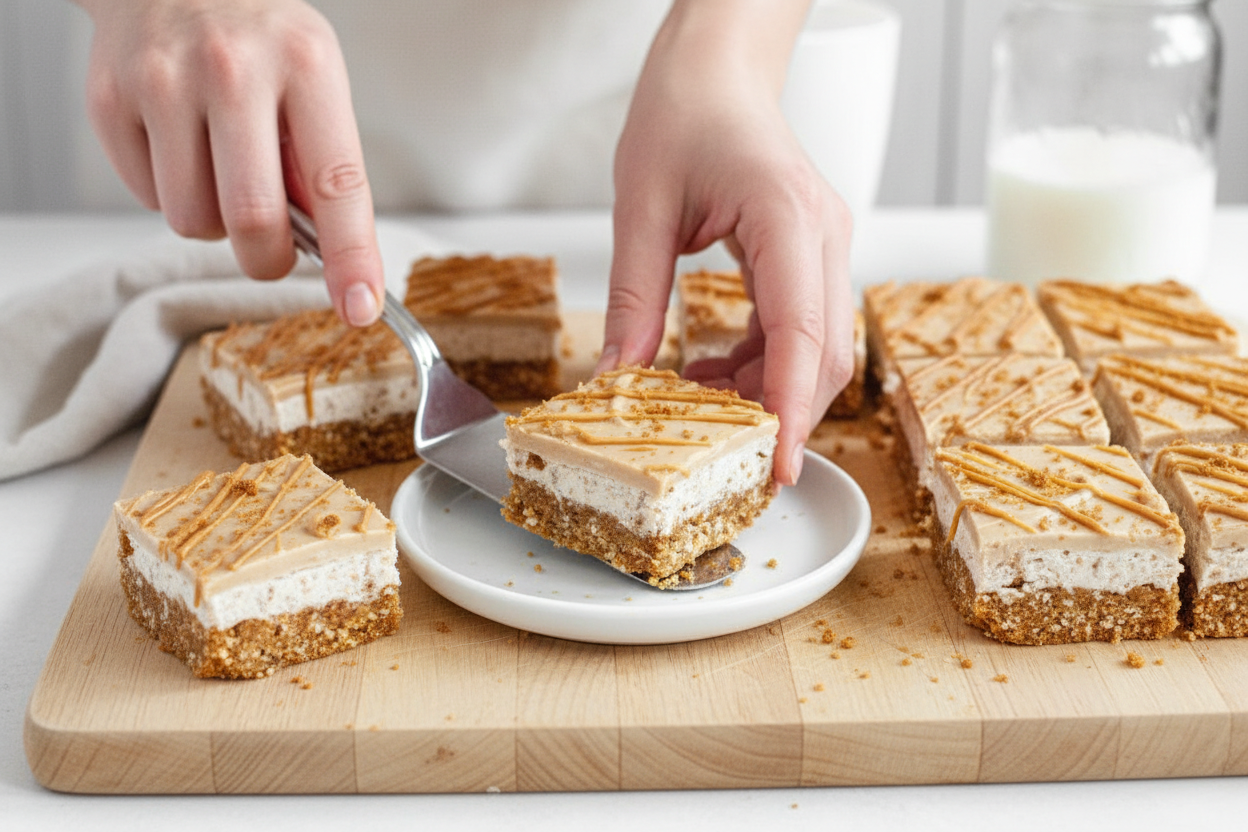
Start with the base. Mix the coconut, crumbs, and chopped cookies. Press it down hard in your pan. This is your foundation.
Now the middle. Cream that butter until it’s fluffy and light. This makes the filling smooth. Doesn’t that smell amazing? Add the powdered sugar and cookie crumbs last.
*Fun fact*: The Biscoff cookies are also called “speculoos.” They are spiced with cinnamon. That’s their secret.
A Little Story About Cookie Butter
I discovered cookie butter years ago. My grandson brought some home. We ate it straight from the jar with spoons. It was so good.
Now I keep a jar in my pantry always. It makes everything taste like cookies. Do you have a favorite “secret” ingredient like that?
The Final Touch
The top layer is simple. Melt white chocolate with cookie butter and milk. Stir until it’s silky. Pour it over your chilled bars.
The hardest part is waiting for it to set. But it’s worth it. You get a shiny, sweet top. What’s your favorite part: the crunchy base or the creamy middle?
Your Turn in the Kitchen
Now you have the recipe. It’s your turn. Remember, press the base firmly. And let it chill fully. You can do this.
When you make them, share a picture. I would love to see. Tell me, who did you share your bars with?
Ingredients:
| Ingredient | Amount | Notes |
|---|---|---|
| salted butter, melted | 1/2 cup | plant-based or regular |
| unsweetened shredded coconut | 1 cup | |
| graham cracker crumbs | 1 cup | plant-based or regular |
| biscoff cookies, roughly chopped | 10 cookies (approx. 1 cup) | |
| granulated sugar | 1/8 cup | |
| fine sea salt | 1/4 teaspoon | |
| salted butter, room temperature | 1/2 cup | plant-based or regular |
| powdered sugar | 1 1/2 cups | |
| fine sea salt | 1/4 teaspoon | |
| vanilla extract | 1/2 teaspoon | |
| biscoff cookies, finely crushed | 6 cookies (approx 1/3 cup) | |
| white chocolate | 3/4 cup | plant-based or regular |
| cookie butter | 2 tablespoons | |
| milk | 1 tablespoon | plant-based or regular |
| cookie butter (for decor) | 1 tablespoon | optional |
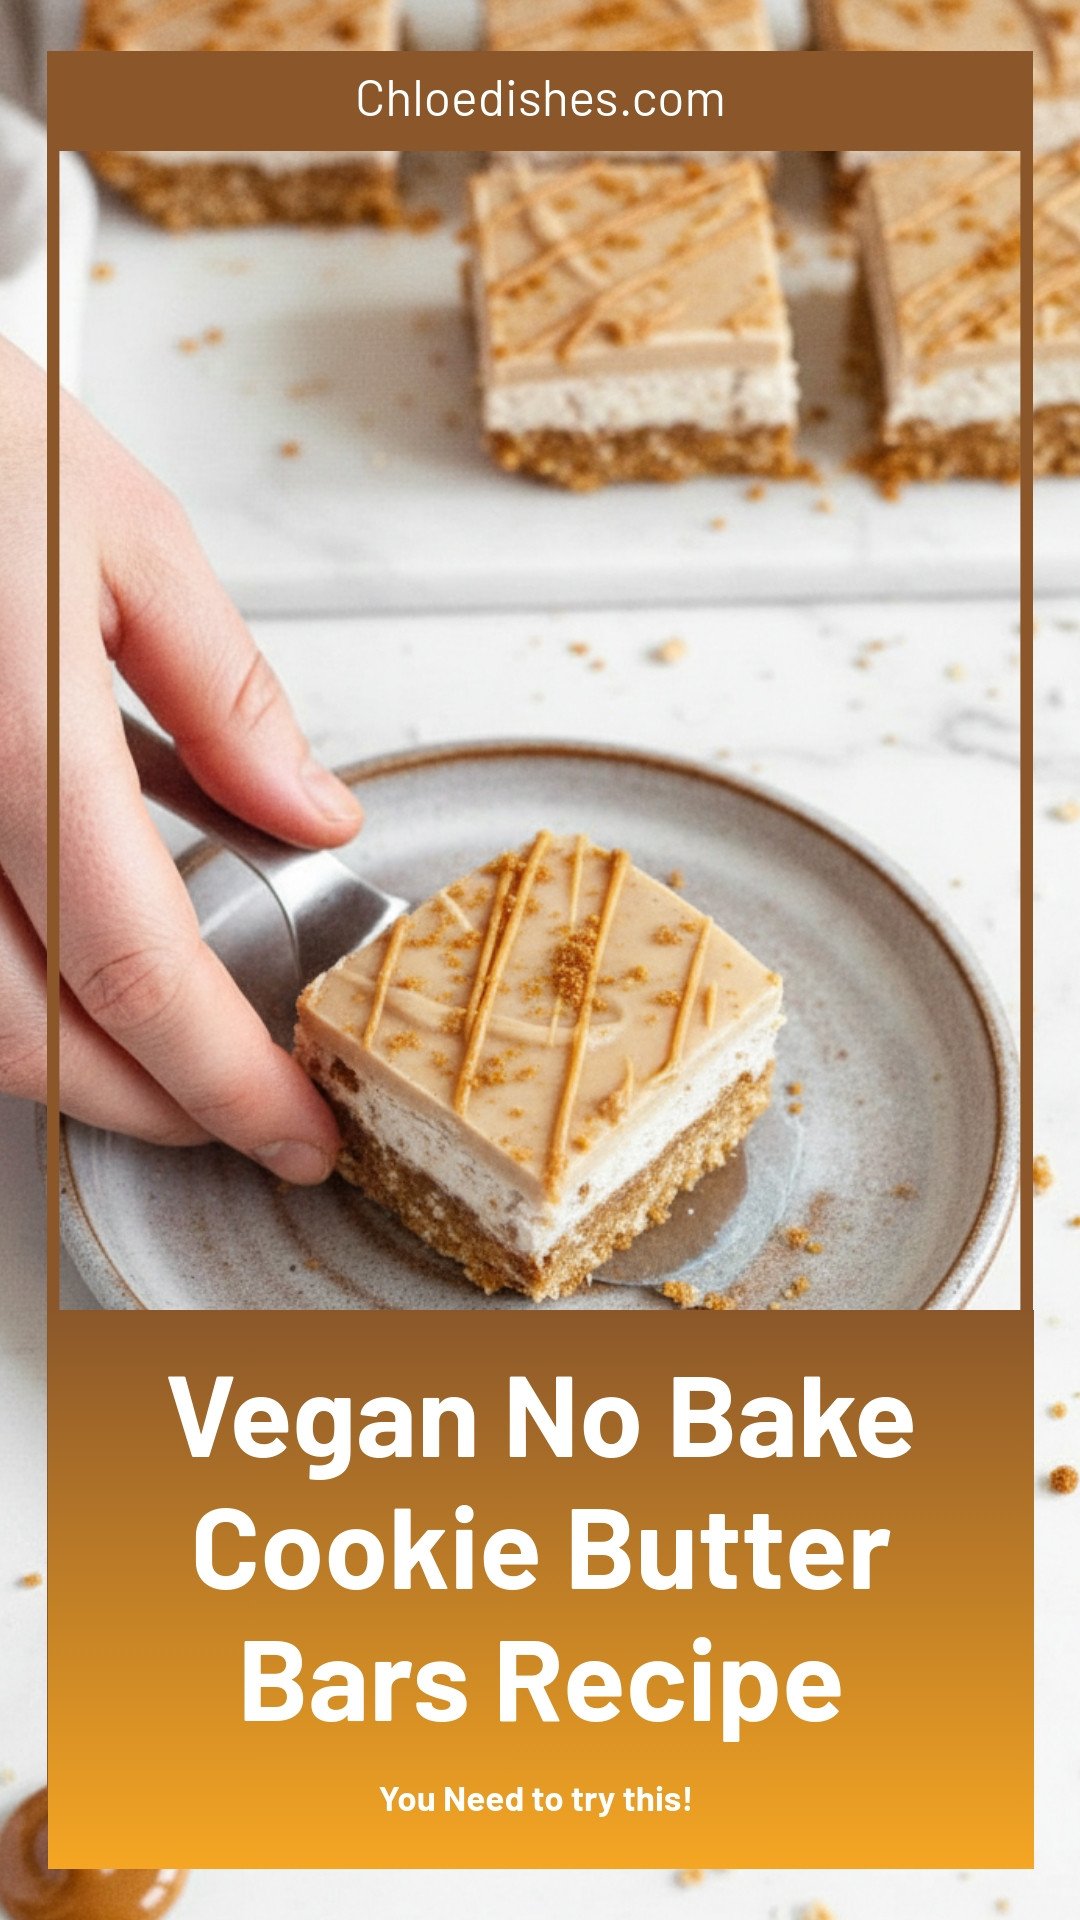
My No-Bake Cookie Butter Bars: A Sweet Little Secret
Hello, my dear. Come sit at the counter. I want to share a secret with you. These bars are my favorite lazy-day treat. They taste like a fancy bakery cookie. But you don’t even need to turn on the oven. Isn’t that wonderful? We just mix, press, and chill. The hardest part is waiting for them to set. I still laugh at that.
My grandson, Leo, helped me test this recipe. He is a very serious taste-tester. He said they were “next-level.” I think that means he ate three. Let’s make them together. I’ll walk you through each simple step. You’ll be so proud of the result.
Step 1: First, line your pan with parchment paper. This little trick is a lifesaver. It lets you lift the whole batch out later. Now, grab a bowl for the base. Mix the melted butter, coconut, crumbs, chopped cookies, sugar, and salt. It should look like wet, chunky sand. Press it firmly into your pan. Then, pop it in the fridge to get cold and firm.
Step 2: Time for the fluffy middle. Use your mixer to beat the room-temperature butter. Beat it until it’s pale and dreamy. This takes patience. (My hard-learned tip: Don’t rush this! Soft butter makes it fluffy. Cold butter makes it lumpy.) Then, add the powdered sugar and salt. Mix it on low first, unless you want a sugar cloud in your kitchen!
Step 3: Now, stir in the vanilla and those finely crushed cookies. Doesn’t that smell amazing? Turn the mixer back to high. Let it whip for five whole minutes. This makes the filling light as a cloud. Spread this over your chilled base. Be gentle and smooth. Back into the fridge it goes.
Step 4: The top layer is magic. Melt white chocolate, cookie butter, and milk together. Do this in short bursts in the microwave. Stir well between each one. We want it silky, not scorched. Pour this gorgeous ganache over the cold bars. Tilt the pan to spread it. Quick quiz: What’s the secret to smooth melting? Share below!
Step 5: The final chill. Let the pan sit in the fridge for at least an hour. Overnight is even better. The wait makes them perfect for slicing. If you like, warm a spoonful of cookie butter. Drizzle it over the top for a pretty finish. Then, cut into squares and enjoy your creation!
Cook Time: 1–2 hours (chilling)
Total Time: 1 hour 30 minutes
Yield: 16 squares
Category: Dessert, No-Bake
Three Fun Twists to Try
Once you master the basic bars, you can play. Here are some of my favorite little changes. They make the recipe feel new again.
Chocolate Drizzle Dream: Swap the white chocolate topping for dark chocolate. Add a tiny pinch of sea salt on top. It’s wonderfully rich.
Berry Surprise: Press a handful of freeze-dried raspberries into the middle layer. They add a sweet-tart crunch and a pretty pink color.
Nutty Crunch: Replace half the coconut in the base with chopped, toasted pecans. It gives a lovely, warm flavor. My neighbor Ruth loves this version.
Which one would you try first? Comment below!
Serving Them Up with Style
These bars are stars on their own. But a little presentation makes them special. For a party, cut them into tiny bites. Serve them on a pretty plate. You could add a dollop of coconut whipped cream on the side. A few fresh berries look lovely, too.
What to drink? For a cozy night, I love a glass of cold oat milk. It’s creamy and perfect. For the grown-ups, a small glass of amaretto or a coffee liqueur is nice. It sips like a dessert itself. Which would you choose tonight?
Keeping Your Cookie Butter Bars Fresh and Tasty
These bars love the cold. Keep them in the fridge for a week. They get firmer and taste even better.
You can also freeze them for months. Wrap each bar tightly. I use a little parchment paper between layers.
I once froze a whole batch for my grandson’s visit. He was so happy to have a ready treat! Let them thaw in the fridge before eating.
Making a double batch saves time later. You always have a sweet snack ready. This matters because life gets busy. A homemade treat can make any day special.
Have you ever tried storing it this way? Share below!
Simple Fixes for Common Cookie Butter Bar Troubles
Is your base layer too crumbly? Press it down harder. Use the bottom of a cup. A firm press makes the bars hold together.
Is the middle layer too soft? Your butter might be too warm. I remember my first batch was like soup! Just chill the bowl for ten minutes. Then mix again.
Is the top layer cracking? The chocolate was likely too hot. Let it cool a bit before pouring. This matters for a smooth, pretty finish.
Fixing small problems builds your kitchen confidence. It also makes your food look and taste its best. You learn by doing.
Which of these problems have you run into before?
Your Cookie Butter Bar Questions, Answered
Q: Can I make these gluten-free?
A: Yes! Use gluten-free graham crackers and cookies. Check all labels carefully.
Q: How far ahead can I make them?
A: They are perfect for making ahead. Make them up to two days before you need them.
Q: I don’t have Biscoff cookies. What can I use?
A: Any spiced cookie will work. Gingersnaps are a lovely swap. *Fun fact: The cookie butter flavor comes from these special biscuits!
Q: Can I double the recipe?
A: Absolutely. Use a 9×13 inch pan. Just press all the layers down well.
Q: Is the cookie butter drizzle needed?
A: It’s just for pretty looks. Your bars will taste wonderful without it.
Which tip will you try first?
From My Kitchen to Yours
I hope you love making these bars. They are a little piece of joy. I make them for all my family gatherings.
It would make my day to see your creation. Share a picture of your finished bars. Let’s build a sweet little community.
Have you tried this recipe? Tag us on Pinterest! Use our handle @ChloesKitchen. I can’t wait to see.
Happy cooking!
—Chloe Hartwell.
Vegan No Bake Cookie Butter Bars Recipe
Description
Indulge in these easy vegan no-bake cookie butter bars! A creamy, dreamy dessert ready in minutes with simple ingredients. Perfect for sweet cravings.
Ingredients
Base Layer
Middle Layer
Top Layer
Instructions
- Base Layer: Spray with a non-stick baking spray and parchment line an 8×8 inch or 9×9 inch baking pan. In a medium mixing bowl combine all the ingredients and mix until a coarse sand-like texture is achieved. Place the mixture into the prepared pan and press the mixture down evenly and firmly. Chill in the refrigerator.
- Middle Layer: In the bowl of a stand mixer with the paddle attachment cream the butter on high speed until light and fluffy. This should take approximately 5-10 minutes. Add in the powdered sugar and salt and mix on low until combined. Add the vanilla extract and biscoff cookie crumbs and mix on low until combined. Turn the mixer up to high and allow to cream for 5 minutes. Spread smoothly and evenly over the chilled base layer. Place back in the refrigerator.
- Top Layer: In a microwave-safe bowl combine the white chocolate, cookie butter, and milk and heat in 30-second intervals, stirring after each interval, until fully melted and smooth. Pour the white chocolate cookie butter ganache over the chilled cookie butter bars and spread evenly on top. Place back in the refrigerator to chill for at least 1 hour or up to overnight. Heat the remaining cookie butter and drizzle over if desired. Cut into 16 squares and enjoy!
Notes
- Store leftover no-bake cookie butter squares in an airtight container in the refrigerator for up to 7 days or in the freezer for up to 6 months.


Leave a Reply