
The First Time I Tried Cauliflower Pizza
I still laugh at the memory. My neighbor Betsy brought over a pizza that looked… different. It was pale and sort of lumpy. I thought she had lost her mind. But then I took a bite. It was light, a little cheesy, and it didn’t make me feel sleepy afterward. I asked for the recipe before she even sat down. That was ten years ago. Now, I make it all the time.
This crust is a game changer. It is not like regular dough, but that is okay. It has its own gentle crunch. And guess what? You get to eat vegetables for dinner. Doesn’t that feel a little sneaky and wonderful?
Why Squeezing Is the Secret
Here is the most important part of this recipe. You have to get the water out of the cauliflower. I mean really, really dry it. Wet cauliflower makes a soggy crust. Nobody wants that. Use a clean kitchen towel or cheesecloth. Squeeze it like you are wringing out a wet sock.
*Fun fact: Cauliflower is 92% water. That is why drying it is so important. If you skip this step, your pizza crust will fall apart into a sad pile of crumbs. I learned that the hard way, and I still laugh about my first failed attempt. It looked like a lumpy pancake.
Small Bites, Big Feelings
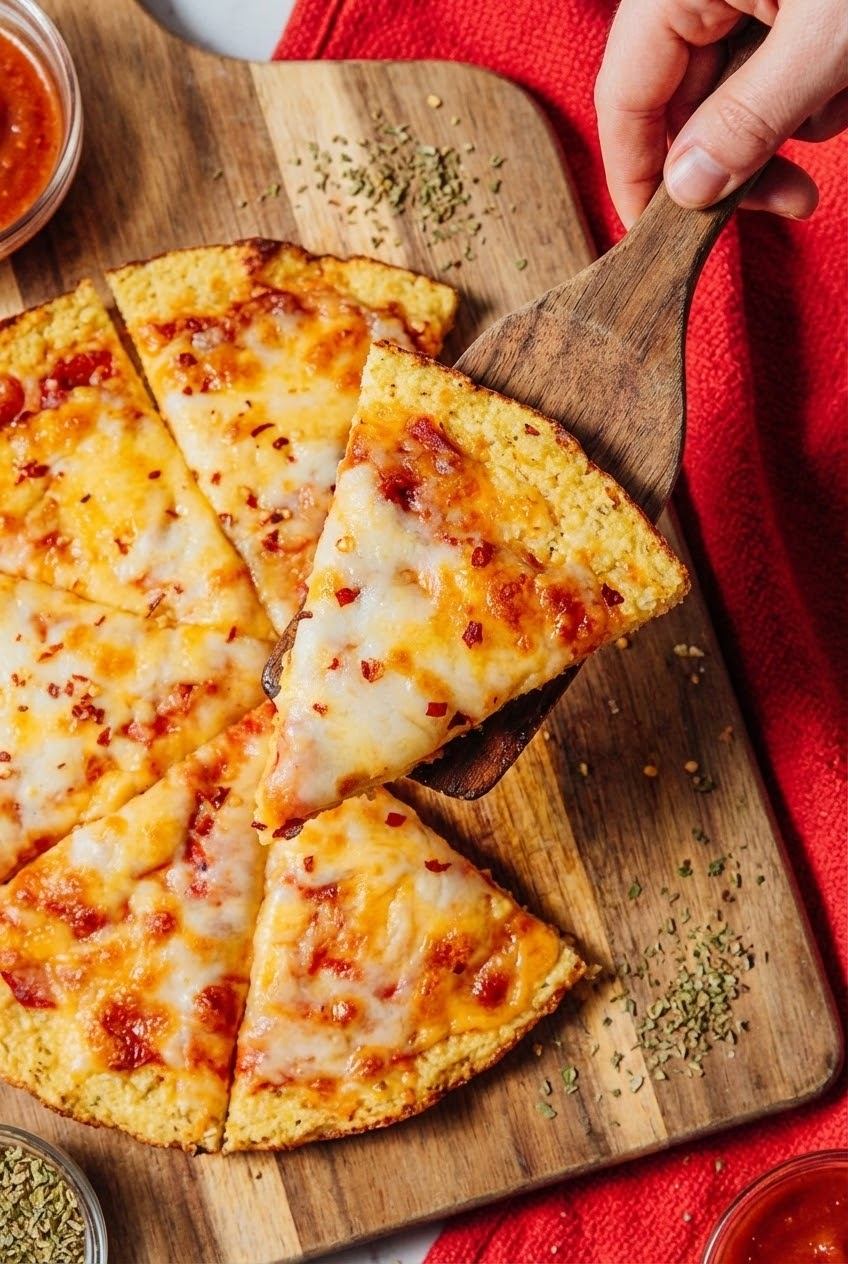
When you bite into this crust, you get a tiny feeling of victory. It is warm, a little salty from the cheese, and it holds up under pepperoni or mushrooms. One slice has only 58 calories. That means you can have two slices and still feel good. I like to serve it with a big green salad on the side.
I want to hear from you. What is your favorite pizza topping? Is it something classic like pepperoni, or something adventurous like pineapple?
A Little History Lesson
People have been cooking cauliflower for hundreds of years. It started in the Mediterranean, near Turkey and Italy. Farmers grew it because it grows well in cool weather. But nobody thought to turn it into pizza crust until recently. I think that is funny. Sometimes the best ideas take a long time to find us.
This recipe matters because it uses a whole head of cauliflower. That is one less vegetable going to waste in your fridge. It also helps you eat more fiber. Fiber helps your belly feel happy and full.
The Rolling and Flipping Trick
When you shape the dough, do not press too hard. Be gentle, like you are patting a cat on the head. Use your hands or the back of a spoon. Make it into a round circle, but it does not have to be perfect. Mine always look like wobbly moons.
After you bake it for 15 minutes, you must flip it over carefully. Use a big spatula. If you try to flip it too fast, it might crack. That is okay. Just press the cracked parts back together. It will still taste delicious. Does that sound doable to you?
This Is for Real People, Not Chefs
Some recipes make you feel stressed. They use fancy words like “microplane” or “blanching.” Not this one. You just need a box grater or a food processor. You need a bowl and a baking sheet. That is it. Even a twelve-year-old can make this, with a little help with the hot oven.
This matters because cooking should not be scary. It is just mixing things together and seeing what happens. When you make this crust, you learn that vegetables can be fun. You also learn that mistakes are okay. My first crust fell apart, and I still ate it with a fork. It was still good.
Your Turn to Make It
Now I want to know something. Have you ever tried cauliflower before and hated it? Or do you love it already? Let me know in your head. And if you make this pizza, tell me if your family noticed it was not regular dough. Sometimes they do not even notice. That is the best kind of trick.
Here is a quick poll for you: Would you rather dip your pizza in ranch or marinara sauce? I am a marinara fan myself. It feels more like a real pizza party.
Ingredients:
| Ingredient | Amount | Notes |
|---|---|---|
| Cauliflower (large head) | 1 | |
| Eggs | 2 large | |
| Grated parmesan | ¼ cup (25 g) | |
| Grated mozzarella | ¼ cup (25 g) | |
| Salt | ½ tsp | |
| Oregano | ½ tsp | |
| Garlic powder | ¼ tsp |
The Day I Learned Cauliflower Could Be a Pizza Crust
I will never forget the first time I tried cauliflower pizza. My granddaughter handed me a slice and said, “Gram, you won’t miss the dough.” I laughed. But then I took a bite, and I still laugh at that memory. It was actually good. It was sturdy and cheesy, and it did not fall apart like I expected. That is why I am so excited to share this recipe with you today. Doesn’t that smell amazing already?
Now, let us get to it. You will need one big head of cauliflower, two eggs, some parmesan and mozzarella, and a pinch of salt and spices. That is it. Nothing fancy. I found that using a box grater works just as well as a food processor. It is a little bit of arm work, but I like the feeling of doing things by hand. It reminds me of grating cheese for my mama when I was your age.
Let’s Make That Crust Step by Step
Follow these steps carefully, and you will have a crust that holds up. I promise it is easier than it sounds. Just take it slow, and do not skip the drying part. That is the secret.
Step 1: Preheat your oven to 350 degrees. Grab your cauliflower and grate it into tiny rice-sized pieces. I use a box grater, but a food processor works too. Once it looks like snowy little crumbs, spread it on a baking sheet lined with parchment paper. Make it as flat as you can. Bake for 20 minutes until it starts to turn golden at the edges. (Hard-learned tip: Do not skip this baking step. If you do, your crust will be soggy and sad.) Step 2: Take the cauliflower out and let it cool just a little. Now, here is the most important part. Spoon it into a clean kitchen towel or cheesecloth and squeeze out every drop of water you can. I mean really squeeze. I once forgot this step, and my pizza turned into a wet, crumbly mess. My dog enjoyed it, but I did not. After squeezing, turn your oven up to 450 degrees. Step 3: In a large bowl, mix the dry cauliflower with the eggs, both cheeses, salt, oregano, and garlic powder. Stir it all together until it looks like a sticky, chunky dough. Now, shape it into a pizza round on a fresh sheet of parchment paper. Press it flat with your hands, about a quarter-inch thick. Bake it for 15 minutes until it feels firm to the touch. Step 4: Carefully flip the crust over. This is where the magic happens. Top it with your favorite sauce, cheese, and toppings. I love mushrooms and olives. Put it back in the hot oven for about 7 minutes until the cheese is melty and bubbly. Now, tell me: what is your favorite pizza topping? Share below! Cook Time: 42 minutes Total Time: 1 hour Yield: 4 to 6 slices Category: Dinner, SnackThree Fun Twists to Try on Your Pizza Night
Sometimes I get bored with the same old toppings. That is when I play around. Here are three of my favorite ways to change things up. They are all simple and oh-so-tasty.
1. The Veggie Garden: Top your pizza with roasted zucchini, bell peppers, and cherry tomatoes. Add a sprinkle of fresh basil after it comes out. It tastes like summer on a plate. 2. Spicy Honey Heat: Before baking, drizzle a little hot honey over pepperoni and jalapeños. The sweet and spicy mix is a little wild, but I love it. My grandson calls it “fire pizza.” 3. Breakfast Pizza Surprise: After baking the crust, top it with scrambled eggs, crumbled bacon, and shredded cheddar. Pop it back in for 5 minutes. It makes a funny but delicious breakfast. Which one would you try first? Comment below!What to Serve and Sip With Your Pizza
A good pizza needs good friends on the plate. I like to serve mine with a simple side salad of spinach and cherry tomatoes tossed in lemon juice. It is fresh and light. Another idea is a bowl of roasted broccoli with garlic. It feels like a real feast then.
For something to drink, I have two favorites. For the grown-ups, a crisp, cold glass of white wine, like a Pinot Grigio, goes perfectly. For everyone else, try a fizzy lemonade with a sprig of mint. It is so refreshing. Which would you choose tonight?
How to Store and Reheat Your Cauliflower Pizza Crust
This crust keeps well in the fridge for three days. Just wrap it in foil or put it in a zip-top bag. I once forgot a slice in the fridge for a week. It was still okay, but a little sad and soggy.
For the freezer, freeze the baked crust without toppings. Lay it flat on a baking sheet until hard. Then wrap it tight in plastic wrap and foil. It will stay good for up to three months.
To reheat, pop it in a 400°F oven for about 10 minutes. This makes it crispy again. Avoid the microwave — it turns the crust into mush. Batch cooking is a lifesaver. Make two crusts at once and freeze one for a busy weeknight. That way, you always have a healthy pizza base ready. Have you ever tried storing it this way? Share below!
Three Common Problems (And Easy Fixes)
Problem one: The crust is too wet. The fix is simple. Squeeze every drop of water out of the baked cauliflower. I remember once I was lazy and skipped this step. My pizza turned into a sad, flat puddle.
Problem two: The crust falls apart. This happens when you don’t let it bake long enough the first time. Bake it until it is golden and firm. Touch it gently — it should feel solid. This matters because a sturdy crust means you can hold your pizza slice with pride.
Problem three: The crust sticks to the paper. Use parchment paper, not wax paper. Parchment is non-stick and heat-safe. This small swap saves your dinner. Which of these problems have you run into before?
*Fun fact: Cauliflower is actually a flower, not a vegetable. So you are eating a flower pizza crust!
Your Top Questions Answered
Q: Is this crust gluten-free? A: Yes, it is naturally gluten-free. Perfect for anyone who avoids wheat.
Q: Can I make the dough ahead of time? A: Yes. Mix the dough, shape it into a disc, and keep it in the fridge for up to 24 hours.
Q: Can I swap the cheese? A: Sure. Use any shredded hard cheese like cheddar or asiago. Just keep the amounts the same.
Q: Can I double this recipe? A: Yes, easily. Just use two heads of cauliflower and double everything else. It feeds a crowd.
Q: Any tips for a crispier crust? A: After flipping the crust, bake it for an extra 5 minutes before adding toppings. Which tip will you try first?
From My Kitchen to Yours
Thank you for cooking with me today. I hope you try this sturdy cauliflower pizza crust and love it as much as I do. It is a simple way to eat more veggies and still enjoy pizza night. I would love to see your creations! Take a photo of your pizza and share it. Have you tried this recipe? Tag us on Pinterest! My handle is pinned on the blog. Until next time, keep stirring up good food and happy memories. Happy cooking! —Chloe Hartwell.

Sturdy Cauliflower Pizza Crust Recipe
Description
Discover the best sturdy cauliflower pizza crust recipe for a low-carb, gluten-free dinner. Crispy, easy, and delicious!
Ingredients
Instructions
- Rice Cauliflower: Preheat oven to 350°F (175°C). Grate cauliflower into rice consistency using either your food processor or a box grater.
- Bake Cauliflower: Spread cauliflower onto a parchment-lined baking sheet into as flat of a layer as possible. Bake for 20 minutes, or until the cauliflower begins to brown. Remove from oven and let cool slightly. Increase oven temperature to 450°F (230°C).
- Dry Cauliflower: Spoon cauliflower into a cheesecloth and squeeze out as much moisture as possible.
- Make Dough: In a large bowl, stir to combine cauliflower and all remaining ingredients.
- Shape Dough: Into a pizza round on a parchment-lined baking sheet. Bake for 15 minutes, or until firm.
- Make Pizza: Carefully flip the pizza crust. Top the pizza crust with your favorite sauces and toppings, then return it to the oven until it is all melty and delicious, about 7 minutes.


Leave a Reply