
Why I Love This Little Trick
I was sitting on my porch, watching the bees dance in the garden. My grandson came running out, hot and sticky from playing. He begged for ice cream, but the freezer was bare. I remembered an old camping trick my own grandma taught me. You don’t need fancy machines or heavy cream. You just need a bag, some ice, salt, and your favorite coffee creamer. Doesn’t that sound clever?
I still laugh at that afternoon. We ended up with a tiny cup of vanilla-scented ice cream, and my grandson declared it the best ever. This recipe is perfect for those “no ice cream in the house” moments. It’s also a wonderful way to get kids into the kitchen. They love shaking the bag. It feels like a magic trick.
The Simple Magic of Salt and Ice
Why does salt make ice cream freeze faster? It’s not a new trick. People have been using salt and ice for hundreds of years. My grandma never explained the science. She just said, “Salt makes the ice cold enough to work its magic.” That is good enough for me.
Here is why this matters: When you add salt to ice, the ice gets colder than normal. It drops below 32 degrees. This deep cold is what turns your liquid creamer into delicious, scoopable ice cream. Without the salt, the ice would just melt and give you a cold drink.
*Fun fact: Rock salt or kosher salt works best because the big crystals melt the ice slowly and evenly. Table salt melts too fast and won’t get cold enough.*
Have you ever tried this science experiment in your own kitchen? I would love to hear how it went for you.
Picking Your Creamer Flavor
The best part of this recipe is the choice. Coffee creamer comes in so many fun flavors. You can use a plain vanilla creamer for a classic treat. Or try something wild like caramel macchiato or hazelnut. Last week, I used a peppermint mocha creamer. It tasted just like a Christmas cookie.
Another reason this matters: You control the sugar. Some creamers are very sweet. Others are less sweet. You can mix plain creamer with a sweet one to get it just right. No more guessing. That makes me feel smart in the kitchen. What flavor sounds best to you? Chocolate? Birthday cake? I bet you have a favorite.
Step by Step: A Little Dance in the Kitchen
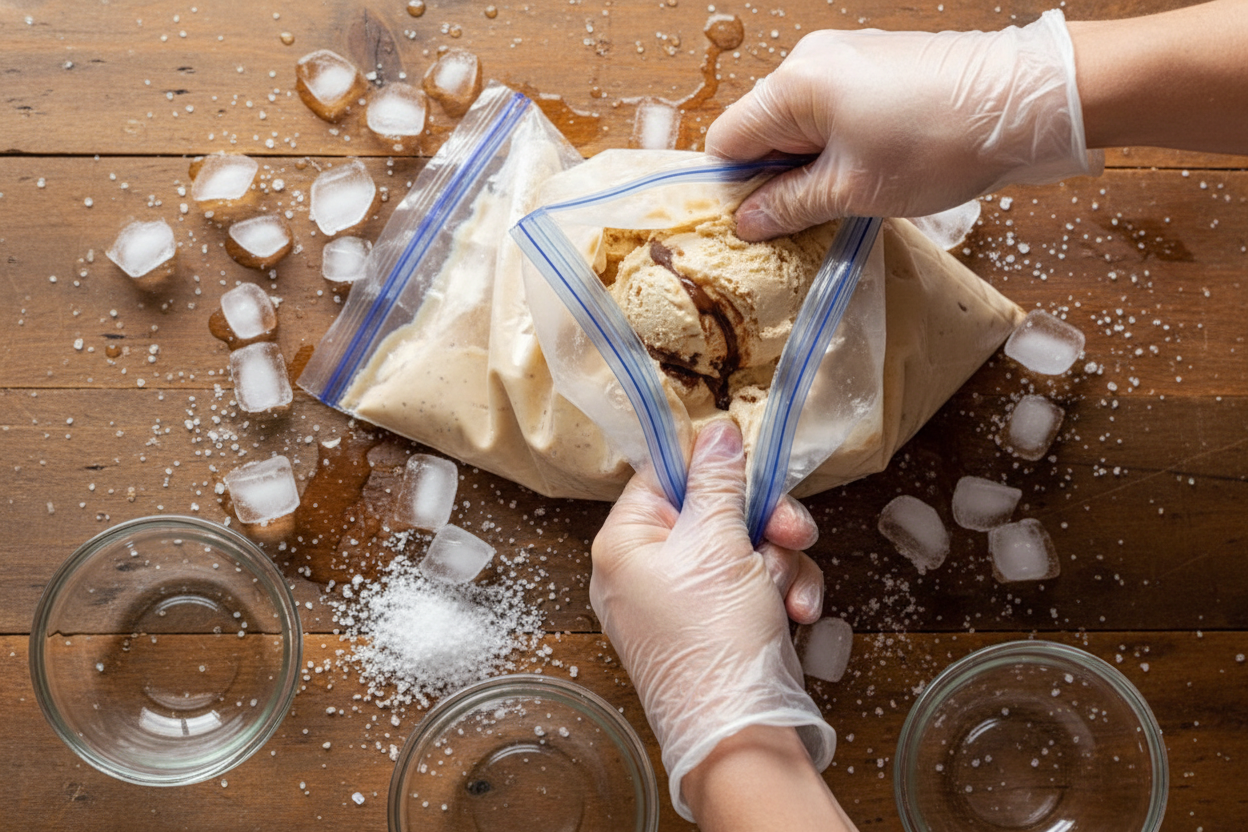
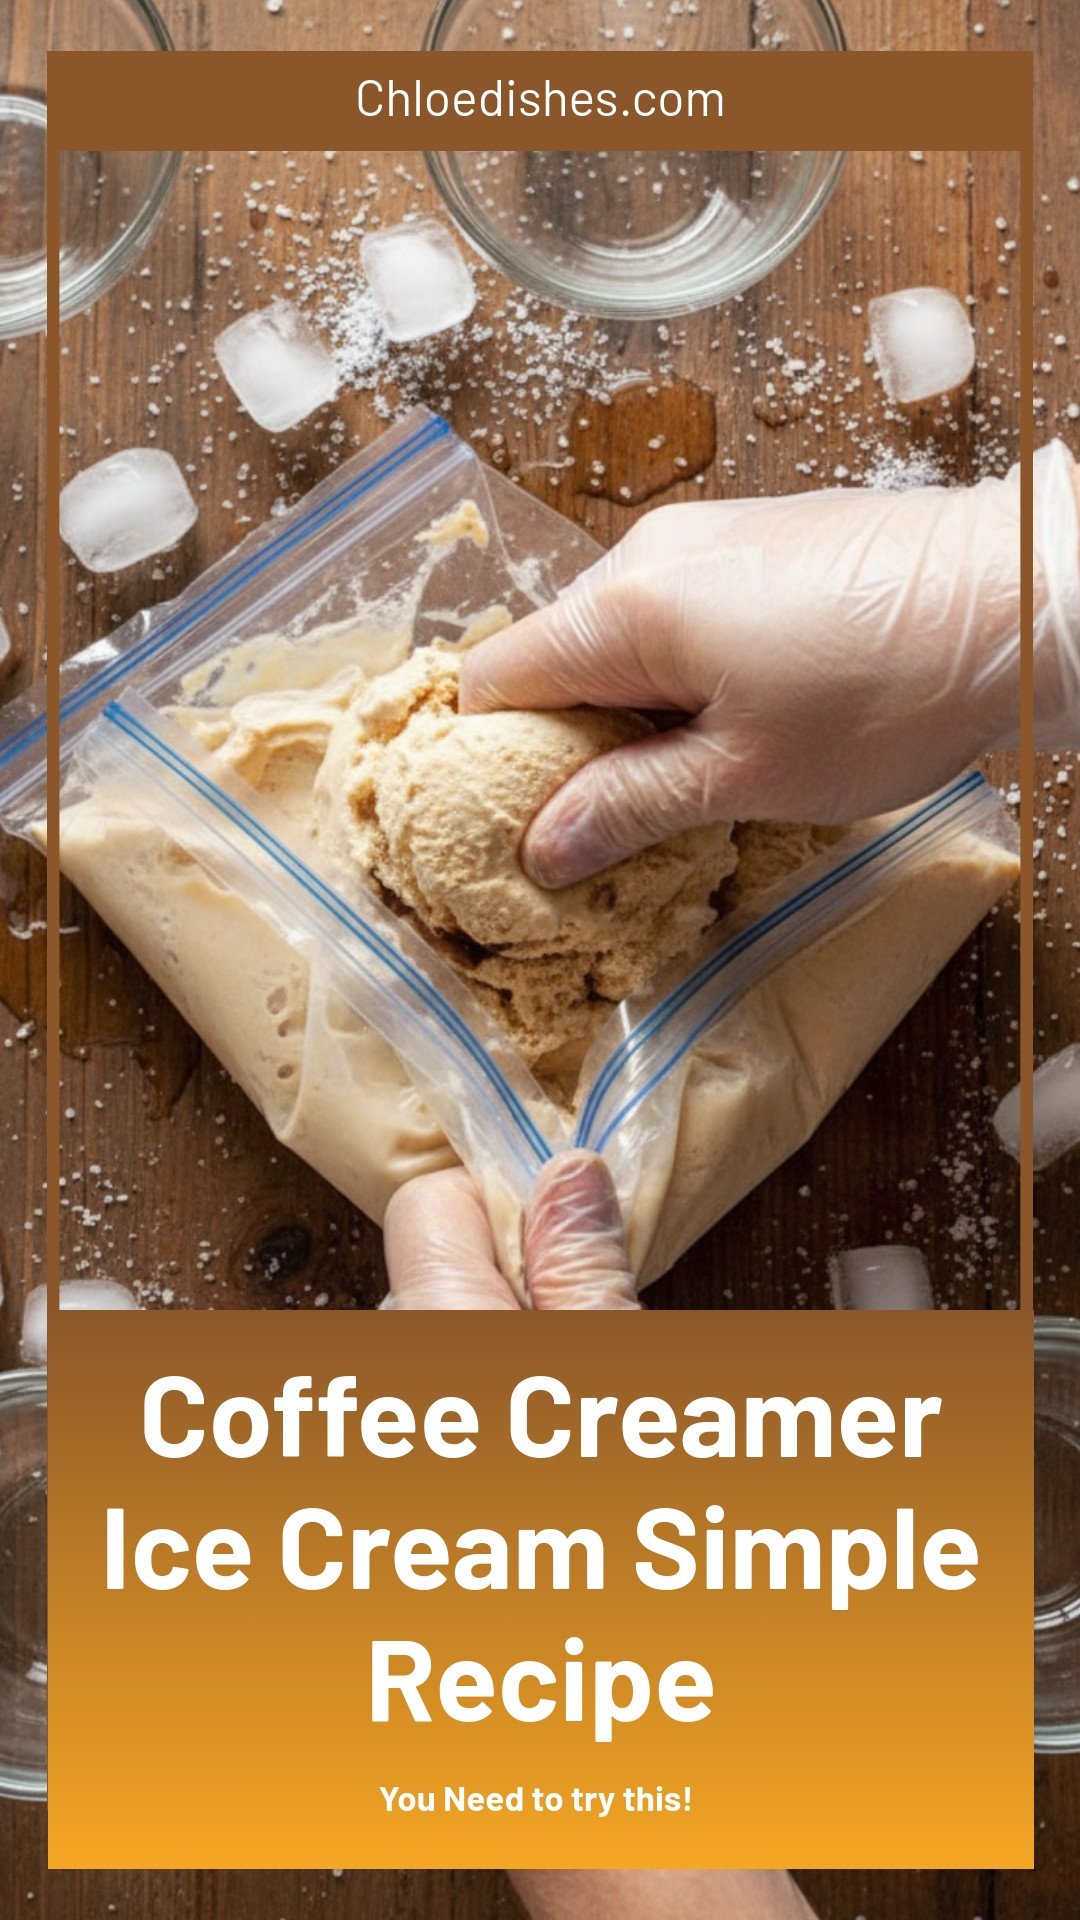
First, pour one cup of your creamer into the small bag. Squeeze out all the air before you seal it. Air makes the bag puffy and hard to shake. Now fill the big bag halfway with ice cubes. Add the half cup of salt. Drop the small creamer bag inside.
Here comes the fun part. Seal the big bag tight. Then shake, shake, shake for three to four minutes. You can dance around the kitchen. Sing a silly song. My grandson and I do a “freeze dance” while we shake. When the time is up, take the small bag out. Rinse it quickly under cold water to wash off any salt. Then open, scoop, and eat.
Doesn’t that smell amazing when you open the bag? The sweet scent just fills the room.
What To Do If You Want It Harder
Sometimes you want that firm, scoopable ice cream from the store. After shaking, if it looks more like a soft milkshake, that is okay. You can eat it soft right away. Or you can scoop it into a freezer-safe container. Pop it in the freezer for a few hours or overnight.
I have another little story for you. One time, I forgot the bag in the freezer for two days. It came out like a hard block of ice. I let it sit on the counter for five minutes, and it softened up perfectly. You can’t ruin this recipe. It always works out.
Which do you like better: soft-serve ice cream or hard scoops? I am a soft-serve girl myself.
Toppings and Fun Finishes
This little ice cream is a blank canvas. You can add chocolate syrup, sprinkles, or crushed cookies. My favorite topping is a drizzle of warm honey and a pinch of sea salt. It makes the sweet cream taste even better.
You can also stir things into the creamer before you freeze it. Try mixing in a spoonful of cocoa powder or a drop of vanilla extract. One time, I added a few shakes of cinnamon. It tasted like a snickerdoodle cookie. Tell me, what is your go-to ice cream topping? I am always looking for new ideas.
Ingredients:
| Ingredient | Amount | Notes |
|---|---|---|
| Coffee creamer | 1 cup | Any flavor of your choice |
| Gallon-size zip-close bag | 1 | For the outer bag |
| Quart-size zip-close bag | 1 | For the inner bag |
| Kosher salt | 1/2 cup | Helps lower the freezing point of ice |
| Ice cubes | Enough to fill a gallon-size bag about half full | For the ice bath |
Making Ice Cream in a Bag? Yes, Please
You won’t believe how easy this is. It feels like a magic trick, I promise. My own kids would shake that bag like it owed them money. I still laugh at that memory.
We only need one special ingredient: coffee creamer. That’s right, no heavy cream or eggs. Just pour, shake, and eat. It’s the perfect little project on a hot afternoon.
Step 1: Pour the coffee creamer into the small, quart-sized plastic bag. Squeeze out as much air as you can before you seal it tight. Less air means the creamer gets colder, faster. My grandson always makes a funny face when he does this part.
Step 2: Fill the big gallon-sized bag halfway with ice cubes. Add the 1/2 cup of kosher salt. (Here is a hard-learned tip: do not use table salt. Kosher salt is bigger and works better for freezing.) Now place the small creamer bag inside the big ice bag. Seal the big bag carefully.
Step 3: Pick the bag up and shake it really hard for three to four minutes. This is the fun part! You can toss it back and forth or just shake it like a snow globe. Doesn’t it feel like you are making science in the kitchen? What flavor of creamer would you use… ? Share below!
Step 4: Open the big ice bag and take out the smaller bag. Quickly rinse it under cold water to wash off any salty bits. You do not want salty ice cream, trust me. I learned that the messy way once.
Step 5: Open the small bag and scoop your soft ice cream into a bowl right away. Add sprinkles or chocolate syrup. If you want it firmer, spoon it into a container and freeze it overnight. Both ways are good. Which would you choose tonight?
Cook Time: 4 minutes
Total Time: 10 minutes
Yield: 1 serving
Category: Dessert, Snack
Three Fun Twists to Try
Want to change things up? Here are three simple ways to make it your own. They are all very easy to sneak into the bag.
Fruity Swirl: Use a strawberry or vanilla coffee creamer. After shaking, stir in a spoonful of jam. It looks like a tie-dye dream.
Chocolate Mint Crunch: Use a chocolate mint creamer. Throw in a few crumbled chocolate cookies before you shake. It tastes just like a fancy dessert.
S’mores Surprise: Use a vanilla or caramel creamer. After rinsing, sprinkle in tiny marshmallows and a bit of crumbled graham cracker. It is like a campfire in your bowl. Which one would you try first? Comment below!
How to Serve Your Little Treat
You can eat this ice cream all by itself, and it is wonderful. But here are a few ways to dress it up. A little bit of crunch or a warm drink makes it feel extra special.
Scoop it over a warm brownie or a soft chocolate chip cookie. The warm and cold together is heavenly. You could also top it with fresh berries or a drizzle of honey. For a fizzy drink pairing, try a cold root beer float next to your bowl. Grown-ups might like a tiny glass of coffee with a splash of the same creamer. Which would you choose tonight?

How to Store Your Homemade Ice Cream
Homemade ice cream is best eaten right away. But you can save some for later. Just put it in a freezer-safe container with a tight lid. Press a piece of wax paper right onto the ice cream’s surface. This stops ice crystals from forming. I once tucked a batch in the back of my freezer and forgot it. Three days later, it was still creamy and sweet. That little paper trick works like magic. If you make a double batch, freeze half in single servings. Kids love pulling out their own little cup. It makes dessert time feel extra special. Have you ever tried storing it this way? Share below!
Why does storing ice cream well matter? It saves you time on busy days. You can make one batch and enjoy it all week. No need to pull out the blender every time a craving hits. That is a little gift to your future self. Plus, properly stored ice cream keeps its soft, scoopable texture. No one wants a brick of frozen cream. So take an extra minute to wrap it right. Your taste buds will thank you.
Three Common Problems and Easy Fixes
Problem one: your ice cream turns out rock hard. This happens when you freeze it too long. The fix is simple. Let it sit on the counter for five minutes before scooping. I remember my first batch was like a hockey puck. A little patience made all the difference.
Problem two: the creamer leaks from the bag. Make sure you squeeze every bit of air out before sealing. A leaky bag means salty ice cream. No one wants that. Double-check the seal by gently pressing the bag. If it holds, you are good to go.
Problem three: the ice cream tastes a little salty. Rinsing the small bag under cold water is key. Do not skip this step. The salt helps the ice get super cold, but it should not get in your treat. A quick rinse fixes everything. Which of these problems have you run into before? Fixing them builds your cooking confidence. You learn to trust your hands. And when you nail the texture, the flavor shines. That is why these little tricks matter so much.
Your Five Quick Questions Answered
Q: Can I make this ice cream gluten-free? A: Yes. Most coffee creamers are naturally gluten-free. Just check the label to be sure.
Q: Can I make it ahead of time? A: Absolutely. Follow step five and freeze it overnight. It turns into a firmer, scoopable treat.
Q: Can I swap the creamer flavor? A: Yes. Try vanilla, caramel, or even peppermint for the holidays. Each one gives a new taste.
Q: Can I double the recipe? A: You can, but use a bigger bag. A gallon bag is fine for one cup of creamer. For two cups, use a two-gallon bag.
Q: Any extra tips? A: Wear gloves while shaking! The bag gets very cold. Your hands will thank you. Which tip will you try first?
A Warm Send-Off from Chloe
Thank you for spending this time in my kitchen. I hope you try this easy coffee creamer ice cream. It is a fun project for a lazy afternoon. The best part is shaking the bag with someone you love. Take a picture of your creation. Show me how it turned out. Have you tried this recipe? Tag us on Pinterest! I love seeing your sweet, frosty smiles. Remember, the best recipes are the ones you share. Happy cooking! —Chloe Hartwell.

Coffee Creamer Ice Cream Simple Recipe
Description
Make creamy coffee creamer ice cream at home with this simple 3-ingredient recipe. Easy, delicious, and ready in minutes.
Ingredients
Instructions
- Pour the coffee creamer into the small, quart-sized plastic bag. Seal the bag closed, squeezing out as much air as possible.
- Fill the gallon-sized plastic bag halfway with ice cubes and 1/2 cup of kosher salt. Place the creamer-filled bag inside the ice bag and seal it closed.
- Pick the bag and shake vigorously for 3-4 minutes.
- Open the ice bag, remove the smaller bag and quickly rinse under cold water to remove any salt stuck to the bag.
- To enjoy immediately, open the small bag and scoop the ice cream into bowls. Garnish with desired ice cream toppings. To enjoy later, transfer the ice cream into a freezer-safe container and freeze overnight until firm.
Notes
- Nutrition information is not provided in the text.


Leave a Reply