
My Love Affair with Grilled Cheese
When I was a little girl, my grandma made grilled cheese on rainy days. She called it “sunshine on a plate.” I remember watching the butter sizzle in the pan and feeling so warm inside. Lunch was always something to look forward to then. I still laugh at how I’d try to peek into the pan without her seeing. She’d shoo me away with a spatula and say, “Good things come to those who wait.” And she was right. That first crispy bite was always worth it. Have you ever had a food that just makes you feel safe? That’s what grilled cheese is for me. A simple, happy memory in every bite.The Problem with Regular Sandwiches
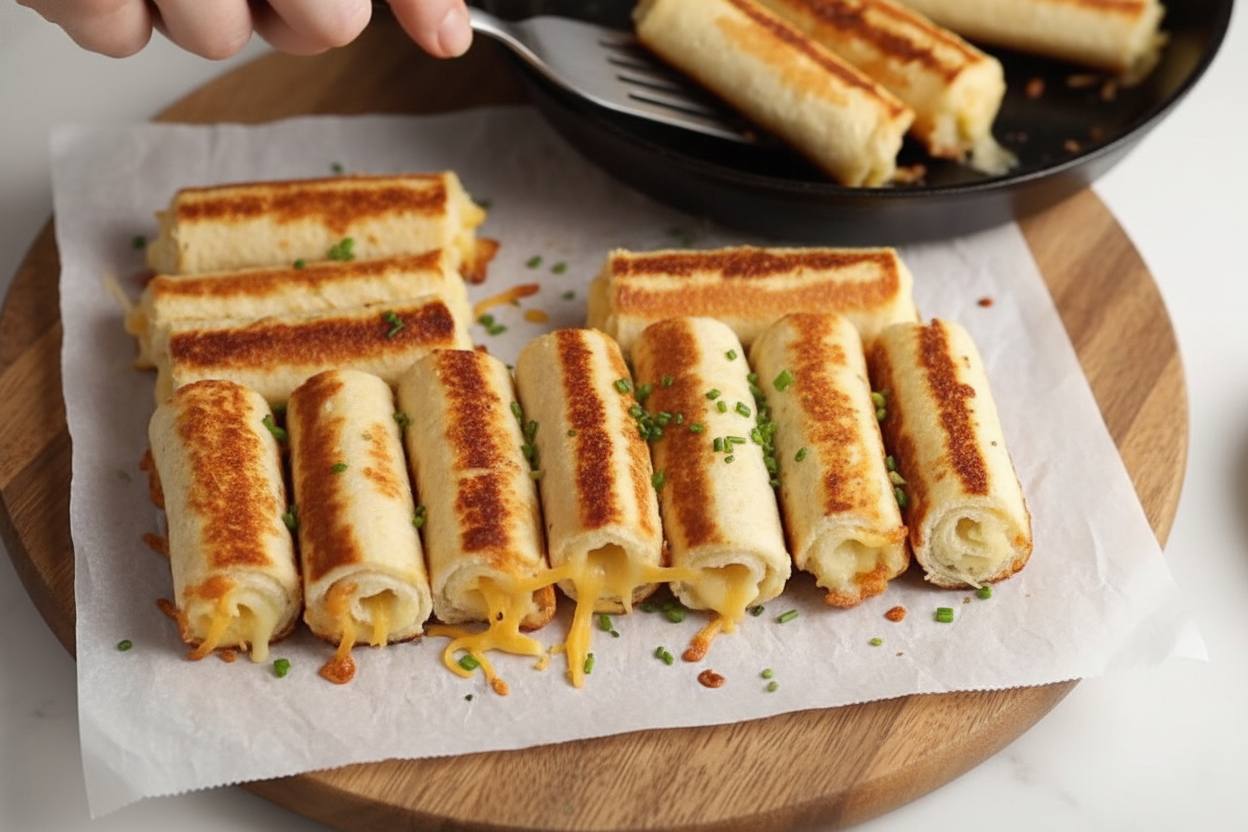
Now, I love a classic grilled cheese. But sometimes the bread gets too thick. Or the cheese melts out the sides. It can get a little messy. That’s why I started making roll-ups. They are neater, crunchier, and somehow even more fun to eat. Every bite has cheese in the middle, wrapped in a golden shell. Does that sound amazing to you? The trick is using soft bread. White bread works best because it bends without breaking. *Fun fact: Wonder Bread was invented in 1921 and became the first pre-sliced bread in America. Before that, people had to slice their own!* That softness is exactly what we need here.Getting Your Bread Ready
You start by cutting off the crusts. I know some people love crusts. But for roll-ups, we want pure softness. Then you grab a rolling pin or even a clean water bottle and flatten each slice. Make it thin and smooth. Why does this matter? Because thin bread rolls better. If the slice is too thick, it cracks when you try to bend it. Nobody wants a cracked roll-up. This little step keeps everything together. Have you ever tried using a glass bottle as a rolling pin? I did once after losing mine. It works perfectly in a pinch.Adding the Good Stuff
Next comes the cheese. Shredded cheddar is my favorite. It melts fast and spreads evenly over the bread. You sprinkle it in a thin layer, leaving a little room at the edges. Then you roll it up tight, like a little sleeping bag for the cheese. Brush a bit of melted butter on the edge to seal it shut. That butter is the glue. Why does using shredded cheese matter? Because slices can be too thick. They might not melt all the way before the bread burns. Shredded cheese melts evenly and quickly. This is the secret to a perfect roll-up. I learned this after a few burnt disasters in my own kitchen.The Pan and the Patience
Place your roll-ups in a nonstick pan over low-medium heat. Do not rush this part. If the heat is too high, the outside burns and the inside stays cold. Low and slow is the way. Turn them every so often with a fork or tongs. Watch them turn golden brown and crispy. The cheese inside will get soft and stretchy. When you see that, you know it’s ready. What’s your favorite thing to dip these in? I love tomato soup, but some kids I know use ketchup. No judgment here.When Lunch Becomes an Adventure
I once made these for my neighbor’s grandkids. They were picky eaters who only wanted chicken nuggets. After one bite of these roll-ups, they asked for seconds. And then thirds. That moment reminded me why I love cooking. Food connects us. It turns strangers into friends and sad days into good ones. A simple meal can change everything. This is why making food from scratch matters. You put love into every step. And people taste that love, even if they don’t say it.Your Turn to Try
Now you have the recipe. Soft bread, shredded cheese, butter, and patience. Roll them up, cook them slow, and enjoy every bite. I want to hear from you. What’s one food that reminds you of home? Also, would you add anything inside your roll-up, like ham or pepperoni? And lastly, who would you make these for first?Ingredients:
| Ingredient | Amount | Notes |
|---|---|---|
| Soft bread | 8 slices | – |
| Shredded cheddar cheese | 1 1/2 cups | – |
| Butter | 2 tablespoons | – |
My Favorite Lunchtime Secret
I still remember the first time I made these for my own kids. They were so picky about sandwiches. I needed something fun and different. That’s when I thought of rolling everything up like a little log. Doesn’t that sound silly and delicious?
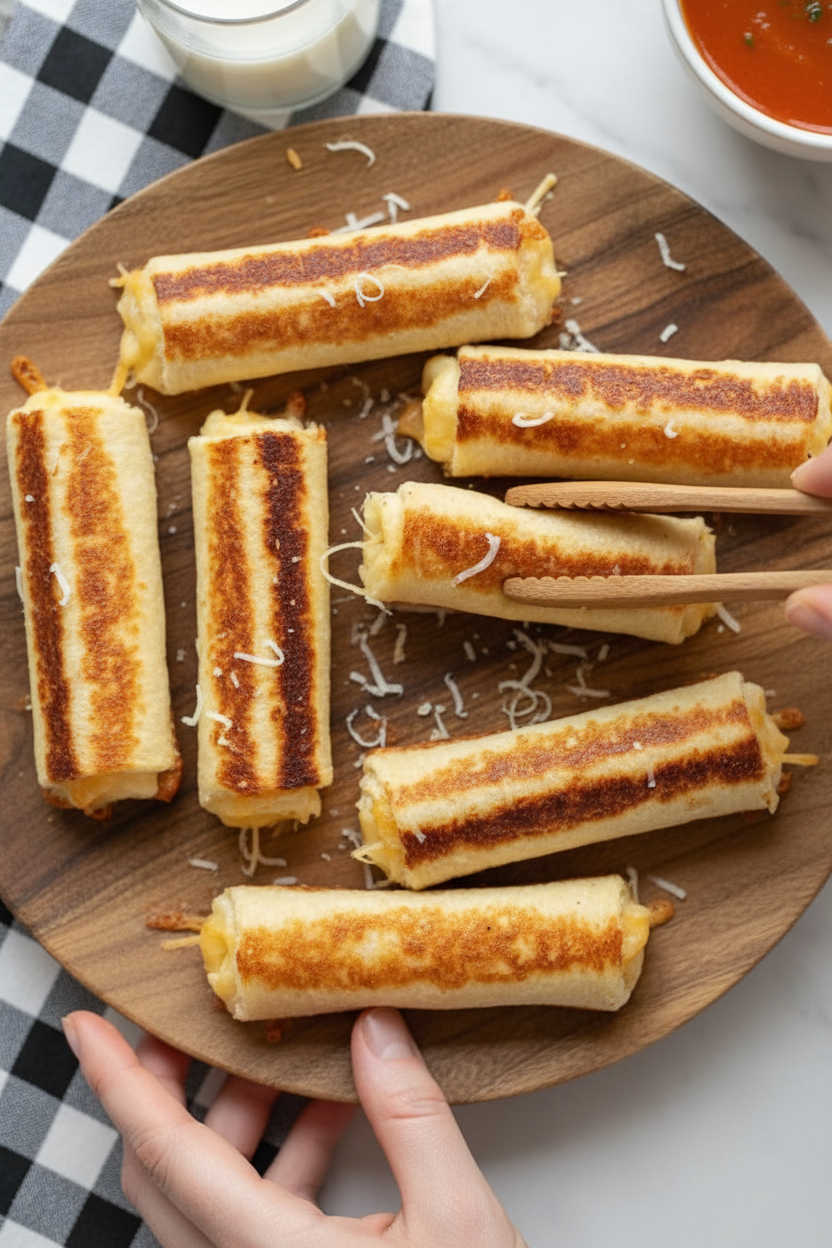
These Grilled Cheese Roll Ups are now my go-to lunch. They are crispy on the outside and gooey inside. My grandson calls them “cheese cigars.” I still laugh at that every time. They are perfect for a hungry 12-year-old or a grown-up who misses being one.
You will need just three things for this recipe. Grab some soft white bread, cheddar cheese, and butter. That’s it! (Here is a hard-learned tip: do not use sourdough or crusty bread. It will crack and snap like a twig when you try to roll it.) Save the firm bread for toast and use the fluffy stuff here.
Step 1: Take one slice of soft bread and cut off the crusts with a knife. Then, grab a rolling pin or even a clean glass bottle. Flatten the bread until it is thin and flat. You want it to look like a little pancake. This helps it roll up tight without tearing.
Step 2: Sprinkle a thin layer of shredded cheddar all over the flat bread. Leave a tiny border at the edges so the cheese doesn’t fall out. Now roll it up carefully like a sleeping bag. Brush a little melted butter on the seam to seal it shut. Then brush butter all over the outside so it gets golden and crispy.
Step 3: Place your roll-ups in a nonstick pan over low-medium heat. Cook them slowly, rotating every minute or so. You want the cheese inside to melt completely and the outside to turn a beautiful golden brown. Watch them closely, they can burn fast. Now here is a fun question for you: Do you like your grilled cheese dippy in tomato soup or ketchup? Share below!
Cook Time: 8 minutes
Total Time: 15 minutes
Yield: 8 roll-ups (feeds 2 hungry kids)
Category: Lunch, Snack
Three Fun Twists to Try
Sometimes I like to change things up a little. These twists are so easy and make lunch feel like a new adventure. You can even ask your kids to help pick one. My youngest always votes for the spicy one.
Spicy Kick Twist: Add a pinch of chili flakes or a few drops of hot sauce before rolling. It gives the cheese a warm little hug. My husband thinks these are the best.
Hidden Veggie Twist: Sprinkle in some finely chopped spinach or tiny bits of bell pepper. Your family will never notice it hiding in there. It is my sneaky secret for extra health points.
Ham and Cheese Twist: Lay a thin slice of deli ham on top of the cheese before rolling. It adds a salty, savory bite that pairs perfectly with the buttery crunch. Which one would you try first? Comment below!
How to Serve and Sip
These little roll-ups are best eaten warm and fresh. I love serving them with a small bowl of warm tomato soup for dipping. It feels like a hug in a bowl. You can also place them on a plate with some crunchy carrot sticks and a handful of grapes for color.
For a fun garnish, sprinkle a little dried parsley on top of the melted butter before cooking. It makes them look fancy, even though they took almost no effort. My friend calls them “restaurant roll-ups” when I do that.
Now for drinks, the grown-ups might enjoy a cold glass of hard apple cider. It is crisp and sweet like the roll-ups. For the kids (and me), a tall glass of cold milk is the best friend to melted cheese. Which would you choose tonight?
Storing and Reheating Your Grilled Cheese Roll Ups
I remember the first time I made these for a big lunch crowd. I had too many, so I put them in the fridge. They were even better the next day. Let me share what I learned.
To store them, let the roll ups cool completely. Then place them in a single layer in a sealed container. Put a piece of wax paper between each layer. You can keep them in the fridge for up to three days. For the freezer, wrap each roll up tightly in plastic wrap. Then put them all in a freezer bag. They will stay good for one month.
When you want to reheat them, do not use the microwave. It makes them soggy. Instead, warm them in a nonstick pan over low heat. Cover the pan with a lid to help the cheese melt. Flip them gently until they are hot and crispy again. This takes about five minutes.
Batch cooking these is a lifesaver for busy weeks. You can make a double batch on Sunday and have lunch ready all week. It saves time and keeps you from reaching for junk food. That is why storing them right matters. It means you always have a warm, happy meal waiting.
Have you ever tried storing it this way? Share below!
Common Problems and Easy Fixes for Roll Ups
Sometimes your roll ups might not turn out perfect. Do not worry. I have made every mistake in the book. Here are three common issues and how to fix them.
First, the bread cracks when you roll it. This happens if the bread is too dry. I once used stale bread and it broke into pieces. The fix is simple. Use soft, fresh white bread. And always flatten it with a rolling pin first. This makes the bread flexible and easy to roll.
Second, the cheese does not melt in the middle. This happens when the heat is too high. Lower the heat and cook them slowly. Cover the pan with a lid to trap the warmth. The cheese will melt evenly, and the outside will not burn. Why does this matter? It gives you a gooey, comforting center every time.
Third, the roll ups come apart while cooking. I remember my first batch unrolled in the pan like a sad little snake. The fix is to brush melted butter on the seam before cooking. Press the seam down gently. Wait one minute before flipping. This seals them tight.
Fixing these problems makes you a better cook. It builds your confidence in the kitchen. That is why these tips matter. They turn frustrating moments into yummy successes.
Which of these problems have you run into before?
Your Questions Answered
Q: Can I make these gluten-free?
A: Yes! Use your favorite soft gluten-free bread. Flatten it gently and follow the recipe as usual.
Q: Can I make these ahead of time?
A: Absolutely. Roll them up and keep them in the fridge uncooked. Cook them fresh when you are ready to eat.
Q: What else can I put inside?
A: Try ham, cooked bacon, or even a little jam. The cheese is the star, so do not overload it.
Q: How do I make more than eight?
A: Simply double or triple the ingredients. Use a larger pan or cook them in batches. Keep the first batch warm in a low oven.
Q: Can I use an air fryer?
A: Yes! Cook them at 350 degrees for about 4 minutes. Flip halfway through for even browning.
Which tip will you try first?
A Warm Goodbye from Chloe
I have loved sharing these little roll ups with you. They remind me of rainy afternoons in my own kitchen. The smell of melted butter and toasty bread fills the house. I hope you make them for your family soon.
Here is a fun fact for you: Grilled cheese was first called a “cheese toastie” in the 1920s. It has been making people smile for over one hundred years.
Now it is your turn. Make a batch and take a picture. Have you tried this recipe? Tag us on Pinterest! I love seeing your creations. It feels like we are cooking together in the same warm kitchen.
Happy cooking!
—Chloe Hartwell.
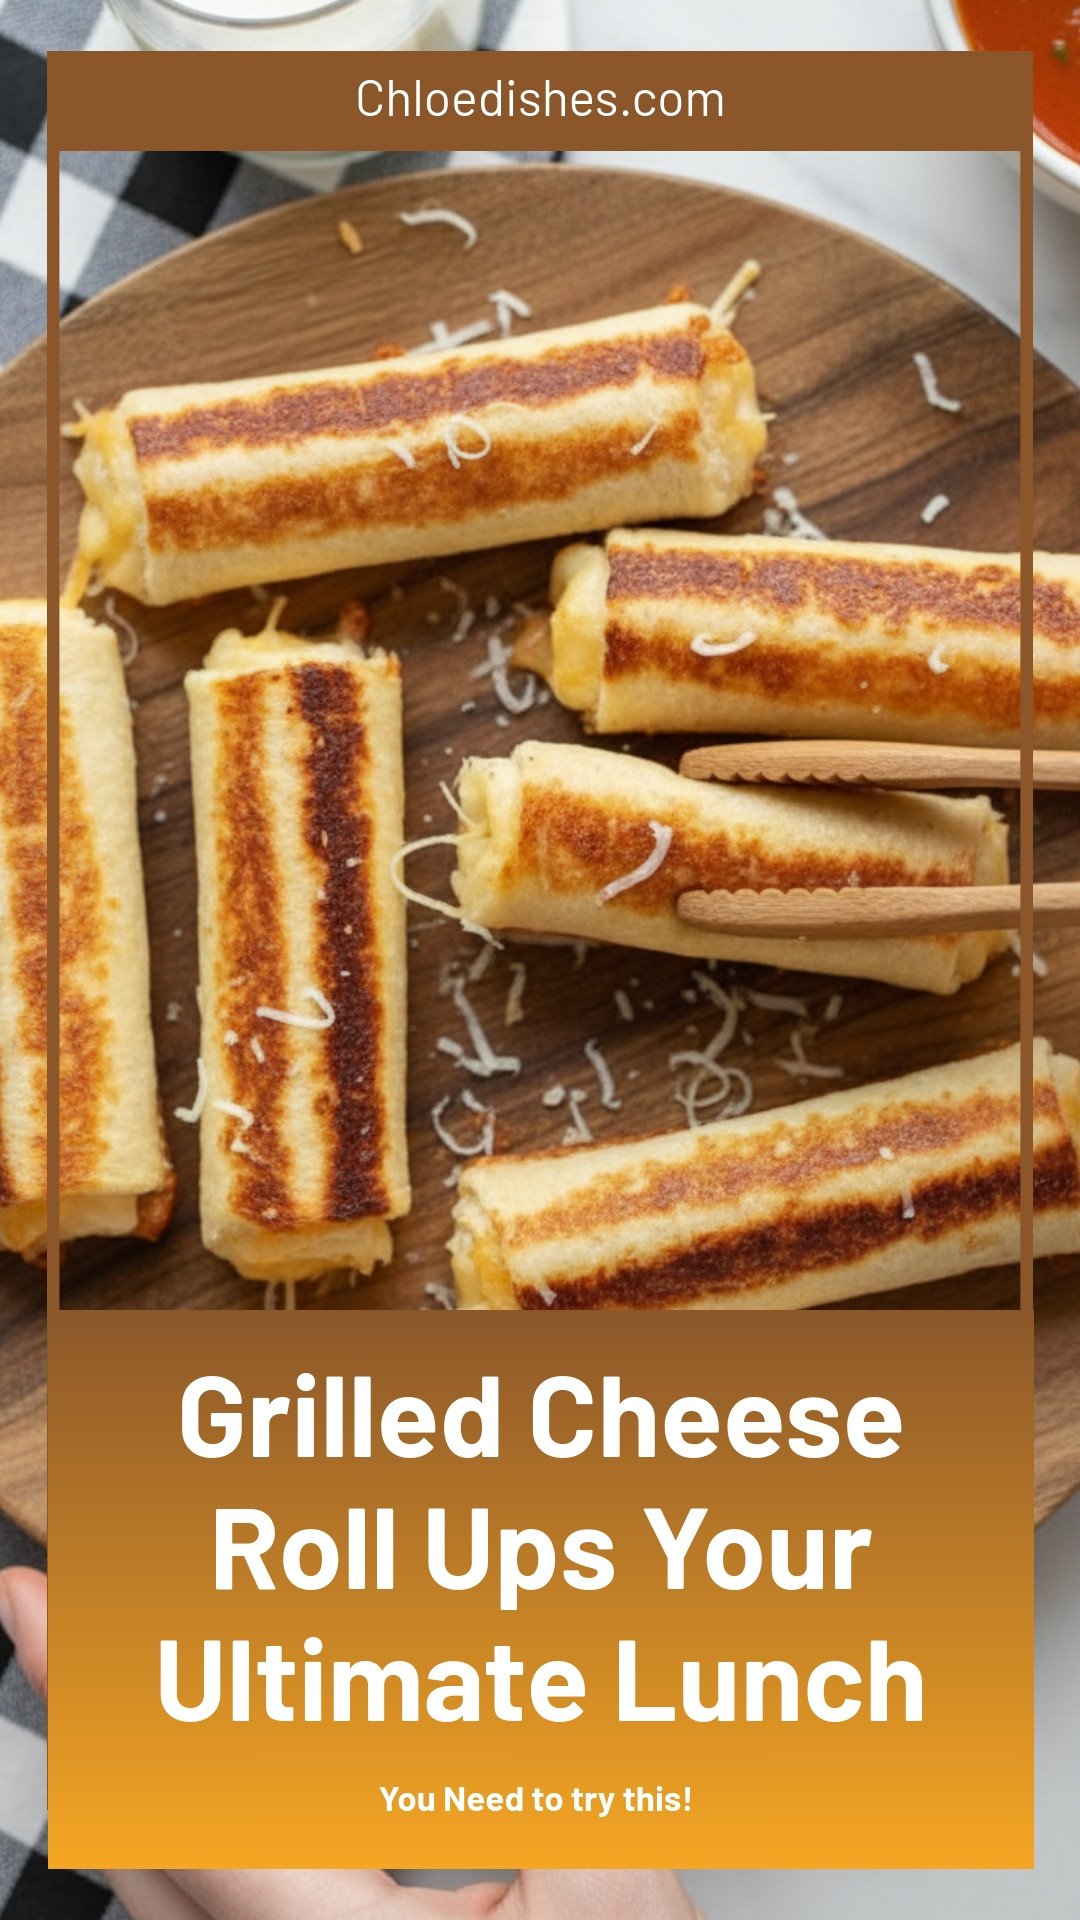

Grilled Cheese Roll Ups Your Ultimate Lunch
Description
Easy grilled cheese roll ups recipe for the ultimate crispy, cheesy lunch. Perfect for kids, quick meals, and easy snacks.
Ingredients
Instructions
- Take a single slice of the white bread and cut off the crusts. Then, take a rolling pin and flatten the bread into a thin piece. You want to avoid using a firm bread, like sourdough, because it will crack when you try to roll it. Using thick slices also keeps the bread from tearing.
- Next, take your thin slice of white bread and grab the cheese. You’re more than welcome to use slices of cheese rather than shredded, but shredded tends to work better when rolling. Once you’ve spread a thin layer of cheese all over the bread, roll it up and brush melted butter on the edge to secure it shut. Brush melted butter completely around the roll-up as well.
- Place the roll-ups in a nonstick pan over low-medium heat. Rotate occasionally. Cook until the center melts and the outside becomes a golden brown and crispy.
Notes
- Nutrition information is not provided in the text.


Leave a Reply