
The Muffin That Started as an Accident
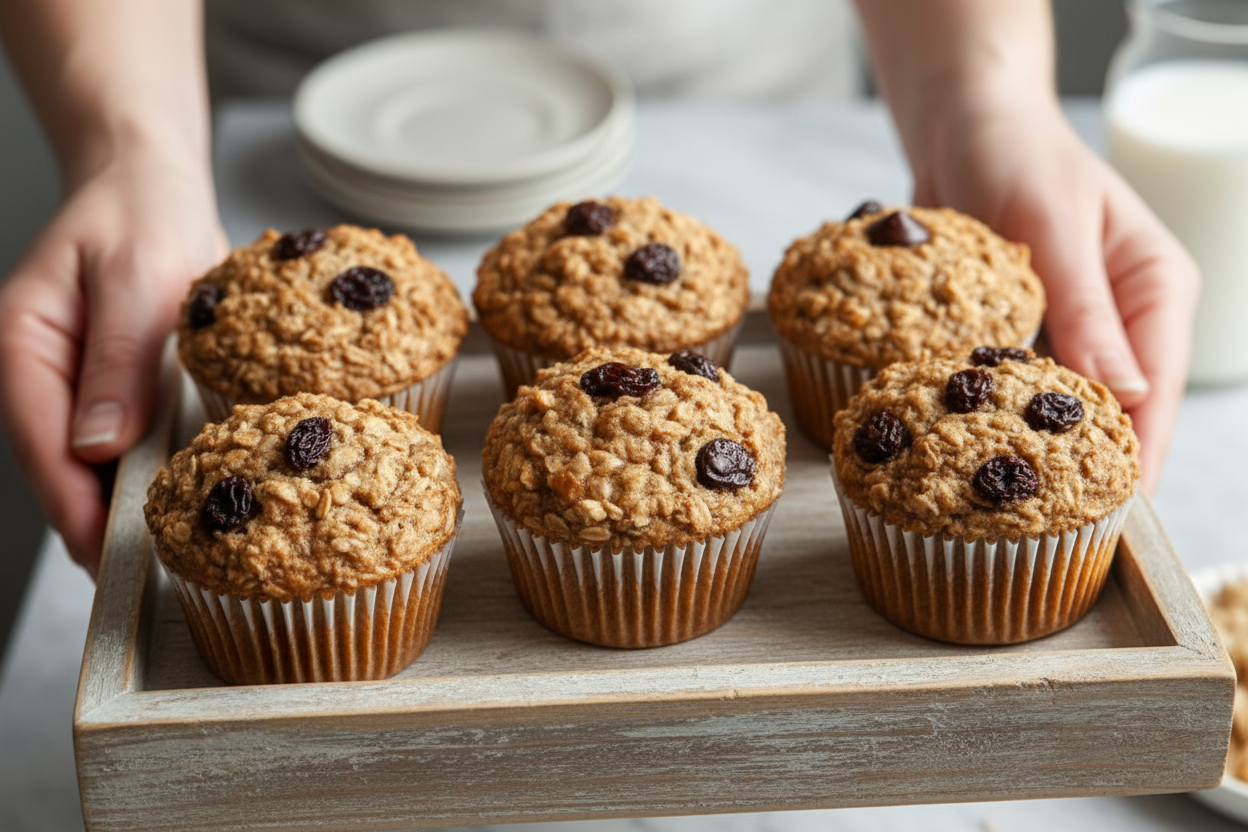
I remember the first time I made these oatmeal cupcakes. My grandson was rushing to school, and I had no time for a sit-down breakfast. I grabbed oats, a banana, and some milk, and just tossed them together. The batter looked too thin for oatmeal, so I poured it into muffin tins. They came out warm, soft, and a little sweet. My grandson took two in a napkin and ran out the door. I still laugh at how messy his backpack was that day, with crumbs everywhere. But he said it was the best breakfast he ever had. What do you grab when you are running late? A granola bar? Toast? I bet you have a story like mine.Why These Cupcakes Are Better Than a Bowl
This recipe is different from regular oatmeal because you can hold it in your hand. You do not need a spoon or a bowl. You do not even need a plate. That is the first reason this matters: no dishes to wash. The second reason is that these cupcakes are not just for breakfast. You can pack them in a lunchbox or eat one after homework. They do not crumble like cookies or get sticky like fruit. They stay soft and easy to carry. I love that. Take a cup of rolled oats. Add cinnamon and a pinch of salt. That simple mix reminds me of my grandma’s kitchen. She always said cinnamon makes everything feel cozy. Does not that smell amazing when you open the oven? *Fun fact: Oats come from a grain called Avena sativa, which people have grown for over 3,000 years. That is older than the Roman Empire.*The Secret to a Tender Cupcake
Do not overmix the batter. I know it is tempting to stir until smooth, but stop when you still see a few lumps. That keeps the cupcakes light, not tough. My sister once stirred hers for a full minute, and the cupcakes came out like hockey pucks. Use either mashed banana or applesauce for the wet part. Banana gives a sweeter flavor. Applesauce makes them a little lighter. I usually pick banana because I always have one that is too spotty to eat plain. Have you tried both? If you want to add chocolate chips, fold them in gently at the end. That way they do not sink to the bottom. My youngest niece always picks out the chips first and eats them alone. I pretend not to notice.How to Make Them Your Own
This batter is like a blank canvas. You can swap the milk for almond milk or oat milk. You can use honey instead of maple syrup, or skip the nut butter if you want them lean. I once added shredded coconut, and it tasted like a tropical morning. Raisins are good, but I prefer dried cranberries for a little tang. My neighbor puts in pumpkin seeds for crunch. What would you add? Think about your favorite oatmeal toppings, and try them here. That is the fun part. Do you like your oatmeal sweet or plain? I am curious. Drop your idea in the comments below, or just tell me next time you see me at the store.The Baking Part Is Easy
Set your oven to 375 degrees. That is hot but not too hot. Line your muffin tin with paper liners, or grease the cups well. Spoon the batter in until each one is about three-quarters full. They will rise a little, but not like regular cupcakes. Bake for 20 to 25 minutes. Check with a toothpick. If it comes out clean, they are done. Let them cool in the pan for five minutes, then move them to a rack. My cats always sit by the oven when these are baking. They love the smell of cinnamon. After they cool, you can store them in a container in the fridge for up to five days. Or freeze them for a month. That means you can make a batch on Sunday and grab one every morning. Does not that make life easier?A Little Story About Sharing
Last fall, I brought these oatmeal cupcakes to a park picnic. My friend Lisa said they looked like tiny muffins. Then she took one bite and asked for the recipe before she even swallowed. I wrote it on a napkin with a pen that was running out of ink. That napkin is now taped to her fridge, faded and splattered. She told me her kids make them by themselves now. That might be my favorite part of cooking: when a recipe gets passed on and becomes part of someone else’s morning. That is why this matters. What is a recipe you learned from someone special? I would love to know. Share it with me.Ingredients:
| Ingredient | Amount | Notes |
|---|---|---|
| Rolled oats | 2 1/2 cups | Dry ingredient |
| Salt | 1/2 tsp | Dry ingredient |
| Cinnamon | 1/2 tsp | Dry ingredient |
| Baking powder | 1 tsp | Dry ingredient |
| Mashed banana or applesauce | 1/2 cup | Wet ingredient |
| Milk of choice | 1 3/4 cups | Wet ingredient |
| Maple syrup or honey | 1/4 cup | Wet ingredient |
| Nut butter or oil | 1/4 cup | Optional |
| Pure vanilla extract | 1 tsp | Wet ingredient |
| Chocolate chips or raisins | 1/3 cup | Optional mix-in |
My Morning Oatmeal Cupcake Memory
I still remember the first time I made these oatmeal cupcakes. My grandson was running late for school, and he grabbed one off the counter. He said it tasted like a warm hug. Doesn’t that smell amazing? They are breakfast in a little paper cup. No bowls to wash, no spoons to lose. Just grab one and go. I love that they are soft, sweet, and filling. You can even pack them in a lunchbox. My neighbor Martha calls them “pocket pancakes.” I think she is right. They are perfect for busy mornings. Or for a lazy Sunday snack. What is the best breakfast you ever ate on the run? Share below!
Let’s Make These Together
Step 1: First, warm up your oven to 375 degrees. That is 190 on some ovens. Line a muffin tin with pretty cupcake liners. My grandma always used the blue ones with little dots. It makes cleanup so easy. (Hard-learned tip: Do not skip the liners. The oatmeal sticks like glue.)
Step 2: Grab a big bowl and toss in your rolled oats, salt, cinnamon, and baking powder. Stir them with a fork. I like to pretend I am mixing a magic potion. Make sure the baking powder is mixed in well. No one wants a salty bite.
Step 3: In another bowl, whisk together the mashed banana or applesauce, milk, maple syrup or honey, your nut butter or oil, and the vanilla. I like using a fork for this too. It feels better than a whisk. If the banana is not super soft, just mash it with your hands. That is what my daughter does. It is okay if it is a little lumpy.
Step 4: Now, pour the wet stuff into the dry stuff. Gently stir with a spoon. Stop as soon as it all comes together. Overmixing makes them tough. My first batch came out like hockey pucks. I learned that lesson the hard way. If you want chocolate chips or raisins, fold them in now. Give them a gentle stir.
Step 5: Spoon the batter into your liners. Fill each one about three-quarters full. They will puff up a little in the oven. I use an ice cream scoop for this. It makes them all the same size. My little niece calls them “smiley cakes.” I still laugh at that.
Step 6: Bake them for 20 to 25 minutes. Stick a toothpick in the middle of one. If it comes out clean, they are done. The kitchen will smell like a cozy bakery. Let them sit in the pan for 5 minutes. Then move them to a wire rack to cool. Or you can eat one warm. I always do. Do you eat them warm or cold? Share below!
Cook Time: 20–25 minutes
Total Time: 35 minutes
Yield: 12 cupcakes
Category: Breakfast, Snack
Fun Twists to Try
PB&J Surprise: Swirl a little jam into the batter before baking. It tastes like a classic sandwich but warm and soft.
Spiced Apple Pie: Use applesauce and add extra cinnamon and a pinch of nutmeg. Toss in some chopped dried apple bits. It smells like fall.
Chocolate Dream: Stir in cocoa powder with the dry mix. Use chocolate chips as your mix-in. It feels like dessert for breakfast. Which one would you try first? Comment below!
How to Serve and Sip
These cupcakes are perfect on their own. But you can dress them up. Drizzle a little honey on top. Or spread a thin layer of cream cheese. For a fun snack, serve them with a small bowl of yogurt and berries. They also make a nice side for scrambled eggs. Just add a little fruit on the plate.
For a drink, try a tall glass of cold milk. It is the classic choice. If you want something warmer, a mug of chai tea works beautifully. For grown-ups, a splash of spiced rum in warm apple cider is cozy. Which would you choose tonight?

Storing Your Oatmeal Cupcakes
These little cupcakes are perfect for busy mornings. But what if you make too many? No worries at all.
Let them cool completely first. Then pop them in an airtight container. They will stay fresh in the fridge for up to five days.
For longer storage, wrap each one in plastic wrap. Then put them in a freezer bag. They will keep for three months.
To reheat, just unwrap one and microwave it for 20 seconds. Or pop it in a toaster oven at 350 for five minutes. I once forgot a batch in the freezer for two months. They still tasted wonderful, like a little breakfast hug.
Batch cooking matters because it saves you time on harried mornings. You can grab a cupcake and run out the door. Have you ever tried storing it this way? Share below!
Common Problems and Easy Fixes
Sometimes things don’t go as planned. That is okay. Here are three common problems and how to fix them.
First, the cupcakes might come out too dry. This happens if you overmix the batter. Just stir until the dry and wet ingredients come together. Stop right then. This matters because dry cupcakes are no fun to eat.
Second, they might stick to the liners. I remember when I used cheap paper liners. The cupcakes tore apart. Now I always use good-quality liners or a little cooking spray. This matters because nobody wants to eat a crumbled mess.
Third, the cupcakes might not rise much. That is normal for oatmeal cupcakes. But if they are flat as a pancake, your baking powder might be old. Test it by adding a pinch to hot water. It should fizz. Which of these problems have you run into before?
Your Questions, Answered
Q: Can I make these gluten-free?
A: Yes. Just use certified gluten-free rolled oats. Everything else is naturally gluten-free.
Q: Can I make these ahead of time?
A: Absolutely. Bake them the night before. Store them in the fridge for a quick grab-and-go breakfast.
Q: Can I swap the banana for something else?
A: Sure. Use applesauce instead. Or try pumpkin puree for a fall twist.
Q: How do I scale the recipe up or down?
A: Just double or halve all the ingredients. Use a bigger bowl for double batches.
Q: Can I leave out the nut butter?
A: Yes. It is optional. The cupcakes will still be moist and tasty. Which tip will you try first?
A Warm Goodbye from Chloe
I hope these little oatmeal cupcakes make your mornings brighter. They are simple, warm, and full of love.
One *fun fact* is that oatmeal was a favorite breakfast of my grandma. She called it “porridge with a hug.”
Now you can take that hug on the go. I would love to see your version. Have you tried this recipe? Tag us on Pinterest!
Happy cooking!
—Chloe Hartwell.

Breakfast Oatmeal Cupcakes To Go Recipe
Description
Start your morning right with easy Breakfast Oatmeal Cupcakes To Go! A healthy, portable muffin perfect for busy days.
Ingredients
Instructions
- Preheat your oven to 375°F (190°C) and prepare a muffin tin by lining it with cupcake liners to ensure easy removal and cleanup.
- In a large bowl, combine the rolled oats, salt, cinnamon, and baking powder. Stir these ingredients well to distribute everything evenly.
- In a separate bowl, whisk together the mashed banana or applesauce, milk of choice, maple syrup or honey, nut butter or oil if using, and pure vanilla extract until smooth and well combined.
- Pour the wet ingredient mixture into the dry ingredients. Gently stir until just combined, being careful not to overmix. Fold in the chocolate chips or raisins if you choose to add them.
- Spoon the batter evenly into the prepared muffin tin, filling each cupcake liner about three-quarters full to allow room for rising.
- Place the muffin tin in the preheated oven and bake for 20 to 25 minutes, or until a toothpick inserted into the center of a cupcake comes out clean, indicating they are fully cooked.
- Let the oatmeal cupcakes cool in the pan for about 5 minutes, then transfer them to a wire rack to cool completely before serving or packing them to go.
Notes
- These oatmeal cupcakes are perfect for meal prep. Store in an airtight container in the refrigerator for up to 5 days or freeze for up to 3 months.


Leave a Reply