
A Memory in Every Bite
I still smile thinking about my first real mac and cheese. It was a rainy Sunday, and my grandma was humming in the kitchen. She let me stir the cheese sauce until my arm got tired. “This is love in a pot,” she said with a wink. That day I learned her secret: good mac and cheese takes patience, but it’s so worth it. Why does this matter? Because this dish isn’t just food. It is a warm hug on a cold day. It’s the meal that makes everyone at the table quiet for a moment before saying “Mmm.”The Little Things That Make It Special
You might look at the ingredient list and think, “That’s a lot of cheese.” And you’re right. Three kinds of cheese make this so creamy and rich. I use mozzarella for the stretch, Colby Jack for the smooth melt, and cheddar for that sharp, tangy kick. Mixing them together is like having a little cheese party in your pan. Doesn’t that sound fun? Here is a little question for you: What is your favorite cheese to put on everything? Mine is cheddar, but I know some folks who love pepper jack for a spicy surprise.The Crunchy Crown
Now, let’s talk about the top. The garlic bread crumb topping is like a crunchy crown for your mac and cheese. I love how it contrasts with the soft, creamy pasta underneath. One time, I forgot to make the topping and just sprinkled plain crackers on top. It was okay, but nothing beats this buttery, garlicky, parmesan crunch. *Fun fact: You can use leftover King’s Hawaiian bread to make your own breadcrumbs. Just toast it until dry, then crush it up in a bag.* Tell me, do you like a crunchy topping on your mac and cheese, or do you like it all soft and gooey?Slow and Low is the Way to Go
The biggest lesson my grandma taught me was to keep the heat low when making the sauce. If you rush it, the cheese can turn grainy or separate. And nobody wants that. You bloom the spices in butter first, then add the flour and cream cheese slowly. It sounds like a lot of steps, but think of it as building a cozy little nest for your pasta. Each stir adds a layer of flavor. Why does this matter? Because taking your time with the roux (that’s the butter and flour base) makes the sauce silky smooth. It’s the difference between a good dinner and a great one that everyone remembers.Layers of Love
Here is where it gets fun. You don’t just dump everything in the dish at once. You layer half the mac and cheese, then some cheese, then the rest, then more cheese. It is like building a lasagna, but cheesier and faster. The extra cheese in the middle melts into little pockets of gooey goodness. I still laugh at the faces my kids make when they pull a long, stretchy string of cheese from their plate. Have you ever tried layering cheese in the middle of a baked pasta dish? It is a game changer. I’d love to hear if you do something similar.The Golden Finish
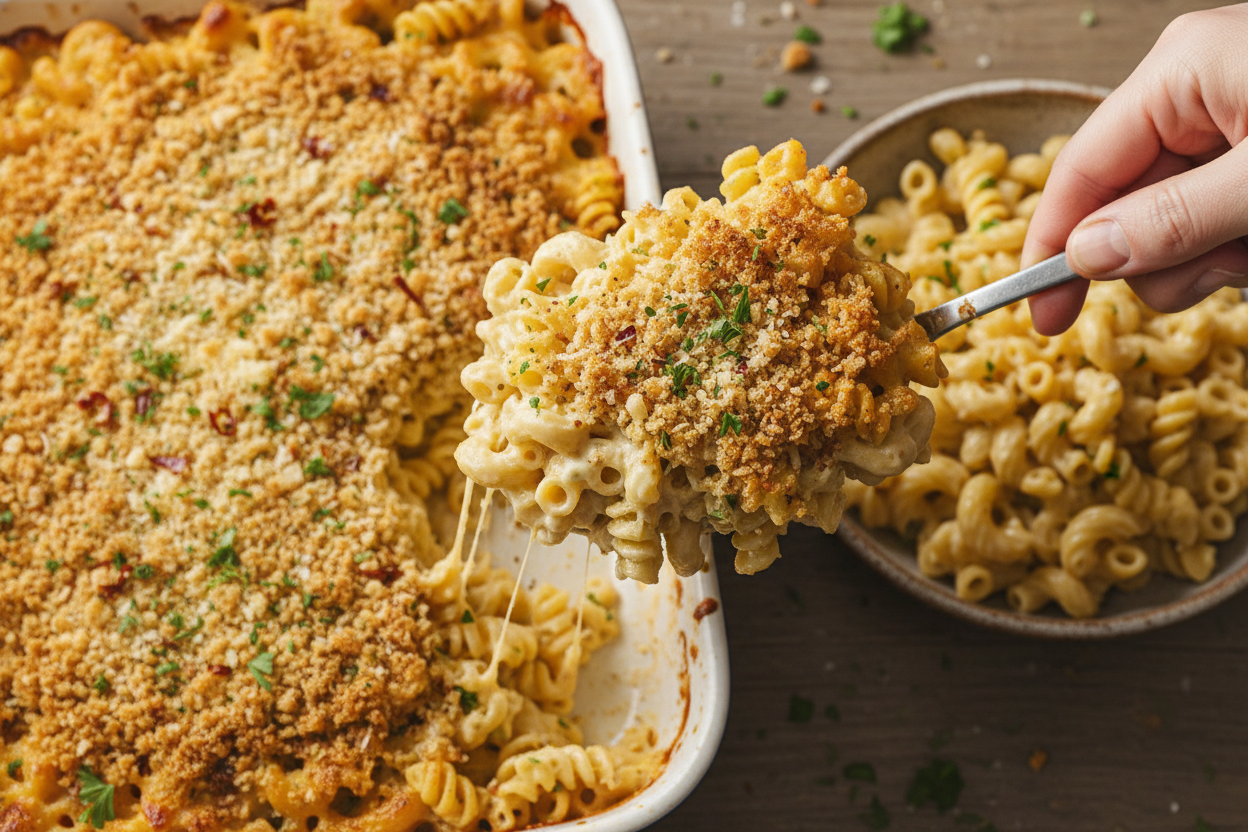
When you pull this dish out of the oven, the breadcrumb topping should be golden brown and the cheese bubbling at the edges. That is your sign that everything is perfect. I always sprinkle fresh parsley on top right before serving. It adds a little green pop and makes it look fancy, even if you’re just eating in your pajamas. And trust me, you will want to eat this in your pajamas. One last thing: Let it sit for about five minutes before you dig in. This helps it set so it doesn’t slide off your spoon. A little patience for a perfect bite. What is your favorite side dish to eat with mac and cheese? I like a simple green salad or some roasted broccoli.Ingredients:
| Ingredient | Amount | Notes |
|---|---|---|
| Bread crumbs | 1 cup (130g) | See notes to make your own with King’s Hawaiian bread |
| Grated parmesan cheese | ½ cup (40g) | |
| Unsalted butter | 4 tbsp | Melted; for topping |
| Salt | ½ tsp | For topping |
| Chilli flakes | 1 tsp | |
| Garlic powder | 1 tsp | For topping |
| Dry parsley | 1 tsp | |
| Cavatappi pasta or elbow macaroni | 1 lb (16oz) | |
| Unsalted butter | 4 tbsp (56g) | For mac & cheese |
| Salt | 1 tsp | For mac & cheese |
| Black pepper | 1 tsp | |
| Garlic powder | 1 tsp | For mac & cheese |
| Paprika | 1 tsp | |
| Onion powder | 1 tsp | |
| All-purpose flour | 3 tbsp | |
| Cream cheese | 2oz | Room temp |
| Whole milk | 1 ¾ cup (420g) | |
| Heavy cream | 1 cup (240g) | |
| Shredded mozzarella cheese | 1 lb | |
| Shredded Colby jack cheese | 1 lb | |
| Shredded cheddar cheese | ½ lb | |
| Chopped fresh parsley | 1 tbsp |
My Grandma’s Secret Mac and Cheese
I still remember the first time I made this for my own little ones. I burnt the topping so badly the smoke alarm went off! Doesn’t that smell amazing? It’s a special creamy baked mac and cheese with a crispy garlic bread crumb topping. This recipe handles a little messing up, just like we all do. Let’s get started together, nice and easy.
Step 1: First, get your prep done. In a bowl, mix the bread crumbs, parmesan cheese, melted butter, salt, chilli flakes, garlic powder, and parsley. Stir gently until it looks like crumbly wet sand. Set that bowl aside for later. (Hard-learned tip: Don’t skip making the bread crumbs from King’s Hawaiian bread—it adds a sweet, soft crunch that store-bought can’t match.)
Step 2: Now cook your pasta. Boil a big pot of salted water, then add your cavatappi or elbow macaroni. Follow the box directions and cook it just until it’s al dente (firm but not mushy). Drain it in a colander and set it aside. Do you know why it’s called cavatappi? It means “corkscrew” in Italian. Such a fun name!
Step 3: Shred all your cheese while the pasta cooks. You need mozzarella, Colby jack, and cheddar. Divide the shredded cheese into two equal piles. One pile goes into the sauce, the other pile gets layered on top. I always let my kids shred the cheese—they complain about sticky fingers, but they love the taste testing.
Step 4: Time to make the creamy sauce. Melt the butter in a big nonstick pan on low heat. Stir in your measured salt, pepper, garlic powder, paprika, and onion powder. Cook them for one to two minutes until the spices smell toasty. Keep the heat low or you’ll get bitter burnt bits. True or false: You should add flour right after the butter melts? Share below!
Step 5: Add the flour and stir it in for a minute. Then drop in the cream cheese. Press it flat with your spatula and mix it in as best you can. Small lumps are totally okay. Now pour in half a cup of the milk and cream mixture. Whisk it smooth, and if needed, take the pan off the heat to break up any clumps. Then add the rest of the milk and cream. Keep stirring on low heat until it bubbles and feels thicker.
Step 6: Now add half your shredded cheese (the first pile) to the sauce. Do it in three or four batches, whisking each batch until melted before adding the next. Keep the heat on the lowest setting. Once it’s all smooth and cheesy, turn off the heat. Stir in your cooked pasta until every piece is coated. You should have a very creamy, saucy bowl of happiness.
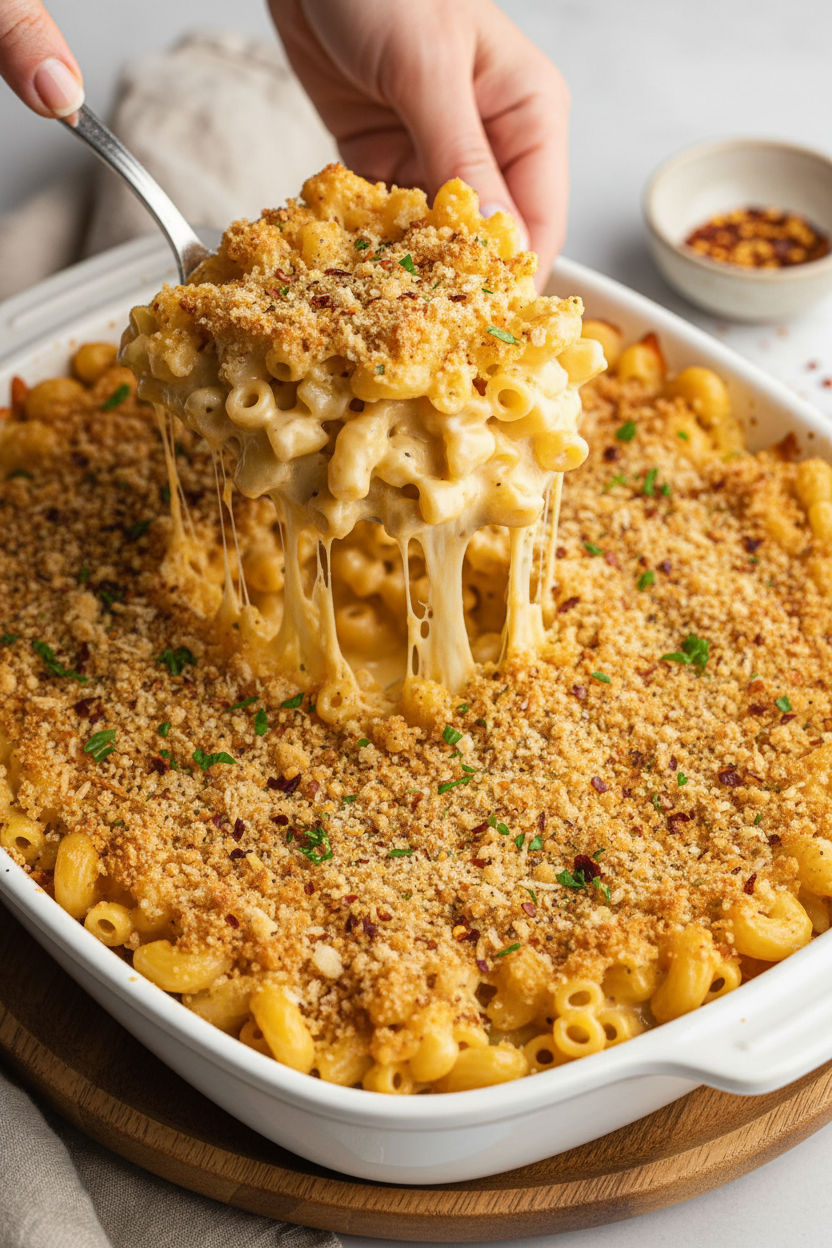
Step 7: Time to layer and bake. Put half the mac and cheese in a 9×13 dish, then sprinkle on half the second pile of cheese. Repeat with the rest of the mac and cheese, then the rest of the cheese. Scatter the bread crumb topping evenly over the top. Bake at 350°F for about 20–25 minutes, until the cheese bubbles at the edges and the topping is golden. If the topping browns too fast, lay a sheet of foil gently over the dish. Garnish with fresh parsley, and dig in while it’s warm!
Cook Time: 25 minutes
Total Time: 45 minutes
Yield: 8 servings
Category: Dinner, Comfort Food
Three Fun Twists to Try
This creamy baked mac and cheese is perfect as written, but sometimes a little change is fun. Spicy Buffalo Twist: Stir in 1/4 cup of buffalo sauce and a handful of crumbled blue cheese. It’s tangy and warm without being too hot. Veggie Lover’s Dream: Toss in two cups of steamed broccoli florets or roasted cherry tomatoes before baking. My grandson calls that “green mac.” Fall Harvest Version: Swap the chilli flakes for a pinch of cinnamon and nutmeg, and mix in 1 cup of roasted butternut squash cubes. Sounds weird but tastes like a hug. Which one would you try first? Comment below!
What to Serve Alongside
A big bowl of mac and cheese calls for simple sides. Try a crisp green salad with a lemony vinaigrette to cut through the richness. Or serve it with steamed green beans sprinkled with sea salt. For a cozy meal, pair it with roasted chicken thighs or crispy bacon bits on top. For drinks, a tall glass of cold apple cider works perfectly for everyone. Grown-ups might enjoy a light, fruity rosé wine. Which would you choose tonight?
Storing Your Mac and Cheese Like a Pro
This baked mac and cheese keeps well in the fridge for up to four days. Let it cool first, then cover the dish tightly with foil or a lid. The creamy sauce stays rich, and the topping gets a little softer. That is still very tasty. I once stored leftovers in a big glass dish and forgot about them for two days. When I reheated a square in the oven, it tasted even better than the first night. The flavors had settled in like a warm hug.
For the freezer, wrap the whole dish in plastic wrap, then foil. It will stay good for three months. Thaw it in the fridge overnight before baking. Reheat at 350F for about 20 minutes, covered, then uncover for a few minutes to crisp the top. This matters because a big batch saves time on busy weeknights. You can cook once and eat twice. Have you ever tried storing it this way? Share below!
Common Problems and Easy Fixes
Sometimes the cheese sauce turns grainy. This happens when the heat is too high. Always melt cheese on low heat. I remember when I first learned this. My sauce looked like little pebbles in milk. I had to start over. Now I keep the burner low and stir gently. The sauce stays smooth and silky every time.
Another issue is watery mac and cheese. The fix is easy. Do not overcook the pasta. Cook it al dente, so it is firm. It will soak up the sauce as it bakes. Why this matters: firm pasta keeps the dish creamy instead of runny. You get a perfect bite every time.
The topping can also burn before the cheese melts. If you see it browning too fast, cover the dish with foil. Bake until the cheese bubbles. Then remove the foil for a few minutes to brown the top. I once let the topping burn while I checked my phone. The kitchen smelled smoky. Now I watch closely. Why this matters: a golden topping adds crunch and joy. Which of these problems have you run into before?
Your Top 5 Questions Answered
Q: Can I make this gluten-free?
A: Yes. Use gluten-free pasta and a 1-to-1 flour blend. The topping can use gluten-free bread crumbs.
Q: Can I prep this ahead of time?
A: Yes. Assemble the dish, but do not add the topping. Cover and refrigerate. Add the topping right before baking.
Q: Can I swap the cheeses?
A: Yes. Gouda or Monterey Jack work well. Keep the total weight the same for a creamy sauce.
Q: How do I scale this for a crowd?
A: Double everything. Use a large 9×13 dish or two smaller ones. Baking time stays the same.
Q: Do I have to use the garlic crumb topping?
A: No. You can skip it for a classic baked mac. The cheese topping will get golden on its own. Which tip will you try first?
From My Kitchen to Yours
I hope this mac and cheese brings warmth to your table. It is the kind of dish that makes people smile. Every time I pull a bubbling dish from the oven, I think of my grandkids. They always ask for seconds. That is the best feeling. *Fun fact: this recipe uses three kinds of cheese for extra flavor and meltiness.*
Please share your results with us. Did you add extra chili flakes? Use a different pasta shape? Every kitchen has its own story. I would love to hear yours. Have you tried this recipe? Tag us on Pinterest! Happy cooking! —Chloe Hartwell.


Creamy Baked Mac and Cheese with Crispy Topping
Description
The creamiest baked mac and cheese with a golden, crispy topping. Perfect comfort food for dinner tonight!
Ingredients
Garlic bread crumb topping:
Mac & cheese:
Instructions
- In a bowl, gently mix the bread crumbs, parmesan cheese, melted butter and seasonings to make the bread crumb topping. It should have a crumbly texture. Set aside
- Boil the macaroni or cavatappi in salted water following the box instructions to reach al dente (it should be cooked through but not soft or mushy). Strain and set aside
- Shred the three types of cheeses using a grater, and mix them up. Divide them into 2 halves – one half will be incorporated into the sauce, and the other half will be layered during assembly
- In a small bowl, measure and mix the salt, pepper, garlic powder, paprika, and onion powder for the mac and cheese.
- Mix the milk and cream in a bowl or jar
- Preheat oven to 350F (conventional / no fan)
- Melt the butter in a large nonstick pan at low heat. Once melted, add the mixed seasonings and cook and stir for 1-2 minutes until fragrant. This will toast and bloom the spices to bring out their flavor; make sure to keep the heat on low throughout
- Add the flour and mix it for another minute until combined
- Then add the cream cheese, and use a spatula to press it down and mix it in as much as possible. It’s ok if there are some small lumps
- Add about half a cup of the milk and cream mixture, and use a whisk to mix it with the rest of the mixture in the pan. Take your time at this step to break down any lumps of flour or cream cheese so the mixture is completely smooth; you can also remove the pan from the heat if needed
- Then add the rest of the milk and cream mixture. Cook and stir on low heat for a few minutes until the mixture starts to bubble. It will also start to feel thicker around the same time. Once it starts to thicken, move on to the next step
- Now add half of the shredded cheese to the sauce in 3-4 batches, whisking to incorporate each batch before adding the next. Keep the heat on the lowest setting and only cook until the cheese has melted
- Once the cheese has been mixed in, turn off the heat and add the boiled pasta. Mix it until combined – you should have a very creamy, saucy mac and cheese
- In a 7×11 or 9×13 casserole dish, add half of the mac and cheese and spread it out. Top with half of the remaining shredded cheese. Then repeat with the rest of the mac and cheese and rest of the shredded cheese
- Finally, add the bread crumb topping on top of the mac and cheese and spread it out
- Place the casserole dish in the preheated oven and bake for ~20-25 minutes, until the cheese has melted (you will see it bubbling on the corners or the dish) and the breadcrumb topping is golden brown. If the topping starts to brown too quickly before the cheese melts, add a sheet of foil on top of the dish and continue baking.
- Remove from the oven, garnish with fresh parsley, serve and enjoy!
Notes
- Garlic bread crumb topping: (see notes on how to skip this)


Leave a Reply