
Why I Love This Recipe
This chicken reminds me of Sunday dinners at my friend Mary’s house. She always made a big mess in the kitchen, but the smell was worth it. I still laugh at how she would chase her dog away from the breadcrumbs. The trick is the crispy coating. It keeps the chicken juicy inside. That matters because nobody likes dry chicken. It’s like a happy little secret for your taste buds. *Fun fact: Parmesan cheese comes from a place in Italy called Parma. People there have been making it the same way for nearly 1,000 years.*Getting the Chicken Ready
First, you pound the chicken flat. Use a meat mallet or a rolling pin. I once used a heavy coffee mug – it worked fine. Make them about half an inch thick. This helps them cook evenly and fast. Sprinkle a little salt and pepper on both sides. Doesn’t that smell amazing already? Why does this step matter? Thick chicken burns on the outside before it’s done inside. Pounding it makes sure you get a golden crust without a raw middle.The Three Bowls Dance
Now set up three shallow bowls. Bowl one has flour. Bowl two has beaten eggs. Bowl three has breadcrumbs, Parmesan, basil, and pepper. Dredge the chicken in flour first. Shake off the extra. Then dip it in the egg. Finally, press it into the breadcrumb mix until it looks like a snowy hill. Have you ever made a mess breading chicken? It’s part of the fun. Just lick your fingers after (but only if nobody is watching).Frying Time Tips
Heat your skillet with olive oil over medium heat. You want it hot, but not smoking. Place the coated chicken in the pan. Let it sizzle. Cook each side for 4 to 5 minutes. The crust should turn golden brown. Flip carefully with tongs. Press down gently so it browns even. Why does this matter? Too high heat burns the crust. Too low makes it soggy. You want that perfect crunch. What do you like to dip your chicken in?Checking If It’s Done
The best way to know is a meat thermometer. Look for 165 degrees Fahrenheit inside. I always check the thickest piece. No thermometer? No problem. Cut into the thickest part. The juices should run clear, not pink. Let the chicken rest for 2 or 3 minutes on a plate. Resting keeps the juices inside. If you cut too soon, they run out and leave dry meat. That is a sad mistake I only made once.Serving It Up
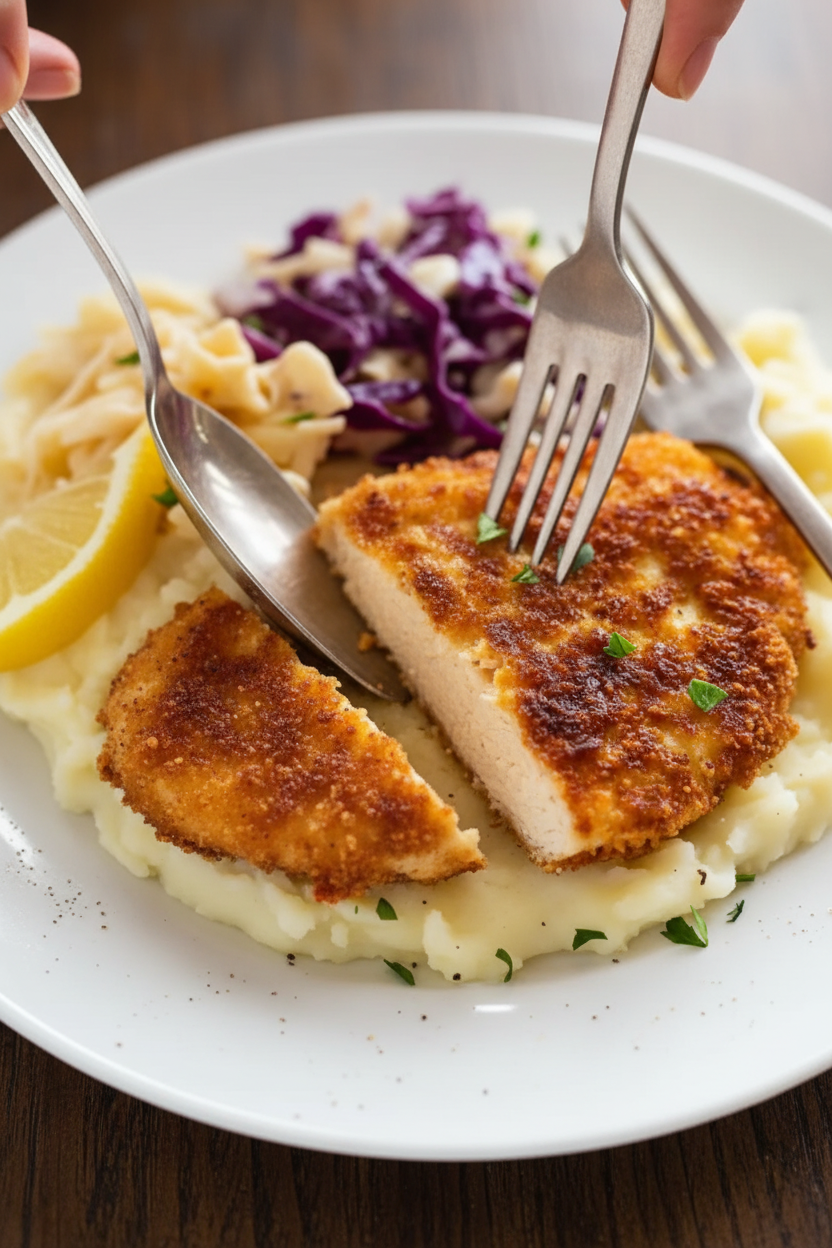
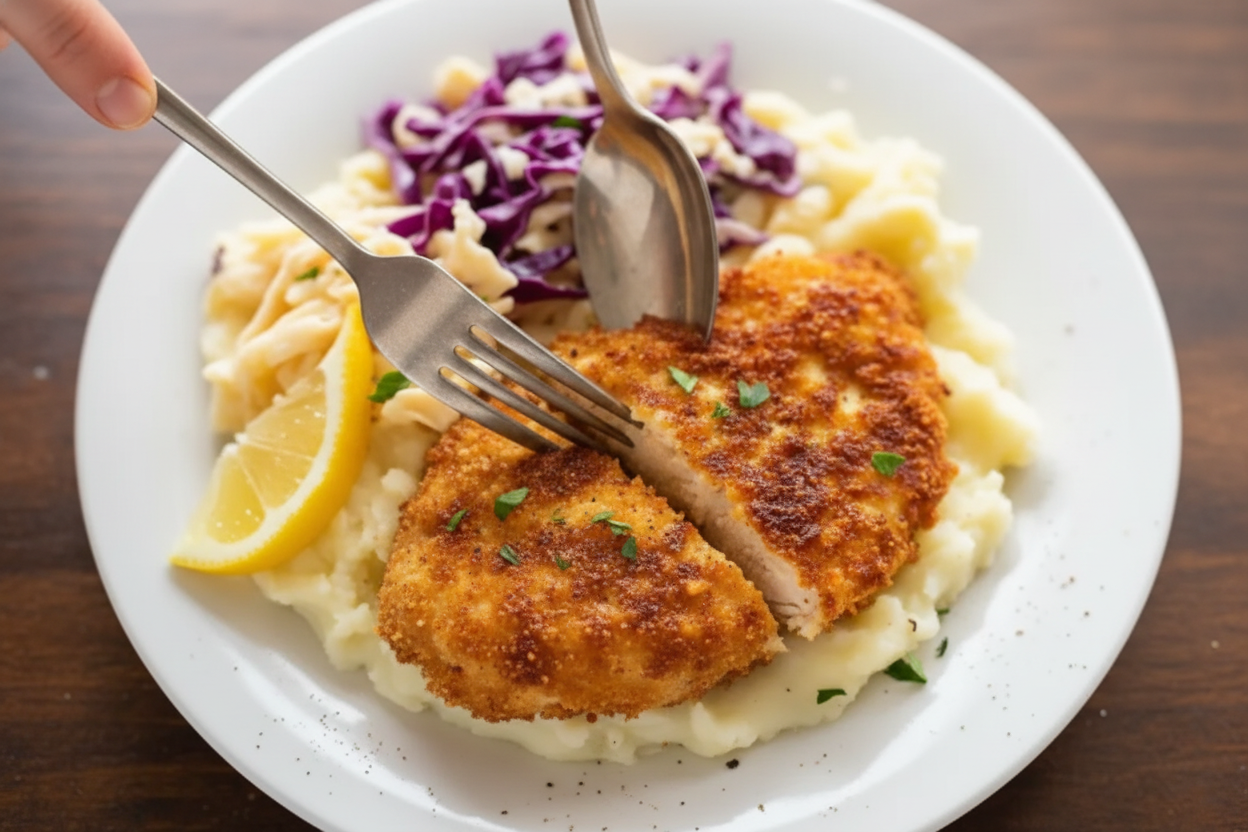
Slice the chicken into strips or serve whole. Sprinkle fresh parsley on top. Maybe add a little more Parmesan cheese for fun. I like mine with a side of roasted broccoli and mashed potatoes. My grandkids love it with ketchup (don’t judge). What sides would you pick for this meal?A Little Story from My Kitchen
One time I was making this for a big family dinner. My cat jumped on the counter and knocked over the breadcrumb bowl. It went everywhere. I still laugh at that. We ate chicken with a few cat hairs on the floor. Nobody noticed because it tasted so good. That’s how I know this recipe is special. Have you ever had a kitchen disaster that turned into a happy memory? Share it with me. I love hearing your stories.Ingredients:
| Ingredient | Amount | Notes |
|---|---|---|
| Extra virgin olive oil | 2 tablespoons | For garlic-infused coating |
| Fresh garlic | 1 clove | Finely minced |
| Seasoned bread crumbs (dry) | 1 cup | For savory crust mixture |
| Parmesan cheese (freshly grated) | ⅔ cup | For savory crust mixture |
| Dried basil | 1 teaspoon | For savory crust mixture |
| Freshly ground black pepper | ¼ teaspoon | For savory crust mixture |
The Best Chicken I Ever Burned (And Then Perfected)
I still laugh when I think about my first crispy chicken. I was so proud, until I flipped it and saw a black, smoky mess. My kitchen smelled like a campfire for days. But that disaster taught me a secret: patience and a good crust make all the difference. This recipe is the happy ending to that story.
There is something magical about Parmesan. It gets all golden and crunchy, like a little cheese blanket for your chicken. My grandma used to say it was “the good kind of fancy.” I think she was right. Doesn’t that sizzling sound smell amazing already?
Let me walk you through it. I promise it is easier than you think. Grab your favorite music, maybe a friend to help, and let’s make some kitchen memories. Here is how we get that perfect crunch every single time.
Step-by-Step: Crispy Parmesan Chicken
Step 1: First, grab two chicken breasts. Place one between two pieces of plastic wrap. Use a rolling pin or a heavy mug to gently pound it flat, about half an inch thick. (Hard-learned tip: Pounding it even means it cooks evenly. No one likes a raw middle!) Sprinkle a little salt and pepper on both sides.
Step 2: Now set up your three bowls. Bowl one gets half a cup of flour. Bowl two gets two beaten eggs. Bowl three gets one cup of breadcrumbs, two-thirds cup of grated Parmesan, a teaspoon of dried basil, and a pinch of black pepper. Mix the dry stuff in bowl three with a fork. (Doesn’t that smell like a fancy restaurant already?)
Step 3: Take a chicken piece and coat it in the flour. Shake off the extra. Then dip it in the egg, letting the extra drip off. Finally, press it into the breadcrumb mix. Make sure every spot is covered. I like to press firmly with my fingers. It feels like making a sandcastle at the beach.
Step 4: Heat a big skillet over medium heat. Add about three tablespoons of olive oil. Wait until the oil shimmers, like a little mirror. Gently place the coated chicken in the pan. Do not crowd them. Give each piece some breathing room. Listen to that happy sizzle.
Step 5: Cook for four to five minutes on the first side. Peek under the edge with a spatula. Is it golden brown? Flip it carefully with tongs. Cook another four to five minutes. (Hard-learned tip: If it browns too fast, turn the heat down. Burnt chicken makes me sad.) Check the inside with a thermometer. It should be 165 degrees Fahrenheit.
Step 6: Take the chicken out and let it rest on a plate for two to three minutes. This keeps the juices inside. I always want to bite into it right away, but waiting is worth it. Slice it up and sprinkle with fresh parsley or extra cheese. Now, here is a fun question: What is your favorite side dish to dunk in the crispy crumbs? Share below!
Cook Time: 10–12 minutes
Total Time: 25 minutes
Yield: 2–4 servings
Category: Dinner, Main Dish
Three Fun Twists to Try Next Time
Cheesy Veggie Cutlets: Skip the chicken. Use thick slices of zucchini or eggplant instead. Follow the same coating and frying steps. It comes out super tender and crunchy. Even my meat-loving uncle asks for seconds!
Spicy Honey Crunch: Add half a teaspoon of cayenne pepper to the breadcrumb mix. After cooking, drizzle a little honey over the top. The sweet and heat dance together like old friends. It is a party in your mouth.
Lemon Herb Summer Chicken: Replace the Parmesan with a quarter cup of chopped fresh dill and parsley. Add the zest of one lemon to the breadcrumbs. It tastes like sunshine on a plate. Perfect for a picnic or a lazy Sunday. Which one would you try first? Comment below!
How to Serve This Crunchy Beauty
I love slicing this chicken into strips and piling them on a big green salad. Add cherry tomatoes and a simple lemon vinaigrette. Or serve it with buttery mashed potatoes and roasted green beans. Another idea? Slap it on a soft bun with lettuce, tomato, and a smear of mayo. It becomes the world’s best sandwich.
For drinks, I would pour a tall glass of icy lemonade. It cuts through the richness perfectly. If adults are joining, a crisp white wine like Pinot Grigio works wonders. It feels fancy but cozy at the same time. Which would you choose tonight?
How to Store and Reheat Your Crispy Chicken
Storing this chicken the right way keeps it crispy. Let the chicken cool completely on a wire rack. Then wrap each piece in foil and place in a fridge container. It will stay good for up to three days. I once stuffed a warm piece in a bag and found it soggy the next day. What a mess! For freezing, wrap each piece in foil and put them in a freezer bag. They can last up to two months. To reheat, use a hot skillet with a little oil. Do not use the microwave. It will make the coating soft. This matters because you worked hard on that crunch. You want to taste it again later. Batch cooking saves time on busy weeknights. Make extra for lunch or dinner the next day. Have you ever tried storing it this way? Share below!
Three Common Problems and Easy Fixes
First, the coating falls off in the pan. This happens when you skip the flour step. The flour helps the egg stick. Then the breadcrumbs hold tight. Always use that first bowl of flour. I remember my first time, I thought I could skip it. The chicken looked sad and bare. Second, the chicken burns on the outside but is raw inside. Your pan is likely too hot. Lower the heat to medium and cook slower. This matters because burnt chicken tastes bitter. No one wants that. Third, the crust is not crispy enough. You might be crowding the pan. Give each piece space so the heat gets around. Cooking in small batches fixes this problem right up. Why does this matter? It builds your confidence in the kitchen. You will feel proud serving golden, crunchy chicken every time. Which of these problems have you run into before?
Five Quick Answers for Your Questions
Q: Can I make this gluten-free? A: Yes, just swap the flour and breadcrumbs for gluten-free versions. The rest works the same.
Q: Can I prep the chicken ahead of time? A: Yes, coat the chicken and place it in the fridge for up to four hours before cooking.
Q: Can I swap the Parmesan cheese? A: Sure. Try grated Pecorino or even a sharp cheddar for a different taste.
Q: Can I cook this for a big crowd? A: Yes. Double or triple the recipe. Just cook in smaller batches so each piece gets crispy.
Q: Do I really need to pound the chicken? A: Yes. It helps the chicken cook evenly and stay juicy. Which tip will you try first?
A Warm Goodbye From My Kitchen to Yours
*Fun fact: My grandmother always said a good crust is like a hug for the chicken.* I hope this recipe brings you comfort and joy. Cooking is about sharing and learning together. Please send me your photos or tell me how it turned out. I love seeing the crispy, golden pieces you make. Have you tried this recipe? Tag us on Pinterest! Happy cooking! —Chloe Hartwell.

Crispy Parmesan Crusted Chicken Breast Recipe
Description
Crispy Parmesan crusted chicken breast recipe topped with golden cheese. Easy, juicy, and perfect for dinner. gluten free, keto friendly, high protein, low carb, quick dinner recipe
Ingredients
Instructions
- Pound the chicken breasts to an even thickness, about ½ inch, using a meat mallet or rolling pin for quicker, even cooking.
- Season both sides of the chicken with a light sprinkle of salt and black pepper.
- Set up three shallow bowls: Bowl 1: All-purpose flour. Bowl 2: Beaten eggs. Bowl 3: A mixture of breadcrumbs, grated Parmesan cheese, garlic powder, and dried Italian herbs.
- Dredge each chicken breast in the flour, shaking off the excess. Then dip into the egg wash, and press into the breadcrumb-Parmesan mixture until fully coated.
- Heat a large skillet over medium heat and add about 3 tablespoons of olive oil.
- Place the coated chicken breasts in the hot pan. Cook for 4–5 minutes on each side, or until the coating is golden and the internal temperature of the chicken reaches 165°F (74°C).
- Flip carefully using tongs, pressing gently to ensure even browning. Adjust heat as needed to prevent burning.
- Remove from the skillet once crispy and cooked through. Let rest for 2–3 minutes before slicing.
- Serve immediately, garnished with fresh parsley or extra Parmesan, and enjoy with your favorite sides.
Notes
- For the garlic-infused coating, mix 2 tablespoons of extra virgin olive oil with 1 clove of finely minced fresh garlic. For the savory crust mixture, combine 1 cup dry seasoned bread crumbs, ⅔ cup freshly grated Parmesan cheese, 1 teaspoon dried basil, and ¼ teaspoon freshly ground black pepper.


Leave a Reply