
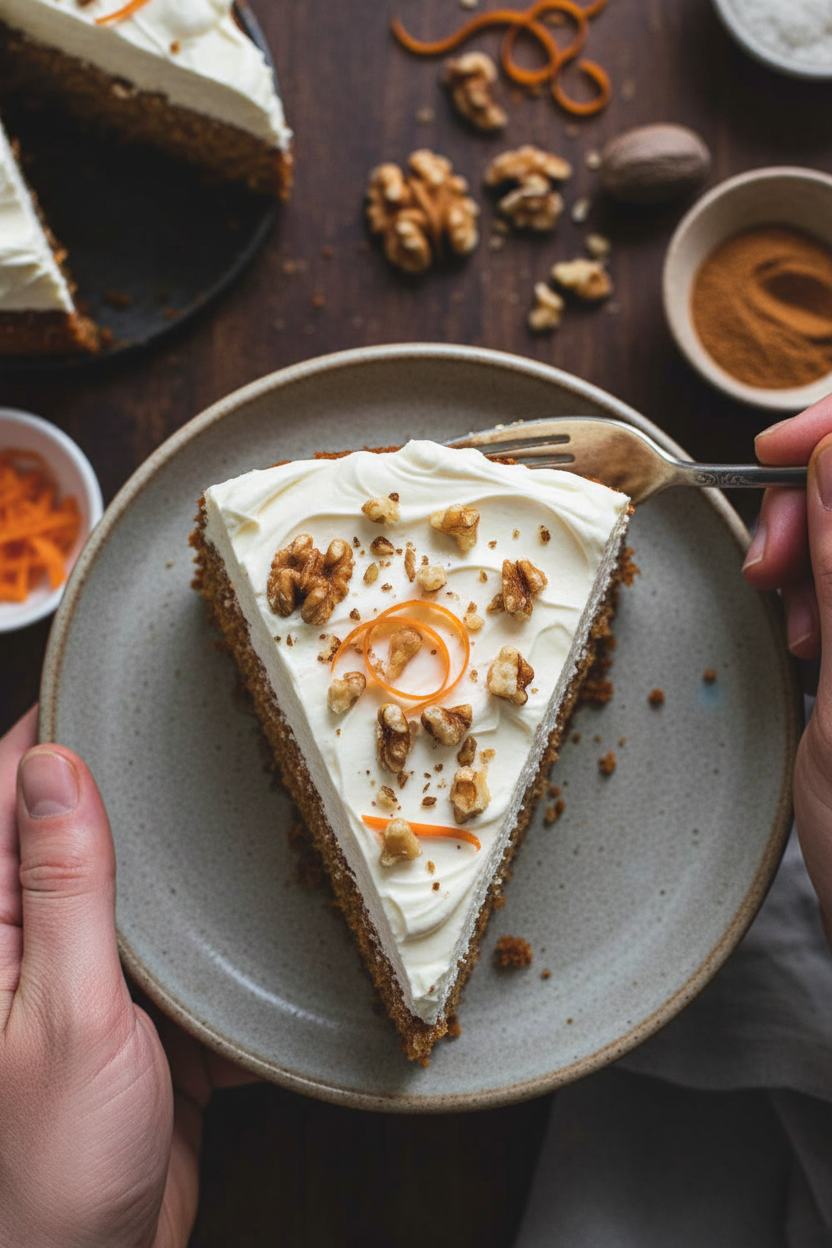
Why I Love This Carrot Cake Cheesecake
I remember the first time I tried to make a dairy-free cheesecake. It was for my neighbor’s little girl, who couldn’t have milk. I was nervous. Would it taste like real cheesecake? The answer was yes. And this carrot cake version is even better. The warm spices and sweet carrots feel like a hug on a plate. The creamy cheesecake on top makes it extra special. Have you ever had carrot cake before? What do you like best about it?A Slice of History (and a Little Life Lesson)
Carrot cake has been around for a long time. People started putting carrots in sweet cakes because carrots are naturally sweet. It was a clever way to use up vegetables from the garden. This recipe taught me something important. Sometimes you have to be patient. The cheesecake needs time to chill in the fridge for at least 4 hours. I know it is hard to wait. But when you finally take that first bite, you will be so glad you did. Why does this matter? Patience in the kitchen makes the food taste better. It also teaches you a good habit for other parts of life. Do you think you can wait a few hours for a delicious dessert? I bet you can.My Little Kitchen Mistake
I still laugh at the time I forgot to put foil around the springform pan. Water from the hot bath leaked right into my cheesecake. It turned into a soupy mess. My family still teases me about it. Now, I make sure to wrap the pan tightly with foil. It only takes a minute but saves you a lot of tears. Doesn’t that smell amazing when it bakes? The cinnamon and nutmeg fill up the whole house. Here is a question for you: Have you ever made a silly mistake in the kitchen? What happened? I promise you are not alone.Two Versions, Same Yummy Taste
This recipe gives you two choices. You can make it with regular dairy ingredients. Or you can make it dairy-free. Both taste wonderful. I use Kitehill cream cheese for the dairy-free version. It works really well. The steps are almost the same for both. Just swap the sour cream and cream cheese for dairy-free kinds. Everything else stays the same. Do you or someone in your family have trouble with dairy? This recipe lets everyone enjoy dessert together. *Fun fact: Carrots were originally purple, not orange. Orange carrots came from Dutch farmers in the 1600s.*Tips for a Smooth Cheesecake
Here is a secret. Make sure your eggs, cream cheese, and sour cream are at room temperature. Cold ingredients make lumps. Warm ingredients blend into a silky, creamy batter. Mix the cream cheese on medium-low speed. High speed adds too much air. Air bubbles can crack your cheesecake. We want it smooth and pretty. Why does this matter? A little bit of care makes your food look as good as it tastes. You are not just cooking. You are creating something beautiful. What is your favorite thing to bake when you want it to look perfect?The Water Bath Trick
Baking the cheesecake in a water bath sounds fancy. It is just a bigger pan with hot water. The water keeps the oven moist. This helps the cheesecake bake gently and not crack. Put your springform pan inside a large roasting pan. Carefully pour hot water until it comes halfway up the sides. Then bake for 50 minutes without opening the door. The cheesecake will be slightly jiggly in the middle. That is perfect. After baking, turn off the oven and crack the door open. Let the cake rest inside for one hour. Then cool it on the counter. This slow cooling stops it from cracking. Have you ever made a water bath before? It is easier than it sounds.Frosting and Final Thoughts
Once the cake is fully chilled, it is time for frosting. For the dairy version, beat cream cheese and butter until fluffy. Slowly add powdered sugar and vanilla. For dairy-free, use a store-bought dairy-free cream cheese frosting. Both are delicious. Spread the frosting all over the top. You can even make little swirls with a spatula. Put the cake back in the fridge until you are ready to serve. I hope you try this recipe and share it with people you love. Food is about more than feeding our stomachs. It is about feeding our hearts. What special dessert do you love making for your family? I would love to hear your story.Ingredients:
| Ingredient | Amount | Notes |
|---|---|---|
| Gluten Free 1:1 Flour | 1 cup | Carrot cake layer |
| Corn starch | 1 tablespoon | Carrot cake layer |
| Sugar | ½ cup | Carrot cake layer |
| Baking Powder | 1 teaspoon | Carrot cake layer |
| Baking Soda | ½ teaspoon | Carrot cake layer |
| Ground cinnamon | 1 teaspoon | Carrot cake layer |
| Nutmeg | ¼ teaspoon | Carrot cake layer |
| Ginger | ¼ teaspoon | Carrot cake layer |
| Vegetable oil | ½ cup | Carrot cake layer |
| Large eggs | 2 | Room temperature; for carrot cake layer |
| Shredded carrots | 1 cup | Carrot cake layer |
| Vanilla Extract | ½ teaspoon (dairy-free) / 1 ¼ teaspoon (full dairy) | Carrot cake layer |
| Dairy-free cream cheese | 24 oz | Kitehill recommended; cheesecake layer |
| Dairy-free sour cream | ½ cup | Room temperature; cheesecake layer |
| Large eggs | 2 | Cheesecake layer |
| Sugar | ⅔ cup | Cheesecake layer |
| Vanilla Extract | 1 ¼ teaspoon | Cheesecake layer |
| Gluten Free 1:1 Flour | 3 tablespoons | Cheesecake layer |
| Dairy-free cream cheese frosting | As needed | For the top; dairy-free version |
| Cream cheese | 4 oz | Softened; frosting (full dairy version) |
| Butter | 4 tablespoons | Softened; frosting (full dairy version) |
| Powdered sugar | 1 ½ cups | Frosting (full dairy version) |
| Vanilla | 1 teaspoon | Frosting (full dairy version) |
| Cream cheese | 24 oz | Softened; full dairy cheesecake layer |
| Sour cream | ½ cup | Room temperature; full dairy cheesecake layer |
| Large eggs | 2 | Full dairy cheesecake layer |
| Sugar | ⅔ cup | Full dairy cheesecake layer |
| Vanilla Extract | 1 ¼ teaspoon | Full dairy cheesecake layer |
My Secret to the Best Dairy-Free Carrot Cake Cheesecake
I remember the first time I tried to make a cheesecake without dairy. It was a total flop. The top cracked like a dried-up riverbed. I still laugh at that sad cake sitting on my counter. But I learned something important that day. You just need a little patience and the right tricks. This recipe is my love letter to all of you who miss that creamy, dreamy dessert.
The secret is getting your ingredients to room temperature. Does that sound boring? Trust me, it is magic. Cold cream cheese makes lumps, and nobody wants lumpy cheesecake. Let your eggs, cream cheese, and sour cream sit out for about an hour. That way everything blends together like a happy family reunion. You will thank me later.
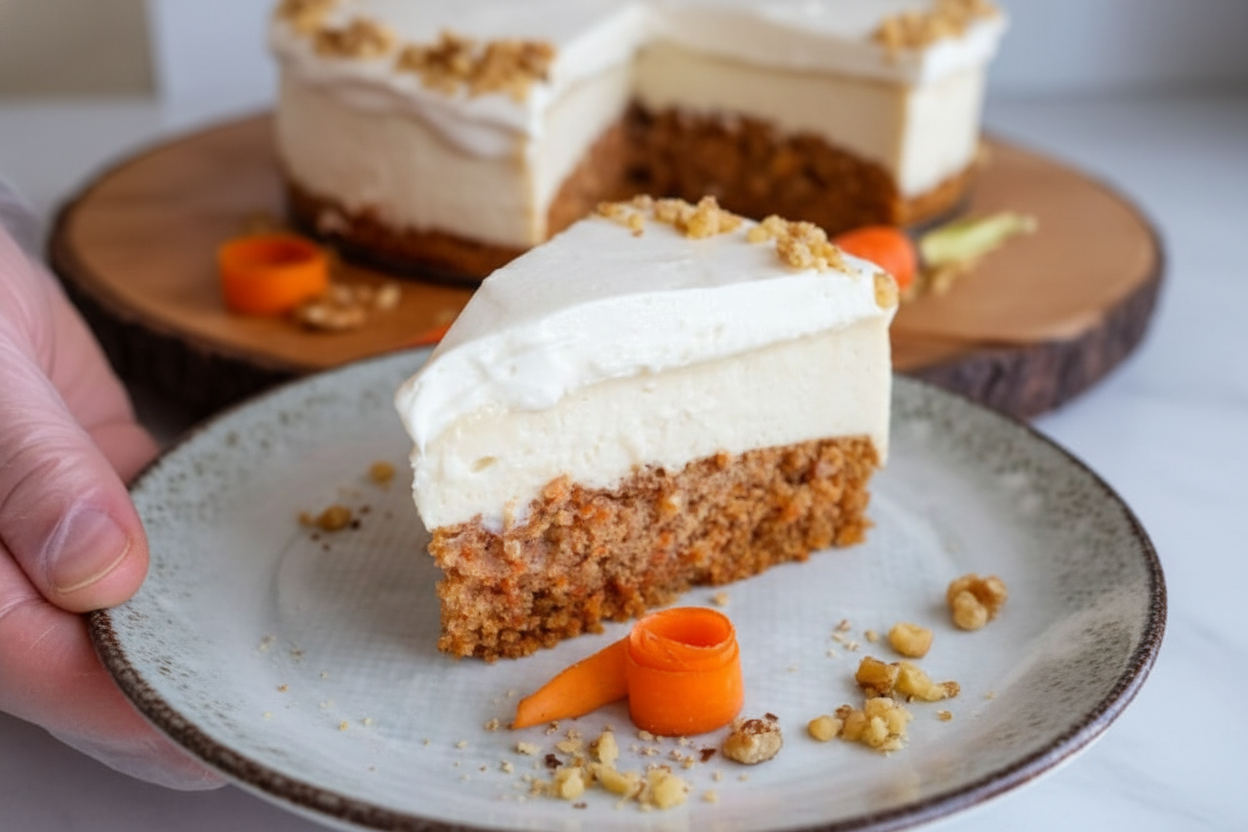
This cake has two layers that work together perfectly. The bottom is a spiced carrot cake that is soft and sweet. The top is a silky, tangy cheesecake that melts in your mouth. You get two treats in one slice. My grandson calls it “the best of both worlds.” I think he is right.
Now, let me walk you through this step by step. I will be right here with you. No fancy chef talk, just my real kitchen table advice. Ready? Grab your mixing bowls and let us bake something wonderful. Doesn’t that smell amazing already?
Let’s Bake It Together
Step 1: First, take your cream cheese, sour cream, and eggs out of the fridge. Let them sit on the counter for about an hour. This is the most important step for a smooth cheesecake. I once rushed this part and ended up with tiny white lumps in my batter. Never again.
Step 2: Preheat your oven to 350 degrees. Spray your 9-inch springform pan with nonstick spray. In a bowl, whisk together the flour, cornstarch, sugar, baking powder, baking soda, cinnamon, nutmeg, and ginger. The spices will smell like fall in a bowl. (Hard-learned tip: Do not skip the cornstarch. It keeps the gluten-free flour from turning gummy.)
Step 3: In another bowl, whisk together the oil, eggs, and vanilla. Fold in your shredded carrots with a spatula. Slowly add the dry mix to the wet mix. Stir just until combined. Overmixing makes the cake tough, so be gentle like you are tucking in a baby.
Step 4: Pour the carrot cake batter into your pan. Bake for 18 to 20 minutes. The edges should look set, but the center will still be soft. While it bakes, start your cheesecake layer. Beat the cream cheese on medium-low until it is smooth and creamy. Add the sour cream, eggs, sugar, vanilla, and the extra flour. Mix slowly until it is all combined.
Step 5: Take the carrot cake out of the oven and lower the heat to 325 degrees. Wrap the bottom of the springform pan tightly with foil. Place it inside a bigger pan, like a roasting dish. Carefully pour hot water into the big pan until it reaches halfway up the springform. This is your water bath. It keeps the cheesecake from cracking.
Step 6: Pour the cheesecake mixture right on top of the warm carrot cake. Bake for 50 minutes. Do not open the oven door during this time. I know it is hard not to peek. The cheesecake should be slightly jiggly in the center when done. No air bubbles on top means you did it right. What is your biggest baking challenge? Share below!
Step 7: Turn off the oven and crack the door open. Let the cheesecake sit inside for one full hour. Then take it out and let it cool on the counter for 30 minutes. Remove the foil from the bottom and let it cool another 30 minutes. Finally, place it in the fridge for 4 to 6 hours. Overnight is even better. Patience is the hard part, but it is worth it.
Step 8: Once the cake is fully chilled, frost it with dairy-free cream cheese frosting. Spread it gently over the top. Slice with a warm knife for clean cuts. Serve cold straight from the fridge. Every bite will remind you why homemade is best.
Cook Time: 1 hour 10 minutes
Total Time: 4 to 6 hours (mostly chilling)
Yield: 10 to 12 servings
Category: Dessert, Cheesecake
3 Fun Twists to Try
Spiced Maple Swirl. Mix two tablespoons of maple syrup with a pinch of cinnamon. Drizzle it over the cheesecake batter before baking. Use a knife to make pretty swirls. It adds a cozy autumn feeling to each bite.
Coconut Carrot Crunch. Fold half a cup of shredded coconut into the carrot cake batter. Toast some extra coconut flakes to sprinkle on top of the frosting. It gives the cake a tropical, chewy surprise. My niece begs me to make this version for her birthday.
Chocolate Chip Dream. Add a quarter cup of mini dairy-free chocolate chips to the carrot cake layer. The little chocolate bits melt into the warm cake and pair beautifully with the cream cheese. It is like a hidden treasure in every slice. Which one would you try first? Comment below!
How to Serve It Like a Pro
Serve this cheesecake straight from the fridge. A cold slice holds its shape better on the plate. Add a small handful of toasted pecans on the side for crunch. A tiny drizzle of maple syrup over the frosting makes it look fancy with zero effort.
For drinks, try a tall glass of cold oat milk with a dash of cinnamon. It is sweet and creamy, just like the cake. For the grown-ups, a warm cup of spiced chai tea is wonderful. The ginger and cinnamon in the chai match the cake’s flavors perfectly. Which would you choose tonight?
Storing Your Carrot Cake Cheesecake
This cake keeps very well in the fridge. Cover it tightly with plastic wrap. It will stay fresh for up to five days. I once forgot a slice in the back of my fridge for a week. It was still good, just a little sad looking.
You can also freeze this cake for later. Wrap it in plastic wrap first. Then wrap it again in foil. It will keep for up to three months. When you want a slice, let it thaw in the fridge overnight. Why does this matter? You can make it ahead for a busy week. No rushing around on party day.
Batch cooking saves time and stress. You could make two small cakes instead of one big one. Freeze one for next month. My daughter Sarah did this for her book club. She said it felt like cheating. I call it smart planning. Have you ever tried storing it this way? Share below!
Common Problems and Easy Fixes
The first problem is a cracked cheesecake top. This happens when the oven is too hot. Always bake at the lower temperature. The water bath helps too. I remember my first cheesecake. It looked like a map of the moon. Now I know better.
The second problem is a lumpy cheesecake layer. Cold cream cheese causes lumps. Always let it sit out for an hour first. Room temperature is key. This matters because smooth texture makes the cake taste richer. You will feel proud when it comes out silky.
The third problem is a soggy carrot cake bottom. Make sure you bake the carrot cake layer first. Do not skip the 18 to 20 minutes. That first bake gives it a sturdy base. Which of these problems have you run into before? Fixing these small things builds your cooking confidence. You will feel like a pro in no time.
Five Quick Answers to Your Questions
Q: Can I make this gluten-free?
A: Yes. The recipe already uses gluten free 1 to 1 flour. It works great.
Q: Can I make it a day ahead?
A: Absolutely. Make it the night before. The flavors get even better overnight.
Q: Can I swap the cream cheese?
A: For dairy-free, use Kite Hill brand. For regular, any block cream cheese works fine.
Q: Can I halve the recipe?
A: Yes. Use a smaller pan, like a 6-inch springform. Adjust baking time by a few minutes.
Q: Any tips for a pretty top?
A: Grate extra carrot on top after frosting. Which tip will you try first?
A Final Note from My Kitchen to Yours
Thank you for spending time with me today. I love how this cake brings two desserts together. It feels special, but it is not hard to make. My grandkids beg for it every birthday.
I hope you give it a try. Take a picture when you do. Food tastes better when we share it. Have you tried this recipe? Tag us on Pinterest! I love seeing your creations. Happy cooking! —Chloe Hartwell.
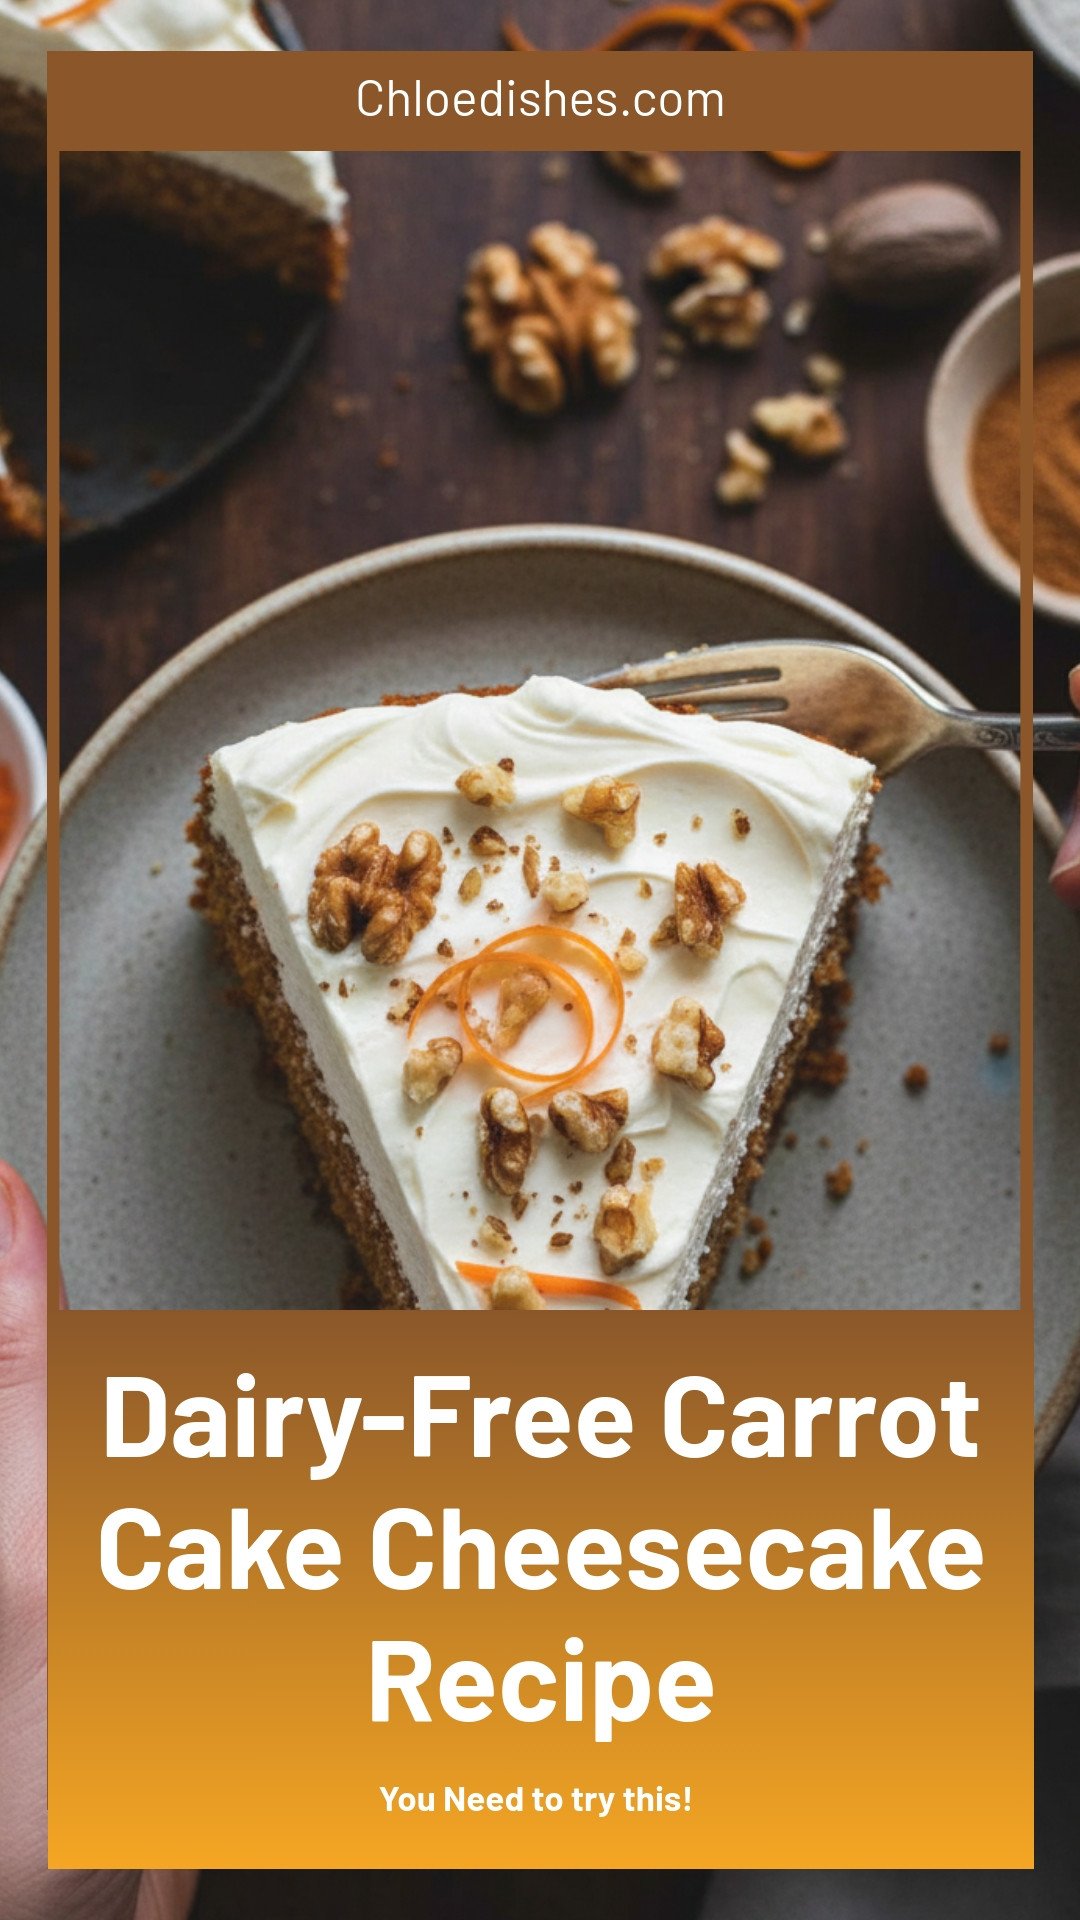
Dairy-Free Carrot Cake Cheesecake Recipe
Description
Indulge in a creamy dairy-free carrot cake cheesecake. This vegan dessert is perfect for Easter brunch or a healthy treat.
Ingredients
DAIRY-FREE VERSION
Carrot cake layer
Cheesecake layer
For the top
FULL DAIRY VERSION
Carrot cake layer
Cheesecake layer
Frosting
Instructions
- Make sure that your eggs, cream cheese, and sour cream are all at room temperature. This will give you a smooth, creamy, lump free texture.
- Preheat your oven to 350 ℉. Lightly spray a 9” springform pan with nonstick baking spray.
- Carrot Cake layer: Add the flour, cornstarch, spices, baking powder, and baking soda to a bowl and whisk to combine.
- In a separate bowl add the oil, eggs, and sugar and mix to combine.
- Fold in the carrots.
- Slowly add in the dry ingredients and mix to just combine. You want to be careful of not overmixing.
- Pour the carrot cake batter into the prepared springform pan.
- Let your cake bake for 18-20 minutes. Keep in mind that it’s going to bake longer with the cheesecake layer.
- Cheesecake Layer: While your cake is baking make your cheesecake layer. Add the cream cheese to a bowl and mix on medium low until it is smooth and creamy without any lumps.
- Add the remaining ingredients and mix on medium low until creamy and completely combined.
- Once the carrot cake is done remove the pan from the oven and turn the oven down to 325 ℉
- Line the bottom of the springform pan with foil to prevent any water from getting in.
- Place the springform pan into a larger pan such as a roaster.
- Carefully fill the pan with water until it reaches halfway up the springform pan.
- Pour the cheesecake mixture on top of the carrot cake.
- Allow the carrot cake cheesecake to bake for 50 minutes. Do not open the oven door during this time! The cheesecake should be slightly jiggly in the center with no air bubbles.
- Turn off the oven and crack the oven door open. Allow the cheesecake to remain in the cooling oven for an hour.
- Remove the cake from the oven and allow it to cool further on the counter for another 30 minutes.
- Carefully remove the foil from the bottom of the pan and allow the cake to cool an additional 30 minutes on the counter.
- Place the cake into the refrigerator and let it chill for an additional 4-6 hours. You can do this the night before.
- Frosting: Once completely cooled and set frost the cake with Dairy Free Cream Cheese Frosting.
- Carrot cake layer: Preheat oven to 350 ℉. Lightly coat 9 inch springform pan.
- In bowl, combine all dry carrot cake ingredients. In mixer, whisk together eggs, oil, and sugar until combined.
- Fold in carrots.
- Slowly add in dry ingredients and mix until combined.
- Pour into pan and bake for 18-20 minutes.
- Cheesecake layer: While baking, prepare cheesecake mixture. On medium low, beat cream cheese until there are no clumps. (Medium low will prevent too much air from entering).
- Add in sour cream, eggs, sugar, and vanilla.
- Mix on medium-low for another 2 minutes.
- Once carrot cake is done, lower oven temp to 325℉, cover the bottom of the springform pan with foil to prevent water from entering.
- Place springform pan in a larger pan and fill with water ½ way.
- Pour cheesecake mix on top of the carrot cake. Bake for 50 mins. Cheesecake should be slightly jiggly in the center with no air bubbles on top.
- Turn off oven. Crack oven and leave in for 1 hour to cool.
- Remove from oven, and let cool another 30 mins on the counter.
- Remove foil, cool for 30 more mins then place in fridge for 4-6 hours.
- Frosting: Beat cream cheese and butter for 1-2 mins. Slowly add remaining ingredients and mix until its smooth. Frost cake and place in the fridge until ready to serve.


Leave a Reply