
A Cookie That Says ‘You Can Eat Me’
The best recipes are the ones that let everyone join the party. That is why I love these dairy-free sugar cookies. They taste just like the cookies my grandma used to make, but they are kind to tummies that cannot handle butter or milk. I remember the first time I made them for my friend Sarah. She has a dairy allergy and always felt left out at bake sales. When she bit into one, her eyes got wide. She said, “Chloe, this is real cookie magic.” I still laugh at that. It is not magic. It is just cornstarch and love. If you have a friend or a family member who skips dessert, this recipe is your secret weapon. *Fun fact: Cornstarch is the trick that makes these cookies soft, even without butter. It is like a cozy blanket for the dough.* Have you ever had to change a recipe for someone you love? What do you miss most in a classic cookie?Butter That Comes from Plants
You might wonder: does dairy-free butter really work? Yes, it does. I use a stick of plant-based butter that you keep in the fridge. It creams up with the sugar just like regular butter. Do not use the spreadable kind from a tub. It has too much water, and your cookies will flatten. This matters because butter is the heart of a sugar cookie. When you get the right one, your dough feels soft and happy. You can use coconut oil too, but the cookies will be a little more crumbly. That is okay. Crumbly still tastes like a hug. When you cream the butter and sugar, take your time. Set a timer for five minutes. The mixture should look light and fluffy, like a cloud. Does that sound like a lot of work? Your reward is a cookie that melts in your mouth. Why this matters: patience in mixing makes the difference between a good cookie and a great one. Do you have a favorite brand of dairy-free butter? I am always looking for new ones to try!Rolling, Cutting, and Little Messes
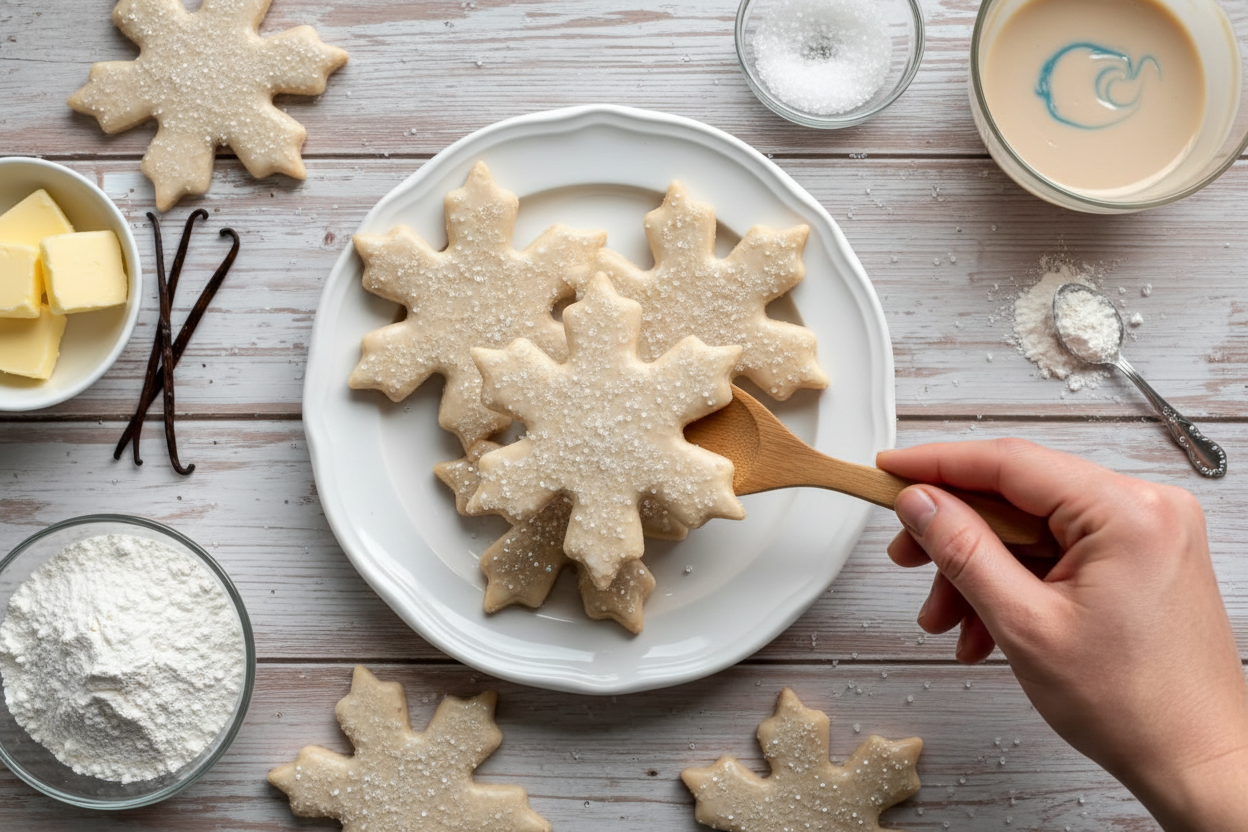
This dough is very forgiving. That means it does not get mad if you handle it a lot. My niece Lily once rolled hers too thin, and the cookies came out like crackers. We laughed and called them “crunchy stars.” She ate them all anyway. The point is: do not stress. Flour your rolling pin and your parchment paper. The dough will stick less. If it gets too soft, pop it in the fridge for ten minutes. That is a little grandma trick. Cold dough is easier to cut into stars, hearts, or silly dinosaur shapes. Bake them just until the edges look set. They should still be pale. Overbaked cookies are sad cookies. This matters because sugar cookies are supposed to be tender, not crunchy like store-bought ones. What is your favorite cookie cutter shape? I still use a rusty old reindeer one from 1987.The Icing That Pours Like a Dream
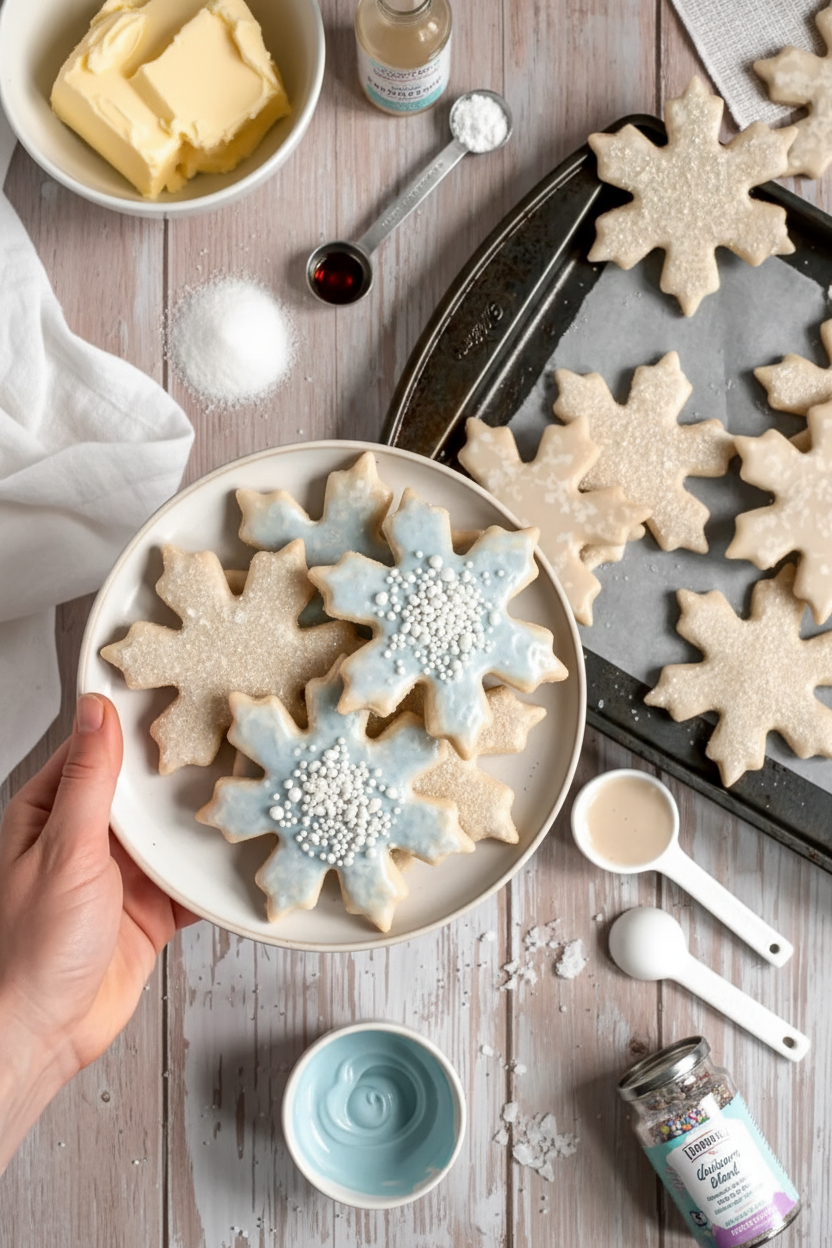
Now for the best part: the icing. You only need four things. Powdered sugar, dairy-free milk (I use oat milk), a little corn syrup, and vanilla. The corn syrup makes it shiny, so your cookies look like they came from a bakery. You can skip it, but the icing will look matte. Both are delicious. Whisk it until it is smooth. If it is too thick, add a drop more milk. Too thin? Add a spoonful of powdered sugar. You want it to pour off the spoon like thick honey. Then dip your cookies, add sprinkles, or paint them with a little brush. Why this matters: homemade icing lets you control the sweetness. You can make it less sugary if you like. And your kitchen will smell like vanilla heaven. Doesn’t that smell amazing?Gluten-Free? Yes, Please
I put a gluten-free option in the recipe because I believe everyone deserves a sugar cookie. Just swap the regular flour for a 1:1 gluten-free baking blend. I use the one with a blue label. Do not use almond flour or coconut flour. They do not work the same way. I tested this for my neighbor Mr. Garcia. He has celiac disease, so he cannot have any wheat. He brought the cookies to his book club, and nobody guessed they were gluten-free. That is the highest compliment. He told me, “Chloe, these are the real deal.” This matters because food is about bringing people together. A cookie should not be a barrier. It should be a bridge. If you need a gluten-free option, this recipe is your new best friend. Do you cook for someone with a food allergy? How do you make them feel included?Store Them Like a Pro
These cookies keep well. At room temperature, they stay soft for five days. In the fridge, they last two weeks. But who has cookies that long? In my house, they vanish in two days. Still, it is good to know. You can freeze the baked cookies for up to six months. Wrap them in plastic wrap, then put them in a zip bag. When you want one, let it sit out for ten minutes. That trick saved me last Christmas. I baked three batches ahead of time, and when the cousins arrived, I just pulled them out. I felt like a kitchen wizard. You can also freeze the raw dough. Shape it into a disk, wrap it tight, and thaw it in the fridge overnight. Then roll and cut whenever you want fresh cookies. That is the real magic. Do you ever bake ahead for holidays? What is your favorite shortcut?Ingredients:
| Ingredient | Amount | Notes |
|---|---|---|
| Dairy-free butter, softened | 1 cup (227g) | |
| Granulated sugar | 1 cup (200g) | |
| Vanilla extract | 1 tbsp (15ml) | |
| All-purpose flour (or gluten-free 1:1 baking blend) | 3 cups (360g) | Can sub gluten-free 1:1 baking blend |
| Cornstarch | 2 tablespoons (16g) | |
| Baking powder | 1 teaspoon | |
| Baking soda | 1/2 teaspoon | |
| Fine sea salt | 1/2 teaspoon | |
| Powdered sugar | 3 cups (360g) | For icing |
| Dairy-free milk | 4 tablespoons (60ml) | For icing |
| Light corn syrup | 1 tablespoon (15ml) | For icing |
| Vanilla extract | 1/2 teaspoon | For icing |
| Food coloring, sprinkles, etc | As desired | Optional for decorating |
The Softest Sugar Cookies, No Dairy Needed
I remember my first batch of sugar cookies. I was maybe twelve. My grandma let me cut them into star shapes, and I burned half of them. She just laughed and said the burnt ones were “toasty” and ate them with her tea. I still laugh at that memory every time I bake. These cookies bring back that same warm feeling, but they are much nicer to my tummy now.
This recipe uses dairy-free butter, so everyone can enjoy them. The secret to a soft cookie is cornstarch. It keeps them from getting too hard. Does the vanilla smell remind you of something sweet? Let me tell you a small thing I learned the hard way: never skip the five minutes of creaming the butter and sugar. It makes the cookies light and fluffy, just like a cloud.
I like to make these cookies when the weather turns chilly. They fill the whole house with a lovely, sweet smell. You can use any cookie cutter you like. Hearts for Valentine’s Day or simple circles for a snack. What is your favorite shape to cut out? … Share below!
Let’s Make These Cookies Together
Step 1: First, preheat your oven to 325ºF. Line two cookie sheets with parchment paper. This keeps the cookies from sticking, and it makes cleanup super easy. I like to tear the paper ahead of time so I am ready to go.
Step 2: In a big bowl, mix the softened dairy-free butter and sugar. Use a mixer if you have one. Add the vanilla and beat everything for about five minutes until it looks light and fluffy. (Hard-learned tip: If your butter is cold, it will not cream right. Let it sit on the counter for an hour first!)
Step 3: Now add the flour, cornstarch, baking powder, baking soda, and salt. Turn the mixer on low. Mix it just until a rough dough forms. Do not overmix, or the cookies will be tough. I once mixed too long, and my cookies came out like little rocks.
Step 4: Take the dough out and put it on a floured piece of parchment paper. Gently form it into a smooth ball. Sprinkle a little flour on top. This dough is soft, so a light touch helps.
Step 5: Roll the dough out to about ¼ inch thick. Press your cookie cutter into the dough and lift the shape out. Place it on the prepared sheet. Gather the leftover dough, roll it again, and keep cutting until it is all used up.
Step 6: Bake the cookies for about eight minutes. Look for the edges to be set but still light in color. They will not look done, but trust me, they are. Overbaking makes them dry, so keep an eye on them. Let them cool completely on the sheet.
Step 7: While the cookies cool, make the icing. Whisk the powdered sugar, dairy-free milk, corn syrup, and vanilla together until smooth. Pour it into a shallow bowl. Dip the tops of the cookies in the icing and add sprinkles or food coloring. Enjoy every bite!
Cook Time: 8 minutes
Total Time: 30 minutes
Yield: 24 cookies (depending on cutter size)
Category: Dessert, Cookies
Three Fun Twists to Try
Lemon Zest Burst: Add the zest of one lemon to your sugar mixture in Step 2. It gives the cookies a bright, sunny flavor. It tastes just like a spring picnic in your mouth.
Spiced Chai Cookies: Mix in one teaspoon of cinnamon and half a teaspoon of cardamom with the flour. This is perfect for a cozy winter evening. The warm spice smell will make everyone come running.
Chocolate Drizzle Dream: Skip the icing and melt half a cup of dairy-free chocolate chips. Drizzle it over the cooled cookies for a rich treat. It is like a fancy bakery cookie, but you made it. Which one would you try first? Comment below!
Serving Them Up with Love
These cookies are lovely all on their own, but a little extra makes them special. Stack three cookies on a small plate with a few fresh berries. Or serve them next to a scoop of dairy-free vanilla ice cream for a dessert. You can even crumble one over a bowl of fruit salad for a sweet crunch.
For a drink, pour a cold glass of oat milk or almond milk. It pairs so nicely with the sweet cookie. If you want something for grown-ups, try a warm cup of chai tea. The spices go hand in hand with the vanilla. Which would you choose tonight?
Your New Favorite Cookie: How to Store and Batch Bake
Let me tell you a little secret about these sugar cookies. The first time I made them, I was nervous about storing them right. I left a batch out on the counter overnight without covering them. The next morning, they were as hard as little rocks. What a waste of good butter and sugar! So here is what I learned. These cookies stay soft for five days in an airtight container at room temperature. If you want them to last longer, put them in the fridge for up to two weeks. You can even freeze them for six months. Just stack them with a piece of wax paper between each cookie. When you want a treat, let them thaw on the counter for about an hour. This matters because you can bake a big batch now and have cookies ready for school snacks or unexpected guests. Have you ever tried storing cookies this way? Share below!
Oops! Three Common Sugar Cookie Troubles (And Easy Fixes)
Even I mess up in the kitchen sometimes. Here are three problems you might face and how to fix them. Problem one: your cookies spread too much and look flat. This usually happens if your butter was too soft or melted. Next time, make sure your dairy-free butter is just soft, not runny. Problem two: your dough is too sticky to roll out. I remember once my dough stuck to everything like glue. The fix is simple. Add a little extra flour, a tablespoon at a time, until it feels smooth. Problem three: your cookies turn out dry. This means you baked them just a minute too long. Take them out when the edges are set but the centers still look soft. They will firm up as they cool. Why does this matter? Fixing these problems gives you tender cookies every time. It also builds your confidence in the kitchen. Which of these problems have you run into before?
Your Top 5 Questions Answered
Q: Can I use a gluten-free flour blend?
A: Yes. Use a 1:1 gluten-free baking blend. Your cookies will still taste wonderful.
Q: Can I make the dough ahead of time?
A: Absolutely. Wrap the dough in plastic wrap and chill it for up to three days.
Q: Can I swap the dairy-free butter for regular butter?
A: Yes. Just use the same amount. The recipe works perfectly either way.
Q: Can I cut this recipe in half?
A: Yes. Use half of every ingredient. Bake for the same time.
Q: Can I skip the cornstarch?
A: You can, but the cookies will be less tender. Cornstarch gives them a soft bite.
Which tip will you try first?
*Fun fact: Cornstarch is what gives bakery-style cookies their soft, melt-in-your-mouth texture.
A Sweet Farewell From My Kitchen to Yours
I hope you enjoy these cookies as much as my family does. There is something so special about sharing a homemade treat with the people you love. Whether you bake them for a holiday or just a Tuesday afternoon, they are sure to bring smiles. Have you tried this recipe? Tag us on Pinterest! I love seeing your photos and hearing your stories. Happy cooking!
—Chloe Hartwell.


Dairy-Free Sugar Cookies With Gluten-Free Option
Description
Soft, buttery dairy-free sugar cookies with a chewy center and crisp edges. A perfect gluten-free treat for any occasion.
Ingredients
Icing
Instructions
- Preheat the oven to 325ºF and prepare two cookie sheets with parchment paper. Set aside.
- In the bowl of a stand mixer or large mixing bowl with electric beaters, cream together the softened butter, sugar, and vanilla extract until light and fluffy. This should take approximately 5 minutes.
- Add in the flour, cornstarch, baking powder, baking soda, and salt and mix on low until a rough dough forms.
- Remove the dough from the bowl and place onto a floured piece of parchment paper. Form the dough into a smooth ball.
- Using a lightly floured rolling pin, roll the dough out to ¼ inch thickness. Press the cookie cutter(s) into the dough and gently remove and place the cookie onto the prepared sheet. Form the remaining cookie dough into a ball and roll it out again. Repeat until all the dough has been used.
- Bake for approximately 8 minutes or until the edges are set but are still light in color. Be careful to not overbake or the cookies will be dry.
- Allow the cookies to fully cool on the cookie sheets.
- In a small mixing bowl, combine all of the icing ingredients and whisk vigorously until fully combined and smooth.
- Pour the icing into a shallow bowl and decorate as desired. Enjoy!
Notes
- Store leftover cookies in an airtight container at room temperature for up to 5 days, in the fridge for up to 2 weeks, or frozen for up to 6 months.


Leave a Reply