
My First Air Fryer Surprise
I remember the first time I used an air fryer. My neighbor Betty brought one over, looking like she had found a magic box. I was scared of it at first. All those buttons and beeps! But then I made this garlic bread. The smell filled my whole kitchen. I still laugh at how fast it disappeared. Have you ever tried cooking with an air fryer? What is your favorite thing to make in it?Why This Bread Matters So Much
This isn’t just about getting dinner on the table fast. It is about making something special with your own hands. When you grate the garlic fresh, you can smell the earth in it. That matters. The second reason is this: you learn to trust your nose. The herbs, the butter, the warm bread. They tell you when it is ready. Cooking this way teaches you to slow down, even in a busy week. Doesn’t that smell amazing?The Little Story Behind the Herbs
My grandma grew lemon balm right by her back door. She would pinch a leaf and say, “Taste the sunshine.” I never understood until I added it to this butter. It makes the bread taste like a happy summer day. One time, I had no basil. I used mint leaves from my window pot instead. The bread was even better! My son said it tasted like a fancy restaurant. *Fun fact: Mint and garlic are actually cousins in the plant world. They love being together.*How to Make the Lemon Balm Butter
This part is like a little craft project. First, chop up your lemon balm, mint, oregano, and basil very small. Mix them in a bowl with the grated garlic. Add the lemon pepper and salt. Melt your butter gently. Pour it over the herb mixture. Stir with a spoon until it looks like green-flecked gold. This butter is the secret. What herbs do you have growing in your kitchen or yard right now?The Easy Air Fryer Trick
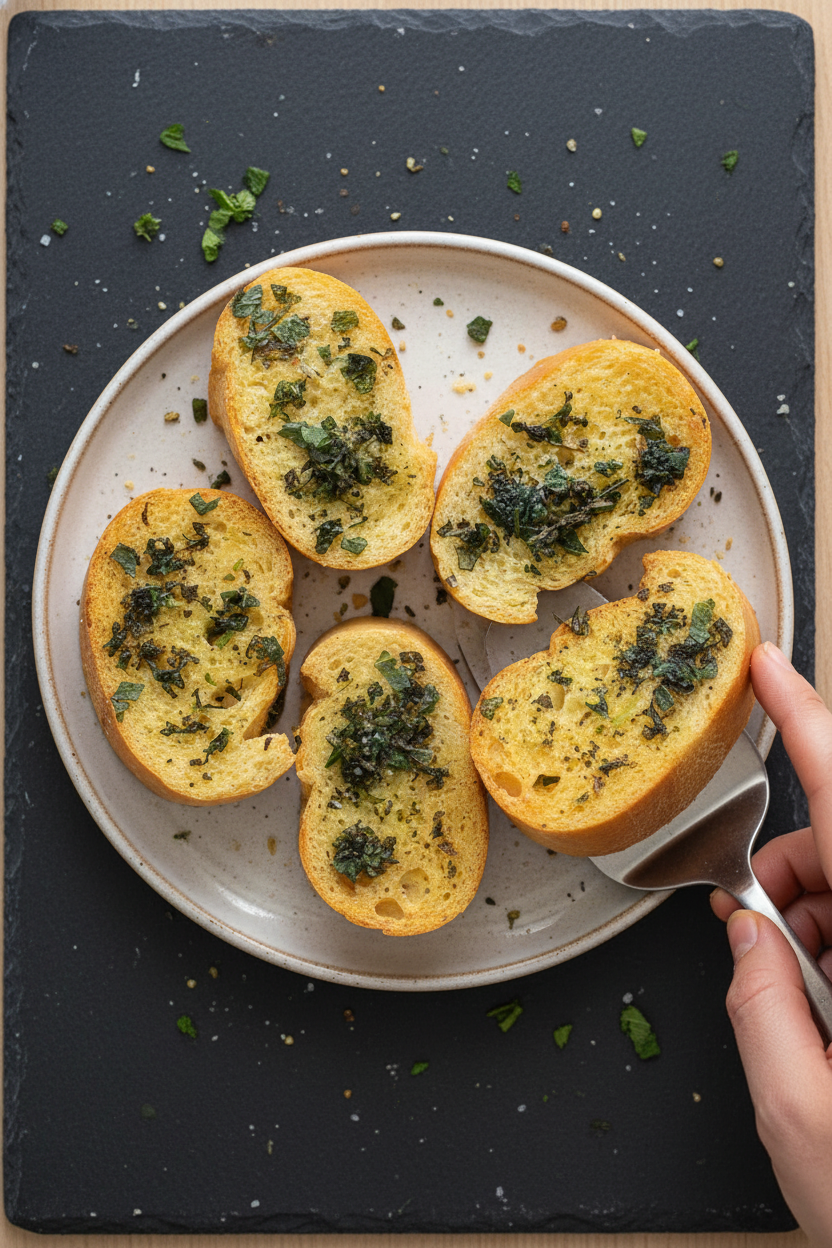
Spread that beautiful butter on both sides of each baguette slice. Yes, both sides. That is the trick for crunchy outside, soft inside. Place them on air fryer paper in the basket. Set your air fryer to 320 degrees for 8 minutes. Use the bread setting if you have one. When the timer beeps, wait one whole minute before opening. That little rest makes the crust perfect.A Warm Lesson About Patience
The hardest part for me was waiting that minute at the end. I wanted to peek. But my neighbor Betty said, “Let the bread have its quiet time.” She was right. That minute lets the butter soak in. This is why patience matters in cooking. You give food a moment to become its best. And then you get to enjoy something made by your own two hands. What is one thing you have learned to wait for in the kitchen?Ingredients:
| Ingredient | Amount | Notes |
|---|---|---|
| Baguette | 4 slices | cut to about 2 inches thick |
| Butter (vegan or regular) | 4 Tbsp (half a stick) | |
| Garlic | 2 cloves | peeled and grated, adjust to taste |
| Lemon pepper | 1 tsp | |
| Salt | 1 tsp | adjust to taste |
| Lemon balm | 6 leaves | optional herbs to add to the butter |
| Cuban oregano | 1 leaf | optional herbs to add to the butter |
| Mint | 4 leaves | optional herbs to add to the butter |
| Purple basil or regular basil | 2 leaves | optional herbs to add to the butter |
The First Time I Made Air Fryer Garlic Bread
I still remember the day I got my first air fryer. My daughter handed it to me with a big grin. “Mom, you’ll love this thing,” she said. I just stared at it for a week. Then I made garlic bread, and oh my goodness. The smell filled my whole kitchen. Doesn’t that sound amazing?
This recipe is my little twist on a classic. I use fresh herbs from my garden. Lemon balm and mint make it taste so bright. The lemon pepper adds a tiny zing. It’s like a sunny day on toast. You won’t believe how fast it cooks. Eight minutes! My grandkids call it “magic bread.”
Here is the easy way to make it yourself. Just follow these steps. They are simple and foolproof. I learned a few tricks the hard way. Like the time I forgot the paper liner. What a mess that was. Let me save you the trouble.
Step 1: Cut your baguette into four slices. Make them about two inches thick, not too thin. Thick slices get soft inside and crispy outside. That is the perfect texture. My dad always said bread should have a “crunch hug.”
Step 2: Mix your butter with the grated garlic. Use two cloves, or three if you love garlic. Add the lemon pepper and salt. Stir it until it is smooth and creamy. (Hard-learned tip: Soften the butter first so it mixes easier! Cold butter will tear your bread.)
Step 3: Make the special herb butter if you want. Chop the lemon balm, mint, and basil very tiny. Mix them with the garlic butter. Spread this on both sides of each bread slice. Don’t skip the second side. It makes the crunch even better. I once only buttered one side. The top was dry. Never again!
Step 4: Place an air fryer safe paper liner in your basket. Put the bread slices on top. Do not crowd them. Leave space for the hot air to dance around. That is how they get golden and even. Fun fact: Which herb grows fastest in a sunny window? Share below!
Step 5: Set your air fryer to 320 degrees for eight minutes. Use the bread setting if you have one. When the timer beeps, wait one minute before opening. This locks in the steam. Then serve right away while it is warm. The butter will drip down your chin. That’s a good sign.
Cook Time: 8 minutes
Total Time: 13 minutes
Yield: 4 slices
Category: Snack, Side Dish
Three Fun Twists to Try
Sometimes I get bored with plain garlic bread. So I change it up a little. These three ideas are my favorites. They are so easy to make. You probably have the ingredients already.
Cheesy Herb Dream: Sprinkle shredded mozzarella on top before cooking. It melts into gooey strings. Perfect for dipping in tomato soup. Kids go crazy for this one.
Spicy Kick: Add a pinch of red pepper flakes to your butter. Or swap the lemon pepper for cayenne. It wakes up your whole mouth. My neighbor calls it “fire bread.”
Sweet and Savory Surprise: Drizzle a tiny bit of honey over the finished toast. The sweet honey and salty butter are so good together. Try it once and you will be hooked. Which one would you try first? Comment below!
How to Serve and What to Sip
This garlic bread is a star on its own. But it loves company too. Serve it next to a big bowl of pasta. Or a simple tomato soup with fresh basil. I even crumble it over salads for crunch. My family fights over the last piece every time. That is how you know it’s good.
For a fancy touch, sprinkle fresh chopped parsley on top. It looks so pretty. For a cozy night, just stack the slices on a small plate. Let everyone grab their own. No rules, just butter.
Now for something to drink. A cold glass of iced tea with lemon is perfect. It cuts through the buttery flavor. If you want something grown-up, try a crisp white wine like Sauvignon Blanc. It matches the herby notes nicely. Which would you choose tonight?
Storing Your Garlic Bread Like a Pro
I remember the first time I made this air fryer garlic bread. I made six slices, but only four would fit. I thought, “What do I do with the extras?” So I popped them in the fridge. The next day, they were still good, but a bit chewy. Here is the trick: store leftover garlic bread in an airtight container or a zip-top bag. It keeps in the fridge for two days. For longer, wrap each slice in foil and put it in a freezer bag. They will last for one month. To reheat, do not thaw them first. Just pop them frozen back in the air fryer at 320 degrees for 3 minutes. The outside gets crispy again. This matters because you can make a big batch on Sunday and have quick snacks all week. Have you ever tried storing it this way? Share below!
Fixing Common Garlic Bread Problems
I once got the butter too salty. I used salted butter AND added the extra salt. It was a salty mess. Here is how to fix that. If the butter is too salty, add a pinch more chopped fresh herbs. The herbs balance the salt. Another problem is soggy bread. That happens if you use too much butter. Just brush a light coat on both sides. A thin layer works best. The third issue is burning. My first batch got black edges. *Fun fact: Air fryers run hot, so check your bread at 6 minutes instead of 8.* I now watch it like a hawk. Why does this matter? Fixing these little mistakes builds your confidence. You learn how your own air fryer works. Then every batch tastes perfect. Which of these problems have you run into before?
Quick Questions and Answers
Q: Can I make this gluten-free?
A: Yes. Use gluten-free baguette slices. Everything else stays the same.
Q: Can I prep the butter ahead?
A: Yes. Mix the butter and herbs the night before. Keep it in the fridge.
Q: What if I don’t have lemon pepper?
A: Use black pepper and a squeeze of fresh lemon juice instead.
Q: Can I double the recipe?
A: Yes. Just cook in batches. Do not crowd the air fryer basket.
Q: Is the lemon balm butter worth it?
A: Yes. It makes the bread taste like a garden. It is so fresh and bright. Which tip will you try first?
A Warm Send-Off From Chloe
Thank you for cooking with me today. I hope this garlic bread fills your kitchen with happy smells. It is simple food made with love. I would love to see your version. Have you tried this recipe? Tag us on Pinterest! Just search for Chloe Hartwell’s Kitchen. Show me your golden, crunchy slices. I will leave a comment on your photo. Remember, cooking is just sharing little bits of care. Keep it simple and keep it fun. Happy cooking! —Chloe Hartwell.


Easy Air Fryer Garlic Bread Recipe
Description
Make easy air fryer garlic bread in minutes! Crispy, buttery, and delicious. Perfect side dish for pasta, soups, or dinner.
Ingredients
Optional herbs to add to the butter
Instructions
- Add garlic to the butter (See notes #1)
- Butter both sides of the cut baguette slices with the butter
- Place a fryer safe paper on the air fryer basket
- Put the 4 slices on the paper and place it in the air fryer
- Turn the air fryer on and choose the bread option (320° for 8 minutes)
- When finished cooking, don’t open the air fryer for about 1 minute.
- Open and serve immediately.
- To make the lemon balm butter (optional)
- Mix lemon balm and fresh herbs
- Add the grated garlic, lemon pepper and salt to the butter
- Add the melted butter to the herbs mixture
- Use this butter on the cut baguette slices
Notes
- #1: Add garlic to the butter.


Leave a Reply