

A Sweet Idea from a Birthday Party
My friend Sarah once made these for her daughter’s birthday. She handed them out like little lollipops. The kids went wild, and so did the grown-ups. I still laugh at how fast they disappeared. Does a dessert on a stick make everything more fun? I think so. These cheesecake pops are just that—fun and fancy, but easy to make at home. Here’s why this matters: you can serve a fancy dessert without needing plates or forks. That means less cleanup and more time for stories. Have you ever tried eating cheesecake with your hands? This is your chance.Soft and Creamy Filling
The filling is like a hug in a bowl. Start with softened cream cheese. Beat it until it’s fluffy like a cloud. Add powdered sugar and vanilla. Then stir in sour cream and heavy cream. It will be smooth and dreamy. Doesn’t that smell amazing? Vanilla always takes me back to my grandma’s kitchen. I learned one trick the hard way: make sure your cream cheese is really soft. If it’s cold, you’ll get lumps. Nobody wants lumpy cheesecake. So leave it on the counter for an hour first.Rolling the Balls
Use a small cookie scoop or just a spoon. Roll the mixture into balls about the size of a walnut. Place them on a baking sheet lined with wax paper. Then push a lollipop stick into each ball. It helps to freeze them for at least two hours. They need to be really firm for the next part. *Fun fact: Cheesecake has been around since ancient Greece. They served it to athletes during the first Olympic games. That’s over two thousand years ago. Here’s an insight: freezing the pops makes the chocolate coating stick perfectly. If you skip this step, the cheesecake might fall off the stick. Patience pays off here.Dipping in Chocolate
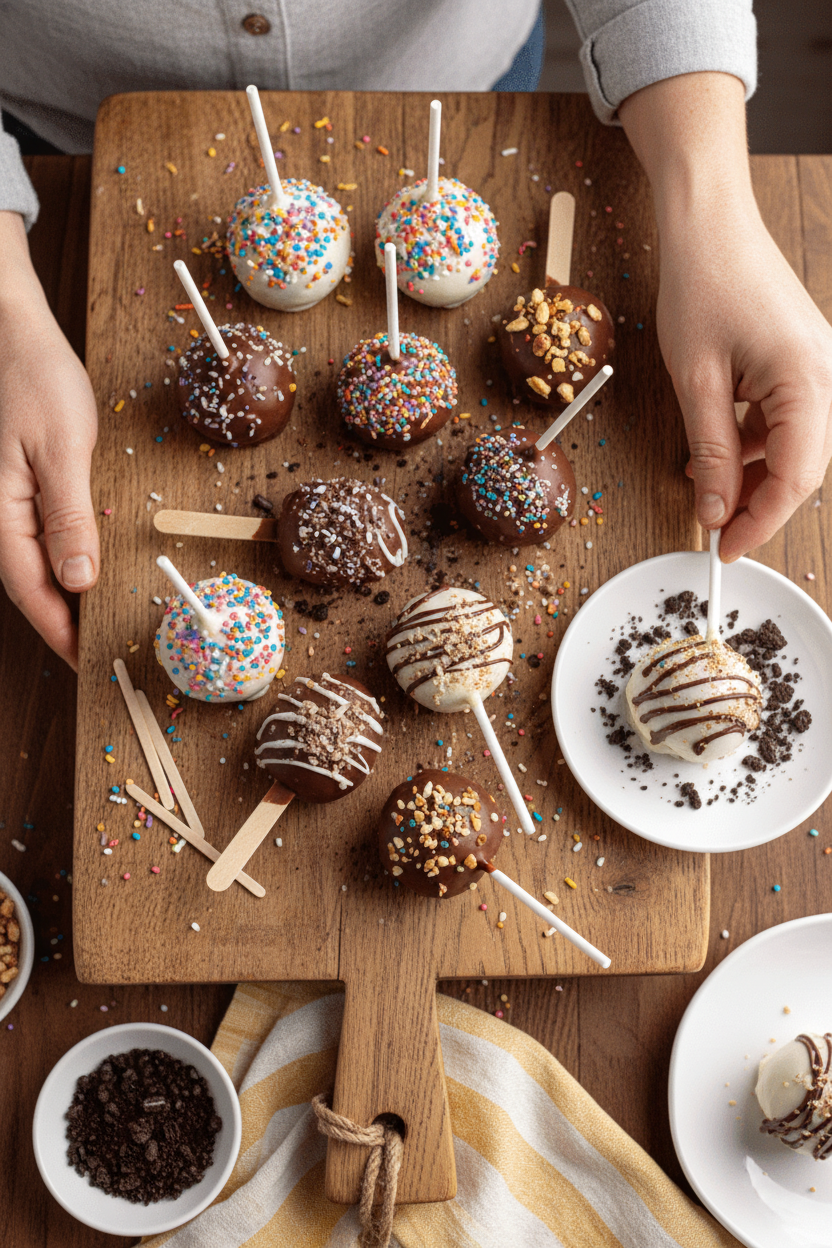
Melt your chocolate in the microwave. Use 30-second bursts and stir each time. Add a little coconut oil if you want it shiny and smooth. Dip each frozen pop into the chocolate. Let the extra drip off. Then quickly add sprinkles or crushed cookies before it hardens. This part feels like being a little kid again. What is your favorite topping? I love rainbow sprinkles, but crushed graham crackers are good too.Chill and Serve
Put the coated pops back on the baking sheet. Pop them in the fridge for about 30 minutes. The chocolate needs to set so it cracks when you bite into it. Serve them cold, right from the fridge. They melt a little too fast if you leave them out. Here’s another reason this recipe matters: you can make them ahead of time. That means you can relax while your guests enjoy a special treat. Who doesn’t want more time to laugh and talk?My Favorite Memory
I made these once for a rainy Sunday. My grandson and I dipped them together. He got chocolate on his nose and sprinkles on the floor. We didn’t clean up for an hour. We just ate pops and told silly jokes. That messy kitchen is still one of my happiest memories. Have you ever cooked with a little helper? It makes everything taste better, I promise.Share Your Creations
Now it’s your turn. I’d love to hear how yours turn out. Did you use dark chocolate or white? Did you add a special topping? Tell me your story. And if you make a mess, don’t worry. That’s part of the fun. So, what flavor will you try first? Will you make these for a party or just a quiet night at home? Let me know in your heart, or share with a friend. Happy dipping.Ingredients:
| Ingredient | Amount | Notes |
|---|---|---|
| Cream cheese | 8 oz | softened |
| Powdered sugar | 1/2 cup | |
| Vanilla extract | 1 teaspoon | |
| Sour cream | 1/4 cup | |
| Heavy cream | 1/4 cup | |
| Chocolate (dark, milk, or white) | 8 oz | chopped |
| Coconut oil | 1 tablespoon | optional, for smoothness |
| Sprinkles or crushed cookies | optional, for decoration | |
| Lollipop sticks or popsicle sticks | for assembly |
My Grandma’s Cheesecake Pop Secret
I still remember the first time I made these. My kitchen looked like a snowy mess of powdered sugar. But the giggles from my grandsons were worth every sprinkle. These cheesecake pops are little bites of joy on a stick. Doesn’t that sound like fun?
You only need a few simple things from the store. Cream cheese, some sugar, vanilla, and a little cream. Oh, and chocolate for dipping, of course. The trick is to let your cream cheese sit out. It gets soft and friendly that way.
Now, here is a hard-learned tip I almost forgot: if your cream cheese is too cold, you’ll get lumpy filling. Let it sit on the counter for 30 minutes. Then it will whip up smooth as butter. I learned that the hard way once. My pops looked like tiny moon craters.
Step 1: Beat your softened cream cheese until it is fluffy. Add the powdered sugar and vanilla, and mix again. Pour in the sour cream and heavy cream. Beat until it looks like a cloud. It should feel smooth and dreamy.
Step 2: Now scoop the mixture into small balls, like little snowballs. Place them on a baking sheet lined with parchment paper. Stick a lollipop stick into each ball. Then pop them into the freezer for at least two hours. (Don’t skip this, or they will be too soft to dip.)
Step 3: Melt your chocolate in a bowl in the microwave. Do it in short bursts, stirring each time. Dip each frozen pop into the shiny chocolate. Let the extra drip off. Then add sprinkles or crushed cookies before the chocolate hardens. Doesn’t that smell amazing? Which topping would you pick for your pops? Share below!
Step 4: Place the coated pops back on the parchment. Put them in the fridge for about 30 minutes. This lets the chocolate set nice and firm. You will hear a tiny snap when you bite into them later. That is the sound of happiness.
To serve, just pull them straight from the fridge. They are perfect for birthday parties or a cozy movie night. My grandson once ate three in a row and asked for more. I just laughed and handed him a napkin.
Cook Time: 2 hours (freezing)
Total Time: 2 hours 45 minutes
Yield: 12-15 pops
Category: Dessert, Snack
Three Fun Ways to Mix It Up
Sometimes I like to change things around in my kitchen. It keeps my fingers happy and my family guessing. Here are three twists I have tried. Which one would you try first? Comment below!
Berry Swirl: Drop a little strawberry jam into the cheesecake mix before freezing. Swirl it with a toothpick. It looks like a pink ribbon in every bite.
Lemon Zest: Grate the peel of one lemon into the filling. It adds a sunny, fresh taste. My neighbor says it reminds her of springtime.
Cookie Monster: Crush up chocolate sandwich cookies and roll your pops in them instead of sprinkles. They get a crunchy, cozy coat. Perfect for little cookie fans.
How to Serve and Sip
These cheesecake pops are lovely on a plate with fresh berries. They also look so cute standing up in a little jar. You can even stick them into a halved watermelon for a party centerpiece. Everyone will grab one and smile.
For a drink, try a tall glass of cold milk. It makes the chocolate taste even better. If grown-ups want something fancy, a tiny glass of sweet dessert wine works nicely. The creamy pop and the sip just dance together. Which would you choose tonight?
Storing Your Cheesecake Pops the Right Way
These cheesecake pops are best kept in the fridge. Place them in a single layer in an airtight container. They will stay fresh for up to three days. I once left a batch on the counter overnight. The next morning, they were too soft to hold their shape. That is why the fridge is your friend here.
You can also freeze them for a later treat. Freeze the plain cheesecake balls before dipping them in chocolate. They will keep for up to a month in a freezer bag. This is perfect for making a big batch ahead of a party. Just thaw them in the fridge for an hour before dipping. Why does this matter? It saves you time on a busy day. You can prep dessert a whole week early. Have you ever tried storing it this way? Share below!
Fix Three Common Problems with Ease
Sometimes the cheesecake mixture is too sticky to roll. I remember when this happened at my first try. The fix is simple: chill the mixture for twenty minutes first. This makes it firm and easy to shape into balls. Why does this matter? It keeps you from getting frustrated. Cooking should feel fun and easy, not messy.
Another problem is the chocolate coating cracking. This happens if the cheesecake balls are too cold. Let them sit on the counter for five minutes before dipping. The chocolate will stick smoothly without breaking. One more issue is the pops sliding off the stick. Press the stick only halfway into the ball. Too deep, and the pop will fall off when you dip it. Which of these problems have you run into before?
Your Quick Questions Answered
Q: Can I make these gluten-free? A: Yes, just use gluten-free cookies for the topping. The cheesecake filling has no gluten.
Q: How far ahead can I make them? A: You can make the balls three days early. Dip them in chocolate the day you serve them.
Q: Can I swap the cream cheese? A: Use a dairy-free cream cheese for a lighter version. The taste will be a little different but still good.
Q: Can I double the recipe? A: Yes, just double all the ingredients. Use a bigger bowl for mixing.
Q: Do I need the coconut oil? A: No, it just makes the chocolate shinier. You can skip it if you want. Which tip will you try first?
Warm Wishes from My Kitchen to Yours
I hope these cheesecake pops bring a big smile to your table. They are perfect for birthdays, holidays, or just a rainy afternoon. I love hearing how your treats turn out. *Fun fact: Cheesecake has been a favorite dessert for over 2,000 years.* Take a photo of your pops and share it with us. Have you tried this recipe? Tag us on Pinterest! You can find me there as ChloeHartwellBakes. Happy cooking!
—Chloe Hartwell.
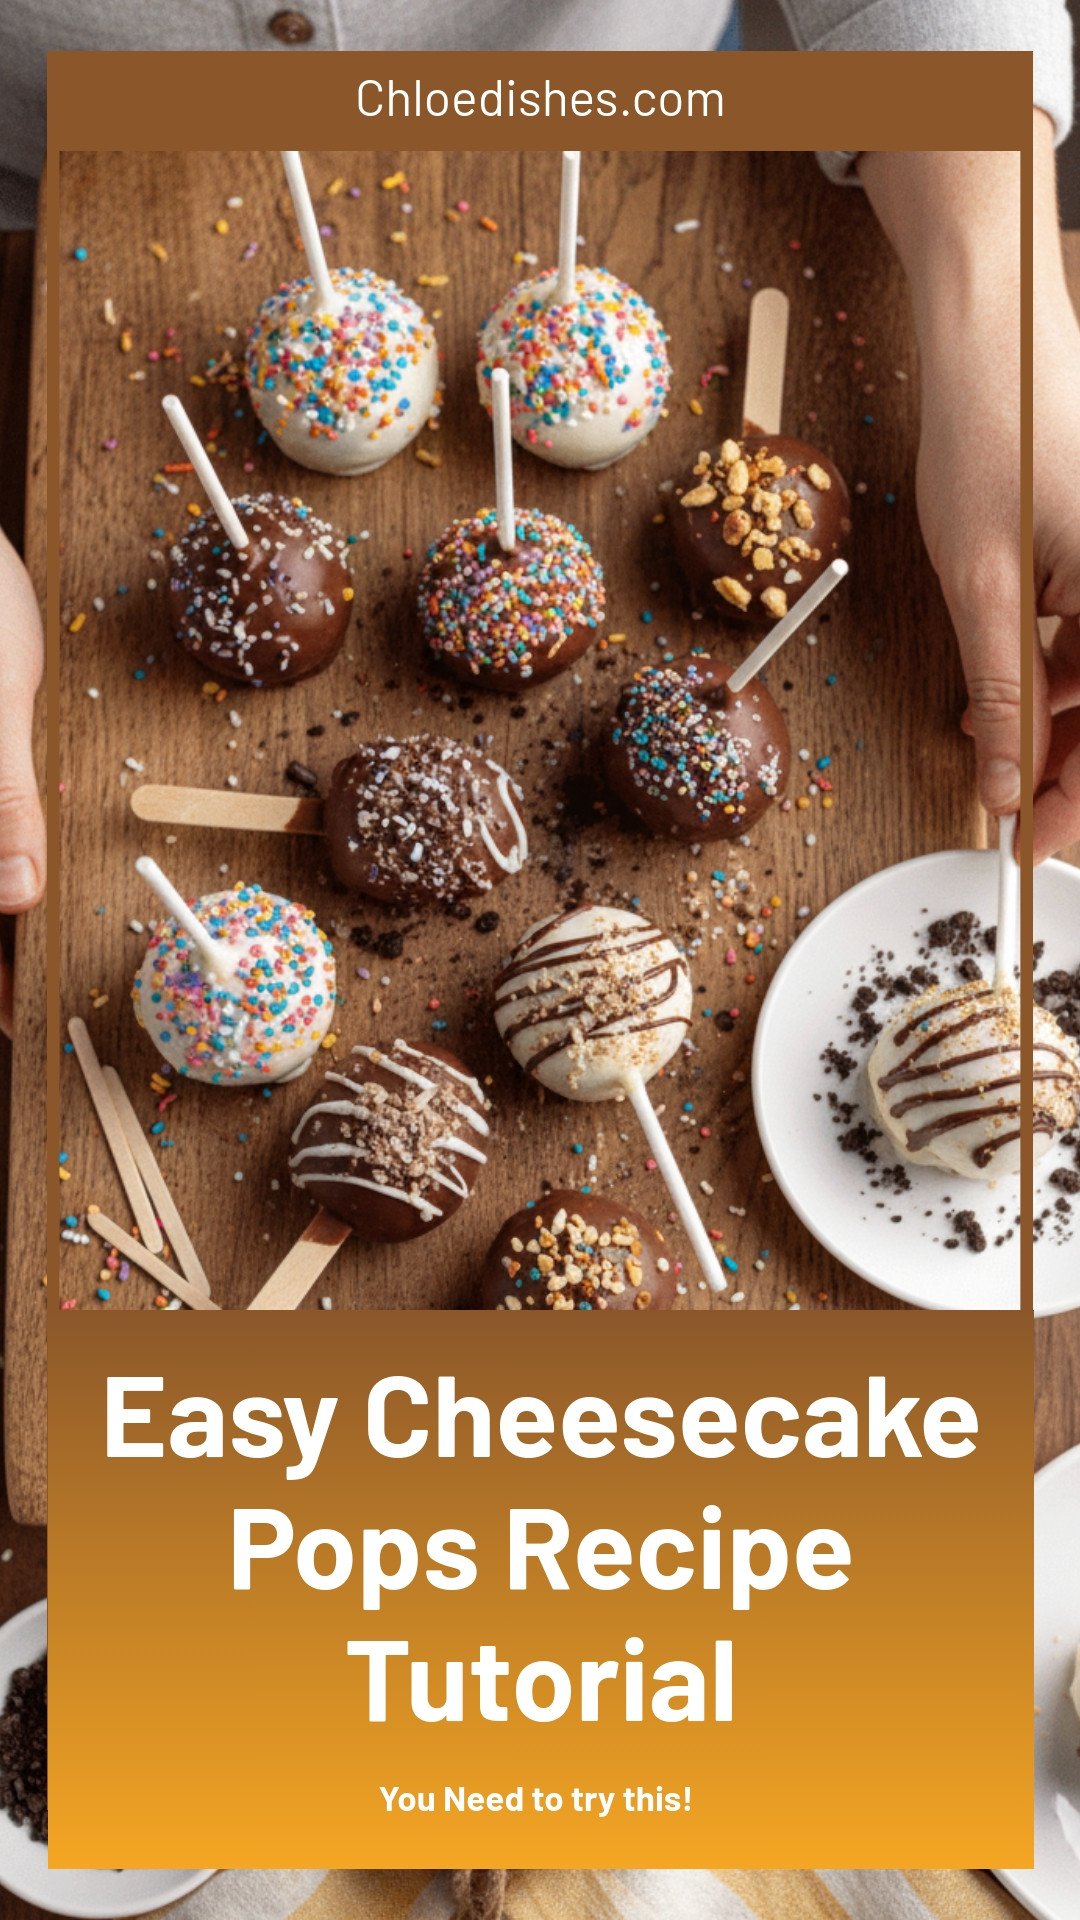

Easy Cheesecake Pops Recipe Tutorial
Description
Easy 3-ingredient cheesecake pops recipe tutorial. Perfect creamy dessert bites on a stick for parties and holidays.
Ingredients
Instructions
- In a mixing bowl, beat the softened cream cheese with an electric mixer until smooth.Gradually add the powdered sugar and vanilla extract, mixing until well combined.Add the sour cream and heavy cream, mixing until the mixture is creamy and smooth.
- Using a small cookie scoop or tablespoon, scoop the cheesecake mixture and roll it into balls.Place each ball on a parchment-lined baking sheet and insert a lollipop stick into the center of each ball.Freeze the cheesecake pops for at least 2 hours until firm.
- In a microwave-safe bowl, combine the chopped chocolate and coconut oil if using. Microwave in 30-second intervals, stirring in between, until smooth and fully melted.Remove the cheesecake pops from the freezer and dip each pop into the melted chocolate, allowing excess chocolate to drip off.If desired, sprinkle with crushed cookies or sprinkles before the chocolate sets.
- Place the coated cheesecake pops back on the parchment-lined baking sheet and refrigerate until the chocolate is set, about 30 minutes.
- Serve the cheesecake pops chilled and enjoy.
Notes
- For best results, ensure cream cheese is fully softened before mixing. Let pops freeze completely before dipping in chocolate.


Leave a Reply