

Why I Love Making Bread
There is something magic about bread. I learned to make it from my own grandma, who always had flour on her apron. She would say bread is patience you can eat. That first time I saw my dough puff up, I ran to show her. She laughed and said, “See? The yeast woke up.” I still feel that same joy every time. Have you ever watched dough rise? It feels like a little miracle.The Simple Start
You start with warm water and yeast. Think of it like waking up a sleepy friend. The water must be just right—warm like a bath, not hot like soup. I once used water that was too hot. I killed the poor yeast. My bread came out like a flat, heavy brick. We still joke about that at family dinners. What is the funniest kitchen mistake you have made?Kneading and Feeling
Kneading is where you get your hands messy. You push and fold the dough for about eight minutes. It starts sticky, but then it becomes smooth and silky. *Fun fact: Kneading stretches the gluten in the flour. Gluten is like tiny rubber bands that help bread hold its shape. That is why your loaf doesn’t crumble into dust.* This part teaches you to trust your hands. You learn how dough should feel. Doesn’t that smell amazing when it rises? That yeasty, warm smell is pure comfort.Why Waiting Matters
The dough must double in size. This takes almost two hours. You cannot rush it. The yeast needs time to eat the sugar and make little gas bubbles. Waiting is part of the recipe. It reminds me that good things take time. My grandma used to say, “You cannot hurry love or bread.” I think that is true for many things. Why this matters: When we slow down, we notice more. You can watch the dough grow. It teaches you patience without being boring. Have you ever waited for something that felt worth it?The Second Rise
After you punch the dough down, you shape it into loaves. Then you let it rise again in the pans. This second rise makes the bread light and fluffy. I always tap the top gently before it goes in the oven. It feels like giving the bread a little hug. You want it to feel puffy like a pillow. Why this matters: Pushing the air out and letting it rise again makes the texture soft. If you skipped this step, your bread would be dense and chewy. Tiny details make a big difference.Baking and Listening
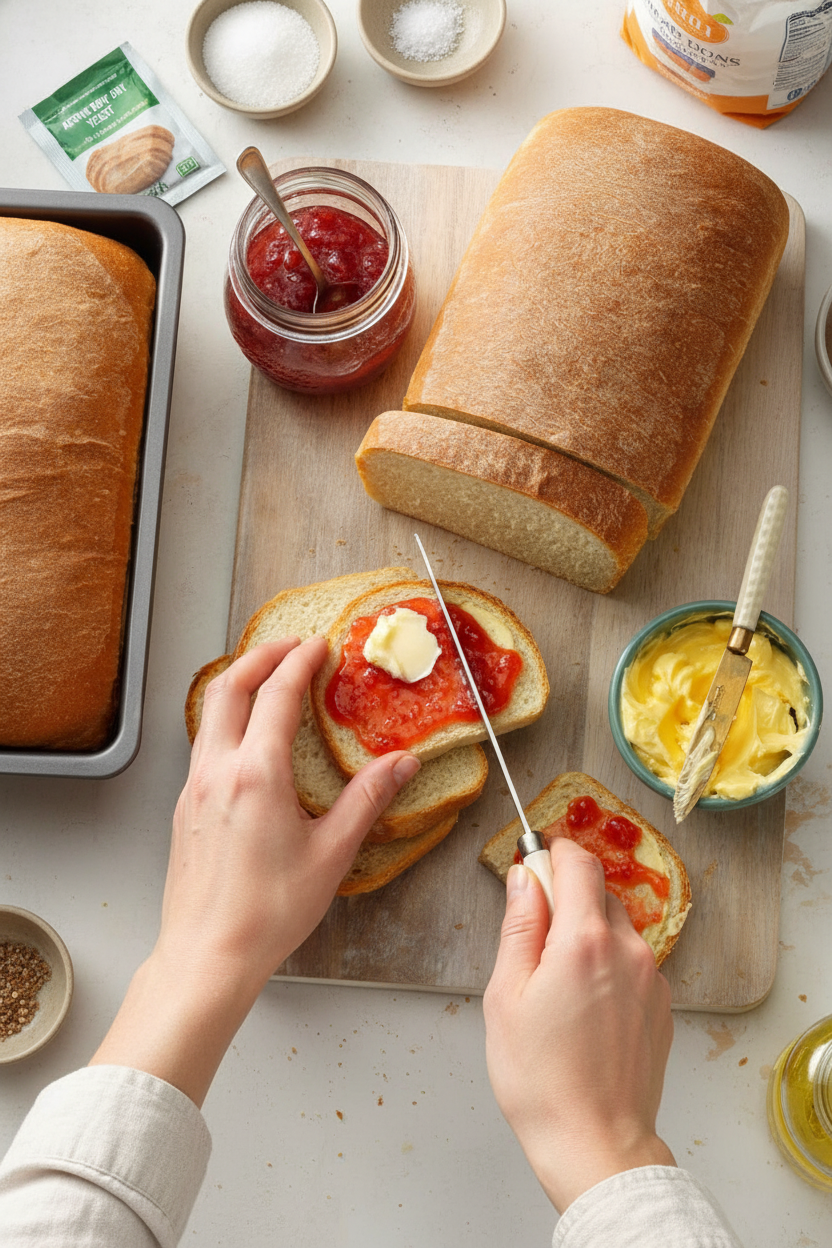
The oven does the final magic. You bake until the crust is golden brown. Then you tap the loaf. If it sounds hollow, it is done. The first time I did the hollow tap test, I was sure I broke the bread. But no, that hollow sound means success. I still grin when I hear it.Sharing the Warmth
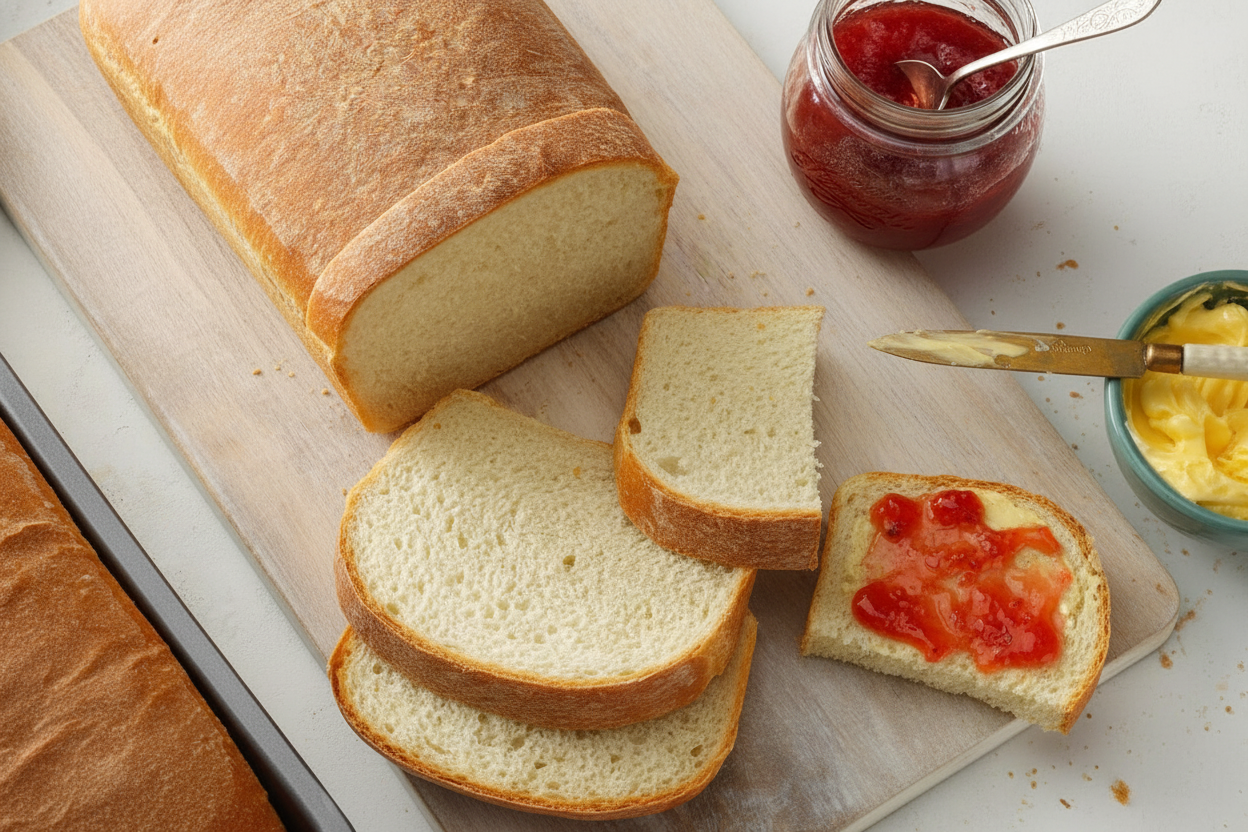
Fresh bread straight from the oven is pure happiness. The butter melts the second you spread it. You can share it with neighbors or save it for breakfast. Each loaf has 102 calories per slice. That is not too bad for something made with love. Do you like your bread plain, toasted, or with jam? Tell me your favorite way to eat it.Ingredients:
| Ingredient | Amount | Notes |
|---|---|---|
| Active dry yeast | 1 package (1/4 ounce) | |
| Sugar | 3 tablespoons plus 1/2 teaspoon | |
| Warm water (110° to 115°) | 2-1/4 cups | |
| Salt | 1 tablespoon | |
| Bread flour | 6-1/4 to 6-3/4 cups | |
| Canola oil | 2 tablespoons |
Why You Can Totally Make This Bread
I remember my first loaf. It looked like a lumpy, sad rock. But you know what? It tasted like pure magic.
This recipe is for beginners, just like I was. The smell of bread baking will fill your whole house. Doesn’t that smell amazing? We are going to make that happen together.
Yeast is a living thing, so be patient with it. Think of it like a sleepy little pet that needs warm water to wake up. Once you see bubbles, you know it’s alive and happy.
Grab your measuring cups and get ready. You will feel so proud when you pull that golden loaf out of the oven. I still laugh at the funny shapes my early loaves had.
Before we start, here is a mini-quiz for you: What do you think makes bread dough feel soft and squishy like a pillow? Share below!
Let’s Bake Your First Loaf
Follow these steps, and don’t worry about making it perfect. Even a crooked loaf tastes wonderful.
Step 1: In a big bowl, stir the yeast and half a teaspoon of sugar into the warm water. Let it sit for five minutes until bubbles form on top. This is called “proofing” the yeast. If no bubbles appear, your water was too hot or the yeast is old, so start over.
Step 2: In another bowl, whisk the salt, three cups of flour, and the rest of the sugar together. Then stir the oil into your bubbly yeast mixture. Pour the wet stuff into the flour bowl and beat it until smooth. Now add more flour, half a cup at a time, until you have a soft dough that pulls away from the bowl. (Hard-learned tip: Stop adding flour the moment the dough stops being sticky. Too much flour makes bread heavy and dry.)
Step 3: Put some flour on your clean counter. Turn the dough out and knead it for eight to ten minutes. Push it away from you, fold it over, and turn it. Keep going until it feels smooth and springy like a baby’s cheek. I love this part; it feels like giving the dough a little massage.
Step 4: Shape the dough into a ball and put it in a greased bowl. Turn it once so the top has a little oil on it. Cover the bowl with a clean towel. Put it in a warm, draft-free spot and let it rest until it doubles in size, about one and a half to two hours. This is the waiting game, but it’s worth it.
Step 5: Punch the dough down with your fist to let the air out. Turn it onto a floured surface. Cut the dough in half with a knife. Shape each half into a loaf and place them into two greased loaf pans. Cover them again and let them rise until they double one more time, about one hour.
Step 6: Bake the loaves at 375 degrees for 30 to 35 minutes. They are ready when the top is golden brown and the loaf sounds hollow when you tap it. Take them out of the pans right away and let them cool on a wire rack. Try to wait until they are cool before slicing, but I know that is hard.
Cook Time: 30–35 minutes
Total Time: 3–4 hours (mostly waiting for the dough to rise)
Yield: 2 loaves, about 16 slices each
Category: Bread, Baking
Fun Ways to Change This Bread
Once you master the plain loaf, you can try fun twists. These three ideas are easy and delicious.
Cheesy Garlic Swirl: After you punch the dough down, roll it into a flat rectangle. Sprinkle on shredded mozzarella, garlic powder, and dried parsley. Roll it up tight before putting it in the pan. The cheese gets melty and amazing inside.
Sweet Cinnamon Raisin: Before you shape the loaves, knead in a handful of raisins, some brown sugar, and a teaspoon of cinnamon. Your kitchen will smell like a bakery. This is perfect for toast with butter in the morning.
Seeded Herb Loaf: Add two tablespoons of mixed seeds like sesame, poppy, or sunflower to the flour. Also stir in a teaspoon of dried rosemary or thyme. The seeds give a nice little crunch on the crust.
Which one would you try first? Comment below!
How to Enjoy Your Fresh Bread
Warm bread is a gift. Let me share a few ways I love to serve it at my kitchen table.
A simple side is a bowl of good olive oil mixed with a pinch of salt and pepper for dipping. Another idea is to slice the bread and toast it lightly, then rub it with a cut garlic clove and drizzle with olive oil. That is called bruschetta, and it is wonderful with fresh tomatoes.
For a drink, try a glass of cold milk. It is a classic friend to a slice of warm bread. If you are older and want something fancier, a light white wine like a Sauvignon Blanc is lovely with the cheesy version.
You can also make a simple sandwich with ham, cheese, and lettuce. The homemade bread makes it taste ten times better. Which would you choose tonight?
Storing and Reheating Your Homemade Bread
Fresh bread is a gift. But you can save some for later. Let the loaves cool completely before storing.
Wrap each loaf tightly in plastic wrap. Then put it in a zip-top bag. This keeps it soft for two days on the counter.
For the freezer, wrap the bread in foil first. Then put it in a freezer bag. It stays fresh for three months.
I once forgot a loaf in the freezer for two months. It thawed perfectly and tasted like the day I baked it. That is why this matters: good storage saves you time and waste.
To reheat, pop a slice in the toaster. Or warm the whole loaf in a 350-degree oven for ten minutes. Have you ever tried storing it this way? Share below!
Batch cooking matters because you make one big effort. Then you have bread for the week. That is a win for your schedule and your belly.
Common Problems and Easy Fixes
Sometimes the dough does not rise. That can happen if the water is too hot or too cold. The yeast needs warm water, like a bath for a baby.
I remember when my first loaf came out flat. I had used cold tap water. Now I always check the temp with a thermometer.
Another problem is a hard, dry crust. This happens if you bake the bread too long. Check it at 30 minutes and tap the top. It should sound hollow.
Fixing these issues builds your confidence. That is why this matters: you learn to trust your hands. You also get better flavor every time.
The third issue is sticky dough. Just add a little more flour, a spoonful at a time. Which of these problems have you run into before?
Your Bread Questions, Answered
Q: Can I make this bread gluten-free?
A: Swap the bread flour for a gluten-free blend. The texture will be denser but still good.
Q: Can I make the dough ahead of time?
A: Yes. After the first rise, punch it down and put it in the fridge overnight.
Q: Can I swap the oil for butter?
A: Yes, use melted butter. It adds a rich taste and soft crumb.
Q: How do I make smaller loaves?
A: Divide the dough into four pieces. Bake them for 20 minutes instead of 30.
Q: Any fun tip to make it special?
A: Brush the top with milk before baking. It gives a shiny, golden crust. Which tip will you try first?
A Warm Send-Off from Chloe
I hope you feel brave enough to try this recipe. Making bread is like making a memory. Each loaf tells a story.
Remember that first bite of warm bread with butter? That feeling is yours to create. Have you tried this recipe? Tag us on Pinterest!
Share your photos and stories with me. I love seeing your flour-dusted counters and happy faces. Happy cooking! —Chloe Hartwell.

Easy Homemade Bread Recipe for Beginners
Description
Easy homemade bread recipe for beginners – soft, fluffy, and foolproof. Perfect for baking at home with simple ingredients.
Ingredients
Instructions
- In a large bowl, dissolve yeast and 1/2 teaspoon sugar in warm water; let stand until bubbles form on surface. Whisk together salt, 3 cups flour and remaining 3 tablespoons sugar. Stir oil into yeast mixture; pour into flour mixture and beat until smooth. Stir in enough remaining flour, 1/2 cup at a time, to form a soft dough.
- Turn out onto a floured surface; knead until smooth and elastic, 8-10 minutes. Place in a greased bowl, turning once to grease the top. Cover and let rise in a warm place until doubled, 1-1/2 to 2 hours.
- Punch dough down. Turn onto a lightly floured surface; divide dough in half. Shape each into a loaf. Place in 2 greased 9×5-in. loaf pans. Cover and let rise until doubled, 1 to 1-1/2 hours.
- Bake at 375° until loaf is golden brown and sounds hollow when tapped or a thermometer reads 200°, 30-35 minutes. Remove from pans to wire racks to cool.
Notes
- Nutrition Facts (per 1 piece): 102 calories, 1g fat (0g saturated fat), 0mg cholesterol, 222mg sodium, 20g carbohydrate (1g sugars, 1g fiber), 3g protein.


Leave a Reply