
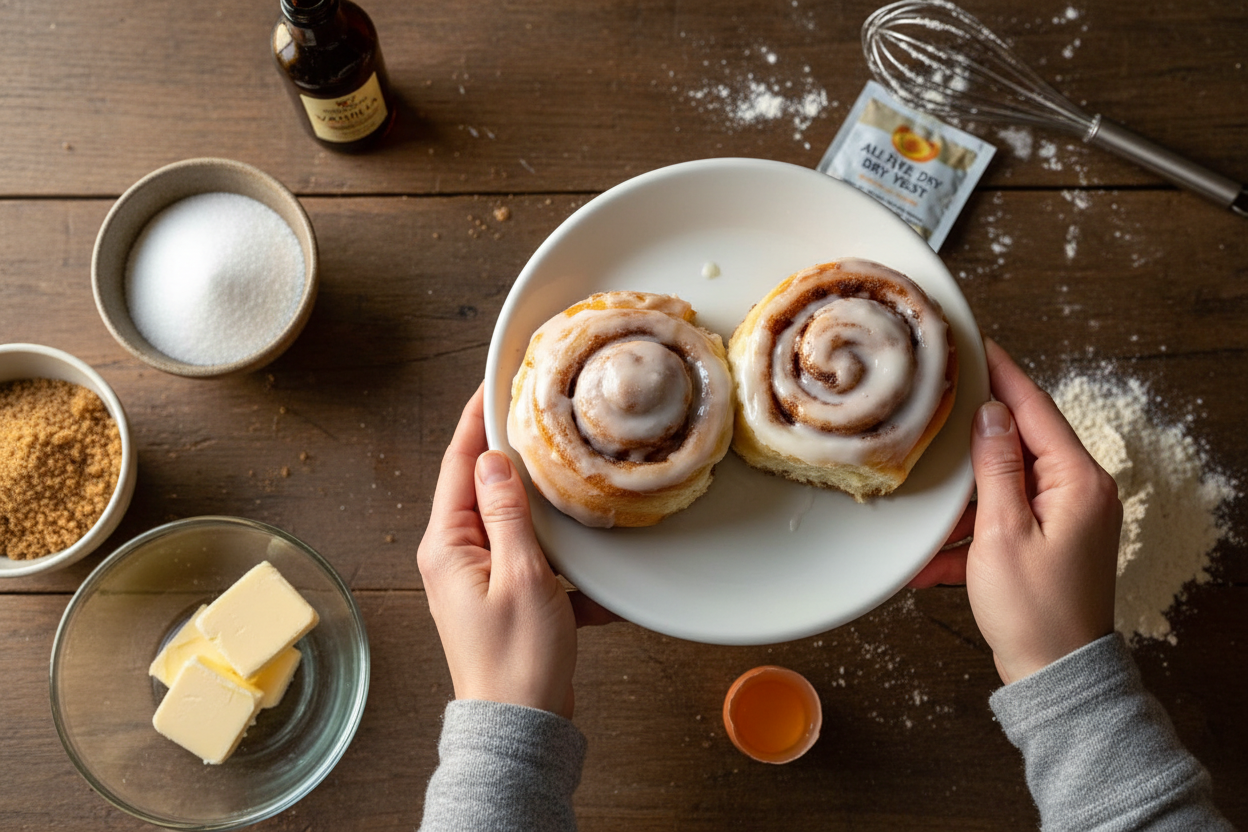
Rolling, Slicing, and Waiting
Rolling the dough into a rectangle is like making a big, sweet blanket. Spread the filling evenly, all the way to the edges except for a tiny bit. Then roll it up tight. Use dental floss to cut the rolls. Slide a long piece of unflavored floss under the log, cross the ends over the top, and pull. It cuts clean without squishing the dough. While they bake, your whole house will smell like a bakery. That is the best part of waiting. The timer feels like it takes forever, I know. But when you pull them out, golden and bubbling, you will forget the wait. Do you let your rolls cool before icing them? I do for about ten minutes. If they are too hot, the icing melts into a puddle. If they are too cold, the icing sits on top like a hat. Ten minutes is just right.The Icing on the Memory
This recipe is not just about food. It is about making moments. When you serve these rolls, people stop talking. They close their eyes. They say “Mmmm” without thinking. That sound is better than any compliment. I once made these for a neighbor who was sad. She ate two, then started crying. She said they tasted like her grandmother’s kitchen. I cried too. That is why I share this recipe with you. Because food can hold memories we forgot we had. Here is my last question for you: Who would you share these cinnamon rolls with right now? Imagine their face when they take the first bite. That is the best part of cooking.Ingredients:
| Ingredient | Amount | Notes |
|---|---|---|
| Milk (whole or 2%) | 1 cup | |
| Unsalted butter, melted | 1/4 cup (1/2 stick) | |
| Active dry yeast | 1 packet (0.25 oz / ~2 1/4 tsp) | |
| Granulated sugar | 1/4 cup | For dough |
| Large egg | 1 | |
| Salt | 1/2 teaspoon | |
| Vanilla extract | 1 teaspoon | For dough |
| All-purpose flour | 3 1/2 cups | |
| Unsalted butter, softened | 1/2 cup (1 stick) | For filling |
| Brown sugar | 1/2 cup | For filling |
| Granulated sugar | 1/2 cup | For filling |
| Ground cinnamon | 1 1/2 tablespoons | For filling |
| Vanilla extract | 1 teaspoon | For filling |
| Cream cheese, softened | 4 ounces | For icing |
| Powdered sugar | 2 cups | For icing |
| Vanilla extract | 1 teaspoon | For icing |
| Milk | 2–4 tablespoons | Add 1 tbsp at a time, as needed |
The Best Smell in My Kitchen
I still remember the first time I made these cinnamon rolls. My kitchen smelled like a bakery, and my dog sat right by the oven door. Doesn’t that smell amazing? These rolls come together in just one hour, so you don’t have to wait all day. You get soft, gooey, and perfectly sweet rolls every single time. Let me walk you through it, just like my grandma did for me.
Step 1: Melt your butter in a microwave-safe bowl for about 40 seconds. Then warm your milk in the same bowl for 45 seconds. Check the temperature — it should feel like warm bathwater, not hot. If it’s too hot, let it cool for a minute. If it’s too cold, give it another few seconds. (Here’s a hard-learned tip: if the milk is too hot, it will kill the yeast, and your rolls won’t rise. I learned that the hard way!)
Step 2: Stir in the sugar and yeast until everything dissolves. Cover the bowl with a towel and let it sit for 10 minutes. You’ll see bubbles and foam form on top — that means your yeast is alive and happy. While you wait, preheat your oven to the lowest setting, then turn it off. This creates a cozy, warm spot for your dough to rise. What’s your favorite thing to bake on a rainy afternoon? Share below!
Step 3: Once the yeast is frothy, crack in the egg, add the salt, and pour in the vanilla. Stir it all together until smooth. Now add the flour one half-cup at a time, mixing with a spatula. When the dough gets too thick, use your hands to gently knead it. The dough should be soft and a little tacky, like a sticky hug.
Step 4: Shape the dough into a ball and place it back in the bowl. Cover it with a clean tea towel and put it in the warm oven for 10 minutes. Don’t open the oven door — just let the dough rest and puff up. While it rests, mix your filling: butter, brown sugar, white sugar, cinnamon, and vanilla. Cream them together until light and fluffy. My grandma always said, “The filling is the heart of the roll.”
Step 5: Roll the dough out on a lightly floured surface into a big rectangle, about 14 by 18 inches. Spread the filling evenly, leaving a tiny border around the edges. Starting from the short side, roll the dough tightly into a log. Then cut it into 12 even slices. I use unflavored dental floss for clean cuts — slide it under the dough, cross the ends, and pull. It works like magic.
Step 6: Place your rolls in a greased 9×13 pan and bake at 350°F for 20 to 25 minutes. Let them cool for 10 minutes while you make the icing. Beat cream cheese, powdered sugar, vanilla, and milk until smooth. Drizzle the icing over the warm rolls and watch it melt into every swirl. Serve immediately, preferably with a tall glass of cold milk.
Cook Time: 20–25 minutes
Total Time: 1 hour
Yield: 12 rolls
Category: Breakfast, Dessert
Three Fun Twists to Try
Sometimes I like to mix things up with these cinnamon rolls. Here are three ways to make them your own. Which one would you try first? Comment below!
Apple Pie Rolls: Before adding the cinnamon filling, scatter some chopped apples and a little more brown sugar on the dough. The apples get soft and jammy in the oven, like a warm pie.
Chocolate Hazelnut Swirl: Spread a thin layer of chocolate hazelnut spread over the dough before adding the cinnamon filling. It makes each roll taste like a fancy bakery treat.
Pumpkin Spice Rolls: Mix two tablespoons of pumpkin puree into the dough and swap the cinnamon for pumpkin pie spice. It turns these into a perfect fall breakfast.
How to Serve and Sip
Your cinnamon rolls are ready, but what goes with them? For a cozy breakfast, serve them on a big plate with a side of scrambled eggs and fresh berries. The tart fruit cuts through the sweetness. For dessert, add a scoop of vanilla ice cream on top. The warm rolls and cold ice cream are a dream pair.
For drinks, try a warm mug of spiced chai tea — the cinnamon and cardamom match the rolls perfectly. If you want something cold, a glass of iced oat milk latte is creamy and delicious. For adults, a small glass of cold milk with a splash of bourbon is a cozy treat. Which would you choose tonight?
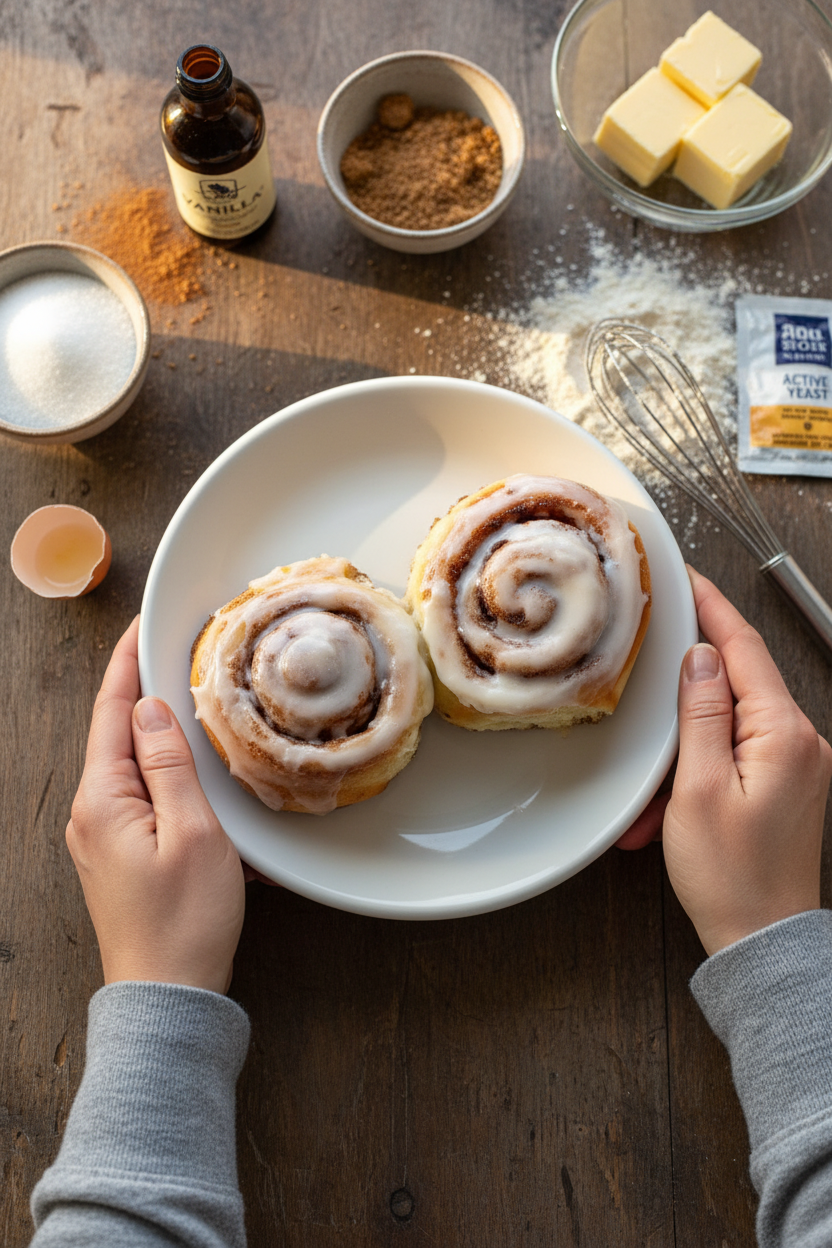
Storing and Reheating Your Cinnamon Rolls
These cinnamon rolls are best warm from the oven. But leftovers are a real treat too. Let them cool completely before storing them. Place them in an airtight container at room temperature for up to two days. Do not put them in the fridge or they will dry out.
I once stored a batch in the freezer by accident. I wrapped each roll in plastic wrap, then put them in a freezer bag. They thawed beautifully on the counter overnight. To reheat, pop one in the microwave for 15 seconds. It tastes almost fresh from the oven.
Batch cooking matters because it saves you time on busy mornings. You can make the dough the night before, cover it, and keep it in the fridge. In the morning, let it sit out for 20 minutes, then roll, fill, and bake. This way, you get fresh rolls without rushing. Have you ever tried storing it this way? Share below!
Common Problems and Simple Fixes
Sometimes the dough does not rise. This usually means the milk was too hot or too cold. The milk should feel like warm bath water, between 100 and 110 degrees. If the yeast does not foam, start over with new yeast. This is important because a good rise gives you soft, fluffy rolls.
The filling can leak out while baking. I remember when my first batch made a sticky mess in the pan. The trick is to roll the dough tightly and pinch the seam shut. Also, leave a small border around the edges before spreading the filling. This keeps the sugar and butter inside where they belong.
Your icing might turn out too runny. Just add more powdered sugar one spoonful at a time. Or if it is too thick, add a little more milk. Getting the icing right matters because it makes the rolls feel special and homemade. Which of these problems have you run into before?
*Fun fact: Unflavored dental floss cuts cinnamon rolls cleaner than any knife.*Your Questions Answered
Q: Can I make these gluten-free?
A: Try a 1-to-1 gluten-free flour blend. The dough may be stickier, so add a little extra flour.
Q: Can I make them ahead of time?
A: Yes. Assemble the rolls in the pan, cover, and refrigerate overnight. Bake them in the morning.
Q: What if I do not have cream cheese?
A: Use butter, powdered sugar, and vanilla with a splash of milk. It is still sweet and tasty.
Q: How do I make a smaller batch?
A: Cut the recipe in half. Use a smaller pan, like an 8×8 inch dish, and bake for 18 minutes.
Q: Can I add nuts or raisins?
A: Of course. Sprinkle chopped pecans or raisins over the filling before rolling. Which tip will you try first?
A Warm Goodbye from Chloe
I hope these cinnamon rolls fill your home with that cozy, sweet smell. They remind me of Sunday mornings at my grandma’s table. Baking is a way to slow down and share something good. I would love to see your golden, gooey creations. Have you tried this recipe? Tag us on Pinterest!
Keep your kitchen warm and your heart full. Happy cooking!
—Chloe Hartwell.
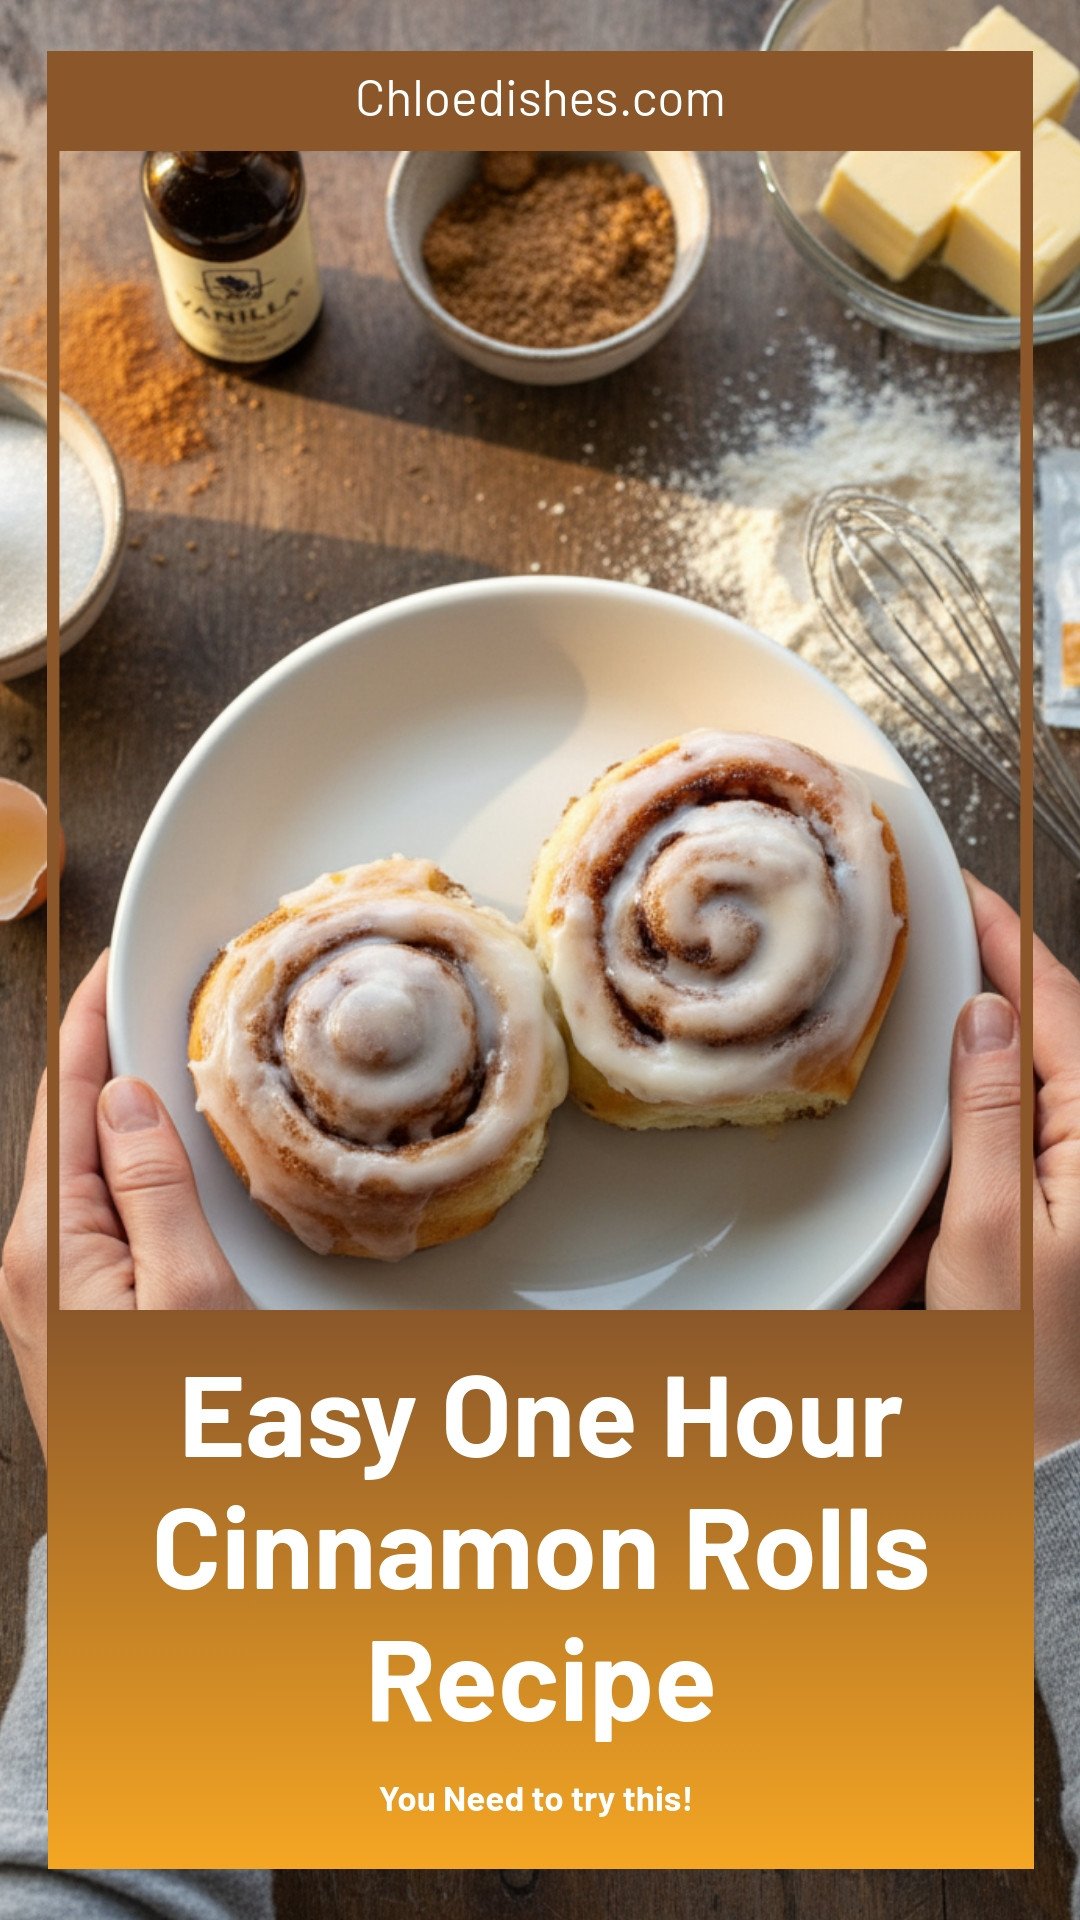
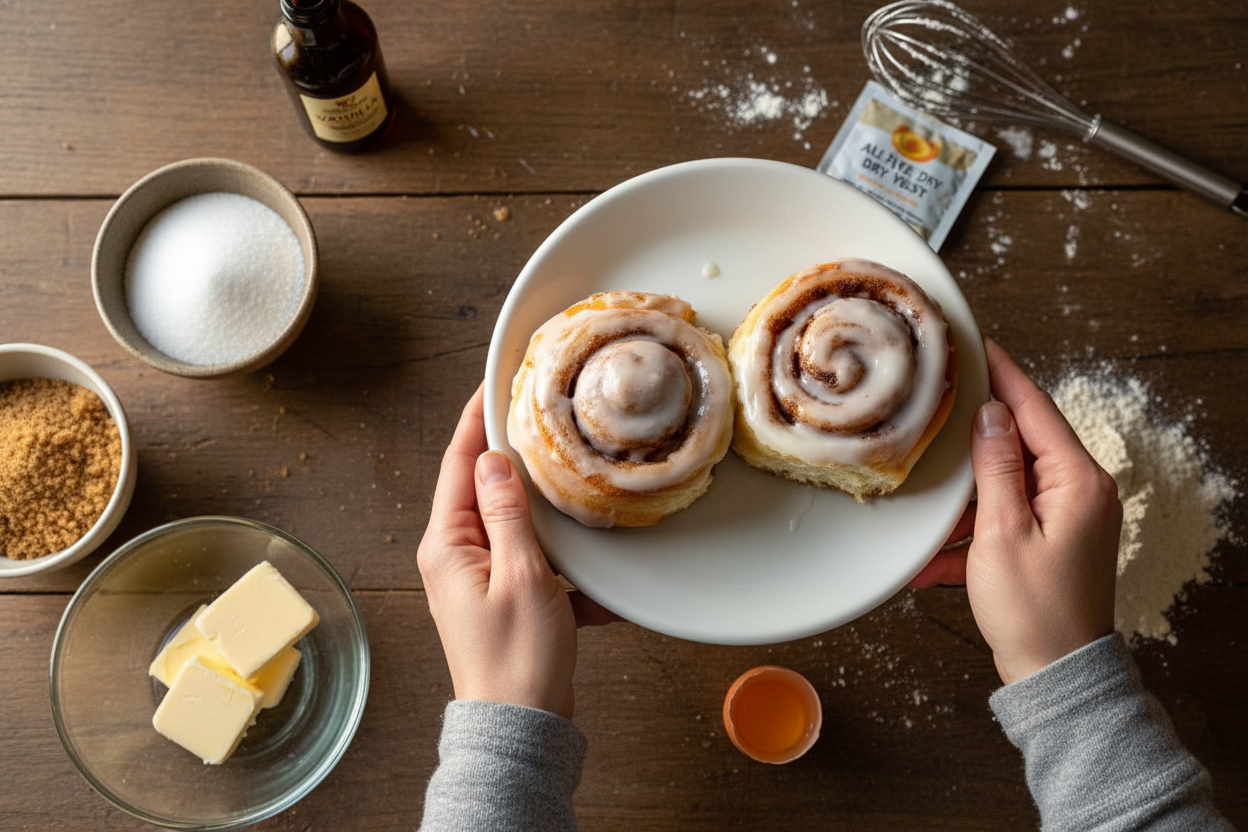
Easy One Hour Cinnamon Rolls Recipe
Description
Fluffy, gooey homemade cinnamon rolls ready in just one hour! Easy yeast dough, simple icing. Perfect quick breakfast or brunch treat.
Ingredients
Cinnamon Sugar Filling
Cream Cheese Icing
Instructions
- Melt 1/4 cup (1/2 stick) unsalted butter in a microwave-safe bowl for about 40-45 seconds. Pour the melted butter into a medium bowl. Using the same bowl, warm 1 cup of milk for 45 seconds, then add it to the butter. Ensure the mixture is between 100-110°F; cool or warm as needed.
- Stir in 1/4 cup granulated sugar and 2 1/4 teaspoons active dry yeast until dissolved. Cover with a towel or plastic wrap and let sit for 10 minutes until foamy. While waiting, preheat your oven to its lowest setting (~170°F), then turn it off to create a warm proofing environment.
- Once the yeast mixture is frothy, add 1 large egg, 1/2 teaspoon salt, and 1 teaspoon vanilla extract. Mix well to combine.
- Gradually add 3 1/2 cups all-purpose flour in 1/2 cup increments, stirring with a spatula. Use your hands to knead any remaining flour gently. The dough should be soft and slightly tacky but not overly sticky.
- Form the dough into a ball, cover it with a tea cloth, and place it in the warm, turned-off oven to proof for 10 minutes.
- In a medium bowl, cream together 1/2 cup softened unsalted butter, 1/2 cup brown sugar, 1/2 cup granulated sugar, 1 1/2 tablespoons ground cinnamon, and 1 teaspoon vanilla extract until light and fluffy. Set aside.
- Remove the dough from the oven and place it on a lightly greased or floured surface. Roll it into a 14″ x 18″ rectangle about 1/4″ thick.
- Preheat the oven to 350°F. Spread the cinnamon sugar filling evenly over the rolled dough, leaving a small margin around the edges.
- Starting from the shorter edge, tightly roll the dough into a log. Using a sharp knife or unflavored dental floss, cut the log into 12 even rolls by gentle sawing motions for clean edges.
- Place the rolls cut side up in a greased 9×13-inch baking dish. Bake at 350°F for 20-25 minutes, or until golden brown. Let cool in the pan for 10 minutes.
- While rolls cool, beat 4 ounces softened cream cheese, 2 cups powdered sugar, 1 teaspoon vanilla extract, and 2 tablespoons milk together. Add more milk one tablespoon at a time until reaching desired spreading or drizzling consistency.
- Spread the cream cheese icing generously over warm cinnamon rolls. Serve immediately and enjoy your delicious homemade cinnamon rolls.
Making the Dough Talk
When you add the flour, do not dump it all in at once. Add it a little at a time. This is so the dough can breathe. It is like eating a big meal slowly. You do not want to stuff yourself all at once. Kneading the dough is one of my favorite parts. Use your hands. Feel the dough change from sticky to smooth. That is the yeast working. It is alive, and it is making bubbles that will make your rolls fluffy. If the dough sticks to your hands, just add a tiny bit more flour. Not too much, though. You want it soft, like a baby’s cheek. Have you ever made bread before? If not, this is a gentle place to start. You will feel so proud when you see those golden rolls come out of the oven.Rolling, Slicing, and Waiting
Rolling the dough into a rectangle is like making a big, sweet blanket. Spread the filling evenly, all the way to the edges except for a tiny bit. Then roll it up tight. Use dental floss to cut the rolls. Slide a long piece of unflavored floss under the log, cross the ends over the top, and pull. It cuts clean without squishing the dough. While they bake, your whole house will smell like a bakery. That is the best part of waiting. The timer feels like it takes forever, I know. But when you pull them out, golden and bubbling, you will forget the wait. Do you let your rolls cool before icing them? I do for about ten minutes. If they are too hot, the icing melts into a puddle. If they are too cold, the icing sits on top like a hat. Ten minutes is just right.The Icing on the Memory
This recipe is not just about food. It is about making moments. When you serve these rolls, people stop talking. They close their eyes. They say “Mmmm” without thinking. That sound is better than any compliment. I once made these for a neighbor who was sad. She ate two, then started crying. She said they tasted like her grandmother’s kitchen. I cried too. That is why I share this recipe with you. Because food can hold memories we forgot we had. Here is my last question for you: Who would you share these cinnamon rolls with right now? Imagine their face when they take the first bite. That is the best part of cooking.Ingredients:
| Ingredient | Amount | Notes |
|---|---|---|
| Milk (whole or 2%) | 1 cup | |
| Unsalted butter, melted | 1/4 cup (1/2 stick) | |
| Active dry yeast | 1 packet (0.25 oz / ~2 1/4 tsp) | |
| Granulated sugar | 1/4 cup | For dough |
| Large egg | 1 | |
| Salt | 1/2 teaspoon | |
| Vanilla extract | 1 teaspoon | For dough |
| All-purpose flour | 3 1/2 cups | |
| Unsalted butter, softened | 1/2 cup (1 stick) | For filling |
| Brown sugar | 1/2 cup | For filling |
| Granulated sugar | 1/2 cup | For filling |
| Ground cinnamon | 1 1/2 tablespoons | For filling |
| Vanilla extract | 1 teaspoon | For filling |
| Cream cheese, softened | 4 ounces | For icing |
| Powdered sugar | 2 cups | For icing |
| Vanilla extract | 1 teaspoon | For icing |
| Milk | 2–4 tablespoons | Add 1 tbsp at a time, as needed |
The Best Smell in My Kitchen
I still remember the first time I made these cinnamon rolls. My kitchen smelled like a bakery, and my dog sat right by the oven door. Doesn’t that smell amazing? These rolls come together in just one hour, so you don’t have to wait all day. You get soft, gooey, and perfectly sweet rolls every single time. Let me walk you through it, just like my grandma did for me.
Step 1: Melt your butter in a microwave-safe bowl for about 40 seconds. Then warm your milk in the same bowl for 45 seconds. Check the temperature — it should feel like warm bathwater, not hot. If it’s too hot, let it cool for a minute. If it’s too cold, give it another few seconds. (Here’s a hard-learned tip: if the milk is too hot, it will kill the yeast, and your rolls won’t rise. I learned that the hard way!)
Step 2: Stir in the sugar and yeast until everything dissolves. Cover the bowl with a towel and let it sit for 10 minutes. You’ll see bubbles and foam form on top — that means your yeast is alive and happy. While you wait, preheat your oven to the lowest setting, then turn it off. This creates a cozy, warm spot for your dough to rise. What’s your favorite thing to bake on a rainy afternoon? Share below!
Step 3: Once the yeast is frothy, crack in the egg, add the salt, and pour in the vanilla. Stir it all together until smooth. Now add the flour one half-cup at a time, mixing with a spatula. When the dough gets too thick, use your hands to gently knead it. The dough should be soft and a little tacky, like a sticky hug.
Step 4: Shape the dough into a ball and place it back in the bowl. Cover it with a clean tea towel and put it in the warm oven for 10 minutes. Don’t open the oven door — just let the dough rest and puff up. While it rests, mix your filling: butter, brown sugar, white sugar, cinnamon, and vanilla. Cream them together until light and fluffy. My grandma always said, “The filling is the heart of the roll.”
Step 5: Roll the dough out on a lightly floured surface into a big rectangle, about 14 by 18 inches. Spread the filling evenly, leaving a tiny border around the edges. Starting from the short side, roll the dough tightly into a log. Then cut it into 12 even slices. I use unflavored dental floss for clean cuts — slide it under the dough, cross the ends, and pull. It works like magic.
Step 6: Place your rolls in a greased 9×13 pan and bake at 350°F for 20 to 25 minutes. Let them cool for 10 minutes while you make the icing. Beat cream cheese, powdered sugar, vanilla, and milk until smooth. Drizzle the icing over the warm rolls and watch it melt into every swirl. Serve immediately, preferably with a tall glass of cold milk.
Cook Time: 20–25 minutes
Total Time: 1 hour
Yield: 12 rolls
Category: Breakfast, Dessert
Three Fun Twists to Try
Sometimes I like to mix things up with these cinnamon rolls. Here are three ways to make them your own. Which one would you try first? Comment below!
Apple Pie Rolls: Before adding the cinnamon filling, scatter some chopped apples and a little more brown sugar on the dough. The apples get soft and jammy in the oven, like a warm pie.
Chocolate Hazelnut Swirl: Spread a thin layer of chocolate hazelnut spread over the dough before adding the cinnamon filling. It makes each roll taste like a fancy bakery treat.
Pumpkin Spice Rolls: Mix two tablespoons of pumpkin puree into the dough and swap the cinnamon for pumpkin pie spice. It turns these into a perfect fall breakfast.
How to Serve and Sip
Your cinnamon rolls are ready, but what goes with them? For a cozy breakfast, serve them on a big plate with a side of scrambled eggs and fresh berries. The tart fruit cuts through the sweetness. For dessert, add a scoop of vanilla ice cream on top. The warm rolls and cold ice cream are a dream pair.
For drinks, try a warm mug of spiced chai tea — the cinnamon and cardamom match the rolls perfectly. If you want something cold, a glass of iced oat milk latte is creamy and delicious. For adults, a small glass of cold milk with a splash of bourbon is a cozy treat. Which would you choose tonight?
Storing and Reheating Your Cinnamon Rolls
These cinnamon rolls are best warm from the oven. But leftovers are a real treat too. Let them cool completely before storing them. Place them in an airtight container at room temperature for up to two days. Do not put them in the fridge or they will dry out.
I once stored a batch in the freezer by accident. I wrapped each roll in plastic wrap, then put them in a freezer bag. They thawed beautifully on the counter overnight. To reheat, pop one in the microwave for 15 seconds. It tastes almost fresh from the oven.
Batch cooking matters because it saves you time on busy mornings. You can make the dough the night before, cover it, and keep it in the fridge. In the morning, let it sit out for 20 minutes, then roll, fill, and bake. This way, you get fresh rolls without rushing. Have you ever tried storing it this way? Share below!
Common Problems and Simple Fixes
Sometimes the dough does not rise. This usually means the milk was too hot or too cold. The milk should feel like warm bath water, between 100 and 110 degrees. If the yeast does not foam, start over with new yeast. This is important because a good rise gives you soft, fluffy rolls.
The filling can leak out while baking. I remember when my first batch made a sticky mess in the pan. The trick is to roll the dough tightly and pinch the seam shut. Also, leave a small border around the edges before spreading the filling. This keeps the sugar and butter inside where they belong.
Your icing might turn out too runny. Just add more powdered sugar one spoonful at a time. Or if it is too thick, add a little more milk. Getting the icing right matters because it makes the rolls feel special and homemade. Which of these problems have you run into before?
*Fun fact: Unflavored dental floss cuts cinnamon rolls cleaner than any knife.*Your Questions Answered
Q: Can I make these gluten-free?
A: Try a 1-to-1 gluten-free flour blend. The dough may be stickier, so add a little extra flour.
Q: Can I make them ahead of time?
A: Yes. Assemble the rolls in the pan, cover, and refrigerate overnight. Bake them in the morning.
Q: What if I do not have cream cheese?
A: Use butter, powdered sugar, and vanilla with a splash of milk. It is still sweet and tasty.
Q: How do I make a smaller batch?
A: Cut the recipe in half. Use a smaller pan, like an 8×8 inch dish, and bake for 18 minutes.
Q: Can I add nuts or raisins?
A: Of course. Sprinkle chopped pecans or raisins over the filling before rolling. Which tip will you try first?
A Warm Goodbye from Chloe
I hope these cinnamon rolls fill your home with that cozy, sweet smell. They remind me of Sunday mornings at my grandma’s table. Baking is a way to slow down and share something good. I would love to see your golden, gooey creations. Have you tried this recipe? Tag us on Pinterest!
Keep your kitchen warm and your heart full. Happy cooking!
—Chloe Hartwell.
Little Secrets for Big Flavor
Let me tell you something I learned the hard way. The temperature of your milk matters. If it is too hot, it kills the yeast. If it is too cold, the yeast goes to sleep. You want it warm like bathwater. That means around 100 to 110 degrees. If you do not have a thermometer, drip a little on your wrist. It should feel warm but not burn. Another secret is the cream cheese icing. Use real cream cheese, not the spread in a tub. The real kind makes the icing thick and dreamy. My friend Carol once used low-fat cream cheese and her icing came out runny like soup. We laughed and called it “cinnamon roll soup.” It still tasted good, but not the same. Here is a little poll for you: Do you like your icing thick like frosting or thin like a glaze? I am a thick girl myself. Drop your answer below.Making the Dough Talk
When you add the flour, do not dump it all in at once. Add it a little at a time. This is so the dough can breathe. It is like eating a big meal slowly. You do not want to stuff yourself all at once. Kneading the dough is one of my favorite parts. Use your hands. Feel the dough change from sticky to smooth. That is the yeast working. It is alive, and it is making bubbles that will make your rolls fluffy. If the dough sticks to your hands, just add a tiny bit more flour. Not too much, though. You want it soft, like a baby’s cheek. Have you ever made bread before? If not, this is a gentle place to start. You will feel so proud when you see those golden rolls come out of the oven.Rolling, Slicing, and Waiting
Rolling the dough into a rectangle is like making a big, sweet blanket. Spread the filling evenly, all the way to the edges except for a tiny bit. Then roll it up tight. Use dental floss to cut the rolls. Slide a long piece of unflavored floss under the log, cross the ends over the top, and pull. It cuts clean without squishing the dough. While they bake, your whole house will smell like a bakery. That is the best part of waiting. The timer feels like it takes forever, I know. But when you pull them out, golden and bubbling, you will forget the wait. Do you let your rolls cool before icing them? I do for about ten minutes. If they are too hot, the icing melts into a puddle. If they are too cold, the icing sits on top like a hat. Ten minutes is just right.The Icing on the Memory
This recipe is not just about food. It is about making moments. When you serve these rolls, people stop talking. They close their eyes. They say “Mmmm” without thinking. That sound is better than any compliment. I once made these for a neighbor who was sad. She ate two, then started crying. She said they tasted like her grandmother’s kitchen. I cried too. That is why I share this recipe with you. Because food can hold memories we forgot we had. Here is my last question for you: Who would you share these cinnamon rolls with right now? Imagine their face when they take the first bite. That is the best part of cooking.Ingredients:
| Ingredient | Amount | Notes |
|---|---|---|
| Milk (whole or 2%) | 1 cup | |
| Unsalted butter, melted | 1/4 cup (1/2 stick) | |
| Active dry yeast | 1 packet (0.25 oz / ~2 1/4 tsp) | |
| Granulated sugar | 1/4 cup | For dough |
| Large egg | 1 | |
| Salt | 1/2 teaspoon | |
| Vanilla extract | 1 teaspoon | For dough |
| All-purpose flour | 3 1/2 cups | |
| Unsalted butter, softened | 1/2 cup (1 stick) | For filling |
| Brown sugar | 1/2 cup | For filling |
| Granulated sugar | 1/2 cup | For filling |
| Ground cinnamon | 1 1/2 tablespoons | For filling |
| Vanilla extract | 1 teaspoon | For filling |
| Cream cheese, softened | 4 ounces | For icing |
| Powdered sugar | 2 cups | For icing |
| Vanilla extract | 1 teaspoon | For icing |
| Milk | 2–4 tablespoons | Add 1 tbsp at a time, as needed |
The Best Smell in My Kitchen
I still remember the first time I made these cinnamon rolls. My kitchen smelled like a bakery, and my dog sat right by the oven door. Doesn’t that smell amazing? These rolls come together in just one hour, so you don’t have to wait all day. You get soft, gooey, and perfectly sweet rolls every single time. Let me walk you through it, just like my grandma did for me.
Step 1: Melt your butter in a microwave-safe bowl for about 40 seconds. Then warm your milk in the same bowl for 45 seconds. Check the temperature — it should feel like warm bathwater, not hot. If it’s too hot, let it cool for a minute. If it’s too cold, give it another few seconds. (Here’s a hard-learned tip: if the milk is too hot, it will kill the yeast, and your rolls won’t rise. I learned that the hard way!)
Step 2: Stir in the sugar and yeast until everything dissolves. Cover the bowl with a towel and let it sit for 10 minutes. You’ll see bubbles and foam form on top — that means your yeast is alive and happy. While you wait, preheat your oven to the lowest setting, then turn it off. This creates a cozy, warm spot for your dough to rise. What’s your favorite thing to bake on a rainy afternoon? Share below!
Step 3: Once the yeast is frothy, crack in the egg, add the salt, and pour in the vanilla. Stir it all together until smooth. Now add the flour one half-cup at a time, mixing with a spatula. When the dough gets too thick, use your hands to gently knead it. The dough should be soft and a little tacky, like a sticky hug.
Step 4: Shape the dough into a ball and place it back in the bowl. Cover it with a clean tea towel and put it in the warm oven for 10 minutes. Don’t open the oven door — just let the dough rest and puff up. While it rests, mix your filling: butter, brown sugar, white sugar, cinnamon, and vanilla. Cream them together until light and fluffy. My grandma always said, “The filling is the heart of the roll.”
Step 5: Roll the dough out on a lightly floured surface into a big rectangle, about 14 by 18 inches. Spread the filling evenly, leaving a tiny border around the edges. Starting from the short side, roll the dough tightly into a log. Then cut it into 12 even slices. I use unflavored dental floss for clean cuts — slide it under the dough, cross the ends, and pull. It works like magic.
Step 6: Place your rolls in a greased 9×13 pan and bake at 350°F for 20 to 25 minutes. Let them cool for 10 minutes while you make the icing. Beat cream cheese, powdered sugar, vanilla, and milk until smooth. Drizzle the icing over the warm rolls and watch it melt into every swirl. Serve immediately, preferably with a tall glass of cold milk.
Cook Time: 20–25 minutes
Total Time: 1 hour
Yield: 12 rolls
Category: Breakfast, Dessert
Three Fun Twists to Try
Sometimes I like to mix things up with these cinnamon rolls. Here are three ways to make them your own. Which one would you try first? Comment below!
Apple Pie Rolls: Before adding the cinnamon filling, scatter some chopped apples and a little more brown sugar on the dough. The apples get soft and jammy in the oven, like a warm pie.
Chocolate Hazelnut Swirl: Spread a thin layer of chocolate hazelnut spread over the dough before adding the cinnamon filling. It makes each roll taste like a fancy bakery treat.
Pumpkin Spice Rolls: Mix two tablespoons of pumpkin puree into the dough and swap the cinnamon for pumpkin pie spice. It turns these into a perfect fall breakfast.
How to Serve and Sip
Your cinnamon rolls are ready, but what goes with them? For a cozy breakfast, serve them on a big plate with a side of scrambled eggs and fresh berries. The tart fruit cuts through the sweetness. For dessert, add a scoop of vanilla ice cream on top. The warm rolls and cold ice cream are a dream pair.
For drinks, try a warm mug of spiced chai tea — the cinnamon and cardamom match the rolls perfectly. If you want something cold, a glass of iced oat milk latte is creamy and delicious. For adults, a small glass of cold milk with a splash of bourbon is a cozy treat. Which would you choose tonight?
Storing and Reheating Your Cinnamon Rolls
These cinnamon rolls are best warm from the oven. But leftovers are a real treat too. Let them cool completely before storing them. Place them in an airtight container at room temperature for up to two days. Do not put them in the fridge or they will dry out.
I once stored a batch in the freezer by accident. I wrapped each roll in plastic wrap, then put them in a freezer bag. They thawed beautifully on the counter overnight. To reheat, pop one in the microwave for 15 seconds. It tastes almost fresh from the oven.
Batch cooking matters because it saves you time on busy mornings. You can make the dough the night before, cover it, and keep it in the fridge. In the morning, let it sit out for 20 minutes, then roll, fill, and bake. This way, you get fresh rolls without rushing. Have you ever tried storing it this way? Share below!
Common Problems and Simple Fixes
Sometimes the dough does not rise. This usually means the milk was too hot or too cold. The milk should feel like warm bath water, between 100 and 110 degrees. If the yeast does not foam, start over with new yeast. This is important because a good rise gives you soft, fluffy rolls.
The filling can leak out while baking. I remember when my first batch made a sticky mess in the pan. The trick is to roll the dough tightly and pinch the seam shut. Also, leave a small border around the edges before spreading the filling. This keeps the sugar and butter inside where they belong.
Your icing might turn out too runny. Just add more powdered sugar one spoonful at a time. Or if it is too thick, add a little more milk. Getting the icing right matters because it makes the rolls feel special and homemade. Which of these problems have you run into before?
*Fun fact: Unflavored dental floss cuts cinnamon rolls cleaner than any knife.*Your Questions Answered
Q: Can I make these gluten-free?
A: Try a 1-to-1 gluten-free flour blend. The dough may be stickier, so add a little extra flour.
Q: Can I make them ahead of time?
A: Yes. Assemble the rolls in the pan, cover, and refrigerate overnight. Bake them in the morning.
Q: What if I do not have cream cheese?
A: Use butter, powdered sugar, and vanilla with a splash of milk. It is still sweet and tasty.
Q: How do I make a smaller batch?
A: Cut the recipe in half. Use a smaller pan, like an 8×8 inch dish, and bake for 18 minutes.
Q: Can I add nuts or raisins?
A: Of course. Sprinkle chopped pecans or raisins over the filling before rolling. Which tip will you try first?
A Warm Goodbye from Chloe
I hope these cinnamon rolls fill your home with that cozy, sweet smell. They remind me of Sunday mornings at my grandma’s table. Baking is a way to slow down and share something good. I would love to see your golden, gooey creations. Have you tried this recipe? Tag us on Pinterest!
Keep your kitchen warm and your heart full. Happy cooking!
—Chloe Hartwell.
The Morning That Changed My Baking
The first time I made cinnamon rolls, I was twelve years old. My grandmother stood beside me in her tiny yellow kitchen. She had flour on her nose and a twinkle in her eye. I remember thinking, “This looks too hard for me.” But she just laughed and said, “Honey, dough is just a friend you haven’t hugged yet.” I still laugh at that. She was right. Simple things like warm milk and butter can turn into something magical. That day, we burned the first batch because we were giggling too much. The second batch was perfect. We ate three each and saved none for my grandpa. He pretended to be mad, then snuck into the kitchen for one anyway. Doesn’t that smell amazing just thinking about it? Have you ever had a baking moment with someone special? Tell me about it in the comments.Why One Hour Feels Like a Gift
This recipe is special because it only takes one hour. Most cinnamon roll recipes ask you to wait two or three hours. I know that feeling when you want something warm but don’t want to wait all afternoon. The trick is using a warm, turned-off oven to help the dough rise fast. It is like giving the dough a cozy blanket. This matters because life is busy. You don’t have to spend all day in the kitchen to make something that tastes like love. You can start at nine in the morning and have warm rolls by ten o’clock. That is a good kind of hurry. Why does this matter? Because when you can make something from scratch quickly, you do it more often. And that means more sticky fingers around your table.The Science of Sweet Swirls
Here is something fun. The cinnamon in this recipe does more than just taste good. Cinnamon has natural oils that wake up your senses. It makes you feel cozy and happy. That is why cinnamon rolls always feel like a hug on a plate. Think about how the filling spreads when you roll the dough. You are making little layers of brown sugar and butter. When they bake, the sugar melts and creates tiny pockets of gooey heaven. *Fun fact: The first cinnamon rolls were made in Sweden in the 1920s. They were called “kanelbulle” and had no icing at all.* Can you imagine that? What is your favorite part of a cinnamon roll? The gooey middle, the crispy edge, or the icing? I love hearing what people pick first.Little Secrets for Big Flavor
Let me tell you something I learned the hard way. The temperature of your milk matters. If it is too hot, it kills the yeast. If it is too cold, the yeast goes to sleep. You want it warm like bathwater. That means around 100 to 110 degrees. If you do not have a thermometer, drip a little on your wrist. It should feel warm but not burn. Another secret is the cream cheese icing. Use real cream cheese, not the spread in a tub. The real kind makes the icing thick and dreamy. My friend Carol once used low-fat cream cheese and her icing came out runny like soup. We laughed and called it “cinnamon roll soup.” It still tasted good, but not the same. Here is a little poll for you: Do you like your icing thick like frosting or thin like a glaze? I am a thick girl myself. Drop your answer below.Making the Dough Talk
When you add the flour, do not dump it all in at once. Add it a little at a time. This is so the dough can breathe. It is like eating a big meal slowly. You do not want to stuff yourself all at once. Kneading the dough is one of my favorite parts. Use your hands. Feel the dough change from sticky to smooth. That is the yeast working. It is alive, and it is making bubbles that will make your rolls fluffy. If the dough sticks to your hands, just add a tiny bit more flour. Not too much, though. You want it soft, like a baby’s cheek. Have you ever made bread before? If not, this is a gentle place to start. You will feel so proud when you see those golden rolls come out of the oven.Rolling, Slicing, and Waiting
Rolling the dough into a rectangle is like making a big, sweet blanket. Spread the filling evenly, all the way to the edges except for a tiny bit. Then roll it up tight. Use dental floss to cut the rolls. Slide a long piece of unflavored floss under the log, cross the ends over the top, and pull. It cuts clean without squishing the dough. While they bake, your whole house will smell like a bakery. That is the best part of waiting. The timer feels like it takes forever, I know. But when you pull them out, golden and bubbling, you will forget the wait. Do you let your rolls cool before icing them? I do for about ten minutes. If they are too hot, the icing melts into a puddle. If they are too cold, the icing sits on top like a hat. Ten minutes is just right.The Icing on the Memory
This recipe is not just about food. It is about making moments. When you serve these rolls, people stop talking. They close their eyes. They say “Mmmm” without thinking. That sound is better than any compliment. I once made these for a neighbor who was sad. She ate two, then started crying. She said they tasted like her grandmother’s kitchen. I cried too. That is why I share this recipe with you. Because food can hold memories we forgot we had. Here is my last question for you: Who would you share these cinnamon rolls with right now? Imagine their face when they take the first bite. That is the best part of cooking.Ingredients:
| Ingredient | Amount | Notes |
|---|---|---|
| Milk (whole or 2%) | 1 cup | |
| Unsalted butter, melted | 1/4 cup (1/2 stick) | |
| Active dry yeast | 1 packet (0.25 oz / ~2 1/4 tsp) | |
| Granulated sugar | 1/4 cup | For dough |
| Large egg | 1 | |
| Salt | 1/2 teaspoon | |
| Vanilla extract | 1 teaspoon | For dough |
| All-purpose flour | 3 1/2 cups | |
| Unsalted butter, softened | 1/2 cup (1 stick) | For filling |
| Brown sugar | 1/2 cup | For filling |
| Granulated sugar | 1/2 cup | For filling |
| Ground cinnamon | 1 1/2 tablespoons | For filling |
| Vanilla extract | 1 teaspoon | For filling |
| Cream cheese, softened | 4 ounces | For icing |
| Powdered sugar | 2 cups | For icing |
| Vanilla extract | 1 teaspoon | For icing |
| Milk | 2–4 tablespoons | Add 1 tbsp at a time, as needed |
The Best Smell in My Kitchen
I still remember the first time I made these cinnamon rolls. My kitchen smelled like a bakery, and my dog sat right by the oven door. Doesn’t that smell amazing? These rolls come together in just one hour, so you don’t have to wait all day. You get soft, gooey, and perfectly sweet rolls every single time. Let me walk you through it, just like my grandma did for me.
Step 1: Melt your butter in a microwave-safe bowl for about 40 seconds. Then warm your milk in the same bowl for 45 seconds. Check the temperature — it should feel like warm bathwater, not hot. If it’s too hot, let it cool for a minute. If it’s too cold, give it another few seconds. (Here’s a hard-learned tip: if the milk is too hot, it will kill the yeast, and your rolls won’t rise. I learned that the hard way!)
Step 2: Stir in the sugar and yeast until everything dissolves. Cover the bowl with a towel and let it sit for 10 minutes. You’ll see bubbles and foam form on top — that means your yeast is alive and happy. While you wait, preheat your oven to the lowest setting, then turn it off. This creates a cozy, warm spot for your dough to rise. What’s your favorite thing to bake on a rainy afternoon? Share below!
Step 3: Once the yeast is frothy, crack in the egg, add the salt, and pour in the vanilla. Stir it all together until smooth. Now add the flour one half-cup at a time, mixing with a spatula. When the dough gets too thick, use your hands to gently knead it. The dough should be soft and a little tacky, like a sticky hug.
Step 4: Shape the dough into a ball and place it back in the bowl. Cover it with a clean tea towel and put it in the warm oven for 10 minutes. Don’t open the oven door — just let the dough rest and puff up. While it rests, mix your filling: butter, brown sugar, white sugar, cinnamon, and vanilla. Cream them together until light and fluffy. My grandma always said, “The filling is the heart of the roll.”
Step 5: Roll the dough out on a lightly floured surface into a big rectangle, about 14 by 18 inches. Spread the filling evenly, leaving a tiny border around the edges. Starting from the short side, roll the dough tightly into a log. Then cut it into 12 even slices. I use unflavored dental floss for clean cuts — slide it under the dough, cross the ends, and pull. It works like magic.
Step 6: Place your rolls in a greased 9×13 pan and bake at 350°F for 20 to 25 minutes. Let them cool for 10 minutes while you make the icing. Beat cream cheese, powdered sugar, vanilla, and milk until smooth. Drizzle the icing over the warm rolls and watch it melt into every swirl. Serve immediately, preferably with a tall glass of cold milk.
Cook Time: 20–25 minutes
Total Time: 1 hour
Yield: 12 rolls
Category: Breakfast, Dessert
Three Fun Twists to Try
Sometimes I like to mix things up with these cinnamon rolls. Here are three ways to make them your own. Which one would you try first? Comment below!
Apple Pie Rolls: Before adding the cinnamon filling, scatter some chopped apples and a little more brown sugar on the dough. The apples get soft and jammy in the oven, like a warm pie.
Chocolate Hazelnut Swirl: Spread a thin layer of chocolate hazelnut spread over the dough before adding the cinnamon filling. It makes each roll taste like a fancy bakery treat.
Pumpkin Spice Rolls: Mix two tablespoons of pumpkin puree into the dough and swap the cinnamon for pumpkin pie spice. It turns these into a perfect fall breakfast.
How to Serve and Sip
Your cinnamon rolls are ready, but what goes with them? For a cozy breakfast, serve them on a big plate with a side of scrambled eggs and fresh berries. The tart fruit cuts through the sweetness. For dessert, add a scoop of vanilla ice cream on top. The warm rolls and cold ice cream are a dream pair.
For drinks, try a warm mug of spiced chai tea — the cinnamon and cardamom match the rolls perfectly. If you want something cold, a glass of iced oat milk latte is creamy and delicious. For adults, a small glass of cold milk with a splash of bourbon is a cozy treat. Which would you choose tonight?
Storing and Reheating Your Cinnamon Rolls
These cinnamon rolls are best warm from the oven. But leftovers are a real treat too. Let them cool completely before storing them. Place them in an airtight container at room temperature for up to two days. Do not put them in the fridge or they will dry out.
I once stored a batch in the freezer by accident. I wrapped each roll in plastic wrap, then put them in a freezer bag. They thawed beautifully on the counter overnight. To reheat, pop one in the microwave for 15 seconds. It tastes almost fresh from the oven.
Batch cooking matters because it saves you time on busy mornings. You can make the dough the night before, cover it, and keep it in the fridge. In the morning, let it sit out for 20 minutes, then roll, fill, and bake. This way, you get fresh rolls without rushing. Have you ever tried storing it this way? Share below!
Common Problems and Simple Fixes
Sometimes the dough does not rise. This usually means the milk was too hot or too cold. The milk should feel like warm bath water, between 100 and 110 degrees. If the yeast does not foam, start over with new yeast. This is important because a good rise gives you soft, fluffy rolls.
The filling can leak out while baking. I remember when my first batch made a sticky mess in the pan. The trick is to roll the dough tightly and pinch the seam shut. Also, leave a small border around the edges before spreading the filling. This keeps the sugar and butter inside where they belong.
Your icing might turn out too runny. Just add more powdered sugar one spoonful at a time. Or if it is too thick, add a little more milk. Getting the icing right matters because it makes the rolls feel special and homemade. Which of these problems have you run into before?
*Fun fact: Unflavored dental floss cuts cinnamon rolls cleaner than any knife.*Your Questions Answered
Q: Can I make these gluten-free?
A: Try a 1-to-1 gluten-free flour blend. The dough may be stickier, so add a little extra flour.
Q: Can I make them ahead of time?
A: Yes. Assemble the rolls in the pan, cover, and refrigerate overnight. Bake them in the morning.
Q: What if I do not have cream cheese?
A: Use butter, powdered sugar, and vanilla with a splash of milk. It is still sweet and tasty.
Q: How do I make a smaller batch?
A: Cut the recipe in half. Use a smaller pan, like an 8×8 inch dish, and bake for 18 minutes.
Q: Can I add nuts or raisins?
A: Of course. Sprinkle chopped pecans or raisins over the filling before rolling. Which tip will you try first?
A Warm Goodbye from Chloe
I hope these cinnamon rolls fill your home with that cozy, sweet smell. They remind me of Sunday mornings at my grandma’s table. Baking is a way to slow down and share something good. I would love to see your golden, gooey creations. Have you tried this recipe? Tag us on Pinterest!
Keep your kitchen warm and your heart full. Happy cooking!
—Chloe Hartwell.




Leave a Reply