
Why the Icing Is Non-Negotiable
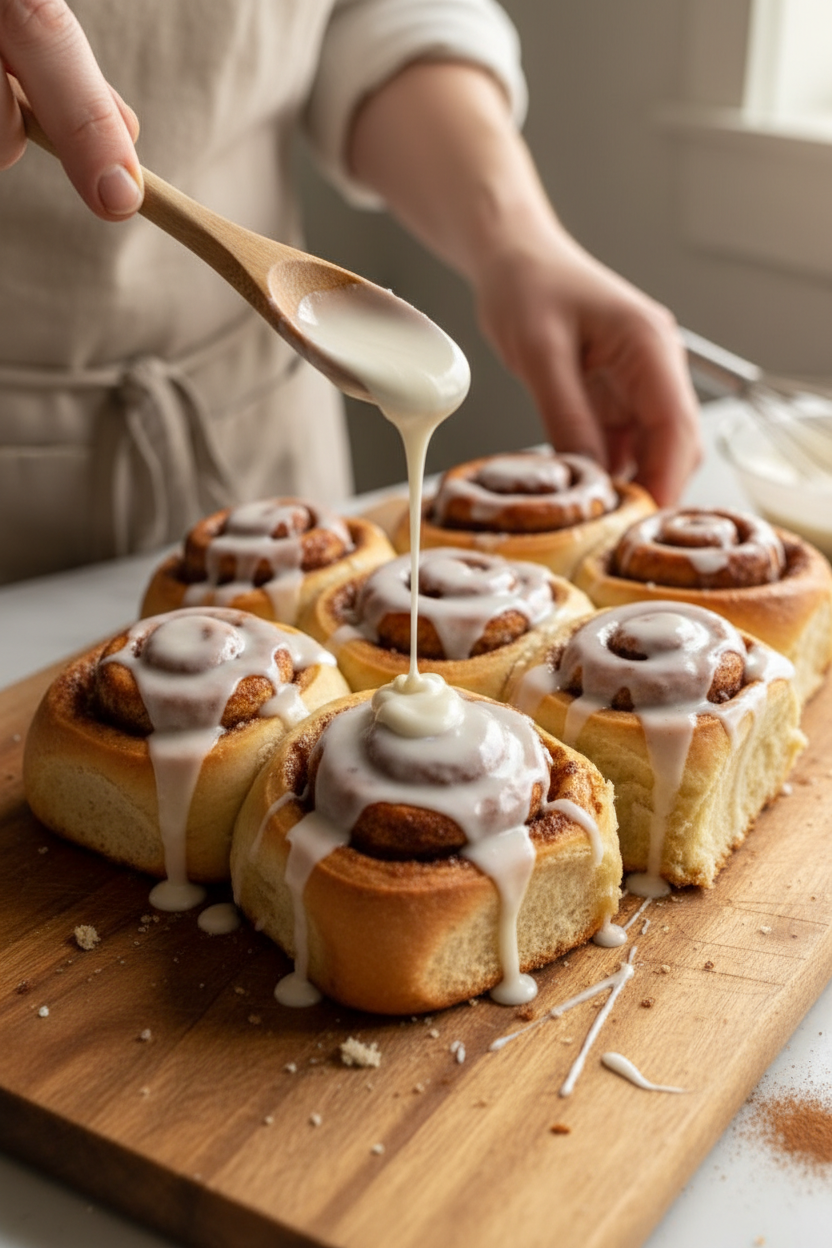
Some people eat cinnamon rolls without icing. I do not trust those people. Just kidding. But seriously, the cream cheese icing is what turns a good roll into a memorable one. It is tangy, sweet, and smooth. You spread it over the warm rolls, and it melts into every swirl. I like to add a little extra vanilla. It makes the kitchen smell even better than before. Doesnt that smell amazing? I think the icing is why we keep coming back for seconds. Why does this matter? Because food is about pleasure. A little indulgence makes life sweeter. And you deserve that.Your Turn to Make a Memory
Ingredients:
| Ingredient | Amount | Notes |
|---|---|---|
| Milk (whole or 2%) | 1 cup | |
| Unsalted butter, melted | 1/4 cup (1/2 stick) | |
| Active dry yeast | 1 (0.25 oz) packet (about 2 1/4 tsp) | |
| Granulated sugar | 1/4 cup | For dough |
| Large egg | 1 | |
| Salt | 1/2 teaspoon | |
| Vanilla extract | 1 teaspoon | For dough |
| All-purpose flour | 3 1/2 cups | |
| Unsalted butter, softened | 1/2 cup (1 stick) | For filling |
| Brown sugar | 1/2 cup | For filling |
| Granulated sugar | 1/2 cup | For filling |
| Ground cinnamon | 1 1/2 tablespoons | For filling |
| Vanilla extract | 1 teaspoon | For filling |
| Cream cheese, softened | 4 ounces | For icing |
| Powdered sugar | 2 cups | For icing |
| Vanilla extract | 1 teaspoon | For icing |
| Milk | 2–4 tablespoons | Add 1 tbsp at a time, as needed |
The Story Behind These Speedy Cinnamon Rolls
I remember the first time I tried making cinnamon rolls from scratch. I was about your age, and my kitchen looked like a flour bomb had gone off. My grandma just laughed and handed me a damp cloth. Now I have a secret that saves time without losing that warm, gooey feeling. These rolls come together in just one hour, start to finish. Doesn’t that sound like a wonderful weekend project?
The best part is the smell that fills your whole house. It is like a cozy hug from the kitchen. My neighbor once knocked on my door asking what I was baking. I still laugh at that every time I pull these rolls from the oven.
Let me walk you through it step by step. I promise, if a 12-year-old me could do it, you can too.
Step 1: First, melt the butter in a microwave-safe bowl for about 40 seconds. Then warm the milk in the same bowl for 45 seconds. Check that the mixture feels warm to your wrist, not hot. (Hard-learned tip: If the milk is too hot, it will kill the yeast. Think bath water, not soup.) Add the sugar and yeast, stir, and cover with a towel. Wait 10 minutes until it looks frothy like a sea foam. Isn’t it amazing how yeast wakes up?
Step 2: While you wait, preheat your oven to its lowest setting, then turn it off. This creates a cozy warm spot for the dough to rise. Once the yeast is foamy, crack in the egg, add salt, and pour in the vanilla. Mix it all together with a spoon. Do you hear that little sizzle? That is the yeast saying hello.
Step 3: Now add the flour, half a cup at a time. Stir gently with a spatula, then use your hands to bring the dough together. It should feel soft and a little sticky, like a marshmallow. If it sticks too much, add a tiny sprinkle of flour. Knead it just a few times until it forms a ball. What is your favorite thing to make in the kitchen? Share below!
Step 4: Place the dough ball in a greased bowl, cover with a tea towel, and pop it in the warm oven for 10 minutes. This is called proofing, and it makes the dough puffy and happy. While it rests, mix the filling. Cream together the softened butter, brown sugar, white sugar, cinnamon, and vanilla until smooth. This filling smells like a candy shop. I sometimes sneak a tiny taste before spreading it.
Step 5: Take the dough out and roll it on a lightly floured surface into a big rectangle. Aim for about 14 inches by 18 inches, roughly the size of a baking sheet. Spread the cinnamon filling all over, leaving a small border around the edges. Then roll it up tightly from the shorter side, like a sleeping bag. Use a sharp knife or dental floss to cut 12 even rolls. Dental floss works like magic and gives clean edges.
Step 6: Place the rolls cut side up in a greased 9×13-inch baking dish. Bake at 350°F for 20 to 25 minutes until golden brown. Let them cool in the pan for 10 minutes. While they cool, beat the cream cheese, powdered sugar, vanilla, and milk into a thick icing. Spread it on warm rolls so it melts into every swirl. Serve immediately and watch them disappear.
Cook Time: 20–25 minutes
Total Time: 1 hour
Yield: 12 cinnamon rolls
Category: Breakfast, Dessert
Three Fun Twists to Try
Once you master the basic recipe, you can play around a little. Here are three of my favorite twists. Each one adds a new flavor without extra work.
Apple Pie Rolls: Before spreading the filling, scatter half a cup of finely chopped apples over the butter. The apples get soft and sweet as they bake. It tastes like a pie in a roll.
Spicy Chocolate Swirl: Add a teaspoon of cocoa powder and a pinch of cayenne pepper to the cinnamon sugar. It gives a warm, surprising kick that grown-ups love.
Lemon Blueberry Version: Swap the cinnamon for lemon zest and replace the brown sugar with white sugar. Fold in a handful of fresh or frozen blueberries before rolling. These are perfect for a summer morning.
Which one would you try first? Comment below!
How to Serve and Sip Along
Cinnamon rolls are wonderful on their own, but a few extras make them feel special. Serve them warm with a pat of butter melting on top. A small sprinkle of chopped pecans or walnuts adds a nice crunch.
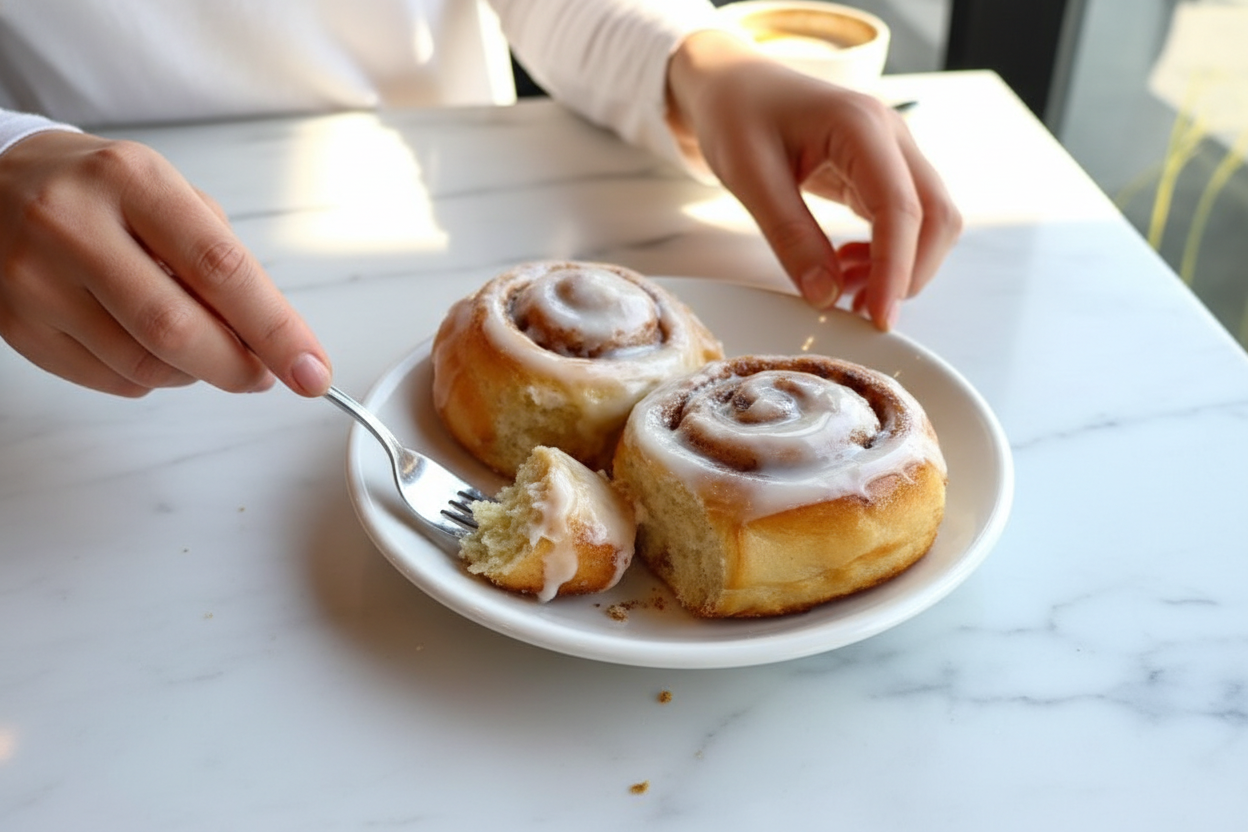
For a breakfast treat, place a single roll in a bowl and pour a little cold milk around it. The milk turns sweet and cinnamon-y. For a dessert plate, drizzle extra icing and add fresh berries on the side. They look like little jewels next to the golden rolls.
For drinks, pour yourself a tall glass of cold milk or a cup of hot cocoa. Grown-ups might enjoy a cup of strong black coffee or a warm chai latte. The spices in the rolls and the drink match perfectly. Which would you choose tonight?
Storing and Reheating Your Cinnamon Rolls
These cinnamon rolls stay soft for days if you store them right. Keep them in an airtight container at room temperature for up to two days. I remember the first time I made a whole batch for a sleepover. We ate half and put the rest in the fridge. The next morning, they were still tender, but the icing had soaked in a bit. For the freezer, wrap each roll tightly in plastic wrap, then foil. They keep for up to three months. To reheat, pop one in the microwave for 15 seconds or warm them in a 350°F oven for 5 minutes. Batch cooking is a lifesaver for busy mornings. You can make the dough the night before, refrigerate it, and bake fresh in the morning. That way, you get warm rolls without the rush. Have you ever tried storing it this way? Share below! Storing properly saves you time and keeps that fresh-baked taste. It means you can enjoy homemade goodness whenever you want.
Common Problems and Easy Fixes
Sometimes the dough doesn’t rise well. That usually means the milk was too hot or too cold. I once killed a batch of yeast because I got impatient and used hot milk. The yeast needs warm liquid, around 100-110°F. If your rolls come out dry, you might have added too much flour. The dough should be soft and slightly tacky. Add flour slowly and stop when it feels right. Another problem is filling leaking out while baking. This happens if you roll the dough too loosely. I remember my first time—I had sticky sugar butter all over the pan. Just roll it tight and pinch the seam closed. Which of these problems have you run into before? Fixing these issues matters because it builds your confidence in the kitchen. You learn to trust your hands and eyes. It also makes the final dish taste exactly how you imagined. That warm, gooey center is worth the small effort.
Your Top Questions Answered
Q: Can I make these gluten-free?
A: Yes, use a 1-to-1 gluten-free flour blend. The dough will be a bit stickier, so add a little extra flour if needed.
Q: Can I make the dough ahead of time?
A: Absolutely. Prepare the dough, cover it, and refrigerate overnight. Let it sit at room temp for 15 minutes before rolling.
Q: Can I swap the cream cheese icing?
A: Sure. Use a simple butter glaze with powdered sugar, milk, and vanilla. Or try a maple glaze for a different flavor.
Q: How do I scale the recipe?
A: Halve or double the ingredients easily. Just keep the ratios the same. Use two 9×13 pans if doubling.
Q: Any tips for softer rolls?
A: Brush the baked rolls with melted butter as soon as they come out of the oven. It adds moisture and shine. Which tip will you try first?
*Fun fact: Unflavored dental floss cuts cinnamon rolls cleaner than a knife. It keeps the layers from squishing.*
A Warm Goodbye from My Kitchen to Yours
Thank you for spending this time with me. I hope these cinnamon rolls fill your home with the same cozy smell I love. Every time I bake them, I think of my grandma letting us lick the icing bowl. It is a simple joy worth sharing. When you make yours, take a picture and share it with someone you love. Have you tried this recipe? Tag us on Pinterest! I cannot wait to see your beautiful rolls. Keep baking, keep tasting, and keep making memories. Happy cooking! —Chloe Hartwell.

Easy One Hour Cinnamon Rolls Recipe
Description
Fluffy, gooey one hour cinnamon rolls from scratch. Quick yeast dough with buttery cinnamon sugar. Easy homemade breakfast or dessert.
Ingredients
Instructions
- Prepare the Dough: Melt 1/4 cup (1/2 stick) unsalted butter in a microwave-safe bowl for about 40-45 seconds. Pour the melted butter into a medium bowl. Using the same bowl, warm 1 cup of milk for 45 seconds, then add it to the butter. Ensure the mixture is between 100-110°F; cool or warm as needed.
- Activate the Yeast & Preheat Oven: Stir in 1/4 cup granulated sugar and 2 1/4 teaspoons active dry yeast until dissolved. Cover with a towel or plastic wrap and let sit for 10 minutes until foamy. While waiting, preheat your oven to its lowest setting (~170°F), then turn it off to create a warm proofing environment.
- Mix Wet Ingredients: Once the yeast mixture is frothy, add 1 large egg, 1/2 teaspoon salt, and 1 teaspoon vanilla extract. Mix well to combine.
- Add the Flour: Gradually add 3 1/2 cups all-purpose flour in 1/2 cup increments, stirring with a spatula. Use your hands to knead any remaining flour gently. The dough should be soft and slightly tacky but not overly sticky.
- Proof the Dough: Form the dough into a ball, cover it with a tea cloth, and place it in the warm, turned-off oven to proof for 10 minutes.
- Prepare the Cinnamon Sugar Filling: In a medium bowl, cream together 1/2 cup softened unsalted butter, 1/2 cup brown sugar, 1/2 cup granulated sugar, 1 1/2 tablespoons ground cinnamon, and 1 teaspoon vanilla extract until light and fluffy. Set aside.
- Roll Out the Dough: Remove the dough from the oven and place it on a lightly greased or floured surface. Roll it into a 14″ x 18″ rectangle about 1/4″ thick.
- Add Filling: Preheat the oven to 350°F. Spread the cinnamon sugar filling evenly over the rolled dough, leaving a small margin around the edges.
- Roll and Slice: Starting from the shorter edge, tightly roll the dough into a log. Using a sharp knife or unflavored dental floss, cut the log into 12 even rolls by gentle sawing motions for clean edges.
- Bake: Place the rolls cut side up in a greased 9×13-inch baking dish. Bake at 350°F for 20-25 minutes, or until golden brown. Let cool in the pan for 10 minutes.
- Make the Cream Cheese Icing: While rolls cool, beat 4 ounces softened cream cheese, 2 cups powdered sugar, 1 teaspoon vanilla extract, and 2 tablespoons milk together. Add more milk one tablespoon at a time until reaching desired spreading or drizzling consistency.
- Frost and Serve: Spread the cream cheese icing generously over warm cinnamon rolls. Serve immediately and enjoy your delicious homemade cinnamon rolls.
Why the Icing Is Non-Negotiable
Some people eat cinnamon rolls without icing. I do not trust those people. Just kidding. But seriously, the cream cheese icing is what turns a good roll into a memorable one. It is tangy, sweet, and smooth. You spread it over the warm rolls, and it melts into every swirl. I like to add a little extra vanilla. It makes the kitchen smell even better than before. Doesnt that smell amazing? I think the icing is why we keep coming back for seconds. Why does this matter? Because food is about pleasure. A little indulgence makes life sweeter. And you deserve that.Your Turn to Make a Memory
Ingredients:
| Ingredient | Amount | Notes |
|---|---|---|
| Milk (whole or 2%) | 1 cup | |
| Unsalted butter, melted | 1/4 cup (1/2 stick) | |
| Active dry yeast | 1 (0.25 oz) packet (about 2 1/4 tsp) | |
| Granulated sugar | 1/4 cup | For dough |
| Large egg | 1 | |
| Salt | 1/2 teaspoon | |
| Vanilla extract | 1 teaspoon | For dough |
| All-purpose flour | 3 1/2 cups | |
| Unsalted butter, softened | 1/2 cup (1 stick) | For filling |
| Brown sugar | 1/2 cup | For filling |
| Granulated sugar | 1/2 cup | For filling |
| Ground cinnamon | 1 1/2 tablespoons | For filling |
| Vanilla extract | 1 teaspoon | For filling |
| Cream cheese, softened | 4 ounces | For icing |
| Powdered sugar | 2 cups | For icing |
| Vanilla extract | 1 teaspoon | For icing |
| Milk | 2–4 tablespoons | Add 1 tbsp at a time, as needed |
The Story Behind These Speedy Cinnamon Rolls
I remember the first time I tried making cinnamon rolls from scratch. I was about your age, and my kitchen looked like a flour bomb had gone off. My grandma just laughed and handed me a damp cloth. Now I have a secret that saves time without losing that warm, gooey feeling. These rolls come together in just one hour, start to finish. Doesn’t that sound like a wonderful weekend project?
The best part is the smell that fills your whole house. It is like a cozy hug from the kitchen. My neighbor once knocked on my door asking what I was baking. I still laugh at that every time I pull these rolls from the oven.
Let me walk you through it step by step. I promise, if a 12-year-old me could do it, you can too.
Step 1: First, melt the butter in a microwave-safe bowl for about 40 seconds. Then warm the milk in the same bowl for 45 seconds. Check that the mixture feels warm to your wrist, not hot. (Hard-learned tip: If the milk is too hot, it will kill the yeast. Think bath water, not soup.) Add the sugar and yeast, stir, and cover with a towel. Wait 10 minutes until it looks frothy like a sea foam. Isn’t it amazing how yeast wakes up?
Step 2: While you wait, preheat your oven to its lowest setting, then turn it off. This creates a cozy warm spot for the dough to rise. Once the yeast is foamy, crack in the egg, add salt, and pour in the vanilla. Mix it all together with a spoon. Do you hear that little sizzle? That is the yeast saying hello.
Step 3: Now add the flour, half a cup at a time. Stir gently with a spatula, then use your hands to bring the dough together. It should feel soft and a little sticky, like a marshmallow. If it sticks too much, add a tiny sprinkle of flour. Knead it just a few times until it forms a ball. What is your favorite thing to make in the kitchen? Share below!
Step 4: Place the dough ball in a greased bowl, cover with a tea towel, and pop it in the warm oven for 10 minutes. This is called proofing, and it makes the dough puffy and happy. While it rests, mix the filling. Cream together the softened butter, brown sugar, white sugar, cinnamon, and vanilla until smooth. This filling smells like a candy shop. I sometimes sneak a tiny taste before spreading it.
Step 5: Take the dough out and roll it on a lightly floured surface into a big rectangle. Aim for about 14 inches by 18 inches, roughly the size of a baking sheet. Spread the cinnamon filling all over, leaving a small border around the edges. Then roll it up tightly from the shorter side, like a sleeping bag. Use a sharp knife or dental floss to cut 12 even rolls. Dental floss works like magic and gives clean edges.
Step 6: Place the rolls cut side up in a greased 9×13-inch baking dish. Bake at 350°F for 20 to 25 minutes until golden brown. Let them cool in the pan for 10 minutes. While they cool, beat the cream cheese, powdered sugar, vanilla, and milk into a thick icing. Spread it on warm rolls so it melts into every swirl. Serve immediately and watch them disappear.
Cook Time: 20–25 minutes
Total Time: 1 hour
Yield: 12 cinnamon rolls
Category: Breakfast, Dessert
Three Fun Twists to Try
Once you master the basic recipe, you can play around a little. Here are three of my favorite twists. Each one adds a new flavor without extra work.
Apple Pie Rolls: Before spreading the filling, scatter half a cup of finely chopped apples over the butter. The apples get soft and sweet as they bake. It tastes like a pie in a roll.
Spicy Chocolate Swirl: Add a teaspoon of cocoa powder and a pinch of cayenne pepper to the cinnamon sugar. It gives a warm, surprising kick that grown-ups love.
Lemon Blueberry Version: Swap the cinnamon for lemon zest and replace the brown sugar with white sugar. Fold in a handful of fresh or frozen blueberries before rolling. These are perfect for a summer morning.
Which one would you try first? Comment below!
How to Serve and Sip Along
Cinnamon rolls are wonderful on their own, but a few extras make them feel special. Serve them warm with a pat of butter melting on top. A small sprinkle of chopped pecans or walnuts adds a nice crunch.
For a breakfast treat, place a single roll in a bowl and pour a little cold milk around it. The milk turns sweet and cinnamon-y. For a dessert plate, drizzle extra icing and add fresh berries on the side. They look like little jewels next to the golden rolls.
For drinks, pour yourself a tall glass of cold milk or a cup of hot cocoa. Grown-ups might enjoy a cup of strong black coffee or a warm chai latte. The spices in the rolls and the drink match perfectly. Which would you choose tonight?
Storing and Reheating Your Cinnamon Rolls
These cinnamon rolls stay soft for days if you store them right. Keep them in an airtight container at room temperature for up to two days. I remember the first time I made a whole batch for a sleepover. We ate half and put the rest in the fridge. The next morning, they were still tender, but the icing had soaked in a bit. For the freezer, wrap each roll tightly in plastic wrap, then foil. They keep for up to three months. To reheat, pop one in the microwave for 15 seconds or warm them in a 350°F oven for 5 minutes. Batch cooking is a lifesaver for busy mornings. You can make the dough the night before, refrigerate it, and bake fresh in the morning. That way, you get warm rolls without the rush. Have you ever tried storing it this way? Share below! Storing properly saves you time and keeps that fresh-baked taste. It means you can enjoy homemade goodness whenever you want.
Common Problems and Easy Fixes
Sometimes the dough doesn’t rise well. That usually means the milk was too hot or too cold. I once killed a batch of yeast because I got impatient and used hot milk. The yeast needs warm liquid, around 100-110°F. If your rolls come out dry, you might have added too much flour. The dough should be soft and slightly tacky. Add flour slowly and stop when it feels right. Another problem is filling leaking out while baking. This happens if you roll the dough too loosely. I remember my first time—I had sticky sugar butter all over the pan. Just roll it tight and pinch the seam closed. Which of these problems have you run into before? Fixing these issues matters because it builds your confidence in the kitchen. You learn to trust your hands and eyes. It also makes the final dish taste exactly how you imagined. That warm, gooey center is worth the small effort.
Your Top Questions Answered
Q: Can I make these gluten-free?
A: Yes, use a 1-to-1 gluten-free flour blend. The dough will be a bit stickier, so add a little extra flour if needed.
Q: Can I make the dough ahead of time?
A: Absolutely. Prepare the dough, cover it, and refrigerate overnight. Let it sit at room temp for 15 minutes before rolling.
Q: Can I swap the cream cheese icing?
A: Sure. Use a simple butter glaze with powdered sugar, milk, and vanilla. Or try a maple glaze for a different flavor.
Q: How do I scale the recipe?
A: Halve or double the ingredients easily. Just keep the ratios the same. Use two 9×13 pans if doubling.
Q: Any tips for softer rolls?
A: Brush the baked rolls with melted butter as soon as they come out of the oven. It adds moisture and shine. Which tip will you try first?
*Fun fact: Unflavored dental floss cuts cinnamon rolls cleaner than a knife. It keeps the layers from squishing.*
A Warm Goodbye from My Kitchen to Yours
Thank you for spending this time with me. I hope these cinnamon rolls fill your home with the same cozy smell I love. Every time I bake them, I think of my grandma letting us lick the icing bowl. It is a simple joy worth sharing. When you make yours, take a picture and share it with someone you love. Have you tried this recipe? Tag us on Pinterest! I cannot wait to see your beautiful rolls. Keep baking, keep tasting, and keep making memories. Happy cooking! —Chloe Hartwell.
Easy One Hour Cinnamon Rolls Recipe
Description
Fluffy, gooey one hour cinnamon rolls from scratch. Quick yeast dough with buttery cinnamon sugar. Easy homemade breakfast or dessert.
Ingredients
Instructions
- Prepare the Dough: Melt 1/4 cup (1/2 stick) unsalted butter in a microwave-safe bowl for about 40-45 seconds. Pour the melted butter into a medium bowl. Using the same bowl, warm 1 cup of milk for 45 seconds, then add it to the butter. Ensure the mixture is between 100-110°F; cool or warm as needed.
- Activate the Yeast & Preheat Oven: Stir in 1/4 cup granulated sugar and 2 1/4 teaspoons active dry yeast until dissolved. Cover with a towel or plastic wrap and let sit for 10 minutes until foamy. While waiting, preheat your oven to its lowest setting (~170°F), then turn it off to create a warm proofing environment.
- Mix Wet Ingredients: Once the yeast mixture is frothy, add 1 large egg, 1/2 teaspoon salt, and 1 teaspoon vanilla extract. Mix well to combine.
- Add the Flour: Gradually add 3 1/2 cups all-purpose flour in 1/2 cup increments, stirring with a spatula. Use your hands to knead any remaining flour gently. The dough should be soft and slightly tacky but not overly sticky.
- Proof the Dough: Form the dough into a ball, cover it with a tea cloth, and place it in the warm, turned-off oven to proof for 10 minutes.
- Prepare the Cinnamon Sugar Filling: In a medium bowl, cream together 1/2 cup softened unsalted butter, 1/2 cup brown sugar, 1/2 cup granulated sugar, 1 1/2 tablespoons ground cinnamon, and 1 teaspoon vanilla extract until light and fluffy. Set aside.
- Roll Out the Dough: Remove the dough from the oven and place it on a lightly greased or floured surface. Roll it into a 14″ x 18″ rectangle about 1/4″ thick.
- Add Filling: Preheat the oven to 350°F. Spread the cinnamon sugar filling evenly over the rolled dough, leaving a small margin around the edges.
- Roll and Slice: Starting from the shorter edge, tightly roll the dough into a log. Using a sharp knife or unflavored dental floss, cut the log into 12 even rolls by gentle sawing motions for clean edges.
- Bake: Place the rolls cut side up in a greased 9×13-inch baking dish. Bake at 350°F for 20-25 minutes, or until golden brown. Let cool in the pan for 10 minutes.
- Make the Cream Cheese Icing: While rolls cool, beat 4 ounces softened cream cheese, 2 cups powdered sugar, 1 teaspoon vanilla extract, and 2 tablespoons milk together. Add more milk one tablespoon at a time until reaching desired spreading or drizzling consistency.
- Frost and Serve: Spread the cream cheese icing generously over warm cinnamon rolls. Serve immediately and enjoy your delicious homemade cinnamon rolls.
Why the Icing Is Non-Negotiable
Some people eat cinnamon rolls without icing. I do not trust those people. Just kidding. But seriously, the cream cheese icing is what turns a good roll into a memorable one. It is tangy, sweet, and smooth. You spread it over the warm rolls, and it melts into every swirl. I like to add a little extra vanilla. It makes the kitchen smell even better than before. Doesnt that smell amazing? I think the icing is why we keep coming back for seconds. Why does this matter? Because food is about pleasure. A little indulgence makes life sweeter. And you deserve that.Your Turn to Make a Memory
Ingredients:
| Ingredient | Amount | Notes |
|---|---|---|
| Milk (whole or 2%) | 1 cup | |
| Unsalted butter, melted | 1/4 cup (1/2 stick) | |
| Active dry yeast | 1 (0.25 oz) packet (about 2 1/4 tsp) | |
| Granulated sugar | 1/4 cup | For dough |
| Large egg | 1 | |
| Salt | 1/2 teaspoon | |
| Vanilla extract | 1 teaspoon | For dough |
| All-purpose flour | 3 1/2 cups | |
| Unsalted butter, softened | 1/2 cup (1 stick) | For filling |
| Brown sugar | 1/2 cup | For filling |
| Granulated sugar | 1/2 cup | For filling |
| Ground cinnamon | 1 1/2 tablespoons | For filling |
| Vanilla extract | 1 teaspoon | For filling |
| Cream cheese, softened | 4 ounces | For icing |
| Powdered sugar | 2 cups | For icing |
| Vanilla extract | 1 teaspoon | For icing |
| Milk | 2–4 tablespoons | Add 1 tbsp at a time, as needed |
The Story Behind These Speedy Cinnamon Rolls
I remember the first time I tried making cinnamon rolls from scratch. I was about your age, and my kitchen looked like a flour bomb had gone off. My grandma just laughed and handed me a damp cloth. Now I have a secret that saves time without losing that warm, gooey feeling. These rolls come together in just one hour, start to finish. Doesn’t that sound like a wonderful weekend project?
The best part is the smell that fills your whole house. It is like a cozy hug from the kitchen. My neighbor once knocked on my door asking what I was baking. I still laugh at that every time I pull these rolls from the oven.
Let me walk you through it step by step. I promise, if a 12-year-old me could do it, you can too.
Step 1: First, melt the butter in a microwave-safe bowl for about 40 seconds. Then warm the milk in the same bowl for 45 seconds. Check that the mixture feels warm to your wrist, not hot. (Hard-learned tip: If the milk is too hot, it will kill the yeast. Think bath water, not soup.) Add the sugar and yeast, stir, and cover with a towel. Wait 10 minutes until it looks frothy like a sea foam. Isn’t it amazing how yeast wakes up?
Step 2: While you wait, preheat your oven to its lowest setting, then turn it off. This creates a cozy warm spot for the dough to rise. Once the yeast is foamy, crack in the egg, add salt, and pour in the vanilla. Mix it all together with a spoon. Do you hear that little sizzle? That is the yeast saying hello.
Step 3: Now add the flour, half a cup at a time. Stir gently with a spatula, then use your hands to bring the dough together. It should feel soft and a little sticky, like a marshmallow. If it sticks too much, add a tiny sprinkle of flour. Knead it just a few times until it forms a ball. What is your favorite thing to make in the kitchen? Share below!
Step 4: Place the dough ball in a greased bowl, cover with a tea towel, and pop it in the warm oven for 10 minutes. This is called proofing, and it makes the dough puffy and happy. While it rests, mix the filling. Cream together the softened butter, brown sugar, white sugar, cinnamon, and vanilla until smooth. This filling smells like a candy shop. I sometimes sneak a tiny taste before spreading it.
Step 5: Take the dough out and roll it on a lightly floured surface into a big rectangle. Aim for about 14 inches by 18 inches, roughly the size of a baking sheet. Spread the cinnamon filling all over, leaving a small border around the edges. Then roll it up tightly from the shorter side, like a sleeping bag. Use a sharp knife or dental floss to cut 12 even rolls. Dental floss works like magic and gives clean edges.
Step 6: Place the rolls cut side up in a greased 9×13-inch baking dish. Bake at 350°F for 20 to 25 minutes until golden brown. Let them cool in the pan for 10 minutes. While they cool, beat the cream cheese, powdered sugar, vanilla, and milk into a thick icing. Spread it on warm rolls so it melts into every swirl. Serve immediately and watch them disappear.
Cook Time: 20–25 minutes
Total Time: 1 hour
Yield: 12 cinnamon rolls
Category: Breakfast, Dessert
Three Fun Twists to Try
Once you master the basic recipe, you can play around a little. Here are three of my favorite twists. Each one adds a new flavor without extra work.
Apple Pie Rolls: Before spreading the filling, scatter half a cup of finely chopped apples over the butter. The apples get soft and sweet as they bake. It tastes like a pie in a roll.
Spicy Chocolate Swirl: Add a teaspoon of cocoa powder and a pinch of cayenne pepper to the cinnamon sugar. It gives a warm, surprising kick that grown-ups love.
Lemon Blueberry Version: Swap the cinnamon for lemon zest and replace the brown sugar with white sugar. Fold in a handful of fresh or frozen blueberries before rolling. These are perfect for a summer morning.
Which one would you try first? Comment below!
How to Serve and Sip Along
Cinnamon rolls are wonderful on their own, but a few extras make them feel special. Serve them warm with a pat of butter melting on top. A small sprinkle of chopped pecans or walnuts adds a nice crunch.
For a breakfast treat, place a single roll in a bowl and pour a little cold milk around it. The milk turns sweet and cinnamon-y. For a dessert plate, drizzle extra icing and add fresh berries on the side. They look like little jewels next to the golden rolls.
For drinks, pour yourself a tall glass of cold milk or a cup of hot cocoa. Grown-ups might enjoy a cup of strong black coffee or a warm chai latte. The spices in the rolls and the drink match perfectly. Which would you choose tonight?
Storing and Reheating Your Cinnamon Rolls
These cinnamon rolls stay soft for days if you store them right. Keep them in an airtight container at room temperature for up to two days. I remember the first time I made a whole batch for a sleepover. We ate half and put the rest in the fridge. The next morning, they were still tender, but the icing had soaked in a bit. For the freezer, wrap each roll tightly in plastic wrap, then foil. They keep for up to three months. To reheat, pop one in the microwave for 15 seconds or warm them in a 350°F oven for 5 minutes. Batch cooking is a lifesaver for busy mornings. You can make the dough the night before, refrigerate it, and bake fresh in the morning. That way, you get warm rolls without the rush. Have you ever tried storing it this way? Share below! Storing properly saves you time and keeps that fresh-baked taste. It means you can enjoy homemade goodness whenever you want.
Common Problems and Easy Fixes
Sometimes the dough doesn’t rise well. That usually means the milk was too hot or too cold. I once killed a batch of yeast because I got impatient and used hot milk. The yeast needs warm liquid, around 100-110°F. If your rolls come out dry, you might have added too much flour. The dough should be soft and slightly tacky. Add flour slowly and stop when it feels right. Another problem is filling leaking out while baking. This happens if you roll the dough too loosely. I remember my first time—I had sticky sugar butter all over the pan. Just roll it tight and pinch the seam closed. Which of these problems have you run into before? Fixing these issues matters because it builds your confidence in the kitchen. You learn to trust your hands and eyes. It also makes the final dish taste exactly how you imagined. That warm, gooey center is worth the small effort.
Your Top Questions Answered
Q: Can I make these gluten-free?
A: Yes, use a 1-to-1 gluten-free flour blend. The dough will be a bit stickier, so add a little extra flour if needed.
Q: Can I make the dough ahead of time?
A: Absolutely. Prepare the dough, cover it, and refrigerate overnight. Let it sit at room temp for 15 minutes before rolling.
Q: Can I swap the cream cheese icing?
A: Sure. Use a simple butter glaze with powdered sugar, milk, and vanilla. Or try a maple glaze for a different flavor.
Q: How do I scale the recipe?
A: Halve or double the ingredients easily. Just keep the ratios the same. Use two 9×13 pans if doubling.
Q: Any tips for softer rolls?
A: Brush the baked rolls with melted butter as soon as they come out of the oven. It adds moisture and shine. Which tip will you try first?
*Fun fact: Unflavored dental floss cuts cinnamon rolls cleaner than a knife. It keeps the layers from squishing.*
A Warm Goodbye from My Kitchen to Yours
Thank you for spending this time with me. I hope these cinnamon rolls fill your home with the same cozy smell I love. Every time I bake them, I think of my grandma letting us lick the icing bowl. It is a simple joy worth sharing. When you make yours, take a picture and share it with someone you love. Have you tried this recipe? Tag us on Pinterest! I cannot wait to see your beautiful rolls. Keep baking, keep tasting, and keep making memories. Happy cooking! —Chloe Hartwell.
Rolling, Filling, and a Little Story
My granddaughter Lily helped me roll out the dough last weekend. She pressed too hard and made a hole. I almost said something. But instead, I showed her how to pinch it closed like a little blanket. She giggled and said it looked like a bandage. I still laugh at that. The filling is the best part anyway. Butter, brown sugar, and cinnamon create a swirl that tastes like autumn in every bite. When you roll the dough tight, you seal in all that sweetness. Then you slice it with dental floss. Yes, dental floss. It gives you clean cuts without squishing the dough. Try it next time. You will thank me. Do you have a funny kitchen helper story? Maybe a kid or a pet who got into the flour? I would love to hear it.Why the Icing Is Non-Negotiable
Some people eat cinnamon rolls without icing. I do not trust those people. Just kidding. But seriously, the cream cheese icing is what turns a good roll into a memorable one. It is tangy, sweet, and smooth. You spread it over the warm rolls, and it melts into every swirl. I like to add a little extra vanilla. It makes the kitchen smell even better than before. Doesnt that smell amazing? I think the icing is why we keep coming back for seconds. Why does this matter? Because food is about pleasure. A little indulgence makes life sweeter. And you deserve that.Your Turn to Make a Memory
Ingredients:
| Ingredient | Amount | Notes |
|---|---|---|
| Milk (whole or 2%) | 1 cup | |
| Unsalted butter, melted | 1/4 cup (1/2 stick) | |
| Active dry yeast | 1 (0.25 oz) packet (about 2 1/4 tsp) | |
| Granulated sugar | 1/4 cup | For dough |
| Large egg | 1 | |
| Salt | 1/2 teaspoon | |
| Vanilla extract | 1 teaspoon | For dough |
| All-purpose flour | 3 1/2 cups | |
| Unsalted butter, softened | 1/2 cup (1 stick) | For filling |
| Brown sugar | 1/2 cup | For filling |
| Granulated sugar | 1/2 cup | For filling |
| Ground cinnamon | 1 1/2 tablespoons | For filling |
| Vanilla extract | 1 teaspoon | For filling |
| Cream cheese, softened | 4 ounces | For icing |
| Powdered sugar | 2 cups | For icing |
| Vanilla extract | 1 teaspoon | For icing |
| Milk | 2–4 tablespoons | Add 1 tbsp at a time, as needed |
The Story Behind These Speedy Cinnamon Rolls
I remember the first time I tried making cinnamon rolls from scratch. I was about your age, and my kitchen looked like a flour bomb had gone off. My grandma just laughed and handed me a damp cloth. Now I have a secret that saves time without losing that warm, gooey feeling. These rolls come together in just one hour, start to finish. Doesn’t that sound like a wonderful weekend project?
The best part is the smell that fills your whole house. It is like a cozy hug from the kitchen. My neighbor once knocked on my door asking what I was baking. I still laugh at that every time I pull these rolls from the oven.
Let me walk you through it step by step. I promise, if a 12-year-old me could do it, you can too.
Step 1: First, melt the butter in a microwave-safe bowl for about 40 seconds. Then warm the milk in the same bowl for 45 seconds. Check that the mixture feels warm to your wrist, not hot. (Hard-learned tip: If the milk is too hot, it will kill the yeast. Think bath water, not soup.) Add the sugar and yeast, stir, and cover with a towel. Wait 10 minutes until it looks frothy like a sea foam. Isn’t it amazing how yeast wakes up?
Step 2: While you wait, preheat your oven to its lowest setting, then turn it off. This creates a cozy warm spot for the dough to rise. Once the yeast is foamy, crack in the egg, add salt, and pour in the vanilla. Mix it all together with a spoon. Do you hear that little sizzle? That is the yeast saying hello.
Step 3: Now add the flour, half a cup at a time. Stir gently with a spatula, then use your hands to bring the dough together. It should feel soft and a little sticky, like a marshmallow. If it sticks too much, add a tiny sprinkle of flour. Knead it just a few times until it forms a ball. What is your favorite thing to make in the kitchen? Share below!
Step 4: Place the dough ball in a greased bowl, cover with a tea towel, and pop it in the warm oven for 10 minutes. This is called proofing, and it makes the dough puffy and happy. While it rests, mix the filling. Cream together the softened butter, brown sugar, white sugar, cinnamon, and vanilla until smooth. This filling smells like a candy shop. I sometimes sneak a tiny taste before spreading it.
Step 5: Take the dough out and roll it on a lightly floured surface into a big rectangle. Aim for about 14 inches by 18 inches, roughly the size of a baking sheet. Spread the cinnamon filling all over, leaving a small border around the edges. Then roll it up tightly from the shorter side, like a sleeping bag. Use a sharp knife or dental floss to cut 12 even rolls. Dental floss works like magic and gives clean edges.
Step 6: Place the rolls cut side up in a greased 9×13-inch baking dish. Bake at 350°F for 20 to 25 minutes until golden brown. Let them cool in the pan for 10 minutes. While they cool, beat the cream cheese, powdered sugar, vanilla, and milk into a thick icing. Spread it on warm rolls so it melts into every swirl. Serve immediately and watch them disappear.
Cook Time: 20–25 minutes
Total Time: 1 hour
Yield: 12 cinnamon rolls
Category: Breakfast, Dessert
Three Fun Twists to Try
Once you master the basic recipe, you can play around a little. Here are three of my favorite twists. Each one adds a new flavor without extra work.
Apple Pie Rolls: Before spreading the filling, scatter half a cup of finely chopped apples over the butter. The apples get soft and sweet as they bake. It tastes like a pie in a roll.
Spicy Chocolate Swirl: Add a teaspoon of cocoa powder and a pinch of cayenne pepper to the cinnamon sugar. It gives a warm, surprising kick that grown-ups love.
Lemon Blueberry Version: Swap the cinnamon for lemon zest and replace the brown sugar with white sugar. Fold in a handful of fresh or frozen blueberries before rolling. These are perfect for a summer morning.
Which one would you try first? Comment below!
How to Serve and Sip Along
Cinnamon rolls are wonderful on their own, but a few extras make them feel special. Serve them warm with a pat of butter melting on top. A small sprinkle of chopped pecans or walnuts adds a nice crunch.
For a breakfast treat, place a single roll in a bowl and pour a little cold milk around it. The milk turns sweet and cinnamon-y. For a dessert plate, drizzle extra icing and add fresh berries on the side. They look like little jewels next to the golden rolls.
For drinks, pour yourself a tall glass of cold milk or a cup of hot cocoa. Grown-ups might enjoy a cup of strong black coffee or a warm chai latte. The spices in the rolls and the drink match perfectly. Which would you choose tonight?
Storing and Reheating Your Cinnamon Rolls
These cinnamon rolls stay soft for days if you store them right. Keep them in an airtight container at room temperature for up to two days. I remember the first time I made a whole batch for a sleepover. We ate half and put the rest in the fridge. The next morning, they were still tender, but the icing had soaked in a bit. For the freezer, wrap each roll tightly in plastic wrap, then foil. They keep for up to three months. To reheat, pop one in the microwave for 15 seconds or warm them in a 350°F oven for 5 minutes. Batch cooking is a lifesaver for busy mornings. You can make the dough the night before, refrigerate it, and bake fresh in the morning. That way, you get warm rolls without the rush. Have you ever tried storing it this way? Share below! Storing properly saves you time and keeps that fresh-baked taste. It means you can enjoy homemade goodness whenever you want.
Common Problems and Easy Fixes
Sometimes the dough doesn’t rise well. That usually means the milk was too hot or too cold. I once killed a batch of yeast because I got impatient and used hot milk. The yeast needs warm liquid, around 100-110°F. If your rolls come out dry, you might have added too much flour. The dough should be soft and slightly tacky. Add flour slowly and stop when it feels right. Another problem is filling leaking out while baking. This happens if you roll the dough too loosely. I remember my first time—I had sticky sugar butter all over the pan. Just roll it tight and pinch the seam closed. Which of these problems have you run into before? Fixing these issues matters because it builds your confidence in the kitchen. You learn to trust your hands and eyes. It also makes the final dish taste exactly how you imagined. That warm, gooey center is worth the small effort.
Your Top Questions Answered
Q: Can I make these gluten-free?
A: Yes, use a 1-to-1 gluten-free flour blend. The dough will be a bit stickier, so add a little extra flour if needed.
Q: Can I make the dough ahead of time?
A: Absolutely. Prepare the dough, cover it, and refrigerate overnight. Let it sit at room temp for 15 minutes before rolling.
Q: Can I swap the cream cheese icing?
A: Sure. Use a simple butter glaze with powdered sugar, milk, and vanilla. Or try a maple glaze for a different flavor.
Q: How do I scale the recipe?
A: Halve or double the ingredients easily. Just keep the ratios the same. Use two 9×13 pans if doubling.
Q: Any tips for softer rolls?
A: Brush the baked rolls with melted butter as soon as they come out of the oven. It adds moisture and shine. Which tip will you try first?
*Fun fact: Unflavored dental floss cuts cinnamon rolls cleaner than a knife. It keeps the layers from squishing.*
A Warm Goodbye from My Kitchen to Yours
Thank you for spending this time with me. I hope these cinnamon rolls fill your home with the same cozy smell I love. Every time I bake them, I think of my grandma letting us lick the icing bowl. It is a simple joy worth sharing. When you make yours, take a picture and share it with someone you love. Have you tried this recipe? Tag us on Pinterest! I cannot wait to see your beautiful rolls. Keep baking, keep tasting, and keep making memories. Happy cooking! —Chloe Hartwell.
Rolling, Filling, and a Little Story
My granddaughter Lily helped me roll out the dough last weekend. She pressed too hard and made a hole. I almost said something. But instead, I showed her how to pinch it closed like a little blanket. She giggled and said it looked like a bandage. I still laugh at that. The filling is the best part anyway. Butter, brown sugar, and cinnamon create a swirl that tastes like autumn in every bite. When you roll the dough tight, you seal in all that sweetness. Then you slice it with dental floss. Yes, dental floss. It gives you clean cuts without squishing the dough. Try it next time. You will thank me. Do you have a funny kitchen helper story? Maybe a kid or a pet who got into the flour? I would love to hear it.Why the Icing Is Non-Negotiable
Some people eat cinnamon rolls without icing. I do not trust those people. Just kidding. But seriously, the cream cheese icing is what turns a good roll into a memorable one. It is tangy, sweet, and smooth. You spread it over the warm rolls, and it melts into every swirl. I like to add a little extra vanilla. It makes the kitchen smell even better than before. Doesnt that smell amazing? I think the icing is why we keep coming back for seconds. Why does this matter? Because food is about pleasure. A little indulgence makes life sweeter. And you deserve that.Your Turn to Make a Memory
Ingredients:
| Ingredient | Amount | Notes |
|---|---|---|
| Milk (whole or 2%) | 1 cup | |
| Unsalted butter, melted | 1/4 cup (1/2 stick) | |
| Active dry yeast | 1 (0.25 oz) packet (about 2 1/4 tsp) | |
| Granulated sugar | 1/4 cup | For dough |
| Large egg | 1 | |
| Salt | 1/2 teaspoon | |
| Vanilla extract | 1 teaspoon | For dough |
| All-purpose flour | 3 1/2 cups | |
| Unsalted butter, softened | 1/2 cup (1 stick) | For filling |
| Brown sugar | 1/2 cup | For filling |
| Granulated sugar | 1/2 cup | For filling |
| Ground cinnamon | 1 1/2 tablespoons | For filling |
| Vanilla extract | 1 teaspoon | For filling |
| Cream cheese, softened | 4 ounces | For icing |
| Powdered sugar | 2 cups | For icing |
| Vanilla extract | 1 teaspoon | For icing |
| Milk | 2–4 tablespoons | Add 1 tbsp at a time, as needed |
The Story Behind These Speedy Cinnamon Rolls
I remember the first time I tried making cinnamon rolls from scratch. I was about your age, and my kitchen looked like a flour bomb had gone off. My grandma just laughed and handed me a damp cloth. Now I have a secret that saves time without losing that warm, gooey feeling. These rolls come together in just one hour, start to finish. Doesn’t that sound like a wonderful weekend project?
The best part is the smell that fills your whole house. It is like a cozy hug from the kitchen. My neighbor once knocked on my door asking what I was baking. I still laugh at that every time I pull these rolls from the oven.
Let me walk you through it step by step. I promise, if a 12-year-old me could do it, you can too.
Step 1: First, melt the butter in a microwave-safe bowl for about 40 seconds. Then warm the milk in the same bowl for 45 seconds. Check that the mixture feels warm to your wrist, not hot. (Hard-learned tip: If the milk is too hot, it will kill the yeast. Think bath water, not soup.) Add the sugar and yeast, stir, and cover with a towel. Wait 10 minutes until it looks frothy like a sea foam. Isn’t it amazing how yeast wakes up?
Step 2: While you wait, preheat your oven to its lowest setting, then turn it off. This creates a cozy warm spot for the dough to rise. Once the yeast is foamy, crack in the egg, add salt, and pour in the vanilla. Mix it all together with a spoon. Do you hear that little sizzle? That is the yeast saying hello.
Step 3: Now add the flour, half a cup at a time. Stir gently with a spatula, then use your hands to bring the dough together. It should feel soft and a little sticky, like a marshmallow. If it sticks too much, add a tiny sprinkle of flour. Knead it just a few times until it forms a ball. What is your favorite thing to make in the kitchen? Share below!
Step 4: Place the dough ball in a greased bowl, cover with a tea towel, and pop it in the warm oven for 10 minutes. This is called proofing, and it makes the dough puffy and happy. While it rests, mix the filling. Cream together the softened butter, brown sugar, white sugar, cinnamon, and vanilla until smooth. This filling smells like a candy shop. I sometimes sneak a tiny taste before spreading it.
Step 5: Take the dough out and roll it on a lightly floured surface into a big rectangle. Aim for about 14 inches by 18 inches, roughly the size of a baking sheet. Spread the cinnamon filling all over, leaving a small border around the edges. Then roll it up tightly from the shorter side, like a sleeping bag. Use a sharp knife or dental floss to cut 12 even rolls. Dental floss works like magic and gives clean edges.
Step 6: Place the rolls cut side up in a greased 9×13-inch baking dish. Bake at 350°F for 20 to 25 minutes until golden brown. Let them cool in the pan for 10 minutes. While they cool, beat the cream cheese, powdered sugar, vanilla, and milk into a thick icing. Spread it on warm rolls so it melts into every swirl. Serve immediately and watch them disappear.
Cook Time: 20–25 minutes
Total Time: 1 hour
Yield: 12 cinnamon rolls
Category: Breakfast, Dessert
Three Fun Twists to Try
Once you master the basic recipe, you can play around a little. Here are three of my favorite twists. Each one adds a new flavor without extra work.
Apple Pie Rolls: Before spreading the filling, scatter half a cup of finely chopped apples over the butter. The apples get soft and sweet as they bake. It tastes like a pie in a roll.
Spicy Chocolate Swirl: Add a teaspoon of cocoa powder and a pinch of cayenne pepper to the cinnamon sugar. It gives a warm, surprising kick that grown-ups love.
Lemon Blueberry Version: Swap the cinnamon for lemon zest and replace the brown sugar with white sugar. Fold in a handful of fresh or frozen blueberries before rolling. These are perfect for a summer morning.
Which one would you try first? Comment below!
How to Serve and Sip Along
Cinnamon rolls are wonderful on their own, but a few extras make them feel special. Serve them warm with a pat of butter melting on top. A small sprinkle of chopped pecans or walnuts adds a nice crunch.
For a breakfast treat, place a single roll in a bowl and pour a little cold milk around it. The milk turns sweet and cinnamon-y. For a dessert plate, drizzle extra icing and add fresh berries on the side. They look like little jewels next to the golden rolls.
For drinks, pour yourself a tall glass of cold milk or a cup of hot cocoa. Grown-ups might enjoy a cup of strong black coffee or a warm chai latte. The spices in the rolls and the drink match perfectly. Which would you choose tonight?
Storing and Reheating Your Cinnamon Rolls
These cinnamon rolls stay soft for days if you store them right. Keep them in an airtight container at room temperature for up to two days. I remember the first time I made a whole batch for a sleepover. We ate half and put the rest in the fridge. The next morning, they were still tender, but the icing had soaked in a bit. For the freezer, wrap each roll tightly in plastic wrap, then foil. They keep for up to three months. To reheat, pop one in the microwave for 15 seconds or warm them in a 350°F oven for 5 minutes. Batch cooking is a lifesaver for busy mornings. You can make the dough the night before, refrigerate it, and bake fresh in the morning. That way, you get warm rolls without the rush. Have you ever tried storing it this way? Share below! Storing properly saves you time and keeps that fresh-baked taste. It means you can enjoy homemade goodness whenever you want.
Common Problems and Easy Fixes
Sometimes the dough doesn’t rise well. That usually means the milk was too hot or too cold. I once killed a batch of yeast because I got impatient and used hot milk. The yeast needs warm liquid, around 100-110°F. If your rolls come out dry, you might have added too much flour. The dough should be soft and slightly tacky. Add flour slowly and stop when it feels right. Another problem is filling leaking out while baking. This happens if you roll the dough too loosely. I remember my first time—I had sticky sugar butter all over the pan. Just roll it tight and pinch the seam closed. Which of these problems have you run into before? Fixing these issues matters because it builds your confidence in the kitchen. You learn to trust your hands and eyes. It also makes the final dish taste exactly how you imagined. That warm, gooey center is worth the small effort.
Your Top Questions Answered
Q: Can I make these gluten-free?
A: Yes, use a 1-to-1 gluten-free flour blend. The dough will be a bit stickier, so add a little extra flour if needed.
Q: Can I make the dough ahead of time?
A: Absolutely. Prepare the dough, cover it, and refrigerate overnight. Let it sit at room temp for 15 minutes before rolling.
Q: Can I swap the cream cheese icing?
A: Sure. Use a simple butter glaze with powdered sugar, milk, and vanilla. Or try a maple glaze for a different flavor.
Q: How do I scale the recipe?
A: Halve or double the ingredients easily. Just keep the ratios the same. Use two 9×13 pans if doubling.
Q: Any tips for softer rolls?
A: Brush the baked rolls with melted butter as soon as they come out of the oven. It adds moisture and shine. Which tip will you try first?
*Fun fact: Unflavored dental floss cuts cinnamon rolls cleaner than a knife. It keeps the layers from squishing.*
A Warm Goodbye from My Kitchen to Yours
Thank you for spending this time with me. I hope these cinnamon rolls fill your home with the same cozy smell I love. Every time I bake them, I think of my grandma letting us lick the icing bowl. It is a simple joy worth sharing. When you make yours, take a picture and share it with someone you love. Have you tried this recipe? Tag us on Pinterest! I cannot wait to see your beautiful rolls. Keep baking, keep tasting, and keep making memories. Happy cooking! —Chloe Hartwell.
The Secret of the One-Hour Miracle
Most people think cinnamon rolls take all day. They think you have to wake up at dawn and wait for hours. That is not true with this recipe. You can go from a bowl of flour to a warm, gooey roll in just sixty minutes. The trick is a warm oven. You turn it on low, then turn it off. That cozy little box becomes a proofing spa for your dough. *Fun fact:* Professional bakers call this a “proof box.” Fancy name for a warm spot. But your oven works just as well. I love this because it means you can make cinnamon rolls on a school morning. Or a lazy Saturday. Or right when a sugar craving hits. Why does this matter? Because homemade food should not feel like a chore. It should feel like a hug you can make anytime. Have you ever made cinnamon rolls before? Or do you usually buy the ones in a tube? I promise, these are different. The difference is love. And butter. Lots of butter.Rolling, Filling, and a Little Story
My granddaughter Lily helped me roll out the dough last weekend. She pressed too hard and made a hole. I almost said something. But instead, I showed her how to pinch it closed like a little blanket. She giggled and said it looked like a bandage. I still laugh at that. The filling is the best part anyway. Butter, brown sugar, and cinnamon create a swirl that tastes like autumn in every bite. When you roll the dough tight, you seal in all that sweetness. Then you slice it with dental floss. Yes, dental floss. It gives you clean cuts without squishing the dough. Try it next time. You will thank me. Do you have a funny kitchen helper story? Maybe a kid or a pet who got into the flour? I would love to hear it.Why the Icing Is Non-Negotiable
Some people eat cinnamon rolls without icing. I do not trust those people. Just kidding. But seriously, the cream cheese icing is what turns a good roll into a memorable one. It is tangy, sweet, and smooth. You spread it over the warm rolls, and it melts into every swirl. I like to add a little extra vanilla. It makes the kitchen smell even better than before. Doesnt that smell amazing? I think the icing is why we keep coming back for seconds. Why does this matter? Because food is about pleasure. A little indulgence makes life sweeter. And you deserve that.Your Turn to Make a Memory
Ingredients:
| Ingredient | Amount | Notes |
|---|---|---|
| Milk (whole or 2%) | 1 cup | |
| Unsalted butter, melted | 1/4 cup (1/2 stick) | |
| Active dry yeast | 1 (0.25 oz) packet (about 2 1/4 tsp) | |
| Granulated sugar | 1/4 cup | For dough |
| Large egg | 1 | |
| Salt | 1/2 teaspoon | |
| Vanilla extract | 1 teaspoon | For dough |
| All-purpose flour | 3 1/2 cups | |
| Unsalted butter, softened | 1/2 cup (1 stick) | For filling |
| Brown sugar | 1/2 cup | For filling |
| Granulated sugar | 1/2 cup | For filling |
| Ground cinnamon | 1 1/2 tablespoons | For filling |
| Vanilla extract | 1 teaspoon | For filling |
| Cream cheese, softened | 4 ounces | For icing |
| Powdered sugar | 2 cups | For icing |
| Vanilla extract | 1 teaspoon | For icing |
| Milk | 2–4 tablespoons | Add 1 tbsp at a time, as needed |
The Story Behind These Speedy Cinnamon Rolls
I remember the first time I tried making cinnamon rolls from scratch. I was about your age, and my kitchen looked like a flour bomb had gone off. My grandma just laughed and handed me a damp cloth. Now I have a secret that saves time without losing that warm, gooey feeling. These rolls come together in just one hour, start to finish. Doesn’t that sound like a wonderful weekend project?
The best part is the smell that fills your whole house. It is like a cozy hug from the kitchen. My neighbor once knocked on my door asking what I was baking. I still laugh at that every time I pull these rolls from the oven.
Let me walk you through it step by step. I promise, if a 12-year-old me could do it, you can too.
Step 1: First, melt the butter in a microwave-safe bowl for about 40 seconds. Then warm the milk in the same bowl for 45 seconds. Check that the mixture feels warm to your wrist, not hot. (Hard-learned tip: If the milk is too hot, it will kill the yeast. Think bath water, not soup.) Add the sugar and yeast, stir, and cover with a towel. Wait 10 minutes until it looks frothy like a sea foam. Isn’t it amazing how yeast wakes up?
Step 2: While you wait, preheat your oven to its lowest setting, then turn it off. This creates a cozy warm spot for the dough to rise. Once the yeast is foamy, crack in the egg, add salt, and pour in the vanilla. Mix it all together with a spoon. Do you hear that little sizzle? That is the yeast saying hello.
Step 3: Now add the flour, half a cup at a time. Stir gently with a spatula, then use your hands to bring the dough together. It should feel soft and a little sticky, like a marshmallow. If it sticks too much, add a tiny sprinkle of flour. Knead it just a few times until it forms a ball. What is your favorite thing to make in the kitchen? Share below!
Step 4: Place the dough ball in a greased bowl, cover with a tea towel, and pop it in the warm oven for 10 minutes. This is called proofing, and it makes the dough puffy and happy. While it rests, mix the filling. Cream together the softened butter, brown sugar, white sugar, cinnamon, and vanilla until smooth. This filling smells like a candy shop. I sometimes sneak a tiny taste before spreading it.
Step 5: Take the dough out and roll it on a lightly floured surface into a big rectangle. Aim for about 14 inches by 18 inches, roughly the size of a baking sheet. Spread the cinnamon filling all over, leaving a small border around the edges. Then roll it up tightly from the shorter side, like a sleeping bag. Use a sharp knife or dental floss to cut 12 even rolls. Dental floss works like magic and gives clean edges.
Step 6: Place the rolls cut side up in a greased 9×13-inch baking dish. Bake at 350°F for 20 to 25 minutes until golden brown. Let them cool in the pan for 10 minutes. While they cool, beat the cream cheese, powdered sugar, vanilla, and milk into a thick icing. Spread it on warm rolls so it melts into every swirl. Serve immediately and watch them disappear.
Cook Time: 20–25 minutes
Total Time: 1 hour
Yield: 12 cinnamon rolls
Category: Breakfast, Dessert
Three Fun Twists to Try
Once you master the basic recipe, you can play around a little. Here are three of my favorite twists. Each one adds a new flavor without extra work.
Apple Pie Rolls: Before spreading the filling, scatter half a cup of finely chopped apples over the butter. The apples get soft and sweet as they bake. It tastes like a pie in a roll.
Spicy Chocolate Swirl: Add a teaspoon of cocoa powder and a pinch of cayenne pepper to the cinnamon sugar. It gives a warm, surprising kick that grown-ups love.
Lemon Blueberry Version: Swap the cinnamon for lemon zest and replace the brown sugar with white sugar. Fold in a handful of fresh or frozen blueberries before rolling. These are perfect for a summer morning.
Which one would you try first? Comment below!
How to Serve and Sip Along
Cinnamon rolls are wonderful on their own, but a few extras make them feel special. Serve them warm with a pat of butter melting on top. A small sprinkle of chopped pecans or walnuts adds a nice crunch.
For a breakfast treat, place a single roll in a bowl and pour a little cold milk around it. The milk turns sweet and cinnamon-y. For a dessert plate, drizzle extra icing and add fresh berries on the side. They look like little jewels next to the golden rolls.
For drinks, pour yourself a tall glass of cold milk or a cup of hot cocoa. Grown-ups might enjoy a cup of strong black coffee or a warm chai latte. The spices in the rolls and the drink match perfectly. Which would you choose tonight?
Storing and Reheating Your Cinnamon Rolls
These cinnamon rolls stay soft for days if you store them right. Keep them in an airtight container at room temperature for up to two days. I remember the first time I made a whole batch for a sleepover. We ate half and put the rest in the fridge. The next morning, they were still tender, but the icing had soaked in a bit. For the freezer, wrap each roll tightly in plastic wrap, then foil. They keep for up to three months. To reheat, pop one in the microwave for 15 seconds or warm them in a 350°F oven for 5 minutes. Batch cooking is a lifesaver for busy mornings. You can make the dough the night before, refrigerate it, and bake fresh in the morning. That way, you get warm rolls without the rush. Have you ever tried storing it this way? Share below! Storing properly saves you time and keeps that fresh-baked taste. It means you can enjoy homemade goodness whenever you want.
Common Problems and Easy Fixes
Sometimes the dough doesn’t rise well. That usually means the milk was too hot or too cold. I once killed a batch of yeast because I got impatient and used hot milk. The yeast needs warm liquid, around 100-110°F. If your rolls come out dry, you might have added too much flour. The dough should be soft and slightly tacky. Add flour slowly and stop when it feels right. Another problem is filling leaking out while baking. This happens if you roll the dough too loosely. I remember my first time—I had sticky sugar butter all over the pan. Just roll it tight and pinch the seam closed. Which of these problems have you run into before? Fixing these issues matters because it builds your confidence in the kitchen. You learn to trust your hands and eyes. It also makes the final dish taste exactly how you imagined. That warm, gooey center is worth the small effort.
Your Top Questions Answered
Q: Can I make these gluten-free?
A: Yes, use a 1-to-1 gluten-free flour blend. The dough will be a bit stickier, so add a little extra flour if needed.
Q: Can I make the dough ahead of time?
A: Absolutely. Prepare the dough, cover it, and refrigerate overnight. Let it sit at room temp for 15 minutes before rolling.
Q: Can I swap the cream cheese icing?
A: Sure. Use a simple butter glaze with powdered sugar, milk, and vanilla. Or try a maple glaze for a different flavor.
Q: How do I scale the recipe?
A: Halve or double the ingredients easily. Just keep the ratios the same. Use two 9×13 pans if doubling.
Q: Any tips for softer rolls?
A: Brush the baked rolls with melted butter as soon as they come out of the oven. It adds moisture and shine. Which tip will you try first?
*Fun fact: Unflavored dental floss cuts cinnamon rolls cleaner than a knife. It keeps the layers from squishing.*
A Warm Goodbye from My Kitchen to Yours
Thank you for spending this time with me. I hope these cinnamon rolls fill your home with the same cozy smell I love. Every time I bake them, I think of my grandma letting us lick the icing bowl. It is a simple joy worth sharing. When you make yours, take a picture and share it with someone you love. Have you tried this recipe? Tag us on Pinterest! I cannot wait to see your beautiful rolls. Keep baking, keep tasting, and keep making memories. Happy cooking! —Chloe Hartwell.
Why the Icing Is Non-Negotiable
Some people eat cinnamon rolls without icing. I do not trust those people. Just kidding. But seriously, the cream cheese icing is what turns a good roll into a memorable one. It is tangy, sweet, and smooth. You spread it over the warm rolls, and it melts into every swirl. I like to add a little extra vanilla. It makes the kitchen smell even better than before. Doesnt that smell amazing? I think the icing is why we keep coming back for seconds. Why does this matter? Because food is about pleasure. A little indulgence makes life sweeter. And you deserve that.Your Turn to Make a Memory
Ingredients:
| Ingredient | Amount | Notes |
|---|---|---|
| Milk (whole or 2%) | 1 cup | |
| Unsalted butter, melted | 1/4 cup (1/2 stick) | |
| Active dry yeast | 1 (0.25 oz) packet (about 2 1/4 tsp) | |
| Granulated sugar | 1/4 cup | For dough |
| Large egg | 1 | |
| Salt | 1/2 teaspoon | |
| Vanilla extract | 1 teaspoon | For dough |
| All-purpose flour | 3 1/2 cups | |
| Unsalted butter, softened | 1/2 cup (1 stick) | For filling |
| Brown sugar | 1/2 cup | For filling |
| Granulated sugar | 1/2 cup | For filling |
| Ground cinnamon | 1 1/2 tablespoons | For filling |
| Vanilla extract | 1 teaspoon | For filling |
| Cream cheese, softened | 4 ounces | For icing |
| Powdered sugar | 2 cups | For icing |
| Vanilla extract | 1 teaspoon | For icing |
| Milk | 2–4 tablespoons | Add 1 tbsp at a time, as needed |
The Story Behind These Speedy Cinnamon Rolls
I remember the first time I tried making cinnamon rolls from scratch. I was about your age, and my kitchen looked like a flour bomb had gone off. My grandma just laughed and handed me a damp cloth. Now I have a secret that saves time without losing that warm, gooey feeling. These rolls come together in just one hour, start to finish. Doesn’t that sound like a wonderful weekend project?
The best part is the smell that fills your whole house. It is like a cozy hug from the kitchen. My neighbor once knocked on my door asking what I was baking. I still laugh at that every time I pull these rolls from the oven.
Let me walk you through it step by step. I promise, if a 12-year-old me could do it, you can too.
Step 1: First, melt the butter in a microwave-safe bowl for about 40 seconds. Then warm the milk in the same bowl for 45 seconds. Check that the mixture feels warm to your wrist, not hot. (Hard-learned tip: If the milk is too hot, it will kill the yeast. Think bath water, not soup.) Add the sugar and yeast, stir, and cover with a towel. Wait 10 minutes until it looks frothy like a sea foam. Isn’t it amazing how yeast wakes up?
Step 2: While you wait, preheat your oven to its lowest setting, then turn it off. This creates a cozy warm spot for the dough to rise. Once the yeast is foamy, crack in the egg, add salt, and pour in the vanilla. Mix it all together with a spoon. Do you hear that little sizzle? That is the yeast saying hello.
Step 3: Now add the flour, half a cup at a time. Stir gently with a spatula, then use your hands to bring the dough together. It should feel soft and a little sticky, like a marshmallow. If it sticks too much, add a tiny sprinkle of flour. Knead it just a few times until it forms a ball. What is your favorite thing to make in the kitchen? Share below!
Step 4: Place the dough ball in a greased bowl, cover with a tea towel, and pop it in the warm oven for 10 minutes. This is called proofing, and it makes the dough puffy and happy. While it rests, mix the filling. Cream together the softened butter, brown sugar, white sugar, cinnamon, and vanilla until smooth. This filling smells like a candy shop. I sometimes sneak a tiny taste before spreading it.
Step 5: Take the dough out and roll it on a lightly floured surface into a big rectangle. Aim for about 14 inches by 18 inches, roughly the size of a baking sheet. Spread the cinnamon filling all over, leaving a small border around the edges. Then roll it up tightly from the shorter side, like a sleeping bag. Use a sharp knife or dental floss to cut 12 even rolls. Dental floss works like magic and gives clean edges.
Step 6: Place the rolls cut side up in a greased 9×13-inch baking dish. Bake at 350°F for 20 to 25 minutes until golden brown. Let them cool in the pan for 10 minutes. While they cool, beat the cream cheese, powdered sugar, vanilla, and milk into a thick icing. Spread it on warm rolls so it melts into every swirl. Serve immediately and watch them disappear.
Cook Time: 20–25 minutes
Total Time: 1 hour
Yield: 12 cinnamon rolls
Category: Breakfast, Dessert
Three Fun Twists to Try
Once you master the basic recipe, you can play around a little. Here are three of my favorite twists. Each one adds a new flavor without extra work.
Apple Pie Rolls: Before spreading the filling, scatter half a cup of finely chopped apples over the butter. The apples get soft and sweet as they bake. It tastes like a pie in a roll.
Spicy Chocolate Swirl: Add a teaspoon of cocoa powder and a pinch of cayenne pepper to the cinnamon sugar. It gives a warm, surprising kick that grown-ups love.
Lemon Blueberry Version: Swap the cinnamon for lemon zest and replace the brown sugar with white sugar. Fold in a handful of fresh or frozen blueberries before rolling. These are perfect for a summer morning.
Which one would you try first? Comment below!
How to Serve and Sip Along
Cinnamon rolls are wonderful on their own, but a few extras make them feel special. Serve them warm with a pat of butter melting on top. A small sprinkle of chopped pecans or walnuts adds a nice crunch.
For a breakfast treat, place a single roll in a bowl and pour a little cold milk around it. The milk turns sweet and cinnamon-y. For a dessert plate, drizzle extra icing and add fresh berries on the side. They look like little jewels next to the golden rolls.
For drinks, pour yourself a tall glass of cold milk or a cup of hot cocoa. Grown-ups might enjoy a cup of strong black coffee or a warm chai latte. The spices in the rolls and the drink match perfectly. Which would you choose tonight?
Storing and Reheating Your Cinnamon Rolls
These cinnamon rolls stay soft for days if you store them right. Keep them in an airtight container at room temperature for up to two days. I remember the first time I made a whole batch for a sleepover. We ate half and put the rest in the fridge. The next morning, they were still tender, but the icing had soaked in a bit. For the freezer, wrap each roll tightly in plastic wrap, then foil. They keep for up to three months. To reheat, pop one in the microwave for 15 seconds or warm them in a 350°F oven for 5 minutes. Batch cooking is a lifesaver for busy mornings. You can make the dough the night before, refrigerate it, and bake fresh in the morning. That way, you get warm rolls without the rush. Have you ever tried storing it this way? Share below! Storing properly saves you time and keeps that fresh-baked taste. It means you can enjoy homemade goodness whenever you want.
Common Problems and Easy Fixes
Sometimes the dough doesn’t rise well. That usually means the milk was too hot or too cold. I once killed a batch of yeast because I got impatient and used hot milk. The yeast needs warm liquid, around 100-110°F. If your rolls come out dry, you might have added too much flour. The dough should be soft and slightly tacky. Add flour slowly and stop when it feels right. Another problem is filling leaking out while baking. This happens if you roll the dough too loosely. I remember my first time—I had sticky sugar butter all over the pan. Just roll it tight and pinch the seam closed. Which of these problems have you run into before? Fixing these issues matters because it builds your confidence in the kitchen. You learn to trust your hands and eyes. It also makes the final dish taste exactly how you imagined. That warm, gooey center is worth the small effort.
Your Top Questions Answered
Q: Can I make these gluten-free?
A: Yes, use a 1-to-1 gluten-free flour blend. The dough will be a bit stickier, so add a little extra flour if needed.
Q: Can I make the dough ahead of time?
A: Absolutely. Prepare the dough, cover it, and refrigerate overnight. Let it sit at room temp for 15 minutes before rolling.
Q: Can I swap the cream cheese icing?
A: Sure. Use a simple butter glaze with powdered sugar, milk, and vanilla. Or try a maple glaze for a different flavor.
Q: How do I scale the recipe?
A: Halve or double the ingredients easily. Just keep the ratios the same. Use two 9×13 pans if doubling.
Q: Any tips for softer rolls?
A: Brush the baked rolls with melted butter as soon as they come out of the oven. It adds moisture and shine. Which tip will you try first?
*Fun fact: Unflavored dental floss cuts cinnamon rolls cleaner than a knife. It keeps the layers from squishing.*
A Warm Goodbye from My Kitchen to Yours
Thank you for spending this time with me. I hope these cinnamon rolls fill your home with the same cozy smell I love. Every time I bake them, I think of my grandma letting us lick the icing bowl. It is a simple joy worth sharing. When you make yours, take a picture and share it with someone you love. Have you tried this recipe? Tag us on Pinterest! I cannot wait to see your beautiful rolls. Keep baking, keep tasting, and keep making memories. Happy cooking! —Chloe Hartwell.
Easy One Hour Cinnamon Rolls Recipe
Description
Fluffy, gooey one hour cinnamon rolls from scratch. Quick yeast dough with buttery cinnamon sugar. Easy homemade breakfast or dessert.
Ingredients
Instructions
- Prepare the Dough: Melt 1/4 cup (1/2 stick) unsalted butter in a microwave-safe bowl for about 40-45 seconds. Pour the melted butter into a medium bowl. Using the same bowl, warm 1 cup of milk for 45 seconds, then add it to the butter. Ensure the mixture is between 100-110°F; cool or warm as needed.
- Activate the Yeast & Preheat Oven: Stir in 1/4 cup granulated sugar and 2 1/4 teaspoons active dry yeast until dissolved. Cover with a towel or plastic wrap and let sit for 10 minutes until foamy. While waiting, preheat your oven to its lowest setting (~170°F), then turn it off to create a warm proofing environment.
- Mix Wet Ingredients: Once the yeast mixture is frothy, add 1 large egg, 1/2 teaspoon salt, and 1 teaspoon vanilla extract. Mix well to combine.
- Add the Flour: Gradually add 3 1/2 cups all-purpose flour in 1/2 cup increments, stirring with a spatula. Use your hands to knead any remaining flour gently. The dough should be soft and slightly tacky but not overly sticky.
- Proof the Dough: Form the dough into a ball, cover it with a tea cloth, and place it in the warm, turned-off oven to proof for 10 minutes.
- Prepare the Cinnamon Sugar Filling: In a medium bowl, cream together 1/2 cup softened unsalted butter, 1/2 cup brown sugar, 1/2 cup granulated sugar, 1 1/2 tablespoons ground cinnamon, and 1 teaspoon vanilla extract until light and fluffy. Set aside.
- Roll Out the Dough: Remove the dough from the oven and place it on a lightly greased or floured surface. Roll it into a 14″ x 18″ rectangle about 1/4″ thick.
- Add Filling: Preheat the oven to 350°F. Spread the cinnamon sugar filling evenly over the rolled dough, leaving a small margin around the edges.
- Roll and Slice: Starting from the shorter edge, tightly roll the dough into a log. Using a sharp knife or unflavored dental floss, cut the log into 12 even rolls by gentle sawing motions for clean edges.
- Bake: Place the rolls cut side up in a greased 9×13-inch baking dish. Bake at 350°F for 20-25 minutes, or until golden brown. Let cool in the pan for 10 minutes.
- Make the Cream Cheese Icing: While rolls cool, beat 4 ounces softened cream cheese, 2 cups powdered sugar, 1 teaspoon vanilla extract, and 2 tablespoons milk together. Add more milk one tablespoon at a time until reaching desired spreading or drizzling consistency.
- Frost and Serve: Spread the cream cheese icing generously over warm cinnamon rolls. Serve immediately and enjoy your delicious homemade cinnamon rolls.
The Morning That Changed My Baking World
I still remember the first time I tried making cinnamon rolls from scratch. I was a nervous wreck. The yeast scared me. I thought it would explode or something. Does that sound silly? Well, I laughed at myself later when the dough puffed up like a happy cloud. That day taught me something. Yeast is not magic. It is just tiny hungry friends that need warm milk and a little sugar to wake up. When you treat them kindly, they make your kitchen smell like heaven. Why does this matter? Because baking is not about being perfect. It is about learning to trust your hands. Have you ever been scared to try a new recipe? What held you back?The Secret of the One-Hour Miracle
Most people think cinnamon rolls take all day. They think you have to wake up at dawn and wait for hours. That is not true with this recipe. You can go from a bowl of flour to a warm, gooey roll in just sixty minutes. The trick is a warm oven. You turn it on low, then turn it off. That cozy little box becomes a proofing spa for your dough. *Fun fact:* Professional bakers call this a “proof box.” Fancy name for a warm spot. But your oven works just as well. I love this because it means you can make cinnamon rolls on a school morning. Or a lazy Saturday. Or right when a sugar craving hits. Why does this matter? Because homemade food should not feel like a chore. It should feel like a hug you can make anytime. Have you ever made cinnamon rolls before? Or do you usually buy the ones in a tube? I promise, these are different. The difference is love. And butter. Lots of butter.Rolling, Filling, and a Little Story
My granddaughter Lily helped me roll out the dough last weekend. She pressed too hard and made a hole. I almost said something. But instead, I showed her how to pinch it closed like a little blanket. She giggled and said it looked like a bandage. I still laugh at that. The filling is the best part anyway. Butter, brown sugar, and cinnamon create a swirl that tastes like autumn in every bite. When you roll the dough tight, you seal in all that sweetness. Then you slice it with dental floss. Yes, dental floss. It gives you clean cuts without squishing the dough. Try it next time. You will thank me. Do you have a funny kitchen helper story? Maybe a kid or a pet who got into the flour? I would love to hear it.Why the Icing Is Non-Negotiable
Some people eat cinnamon rolls without icing. I do not trust those people. Just kidding. But seriously, the cream cheese icing is what turns a good roll into a memorable one. It is tangy, sweet, and smooth. You spread it over the warm rolls, and it melts into every swirl. I like to add a little extra vanilla. It makes the kitchen smell even better than before. Doesnt that smell amazing? I think the icing is why we keep coming back for seconds. Why does this matter? Because food is about pleasure. A little indulgence makes life sweeter. And you deserve that.Your Turn to Make a Memory
Ingredients:
| Ingredient | Amount | Notes |
|---|---|---|
| Milk (whole or 2%) | 1 cup | |
| Unsalted butter, melted | 1/4 cup (1/2 stick) | |
| Active dry yeast | 1 (0.25 oz) packet (about 2 1/4 tsp) | |
| Granulated sugar | 1/4 cup | For dough |
| Large egg | 1 | |
| Salt | 1/2 teaspoon | |
| Vanilla extract | 1 teaspoon | For dough |
| All-purpose flour | 3 1/2 cups | |
| Unsalted butter, softened | 1/2 cup (1 stick) | For filling |
| Brown sugar | 1/2 cup | For filling |
| Granulated sugar | 1/2 cup | For filling |
| Ground cinnamon | 1 1/2 tablespoons | For filling |
| Vanilla extract | 1 teaspoon | For filling |
| Cream cheese, softened | 4 ounces | For icing |
| Powdered sugar | 2 cups | For icing |
| Vanilla extract | 1 teaspoon | For icing |
| Milk | 2–4 tablespoons | Add 1 tbsp at a time, as needed |
The Story Behind These Speedy Cinnamon Rolls
I remember the first time I tried making cinnamon rolls from scratch. I was about your age, and my kitchen looked like a flour bomb had gone off. My grandma just laughed and handed me a damp cloth. Now I have a secret that saves time without losing that warm, gooey feeling. These rolls come together in just one hour, start to finish. Doesn’t that sound like a wonderful weekend project?
The best part is the smell that fills your whole house. It is like a cozy hug from the kitchen. My neighbor once knocked on my door asking what I was baking. I still laugh at that every time I pull these rolls from the oven.
Let me walk you through it step by step. I promise, if a 12-year-old me could do it, you can too.
Step 1: First, melt the butter in a microwave-safe bowl for about 40 seconds. Then warm the milk in the same bowl for 45 seconds. Check that the mixture feels warm to your wrist, not hot. (Hard-learned tip: If the milk is too hot, it will kill the yeast. Think bath water, not soup.) Add the sugar and yeast, stir, and cover with a towel. Wait 10 minutes until it looks frothy like a sea foam. Isn’t it amazing how yeast wakes up?
Step 2: While you wait, preheat your oven to its lowest setting, then turn it off. This creates a cozy warm spot for the dough to rise. Once the yeast is foamy, crack in the egg, add salt, and pour in the vanilla. Mix it all together with a spoon. Do you hear that little sizzle? That is the yeast saying hello.
Step 3: Now add the flour, half a cup at a time. Stir gently with a spatula, then use your hands to bring the dough together. It should feel soft and a little sticky, like a marshmallow. If it sticks too much, add a tiny sprinkle of flour. Knead it just a few times until it forms a ball. What is your favorite thing to make in the kitchen? Share below!
Step 4: Place the dough ball in a greased bowl, cover with a tea towel, and pop it in the warm oven for 10 minutes. This is called proofing, and it makes the dough puffy and happy. While it rests, mix the filling. Cream together the softened butter, brown sugar, white sugar, cinnamon, and vanilla until smooth. This filling smells like a candy shop. I sometimes sneak a tiny taste before spreading it.
Step 5: Take the dough out and roll it on a lightly floured surface into a big rectangle. Aim for about 14 inches by 18 inches, roughly the size of a baking sheet. Spread the cinnamon filling all over, leaving a small border around the edges. Then roll it up tightly from the shorter side, like a sleeping bag. Use a sharp knife or dental floss to cut 12 even rolls. Dental floss works like magic and gives clean edges.
Step 6: Place the rolls cut side up in a greased 9×13-inch baking dish. Bake at 350°F for 20 to 25 minutes until golden brown. Let them cool in the pan for 10 minutes. While they cool, beat the cream cheese, powdered sugar, vanilla, and milk into a thick icing. Spread it on warm rolls so it melts into every swirl. Serve immediately and watch them disappear.
Cook Time: 20–25 minutes
Total Time: 1 hour
Yield: 12 cinnamon rolls
Category: Breakfast, Dessert
Three Fun Twists to Try
Once you master the basic recipe, you can play around a little. Here are three of my favorite twists. Each one adds a new flavor without extra work.
Apple Pie Rolls: Before spreading the filling, scatter half a cup of finely chopped apples over the butter. The apples get soft and sweet as they bake. It tastes like a pie in a roll.
Spicy Chocolate Swirl: Add a teaspoon of cocoa powder and a pinch of cayenne pepper to the cinnamon sugar. It gives a warm, surprising kick that grown-ups love.
Lemon Blueberry Version: Swap the cinnamon for lemon zest and replace the brown sugar with white sugar. Fold in a handful of fresh or frozen blueberries before rolling. These are perfect for a summer morning.
Which one would you try first? Comment below!
How to Serve and Sip Along
Cinnamon rolls are wonderful on their own, but a few extras make them feel special. Serve them warm with a pat of butter melting on top. A small sprinkle of chopped pecans or walnuts adds a nice crunch.
For a breakfast treat, place a single roll in a bowl and pour a little cold milk around it. The milk turns sweet and cinnamon-y. For a dessert plate, drizzle extra icing and add fresh berries on the side. They look like little jewels next to the golden rolls.
For drinks, pour yourself a tall glass of cold milk or a cup of hot cocoa. Grown-ups might enjoy a cup of strong black coffee or a warm chai latte. The spices in the rolls and the drink match perfectly. Which would you choose tonight?
Storing and Reheating Your Cinnamon Rolls
These cinnamon rolls stay soft for days if you store them right. Keep them in an airtight container at room temperature for up to two days. I remember the first time I made a whole batch for a sleepover. We ate half and put the rest in the fridge. The next morning, they were still tender, but the icing had soaked in a bit. For the freezer, wrap each roll tightly in plastic wrap, then foil. They keep for up to three months. To reheat, pop one in the microwave for 15 seconds or warm them in a 350°F oven for 5 minutes. Batch cooking is a lifesaver for busy mornings. You can make the dough the night before, refrigerate it, and bake fresh in the morning. That way, you get warm rolls without the rush. Have you ever tried storing it this way? Share below! Storing properly saves you time and keeps that fresh-baked taste. It means you can enjoy homemade goodness whenever you want.
Common Problems and Easy Fixes
Sometimes the dough doesn’t rise well. That usually means the milk was too hot or too cold. I once killed a batch of yeast because I got impatient and used hot milk. The yeast needs warm liquid, around 100-110°F. If your rolls come out dry, you might have added too much flour. The dough should be soft and slightly tacky. Add flour slowly and stop when it feels right. Another problem is filling leaking out while baking. This happens if you roll the dough too loosely. I remember my first time—I had sticky sugar butter all over the pan. Just roll it tight and pinch the seam closed. Which of these problems have you run into before? Fixing these issues matters because it builds your confidence in the kitchen. You learn to trust your hands and eyes. It also makes the final dish taste exactly how you imagined. That warm, gooey center is worth the small effort.
Your Top Questions Answered
Q: Can I make these gluten-free?
A: Yes, use a 1-to-1 gluten-free flour blend. The dough will be a bit stickier, so add a little extra flour if needed.
Q: Can I make the dough ahead of time?
A: Absolutely. Prepare the dough, cover it, and refrigerate overnight. Let it sit at room temp for 15 minutes before rolling.
Q: Can I swap the cream cheese icing?
A: Sure. Use a simple butter glaze with powdered sugar, milk, and vanilla. Or try a maple glaze for a different flavor.
Q: How do I scale the recipe?
A: Halve or double the ingredients easily. Just keep the ratios the same. Use two 9×13 pans if doubling.
Q: Any tips for softer rolls?
A: Brush the baked rolls with melted butter as soon as they come out of the oven. It adds moisture and shine. Which tip will you try first?
*Fun fact: Unflavored dental floss cuts cinnamon rolls cleaner than a knife. It keeps the layers from squishing.*
A Warm Goodbye from My Kitchen to Yours
Thank you for spending this time with me. I hope these cinnamon rolls fill your home with the same cozy smell I love. Every time I bake them, I think of my grandma letting us lick the icing bowl. It is a simple joy worth sharing. When you make yours, take a picture and share it with someone you love. Have you tried this recipe? Tag us on Pinterest! I cannot wait to see your beautiful rolls. Keep baking, keep tasting, and keep making memories. Happy cooking! —Chloe Hartwell.
Rolling, Filling, and a Little Story
My granddaughter Lily helped me roll out the dough last weekend. She pressed too hard and made a hole. I almost said something. But instead, I showed her how to pinch it closed like a little blanket. She giggled and said it looked like a bandage. I still laugh at that. The filling is the best part anyway. Butter, brown sugar, and cinnamon create a swirl that tastes like autumn in every bite. When you roll the dough tight, you seal in all that sweetness. Then you slice it with dental floss. Yes, dental floss. It gives you clean cuts without squishing the dough. Try it next time. You will thank me. Do you have a funny kitchen helper story? Maybe a kid or a pet who got into the flour? I would love to hear it.Why the Icing Is Non-Negotiable
Some people eat cinnamon rolls without icing. I do not trust those people. Just kidding. But seriously, the cream cheese icing is what turns a good roll into a memorable one. It is tangy, sweet, and smooth. You spread it over the warm rolls, and it melts into every swirl. I like to add a little extra vanilla. It makes the kitchen smell even better than before. Doesnt that smell amazing? I think the icing is why we keep coming back for seconds. Why does this matter? Because food is about pleasure. A little indulgence makes life sweeter. And you deserve that.Your Turn to Make a Memory
Ingredients:
| Ingredient | Amount | Notes |
|---|---|---|
| Milk (whole or 2%) | 1 cup | |
| Unsalted butter, melted | 1/4 cup (1/2 stick) | |
| Active dry yeast | 1 (0.25 oz) packet (about 2 1/4 tsp) | |
| Granulated sugar | 1/4 cup | For dough |
| Large egg | 1 | |
| Salt | 1/2 teaspoon | |
| Vanilla extract | 1 teaspoon | For dough |
| All-purpose flour | 3 1/2 cups | |
| Unsalted butter, softened | 1/2 cup (1 stick) | For filling |
| Brown sugar | 1/2 cup | For filling |
| Granulated sugar | 1/2 cup | For filling |
| Ground cinnamon | 1 1/2 tablespoons | For filling |
| Vanilla extract | 1 teaspoon | For filling |
| Cream cheese, softened | 4 ounces | For icing |
| Powdered sugar | 2 cups | For icing |
| Vanilla extract | 1 teaspoon | For icing |
| Milk | 2–4 tablespoons | Add 1 tbsp at a time, as needed |
The Story Behind These Speedy Cinnamon Rolls
I remember the first time I tried making cinnamon rolls from scratch. I was about your age, and my kitchen looked like a flour bomb had gone off. My grandma just laughed and handed me a damp cloth. Now I have a secret that saves time without losing that warm, gooey feeling. These rolls come together in just one hour, start to finish. Doesn’t that sound like a wonderful weekend project?
The best part is the smell that fills your whole house. It is like a cozy hug from the kitchen. My neighbor once knocked on my door asking what I was baking. I still laugh at that every time I pull these rolls from the oven.
Let me walk you through it step by step. I promise, if a 12-year-old me could do it, you can too.
Step 1: First, melt the butter in a microwave-safe bowl for about 40 seconds. Then warm the milk in the same bowl for 45 seconds. Check that the mixture feels warm to your wrist, not hot. (Hard-learned tip: If the milk is too hot, it will kill the yeast. Think bath water, not soup.) Add the sugar and yeast, stir, and cover with a towel. Wait 10 minutes until it looks frothy like a sea foam. Isn’t it amazing how yeast wakes up?
Step 2: While you wait, preheat your oven to its lowest setting, then turn it off. This creates a cozy warm spot for the dough to rise. Once the yeast is foamy, crack in the egg, add salt, and pour in the vanilla. Mix it all together with a spoon. Do you hear that little sizzle? That is the yeast saying hello.
Step 3: Now add the flour, half a cup at a time. Stir gently with a spatula, then use your hands to bring the dough together. It should feel soft and a little sticky, like a marshmallow. If it sticks too much, add a tiny sprinkle of flour. Knead it just a few times until it forms a ball. What is your favorite thing to make in the kitchen? Share below!
Step 4: Place the dough ball in a greased bowl, cover with a tea towel, and pop it in the warm oven for 10 minutes. This is called proofing, and it makes the dough puffy and happy. While it rests, mix the filling. Cream together the softened butter, brown sugar, white sugar, cinnamon, and vanilla until smooth. This filling smells like a candy shop. I sometimes sneak a tiny taste before spreading it.
Step 5: Take the dough out and roll it on a lightly floured surface into a big rectangle. Aim for about 14 inches by 18 inches, roughly the size of a baking sheet. Spread the cinnamon filling all over, leaving a small border around the edges. Then roll it up tightly from the shorter side, like a sleeping bag. Use a sharp knife or dental floss to cut 12 even rolls. Dental floss works like magic and gives clean edges.
Step 6: Place the rolls cut side up in a greased 9×13-inch baking dish. Bake at 350°F for 20 to 25 minutes until golden brown. Let them cool in the pan for 10 minutes. While they cool, beat the cream cheese, powdered sugar, vanilla, and milk into a thick icing. Spread it on warm rolls so it melts into every swirl. Serve immediately and watch them disappear.
Cook Time: 20–25 minutes
Total Time: 1 hour
Yield: 12 cinnamon rolls
Category: Breakfast, Dessert
Three Fun Twists to Try
Once you master the basic recipe, you can play around a little. Here are three of my favorite twists. Each one adds a new flavor without extra work.
Apple Pie Rolls: Before spreading the filling, scatter half a cup of finely chopped apples over the butter. The apples get soft and sweet as they bake. It tastes like a pie in a roll.
Spicy Chocolate Swirl: Add a teaspoon of cocoa powder and a pinch of cayenne pepper to the cinnamon sugar. It gives a warm, surprising kick that grown-ups love.
Lemon Blueberry Version: Swap the cinnamon for lemon zest and replace the brown sugar with white sugar. Fold in a handful of fresh or frozen blueberries before rolling. These are perfect for a summer morning.
Which one would you try first? Comment below!
How to Serve and Sip Along
Cinnamon rolls are wonderful on their own, but a few extras make them feel special. Serve them warm with a pat of butter melting on top. A small sprinkle of chopped pecans or walnuts adds a nice crunch.
For a breakfast treat, place a single roll in a bowl and pour a little cold milk around it. The milk turns sweet and cinnamon-y. For a dessert plate, drizzle extra icing and add fresh berries on the side. They look like little jewels next to the golden rolls.
For drinks, pour yourself a tall glass of cold milk or a cup of hot cocoa. Grown-ups might enjoy a cup of strong black coffee or a warm chai latte. The spices in the rolls and the drink match perfectly. Which would you choose tonight?
Storing and Reheating Your Cinnamon Rolls
These cinnamon rolls stay soft for days if you store them right. Keep them in an airtight container at room temperature for up to two days. I remember the first time I made a whole batch for a sleepover. We ate half and put the rest in the fridge. The next morning, they were still tender, but the icing had soaked in a bit. For the freezer, wrap each roll tightly in plastic wrap, then foil. They keep for up to three months. To reheat, pop one in the microwave for 15 seconds or warm them in a 350°F oven for 5 minutes. Batch cooking is a lifesaver for busy mornings. You can make the dough the night before, refrigerate it, and bake fresh in the morning. That way, you get warm rolls without the rush. Have you ever tried storing it this way? Share below! Storing properly saves you time and keeps that fresh-baked taste. It means you can enjoy homemade goodness whenever you want.
Common Problems and Easy Fixes
Sometimes the dough doesn’t rise well. That usually means the milk was too hot or too cold. I once killed a batch of yeast because I got impatient and used hot milk. The yeast needs warm liquid, around 100-110°F. If your rolls come out dry, you might have added too much flour. The dough should be soft and slightly tacky. Add flour slowly and stop when it feels right. Another problem is filling leaking out while baking. This happens if you roll the dough too loosely. I remember my first time—I had sticky sugar butter all over the pan. Just roll it tight and pinch the seam closed. Which of these problems have you run into before? Fixing these issues matters because it builds your confidence in the kitchen. You learn to trust your hands and eyes. It also makes the final dish taste exactly how you imagined. That warm, gooey center is worth the small effort.
Your Top Questions Answered
Q: Can I make these gluten-free?
A: Yes, use a 1-to-1 gluten-free flour blend. The dough will be a bit stickier, so add a little extra flour if needed.
Q: Can I make the dough ahead of time?
A: Absolutely. Prepare the dough, cover it, and refrigerate overnight. Let it sit at room temp for 15 minutes before rolling.
Q: Can I swap the cream cheese icing?
A: Sure. Use a simple butter glaze with powdered sugar, milk, and vanilla. Or try a maple glaze for a different flavor.
Q: How do I scale the recipe?
A: Halve or double the ingredients easily. Just keep the ratios the same. Use two 9×13 pans if doubling.
Q: Any tips for softer rolls?
A: Brush the baked rolls with melted butter as soon as they come out of the oven. It adds moisture and shine. Which tip will you try first?
*Fun fact: Unflavored dental floss cuts cinnamon rolls cleaner than a knife. It keeps the layers from squishing.*
A Warm Goodbye from My Kitchen to Yours
Thank you for spending this time with me. I hope these cinnamon rolls fill your home with the same cozy smell I love. Every time I bake them, I think of my grandma letting us lick the icing bowl. It is a simple joy worth sharing. When you make yours, take a picture and share it with someone you love. Have you tried this recipe? Tag us on Pinterest! I cannot wait to see your beautiful rolls. Keep baking, keep tasting, and keep making memories. Happy cooking! —Chloe Hartwell.
The Morning That Changed My Baking World
I still remember the first time I tried making cinnamon rolls from scratch. I was a nervous wreck. The yeast scared me. I thought it would explode or something. Does that sound silly? Well, I laughed at myself later when the dough puffed up like a happy cloud. That day taught me something. Yeast is not magic. It is just tiny hungry friends that need warm milk and a little sugar to wake up. When you treat them kindly, they make your kitchen smell like heaven. Why does this matter? Because baking is not about being perfect. It is about learning to trust your hands. Have you ever been scared to try a new recipe? What held you back?The Secret of the One-Hour Miracle
Most people think cinnamon rolls take all day. They think you have to wake up at dawn and wait for hours. That is not true with this recipe. You can go from a bowl of flour to a warm, gooey roll in just sixty minutes. The trick is a warm oven. You turn it on low, then turn it off. That cozy little box becomes a proofing spa for your dough. *Fun fact:* Professional bakers call this a “proof box.” Fancy name for a warm spot. But your oven works just as well. I love this because it means you can make cinnamon rolls on a school morning. Or a lazy Saturday. Or right when a sugar craving hits. Why does this matter? Because homemade food should not feel like a chore. It should feel like a hug you can make anytime. Have you ever made cinnamon rolls before? Or do you usually buy the ones in a tube? I promise, these are different. The difference is love. And butter. Lots of butter.Rolling, Filling, and a Little Story
My granddaughter Lily helped me roll out the dough last weekend. She pressed too hard and made a hole. I almost said something. But instead, I showed her how to pinch it closed like a little blanket. She giggled and said it looked like a bandage. I still laugh at that. The filling is the best part anyway. Butter, brown sugar, and cinnamon create a swirl that tastes like autumn in every bite. When you roll the dough tight, you seal in all that sweetness. Then you slice it with dental floss. Yes, dental floss. It gives you clean cuts without squishing the dough. Try it next time. You will thank me. Do you have a funny kitchen helper story? Maybe a kid or a pet who got into the flour? I would love to hear it.Why the Icing Is Non-Negotiable
Some people eat cinnamon rolls without icing. I do not trust those people. Just kidding. But seriously, the cream cheese icing is what turns a good roll into a memorable one. It is tangy, sweet, and smooth. You spread it over the warm rolls, and it melts into every swirl. I like to add a little extra vanilla. It makes the kitchen smell even better than before. Doesnt that smell amazing? I think the icing is why we keep coming back for seconds. Why does this matter? Because food is about pleasure. A little indulgence makes life sweeter. And you deserve that.Your Turn to Make a Memory
Ingredients:
| Ingredient | Amount | Notes |
|---|---|---|
| Milk (whole or 2%) | 1 cup | |
| Unsalted butter, melted | 1/4 cup (1/2 stick) | |
| Active dry yeast | 1 (0.25 oz) packet (about 2 1/4 tsp) | |
| Granulated sugar | 1/4 cup | For dough |
| Large egg | 1 | |
| Salt | 1/2 teaspoon | |
| Vanilla extract | 1 teaspoon | For dough |
| All-purpose flour | 3 1/2 cups | |
| Unsalted butter, softened | 1/2 cup (1 stick) | For filling |
| Brown sugar | 1/2 cup | For filling |
| Granulated sugar | 1/2 cup | For filling |
| Ground cinnamon | 1 1/2 tablespoons | For filling |
| Vanilla extract | 1 teaspoon | For filling |
| Cream cheese, softened | 4 ounces | For icing |
| Powdered sugar | 2 cups | For icing |
| Vanilla extract | 1 teaspoon | For icing |
| Milk | 2–4 tablespoons | Add 1 tbsp at a time, as needed |
The Story Behind These Speedy Cinnamon Rolls
I remember the first time I tried making cinnamon rolls from scratch. I was about your age, and my kitchen looked like a flour bomb had gone off. My grandma just laughed and handed me a damp cloth. Now I have a secret that saves time without losing that warm, gooey feeling. These rolls come together in just one hour, start to finish. Doesn’t that sound like a wonderful weekend project?
The best part is the smell that fills your whole house. It is like a cozy hug from the kitchen. My neighbor once knocked on my door asking what I was baking. I still laugh at that every time I pull these rolls from the oven.
Let me walk you through it step by step. I promise, if a 12-year-old me could do it, you can too.
Step 1: First, melt the butter in a microwave-safe bowl for about 40 seconds. Then warm the milk in the same bowl for 45 seconds. Check that the mixture feels warm to your wrist, not hot. (Hard-learned tip: If the milk is too hot, it will kill the yeast. Think bath water, not soup.) Add the sugar and yeast, stir, and cover with a towel. Wait 10 minutes until it looks frothy like a sea foam. Isn’t it amazing how yeast wakes up?
Step 2: While you wait, preheat your oven to its lowest setting, then turn it off. This creates a cozy warm spot for the dough to rise. Once the yeast is foamy, crack in the egg, add salt, and pour in the vanilla. Mix it all together with a spoon. Do you hear that little sizzle? That is the yeast saying hello.
Step 3: Now add the flour, half a cup at a time. Stir gently with a spatula, then use your hands to bring the dough together. It should feel soft and a little sticky, like a marshmallow. If it sticks too much, add a tiny sprinkle of flour. Knead it just a few times until it forms a ball. What is your favorite thing to make in the kitchen? Share below!
Step 4: Place the dough ball in a greased bowl, cover with a tea towel, and pop it in the warm oven for 10 minutes. This is called proofing, and it makes the dough puffy and happy. While it rests, mix the filling. Cream together the softened butter, brown sugar, white sugar, cinnamon, and vanilla until smooth. This filling smells like a candy shop. I sometimes sneak a tiny taste before spreading it.
Step 5: Take the dough out and roll it on a lightly floured surface into a big rectangle. Aim for about 14 inches by 18 inches, roughly the size of a baking sheet. Spread the cinnamon filling all over, leaving a small border around the edges. Then roll it up tightly from the shorter side, like a sleeping bag. Use a sharp knife or dental floss to cut 12 even rolls. Dental floss works like magic and gives clean edges.
Step 6: Place the rolls cut side up in a greased 9×13-inch baking dish. Bake at 350°F for 20 to 25 minutes until golden brown. Let them cool in the pan for 10 minutes. While they cool, beat the cream cheese, powdered sugar, vanilla, and milk into a thick icing. Spread it on warm rolls so it melts into every swirl. Serve immediately and watch them disappear.
Cook Time: 20–25 minutes
Total Time: 1 hour
Yield: 12 cinnamon rolls
Category: Breakfast, Dessert
Three Fun Twists to Try
Once you master the basic recipe, you can play around a little. Here are three of my favorite twists. Each one adds a new flavor without extra work.
Apple Pie Rolls: Before spreading the filling, scatter half a cup of finely chopped apples over the butter. The apples get soft and sweet as they bake. It tastes like a pie in a roll.
Spicy Chocolate Swirl: Add a teaspoon of cocoa powder and a pinch of cayenne pepper to the cinnamon sugar. It gives a warm, surprising kick that grown-ups love.
Lemon Blueberry Version: Swap the cinnamon for lemon zest and replace the brown sugar with white sugar. Fold in a handful of fresh or frozen blueberries before rolling. These are perfect for a summer morning.
Which one would you try first? Comment below!
How to Serve and Sip Along
Cinnamon rolls are wonderful on their own, but a few extras make them feel special. Serve them warm with a pat of butter melting on top. A small sprinkle of chopped pecans or walnuts adds a nice crunch.
For a breakfast treat, place a single roll in a bowl and pour a little cold milk around it. The milk turns sweet and cinnamon-y. For a dessert plate, drizzle extra icing and add fresh berries on the side. They look like little jewels next to the golden rolls.
For drinks, pour yourself a tall glass of cold milk or a cup of hot cocoa. Grown-ups might enjoy a cup of strong black coffee or a warm chai latte. The spices in the rolls and the drink match perfectly. Which would you choose tonight?
Storing and Reheating Your Cinnamon Rolls
These cinnamon rolls stay soft for days if you store them right. Keep them in an airtight container at room temperature for up to two days. I remember the first time I made a whole batch for a sleepover. We ate half and put the rest in the fridge. The next morning, they were still tender, but the icing had soaked in a bit. For the freezer, wrap each roll tightly in plastic wrap, then foil. They keep for up to three months. To reheat, pop one in the microwave for 15 seconds or warm them in a 350°F oven for 5 minutes. Batch cooking is a lifesaver for busy mornings. You can make the dough the night before, refrigerate it, and bake fresh in the morning. That way, you get warm rolls without the rush. Have you ever tried storing it this way? Share below! Storing properly saves you time and keeps that fresh-baked taste. It means you can enjoy homemade goodness whenever you want.
Common Problems and Easy Fixes
Sometimes the dough doesn’t rise well. That usually means the milk was too hot or too cold. I once killed a batch of yeast because I got impatient and used hot milk. The yeast needs warm liquid, around 100-110°F. If your rolls come out dry, you might have added too much flour. The dough should be soft and slightly tacky. Add flour slowly and stop when it feels right. Another problem is filling leaking out while baking. This happens if you roll the dough too loosely. I remember my first time—I had sticky sugar butter all over the pan. Just roll it tight and pinch the seam closed. Which of these problems have you run into before? Fixing these issues matters because it builds your confidence in the kitchen. You learn to trust your hands and eyes. It also makes the final dish taste exactly how you imagined. That warm, gooey center is worth the small effort.
Your Top Questions Answered
Q: Can I make these gluten-free?
A: Yes, use a 1-to-1 gluten-free flour blend. The dough will be a bit stickier, so add a little extra flour if needed.
Q: Can I make the dough ahead of time?
A: Absolutely. Prepare the dough, cover it, and refrigerate overnight. Let it sit at room temp for 15 minutes before rolling.
Q: Can I swap the cream cheese icing?
A: Sure. Use a simple butter glaze with powdered sugar, milk, and vanilla. Or try a maple glaze for a different flavor.
Q: How do I scale the recipe?
A: Halve or double the ingredients easily. Just keep the ratios the same. Use two 9×13 pans if doubling.
Q: Any tips for softer rolls?
A: Brush the baked rolls with melted butter as soon as they come out of the oven. It adds moisture and shine. Which tip will you try first?
*Fun fact: Unflavored dental floss cuts cinnamon rolls cleaner than a knife. It keeps the layers from squishing.*
A Warm Goodbye from My Kitchen to Yours
Thank you for spending this time with me. I hope these cinnamon rolls fill your home with the same cozy smell I love. Every time I bake them, I think of my grandma letting us lick the icing bowl. It is a simple joy worth sharing. When you make yours, take a picture and share it with someone you love. Have you tried this recipe? Tag us on Pinterest! I cannot wait to see your beautiful rolls. Keep baking, keep tasting, and keep making memories. Happy cooking! —Chloe Hartwell.
Rolling, Filling, and a Little Story
My granddaughter Lily helped me roll out the dough last weekend. She pressed too hard and made a hole. I almost said something. But instead, I showed her how to pinch it closed like a little blanket. She giggled and said it looked like a bandage. I still laugh at that. The filling is the best part anyway. Butter, brown sugar, and cinnamon create a swirl that tastes like autumn in every bite. When you roll the dough tight, you seal in all that sweetness. Then you slice it with dental floss. Yes, dental floss. It gives you clean cuts without squishing the dough. Try it next time. You will thank me. Do you have a funny kitchen helper story? Maybe a kid or a pet who got into the flour? I would love to hear it.Why the Icing Is Non-Negotiable
Some people eat cinnamon rolls without icing. I do not trust those people. Just kidding. But seriously, the cream cheese icing is what turns a good roll into a memorable one. It is tangy, sweet, and smooth. You spread it over the warm rolls, and it melts into every swirl. I like to add a little extra vanilla. It makes the kitchen smell even better than before. Doesnt that smell amazing? I think the icing is why we keep coming back for seconds. Why does this matter? Because food is about pleasure. A little indulgence makes life sweeter. And you deserve that.Your Turn to Make a Memory
Ingredients:
| Ingredient | Amount | Notes |
|---|---|---|
| Milk (whole or 2%) | 1 cup | |
| Unsalted butter, melted | 1/4 cup (1/2 stick) | |
| Active dry yeast | 1 (0.25 oz) packet (about 2 1/4 tsp) | |
| Granulated sugar | 1/4 cup | For dough |
| Large egg | 1 | |
| Salt | 1/2 teaspoon | |
| Vanilla extract | 1 teaspoon | For dough |
| All-purpose flour | 3 1/2 cups | |
| Unsalted butter, softened | 1/2 cup (1 stick) | For filling |
| Brown sugar | 1/2 cup | For filling |
| Granulated sugar | 1/2 cup | For filling |
| Ground cinnamon | 1 1/2 tablespoons | For filling |
| Vanilla extract | 1 teaspoon | For filling |
| Cream cheese, softened | 4 ounces | For icing |
| Powdered sugar | 2 cups | For icing |
| Vanilla extract | 1 teaspoon | For icing |
| Milk | 2–4 tablespoons | Add 1 tbsp at a time, as needed |
The Story Behind These Speedy Cinnamon Rolls
I remember the first time I tried making cinnamon rolls from scratch. I was about your age, and my kitchen looked like a flour bomb had gone off. My grandma just laughed and handed me a damp cloth. Now I have a secret that saves time without losing that warm, gooey feeling. These rolls come together in just one hour, start to finish. Doesn’t that sound like a wonderful weekend project?
The best part is the smell that fills your whole house. It is like a cozy hug from the kitchen. My neighbor once knocked on my door asking what I was baking. I still laugh at that every time I pull these rolls from the oven.
Let me walk you through it step by step. I promise, if a 12-year-old me could do it, you can too.
Step 1: First, melt the butter in a microwave-safe bowl for about 40 seconds. Then warm the milk in the same bowl for 45 seconds. Check that the mixture feels warm to your wrist, not hot. (Hard-learned tip: If the milk is too hot, it will kill the yeast. Think bath water, not soup.) Add the sugar and yeast, stir, and cover with a towel. Wait 10 minutes until it looks frothy like a sea foam. Isn’t it amazing how yeast wakes up?
Step 2: While you wait, preheat your oven to its lowest setting, then turn it off. This creates a cozy warm spot for the dough to rise. Once the yeast is foamy, crack in the egg, add salt, and pour in the vanilla. Mix it all together with a spoon. Do you hear that little sizzle? That is the yeast saying hello.
Step 3: Now add the flour, half a cup at a time. Stir gently with a spatula, then use your hands to bring the dough together. It should feel soft and a little sticky, like a marshmallow. If it sticks too much, add a tiny sprinkle of flour. Knead it just a few times until it forms a ball. What is your favorite thing to make in the kitchen? Share below!
Step 4: Place the dough ball in a greased bowl, cover with a tea towel, and pop it in the warm oven for 10 minutes. This is called proofing, and it makes the dough puffy and happy. While it rests, mix the filling. Cream together the softened butter, brown sugar, white sugar, cinnamon, and vanilla until smooth. This filling smells like a candy shop. I sometimes sneak a tiny taste before spreading it.
Step 5: Take the dough out and roll it on a lightly floured surface into a big rectangle. Aim for about 14 inches by 18 inches, roughly the size of a baking sheet. Spread the cinnamon filling all over, leaving a small border around the edges. Then roll it up tightly from the shorter side, like a sleeping bag. Use a sharp knife or dental floss to cut 12 even rolls. Dental floss works like magic and gives clean edges.
Step 6: Place the rolls cut side up in a greased 9×13-inch baking dish. Bake at 350°F for 20 to 25 minutes until golden brown. Let them cool in the pan for 10 minutes. While they cool, beat the cream cheese, powdered sugar, vanilla, and milk into a thick icing. Spread it on warm rolls so it melts into every swirl. Serve immediately and watch them disappear.
Cook Time: 20–25 minutes
Total Time: 1 hour
Yield: 12 cinnamon rolls
Category: Breakfast, Dessert
Three Fun Twists to Try
Once you master the basic recipe, you can play around a little. Here are three of my favorite twists. Each one adds a new flavor without extra work.
Apple Pie Rolls: Before spreading the filling, scatter half a cup of finely chopped apples over the butter. The apples get soft and sweet as they bake. It tastes like a pie in a roll.
Spicy Chocolate Swirl: Add a teaspoon of cocoa powder and a pinch of cayenne pepper to the cinnamon sugar. It gives a warm, surprising kick that grown-ups love.
Lemon Blueberry Version: Swap the cinnamon for lemon zest and replace the brown sugar with white sugar. Fold in a handful of fresh or frozen blueberries before rolling. These are perfect for a summer morning.
Which one would you try first? Comment below!
How to Serve and Sip Along
Cinnamon rolls are wonderful on their own, but a few extras make them feel special. Serve them warm with a pat of butter melting on top. A small sprinkle of chopped pecans or walnuts adds a nice crunch.
For a breakfast treat, place a single roll in a bowl and pour a little cold milk around it. The milk turns sweet and cinnamon-y. For a dessert plate, drizzle extra icing and add fresh berries on the side. They look like little jewels next to the golden rolls.
For drinks, pour yourself a tall glass of cold milk or a cup of hot cocoa. Grown-ups might enjoy a cup of strong black coffee or a warm chai latte. The spices in the rolls and the drink match perfectly. Which would you choose tonight?
Storing and Reheating Your Cinnamon Rolls
These cinnamon rolls stay soft for days if you store them right. Keep them in an airtight container at room temperature for up to two days. I remember the first time I made a whole batch for a sleepover. We ate half and put the rest in the fridge. The next morning, they were still tender, but the icing had soaked in a bit. For the freezer, wrap each roll tightly in plastic wrap, then foil. They keep for up to three months. To reheat, pop one in the microwave for 15 seconds or warm them in a 350°F oven for 5 minutes. Batch cooking is a lifesaver for busy mornings. You can make the dough the night before, refrigerate it, and bake fresh in the morning. That way, you get warm rolls without the rush. Have you ever tried storing it this way? Share below! Storing properly saves you time and keeps that fresh-baked taste. It means you can enjoy homemade goodness whenever you want.
Common Problems and Easy Fixes
Sometimes the dough doesn’t rise well. That usually means the milk was too hot or too cold. I once killed a batch of yeast because I got impatient and used hot milk. The yeast needs warm liquid, around 100-110°F. If your rolls come out dry, you might have added too much flour. The dough should be soft and slightly tacky. Add flour slowly and stop when it feels right. Another problem is filling leaking out while baking. This happens if you roll the dough too loosely. I remember my first time—I had sticky sugar butter all over the pan. Just roll it tight and pinch the seam closed. Which of these problems have you run into before? Fixing these issues matters because it builds your confidence in the kitchen. You learn to trust your hands and eyes. It also makes the final dish taste exactly how you imagined. That warm, gooey center is worth the small effort.
Your Top Questions Answered
Q: Can I make these gluten-free?
A: Yes, use a 1-to-1 gluten-free flour blend. The dough will be a bit stickier, so add a little extra flour if needed.
Q: Can I make the dough ahead of time?
A: Absolutely. Prepare the dough, cover it, and refrigerate overnight. Let it sit at room temp for 15 minutes before rolling.
Q: Can I swap the cream cheese icing?
A: Sure. Use a simple butter glaze with powdered sugar, milk, and vanilla. Or try a maple glaze for a different flavor.
Q: How do I scale the recipe?
A: Halve or double the ingredients easily. Just keep the ratios the same. Use two 9×13 pans if doubling.
Q: Any tips for softer rolls?
A: Brush the baked rolls with melted butter as soon as they come out of the oven. It adds moisture and shine. Which tip will you try first?
*Fun fact: Unflavored dental floss cuts cinnamon rolls cleaner than a knife. It keeps the layers from squishing.*
A Warm Goodbye from My Kitchen to Yours
Thank you for spending this time with me. I hope these cinnamon rolls fill your home with the same cozy smell I love. Every time I bake them, I think of my grandma letting us lick the icing bowl. It is a simple joy worth sharing. When you make yours, take a picture and share it with someone you love. Have you tried this recipe? Tag us on Pinterest! I cannot wait to see your beautiful rolls. Keep baking, keep tasting, and keep making memories. Happy cooking! —Chloe Hartwell.
The Morning That Changed My Baking World
I still remember the first time I tried making cinnamon rolls from scratch. I was a nervous wreck. The yeast scared me. I thought it would explode or something. Does that sound silly? Well, I laughed at myself later when the dough puffed up like a happy cloud. That day taught me something. Yeast is not magic. It is just tiny hungry friends that need warm milk and a little sugar to wake up. When you treat them kindly, they make your kitchen smell like heaven. Why does this matter? Because baking is not about being perfect. It is about learning to trust your hands. Have you ever been scared to try a new recipe? What held you back?The Secret of the One-Hour Miracle
Most people think cinnamon rolls take all day. They think you have to wake up at dawn and wait for hours. That is not true with this recipe. You can go from a bowl of flour to a warm, gooey roll in just sixty minutes. The trick is a warm oven. You turn it on low, then turn it off. That cozy little box becomes a proofing spa for your dough. *Fun fact:* Professional bakers call this a “proof box.” Fancy name for a warm spot. But your oven works just as well. I love this because it means you can make cinnamon rolls on a school morning. Or a lazy Saturday. Or right when a sugar craving hits. Why does this matter? Because homemade food should not feel like a chore. It should feel like a hug you can make anytime. Have you ever made cinnamon rolls before? Or do you usually buy the ones in a tube? I promise, these are different. The difference is love. And butter. Lots of butter.Rolling, Filling, and a Little Story
My granddaughter Lily helped me roll out the dough last weekend. She pressed too hard and made a hole. I almost said something. But instead, I showed her how to pinch it closed like a little blanket. She giggled and said it looked like a bandage. I still laugh at that. The filling is the best part anyway. Butter, brown sugar, and cinnamon create a swirl that tastes like autumn in every bite. When you roll the dough tight, you seal in all that sweetness. Then you slice it with dental floss. Yes, dental floss. It gives you clean cuts without squishing the dough. Try it next time. You will thank me. Do you have a funny kitchen helper story? Maybe a kid or a pet who got into the flour? I would love to hear it.Why the Icing Is Non-Negotiable
Some people eat cinnamon rolls without icing. I do not trust those people. Just kidding. But seriously, the cream cheese icing is what turns a good roll into a memorable one. It is tangy, sweet, and smooth. You spread it over the warm rolls, and it melts into every swirl. I like to add a little extra vanilla. It makes the kitchen smell even better than before. Doesnt that smell amazing? I think the icing is why we keep coming back for seconds. Why does this matter? Because food is about pleasure. A little indulgence makes life sweeter. And you deserve that.Your Turn to Make a Memory
Ingredients:
| Ingredient | Amount | Notes |
|---|---|---|
| Milk (whole or 2%) | 1 cup | |
| Unsalted butter, melted | 1/4 cup (1/2 stick) | |
| Active dry yeast | 1 (0.25 oz) packet (about 2 1/4 tsp) | |
| Granulated sugar | 1/4 cup | For dough |
| Large egg | 1 | |
| Salt | 1/2 teaspoon | |
| Vanilla extract | 1 teaspoon | For dough |
| All-purpose flour | 3 1/2 cups | |
| Unsalted butter, softened | 1/2 cup (1 stick) | For filling |
| Brown sugar | 1/2 cup | For filling |
| Granulated sugar | 1/2 cup | For filling |
| Ground cinnamon | 1 1/2 tablespoons | For filling |
| Vanilla extract | 1 teaspoon | For filling |
| Cream cheese, softened | 4 ounces | For icing |
| Powdered sugar | 2 cups | For icing |
| Vanilla extract | 1 teaspoon | For icing |
| Milk | 2–4 tablespoons | Add 1 tbsp at a time, as needed |
The Story Behind These Speedy Cinnamon Rolls
I remember the first time I tried making cinnamon rolls from scratch. I was about your age, and my kitchen looked like a flour bomb had gone off. My grandma just laughed and handed me a damp cloth. Now I have a secret that saves time without losing that warm, gooey feeling. These rolls come together in just one hour, start to finish. Doesn’t that sound like a wonderful weekend project?
The best part is the smell that fills your whole house. It is like a cozy hug from the kitchen. My neighbor once knocked on my door asking what I was baking. I still laugh at that every time I pull these rolls from the oven.
Let me walk you through it step by step. I promise, if a 12-year-old me could do it, you can too.
Step 1: First, melt the butter in a microwave-safe bowl for about 40 seconds. Then warm the milk in the same bowl for 45 seconds. Check that the mixture feels warm to your wrist, not hot. (Hard-learned tip: If the milk is too hot, it will kill the yeast. Think bath water, not soup.) Add the sugar and yeast, stir, and cover with a towel. Wait 10 minutes until it looks frothy like a sea foam. Isn’t it amazing how yeast wakes up?
Step 2: While you wait, preheat your oven to its lowest setting, then turn it off. This creates a cozy warm spot for the dough to rise. Once the yeast is foamy, crack in the egg, add salt, and pour in the vanilla. Mix it all together with a spoon. Do you hear that little sizzle? That is the yeast saying hello.
Step 3: Now add the flour, half a cup at a time. Stir gently with a spatula, then use your hands to bring the dough together. It should feel soft and a little sticky, like a marshmallow. If it sticks too much, add a tiny sprinkle of flour. Knead it just a few times until it forms a ball. What is your favorite thing to make in the kitchen? Share below!
Step 4: Place the dough ball in a greased bowl, cover with a tea towel, and pop it in the warm oven for 10 minutes. This is called proofing, and it makes the dough puffy and happy. While it rests, mix the filling. Cream together the softened butter, brown sugar, white sugar, cinnamon, and vanilla until smooth. This filling smells like a candy shop. I sometimes sneak a tiny taste before spreading it.
Step 5: Take the dough out and roll it on a lightly floured surface into a big rectangle. Aim for about 14 inches by 18 inches, roughly the size of a baking sheet. Spread the cinnamon filling all over, leaving a small border around the edges. Then roll it up tightly from the shorter side, like a sleeping bag. Use a sharp knife or dental floss to cut 12 even rolls. Dental floss works like magic and gives clean edges.
Step 6: Place the rolls cut side up in a greased 9×13-inch baking dish. Bake at 350°F for 20 to 25 minutes until golden brown. Let them cool in the pan for 10 minutes. While they cool, beat the cream cheese, powdered sugar, vanilla, and milk into a thick icing. Spread it on warm rolls so it melts into every swirl. Serve immediately and watch them disappear.
Cook Time: 20–25 minutes
Total Time: 1 hour
Yield: 12 cinnamon rolls
Category: Breakfast, Dessert
Three Fun Twists to Try
Once you master the basic recipe, you can play around a little. Here are three of my favorite twists. Each one adds a new flavor without extra work.
Apple Pie Rolls: Before spreading the filling, scatter half a cup of finely chopped apples over the butter. The apples get soft and sweet as they bake. It tastes like a pie in a roll.
Spicy Chocolate Swirl: Add a teaspoon of cocoa powder and a pinch of cayenne pepper to the cinnamon sugar. It gives a warm, surprising kick that grown-ups love.
Lemon Blueberry Version: Swap the cinnamon for lemon zest and replace the brown sugar with white sugar. Fold in a handful of fresh or frozen blueberries before rolling. These are perfect for a summer morning.
Which one would you try first? Comment below!
How to Serve and Sip Along
Cinnamon rolls are wonderful on their own, but a few extras make them feel special. Serve them warm with a pat of butter melting on top. A small sprinkle of chopped pecans or walnuts adds a nice crunch.
For a breakfast treat, place a single roll in a bowl and pour a little cold milk around it. The milk turns sweet and cinnamon-y. For a dessert plate, drizzle extra icing and add fresh berries on the side. They look like little jewels next to the golden rolls.
For drinks, pour yourself a tall glass of cold milk or a cup of hot cocoa. Grown-ups might enjoy a cup of strong black coffee or a warm chai latte. The spices in the rolls and the drink match perfectly. Which would you choose tonight?
Storing and Reheating Your Cinnamon Rolls
These cinnamon rolls stay soft for days if you store them right. Keep them in an airtight container at room temperature for up to two days. I remember the first time I made a whole batch for a sleepover. We ate half and put the rest in the fridge. The next morning, they were still tender, but the icing had soaked in a bit. For the freezer, wrap each roll tightly in plastic wrap, then foil. They keep for up to three months. To reheat, pop one in the microwave for 15 seconds or warm them in a 350°F oven for 5 minutes. Batch cooking is a lifesaver for busy mornings. You can make the dough the night before, refrigerate it, and bake fresh in the morning. That way, you get warm rolls without the rush. Have you ever tried storing it this way? Share below! Storing properly saves you time and keeps that fresh-baked taste. It means you can enjoy homemade goodness whenever you want.
Common Problems and Easy Fixes
Sometimes the dough doesn’t rise well. That usually means the milk was too hot or too cold. I once killed a batch of yeast because I got impatient and used hot milk. The yeast needs warm liquid, around 100-110°F. If your rolls come out dry, you might have added too much flour. The dough should be soft and slightly tacky. Add flour slowly and stop when it feels right. Another problem is filling leaking out while baking. This happens if you roll the dough too loosely. I remember my first time—I had sticky sugar butter all over the pan. Just roll it tight and pinch the seam closed. Which of these problems have you run into before? Fixing these issues matters because it builds your confidence in the kitchen. You learn to trust your hands and eyes. It also makes the final dish taste exactly how you imagined. That warm, gooey center is worth the small effort.
Your Top Questions Answered
Q: Can I make these gluten-free?
A: Yes, use a 1-to-1 gluten-free flour blend. The dough will be a bit stickier, so add a little extra flour if needed.
Q: Can I make the dough ahead of time?
A: Absolutely. Prepare the dough, cover it, and refrigerate overnight. Let it sit at room temp for 15 minutes before rolling.
Q: Can I swap the cream cheese icing?
A: Sure. Use a simple butter glaze with powdered sugar, milk, and vanilla. Or try a maple glaze for a different flavor.
Q: How do I scale the recipe?
A: Halve or double the ingredients easily. Just keep the ratios the same. Use two 9×13 pans if doubling.
Q: Any tips for softer rolls?
A: Brush the baked rolls with melted butter as soon as they come out of the oven. It adds moisture and shine. Which tip will you try first?
*Fun fact: Unflavored dental floss cuts cinnamon rolls cleaner than a knife. It keeps the layers from squishing.*
A Warm Goodbye from My Kitchen to Yours
Thank you for spending this time with me. I hope these cinnamon rolls fill your home with the same cozy smell I love. Every time I bake them, I think of my grandma letting us lick the icing bowl. It is a simple joy worth sharing. When you make yours, take a picture and share it with someone you love. Have you tried this recipe? Tag us on Pinterest! I cannot wait to see your beautiful rolls. Keep baking, keep tasting, and keep making memories. Happy cooking! —Chloe Hartwell.
The Secret of the One-Hour Miracle
Most people think cinnamon rolls take all day. They think you have to wake up at dawn and wait for hours. That is not true with this recipe. You can go from a bowl of flour to a warm, gooey roll in just sixty minutes. The trick is a warm oven. You turn it on low, then turn it off. That cozy little box becomes a proofing spa for your dough. *Fun fact:* Professional bakers call this a “proof box.” Fancy name for a warm spot. But your oven works just as well. I love this because it means you can make cinnamon rolls on a school morning. Or a lazy Saturday. Or right when a sugar craving hits. Why does this matter? Because homemade food should not feel like a chore. It should feel like a hug you can make anytime. Have you ever made cinnamon rolls before? Or do you usually buy the ones in a tube? I promise, these are different. The difference is love. And butter. Lots of butter.Rolling, Filling, and a Little Story
My granddaughter Lily helped me roll out the dough last weekend. She pressed too hard and made a hole. I almost said something. But instead, I showed her how to pinch it closed like a little blanket. She giggled and said it looked like a bandage. I still laugh at that. The filling is the best part anyway. Butter, brown sugar, and cinnamon create a swirl that tastes like autumn in every bite. When you roll the dough tight, you seal in all that sweetness. Then you slice it with dental floss. Yes, dental floss. It gives you clean cuts without squishing the dough. Try it next time. You will thank me. Do you have a funny kitchen helper story? Maybe a kid or a pet who got into the flour? I would love to hear it.Why the Icing Is Non-Negotiable
Some people eat cinnamon rolls without icing. I do not trust those people. Just kidding. But seriously, the cream cheese icing is what turns a good roll into a memorable one. It is tangy, sweet, and smooth. You spread it over the warm rolls, and it melts into every swirl. I like to add a little extra vanilla. It makes the kitchen smell even better than before. Doesnt that smell amazing? I think the icing is why we keep coming back for seconds. Why does this matter? Because food is about pleasure. A little indulgence makes life sweeter. And you deserve that.Your Turn to Make a Memory
Ingredients:
| Ingredient | Amount | Notes |
|---|---|---|
| Milk (whole or 2%) | 1 cup | |
| Unsalted butter, melted | 1/4 cup (1/2 stick) | |
| Active dry yeast | 1 (0.25 oz) packet (about 2 1/4 tsp) | |
| Granulated sugar | 1/4 cup | For dough |
| Large egg | 1 | |
| Salt | 1/2 teaspoon | |
| Vanilla extract | 1 teaspoon | For dough |
| All-purpose flour | 3 1/2 cups | |
| Unsalted butter, softened | 1/2 cup (1 stick) | For filling |
| Brown sugar | 1/2 cup | For filling |
| Granulated sugar | 1/2 cup | For filling |
| Ground cinnamon | 1 1/2 tablespoons | For filling |
| Vanilla extract | 1 teaspoon | For filling |
| Cream cheese, softened | 4 ounces | For icing |
| Powdered sugar | 2 cups | For icing |
| Vanilla extract | 1 teaspoon | For icing |
| Milk | 2–4 tablespoons | Add 1 tbsp at a time, as needed |
The Story Behind These Speedy Cinnamon Rolls
I remember the first time I tried making cinnamon rolls from scratch. I was about your age, and my kitchen looked like a flour bomb had gone off. My grandma just laughed and handed me a damp cloth. Now I have a secret that saves time without losing that warm, gooey feeling. These rolls come together in just one hour, start to finish. Doesn’t that sound like a wonderful weekend project?
The best part is the smell that fills your whole house. It is like a cozy hug from the kitchen. My neighbor once knocked on my door asking what I was baking. I still laugh at that every time I pull these rolls from the oven.
Let me walk you through it step by step. I promise, if a 12-year-old me could do it, you can too.
Step 1: First, melt the butter in a microwave-safe bowl for about 40 seconds. Then warm the milk in the same bowl for 45 seconds. Check that the mixture feels warm to your wrist, not hot. (Hard-learned tip: If the milk is too hot, it will kill the yeast. Think bath water, not soup.) Add the sugar and yeast, stir, and cover with a towel. Wait 10 minutes until it looks frothy like a sea foam. Isn’t it amazing how yeast wakes up?
Step 2: While you wait, preheat your oven to its lowest setting, then turn it off. This creates a cozy warm spot for the dough to rise. Once the yeast is foamy, crack in the egg, add salt, and pour in the vanilla. Mix it all together with a spoon. Do you hear that little sizzle? That is the yeast saying hello.
Step 3: Now add the flour, half a cup at a time. Stir gently with a spatula, then use your hands to bring the dough together. It should feel soft and a little sticky, like a marshmallow. If it sticks too much, add a tiny sprinkle of flour. Knead it just a few times until it forms a ball. What is your favorite thing to make in the kitchen? Share below!
Step 4: Place the dough ball in a greased bowl, cover with a tea towel, and pop it in the warm oven for 10 minutes. This is called proofing, and it makes the dough puffy and happy. While it rests, mix the filling. Cream together the softened butter, brown sugar, white sugar, cinnamon, and vanilla until smooth. This filling smells like a candy shop. I sometimes sneak a tiny taste before spreading it.
Step 5: Take the dough out and roll it on a lightly floured surface into a big rectangle. Aim for about 14 inches by 18 inches, roughly the size of a baking sheet. Spread the cinnamon filling all over, leaving a small border around the edges. Then roll it up tightly from the shorter side, like a sleeping bag. Use a sharp knife or dental floss to cut 12 even rolls. Dental floss works like magic and gives clean edges.
Step 6: Place the rolls cut side up in a greased 9×13-inch baking dish. Bake at 350°F for 20 to 25 minutes until golden brown. Let them cool in the pan for 10 minutes. While they cool, beat the cream cheese, powdered sugar, vanilla, and milk into a thick icing. Spread it on warm rolls so it melts into every swirl. Serve immediately and watch them disappear.
Cook Time: 20–25 minutes
Total Time: 1 hour
Yield: 12 cinnamon rolls
Category: Breakfast, Dessert
Three Fun Twists to Try
Once you master the basic recipe, you can play around a little. Here are three of my favorite twists. Each one adds a new flavor without extra work.
Apple Pie Rolls: Before spreading the filling, scatter half a cup of finely chopped apples over the butter. The apples get soft and sweet as they bake. It tastes like a pie in a roll.
Spicy Chocolate Swirl: Add a teaspoon of cocoa powder and a pinch of cayenne pepper to the cinnamon sugar. It gives a warm, surprising kick that grown-ups love.
Lemon Blueberry Version: Swap the cinnamon for lemon zest and replace the brown sugar with white sugar. Fold in a handful of fresh or frozen blueberries before rolling. These are perfect for a summer morning.
Which one would you try first? Comment below!
How to Serve and Sip Along
Cinnamon rolls are wonderful on their own, but a few extras make them feel special. Serve them warm with a pat of butter melting on top. A small sprinkle of chopped pecans or walnuts adds a nice crunch.
For a breakfast treat, place a single roll in a bowl and pour a little cold milk around it. The milk turns sweet and cinnamon-y. For a dessert plate, drizzle extra icing and add fresh berries on the side. They look like little jewels next to the golden rolls.
For drinks, pour yourself a tall glass of cold milk or a cup of hot cocoa. Grown-ups might enjoy a cup of strong black coffee or a warm chai latte. The spices in the rolls and the drink match perfectly. Which would you choose tonight?
Storing and Reheating Your Cinnamon Rolls
These cinnamon rolls stay soft for days if you store them right. Keep them in an airtight container at room temperature for up to two days. I remember the first time I made a whole batch for a sleepover. We ate half and put the rest in the fridge. The next morning, they were still tender, but the icing had soaked in a bit. For the freezer, wrap each roll tightly in plastic wrap, then foil. They keep for up to three months. To reheat, pop one in the microwave for 15 seconds or warm them in a 350°F oven for 5 minutes. Batch cooking is a lifesaver for busy mornings. You can make the dough the night before, refrigerate it, and bake fresh in the morning. That way, you get warm rolls without the rush. Have you ever tried storing it this way? Share below! Storing properly saves you time and keeps that fresh-baked taste. It means you can enjoy homemade goodness whenever you want.
Common Problems and Easy Fixes
Sometimes the dough doesn’t rise well. That usually means the milk was too hot or too cold. I once killed a batch of yeast because I got impatient and used hot milk. The yeast needs warm liquid, around 100-110°F. If your rolls come out dry, you might have added too much flour. The dough should be soft and slightly tacky. Add flour slowly and stop when it feels right. Another problem is filling leaking out while baking. This happens if you roll the dough too loosely. I remember my first time—I had sticky sugar butter all over the pan. Just roll it tight and pinch the seam closed. Which of these problems have you run into before? Fixing these issues matters because it builds your confidence in the kitchen. You learn to trust your hands and eyes. It also makes the final dish taste exactly how you imagined. That warm, gooey center is worth the small effort.
Your Top Questions Answered
Q: Can I make these gluten-free?
A: Yes, use a 1-to-1 gluten-free flour blend. The dough will be a bit stickier, so add a little extra flour if needed.
Q: Can I make the dough ahead of time?
A: Absolutely. Prepare the dough, cover it, and refrigerate overnight. Let it sit at room temp for 15 minutes before rolling.
Q: Can I swap the cream cheese icing?
A: Sure. Use a simple butter glaze with powdered sugar, milk, and vanilla. Or try a maple glaze for a different flavor.
Q: How do I scale the recipe?
A: Halve or double the ingredients easily. Just keep the ratios the same. Use two 9×13 pans if doubling.
Q: Any tips for softer rolls?
A: Brush the baked rolls with melted butter as soon as they come out of the oven. It adds moisture and shine. Which tip will you try first?
*Fun fact: Unflavored dental floss cuts cinnamon rolls cleaner than a knife. It keeps the layers from squishing.*
A Warm Goodbye from My Kitchen to Yours
Thank you for spending this time with me. I hope these cinnamon rolls fill your home with the same cozy smell I love. Every time I bake them, I think of my grandma letting us lick the icing bowl. It is a simple joy worth sharing. When you make yours, take a picture and share it with someone you love. Have you tried this recipe? Tag us on Pinterest! I cannot wait to see your beautiful rolls. Keep baking, keep tasting, and keep making memories. Happy cooking! —Chloe Hartwell.
The Morning That Changed My Baking World
I still remember the first time I tried making cinnamon rolls from scratch. I was a nervous wreck. The yeast scared me. I thought it would explode or something. Does that sound silly? Well, I laughed at myself later when the dough puffed up like a happy cloud. That day taught me something. Yeast is not magic. It is just tiny hungry friends that need warm milk and a little sugar to wake up. When you treat them kindly, they make your kitchen smell like heaven. Why does this matter? Because baking is not about being perfect. It is about learning to trust your hands. Have you ever been scared to try a new recipe? What held you back?The Secret of the One-Hour Miracle
Most people think cinnamon rolls take all day. They think you have to wake up at dawn and wait for hours. That is not true with this recipe. You can go from a bowl of flour to a warm, gooey roll in just sixty minutes. The trick is a warm oven. You turn it on low, then turn it off. That cozy little box becomes a proofing spa for your dough. *Fun fact:* Professional bakers call this a “proof box.” Fancy name for a warm spot. But your oven works just as well. I love this because it means you can make cinnamon rolls on a school morning. Or a lazy Saturday. Or right when a sugar craving hits. Why does this matter? Because homemade food should not feel like a chore. It should feel like a hug you can make anytime. Have you ever made cinnamon rolls before? Or do you usually buy the ones in a tube? I promise, these are different. The difference is love. And butter. Lots of butter.Rolling, Filling, and a Little Story
My granddaughter Lily helped me roll out the dough last weekend. She pressed too hard and made a hole. I almost said something. But instead, I showed her how to pinch it closed like a little blanket. She giggled and said it looked like a bandage. I still laugh at that. The filling is the best part anyway. Butter, brown sugar, and cinnamon create a swirl that tastes like autumn in every bite. When you roll the dough tight, you seal in all that sweetness. Then you slice it with dental floss. Yes, dental floss. It gives you clean cuts without squishing the dough. Try it next time. You will thank me. Do you have a funny kitchen helper story? Maybe a kid or a pet who got into the flour? I would love to hear it.Why the Icing Is Non-Negotiable
Some people eat cinnamon rolls without icing. I do not trust those people. Just kidding. But seriously, the cream cheese icing is what turns a good roll into a memorable one. It is tangy, sweet, and smooth. You spread it over the warm rolls, and it melts into every swirl. I like to add a little extra vanilla. It makes the kitchen smell even better than before. Doesnt that smell amazing? I think the icing is why we keep coming back for seconds. Why does this matter? Because food is about pleasure. A little indulgence makes life sweeter. And you deserve that.Your Turn to Make a Memory
Ingredients:
| Ingredient | Amount | Notes |
|---|---|---|
| Milk (whole or 2%) | 1 cup | |
| Unsalted butter, melted | 1/4 cup (1/2 stick) | |
| Active dry yeast | 1 (0.25 oz) packet (about 2 1/4 tsp) | |
| Granulated sugar | 1/4 cup | For dough |
| Large egg | 1 | |
| Salt | 1/2 teaspoon | |
| Vanilla extract | 1 teaspoon | For dough |
| All-purpose flour | 3 1/2 cups | |
| Unsalted butter, softened | 1/2 cup (1 stick) | For filling |
| Brown sugar | 1/2 cup | For filling |
| Granulated sugar | 1/2 cup | For filling |
| Ground cinnamon | 1 1/2 tablespoons | For filling |
| Vanilla extract | 1 teaspoon | For filling |
| Cream cheese, softened | 4 ounces | For icing |
| Powdered sugar | 2 cups | For icing |
| Vanilla extract | 1 teaspoon | For icing |
| Milk | 2–4 tablespoons | Add 1 tbsp at a time, as needed |
The Story Behind These Speedy Cinnamon Rolls
I remember the first time I tried making cinnamon rolls from scratch. I was about your age, and my kitchen looked like a flour bomb had gone off. My grandma just laughed and handed me a damp cloth. Now I have a secret that saves time without losing that warm, gooey feeling. These rolls come together in just one hour, start to finish. Doesn’t that sound like a wonderful weekend project?
The best part is the smell that fills your whole house. It is like a cozy hug from the kitchen. My neighbor once knocked on my door asking what I was baking. I still laugh at that every time I pull these rolls from the oven.
Let me walk you through it step by step. I promise, if a 12-year-old me could do it, you can too.
Step 1: First, melt the butter in a microwave-safe bowl for about 40 seconds. Then warm the milk in the same bowl for 45 seconds. Check that the mixture feels warm to your wrist, not hot. (Hard-learned tip: If the milk is too hot, it will kill the yeast. Think bath water, not soup.) Add the sugar and yeast, stir, and cover with a towel. Wait 10 minutes until it looks frothy like a sea foam. Isn’t it amazing how yeast wakes up?
Step 2: While you wait, preheat your oven to its lowest setting, then turn it off. This creates a cozy warm spot for the dough to rise. Once the yeast is foamy, crack in the egg, add salt, and pour in the vanilla. Mix it all together with a spoon. Do you hear that little sizzle? That is the yeast saying hello.
Step 3: Now add the flour, half a cup at a time. Stir gently with a spatula, then use your hands to bring the dough together. It should feel soft and a little sticky, like a marshmallow. If it sticks too much, add a tiny sprinkle of flour. Knead it just a few times until it forms a ball. What is your favorite thing to make in the kitchen? Share below!
Step 4: Place the dough ball in a greased bowl, cover with a tea towel, and pop it in the warm oven for 10 minutes. This is called proofing, and it makes the dough puffy and happy. While it rests, mix the filling. Cream together the softened butter, brown sugar, white sugar, cinnamon, and vanilla until smooth. This filling smells like a candy shop. I sometimes sneak a tiny taste before spreading it.
Step 5: Take the dough out and roll it on a lightly floured surface into a big rectangle. Aim for about 14 inches by 18 inches, roughly the size of a baking sheet. Spread the cinnamon filling all over, leaving a small border around the edges. Then roll it up tightly from the shorter side, like a sleeping bag. Use a sharp knife or dental floss to cut 12 even rolls. Dental floss works like magic and gives clean edges.
Step 6: Place the rolls cut side up in a greased 9×13-inch baking dish. Bake at 350°F for 20 to 25 minutes until golden brown. Let them cool in the pan for 10 minutes. While they cool, beat the cream cheese, powdered sugar, vanilla, and milk into a thick icing. Spread it on warm rolls so it melts into every swirl. Serve immediately and watch them disappear.
Cook Time: 20–25 minutes
Total Time: 1 hour
Yield: 12 cinnamon rolls
Category: Breakfast, Dessert
Three Fun Twists to Try
Once you master the basic recipe, you can play around a little. Here are three of my favorite twists. Each one adds a new flavor without extra work.
Apple Pie Rolls: Before spreading the filling, scatter half a cup of finely chopped apples over the butter. The apples get soft and sweet as they bake. It tastes like a pie in a roll.
Spicy Chocolate Swirl: Add a teaspoon of cocoa powder and a pinch of cayenne pepper to the cinnamon sugar. It gives a warm, surprising kick that grown-ups love.
Lemon Blueberry Version: Swap the cinnamon for lemon zest and replace the brown sugar with white sugar. Fold in a handful of fresh or frozen blueberries before rolling. These are perfect for a summer morning.
Which one would you try first? Comment below!
How to Serve and Sip Along
Cinnamon rolls are wonderful on their own, but a few extras make them feel special. Serve them warm with a pat of butter melting on top. A small sprinkle of chopped pecans or walnuts adds a nice crunch.
For a breakfast treat, place a single roll in a bowl and pour a little cold milk around it. The milk turns sweet and cinnamon-y. For a dessert plate, drizzle extra icing and add fresh berries on the side. They look like little jewels next to the golden rolls.
For drinks, pour yourself a tall glass of cold milk or a cup of hot cocoa. Grown-ups might enjoy a cup of strong black coffee or a warm chai latte. The spices in the rolls and the drink match perfectly. Which would you choose tonight?
Storing and Reheating Your Cinnamon Rolls
These cinnamon rolls stay soft for days if you store them right. Keep them in an airtight container at room temperature for up to two days. I remember the first time I made a whole batch for a sleepover. We ate half and put the rest in the fridge. The next morning, they were still tender, but the icing had soaked in a bit. For the freezer, wrap each roll tightly in plastic wrap, then foil. They keep for up to three months. To reheat, pop one in the microwave for 15 seconds or warm them in a 350°F oven for 5 minutes. Batch cooking is a lifesaver for busy mornings. You can make the dough the night before, refrigerate it, and bake fresh in the morning. That way, you get warm rolls without the rush. Have you ever tried storing it this way? Share below! Storing properly saves you time and keeps that fresh-baked taste. It means you can enjoy homemade goodness whenever you want.
Common Problems and Easy Fixes
Sometimes the dough doesn’t rise well. That usually means the milk was too hot or too cold. I once killed a batch of yeast because I got impatient and used hot milk. The yeast needs warm liquid, around 100-110°F. If your rolls come out dry, you might have added too much flour. The dough should be soft and slightly tacky. Add flour slowly and stop when it feels right. Another problem is filling leaking out while baking. This happens if you roll the dough too loosely. I remember my first time—I had sticky sugar butter all over the pan. Just roll it tight and pinch the seam closed. Which of these problems have you run into before? Fixing these issues matters because it builds your confidence in the kitchen. You learn to trust your hands and eyes. It also makes the final dish taste exactly how you imagined. That warm, gooey center is worth the small effort.
Your Top Questions Answered
Q: Can I make these gluten-free?
A: Yes, use a 1-to-1 gluten-free flour blend. The dough will be a bit stickier, so add a little extra flour if needed.
Q: Can I make the dough ahead of time?
A: Absolutely. Prepare the dough, cover it, and refrigerate overnight. Let it sit at room temp for 15 minutes before rolling.
Q: Can I swap the cream cheese icing?
A: Sure. Use a simple butter glaze with powdered sugar, milk, and vanilla. Or try a maple glaze for a different flavor.
Q: How do I scale the recipe?
A: Halve or double the ingredients easily. Just keep the ratios the same. Use two 9×13 pans if doubling.
Q: Any tips for softer rolls?
A: Brush the baked rolls with melted butter as soon as they come out of the oven. It adds moisture and shine. Which tip will you try first?
*Fun fact: Unflavored dental floss cuts cinnamon rolls cleaner than a knife. It keeps the layers from squishing.*
A Warm Goodbye from My Kitchen to Yours
Thank you for spending this time with me. I hope these cinnamon rolls fill your home with the same cozy smell I love. Every time I bake them, I think of my grandma letting us lick the icing bowl. It is a simple joy worth sharing. When you make yours, take a picture and share it with someone you love. Have you tried this recipe? Tag us on Pinterest! I cannot wait to see your beautiful rolls. Keep baking, keep tasting, and keep making memories. Happy cooking! —Chloe Hartwell.
Why the Icing Is Non-Negotiable
Some people eat cinnamon rolls without icing. I do not trust those people. Just kidding. But seriously, the cream cheese icing is what turns a good roll into a memorable one. It is tangy, sweet, and smooth. You spread it over the warm rolls, and it melts into every swirl. I like to add a little extra vanilla. It makes the kitchen smell even better than before. Doesnt that smell amazing? I think the icing is why we keep coming back for seconds. Why does this matter? Because food is about pleasure. A little indulgence makes life sweeter. And you deserve that.Your Turn to Make a Memory
Ingredients:
| Ingredient | Amount | Notes |
|---|---|---|
| Milk (whole or 2%) | 1 cup | |
| Unsalted butter, melted | 1/4 cup (1/2 stick) | |
| Active dry yeast | 1 (0.25 oz) packet (about 2 1/4 tsp) | |
| Granulated sugar | 1/4 cup | For dough |
| Large egg | 1 | |
| Salt | 1/2 teaspoon | |
| Vanilla extract | 1 teaspoon | For dough |
| All-purpose flour | 3 1/2 cups | |
| Unsalted butter, softened | 1/2 cup (1 stick) | For filling |
| Brown sugar | 1/2 cup | For filling |
| Granulated sugar | 1/2 cup | For filling |
| Ground cinnamon | 1 1/2 tablespoons | For filling |
| Vanilla extract | 1 teaspoon | For filling |
| Cream cheese, softened | 4 ounces | For icing |
| Powdered sugar | 2 cups | For icing |
| Vanilla extract | 1 teaspoon | For icing |
| Milk | 2–4 tablespoons | Add 1 tbsp at a time, as needed |
The Story Behind These Speedy Cinnamon Rolls
I remember the first time I tried making cinnamon rolls from scratch. I was about your age, and my kitchen looked like a flour bomb had gone off. My grandma just laughed and handed me a damp cloth. Now I have a secret that saves time without losing that warm, gooey feeling. These rolls come together in just one hour, start to finish. Doesn’t that sound like a wonderful weekend project?
The best part is the smell that fills your whole house. It is like a cozy hug from the kitchen. My neighbor once knocked on my door asking what I was baking. I still laugh at that every time I pull these rolls from the oven.
Let me walk you through it step by step. I promise, if a 12-year-old me could do it, you can too.
Step 1: First, melt the butter in a microwave-safe bowl for about 40 seconds. Then warm the milk in the same bowl for 45 seconds. Check that the mixture feels warm to your wrist, not hot. (Hard-learned tip: If the milk is too hot, it will kill the yeast. Think bath water, not soup.) Add the sugar and yeast, stir, and cover with a towel. Wait 10 minutes until it looks frothy like a sea foam. Isn’t it amazing how yeast wakes up?
Step 2: While you wait, preheat your oven to its lowest setting, then turn it off. This creates a cozy warm spot for the dough to rise. Once the yeast is foamy, crack in the egg, add salt, and pour in the vanilla. Mix it all together with a spoon. Do you hear that little sizzle? That is the yeast saying hello.
Step 3: Now add the flour, half a cup at a time. Stir gently with a spatula, then use your hands to bring the dough together. It should feel soft and a little sticky, like a marshmallow. If it sticks too much, add a tiny sprinkle of flour. Knead it just a few times until it forms a ball. What is your favorite thing to make in the kitchen? Share below!
Step 4: Place the dough ball in a greased bowl, cover with a tea towel, and pop it in the warm oven for 10 minutes. This is called proofing, and it makes the dough puffy and happy. While it rests, mix the filling. Cream together the softened butter, brown sugar, white sugar, cinnamon, and vanilla until smooth. This filling smells like a candy shop. I sometimes sneak a tiny taste before spreading it.
Step 5: Take the dough out and roll it on a lightly floured surface into a big rectangle. Aim for about 14 inches by 18 inches, roughly the size of a baking sheet. Spread the cinnamon filling all over, leaving a small border around the edges. Then roll it up tightly from the shorter side, like a sleeping bag. Use a sharp knife or dental floss to cut 12 even rolls. Dental floss works like magic and gives clean edges.
Step 6: Place the rolls cut side up in a greased 9×13-inch baking dish. Bake at 350°F for 20 to 25 minutes until golden brown. Let them cool in the pan for 10 minutes. While they cool, beat the cream cheese, powdered sugar, vanilla, and milk into a thick icing. Spread it on warm rolls so it melts into every swirl. Serve immediately and watch them disappear.
Cook Time: 20–25 minutes
Total Time: 1 hour
Yield: 12 cinnamon rolls
Category: Breakfast, Dessert
Three Fun Twists to Try
Once you master the basic recipe, you can play around a little. Here are three of my favorite twists. Each one adds a new flavor without extra work.
Apple Pie Rolls: Before spreading the filling, scatter half a cup of finely chopped apples over the butter. The apples get soft and sweet as they bake. It tastes like a pie in a roll.
Spicy Chocolate Swirl: Add a teaspoon of cocoa powder and a pinch of cayenne pepper to the cinnamon sugar. It gives a warm, surprising kick that grown-ups love.
Lemon Blueberry Version: Swap the cinnamon for lemon zest and replace the brown sugar with white sugar. Fold in a handful of fresh or frozen blueberries before rolling. These are perfect for a summer morning.
Which one would you try first? Comment below!
How to Serve and Sip Along
Cinnamon rolls are wonderful on their own, but a few extras make them feel special. Serve them warm with a pat of butter melting on top. A small sprinkle of chopped pecans or walnuts adds a nice crunch.
For a breakfast treat, place a single roll in a bowl and pour a little cold milk around it. The milk turns sweet and cinnamon-y. For a dessert plate, drizzle extra icing and add fresh berries on the side. They look like little jewels next to the golden rolls.
For drinks, pour yourself a tall glass of cold milk or a cup of hot cocoa. Grown-ups might enjoy a cup of strong black coffee or a warm chai latte. The spices in the rolls and the drink match perfectly. Which would you choose tonight?
Storing and Reheating Your Cinnamon Rolls
These cinnamon rolls stay soft for days if you store them right. Keep them in an airtight container at room temperature for up to two days. I remember the first time I made a whole batch for a sleepover. We ate half and put the rest in the fridge. The next morning, they were still tender, but the icing had soaked in a bit. For the freezer, wrap each roll tightly in plastic wrap, then foil. They keep for up to three months. To reheat, pop one in the microwave for 15 seconds or warm them in a 350°F oven for 5 minutes. Batch cooking is a lifesaver for busy mornings. You can make the dough the night before, refrigerate it, and bake fresh in the morning. That way, you get warm rolls without the rush. Have you ever tried storing it this way? Share below! Storing properly saves you time and keeps that fresh-baked taste. It means you can enjoy homemade goodness whenever you want.
Common Problems and Easy Fixes
Sometimes the dough doesn’t rise well. That usually means the milk was too hot or too cold. I once killed a batch of yeast because I got impatient and used hot milk. The yeast needs warm liquid, around 100-110°F. If your rolls come out dry, you might have added too much flour. The dough should be soft and slightly tacky. Add flour slowly and stop when it feels right. Another problem is filling leaking out while baking. This happens if you roll the dough too loosely. I remember my first time—I had sticky sugar butter all over the pan. Just roll it tight and pinch the seam closed. Which of these problems have you run into before? Fixing these issues matters because it builds your confidence in the kitchen. You learn to trust your hands and eyes. It also makes the final dish taste exactly how you imagined. That warm, gooey center is worth the small effort.
Your Top Questions Answered
Q: Can I make these gluten-free?
A: Yes, use a 1-to-1 gluten-free flour blend. The dough will be a bit stickier, so add a little extra flour if needed.
Q: Can I make the dough ahead of time?
A: Absolutely. Prepare the dough, cover it, and refrigerate overnight. Let it sit at room temp for 15 minutes before rolling.
Q: Can I swap the cream cheese icing?
A: Sure. Use a simple butter glaze with powdered sugar, milk, and vanilla. Or try a maple glaze for a different flavor.
Q: How do I scale the recipe?
A: Halve or double the ingredients easily. Just keep the ratios the same. Use two 9×13 pans if doubling.
Q: Any tips for softer rolls?
A: Brush the baked rolls with melted butter as soon as they come out of the oven. It adds moisture and shine. Which tip will you try first?
*Fun fact: Unflavored dental floss cuts cinnamon rolls cleaner than a knife. It keeps the layers from squishing.*
A Warm Goodbye from My Kitchen to Yours
Thank you for spending this time with me. I hope these cinnamon rolls fill your home with the same cozy smell I love. Every time I bake them, I think of my grandma letting us lick the icing bowl. It is a simple joy worth sharing. When you make yours, take a picture and share it with someone you love. Have you tried this recipe? Tag us on Pinterest! I cannot wait to see your beautiful rolls. Keep baking, keep tasting, and keep making memories. Happy cooking! —Chloe Hartwell.
Easy One Hour Cinnamon Rolls Recipe
Description
Fluffy, gooey one hour cinnamon rolls from scratch. Quick yeast dough with buttery cinnamon sugar. Easy homemade breakfast or dessert.
Ingredients
Instructions
- Prepare the Dough: Melt 1/4 cup (1/2 stick) unsalted butter in a microwave-safe bowl for about 40-45 seconds. Pour the melted butter into a medium bowl. Using the same bowl, warm 1 cup of milk for 45 seconds, then add it to the butter. Ensure the mixture is between 100-110°F; cool or warm as needed.
- Activate the Yeast & Preheat Oven: Stir in 1/4 cup granulated sugar and 2 1/4 teaspoons active dry yeast until dissolved. Cover with a towel or plastic wrap and let sit for 10 minutes until foamy. While waiting, preheat your oven to its lowest setting (~170°F), then turn it off to create a warm proofing environment.
- Mix Wet Ingredients: Once the yeast mixture is frothy, add 1 large egg, 1/2 teaspoon salt, and 1 teaspoon vanilla extract. Mix well to combine.
- Add the Flour: Gradually add 3 1/2 cups all-purpose flour in 1/2 cup increments, stirring with a spatula. Use your hands to knead any remaining flour gently. The dough should be soft and slightly tacky but not overly sticky.
- Proof the Dough: Form the dough into a ball, cover it with a tea cloth, and place it in the warm, turned-off oven to proof for 10 minutes.
- Prepare the Cinnamon Sugar Filling: In a medium bowl, cream together 1/2 cup softened unsalted butter, 1/2 cup brown sugar, 1/2 cup granulated sugar, 1 1/2 tablespoons ground cinnamon, and 1 teaspoon vanilla extract until light and fluffy. Set aside.
- Roll Out the Dough: Remove the dough from the oven and place it on a lightly greased or floured surface. Roll it into a 14″ x 18″ rectangle about 1/4″ thick.
- Add Filling: Preheat the oven to 350°F. Spread the cinnamon sugar filling evenly over the rolled dough, leaving a small margin around the edges.
- Roll and Slice: Starting from the shorter edge, tightly roll the dough into a log. Using a sharp knife or unflavored dental floss, cut the log into 12 even rolls by gentle sawing motions for clean edges.
- Bake: Place the rolls cut side up in a greased 9×13-inch baking dish. Bake at 350°F for 20-25 minutes, or until golden brown. Let cool in the pan for 10 minutes.
- Make the Cream Cheese Icing: While rolls cool, beat 4 ounces softened cream cheese, 2 cups powdered sugar, 1 teaspoon vanilla extract, and 2 tablespoons milk together. Add more milk one tablespoon at a time until reaching desired spreading or drizzling consistency.
- Frost and Serve: Spread the cream cheese icing generously over warm cinnamon rolls. Serve immediately and enjoy your delicious homemade cinnamon rolls.
The Secret of the One-Hour Miracle
Most people think cinnamon rolls take all day. They think you have to wake up at dawn and wait for hours. That is not true with this recipe. You can go from a bowl of flour to a warm, gooey roll in just sixty minutes. The trick is a warm oven. You turn it on low, then turn it off. That cozy little box becomes a proofing spa for your dough. *Fun fact:* Professional bakers call this a “proof box.” Fancy name for a warm spot. But your oven works just as well. I love this because it means you can make cinnamon rolls on a school morning. Or a lazy Saturday. Or right when a sugar craving hits. Why does this matter? Because homemade food should not feel like a chore. It should feel like a hug you can make anytime. Have you ever made cinnamon rolls before? Or do you usually buy the ones in a tube? I promise, these are different. The difference is love. And butter. Lots of butter.Rolling, Filling, and a Little Story
My granddaughter Lily helped me roll out the dough last weekend. She pressed too hard and made a hole. I almost said something. But instead, I showed her how to pinch it closed like a little blanket. She giggled and said it looked like a bandage. I still laugh at that. The filling is the best part anyway. Butter, brown sugar, and cinnamon create a swirl that tastes like autumn in every bite. When you roll the dough tight, you seal in all that sweetness. Then you slice it with dental floss. Yes, dental floss. It gives you clean cuts without squishing the dough. Try it next time. You will thank me. Do you have a funny kitchen helper story? Maybe a kid or a pet who got into the flour? I would love to hear it.Why the Icing Is Non-Negotiable
Some people eat cinnamon rolls without icing. I do not trust those people. Just kidding. But seriously, the cream cheese icing is what turns a good roll into a memorable one. It is tangy, sweet, and smooth. You spread it over the warm rolls, and it melts into every swirl. I like to add a little extra vanilla. It makes the kitchen smell even better than before. Doesnt that smell amazing? I think the icing is why we keep coming back for seconds. Why does this matter? Because food is about pleasure. A little indulgence makes life sweeter. And you deserve that.Your Turn to Make a Memory
Ingredients:
| Ingredient | Amount | Notes |
|---|---|---|
| Milk (whole or 2%) | 1 cup | |
| Unsalted butter, melted | 1/4 cup (1/2 stick) | |
| Active dry yeast | 1 (0.25 oz) packet (about 2 1/4 tsp) | |
| Granulated sugar | 1/4 cup | For dough |
| Large egg | 1 | |
| Salt | 1/2 teaspoon | |
| Vanilla extract | 1 teaspoon | For dough |
| All-purpose flour | 3 1/2 cups | |
| Unsalted butter, softened | 1/2 cup (1 stick) | For filling |
| Brown sugar | 1/2 cup | For filling |
| Granulated sugar | 1/2 cup | For filling |
| Ground cinnamon | 1 1/2 tablespoons | For filling |
| Vanilla extract | 1 teaspoon | For filling |
| Cream cheese, softened | 4 ounces | For icing |
| Powdered sugar | 2 cups | For icing |
| Vanilla extract | 1 teaspoon | For icing |
| Milk | 2–4 tablespoons | Add 1 tbsp at a time, as needed |
The Story Behind These Speedy Cinnamon Rolls
I remember the first time I tried making cinnamon rolls from scratch. I was about your age, and my kitchen looked like a flour bomb had gone off. My grandma just laughed and handed me a damp cloth. Now I have a secret that saves time without losing that warm, gooey feeling. These rolls come together in just one hour, start to finish. Doesn’t that sound like a wonderful weekend project?
The best part is the smell that fills your whole house. It is like a cozy hug from the kitchen. My neighbor once knocked on my door asking what I was baking. I still laugh at that every time I pull these rolls from the oven.
Let me walk you through it step by step. I promise, if a 12-year-old me could do it, you can too.
Step 1: First, melt the butter in a microwave-safe bowl for about 40 seconds. Then warm the milk in the same bowl for 45 seconds. Check that the mixture feels warm to your wrist, not hot. (Hard-learned tip: If the milk is too hot, it will kill the yeast. Think bath water, not soup.) Add the sugar and yeast, stir, and cover with a towel. Wait 10 minutes until it looks frothy like a sea foam. Isn’t it amazing how yeast wakes up?
Step 2: While you wait, preheat your oven to its lowest setting, then turn it off. This creates a cozy warm spot for the dough to rise. Once the yeast is foamy, crack in the egg, add salt, and pour in the vanilla. Mix it all together with a spoon. Do you hear that little sizzle? That is the yeast saying hello.
Step 3: Now add the flour, half a cup at a time. Stir gently with a spatula, then use your hands to bring the dough together. It should feel soft and a little sticky, like a marshmallow. If it sticks too much, add a tiny sprinkle of flour. Knead it just a few times until it forms a ball. What is your favorite thing to make in the kitchen? Share below!
Step 4: Place the dough ball in a greased bowl, cover with a tea towel, and pop it in the warm oven for 10 minutes. This is called proofing, and it makes the dough puffy and happy. While it rests, mix the filling. Cream together the softened butter, brown sugar, white sugar, cinnamon, and vanilla until smooth. This filling smells like a candy shop. I sometimes sneak a tiny taste before spreading it.
Step 5: Take the dough out and roll it on a lightly floured surface into a big rectangle. Aim for about 14 inches by 18 inches, roughly the size of a baking sheet. Spread the cinnamon filling all over, leaving a small border around the edges. Then roll it up tightly from the shorter side, like a sleeping bag. Use a sharp knife or dental floss to cut 12 even rolls. Dental floss works like magic and gives clean edges.
Step 6: Place the rolls cut side up in a greased 9×13-inch baking dish. Bake at 350°F for 20 to 25 minutes until golden brown. Let them cool in the pan for 10 minutes. While they cool, beat the cream cheese, powdered sugar, vanilla, and milk into a thick icing. Spread it on warm rolls so it melts into every swirl. Serve immediately and watch them disappear.
Cook Time: 20–25 minutes
Total Time: 1 hour
Yield: 12 cinnamon rolls
Category: Breakfast, Dessert
Three Fun Twists to Try
Once you master the basic recipe, you can play around a little. Here are three of my favorite twists. Each one adds a new flavor without extra work.
Apple Pie Rolls: Before spreading the filling, scatter half a cup of finely chopped apples over the butter. The apples get soft and sweet as they bake. It tastes like a pie in a roll.
Spicy Chocolate Swirl: Add a teaspoon of cocoa powder and a pinch of cayenne pepper to the cinnamon sugar. It gives a warm, surprising kick that grown-ups love.
Lemon Blueberry Version: Swap the cinnamon for lemon zest and replace the brown sugar with white sugar. Fold in a handful of fresh or frozen blueberries before rolling. These are perfect for a summer morning.
Which one would you try first? Comment below!
How to Serve and Sip Along
Cinnamon rolls are wonderful on their own, but a few extras make them feel special. Serve them warm with a pat of butter melting on top. A small sprinkle of chopped pecans or walnuts adds a nice crunch.
For a breakfast treat, place a single roll in a bowl and pour a little cold milk around it. The milk turns sweet and cinnamon-y. For a dessert plate, drizzle extra icing and add fresh berries on the side. They look like little jewels next to the golden rolls.
For drinks, pour yourself a tall glass of cold milk or a cup of hot cocoa. Grown-ups might enjoy a cup of strong black coffee or a warm chai latte. The spices in the rolls and the drink match perfectly. Which would you choose tonight?
Storing and Reheating Your Cinnamon Rolls
These cinnamon rolls stay soft for days if you store them right. Keep them in an airtight container at room temperature for up to two days. I remember the first time I made a whole batch for a sleepover. We ate half and put the rest in the fridge. The next morning, they were still tender, but the icing had soaked in a bit. For the freezer, wrap each roll tightly in plastic wrap, then foil. They keep for up to three months. To reheat, pop one in the microwave for 15 seconds or warm them in a 350°F oven for 5 minutes. Batch cooking is a lifesaver for busy mornings. You can make the dough the night before, refrigerate it, and bake fresh in the morning. That way, you get warm rolls without the rush. Have you ever tried storing it this way? Share below! Storing properly saves you time and keeps that fresh-baked taste. It means you can enjoy homemade goodness whenever you want.
Common Problems and Easy Fixes
Sometimes the dough doesn’t rise well. That usually means the milk was too hot or too cold. I once killed a batch of yeast because I got impatient and used hot milk. The yeast needs warm liquid, around 100-110°F. If your rolls come out dry, you might have added too much flour. The dough should be soft and slightly tacky. Add flour slowly and stop when it feels right. Another problem is filling leaking out while baking. This happens if you roll the dough too loosely. I remember my first time—I had sticky sugar butter all over the pan. Just roll it tight and pinch the seam closed. Which of these problems have you run into before? Fixing these issues matters because it builds your confidence in the kitchen. You learn to trust your hands and eyes. It also makes the final dish taste exactly how you imagined. That warm, gooey center is worth the small effort.
Your Top Questions Answered
Q: Can I make these gluten-free?
A: Yes, use a 1-to-1 gluten-free flour blend. The dough will be a bit stickier, so add a little extra flour if needed.
Q: Can I make the dough ahead of time?
A: Absolutely. Prepare the dough, cover it, and refrigerate overnight. Let it sit at room temp for 15 minutes before rolling.
Q: Can I swap the cream cheese icing?
A: Sure. Use a simple butter glaze with powdered sugar, milk, and vanilla. Or try a maple glaze for a different flavor.
Q: How do I scale the recipe?
A: Halve or double the ingredients easily. Just keep the ratios the same. Use two 9×13 pans if doubling.
Q: Any tips for softer rolls?
A: Brush the baked rolls with melted butter as soon as they come out of the oven. It adds moisture and shine. Which tip will you try first?
*Fun fact: Unflavored dental floss cuts cinnamon rolls cleaner than a knife. It keeps the layers from squishing.*
A Warm Goodbye from My Kitchen to Yours
Thank you for spending this time with me. I hope these cinnamon rolls fill your home with the same cozy smell I love. Every time I bake them, I think of my grandma letting us lick the icing bowl. It is a simple joy worth sharing. When you make yours, take a picture and share it with someone you love. Have you tried this recipe? Tag us on Pinterest! I cannot wait to see your beautiful rolls. Keep baking, keep tasting, and keep making memories. Happy cooking! —Chloe Hartwell.
The Morning That Changed My Baking World
I still remember the first time I tried making cinnamon rolls from scratch. I was a nervous wreck. The yeast scared me. I thought it would explode or something. Does that sound silly? Well, I laughed at myself later when the dough puffed up like a happy cloud. That day taught me something. Yeast is not magic. It is just tiny hungry friends that need warm milk and a little sugar to wake up. When you treat them kindly, they make your kitchen smell like heaven. Why does this matter? Because baking is not about being perfect. It is about learning to trust your hands. Have you ever been scared to try a new recipe? What held you back?The Secret of the One-Hour Miracle
Most people think cinnamon rolls take all day. They think you have to wake up at dawn and wait for hours. That is not true with this recipe. You can go from a bowl of flour to a warm, gooey roll in just sixty minutes. The trick is a warm oven. You turn it on low, then turn it off. That cozy little box becomes a proofing spa for your dough. *Fun fact:* Professional bakers call this a “proof box.” Fancy name for a warm spot. But your oven works just as well. I love this because it means you can make cinnamon rolls on a school morning. Or a lazy Saturday. Or right when a sugar craving hits. Why does this matter? Because homemade food should not feel like a chore. It should feel like a hug you can make anytime. Have you ever made cinnamon rolls before? Or do you usually buy the ones in a tube? I promise, these are different. The difference is love. And butter. Lots of butter.Rolling, Filling, and a Little Story
My granddaughter Lily helped me roll out the dough last weekend. She pressed too hard and made a hole. I almost said something. But instead, I showed her how to pinch it closed like a little blanket. She giggled and said it looked like a bandage. I still laugh at that. The filling is the best part anyway. Butter, brown sugar, and cinnamon create a swirl that tastes like autumn in every bite. When you roll the dough tight, you seal in all that sweetness. Then you slice it with dental floss. Yes, dental floss. It gives you clean cuts without squishing the dough. Try it next time. You will thank me. Do you have a funny kitchen helper story? Maybe a kid or a pet who got into the flour? I would love to hear it.Why the Icing Is Non-Negotiable
Some people eat cinnamon rolls without icing. I do not trust those people. Just kidding. But seriously, the cream cheese icing is what turns a good roll into a memorable one. It is tangy, sweet, and smooth. You spread it over the warm rolls, and it melts into every swirl. I like to add a little extra vanilla. It makes the kitchen smell even better than before. Doesnt that smell amazing? I think the icing is why we keep coming back for seconds. Why does this matter? Because food is about pleasure. A little indulgence makes life sweeter. And you deserve that.Your Turn to Make a Memory
Ingredients:
| Ingredient | Amount | Notes |
|---|---|---|
| Milk (whole or 2%) | 1 cup | |
| Unsalted butter, melted | 1/4 cup (1/2 stick) | |
| Active dry yeast | 1 (0.25 oz) packet (about 2 1/4 tsp) | |
| Granulated sugar | 1/4 cup | For dough |
| Large egg | 1 | |
| Salt | 1/2 teaspoon | |
| Vanilla extract | 1 teaspoon | For dough |
| All-purpose flour | 3 1/2 cups | |
| Unsalted butter, softened | 1/2 cup (1 stick) | For filling |
| Brown sugar | 1/2 cup | For filling |
| Granulated sugar | 1/2 cup | For filling |
| Ground cinnamon | 1 1/2 tablespoons | For filling |
| Vanilla extract | 1 teaspoon | For filling |
| Cream cheese, softened | 4 ounces | For icing |
| Powdered sugar | 2 cups | For icing |
| Vanilla extract | 1 teaspoon | For icing |
| Milk | 2–4 tablespoons | Add 1 tbsp at a time, as needed |
The Story Behind These Speedy Cinnamon Rolls
I remember the first time I tried making cinnamon rolls from scratch. I was about your age, and my kitchen looked like a flour bomb had gone off. My grandma just laughed and handed me a damp cloth. Now I have a secret that saves time without losing that warm, gooey feeling. These rolls come together in just one hour, start to finish. Doesn’t that sound like a wonderful weekend project?
The best part is the smell that fills your whole house. It is like a cozy hug from the kitchen. My neighbor once knocked on my door asking what I was baking. I still laugh at that every time I pull these rolls from the oven.
Let me walk you through it step by step. I promise, if a 12-year-old me could do it, you can too.
Step 1: First, melt the butter in a microwave-safe bowl for about 40 seconds. Then warm the milk in the same bowl for 45 seconds. Check that the mixture feels warm to your wrist, not hot. (Hard-learned tip: If the milk is too hot, it will kill the yeast. Think bath water, not soup.) Add the sugar and yeast, stir, and cover with a towel. Wait 10 minutes until it looks frothy like a sea foam. Isn’t it amazing how yeast wakes up?
Step 2: While you wait, preheat your oven to its lowest setting, then turn it off. This creates a cozy warm spot for the dough to rise. Once the yeast is foamy, crack in the egg, add salt, and pour in the vanilla. Mix it all together with a spoon. Do you hear that little sizzle? That is the yeast saying hello.
Step 3: Now add the flour, half a cup at a time. Stir gently with a spatula, then use your hands to bring the dough together. It should feel soft and a little sticky, like a marshmallow. If it sticks too much, add a tiny sprinkle of flour. Knead it just a few times until it forms a ball. What is your favorite thing to make in the kitchen? Share below!
Step 4: Place the dough ball in a greased bowl, cover with a tea towel, and pop it in the warm oven for 10 minutes. This is called proofing, and it makes the dough puffy and happy. While it rests, mix the filling. Cream together the softened butter, brown sugar, white sugar, cinnamon, and vanilla until smooth. This filling smells like a candy shop. I sometimes sneak a tiny taste before spreading it.
Step 5: Take the dough out and roll it on a lightly floured surface into a big rectangle. Aim for about 14 inches by 18 inches, roughly the size of a baking sheet. Spread the cinnamon filling all over, leaving a small border around the edges. Then roll it up tightly from the shorter side, like a sleeping bag. Use a sharp knife or dental floss to cut 12 even rolls. Dental floss works like magic and gives clean edges.
Step 6: Place the rolls cut side up in a greased 9×13-inch baking dish. Bake at 350°F for 20 to 25 minutes until golden brown. Let them cool in the pan for 10 minutes. While they cool, beat the cream cheese, powdered sugar, vanilla, and milk into a thick icing. Spread it on warm rolls so it melts into every swirl. Serve immediately and watch them disappear.
Cook Time: 20–25 minutes
Total Time: 1 hour
Yield: 12 cinnamon rolls
Category: Breakfast, Dessert
Three Fun Twists to Try
Once you master the basic recipe, you can play around a little. Here are three of my favorite twists. Each one adds a new flavor without extra work.
Apple Pie Rolls: Before spreading the filling, scatter half a cup of finely chopped apples over the butter. The apples get soft and sweet as they bake. It tastes like a pie in a roll.
Spicy Chocolate Swirl: Add a teaspoon of cocoa powder and a pinch of cayenne pepper to the cinnamon sugar. It gives a warm, surprising kick that grown-ups love.
Lemon Blueberry Version: Swap the cinnamon for lemon zest and replace the brown sugar with white sugar. Fold in a handful of fresh or frozen blueberries before rolling. These are perfect for a summer morning.
Which one would you try first? Comment below!
How to Serve and Sip Along
Cinnamon rolls are wonderful on their own, but a few extras make them feel special. Serve them warm with a pat of butter melting on top. A small sprinkle of chopped pecans or walnuts adds a nice crunch.
For a breakfast treat, place a single roll in a bowl and pour a little cold milk around it. The milk turns sweet and cinnamon-y. For a dessert plate, drizzle extra icing and add fresh berries on the side. They look like little jewels next to the golden rolls.
For drinks, pour yourself a tall glass of cold milk or a cup of hot cocoa. Grown-ups might enjoy a cup of strong black coffee or a warm chai latte. The spices in the rolls and the drink match perfectly. Which would you choose tonight?
Storing and Reheating Your Cinnamon Rolls
These cinnamon rolls stay soft for days if you store them right. Keep them in an airtight container at room temperature for up to two days. I remember the first time I made a whole batch for a sleepover. We ate half and put the rest in the fridge. The next morning, they were still tender, but the icing had soaked in a bit. For the freezer, wrap each roll tightly in plastic wrap, then foil. They keep for up to three months. To reheat, pop one in the microwave for 15 seconds or warm them in a 350°F oven for 5 minutes. Batch cooking is a lifesaver for busy mornings. You can make the dough the night before, refrigerate it, and bake fresh in the morning. That way, you get warm rolls without the rush. Have you ever tried storing it this way? Share below! Storing properly saves you time and keeps that fresh-baked taste. It means you can enjoy homemade goodness whenever you want.
Common Problems and Easy Fixes
Sometimes the dough doesn’t rise well. That usually means the milk was too hot or too cold. I once killed a batch of yeast because I got impatient and used hot milk. The yeast needs warm liquid, around 100-110°F. If your rolls come out dry, you might have added too much flour. The dough should be soft and slightly tacky. Add flour slowly and stop when it feels right. Another problem is filling leaking out while baking. This happens if you roll the dough too loosely. I remember my first time—I had sticky sugar butter all over the pan. Just roll it tight and pinch the seam closed. Which of these problems have you run into before? Fixing these issues matters because it builds your confidence in the kitchen. You learn to trust your hands and eyes. It also makes the final dish taste exactly how you imagined. That warm, gooey center is worth the small effort.
Your Top Questions Answered
Q: Can I make these gluten-free?
A: Yes, use a 1-to-1 gluten-free flour blend. The dough will be a bit stickier, so add a little extra flour if needed.
Q: Can I make the dough ahead of time?
A: Absolutely. Prepare the dough, cover it, and refrigerate overnight. Let it sit at room temp for 15 minutes before rolling.
Q: Can I swap the cream cheese icing?
A: Sure. Use a simple butter glaze with powdered sugar, milk, and vanilla. Or try a maple glaze for a different flavor.
Q: How do I scale the recipe?
A: Halve or double the ingredients easily. Just keep the ratios the same. Use two 9×13 pans if doubling.
Q: Any tips for softer rolls?
A: Brush the baked rolls with melted butter as soon as they come out of the oven. It adds moisture and shine. Which tip will you try first?
*Fun fact: Unflavored dental floss cuts cinnamon rolls cleaner than a knife. It keeps the layers from squishing.*
A Warm Goodbye from My Kitchen to Yours
Thank you for spending this time with me. I hope these cinnamon rolls fill your home with the same cozy smell I love. Every time I bake them, I think of my grandma letting us lick the icing bowl. It is a simple joy worth sharing. When you make yours, take a picture and share it with someone you love. Have you tried this recipe? Tag us on Pinterest! I cannot wait to see your beautiful rolls. Keep baking, keep tasting, and keep making memories. Happy cooking! —Chloe Hartwell.
Rolling, Filling, and a Little Story
My granddaughter Lily helped me roll out the dough last weekend. She pressed too hard and made a hole. I almost said something. But instead, I showed her how to pinch it closed like a little blanket. She giggled and said it looked like a bandage. I still laugh at that. The filling is the best part anyway. Butter, brown sugar, and cinnamon create a swirl that tastes like autumn in every bite. When you roll the dough tight, you seal in all that sweetness. Then you slice it with dental floss. Yes, dental floss. It gives you clean cuts without squishing the dough. Try it next time. You will thank me. Do you have a funny kitchen helper story? Maybe a kid or a pet who got into the flour? I would love to hear it.Why the Icing Is Non-Negotiable
Some people eat cinnamon rolls without icing. I do not trust those people. Just kidding. But seriously, the cream cheese icing is what turns a good roll into a memorable one. It is tangy, sweet, and smooth. You spread it over the warm rolls, and it melts into every swirl. I like to add a little extra vanilla. It makes the kitchen smell even better than before. Doesnt that smell amazing? I think the icing is why we keep coming back for seconds. Why does this matter? Because food is about pleasure. A little indulgence makes life sweeter. And you deserve that.Your Turn to Make a Memory
Ingredients:
| Ingredient | Amount | Notes |
|---|---|---|
| Milk (whole or 2%) | 1 cup | |
| Unsalted butter, melted | 1/4 cup (1/2 stick) | |
| Active dry yeast | 1 (0.25 oz) packet (about 2 1/4 tsp) | |
| Granulated sugar | 1/4 cup | For dough |
| Large egg | 1 | |
| Salt | 1/2 teaspoon | |
| Vanilla extract | 1 teaspoon | For dough |
| All-purpose flour | 3 1/2 cups | |
| Unsalted butter, softened | 1/2 cup (1 stick) | For filling |
| Brown sugar | 1/2 cup | For filling |
| Granulated sugar | 1/2 cup | For filling |
| Ground cinnamon | 1 1/2 tablespoons | For filling |
| Vanilla extract | 1 teaspoon | For filling |
| Cream cheese, softened | 4 ounces | For icing |
| Powdered sugar | 2 cups | For icing |
| Vanilla extract | 1 teaspoon | For icing |
| Milk | 2–4 tablespoons | Add 1 tbsp at a time, as needed |
The Story Behind These Speedy Cinnamon Rolls
I remember the first time I tried making cinnamon rolls from scratch. I was about your age, and my kitchen looked like a flour bomb had gone off. My grandma just laughed and handed me a damp cloth. Now I have a secret that saves time without losing that warm, gooey feeling. These rolls come together in just one hour, start to finish. Doesn’t that sound like a wonderful weekend project?
The best part is the smell that fills your whole house. It is like a cozy hug from the kitchen. My neighbor once knocked on my door asking what I was baking. I still laugh at that every time I pull these rolls from the oven.
Let me walk you through it step by step. I promise, if a 12-year-old me could do it, you can too.
Step 1: First, melt the butter in a microwave-safe bowl for about 40 seconds. Then warm the milk in the same bowl for 45 seconds. Check that the mixture feels warm to your wrist, not hot. (Hard-learned tip: If the milk is too hot, it will kill the yeast. Think bath water, not soup.) Add the sugar and yeast, stir, and cover with a towel. Wait 10 minutes until it looks frothy like a sea foam. Isn’t it amazing how yeast wakes up?
Step 2: While you wait, preheat your oven to its lowest setting, then turn it off. This creates a cozy warm spot for the dough to rise. Once the yeast is foamy, crack in the egg, add salt, and pour in the vanilla. Mix it all together with a spoon. Do you hear that little sizzle? That is the yeast saying hello.
Step 3: Now add the flour, half a cup at a time. Stir gently with a spatula, then use your hands to bring the dough together. It should feel soft and a little sticky, like a marshmallow. If it sticks too much, add a tiny sprinkle of flour. Knead it just a few times until it forms a ball. What is your favorite thing to make in the kitchen? Share below!
Step 4: Place the dough ball in a greased bowl, cover with a tea towel, and pop it in the warm oven for 10 minutes. This is called proofing, and it makes the dough puffy and happy. While it rests, mix the filling. Cream together the softened butter, brown sugar, white sugar, cinnamon, and vanilla until smooth. This filling smells like a candy shop. I sometimes sneak a tiny taste before spreading it.
Step 5: Take the dough out and roll it on a lightly floured surface into a big rectangle. Aim for about 14 inches by 18 inches, roughly the size of a baking sheet. Spread the cinnamon filling all over, leaving a small border around the edges. Then roll it up tightly from the shorter side, like a sleeping bag. Use a sharp knife or dental floss to cut 12 even rolls. Dental floss works like magic and gives clean edges.
Step 6: Place the rolls cut side up in a greased 9×13-inch baking dish. Bake at 350°F for 20 to 25 minutes until golden brown. Let them cool in the pan for 10 minutes. While they cool, beat the cream cheese, powdered sugar, vanilla, and milk into a thick icing. Spread it on warm rolls so it melts into every swirl. Serve immediately and watch them disappear.
Cook Time: 20–25 minutes
Total Time: 1 hour
Yield: 12 cinnamon rolls
Category: Breakfast, Dessert
Three Fun Twists to Try
Once you master the basic recipe, you can play around a little. Here are three of my favorite twists. Each one adds a new flavor without extra work.
Apple Pie Rolls: Before spreading the filling, scatter half a cup of finely chopped apples over the butter. The apples get soft and sweet as they bake. It tastes like a pie in a roll.
Spicy Chocolate Swirl: Add a teaspoon of cocoa powder and a pinch of cayenne pepper to the cinnamon sugar. It gives a warm, surprising kick that grown-ups love.
Lemon Blueberry Version: Swap the cinnamon for lemon zest and replace the brown sugar with white sugar. Fold in a handful of fresh or frozen blueberries before rolling. These are perfect for a summer morning.
Which one would you try first? Comment below!
How to Serve and Sip Along
Cinnamon rolls are wonderful on their own, but a few extras make them feel special. Serve them warm with a pat of butter melting on top. A small sprinkle of chopped pecans or walnuts adds a nice crunch.
For a breakfast treat, place a single roll in a bowl and pour a little cold milk around it. The milk turns sweet and cinnamon-y. For a dessert plate, drizzle extra icing and add fresh berries on the side. They look like little jewels next to the golden rolls.
For drinks, pour yourself a tall glass of cold milk or a cup of hot cocoa. Grown-ups might enjoy a cup of strong black coffee or a warm chai latte. The spices in the rolls and the drink match perfectly. Which would you choose tonight?
Storing and Reheating Your Cinnamon Rolls
These cinnamon rolls stay soft for days if you store them right. Keep them in an airtight container at room temperature for up to two days. I remember the first time I made a whole batch for a sleepover. We ate half and put the rest in the fridge. The next morning, they were still tender, but the icing had soaked in a bit. For the freezer, wrap each roll tightly in plastic wrap, then foil. They keep for up to three months. To reheat, pop one in the microwave for 15 seconds or warm them in a 350°F oven for 5 minutes. Batch cooking is a lifesaver for busy mornings. You can make the dough the night before, refrigerate it, and bake fresh in the morning. That way, you get warm rolls without the rush. Have you ever tried storing it this way? Share below! Storing properly saves you time and keeps that fresh-baked taste. It means you can enjoy homemade goodness whenever you want.
Common Problems and Easy Fixes
Sometimes the dough doesn’t rise well. That usually means the milk was too hot or too cold. I once killed a batch of yeast because I got impatient and used hot milk. The yeast needs warm liquid, around 100-110°F. If your rolls come out dry, you might have added too much flour. The dough should be soft and slightly tacky. Add flour slowly and stop when it feels right. Another problem is filling leaking out while baking. This happens if you roll the dough too loosely. I remember my first time—I had sticky sugar butter all over the pan. Just roll it tight and pinch the seam closed. Which of these problems have you run into before? Fixing these issues matters because it builds your confidence in the kitchen. You learn to trust your hands and eyes. It also makes the final dish taste exactly how you imagined. That warm, gooey center is worth the small effort.
Your Top Questions Answered
Q: Can I make these gluten-free?
A: Yes, use a 1-to-1 gluten-free flour blend. The dough will be a bit stickier, so add a little extra flour if needed.
Q: Can I make the dough ahead of time?
A: Absolutely. Prepare the dough, cover it, and refrigerate overnight. Let it sit at room temp for 15 minutes before rolling.
Q: Can I swap the cream cheese icing?
A: Sure. Use a simple butter glaze with powdered sugar, milk, and vanilla. Or try a maple glaze for a different flavor.
Q: How do I scale the recipe?
A: Halve or double the ingredients easily. Just keep the ratios the same. Use two 9×13 pans if doubling.
Q: Any tips for softer rolls?
A: Brush the baked rolls with melted butter as soon as they come out of the oven. It adds moisture and shine. Which tip will you try first?
*Fun fact: Unflavored dental floss cuts cinnamon rolls cleaner than a knife. It keeps the layers from squishing.*
A Warm Goodbye from My Kitchen to Yours
Thank you for spending this time with me. I hope these cinnamon rolls fill your home with the same cozy smell I love. Every time I bake them, I think of my grandma letting us lick the icing bowl. It is a simple joy worth sharing. When you make yours, take a picture and share it with someone you love. Have you tried this recipe? Tag us on Pinterest! I cannot wait to see your beautiful rolls. Keep baking, keep tasting, and keep making memories. Happy cooking! —Chloe Hartwell.
The Secret of the One-Hour Miracle
Most people think cinnamon rolls take all day. They think you have to wake up at dawn and wait for hours. That is not true with this recipe. You can go from a bowl of flour to a warm, gooey roll in just sixty minutes. The trick is a warm oven. You turn it on low, then turn it off. That cozy little box becomes a proofing spa for your dough. *Fun fact:* Professional bakers call this a “proof box.” Fancy name for a warm spot. But your oven works just as well. I love this because it means you can make cinnamon rolls on a school morning. Or a lazy Saturday. Or right when a sugar craving hits. Why does this matter? Because homemade food should not feel like a chore. It should feel like a hug you can make anytime. Have you ever made cinnamon rolls before? Or do you usually buy the ones in a tube? I promise, these are different. The difference is love. And butter. Lots of butter.Rolling, Filling, and a Little Story
My granddaughter Lily helped me roll out the dough last weekend. She pressed too hard and made a hole. I almost said something. But instead, I showed her how to pinch it closed like a little blanket. She giggled and said it looked like a bandage. I still laugh at that. The filling is the best part anyway. Butter, brown sugar, and cinnamon create a swirl that tastes like autumn in every bite. When you roll the dough tight, you seal in all that sweetness. Then you slice it with dental floss. Yes, dental floss. It gives you clean cuts without squishing the dough. Try it next time. You will thank me. Do you have a funny kitchen helper story? Maybe a kid or a pet who got into the flour? I would love to hear it.Why the Icing Is Non-Negotiable
Some people eat cinnamon rolls without icing. I do not trust those people. Just kidding. But seriously, the cream cheese icing is what turns a good roll into a memorable one. It is tangy, sweet, and smooth. You spread it over the warm rolls, and it melts into every swirl. I like to add a little extra vanilla. It makes the kitchen smell even better than before. Doesnt that smell amazing? I think the icing is why we keep coming back for seconds. Why does this matter? Because food is about pleasure. A little indulgence makes life sweeter. And you deserve that.Your Turn to Make a Memory
Ingredients:
| Ingredient | Amount | Notes |
|---|---|---|
| Milk (whole or 2%) | 1 cup | |
| Unsalted butter, melted | 1/4 cup (1/2 stick) | |
| Active dry yeast | 1 (0.25 oz) packet (about 2 1/4 tsp) | |
| Granulated sugar | 1/4 cup | For dough |
| Large egg | 1 | |
| Salt | 1/2 teaspoon | |
| Vanilla extract | 1 teaspoon | For dough |
| All-purpose flour | 3 1/2 cups | |
| Unsalted butter, softened | 1/2 cup (1 stick) | For filling |
| Brown sugar | 1/2 cup | For filling |
| Granulated sugar | 1/2 cup | For filling |
| Ground cinnamon | 1 1/2 tablespoons | For filling |
| Vanilla extract | 1 teaspoon | For filling |
| Cream cheese, softened | 4 ounces | For icing |
| Powdered sugar | 2 cups | For icing |
| Vanilla extract | 1 teaspoon | For icing |
| Milk | 2–4 tablespoons | Add 1 tbsp at a time, as needed |
The Story Behind These Speedy Cinnamon Rolls
I remember the first time I tried making cinnamon rolls from scratch. I was about your age, and my kitchen looked like a flour bomb had gone off. My grandma just laughed and handed me a damp cloth. Now I have a secret that saves time without losing that warm, gooey feeling. These rolls come together in just one hour, start to finish. Doesn’t that sound like a wonderful weekend project?
The best part is the smell that fills your whole house. It is like a cozy hug from the kitchen. My neighbor once knocked on my door asking what I was baking. I still laugh at that every time I pull these rolls from the oven.
Let me walk you through it step by step. I promise, if a 12-year-old me could do it, you can too.
Step 1: First, melt the butter in a microwave-safe bowl for about 40 seconds. Then warm the milk in the same bowl for 45 seconds. Check that the mixture feels warm to your wrist, not hot. (Hard-learned tip: If the milk is too hot, it will kill the yeast. Think bath water, not soup.) Add the sugar and yeast, stir, and cover with a towel. Wait 10 minutes until it looks frothy like a sea foam. Isn’t it amazing how yeast wakes up?
Step 2: While you wait, preheat your oven to its lowest setting, then turn it off. This creates a cozy warm spot for the dough to rise. Once the yeast is foamy, crack in the egg, add salt, and pour in the vanilla. Mix it all together with a spoon. Do you hear that little sizzle? That is the yeast saying hello.
Step 3: Now add the flour, half a cup at a time. Stir gently with a spatula, then use your hands to bring the dough together. It should feel soft and a little sticky, like a marshmallow. If it sticks too much, add a tiny sprinkle of flour. Knead it just a few times until it forms a ball. What is your favorite thing to make in the kitchen? Share below!
Step 4: Place the dough ball in a greased bowl, cover with a tea towel, and pop it in the warm oven for 10 minutes. This is called proofing, and it makes the dough puffy and happy. While it rests, mix the filling. Cream together the softened butter, brown sugar, white sugar, cinnamon, and vanilla until smooth. This filling smells like a candy shop. I sometimes sneak a tiny taste before spreading it.
Step 5: Take the dough out and roll it on a lightly floured surface into a big rectangle. Aim for about 14 inches by 18 inches, roughly the size of a baking sheet. Spread the cinnamon filling all over, leaving a small border around the edges. Then roll it up tightly from the shorter side, like a sleeping bag. Use a sharp knife or dental floss to cut 12 even rolls. Dental floss works like magic and gives clean edges.
Step 6: Place the rolls cut side up in a greased 9×13-inch baking dish. Bake at 350°F for 20 to 25 minutes until golden brown. Let them cool in the pan for 10 minutes. While they cool, beat the cream cheese, powdered sugar, vanilla, and milk into a thick icing. Spread it on warm rolls so it melts into every swirl. Serve immediately and watch them disappear.
Cook Time: 20–25 minutes
Total Time: 1 hour
Yield: 12 cinnamon rolls
Category: Breakfast, Dessert
Three Fun Twists to Try
Once you master the basic recipe, you can play around a little. Here are three of my favorite twists. Each one adds a new flavor without extra work.
Apple Pie Rolls: Before spreading the filling, scatter half a cup of finely chopped apples over the butter. The apples get soft and sweet as they bake. It tastes like a pie in a roll.
Spicy Chocolate Swirl: Add a teaspoon of cocoa powder and a pinch of cayenne pepper to the cinnamon sugar. It gives a warm, surprising kick that grown-ups love.
Lemon Blueberry Version: Swap the cinnamon for lemon zest and replace the brown sugar with white sugar. Fold in a handful of fresh or frozen blueberries before rolling. These are perfect for a summer morning.
Which one would you try first? Comment below!
How to Serve and Sip Along
Cinnamon rolls are wonderful on their own, but a few extras make them feel special. Serve them warm with a pat of butter melting on top. A small sprinkle of chopped pecans or walnuts adds a nice crunch.
For a breakfast treat, place a single roll in a bowl and pour a little cold milk around it. The milk turns sweet and cinnamon-y. For a dessert plate, drizzle extra icing and add fresh berries on the side. They look like little jewels next to the golden rolls.
For drinks, pour yourself a tall glass of cold milk or a cup of hot cocoa. Grown-ups might enjoy a cup of strong black coffee or a warm chai latte. The spices in the rolls and the drink match perfectly. Which would you choose tonight?
Storing and Reheating Your Cinnamon Rolls
These cinnamon rolls stay soft for days if you store them right. Keep them in an airtight container at room temperature for up to two days. I remember the first time I made a whole batch for a sleepover. We ate half and put the rest in the fridge. The next morning, they were still tender, but the icing had soaked in a bit. For the freezer, wrap each roll tightly in plastic wrap, then foil. They keep for up to three months. To reheat, pop one in the microwave for 15 seconds or warm them in a 350°F oven for 5 minutes. Batch cooking is a lifesaver for busy mornings. You can make the dough the night before, refrigerate it, and bake fresh in the morning. That way, you get warm rolls without the rush. Have you ever tried storing it this way? Share below! Storing properly saves you time and keeps that fresh-baked taste. It means you can enjoy homemade goodness whenever you want.
Common Problems and Easy Fixes
Sometimes the dough doesn’t rise well. That usually means the milk was too hot or too cold. I once killed a batch of yeast because I got impatient and used hot milk. The yeast needs warm liquid, around 100-110°F. If your rolls come out dry, you might have added too much flour. The dough should be soft and slightly tacky. Add flour slowly and stop when it feels right. Another problem is filling leaking out while baking. This happens if you roll the dough too loosely. I remember my first time—I had sticky sugar butter all over the pan. Just roll it tight and pinch the seam closed. Which of these problems have you run into before? Fixing these issues matters because it builds your confidence in the kitchen. You learn to trust your hands and eyes. It also makes the final dish taste exactly how you imagined. That warm, gooey center is worth the small effort.
Your Top Questions Answered
Q: Can I make these gluten-free?
A: Yes, use a 1-to-1 gluten-free flour blend. The dough will be a bit stickier, so add a little extra flour if needed.
Q: Can I make the dough ahead of time?
A: Absolutely. Prepare the dough, cover it, and refrigerate overnight. Let it sit at room temp for 15 minutes before rolling.
Q: Can I swap the cream cheese icing?
A: Sure. Use a simple butter glaze with powdered sugar, milk, and vanilla. Or try a maple glaze for a different flavor.
Q: How do I scale the recipe?
A: Halve or double the ingredients easily. Just keep the ratios the same. Use two 9×13 pans if doubling.
Q: Any tips for softer rolls?
A: Brush the baked rolls with melted butter as soon as they come out of the oven. It adds moisture and shine. Which tip will you try first?
*Fun fact: Unflavored dental floss cuts cinnamon rolls cleaner than a knife. It keeps the layers from squishing.*
A Warm Goodbye from My Kitchen to Yours
Thank you for spending this time with me. I hope these cinnamon rolls fill your home with the same cozy smell I love. Every time I bake them, I think of my grandma letting us lick the icing bowl. It is a simple joy worth sharing. When you make yours, take a picture and share it with someone you love. Have you tried this recipe? Tag us on Pinterest! I cannot wait to see your beautiful rolls. Keep baking, keep tasting, and keep making memories. Happy cooking! —Chloe Hartwell.
The Morning That Changed My Baking World
I still remember the first time I tried making cinnamon rolls from scratch. I was a nervous wreck. The yeast scared me. I thought it would explode or something. Does that sound silly? Well, I laughed at myself later when the dough puffed up like a happy cloud. That day taught me something. Yeast is not magic. It is just tiny hungry friends that need warm milk and a little sugar to wake up. When you treat them kindly, they make your kitchen smell like heaven. Why does this matter? Because baking is not about being perfect. It is about learning to trust your hands. Have you ever been scared to try a new recipe? What held you back?The Secret of the One-Hour Miracle
Most people think cinnamon rolls take all day. They think you have to wake up at dawn and wait for hours. That is not true with this recipe. You can go from a bowl of flour to a warm, gooey roll in just sixty minutes. The trick is a warm oven. You turn it on low, then turn it off. That cozy little box becomes a proofing spa for your dough. *Fun fact:* Professional bakers call this a “proof box.” Fancy name for a warm spot. But your oven works just as well. I love this because it means you can make cinnamon rolls on a school morning. Or a lazy Saturday. Or right when a sugar craving hits. Why does this matter? Because homemade food should not feel like a chore. It should feel like a hug you can make anytime. Have you ever made cinnamon rolls before? Or do you usually buy the ones in a tube? I promise, these are different. The difference is love. And butter. Lots of butter.Rolling, Filling, and a Little Story
My granddaughter Lily helped me roll out the dough last weekend. She pressed too hard and made a hole. I almost said something. But instead, I showed her how to pinch it closed like a little blanket. She giggled and said it looked like a bandage. I still laugh at that. The filling is the best part anyway. Butter, brown sugar, and cinnamon create a swirl that tastes like autumn in every bite. When you roll the dough tight, you seal in all that sweetness. Then you slice it with dental floss. Yes, dental floss. It gives you clean cuts without squishing the dough. Try it next time. You will thank me. Do you have a funny kitchen helper story? Maybe a kid or a pet who got into the flour? I would love to hear it.Why the Icing Is Non-Negotiable
Some people eat cinnamon rolls without icing. I do not trust those people. Just kidding. But seriously, the cream cheese icing is what turns a good roll into a memorable one. It is tangy, sweet, and smooth. You spread it over the warm rolls, and it melts into every swirl. I like to add a little extra vanilla. It makes the kitchen smell even better than before. Doesnt that smell amazing? I think the icing is why we keep coming back for seconds. Why does this matter? Because food is about pleasure. A little indulgence makes life sweeter. And you deserve that.Your Turn to Make a Memory
Ingredients:
| Ingredient | Amount | Notes |
|---|---|---|
| Milk (whole or 2%) | 1 cup | |
| Unsalted butter, melted | 1/4 cup (1/2 stick) | |
| Active dry yeast | 1 (0.25 oz) packet (about 2 1/4 tsp) | |
| Granulated sugar | 1/4 cup | For dough |
| Large egg | 1 | |
| Salt | 1/2 teaspoon | |
| Vanilla extract | 1 teaspoon | For dough |
| All-purpose flour | 3 1/2 cups | |
| Unsalted butter, softened | 1/2 cup (1 stick) | For filling |
| Brown sugar | 1/2 cup | For filling |
| Granulated sugar | 1/2 cup | For filling |
| Ground cinnamon | 1 1/2 tablespoons | For filling |
| Vanilla extract | 1 teaspoon | For filling |
| Cream cheese, softened | 4 ounces | For icing |
| Powdered sugar | 2 cups | For icing |
| Vanilla extract | 1 teaspoon | For icing |
| Milk | 2–4 tablespoons | Add 1 tbsp at a time, as needed |
The Story Behind These Speedy Cinnamon Rolls
I remember the first time I tried making cinnamon rolls from scratch. I was about your age, and my kitchen looked like a flour bomb had gone off. My grandma just laughed and handed me a damp cloth. Now I have a secret that saves time without losing that warm, gooey feeling. These rolls come together in just one hour, start to finish. Doesn’t that sound like a wonderful weekend project?
The best part is the smell that fills your whole house. It is like a cozy hug from the kitchen. My neighbor once knocked on my door asking what I was baking. I still laugh at that every time I pull these rolls from the oven.
Let me walk you through it step by step. I promise, if a 12-year-old me could do it, you can too.
Step 1: First, melt the butter in a microwave-safe bowl for about 40 seconds. Then warm the milk in the same bowl for 45 seconds. Check that the mixture feels warm to your wrist, not hot. (Hard-learned tip: If the milk is too hot, it will kill the yeast. Think bath water, not soup.) Add the sugar and yeast, stir, and cover with a towel. Wait 10 minutes until it looks frothy like a sea foam. Isn’t it amazing how yeast wakes up?
Step 2: While you wait, preheat your oven to its lowest setting, then turn it off. This creates a cozy warm spot for the dough to rise. Once the yeast is foamy, crack in the egg, add salt, and pour in the vanilla. Mix it all together with a spoon. Do you hear that little sizzle? That is the yeast saying hello.
Step 3: Now add the flour, half a cup at a time. Stir gently with a spatula, then use your hands to bring the dough together. It should feel soft and a little sticky, like a marshmallow. If it sticks too much, add a tiny sprinkle of flour. Knead it just a few times until it forms a ball. What is your favorite thing to make in the kitchen? Share below!
Step 4: Place the dough ball in a greased bowl, cover with a tea towel, and pop it in the warm oven for 10 minutes. This is called proofing, and it makes the dough puffy and happy. While it rests, mix the filling. Cream together the softened butter, brown sugar, white sugar, cinnamon, and vanilla until smooth. This filling smells like a candy shop. I sometimes sneak a tiny taste before spreading it.
Step 5: Take the dough out and roll it on a lightly floured surface into a big rectangle. Aim for about 14 inches by 18 inches, roughly the size of a baking sheet. Spread the cinnamon filling all over, leaving a small border around the edges. Then roll it up tightly from the shorter side, like a sleeping bag. Use a sharp knife or dental floss to cut 12 even rolls. Dental floss works like magic and gives clean edges.
Step 6: Place the rolls cut side up in a greased 9×13-inch baking dish. Bake at 350°F for 20 to 25 minutes until golden brown. Let them cool in the pan for 10 minutes. While they cool, beat the cream cheese, powdered sugar, vanilla, and milk into a thick icing. Spread it on warm rolls so it melts into every swirl. Serve immediately and watch them disappear.
Cook Time: 20–25 minutes
Total Time: 1 hour
Yield: 12 cinnamon rolls
Category: Breakfast, Dessert
Three Fun Twists to Try
Once you master the basic recipe, you can play around a little. Here are three of my favorite twists. Each one adds a new flavor without extra work.
Apple Pie Rolls: Before spreading the filling, scatter half a cup of finely chopped apples over the butter. The apples get soft and sweet as they bake. It tastes like a pie in a roll.
Spicy Chocolate Swirl: Add a teaspoon of cocoa powder and a pinch of cayenne pepper to the cinnamon sugar. It gives a warm, surprising kick that grown-ups love.
Lemon Blueberry Version: Swap the cinnamon for lemon zest and replace the brown sugar with white sugar. Fold in a handful of fresh or frozen blueberries before rolling. These are perfect for a summer morning.
Which one would you try first? Comment below!
How to Serve and Sip Along
Cinnamon rolls are wonderful on their own, but a few extras make them feel special. Serve them warm with a pat of butter melting on top. A small sprinkle of chopped pecans or walnuts adds a nice crunch.
For a breakfast treat, place a single roll in a bowl and pour a little cold milk around it. The milk turns sweet and cinnamon-y. For a dessert plate, drizzle extra icing and add fresh berries on the side. They look like little jewels next to the golden rolls.
For drinks, pour yourself a tall glass of cold milk or a cup of hot cocoa. Grown-ups might enjoy a cup of strong black coffee or a warm chai latte. The spices in the rolls and the drink match perfectly. Which would you choose tonight?
Storing and Reheating Your Cinnamon Rolls
These cinnamon rolls stay soft for days if you store them right. Keep them in an airtight container at room temperature for up to two days. I remember the first time I made a whole batch for a sleepover. We ate half and put the rest in the fridge. The next morning, they were still tender, but the icing had soaked in a bit. For the freezer, wrap each roll tightly in plastic wrap, then foil. They keep for up to three months. To reheat, pop one in the microwave for 15 seconds or warm them in a 350°F oven for 5 minutes. Batch cooking is a lifesaver for busy mornings. You can make the dough the night before, refrigerate it, and bake fresh in the morning. That way, you get warm rolls without the rush. Have you ever tried storing it this way? Share below! Storing properly saves you time and keeps that fresh-baked taste. It means you can enjoy homemade goodness whenever you want.
Common Problems and Easy Fixes
Sometimes the dough doesn’t rise well. That usually means the milk was too hot or too cold. I once killed a batch of yeast because I got impatient and used hot milk. The yeast needs warm liquid, around 100-110°F. If your rolls come out dry, you might have added too much flour. The dough should be soft and slightly tacky. Add flour slowly and stop when it feels right. Another problem is filling leaking out while baking. This happens if you roll the dough too loosely. I remember my first time—I had sticky sugar butter all over the pan. Just roll it tight and pinch the seam closed. Which of these problems have you run into before? Fixing these issues matters because it builds your confidence in the kitchen. You learn to trust your hands and eyes. It also makes the final dish taste exactly how you imagined. That warm, gooey center is worth the small effort.
Your Top Questions Answered
Q: Can I make these gluten-free?
A: Yes, use a 1-to-1 gluten-free flour blend. The dough will be a bit stickier, so add a little extra flour if needed.
Q: Can I make the dough ahead of time?
A: Absolutely. Prepare the dough, cover it, and refrigerate overnight. Let it sit at room temp for 15 minutes before rolling.
Q: Can I swap the cream cheese icing?
A: Sure. Use a simple butter glaze with powdered sugar, milk, and vanilla. Or try a maple glaze for a different flavor.
Q: How do I scale the recipe?
A: Halve or double the ingredients easily. Just keep the ratios the same. Use two 9×13 pans if doubling.
Q: Any tips for softer rolls?
A: Brush the baked rolls with melted butter as soon as they come out of the oven. It adds moisture and shine. Which tip will you try first?
*Fun fact: Unflavored dental floss cuts cinnamon rolls cleaner than a knife. It keeps the layers from squishing.*
A Warm Goodbye from My Kitchen to Yours
Thank you for spending this time with me. I hope these cinnamon rolls fill your home with the same cozy smell I love. Every time I bake them, I think of my grandma letting us lick the icing bowl. It is a simple joy worth sharing. When you make yours, take a picture and share it with someone you love. Have you tried this recipe? Tag us on Pinterest! I cannot wait to see your beautiful rolls. Keep baking, keep tasting, and keep making memories. Happy cooking! —Chloe Hartwell.
Rolling, Filling, and a Little Story
My granddaughter Lily helped me roll out the dough last weekend. She pressed too hard and made a hole. I almost said something. But instead, I showed her how to pinch it closed like a little blanket. She giggled and said it looked like a bandage. I still laugh at that. The filling is the best part anyway. Butter, brown sugar, and cinnamon create a swirl that tastes like autumn in every bite. When you roll the dough tight, you seal in all that sweetness. Then you slice it with dental floss. Yes, dental floss. It gives you clean cuts without squishing the dough. Try it next time. You will thank me. Do you have a funny kitchen helper story? Maybe a kid or a pet who got into the flour? I would love to hear it.Why the Icing Is Non-Negotiable
Some people eat cinnamon rolls without icing. I do not trust those people. Just kidding. But seriously, the cream cheese icing is what turns a good roll into a memorable one. It is tangy, sweet, and smooth. You spread it over the warm rolls, and it melts into every swirl. I like to add a little extra vanilla. It makes the kitchen smell even better than before. Doesnt that smell amazing? I think the icing is why we keep coming back for seconds. Why does this matter? Because food is about pleasure. A little indulgence makes life sweeter. And you deserve that.Your Turn to Make a Memory
Ingredients:
| Ingredient | Amount | Notes |
|---|---|---|
| Milk (whole or 2%) | 1 cup | |
| Unsalted butter, melted | 1/4 cup (1/2 stick) | |
| Active dry yeast | 1 (0.25 oz) packet (about 2 1/4 tsp) | |
| Granulated sugar | 1/4 cup | For dough |
| Large egg | 1 | |
| Salt | 1/2 teaspoon | |
| Vanilla extract | 1 teaspoon | For dough |
| All-purpose flour | 3 1/2 cups | |
| Unsalted butter, softened | 1/2 cup (1 stick) | For filling |
| Brown sugar | 1/2 cup | For filling |
| Granulated sugar | 1/2 cup | For filling |
| Ground cinnamon | 1 1/2 tablespoons | For filling |
| Vanilla extract | 1 teaspoon | For filling |
| Cream cheese, softened | 4 ounces | For icing |
| Powdered sugar | 2 cups | For icing |
| Vanilla extract | 1 teaspoon | For icing |
| Milk | 2–4 tablespoons | Add 1 tbsp at a time, as needed |
The Story Behind These Speedy Cinnamon Rolls
I remember the first time I tried making cinnamon rolls from scratch. I was about your age, and my kitchen looked like a flour bomb had gone off. My grandma just laughed and handed me a damp cloth. Now I have a secret that saves time without losing that warm, gooey feeling. These rolls come together in just one hour, start to finish. Doesn’t that sound like a wonderful weekend project?
The best part is the smell that fills your whole house. It is like a cozy hug from the kitchen. My neighbor once knocked on my door asking what I was baking. I still laugh at that every time I pull these rolls from the oven.
Let me walk you through it step by step. I promise, if a 12-year-old me could do it, you can too.
Step 1: First, melt the butter in a microwave-safe bowl for about 40 seconds. Then warm the milk in the same bowl for 45 seconds. Check that the mixture feels warm to your wrist, not hot. (Hard-learned tip: If the milk is too hot, it will kill the yeast. Think bath water, not soup.) Add the sugar and yeast, stir, and cover with a towel. Wait 10 minutes until it looks frothy like a sea foam. Isn’t it amazing how yeast wakes up?
Step 2: While you wait, preheat your oven to its lowest setting, then turn it off. This creates a cozy warm spot for the dough to rise. Once the yeast is foamy, crack in the egg, add salt, and pour in the vanilla. Mix it all together with a spoon. Do you hear that little sizzle? That is the yeast saying hello.
Step 3: Now add the flour, half a cup at a time. Stir gently with a spatula, then use your hands to bring the dough together. It should feel soft and a little sticky, like a marshmallow. If it sticks too much, add a tiny sprinkle of flour. Knead it just a few times until it forms a ball. What is your favorite thing to make in the kitchen? Share below!
Step 4: Place the dough ball in a greased bowl, cover with a tea towel, and pop it in the warm oven for 10 minutes. This is called proofing, and it makes the dough puffy and happy. While it rests, mix the filling. Cream together the softened butter, brown sugar, white sugar, cinnamon, and vanilla until smooth. This filling smells like a candy shop. I sometimes sneak a tiny taste before spreading it.
Step 5: Take the dough out and roll it on a lightly floured surface into a big rectangle. Aim for about 14 inches by 18 inches, roughly the size of a baking sheet. Spread the cinnamon filling all over, leaving a small border around the edges. Then roll it up tightly from the shorter side, like a sleeping bag. Use a sharp knife or dental floss to cut 12 even rolls. Dental floss works like magic and gives clean edges.
Step 6: Place the rolls cut side up in a greased 9×13-inch baking dish. Bake at 350°F for 20 to 25 minutes until golden brown. Let them cool in the pan for 10 minutes. While they cool, beat the cream cheese, powdered sugar, vanilla, and milk into a thick icing. Spread it on warm rolls so it melts into every swirl. Serve immediately and watch them disappear.
Cook Time: 20–25 minutes
Total Time: 1 hour
Yield: 12 cinnamon rolls
Category: Breakfast, Dessert
Three Fun Twists to Try
Once you master the basic recipe, you can play around a little. Here are three of my favorite twists. Each one adds a new flavor without extra work.
Apple Pie Rolls: Before spreading the filling, scatter half a cup of finely chopped apples over the butter. The apples get soft and sweet as they bake. It tastes like a pie in a roll.
Spicy Chocolate Swirl: Add a teaspoon of cocoa powder and a pinch of cayenne pepper to the cinnamon sugar. It gives a warm, surprising kick that grown-ups love.
Lemon Blueberry Version: Swap the cinnamon for lemon zest and replace the brown sugar with white sugar. Fold in a handful of fresh or frozen blueberries before rolling. These are perfect for a summer morning.
Which one would you try first? Comment below!
How to Serve and Sip Along
Cinnamon rolls are wonderful on their own, but a few extras make them feel special. Serve them warm with a pat of butter melting on top. A small sprinkle of chopped pecans or walnuts adds a nice crunch.
For a breakfast treat, place a single roll in a bowl and pour a little cold milk around it. The milk turns sweet and cinnamon-y. For a dessert plate, drizzle extra icing and add fresh berries on the side. They look like little jewels next to the golden rolls.
For drinks, pour yourself a tall glass of cold milk or a cup of hot cocoa. Grown-ups might enjoy a cup of strong black coffee or a warm chai latte. The spices in the rolls and the drink match perfectly. Which would you choose tonight?
Storing and Reheating Your Cinnamon Rolls
These cinnamon rolls stay soft for days if you store them right. Keep them in an airtight container at room temperature for up to two days. I remember the first time I made a whole batch for a sleepover. We ate half and put the rest in the fridge. The next morning, they were still tender, but the icing had soaked in a bit. For the freezer, wrap each roll tightly in plastic wrap, then foil. They keep for up to three months. To reheat, pop one in the microwave for 15 seconds or warm them in a 350°F oven for 5 minutes. Batch cooking is a lifesaver for busy mornings. You can make the dough the night before, refrigerate it, and bake fresh in the morning. That way, you get warm rolls without the rush. Have you ever tried storing it this way? Share below! Storing properly saves you time and keeps that fresh-baked taste. It means you can enjoy homemade goodness whenever you want.
Common Problems and Easy Fixes
Sometimes the dough doesn’t rise well. That usually means the milk was too hot or too cold. I once killed a batch of yeast because I got impatient and used hot milk. The yeast needs warm liquid, around 100-110°F. If your rolls come out dry, you might have added too much flour. The dough should be soft and slightly tacky. Add flour slowly and stop when it feels right. Another problem is filling leaking out while baking. This happens if you roll the dough too loosely. I remember my first time—I had sticky sugar butter all over the pan. Just roll it tight and pinch the seam closed. Which of these problems have you run into before? Fixing these issues matters because it builds your confidence in the kitchen. You learn to trust your hands and eyes. It also makes the final dish taste exactly how you imagined. That warm, gooey center is worth the small effort.
Your Top Questions Answered
Q: Can I make these gluten-free?
A: Yes, use a 1-to-1 gluten-free flour blend. The dough will be a bit stickier, so add a little extra flour if needed.
Q: Can I make the dough ahead of time?
A: Absolutely. Prepare the dough, cover it, and refrigerate overnight. Let it sit at room temp for 15 minutes before rolling.
Q: Can I swap the cream cheese icing?
A: Sure. Use a simple butter glaze with powdered sugar, milk, and vanilla. Or try a maple glaze for a different flavor.
Q: How do I scale the recipe?
A: Halve or double the ingredients easily. Just keep the ratios the same. Use two 9×13 pans if doubling.
Q: Any tips for softer rolls?
A: Brush the baked rolls with melted butter as soon as they come out of the oven. It adds moisture and shine. Which tip will you try first?
*Fun fact: Unflavored dental floss cuts cinnamon rolls cleaner than a knife. It keeps the layers from squishing.*
A Warm Goodbye from My Kitchen to Yours
Thank you for spending this time with me. I hope these cinnamon rolls fill your home with the same cozy smell I love. Every time I bake them, I think of my grandma letting us lick the icing bowl. It is a simple joy worth sharing. When you make yours, take a picture and share it with someone you love. Have you tried this recipe? Tag us on Pinterest! I cannot wait to see your beautiful rolls. Keep baking, keep tasting, and keep making memories. Happy cooking! —Chloe Hartwell.
The Secret of the One-Hour Miracle
Most people think cinnamon rolls take all day. They think you have to wake up at dawn and wait for hours. That is not true with this recipe. You can go from a bowl of flour to a warm, gooey roll in just sixty minutes. The trick is a warm oven. You turn it on low, then turn it off. That cozy little box becomes a proofing spa for your dough. *Fun fact:* Professional bakers call this a “proof box.” Fancy name for a warm spot. But your oven works just as well. I love this because it means you can make cinnamon rolls on a school morning. Or a lazy Saturday. Or right when a sugar craving hits. Why does this matter? Because homemade food should not feel like a chore. It should feel like a hug you can make anytime. Have you ever made cinnamon rolls before? Or do you usually buy the ones in a tube? I promise, these are different. The difference is love. And butter. Lots of butter.Rolling, Filling, and a Little Story
My granddaughter Lily helped me roll out the dough last weekend. She pressed too hard and made a hole. I almost said something. But instead, I showed her how to pinch it closed like a little blanket. She giggled and said it looked like a bandage. I still laugh at that. The filling is the best part anyway. Butter, brown sugar, and cinnamon create a swirl that tastes like autumn in every bite. When you roll the dough tight, you seal in all that sweetness. Then you slice it with dental floss. Yes, dental floss. It gives you clean cuts without squishing the dough. Try it next time. You will thank me. Do you have a funny kitchen helper story? Maybe a kid or a pet who got into the flour? I would love to hear it.Why the Icing Is Non-Negotiable
Some people eat cinnamon rolls without icing. I do not trust those people. Just kidding. But seriously, the cream cheese icing is what turns a good roll into a memorable one. It is tangy, sweet, and smooth. You spread it over the warm rolls, and it melts into every swirl. I like to add a little extra vanilla. It makes the kitchen smell even better than before. Doesnt that smell amazing? I think the icing is why we keep coming back for seconds. Why does this matter? Because food is about pleasure. A little indulgence makes life sweeter. And you deserve that.Your Turn to Make a Memory
Ingredients:
| Ingredient | Amount | Notes |
|---|---|---|
| Milk (whole or 2%) | 1 cup | |
| Unsalted butter, melted | 1/4 cup (1/2 stick) | |
| Active dry yeast | 1 (0.25 oz) packet (about 2 1/4 tsp) | |
| Granulated sugar | 1/4 cup | For dough |
| Large egg | 1 | |
| Salt | 1/2 teaspoon | |
| Vanilla extract | 1 teaspoon | For dough |
| All-purpose flour | 3 1/2 cups | |
| Unsalted butter, softened | 1/2 cup (1 stick) | For filling |
| Brown sugar | 1/2 cup | For filling |
| Granulated sugar | 1/2 cup | For filling |
| Ground cinnamon | 1 1/2 tablespoons | For filling |
| Vanilla extract | 1 teaspoon | For filling |
| Cream cheese, softened | 4 ounces | For icing |
| Powdered sugar | 2 cups | For icing |
| Vanilla extract | 1 teaspoon | For icing |
| Milk | 2–4 tablespoons | Add 1 tbsp at a time, as needed |
The Story Behind These Speedy Cinnamon Rolls
I remember the first time I tried making cinnamon rolls from scratch. I was about your age, and my kitchen looked like a flour bomb had gone off. My grandma just laughed and handed me a damp cloth. Now I have a secret that saves time without losing that warm, gooey feeling. These rolls come together in just one hour, start to finish. Doesn’t that sound like a wonderful weekend project?
The best part is the smell that fills your whole house. It is like a cozy hug from the kitchen. My neighbor once knocked on my door asking what I was baking. I still laugh at that every time I pull these rolls from the oven.
Let me walk you through it step by step. I promise, if a 12-year-old me could do it, you can too.
Step 1: First, melt the butter in a microwave-safe bowl for about 40 seconds. Then warm the milk in the same bowl for 45 seconds. Check that the mixture feels warm to your wrist, not hot. (Hard-learned tip: If the milk is too hot, it will kill the yeast. Think bath water, not soup.) Add the sugar and yeast, stir, and cover with a towel. Wait 10 minutes until it looks frothy like a sea foam. Isn’t it amazing how yeast wakes up?
Step 2: While you wait, preheat your oven to its lowest setting, then turn it off. This creates a cozy warm spot for the dough to rise. Once the yeast is foamy, crack in the egg, add salt, and pour in the vanilla. Mix it all together with a spoon. Do you hear that little sizzle? That is the yeast saying hello.
Step 3: Now add the flour, half a cup at a time. Stir gently with a spatula, then use your hands to bring the dough together. It should feel soft and a little sticky, like a marshmallow. If it sticks too much, add a tiny sprinkle of flour. Knead it just a few times until it forms a ball. What is your favorite thing to make in the kitchen? Share below!
Step 4: Place the dough ball in a greased bowl, cover with a tea towel, and pop it in the warm oven for 10 minutes. This is called proofing, and it makes the dough puffy and happy. While it rests, mix the filling. Cream together the softened butter, brown sugar, white sugar, cinnamon, and vanilla until smooth. This filling smells like a candy shop. I sometimes sneak a tiny taste before spreading it.
Step 5: Take the dough out and roll it on a lightly floured surface into a big rectangle. Aim for about 14 inches by 18 inches, roughly the size of a baking sheet. Spread the cinnamon filling all over, leaving a small border around the edges. Then roll it up tightly from the shorter side, like a sleeping bag. Use a sharp knife or dental floss to cut 12 even rolls. Dental floss works like magic and gives clean edges.
Step 6: Place the rolls cut side up in a greased 9×13-inch baking dish. Bake at 350°F for 20 to 25 minutes until golden brown. Let them cool in the pan for 10 minutes. While they cool, beat the cream cheese, powdered sugar, vanilla, and milk into a thick icing. Spread it on warm rolls so it melts into every swirl. Serve immediately and watch them disappear.
Cook Time: 20–25 minutes
Total Time: 1 hour
Yield: 12 cinnamon rolls
Category: Breakfast, Dessert
Three Fun Twists to Try
Once you master the basic recipe, you can play around a little. Here are three of my favorite twists. Each one adds a new flavor without extra work.
Apple Pie Rolls: Before spreading the filling, scatter half a cup of finely chopped apples over the butter. The apples get soft and sweet as they bake. It tastes like a pie in a roll.
Spicy Chocolate Swirl: Add a teaspoon of cocoa powder and a pinch of cayenne pepper to the cinnamon sugar. It gives a warm, surprising kick that grown-ups love.
Lemon Blueberry Version: Swap the cinnamon for lemon zest and replace the brown sugar with white sugar. Fold in a handful of fresh or frozen blueberries before rolling. These are perfect for a summer morning.
Which one would you try first? Comment below!
How to Serve and Sip Along
Cinnamon rolls are wonderful on their own, but a few extras make them feel special. Serve them warm with a pat of butter melting on top. A small sprinkle of chopped pecans or walnuts adds a nice crunch.
For a breakfast treat, place a single roll in a bowl and pour a little cold milk around it. The milk turns sweet and cinnamon-y. For a dessert plate, drizzle extra icing and add fresh berries on the side. They look like little jewels next to the golden rolls.
For drinks, pour yourself a tall glass of cold milk or a cup of hot cocoa. Grown-ups might enjoy a cup of strong black coffee or a warm chai latte. The spices in the rolls and the drink match perfectly. Which would you choose tonight?
Storing and Reheating Your Cinnamon Rolls
These cinnamon rolls stay soft for days if you store them right. Keep them in an airtight container at room temperature for up to two days. I remember the first time I made a whole batch for a sleepover. We ate half and put the rest in the fridge. The next morning, they were still tender, but the icing had soaked in a bit. For the freezer, wrap each roll tightly in plastic wrap, then foil. They keep for up to three months. To reheat, pop one in the microwave for 15 seconds or warm them in a 350°F oven for 5 minutes. Batch cooking is a lifesaver for busy mornings. You can make the dough the night before, refrigerate it, and bake fresh in the morning. That way, you get warm rolls without the rush. Have you ever tried storing it this way? Share below! Storing properly saves you time and keeps that fresh-baked taste. It means you can enjoy homemade goodness whenever you want.
Common Problems and Easy Fixes
Sometimes the dough doesn’t rise well. That usually means the milk was too hot or too cold. I once killed a batch of yeast because I got impatient and used hot milk. The yeast needs warm liquid, around 100-110°F. If your rolls come out dry, you might have added too much flour. The dough should be soft and slightly tacky. Add flour slowly and stop when it feels right. Another problem is filling leaking out while baking. This happens if you roll the dough too loosely. I remember my first time—I had sticky sugar butter all over the pan. Just roll it tight and pinch the seam closed. Which of these problems have you run into before? Fixing these issues matters because it builds your confidence in the kitchen. You learn to trust your hands and eyes. It also makes the final dish taste exactly how you imagined. That warm, gooey center is worth the small effort.
Your Top Questions Answered
Q: Can I make these gluten-free?
A: Yes, use a 1-to-1 gluten-free flour blend. The dough will be a bit stickier, so add a little extra flour if needed.
Q: Can I make the dough ahead of time?
A: Absolutely. Prepare the dough, cover it, and refrigerate overnight. Let it sit at room temp for 15 minutes before rolling.
Q: Can I swap the cream cheese icing?
A: Sure. Use a simple butter glaze with powdered sugar, milk, and vanilla. Or try a maple glaze for a different flavor.
Q: How do I scale the recipe?
A: Halve or double the ingredients easily. Just keep the ratios the same. Use two 9×13 pans if doubling.
Q: Any tips for softer rolls?
A: Brush the baked rolls with melted butter as soon as they come out of the oven. It adds moisture and shine. Which tip will you try first?
*Fun fact: Unflavored dental floss cuts cinnamon rolls cleaner than a knife. It keeps the layers from squishing.*
A Warm Goodbye from My Kitchen to Yours
Thank you for spending this time with me. I hope these cinnamon rolls fill your home with the same cozy smell I love. Every time I bake them, I think of my grandma letting us lick the icing bowl. It is a simple joy worth sharing. When you make yours, take a picture and share it with someone you love. Have you tried this recipe? Tag us on Pinterest! I cannot wait to see your beautiful rolls. Keep baking, keep tasting, and keep making memories. Happy cooking! —Chloe Hartwell.
The Morning That Changed My Baking World
I still remember the first time I tried making cinnamon rolls from scratch. I was a nervous wreck. The yeast scared me. I thought it would explode or something. Does that sound silly? Well, I laughed at myself later when the dough puffed up like a happy cloud. That day taught me something. Yeast is not magic. It is just tiny hungry friends that need warm milk and a little sugar to wake up. When you treat them kindly, they make your kitchen smell like heaven. Why does this matter? Because baking is not about being perfect. It is about learning to trust your hands. Have you ever been scared to try a new recipe? What held you back?The Secret of the One-Hour Miracle
Most people think cinnamon rolls take all day. They think you have to wake up at dawn and wait for hours. That is not true with this recipe. You can go from a bowl of flour to a warm, gooey roll in just sixty minutes. The trick is a warm oven. You turn it on low, then turn it off. That cozy little box becomes a proofing spa for your dough. *Fun fact:* Professional bakers call this a “proof box.” Fancy name for a warm spot. But your oven works just as well. I love this because it means you can make cinnamon rolls on a school morning. Or a lazy Saturday. Or right when a sugar craving hits. Why does this matter? Because homemade food should not feel like a chore. It should feel like a hug you can make anytime. Have you ever made cinnamon rolls before? Or do you usually buy the ones in a tube? I promise, these are different. The difference is love. And butter. Lots of butter.Rolling, Filling, and a Little Story
My granddaughter Lily helped me roll out the dough last weekend. She pressed too hard and made a hole. I almost said something. But instead, I showed her how to pinch it closed like a little blanket. She giggled and said it looked like a bandage. I still laugh at that. The filling is the best part anyway. Butter, brown sugar, and cinnamon create a swirl that tastes like autumn in every bite. When you roll the dough tight, you seal in all that sweetness. Then you slice it with dental floss. Yes, dental floss. It gives you clean cuts without squishing the dough. Try it next time. You will thank me. Do you have a funny kitchen helper story? Maybe a kid or a pet who got into the flour? I would love to hear it.Why the Icing Is Non-Negotiable
Some people eat cinnamon rolls without icing. I do not trust those people. Just kidding. But seriously, the cream cheese icing is what turns a good roll into a memorable one. It is tangy, sweet, and smooth. You spread it over the warm rolls, and it melts into every swirl. I like to add a little extra vanilla. It makes the kitchen smell even better than before. Doesnt that smell amazing? I think the icing is why we keep coming back for seconds. Why does this matter? Because food is about pleasure. A little indulgence makes life sweeter. And you deserve that.Your Turn to Make a Memory
Ingredients:
| Ingredient | Amount | Notes |
|---|---|---|
| Milk (whole or 2%) | 1 cup | |
| Unsalted butter, melted | 1/4 cup (1/2 stick) | |
| Active dry yeast | 1 (0.25 oz) packet (about 2 1/4 tsp) | |
| Granulated sugar | 1/4 cup | For dough |
| Large egg | 1 | |
| Salt | 1/2 teaspoon | |
| Vanilla extract | 1 teaspoon | For dough |
| All-purpose flour | 3 1/2 cups | |
| Unsalted butter, softened | 1/2 cup (1 stick) | For filling |
| Brown sugar | 1/2 cup | For filling |
| Granulated sugar | 1/2 cup | For filling |
| Ground cinnamon | 1 1/2 tablespoons | For filling |
| Vanilla extract | 1 teaspoon | For filling |
| Cream cheese, softened | 4 ounces | For icing |
| Powdered sugar | 2 cups | For icing |
| Vanilla extract | 1 teaspoon | For icing |
| Milk | 2–4 tablespoons | Add 1 tbsp at a time, as needed |
The Story Behind These Speedy Cinnamon Rolls
I remember the first time I tried making cinnamon rolls from scratch. I was about your age, and my kitchen looked like a flour bomb had gone off. My grandma just laughed and handed me a damp cloth. Now I have a secret that saves time without losing that warm, gooey feeling. These rolls come together in just one hour, start to finish. Doesn’t that sound like a wonderful weekend project?
The best part is the smell that fills your whole house. It is like a cozy hug from the kitchen. My neighbor once knocked on my door asking what I was baking. I still laugh at that every time I pull these rolls from the oven.
Let me walk you through it step by step. I promise, if a 12-year-old me could do it, you can too.
Step 1: First, melt the butter in a microwave-safe bowl for about 40 seconds. Then warm the milk in the same bowl for 45 seconds. Check that the mixture feels warm to your wrist, not hot. (Hard-learned tip: If the milk is too hot, it will kill the yeast. Think bath water, not soup.) Add the sugar and yeast, stir, and cover with a towel. Wait 10 minutes until it looks frothy like a sea foam. Isn’t it amazing how yeast wakes up?
Step 2: While you wait, preheat your oven to its lowest setting, then turn it off. This creates a cozy warm spot for the dough to rise. Once the yeast is foamy, crack in the egg, add salt, and pour in the vanilla. Mix it all together with a spoon. Do you hear that little sizzle? That is the yeast saying hello.
Step 3: Now add the flour, half a cup at a time. Stir gently with a spatula, then use your hands to bring the dough together. It should feel soft and a little sticky, like a marshmallow. If it sticks too much, add a tiny sprinkle of flour. Knead it just a few times until it forms a ball. What is your favorite thing to make in the kitchen? Share below!
Step 4: Place the dough ball in a greased bowl, cover with a tea towel, and pop it in the warm oven for 10 minutes. This is called proofing, and it makes the dough puffy and happy. While it rests, mix the filling. Cream together the softened butter, brown sugar, white sugar, cinnamon, and vanilla until smooth. This filling smells like a candy shop. I sometimes sneak a tiny taste before spreading it.
Step 5: Take the dough out and roll it on a lightly floured surface into a big rectangle. Aim for about 14 inches by 18 inches, roughly the size of a baking sheet. Spread the cinnamon filling all over, leaving a small border around the edges. Then roll it up tightly from the shorter side, like a sleeping bag. Use a sharp knife or dental floss to cut 12 even rolls. Dental floss works like magic and gives clean edges.
Step 6: Place the rolls cut side up in a greased 9×13-inch baking dish. Bake at 350°F for 20 to 25 minutes until golden brown. Let them cool in the pan for 10 minutes. While they cool, beat the cream cheese, powdered sugar, vanilla, and milk into a thick icing. Spread it on warm rolls so it melts into every swirl. Serve immediately and watch them disappear.
Cook Time: 20–25 minutes
Total Time: 1 hour
Yield: 12 cinnamon rolls
Category: Breakfast, Dessert
Three Fun Twists to Try
Once you master the basic recipe, you can play around a little. Here are three of my favorite twists. Each one adds a new flavor without extra work.
Apple Pie Rolls: Before spreading the filling, scatter half a cup of finely chopped apples over the butter. The apples get soft and sweet as they bake. It tastes like a pie in a roll.
Spicy Chocolate Swirl: Add a teaspoon of cocoa powder and a pinch of cayenne pepper to the cinnamon sugar. It gives a warm, surprising kick that grown-ups love.
Lemon Blueberry Version: Swap the cinnamon for lemon zest and replace the brown sugar with white sugar. Fold in a handful of fresh or frozen blueberries before rolling. These are perfect for a summer morning.
Which one would you try first? Comment below!
How to Serve and Sip Along
Cinnamon rolls are wonderful on their own, but a few extras make them feel special. Serve them warm with a pat of butter melting on top. A small sprinkle of chopped pecans or walnuts adds a nice crunch.
For a breakfast treat, place a single roll in a bowl and pour a little cold milk around it. The milk turns sweet and cinnamon-y. For a dessert plate, drizzle extra icing and add fresh berries on the side. They look like little jewels next to the golden rolls.
For drinks, pour yourself a tall glass of cold milk or a cup of hot cocoa. Grown-ups might enjoy a cup of strong black coffee or a warm chai latte. The spices in the rolls and the drink match perfectly. Which would you choose tonight?
Storing and Reheating Your Cinnamon Rolls
These cinnamon rolls stay soft for days if you store them right. Keep them in an airtight container at room temperature for up to two days. I remember the first time I made a whole batch for a sleepover. We ate half and put the rest in the fridge. The next morning, they were still tender, but the icing had soaked in a bit. For the freezer, wrap each roll tightly in plastic wrap, then foil. They keep for up to three months. To reheat, pop one in the microwave for 15 seconds or warm them in a 350°F oven for 5 minutes. Batch cooking is a lifesaver for busy mornings. You can make the dough the night before, refrigerate it, and bake fresh in the morning. That way, you get warm rolls without the rush. Have you ever tried storing it this way? Share below! Storing properly saves you time and keeps that fresh-baked taste. It means you can enjoy homemade goodness whenever you want.
Common Problems and Easy Fixes
Sometimes the dough doesn’t rise well. That usually means the milk was too hot or too cold. I once killed a batch of yeast because I got impatient and used hot milk. The yeast needs warm liquid, around 100-110°F. If your rolls come out dry, you might have added too much flour. The dough should be soft and slightly tacky. Add flour slowly and stop when it feels right. Another problem is filling leaking out while baking. This happens if you roll the dough too loosely. I remember my first time—I had sticky sugar butter all over the pan. Just roll it tight and pinch the seam closed. Which of these problems have you run into before? Fixing these issues matters because it builds your confidence in the kitchen. You learn to trust your hands and eyes. It also makes the final dish taste exactly how you imagined. That warm, gooey center is worth the small effort.
Your Top Questions Answered
Q: Can I make these gluten-free?
A: Yes, use a 1-to-1 gluten-free flour blend. The dough will be a bit stickier, so add a little extra flour if needed.
Q: Can I make the dough ahead of time?
A: Absolutely. Prepare the dough, cover it, and refrigerate overnight. Let it sit at room temp for 15 minutes before rolling.
Q: Can I swap the cream cheese icing?
A: Sure. Use a simple butter glaze with powdered sugar, milk, and vanilla. Or try a maple glaze for a different flavor.
Q: How do I scale the recipe?
A: Halve or double the ingredients easily. Just keep the ratios the same. Use two 9×13 pans if doubling.
Q: Any tips for softer rolls?
A: Brush the baked rolls with melted butter as soon as they come out of the oven. It adds moisture and shine. Which tip will you try first?
*Fun fact: Unflavored dental floss cuts cinnamon rolls cleaner than a knife. It keeps the layers from squishing.*
A Warm Goodbye from My Kitchen to Yours
Thank you for spending this time with me. I hope these cinnamon rolls fill your home with the same cozy smell I love. Every time I bake them, I think of my grandma letting us lick the icing bowl. It is a simple joy worth sharing. When you make yours, take a picture and share it with someone you love. Have you tried this recipe? Tag us on Pinterest! I cannot wait to see your beautiful rolls. Keep baking, keep tasting, and keep making memories. Happy cooking! —Chloe Hartwell.
Why the Icing Is Non-Negotiable
Some people eat cinnamon rolls without icing. I do not trust those people. Just kidding. But seriously, the cream cheese icing is what turns a good roll into a memorable one. It is tangy, sweet, and smooth. You spread it over the warm rolls, and it melts into every swirl. I like to add a little extra vanilla. It makes the kitchen smell even better than before. Doesnt that smell amazing? I think the icing is why we keep coming back for seconds. Why does this matter? Because food is about pleasure. A little indulgence makes life sweeter. And you deserve that.Your Turn to Make a Memory
Ingredients:
| Ingredient | Amount | Notes |
|---|---|---|
| Milk (whole or 2%) | 1 cup | |
| Unsalted butter, melted | 1/4 cup (1/2 stick) | |
| Active dry yeast | 1 (0.25 oz) packet (about 2 1/4 tsp) | |
| Granulated sugar | 1/4 cup | For dough |
| Large egg | 1 | |
| Salt | 1/2 teaspoon | |
| Vanilla extract | 1 teaspoon | For dough |
| All-purpose flour | 3 1/2 cups | |
| Unsalted butter, softened | 1/2 cup (1 stick) | For filling |
| Brown sugar | 1/2 cup | For filling |
| Granulated sugar | 1/2 cup | For filling |
| Ground cinnamon | 1 1/2 tablespoons | For filling |
| Vanilla extract | 1 teaspoon | For filling |
| Cream cheese, softened | 4 ounces | For icing |
| Powdered sugar | 2 cups | For icing |
| Vanilla extract | 1 teaspoon | For icing |
| Milk | 2–4 tablespoons | Add 1 tbsp at a time, as needed |
The Story Behind These Speedy Cinnamon Rolls
I remember the first time I tried making cinnamon rolls from scratch. I was about your age, and my kitchen looked like a flour bomb had gone off. My grandma just laughed and handed me a damp cloth. Now I have a secret that saves time without losing that warm, gooey feeling. These rolls come together in just one hour, start to finish. Doesn’t that sound like a wonderful weekend project?
The best part is the smell that fills your whole house. It is like a cozy hug from the kitchen. My neighbor once knocked on my door asking what I was baking. I still laugh at that every time I pull these rolls from the oven.
Let me walk you through it step by step. I promise, if a 12-year-old me could do it, you can too.
Step 1: First, melt the butter in a microwave-safe bowl for about 40 seconds. Then warm the milk in the same bowl for 45 seconds. Check that the mixture feels warm to your wrist, not hot. (Hard-learned tip: If the milk is too hot, it will kill the yeast. Think bath water, not soup.) Add the sugar and yeast, stir, and cover with a towel. Wait 10 minutes until it looks frothy like a sea foam. Isn’t it amazing how yeast wakes up?
Step 2: While you wait, preheat your oven to its lowest setting, then turn it off. This creates a cozy warm spot for the dough to rise. Once the yeast is foamy, crack in the egg, add salt, and pour in the vanilla. Mix it all together with a spoon. Do you hear that little sizzle? That is the yeast saying hello.
Step 3: Now add the flour, half a cup at a time. Stir gently with a spatula, then use your hands to bring the dough together. It should feel soft and a little sticky, like a marshmallow. If it sticks too much, add a tiny sprinkle of flour. Knead it just a few times until it forms a ball. What is your favorite thing to make in the kitchen? Share below!
Step 4: Place the dough ball in a greased bowl, cover with a tea towel, and pop it in the warm oven for 10 minutes. This is called proofing, and it makes the dough puffy and happy. While it rests, mix the filling. Cream together the softened butter, brown sugar, white sugar, cinnamon, and vanilla until smooth. This filling smells like a candy shop. I sometimes sneak a tiny taste before spreading it.
Step 5: Take the dough out and roll it on a lightly floured surface into a big rectangle. Aim for about 14 inches by 18 inches, roughly the size of a baking sheet. Spread the cinnamon filling all over, leaving a small border around the edges. Then roll it up tightly from the shorter side, like a sleeping bag. Use a sharp knife or dental floss to cut 12 even rolls. Dental floss works like magic and gives clean edges.
Step 6: Place the rolls cut side up in a greased 9×13-inch baking dish. Bake at 350°F for 20 to 25 minutes until golden brown. Let them cool in the pan for 10 minutes. While they cool, beat the cream cheese, powdered sugar, vanilla, and milk into a thick icing. Spread it on warm rolls so it melts into every swirl. Serve immediately and watch them disappear.
Cook Time: 20–25 minutes
Total Time: 1 hour
Yield: 12 cinnamon rolls
Category: Breakfast, Dessert
Three Fun Twists to Try
Once you master the basic recipe, you can play around a little. Here are three of my favorite twists. Each one adds a new flavor without extra work.
Apple Pie Rolls: Before spreading the filling, scatter half a cup of finely chopped apples over the butter. The apples get soft and sweet as they bake. It tastes like a pie in a roll.
Spicy Chocolate Swirl: Add a teaspoon of cocoa powder and a pinch of cayenne pepper to the cinnamon sugar. It gives a warm, surprising kick that grown-ups love.
Lemon Blueberry Version: Swap the cinnamon for lemon zest and replace the brown sugar with white sugar. Fold in a handful of fresh or frozen blueberries before rolling. These are perfect for a summer morning.
Which one would you try first? Comment below!
How to Serve and Sip Along
Cinnamon rolls are wonderful on their own, but a few extras make them feel special. Serve them warm with a pat of butter melting on top. A small sprinkle of chopped pecans or walnuts adds a nice crunch.
For a breakfast treat, place a single roll in a bowl and pour a little cold milk around it. The milk turns sweet and cinnamon-y. For a dessert plate, drizzle extra icing and add fresh berries on the side. They look like little jewels next to the golden rolls.
For drinks, pour yourself a tall glass of cold milk or a cup of hot cocoa. Grown-ups might enjoy a cup of strong black coffee or a warm chai latte. The spices in the rolls and the drink match perfectly. Which would you choose tonight?
Storing and Reheating Your Cinnamon Rolls
These cinnamon rolls stay soft for days if you store them right. Keep them in an airtight container at room temperature for up to two days. I remember the first time I made a whole batch for a sleepover. We ate half and put the rest in the fridge. The next morning, they were still tender, but the icing had soaked in a bit. For the freezer, wrap each roll tightly in plastic wrap, then foil. They keep for up to three months. To reheat, pop one in the microwave for 15 seconds or warm them in a 350°F oven for 5 minutes. Batch cooking is a lifesaver for busy mornings. You can make the dough the night before, refrigerate it, and bake fresh in the morning. That way, you get warm rolls without the rush. Have you ever tried storing it this way? Share below! Storing properly saves you time and keeps that fresh-baked taste. It means you can enjoy homemade goodness whenever you want.
Common Problems and Easy Fixes
Sometimes the dough doesn’t rise well. That usually means the milk was too hot or too cold. I once killed a batch of yeast because I got impatient and used hot milk. The yeast needs warm liquid, around 100-110°F. If your rolls come out dry, you might have added too much flour. The dough should be soft and slightly tacky. Add flour slowly and stop when it feels right. Another problem is filling leaking out while baking. This happens if you roll the dough too loosely. I remember my first time—I had sticky sugar butter all over the pan. Just roll it tight and pinch the seam closed. Which of these problems have you run into before? Fixing these issues matters because it builds your confidence in the kitchen. You learn to trust your hands and eyes. It also makes the final dish taste exactly how you imagined. That warm, gooey center is worth the small effort.
Your Top Questions Answered
Q: Can I make these gluten-free?
A: Yes, use a 1-to-1 gluten-free flour blend. The dough will be a bit stickier, so add a little extra flour if needed.
Q: Can I make the dough ahead of time?
A: Absolutely. Prepare the dough, cover it, and refrigerate overnight. Let it sit at room temp for 15 minutes before rolling.
Q: Can I swap the cream cheese icing?
A: Sure. Use a simple butter glaze with powdered sugar, milk, and vanilla. Or try a maple glaze for a different flavor.
Q: How do I scale the recipe?
A: Halve or double the ingredients easily. Just keep the ratios the same. Use two 9×13 pans if doubling.
Q: Any tips for softer rolls?
A: Brush the baked rolls with melted butter as soon as they come out of the oven. It adds moisture and shine. Which tip will you try first?
*Fun fact: Unflavored dental floss cuts cinnamon rolls cleaner than a knife. It keeps the layers from squishing.*
A Warm Goodbye from My Kitchen to Yours
Thank you for spending this time with me. I hope these cinnamon rolls fill your home with the same cozy smell I love. Every time I bake them, I think of my grandma letting us lick the icing bowl. It is a simple joy worth sharing. When you make yours, take a picture and share it with someone you love. Have you tried this recipe? Tag us on Pinterest! I cannot wait to see your beautiful rolls. Keep baking, keep tasting, and keep making memories. Happy cooking! —Chloe Hartwell.
Easy One Hour Cinnamon Rolls Recipe
Description
Fluffy, gooey one hour cinnamon rolls from scratch. Quick yeast dough with buttery cinnamon sugar. Easy homemade breakfast or dessert.
Ingredients
Instructions
- Prepare the Dough: Melt 1/4 cup (1/2 stick) unsalted butter in a microwave-safe bowl for about 40-45 seconds. Pour the melted butter into a medium bowl. Using the same bowl, warm 1 cup of milk for 45 seconds, then add it to the butter. Ensure the mixture is between 100-110°F; cool or warm as needed.
- Activate the Yeast & Preheat Oven: Stir in 1/4 cup granulated sugar and 2 1/4 teaspoons active dry yeast until dissolved. Cover with a towel or plastic wrap and let sit for 10 minutes until foamy. While waiting, preheat your oven to its lowest setting (~170°F), then turn it off to create a warm proofing environment.
- Mix Wet Ingredients: Once the yeast mixture is frothy, add 1 large egg, 1/2 teaspoon salt, and 1 teaspoon vanilla extract. Mix well to combine.
- Add the Flour: Gradually add 3 1/2 cups all-purpose flour in 1/2 cup increments, stirring with a spatula. Use your hands to knead any remaining flour gently. The dough should be soft and slightly tacky but not overly sticky.
- Proof the Dough: Form the dough into a ball, cover it with a tea cloth, and place it in the warm, turned-off oven to proof for 10 minutes.
- Prepare the Cinnamon Sugar Filling: In a medium bowl, cream together 1/2 cup softened unsalted butter, 1/2 cup brown sugar, 1/2 cup granulated sugar, 1 1/2 tablespoons ground cinnamon, and 1 teaspoon vanilla extract until light and fluffy. Set aside.
- Roll Out the Dough: Remove the dough from the oven and place it on a lightly greased or floured surface. Roll it into a 14″ x 18″ rectangle about 1/4″ thick.
- Add Filling: Preheat the oven to 350°F. Spread the cinnamon sugar filling evenly over the rolled dough, leaving a small margin around the edges.
- Roll and Slice: Starting from the shorter edge, tightly roll the dough into a log. Using a sharp knife or unflavored dental floss, cut the log into 12 even rolls by gentle sawing motions for clean edges.
- Bake: Place the rolls cut side up in a greased 9×13-inch baking dish. Bake at 350°F for 20-25 minutes, or until golden brown. Let cool in the pan for 10 minutes.
- Make the Cream Cheese Icing: While rolls cool, beat 4 ounces softened cream cheese, 2 cups powdered sugar, 1 teaspoon vanilla extract, and 2 tablespoons milk together. Add more milk one tablespoon at a time until reaching desired spreading or drizzling consistency.
- Frost and Serve: Spread the cream cheese icing generously over warm cinnamon rolls. Serve immediately and enjoy your delicious homemade cinnamon rolls.
Rolling, Filling, and a Little Story
My granddaughter Lily helped me roll out the dough last weekend. She pressed too hard and made a hole. I almost said something. But instead, I showed her how to pinch it closed like a little blanket. She giggled and said it looked like a bandage. I still laugh at that. The filling is the best part anyway. Butter, brown sugar, and cinnamon create a swirl that tastes like autumn in every bite. When you roll the dough tight, you seal in all that sweetness. Then you slice it with dental floss. Yes, dental floss. It gives you clean cuts without squishing the dough. Try it next time. You will thank me. Do you have a funny kitchen helper story? Maybe a kid or a pet who got into the flour? I would love to hear it.Why the Icing Is Non-Negotiable
Some people eat cinnamon rolls without icing. I do not trust those people. Just kidding. But seriously, the cream cheese icing is what turns a good roll into a memorable one. It is tangy, sweet, and smooth. You spread it over the warm rolls, and it melts into every swirl. I like to add a little extra vanilla. It makes the kitchen smell even better than before. Doesnt that smell amazing? I think the icing is why we keep coming back for seconds. Why does this matter? Because food is about pleasure. A little indulgence makes life sweeter. And you deserve that.Your Turn to Make a Memory
Ingredients:
| Ingredient | Amount | Notes |
|---|---|---|
| Milk (whole or 2%) | 1 cup | |
| Unsalted butter, melted | 1/4 cup (1/2 stick) | |
| Active dry yeast | 1 (0.25 oz) packet (about 2 1/4 tsp) | |
| Granulated sugar | 1/4 cup | For dough |
| Large egg | 1 | |
| Salt | 1/2 teaspoon | |
| Vanilla extract | 1 teaspoon | For dough |
| All-purpose flour | 3 1/2 cups | |
| Unsalted butter, softened | 1/2 cup (1 stick) | For filling |
| Brown sugar | 1/2 cup | For filling |
| Granulated sugar | 1/2 cup | For filling |
| Ground cinnamon | 1 1/2 tablespoons | For filling |
| Vanilla extract | 1 teaspoon | For filling |
| Cream cheese, softened | 4 ounces | For icing |
| Powdered sugar | 2 cups | For icing |
| Vanilla extract | 1 teaspoon | For icing |
| Milk | 2–4 tablespoons | Add 1 tbsp at a time, as needed |
The Story Behind These Speedy Cinnamon Rolls
I remember the first time I tried making cinnamon rolls from scratch. I was about your age, and my kitchen looked like a flour bomb had gone off. My grandma just laughed and handed me a damp cloth. Now I have a secret that saves time without losing that warm, gooey feeling. These rolls come together in just one hour, start to finish. Doesn’t that sound like a wonderful weekend project?
The best part is the smell that fills your whole house. It is like a cozy hug from the kitchen. My neighbor once knocked on my door asking what I was baking. I still laugh at that every time I pull these rolls from the oven.
Let me walk you through it step by step. I promise, if a 12-year-old me could do it, you can too.
Step 1: First, melt the butter in a microwave-safe bowl for about 40 seconds. Then warm the milk in the same bowl for 45 seconds. Check that the mixture feels warm to your wrist, not hot. (Hard-learned tip: If the milk is too hot, it will kill the yeast. Think bath water, not soup.) Add the sugar and yeast, stir, and cover with a towel. Wait 10 minutes until it looks frothy like a sea foam. Isn’t it amazing how yeast wakes up?
Step 2: While you wait, preheat your oven to its lowest setting, then turn it off. This creates a cozy warm spot for the dough to rise. Once the yeast is foamy, crack in the egg, add salt, and pour in the vanilla. Mix it all together with a spoon. Do you hear that little sizzle? That is the yeast saying hello.
Step 3: Now add the flour, half a cup at a time. Stir gently with a spatula, then use your hands to bring the dough together. It should feel soft and a little sticky, like a marshmallow. If it sticks too much, add a tiny sprinkle of flour. Knead it just a few times until it forms a ball. What is your favorite thing to make in the kitchen? Share below!
Step 4: Place the dough ball in a greased bowl, cover with a tea towel, and pop it in the warm oven for 10 minutes. This is called proofing, and it makes the dough puffy and happy. While it rests, mix the filling. Cream together the softened butter, brown sugar, white sugar, cinnamon, and vanilla until smooth. This filling smells like a candy shop. I sometimes sneak a tiny taste before spreading it.
Step 5: Take the dough out and roll it on a lightly floured surface into a big rectangle. Aim for about 14 inches by 18 inches, roughly the size of a baking sheet. Spread the cinnamon filling all over, leaving a small border around the edges. Then roll it up tightly from the shorter side, like a sleeping bag. Use a sharp knife or dental floss to cut 12 even rolls. Dental floss works like magic and gives clean edges.
Step 6: Place the rolls cut side up in a greased 9×13-inch baking dish. Bake at 350°F for 20 to 25 minutes until golden brown. Let them cool in the pan for 10 minutes. While they cool, beat the cream cheese, powdered sugar, vanilla, and milk into a thick icing. Spread it on warm rolls so it melts into every swirl. Serve immediately and watch them disappear.
Cook Time: 20–25 minutes
Total Time: 1 hour
Yield: 12 cinnamon rolls
Category: Breakfast, Dessert
Three Fun Twists to Try
Once you master the basic recipe, you can play around a little. Here are three of my favorite twists. Each one adds a new flavor without extra work.
Apple Pie Rolls: Before spreading the filling, scatter half a cup of finely chopped apples over the butter. The apples get soft and sweet as they bake. It tastes like a pie in a roll.
Spicy Chocolate Swirl: Add a teaspoon of cocoa powder and a pinch of cayenne pepper to the cinnamon sugar. It gives a warm, surprising kick that grown-ups love.
Lemon Blueberry Version: Swap the cinnamon for lemon zest and replace the brown sugar with white sugar. Fold in a handful of fresh or frozen blueberries before rolling. These are perfect for a summer morning.
Which one would you try first? Comment below!
How to Serve and Sip Along
Cinnamon rolls are wonderful on their own, but a few extras make them feel special. Serve them warm with a pat of butter melting on top. A small sprinkle of chopped pecans or walnuts adds a nice crunch.
For a breakfast treat, place a single roll in a bowl and pour a little cold milk around it. The milk turns sweet and cinnamon-y. For a dessert plate, drizzle extra icing and add fresh berries on the side. They look like little jewels next to the golden rolls.
For drinks, pour yourself a tall glass of cold milk or a cup of hot cocoa. Grown-ups might enjoy a cup of strong black coffee or a warm chai latte. The spices in the rolls and the drink match perfectly. Which would you choose tonight?
Storing and Reheating Your Cinnamon Rolls
These cinnamon rolls stay soft for days if you store them right. Keep them in an airtight container at room temperature for up to two days. I remember the first time I made a whole batch for a sleepover. We ate half and put the rest in the fridge. The next morning, they were still tender, but the icing had soaked in a bit. For the freezer, wrap each roll tightly in plastic wrap, then foil. They keep for up to three months. To reheat, pop one in the microwave for 15 seconds or warm them in a 350°F oven for 5 minutes. Batch cooking is a lifesaver for busy mornings. You can make the dough the night before, refrigerate it, and bake fresh in the morning. That way, you get warm rolls without the rush. Have you ever tried storing it this way? Share below! Storing properly saves you time and keeps that fresh-baked taste. It means you can enjoy homemade goodness whenever you want.
Common Problems and Easy Fixes
Sometimes the dough doesn’t rise well. That usually means the milk was too hot or too cold. I once killed a batch of yeast because I got impatient and used hot milk. The yeast needs warm liquid, around 100-110°F. If your rolls come out dry, you might have added too much flour. The dough should be soft and slightly tacky. Add flour slowly and stop when it feels right. Another problem is filling leaking out while baking. This happens if you roll the dough too loosely. I remember my first time—I had sticky sugar butter all over the pan. Just roll it tight and pinch the seam closed. Which of these problems have you run into before? Fixing these issues matters because it builds your confidence in the kitchen. You learn to trust your hands and eyes. It also makes the final dish taste exactly how you imagined. That warm, gooey center is worth the small effort.
Your Top Questions Answered
Q: Can I make these gluten-free?
A: Yes, use a 1-to-1 gluten-free flour blend. The dough will be a bit stickier, so add a little extra flour if needed.
Q: Can I make the dough ahead of time?
A: Absolutely. Prepare the dough, cover it, and refrigerate overnight. Let it sit at room temp for 15 minutes before rolling.
Q: Can I swap the cream cheese icing?
A: Sure. Use a simple butter glaze with powdered sugar, milk, and vanilla. Or try a maple glaze for a different flavor.
Q: How do I scale the recipe?
A: Halve or double the ingredients easily. Just keep the ratios the same. Use two 9×13 pans if doubling.
Q: Any tips for softer rolls?
A: Brush the baked rolls with melted butter as soon as they come out of the oven. It adds moisture and shine. Which tip will you try first?
*Fun fact: Unflavored dental floss cuts cinnamon rolls cleaner than a knife. It keeps the layers from squishing.*
A Warm Goodbye from My Kitchen to Yours
Thank you for spending this time with me. I hope these cinnamon rolls fill your home with the same cozy smell I love. Every time I bake them, I think of my grandma letting us lick the icing bowl. It is a simple joy worth sharing. When you make yours, take a picture and share it with someone you love. Have you tried this recipe? Tag us on Pinterest! I cannot wait to see your beautiful rolls. Keep baking, keep tasting, and keep making memories. Happy cooking! —Chloe Hartwell.
The Secret of the One-Hour Miracle
Most people think cinnamon rolls take all day. They think you have to wake up at dawn and wait for hours. That is not true with this recipe. You can go from a bowl of flour to a warm, gooey roll in just sixty minutes. The trick is a warm oven. You turn it on low, then turn it off. That cozy little box becomes a proofing spa for your dough. *Fun fact:* Professional bakers call this a “proof box.” Fancy name for a warm spot. But your oven works just as well. I love this because it means you can make cinnamon rolls on a school morning. Or a lazy Saturday. Or right when a sugar craving hits. Why does this matter? Because homemade food should not feel like a chore. It should feel like a hug you can make anytime. Have you ever made cinnamon rolls before? Or do you usually buy the ones in a tube? I promise, these are different. The difference is love. And butter. Lots of butter.Rolling, Filling, and a Little Story
My granddaughter Lily helped me roll out the dough last weekend. She pressed too hard and made a hole. I almost said something. But instead, I showed her how to pinch it closed like a little blanket. She giggled and said it looked like a bandage. I still laugh at that. The filling is the best part anyway. Butter, brown sugar, and cinnamon create a swirl that tastes like autumn in every bite. When you roll the dough tight, you seal in all that sweetness. Then you slice it with dental floss. Yes, dental floss. It gives you clean cuts without squishing the dough. Try it next time. You will thank me. Do you have a funny kitchen helper story? Maybe a kid or a pet who got into the flour? I would love to hear it.Why the Icing Is Non-Negotiable
Some people eat cinnamon rolls without icing. I do not trust those people. Just kidding. But seriously, the cream cheese icing is what turns a good roll into a memorable one. It is tangy, sweet, and smooth. You spread it over the warm rolls, and it melts into every swirl. I like to add a little extra vanilla. It makes the kitchen smell even better than before. Doesnt that smell amazing? I think the icing is why we keep coming back for seconds. Why does this matter? Because food is about pleasure. A little indulgence makes life sweeter. And you deserve that.Your Turn to Make a Memory
Ingredients:
| Ingredient | Amount | Notes |
|---|---|---|
| Milk (whole or 2%) | 1 cup | |
| Unsalted butter, melted | 1/4 cup (1/2 stick) | |
| Active dry yeast | 1 (0.25 oz) packet (about 2 1/4 tsp) | |
| Granulated sugar | 1/4 cup | For dough |
| Large egg | 1 | |
| Salt | 1/2 teaspoon | |
| Vanilla extract | 1 teaspoon | For dough |
| All-purpose flour | 3 1/2 cups | |
| Unsalted butter, softened | 1/2 cup (1 stick) | For filling |
| Brown sugar | 1/2 cup | For filling |
| Granulated sugar | 1/2 cup | For filling |
| Ground cinnamon | 1 1/2 tablespoons | For filling |
| Vanilla extract | 1 teaspoon | For filling |
| Cream cheese, softened | 4 ounces | For icing |
| Powdered sugar | 2 cups | For icing |
| Vanilla extract | 1 teaspoon | For icing |
| Milk | 2–4 tablespoons | Add 1 tbsp at a time, as needed |
The Story Behind These Speedy Cinnamon Rolls
I remember the first time I tried making cinnamon rolls from scratch. I was about your age, and my kitchen looked like a flour bomb had gone off. My grandma just laughed and handed me a damp cloth. Now I have a secret that saves time without losing that warm, gooey feeling. These rolls come together in just one hour, start to finish. Doesn’t that sound like a wonderful weekend project?
The best part is the smell that fills your whole house. It is like a cozy hug from the kitchen. My neighbor once knocked on my door asking what I was baking. I still laugh at that every time I pull these rolls from the oven.
Let me walk you through it step by step. I promise, if a 12-year-old me could do it, you can too.
Step 1: First, melt the butter in a microwave-safe bowl for about 40 seconds. Then warm the milk in the same bowl for 45 seconds. Check that the mixture feels warm to your wrist, not hot. (Hard-learned tip: If the milk is too hot, it will kill the yeast. Think bath water, not soup.) Add the sugar and yeast, stir, and cover with a towel. Wait 10 minutes until it looks frothy like a sea foam. Isn’t it amazing how yeast wakes up?
Step 2: While you wait, preheat your oven to its lowest setting, then turn it off. This creates a cozy warm spot for the dough to rise. Once the yeast is foamy, crack in the egg, add salt, and pour in the vanilla. Mix it all together with a spoon. Do you hear that little sizzle? That is the yeast saying hello.
Step 3: Now add the flour, half a cup at a time. Stir gently with a spatula, then use your hands to bring the dough together. It should feel soft and a little sticky, like a marshmallow. If it sticks too much, add a tiny sprinkle of flour. Knead it just a few times until it forms a ball. What is your favorite thing to make in the kitchen? Share below!
Step 4: Place the dough ball in a greased bowl, cover with a tea towel, and pop it in the warm oven for 10 minutes. This is called proofing, and it makes the dough puffy and happy. While it rests, mix the filling. Cream together the softened butter, brown sugar, white sugar, cinnamon, and vanilla until smooth. This filling smells like a candy shop. I sometimes sneak a tiny taste before spreading it.
Step 5: Take the dough out and roll it on a lightly floured surface into a big rectangle. Aim for about 14 inches by 18 inches, roughly the size of a baking sheet. Spread the cinnamon filling all over, leaving a small border around the edges. Then roll it up tightly from the shorter side, like a sleeping bag. Use a sharp knife or dental floss to cut 12 even rolls. Dental floss works like magic and gives clean edges.
Step 6: Place the rolls cut side up in a greased 9×13-inch baking dish. Bake at 350°F for 20 to 25 minutes until golden brown. Let them cool in the pan for 10 minutes. While they cool, beat the cream cheese, powdered sugar, vanilla, and milk into a thick icing. Spread it on warm rolls so it melts into every swirl. Serve immediately and watch them disappear.
Cook Time: 20–25 minutes
Total Time: 1 hour
Yield: 12 cinnamon rolls
Category: Breakfast, Dessert
Three Fun Twists to Try
Once you master the basic recipe, you can play around a little. Here are three of my favorite twists. Each one adds a new flavor without extra work.
Apple Pie Rolls: Before spreading the filling, scatter half a cup of finely chopped apples over the butter. The apples get soft and sweet as they bake. It tastes like a pie in a roll.
Spicy Chocolate Swirl: Add a teaspoon of cocoa powder and a pinch of cayenne pepper to the cinnamon sugar. It gives a warm, surprising kick that grown-ups love.
Lemon Blueberry Version: Swap the cinnamon for lemon zest and replace the brown sugar with white sugar. Fold in a handful of fresh or frozen blueberries before rolling. These are perfect for a summer morning.
Which one would you try first? Comment below!
How to Serve and Sip Along
Cinnamon rolls are wonderful on their own, but a few extras make them feel special. Serve them warm with a pat of butter melting on top. A small sprinkle of chopped pecans or walnuts adds a nice crunch.
For a breakfast treat, place a single roll in a bowl and pour a little cold milk around it. The milk turns sweet and cinnamon-y. For a dessert plate, drizzle extra icing and add fresh berries on the side. They look like little jewels next to the golden rolls.
For drinks, pour yourself a tall glass of cold milk or a cup of hot cocoa. Grown-ups might enjoy a cup of strong black coffee or a warm chai latte. The spices in the rolls and the drink match perfectly. Which would you choose tonight?
Storing and Reheating Your Cinnamon Rolls
These cinnamon rolls stay soft for days if you store them right. Keep them in an airtight container at room temperature for up to two days. I remember the first time I made a whole batch for a sleepover. We ate half and put the rest in the fridge. The next morning, they were still tender, but the icing had soaked in a bit. For the freezer, wrap each roll tightly in plastic wrap, then foil. They keep for up to three months. To reheat, pop one in the microwave for 15 seconds or warm them in a 350°F oven for 5 minutes. Batch cooking is a lifesaver for busy mornings. You can make the dough the night before, refrigerate it, and bake fresh in the morning. That way, you get warm rolls without the rush. Have you ever tried storing it this way? Share below! Storing properly saves you time and keeps that fresh-baked taste. It means you can enjoy homemade goodness whenever you want.
Common Problems and Easy Fixes
Sometimes the dough doesn’t rise well. That usually means the milk was too hot or too cold. I once killed a batch of yeast because I got impatient and used hot milk. The yeast needs warm liquid, around 100-110°F. If your rolls come out dry, you might have added too much flour. The dough should be soft and slightly tacky. Add flour slowly and stop when it feels right. Another problem is filling leaking out while baking. This happens if you roll the dough too loosely. I remember my first time—I had sticky sugar butter all over the pan. Just roll it tight and pinch the seam closed. Which of these problems have you run into before? Fixing these issues matters because it builds your confidence in the kitchen. You learn to trust your hands and eyes. It also makes the final dish taste exactly how you imagined. That warm, gooey center is worth the small effort.
Your Top Questions Answered
Q: Can I make these gluten-free?
A: Yes, use a 1-to-1 gluten-free flour blend. The dough will be a bit stickier, so add a little extra flour if needed.
Q: Can I make the dough ahead of time?
A: Absolutely. Prepare the dough, cover it, and refrigerate overnight. Let it sit at room temp for 15 minutes before rolling.
Q: Can I swap the cream cheese icing?
A: Sure. Use a simple butter glaze with powdered sugar, milk, and vanilla. Or try a maple glaze for a different flavor.
Q: How do I scale the recipe?
A: Halve or double the ingredients easily. Just keep the ratios the same. Use two 9×13 pans if doubling.
Q: Any tips for softer rolls?
A: Brush the baked rolls with melted butter as soon as they come out of the oven. It adds moisture and shine. Which tip will you try first?
*Fun fact: Unflavored dental floss cuts cinnamon rolls cleaner than a knife. It keeps the layers from squishing.*
A Warm Goodbye from My Kitchen to Yours
Thank you for spending this time with me. I hope these cinnamon rolls fill your home with the same cozy smell I love. Every time I bake them, I think of my grandma letting us lick the icing bowl. It is a simple joy worth sharing. When you make yours, take a picture and share it with someone you love. Have you tried this recipe? Tag us on Pinterest! I cannot wait to see your beautiful rolls. Keep baking, keep tasting, and keep making memories. Happy cooking! —Chloe Hartwell.
The Morning That Changed My Baking World
I still remember the first time I tried making cinnamon rolls from scratch. I was a nervous wreck. The yeast scared me. I thought it would explode or something. Does that sound silly? Well, I laughed at myself later when the dough puffed up like a happy cloud. That day taught me something. Yeast is not magic. It is just tiny hungry friends that need warm milk and a little sugar to wake up. When you treat them kindly, they make your kitchen smell like heaven. Why does this matter? Because baking is not about being perfect. It is about learning to trust your hands. Have you ever been scared to try a new recipe? What held you back?The Secret of the One-Hour Miracle
Most people think cinnamon rolls take all day. They think you have to wake up at dawn and wait for hours. That is not true with this recipe. You can go from a bowl of flour to a warm, gooey roll in just sixty minutes. The trick is a warm oven. You turn it on low, then turn it off. That cozy little box becomes a proofing spa for your dough. *Fun fact:* Professional bakers call this a “proof box.” Fancy name for a warm spot. But your oven works just as well. I love this because it means you can make cinnamon rolls on a school morning. Or a lazy Saturday. Or right when a sugar craving hits. Why does this matter? Because homemade food should not feel like a chore. It should feel like a hug you can make anytime. Have you ever made cinnamon rolls before? Or do you usually buy the ones in a tube? I promise, these are different. The difference is love. And butter. Lots of butter.Rolling, Filling, and a Little Story
My granddaughter Lily helped me roll out the dough last weekend. She pressed too hard and made a hole. I almost said something. But instead, I showed her how to pinch it closed like a little blanket. She giggled and said it looked like a bandage. I still laugh at that. The filling is the best part anyway. Butter, brown sugar, and cinnamon create a swirl that tastes like autumn in every bite. When you roll the dough tight, you seal in all that sweetness. Then you slice it with dental floss. Yes, dental floss. It gives you clean cuts without squishing the dough. Try it next time. You will thank me. Do you have a funny kitchen helper story? Maybe a kid or a pet who got into the flour? I would love to hear it.Why the Icing Is Non-Negotiable
Some people eat cinnamon rolls without icing. I do not trust those people. Just kidding. But seriously, the cream cheese icing is what turns a good roll into a memorable one. It is tangy, sweet, and smooth. You spread it over the warm rolls, and it melts into every swirl. I like to add a little extra vanilla. It makes the kitchen smell even better than before. Doesnt that smell amazing? I think the icing is why we keep coming back for seconds. Why does this matter? Because food is about pleasure. A little indulgence makes life sweeter. And you deserve that.Your Turn to Make a Memory
Ingredients:
| Ingredient | Amount | Notes |
|---|---|---|
| Milk (whole or 2%) | 1 cup | |
| Unsalted butter, melted | 1/4 cup (1/2 stick) | |
| Active dry yeast | 1 (0.25 oz) packet (about 2 1/4 tsp) | |
| Granulated sugar | 1/4 cup | For dough |
| Large egg | 1 | |
| Salt | 1/2 teaspoon | |
| Vanilla extract | 1 teaspoon | For dough |
| All-purpose flour | 3 1/2 cups | |
| Unsalted butter, softened | 1/2 cup (1 stick) | For filling |
| Brown sugar | 1/2 cup | For filling |
| Granulated sugar | 1/2 cup | For filling |
| Ground cinnamon | 1 1/2 tablespoons | For filling |
| Vanilla extract | 1 teaspoon | For filling |
| Cream cheese, softened | 4 ounces | For icing |
| Powdered sugar | 2 cups | For icing |
| Vanilla extract | 1 teaspoon | For icing |
| Milk | 2–4 tablespoons | Add 1 tbsp at a time, as needed |
The Story Behind These Speedy Cinnamon Rolls
I remember the first time I tried making cinnamon rolls from scratch. I was about your age, and my kitchen looked like a flour bomb had gone off. My grandma just laughed and handed me a damp cloth. Now I have a secret that saves time without losing that warm, gooey feeling. These rolls come together in just one hour, start to finish. Doesn’t that sound like a wonderful weekend project?
The best part is the smell that fills your whole house. It is like a cozy hug from the kitchen. My neighbor once knocked on my door asking what I was baking. I still laugh at that every time I pull these rolls from the oven.
Let me walk you through it step by step. I promise, if a 12-year-old me could do it, you can too.
Step 1: First, melt the butter in a microwave-safe bowl for about 40 seconds. Then warm the milk in the same bowl for 45 seconds. Check that the mixture feels warm to your wrist, not hot. (Hard-learned tip: If the milk is too hot, it will kill the yeast. Think bath water, not soup.) Add the sugar and yeast, stir, and cover with a towel. Wait 10 minutes until it looks frothy like a sea foam. Isn’t it amazing how yeast wakes up?
Step 2: While you wait, preheat your oven to its lowest setting, then turn it off. This creates a cozy warm spot for the dough to rise. Once the yeast is foamy, crack in the egg, add salt, and pour in the vanilla. Mix it all together with a spoon. Do you hear that little sizzle? That is the yeast saying hello.
Step 3: Now add the flour, half a cup at a time. Stir gently with a spatula, then use your hands to bring the dough together. It should feel soft and a little sticky, like a marshmallow. If it sticks too much, add a tiny sprinkle of flour. Knead it just a few times until it forms a ball. What is your favorite thing to make in the kitchen? Share below!
Step 4: Place the dough ball in a greased bowl, cover with a tea towel, and pop it in the warm oven for 10 minutes. This is called proofing, and it makes the dough puffy and happy. While it rests, mix the filling. Cream together the softened butter, brown sugar, white sugar, cinnamon, and vanilla until smooth. This filling smells like a candy shop. I sometimes sneak a tiny taste before spreading it.
Step 5: Take the dough out and roll it on a lightly floured surface into a big rectangle. Aim for about 14 inches by 18 inches, roughly the size of a baking sheet. Spread the cinnamon filling all over, leaving a small border around the edges. Then roll it up tightly from the shorter side, like a sleeping bag. Use a sharp knife or dental floss to cut 12 even rolls. Dental floss works like magic and gives clean edges.
Step 6: Place the rolls cut side up in a greased 9×13-inch baking dish. Bake at 350°F for 20 to 25 minutes until golden brown. Let them cool in the pan for 10 minutes. While they cool, beat the cream cheese, powdered sugar, vanilla, and milk into a thick icing. Spread it on warm rolls so it melts into every swirl. Serve immediately and watch them disappear.
Cook Time: 20–25 minutes
Total Time: 1 hour
Yield: 12 cinnamon rolls
Category: Breakfast, Dessert
Three Fun Twists to Try
Once you master the basic recipe, you can play around a little. Here are three of my favorite twists. Each one adds a new flavor without extra work.
Apple Pie Rolls: Before spreading the filling, scatter half a cup of finely chopped apples over the butter. The apples get soft and sweet as they bake. It tastes like a pie in a roll.
Spicy Chocolate Swirl: Add a teaspoon of cocoa powder and a pinch of cayenne pepper to the cinnamon sugar. It gives a warm, surprising kick that grown-ups love.
Lemon Blueberry Version: Swap the cinnamon for lemon zest and replace the brown sugar with white sugar. Fold in a handful of fresh or frozen blueberries before rolling. These are perfect for a summer morning.
Which one would you try first? Comment below!
How to Serve and Sip Along
Cinnamon rolls are wonderful on their own, but a few extras make them feel special. Serve them warm with a pat of butter melting on top. A small sprinkle of chopped pecans or walnuts adds a nice crunch.
For a breakfast treat, place a single roll in a bowl and pour a little cold milk around it. The milk turns sweet and cinnamon-y. For a dessert plate, drizzle extra icing and add fresh berries on the side. They look like little jewels next to the golden rolls.
For drinks, pour yourself a tall glass of cold milk or a cup of hot cocoa. Grown-ups might enjoy a cup of strong black coffee or a warm chai latte. The spices in the rolls and the drink match perfectly. Which would you choose tonight?
Storing and Reheating Your Cinnamon Rolls
These cinnamon rolls stay soft for days if you store them right. Keep them in an airtight container at room temperature for up to two days. I remember the first time I made a whole batch for a sleepover. We ate half and put the rest in the fridge. The next morning, they were still tender, but the icing had soaked in a bit. For the freezer, wrap each roll tightly in plastic wrap, then foil. They keep for up to three months. To reheat, pop one in the microwave for 15 seconds or warm them in a 350°F oven for 5 minutes. Batch cooking is a lifesaver for busy mornings. You can make the dough the night before, refrigerate it, and bake fresh in the morning. That way, you get warm rolls without the rush. Have you ever tried storing it this way? Share below! Storing properly saves you time and keeps that fresh-baked taste. It means you can enjoy homemade goodness whenever you want.
Common Problems and Easy Fixes
Sometimes the dough doesn’t rise well. That usually means the milk was too hot or too cold. I once killed a batch of yeast because I got impatient and used hot milk. The yeast needs warm liquid, around 100-110°F. If your rolls come out dry, you might have added too much flour. The dough should be soft and slightly tacky. Add flour slowly and stop when it feels right. Another problem is filling leaking out while baking. This happens if you roll the dough too loosely. I remember my first time—I had sticky sugar butter all over the pan. Just roll it tight and pinch the seam closed. Which of these problems have you run into before? Fixing these issues matters because it builds your confidence in the kitchen. You learn to trust your hands and eyes. It also makes the final dish taste exactly how you imagined. That warm, gooey center is worth the small effort.
Your Top Questions Answered
Q: Can I make these gluten-free?
A: Yes, use a 1-to-1 gluten-free flour blend. The dough will be a bit stickier, so add a little extra flour if needed.
Q: Can I make the dough ahead of time?
A: Absolutely. Prepare the dough, cover it, and refrigerate overnight. Let it sit at room temp for 15 minutes before rolling.
Q: Can I swap the cream cheese icing?
A: Sure. Use a simple butter glaze with powdered sugar, milk, and vanilla. Or try a maple glaze for a different flavor.
Q: How do I scale the recipe?
A: Halve or double the ingredients easily. Just keep the ratios the same. Use two 9×13 pans if doubling.
Q: Any tips for softer rolls?
A: Brush the baked rolls with melted butter as soon as they come out of the oven. It adds moisture and shine. Which tip will you try first?
*Fun fact: Unflavored dental floss cuts cinnamon rolls cleaner than a knife. It keeps the layers from squishing.*
A Warm Goodbye from My Kitchen to Yours
Thank you for spending this time with me. I hope these cinnamon rolls fill your home with the same cozy smell I love. Every time I bake them, I think of my grandma letting us lick the icing bowl. It is a simple joy worth sharing. When you make yours, take a picture and share it with someone you love. Have you tried this recipe? Tag us on Pinterest! I cannot wait to see your beautiful rolls. Keep baking, keep tasting, and keep making memories. Happy cooking! —Chloe Hartwell.
Rolling, Filling, and a Little Story
My granddaughter Lily helped me roll out the dough last weekend. She pressed too hard and made a hole. I almost said something. But instead, I showed her how to pinch it closed like a little blanket. She giggled and said it looked like a bandage. I still laugh at that. The filling is the best part anyway. Butter, brown sugar, and cinnamon create a swirl that tastes like autumn in every bite. When you roll the dough tight, you seal in all that sweetness. Then you slice it with dental floss. Yes, dental floss. It gives you clean cuts without squishing the dough. Try it next time. You will thank me. Do you have a funny kitchen helper story? Maybe a kid or a pet who got into the flour? I would love to hear it.Why the Icing Is Non-Negotiable
Some people eat cinnamon rolls without icing. I do not trust those people. Just kidding. But seriously, the cream cheese icing is what turns a good roll into a memorable one. It is tangy, sweet, and smooth. You spread it over the warm rolls, and it melts into every swirl. I like to add a little extra vanilla. It makes the kitchen smell even better than before. Doesnt that smell amazing? I think the icing is why we keep coming back for seconds. Why does this matter? Because food is about pleasure. A little indulgence makes life sweeter. And you deserve that.Your Turn to Make a Memory
Ingredients:
| Ingredient | Amount | Notes |
|---|---|---|
| Milk (whole or 2%) | 1 cup | |
| Unsalted butter, melted | 1/4 cup (1/2 stick) | |
| Active dry yeast | 1 (0.25 oz) packet (about 2 1/4 tsp) | |
| Granulated sugar | 1/4 cup | For dough |
| Large egg | 1 | |
| Salt | 1/2 teaspoon | |
| Vanilla extract | 1 teaspoon | For dough |
| All-purpose flour | 3 1/2 cups | |
| Unsalted butter, softened | 1/2 cup (1 stick) | For filling |
| Brown sugar | 1/2 cup | For filling |
| Granulated sugar | 1/2 cup | For filling |
| Ground cinnamon | 1 1/2 tablespoons | For filling |
| Vanilla extract | 1 teaspoon | For filling |
| Cream cheese, softened | 4 ounces | For icing |
| Powdered sugar | 2 cups | For icing |
| Vanilla extract | 1 teaspoon | For icing |
| Milk | 2–4 tablespoons | Add 1 tbsp at a time, as needed |
The Story Behind These Speedy Cinnamon Rolls
I remember the first time I tried making cinnamon rolls from scratch. I was about your age, and my kitchen looked like a flour bomb had gone off. My grandma just laughed and handed me a damp cloth. Now I have a secret that saves time without losing that warm, gooey feeling. These rolls come together in just one hour, start to finish. Doesn’t that sound like a wonderful weekend project?
The best part is the smell that fills your whole house. It is like a cozy hug from the kitchen. My neighbor once knocked on my door asking what I was baking. I still laugh at that every time I pull these rolls from the oven.
Let me walk you through it step by step. I promise, if a 12-year-old me could do it, you can too.
Step 1: First, melt the butter in a microwave-safe bowl for about 40 seconds. Then warm the milk in the same bowl for 45 seconds. Check that the mixture feels warm to your wrist, not hot. (Hard-learned tip: If the milk is too hot, it will kill the yeast. Think bath water, not soup.) Add the sugar and yeast, stir, and cover with a towel. Wait 10 minutes until it looks frothy like a sea foam. Isn’t it amazing how yeast wakes up?
Step 2: While you wait, preheat your oven to its lowest setting, then turn it off. This creates a cozy warm spot for the dough to rise. Once the yeast is foamy, crack in the egg, add salt, and pour in the vanilla. Mix it all together with a spoon. Do you hear that little sizzle? That is the yeast saying hello.
Step 3: Now add the flour, half a cup at a time. Stir gently with a spatula, then use your hands to bring the dough together. It should feel soft and a little sticky, like a marshmallow. If it sticks too much, add a tiny sprinkle of flour. Knead it just a few times until it forms a ball. What is your favorite thing to make in the kitchen? Share below!
Step 4: Place the dough ball in a greased bowl, cover with a tea towel, and pop it in the warm oven for 10 minutes. This is called proofing, and it makes the dough puffy and happy. While it rests, mix the filling. Cream together the softened butter, brown sugar, white sugar, cinnamon, and vanilla until smooth. This filling smells like a candy shop. I sometimes sneak a tiny taste before spreading it.
Step 5: Take the dough out and roll it on a lightly floured surface into a big rectangle. Aim for about 14 inches by 18 inches, roughly the size of a baking sheet. Spread the cinnamon filling all over, leaving a small border around the edges. Then roll it up tightly from the shorter side, like a sleeping bag. Use a sharp knife or dental floss to cut 12 even rolls. Dental floss works like magic and gives clean edges.
Step 6: Place the rolls cut side up in a greased 9×13-inch baking dish. Bake at 350°F for 20 to 25 minutes until golden brown. Let them cool in the pan for 10 minutes. While they cool, beat the cream cheese, powdered sugar, vanilla, and milk into a thick icing. Spread it on warm rolls so it melts into every swirl. Serve immediately and watch them disappear.
Cook Time: 20–25 minutes
Total Time: 1 hour
Yield: 12 cinnamon rolls
Category: Breakfast, Dessert
Three Fun Twists to Try
Once you master the basic recipe, you can play around a little. Here are three of my favorite twists. Each one adds a new flavor without extra work.
Apple Pie Rolls: Before spreading the filling, scatter half a cup of finely chopped apples over the butter. The apples get soft and sweet as they bake. It tastes like a pie in a roll.
Spicy Chocolate Swirl: Add a teaspoon of cocoa powder and a pinch of cayenne pepper to the cinnamon sugar. It gives a warm, surprising kick that grown-ups love.
Lemon Blueberry Version: Swap the cinnamon for lemon zest and replace the brown sugar with white sugar. Fold in a handful of fresh or frozen blueberries before rolling. These are perfect for a summer morning.
Which one would you try first? Comment below!
How to Serve and Sip Along
Cinnamon rolls are wonderful on their own, but a few extras make them feel special. Serve them warm with a pat of butter melting on top. A small sprinkle of chopped pecans or walnuts adds a nice crunch.
For a breakfast treat, place a single roll in a bowl and pour a little cold milk around it. The milk turns sweet and cinnamon-y. For a dessert plate, drizzle extra icing and add fresh berries on the side. They look like little jewels next to the golden rolls.
For drinks, pour yourself a tall glass of cold milk or a cup of hot cocoa. Grown-ups might enjoy a cup of strong black coffee or a warm chai latte. The spices in the rolls and the drink match perfectly. Which would you choose tonight?
Storing and Reheating Your Cinnamon Rolls
These cinnamon rolls stay soft for days if you store them right. Keep them in an airtight container at room temperature for up to two days. I remember the first time I made a whole batch for a sleepover. We ate half and put the rest in the fridge. The next morning, they were still tender, but the icing had soaked in a bit. For the freezer, wrap each roll tightly in plastic wrap, then foil. They keep for up to three months. To reheat, pop one in the microwave for 15 seconds or warm them in a 350°F oven for 5 minutes. Batch cooking is a lifesaver for busy mornings. You can make the dough the night before, refrigerate it, and bake fresh in the morning. That way, you get warm rolls without the rush. Have you ever tried storing it this way? Share below! Storing properly saves you time and keeps that fresh-baked taste. It means you can enjoy homemade goodness whenever you want.
Common Problems and Easy Fixes
Sometimes the dough doesn’t rise well. That usually means the milk was too hot or too cold. I once killed a batch of yeast because I got impatient and used hot milk. The yeast needs warm liquid, around 100-110°F. If your rolls come out dry, you might have added too much flour. The dough should be soft and slightly tacky. Add flour slowly and stop when it feels right. Another problem is filling leaking out while baking. This happens if you roll the dough too loosely. I remember my first time—I had sticky sugar butter all over the pan. Just roll it tight and pinch the seam closed. Which of these problems have you run into before? Fixing these issues matters because it builds your confidence in the kitchen. You learn to trust your hands and eyes. It also makes the final dish taste exactly how you imagined. That warm, gooey center is worth the small effort.
Your Top Questions Answered
Q: Can I make these gluten-free?
A: Yes, use a 1-to-1 gluten-free flour blend. The dough will be a bit stickier, so add a little extra flour if needed.
Q: Can I make the dough ahead of time?
A: Absolutely. Prepare the dough, cover it, and refrigerate overnight. Let it sit at room temp for 15 minutes before rolling.
Q: Can I swap the cream cheese icing?
A: Sure. Use a simple butter glaze with powdered sugar, milk, and vanilla. Or try a maple glaze for a different flavor.
Q: How do I scale the recipe?
A: Halve or double the ingredients easily. Just keep the ratios the same. Use two 9×13 pans if doubling.
Q: Any tips for softer rolls?
A: Brush the baked rolls with melted butter as soon as they come out of the oven. It adds moisture and shine. Which tip will you try first?
*Fun fact: Unflavored dental floss cuts cinnamon rolls cleaner than a knife. It keeps the layers from squishing.*
A Warm Goodbye from My Kitchen to Yours
Thank you for spending this time with me. I hope these cinnamon rolls fill your home with the same cozy smell I love. Every time I bake them, I think of my grandma letting us lick the icing bowl. It is a simple joy worth sharing. When you make yours, take a picture and share it with someone you love. Have you tried this recipe? Tag us on Pinterest! I cannot wait to see your beautiful rolls. Keep baking, keep tasting, and keep making memories. Happy cooking! —Chloe Hartwell.
Rolling, Filling, and a Little Story
My granddaughter Lily helped me roll out the dough last weekend. She pressed too hard and made a hole. I almost said something. But instead, I showed her how to pinch it closed like a little blanket. She giggled and said it looked like a bandage. I still laugh at that. The filling is the best part anyway. Butter, brown sugar, and cinnamon create a swirl that tastes like autumn in every bite. When you roll the dough tight, you seal in all that sweetness. Then you slice it with dental floss. Yes, dental floss. It gives you clean cuts without squishing the dough. Try it next time. You will thank me. Do you have a funny kitchen helper story? Maybe a kid or a pet who got into the flour? I would love to hear it.Why the Icing Is Non-Negotiable
Some people eat cinnamon rolls without icing. I do not trust those people. Just kidding. But seriously, the cream cheese icing is what turns a good roll into a memorable one. It is tangy, sweet, and smooth. You spread it over the warm rolls, and it melts into every swirl. I like to add a little extra vanilla. It makes the kitchen smell even better than before. Doesnt that smell amazing? I think the icing is why we keep coming back for seconds. Why does this matter? Because food is about pleasure. A little indulgence makes life sweeter. And you deserve that.Your Turn to Make a Memory
Ingredients:
| Ingredient | Amount | Notes |
|---|---|---|
| Milk (whole or 2%) | 1 cup | |
| Unsalted butter, melted | 1/4 cup (1/2 stick) | |
| Active dry yeast | 1 (0.25 oz) packet (about 2 1/4 tsp) | |
| Granulated sugar | 1/4 cup | For dough |
| Large egg | 1 | |
| Salt | 1/2 teaspoon | |
| Vanilla extract | 1 teaspoon | For dough |
| All-purpose flour | 3 1/2 cups | |
| Unsalted butter, softened | 1/2 cup (1 stick) | For filling |
| Brown sugar | 1/2 cup | For filling |
| Granulated sugar | 1/2 cup | For filling |
| Ground cinnamon | 1 1/2 tablespoons | For filling |
| Vanilla extract | 1 teaspoon | For filling |
| Cream cheese, softened | 4 ounces | For icing |
| Powdered sugar | 2 cups | For icing |
| Vanilla extract | 1 teaspoon | For icing |
| Milk | 2–4 tablespoons | Add 1 tbsp at a time, as needed |
The Story Behind These Speedy Cinnamon Rolls
I remember the first time I tried making cinnamon rolls from scratch. I was about your age, and my kitchen looked like a flour bomb had gone off. My grandma just laughed and handed me a damp cloth. Now I have a secret that saves time without losing that warm, gooey feeling. These rolls come together in just one hour, start to finish. Doesn’t that sound like a wonderful weekend project?
The best part is the smell that fills your whole house. It is like a cozy hug from the kitchen. My neighbor once knocked on my door asking what I was baking. I still laugh at that every time I pull these rolls from the oven.
Let me walk you through it step by step. I promise, if a 12-year-old me could do it, you can too.
Step 1: First, melt the butter in a microwave-safe bowl for about 40 seconds. Then warm the milk in the same bowl for 45 seconds. Check that the mixture feels warm to your wrist, not hot. (Hard-learned tip: If the milk is too hot, it will kill the yeast. Think bath water, not soup.) Add the sugar and yeast, stir, and cover with a towel. Wait 10 minutes until it looks frothy like a sea foam. Isn’t it amazing how yeast wakes up?
Step 2: While you wait, preheat your oven to its lowest setting, then turn it off. This creates a cozy warm spot for the dough to rise. Once the yeast is foamy, crack in the egg, add salt, and pour in the vanilla. Mix it all together with a spoon. Do you hear that little sizzle? That is the yeast saying hello.
Step 3: Now add the flour, half a cup at a time. Stir gently with a spatula, then use your hands to bring the dough together. It should feel soft and a little sticky, like a marshmallow. If it sticks too much, add a tiny sprinkle of flour. Knead it just a few times until it forms a ball. What is your favorite thing to make in the kitchen? Share below!
Step 4: Place the dough ball in a greased bowl, cover with a tea towel, and pop it in the warm oven for 10 minutes. This is called proofing, and it makes the dough puffy and happy. While it rests, mix the filling. Cream together the softened butter, brown sugar, white sugar, cinnamon, and vanilla until smooth. This filling smells like a candy shop. I sometimes sneak a tiny taste before spreading it.
Step 5: Take the dough out and roll it on a lightly floured surface into a big rectangle. Aim for about 14 inches by 18 inches, roughly the size of a baking sheet. Spread the cinnamon filling all over, leaving a small border around the edges. Then roll it up tightly from the shorter side, like a sleeping bag. Use a sharp knife or dental floss to cut 12 even rolls. Dental floss works like magic and gives clean edges.
Step 6: Place the rolls cut side up in a greased 9×13-inch baking dish. Bake at 350°F for 20 to 25 minutes until golden brown. Let them cool in the pan for 10 minutes. While they cool, beat the cream cheese, powdered sugar, vanilla, and milk into a thick icing. Spread it on warm rolls so it melts into every swirl. Serve immediately and watch them disappear.
Cook Time: 20–25 minutes
Total Time: 1 hour
Yield: 12 cinnamon rolls
Category: Breakfast, Dessert
Three Fun Twists to Try
Once you master the basic recipe, you can play around a little. Here are three of my favorite twists. Each one adds a new flavor without extra work.
Apple Pie Rolls: Before spreading the filling, scatter half a cup of finely chopped apples over the butter. The apples get soft and sweet as they bake. It tastes like a pie in a roll.
Spicy Chocolate Swirl: Add a teaspoon of cocoa powder and a pinch of cayenne pepper to the cinnamon sugar. It gives a warm, surprising kick that grown-ups love.
Lemon Blueberry Version: Swap the cinnamon for lemon zest and replace the brown sugar with white sugar. Fold in a handful of fresh or frozen blueberries before rolling. These are perfect for a summer morning.
Which one would you try first? Comment below!
How to Serve and Sip Along
Cinnamon rolls are wonderful on their own, but a few extras make them feel special. Serve them warm with a pat of butter melting on top. A small sprinkle of chopped pecans or walnuts adds a nice crunch.
For a breakfast treat, place a single roll in a bowl and pour a little cold milk around it. The milk turns sweet and cinnamon-y. For a dessert plate, drizzle extra icing and add fresh berries on the side. They look like little jewels next to the golden rolls.
For drinks, pour yourself a tall glass of cold milk or a cup of hot cocoa. Grown-ups might enjoy a cup of strong black coffee or a warm chai latte. The spices in the rolls and the drink match perfectly. Which would you choose tonight?
Storing and Reheating Your Cinnamon Rolls
These cinnamon rolls stay soft for days if you store them right. Keep them in an airtight container at room temperature for up to two days. I remember the first time I made a whole batch for a sleepover. We ate half and put the rest in the fridge. The next morning, they were still tender, but the icing had soaked in a bit. For the freezer, wrap each roll tightly in plastic wrap, then foil. They keep for up to three months. To reheat, pop one in the microwave for 15 seconds or warm them in a 350°F oven for 5 minutes. Batch cooking is a lifesaver for busy mornings. You can make the dough the night before, refrigerate it, and bake fresh in the morning. That way, you get warm rolls without the rush. Have you ever tried storing it this way? Share below! Storing properly saves you time and keeps that fresh-baked taste. It means you can enjoy homemade goodness whenever you want.
Common Problems and Easy Fixes
Sometimes the dough doesn’t rise well. That usually means the milk was too hot or too cold. I once killed a batch of yeast because I got impatient and used hot milk. The yeast needs warm liquid, around 100-110°F. If your rolls come out dry, you might have added too much flour. The dough should be soft and slightly tacky. Add flour slowly and stop when it feels right. Another problem is filling leaking out while baking. This happens if you roll the dough too loosely. I remember my first time—I had sticky sugar butter all over the pan. Just roll it tight and pinch the seam closed. Which of these problems have you run into before? Fixing these issues matters because it builds your confidence in the kitchen. You learn to trust your hands and eyes. It also makes the final dish taste exactly how you imagined. That warm, gooey center is worth the small effort.
Your Top Questions Answered
Q: Can I make these gluten-free?
A: Yes, use a 1-to-1 gluten-free flour blend. The dough will be a bit stickier, so add a little extra flour if needed.
Q: Can I make the dough ahead of time?
A: Absolutely. Prepare the dough, cover it, and refrigerate overnight. Let it sit at room temp for 15 minutes before rolling.
Q: Can I swap the cream cheese icing?
A: Sure. Use a simple butter glaze with powdered sugar, milk, and vanilla. Or try a maple glaze for a different flavor.
Q: How do I scale the recipe?
A: Halve or double the ingredients easily. Just keep the ratios the same. Use two 9×13 pans if doubling.
Q: Any tips for softer rolls?
A: Brush the baked rolls with melted butter as soon as they come out of the oven. It adds moisture and shine. Which tip will you try first?
*Fun fact: Unflavored dental floss cuts cinnamon rolls cleaner than a knife. It keeps the layers from squishing.*
A Warm Goodbye from My Kitchen to Yours
Thank you for spending this time with me. I hope these cinnamon rolls fill your home with the same cozy smell I love. Every time I bake them, I think of my grandma letting us lick the icing bowl. It is a simple joy worth sharing. When you make yours, take a picture and share it with someone you love. Have you tried this recipe? Tag us on Pinterest! I cannot wait to see your beautiful rolls. Keep baking, keep tasting, and keep making memories. Happy cooking! —Chloe Hartwell.
The Secret of the One-Hour Miracle
Most people think cinnamon rolls take all day. They think you have to wake up at dawn and wait for hours. That is not true with this recipe. You can go from a bowl of flour to a warm, gooey roll in just sixty minutes. The trick is a warm oven. You turn it on low, then turn it off. That cozy little box becomes a proofing spa for your dough. *Fun fact:* Professional bakers call this a “proof box.” Fancy name for a warm spot. But your oven works just as well. I love this because it means you can make cinnamon rolls on a school morning. Or a lazy Saturday. Or right when a sugar craving hits. Why does this matter? Because homemade food should not feel like a chore. It should feel like a hug you can make anytime. Have you ever made cinnamon rolls before? Or do you usually buy the ones in a tube? I promise, these are different. The difference is love. And butter. Lots of butter.Rolling, Filling, and a Little Story
My granddaughter Lily helped me roll out the dough last weekend. She pressed too hard and made a hole. I almost said something. But instead, I showed her how to pinch it closed like a little blanket. She giggled and said it looked like a bandage. I still laugh at that. The filling is the best part anyway. Butter, brown sugar, and cinnamon create a swirl that tastes like autumn in every bite. When you roll the dough tight, you seal in all that sweetness. Then you slice it with dental floss. Yes, dental floss. It gives you clean cuts without squishing the dough. Try it next time. You will thank me. Do you have a funny kitchen helper story? Maybe a kid or a pet who got into the flour? I would love to hear it.Why the Icing Is Non-Negotiable
Some people eat cinnamon rolls without icing. I do not trust those people. Just kidding. But seriously, the cream cheese icing is what turns a good roll into a memorable one. It is tangy, sweet, and smooth. You spread it over the warm rolls, and it melts into every swirl. I like to add a little extra vanilla. It makes the kitchen smell even better than before. Doesnt that smell amazing? I think the icing is why we keep coming back for seconds. Why does this matter? Because food is about pleasure. A little indulgence makes life sweeter. And you deserve that.Your Turn to Make a Memory
Ingredients:
| Ingredient | Amount | Notes |
|---|---|---|
| Milk (whole or 2%) | 1 cup | |
| Unsalted butter, melted | 1/4 cup (1/2 stick) | |
| Active dry yeast | 1 (0.25 oz) packet (about 2 1/4 tsp) | |
| Granulated sugar | 1/4 cup | For dough |
| Large egg | 1 | |
| Salt | 1/2 teaspoon | |
| Vanilla extract | 1 teaspoon | For dough |
| All-purpose flour | 3 1/2 cups | |
| Unsalted butter, softened | 1/2 cup (1 stick) | For filling |
| Brown sugar | 1/2 cup | For filling |
| Granulated sugar | 1/2 cup | For filling |
| Ground cinnamon | 1 1/2 tablespoons | For filling |
| Vanilla extract | 1 teaspoon | For filling |
| Cream cheese, softened | 4 ounces | For icing |
| Powdered sugar | 2 cups | For icing |
| Vanilla extract | 1 teaspoon | For icing |
| Milk | 2–4 tablespoons | Add 1 tbsp at a time, as needed |
The Story Behind These Speedy Cinnamon Rolls
I remember the first time I tried making cinnamon rolls from scratch. I was about your age, and my kitchen looked like a flour bomb had gone off. My grandma just laughed and handed me a damp cloth. Now I have a secret that saves time without losing that warm, gooey feeling. These rolls come together in just one hour, start to finish. Doesn’t that sound like a wonderful weekend project?
The best part is the smell that fills your whole house. It is like a cozy hug from the kitchen. My neighbor once knocked on my door asking what I was baking. I still laugh at that every time I pull these rolls from the oven.
Let me walk you through it step by step. I promise, if a 12-year-old me could do it, you can too.
Step 1: First, melt the butter in a microwave-safe bowl for about 40 seconds. Then warm the milk in the same bowl for 45 seconds. Check that the mixture feels warm to your wrist, not hot. (Hard-learned tip: If the milk is too hot, it will kill the yeast. Think bath water, not soup.) Add the sugar and yeast, stir, and cover with a towel. Wait 10 minutes until it looks frothy like a sea foam. Isn’t it amazing how yeast wakes up?
Step 2: While you wait, preheat your oven to its lowest setting, then turn it off. This creates a cozy warm spot for the dough to rise. Once the yeast is foamy, crack in the egg, add salt, and pour in the vanilla. Mix it all together with a spoon. Do you hear that little sizzle? That is the yeast saying hello.
Step 3: Now add the flour, half a cup at a time. Stir gently with a spatula, then use your hands to bring the dough together. It should feel soft and a little sticky, like a marshmallow. If it sticks too much, add a tiny sprinkle of flour. Knead it just a few times until it forms a ball. What is your favorite thing to make in the kitchen? Share below!
Step 4: Place the dough ball in a greased bowl, cover with a tea towel, and pop it in the warm oven for 10 minutes. This is called proofing, and it makes the dough puffy and happy. While it rests, mix the filling. Cream together the softened butter, brown sugar, white sugar, cinnamon, and vanilla until smooth. This filling smells like a candy shop. I sometimes sneak a tiny taste before spreading it.
Step 5: Take the dough out and roll it on a lightly floured surface into a big rectangle. Aim for about 14 inches by 18 inches, roughly the size of a baking sheet. Spread the cinnamon filling all over, leaving a small border around the edges. Then roll it up tightly from the shorter side, like a sleeping bag. Use a sharp knife or dental floss to cut 12 even rolls. Dental floss works like magic and gives clean edges.
Step 6: Place the rolls cut side up in a greased 9×13-inch baking dish. Bake at 350°F for 20 to 25 minutes until golden brown. Let them cool in the pan for 10 minutes. While they cool, beat the cream cheese, powdered sugar, vanilla, and milk into a thick icing. Spread it on warm rolls so it melts into every swirl. Serve immediately and watch them disappear.
Cook Time: 20–25 minutes
Total Time: 1 hour
Yield: 12 cinnamon rolls
Category: Breakfast, Dessert
Three Fun Twists to Try
Once you master the basic recipe, you can play around a little. Here are three of my favorite twists. Each one adds a new flavor without extra work.
Apple Pie Rolls: Before spreading the filling, scatter half a cup of finely chopped apples over the butter. The apples get soft and sweet as they bake. It tastes like a pie in a roll.
Spicy Chocolate Swirl: Add a teaspoon of cocoa powder and a pinch of cayenne pepper to the cinnamon sugar. It gives a warm, surprising kick that grown-ups love.
Lemon Blueberry Version: Swap the cinnamon for lemon zest and replace the brown sugar with white sugar. Fold in a handful of fresh or frozen blueberries before rolling. These are perfect for a summer morning.
Which one would you try first? Comment below!
How to Serve and Sip Along
Cinnamon rolls are wonderful on their own, but a few extras make them feel special. Serve them warm with a pat of butter melting on top. A small sprinkle of chopped pecans or walnuts adds a nice crunch.
For a breakfast treat, place a single roll in a bowl and pour a little cold milk around it. The milk turns sweet and cinnamon-y. For a dessert plate, drizzle extra icing and add fresh berries on the side. They look like little jewels next to the golden rolls.
For drinks, pour yourself a tall glass of cold milk or a cup of hot cocoa. Grown-ups might enjoy a cup of strong black coffee or a warm chai latte. The spices in the rolls and the drink match perfectly. Which would you choose tonight?
Storing and Reheating Your Cinnamon Rolls
These cinnamon rolls stay soft for days if you store them right. Keep them in an airtight container at room temperature for up to two days. I remember the first time I made a whole batch for a sleepover. We ate half and put the rest in the fridge. The next morning, they were still tender, but the icing had soaked in a bit. For the freezer, wrap each roll tightly in plastic wrap, then foil. They keep for up to three months. To reheat, pop one in the microwave for 15 seconds or warm them in a 350°F oven for 5 minutes. Batch cooking is a lifesaver for busy mornings. You can make the dough the night before, refrigerate it, and bake fresh in the morning. That way, you get warm rolls without the rush. Have you ever tried storing it this way? Share below! Storing properly saves you time and keeps that fresh-baked taste. It means you can enjoy homemade goodness whenever you want.
Common Problems and Easy Fixes
Sometimes the dough doesn’t rise well. That usually means the milk was too hot or too cold. I once killed a batch of yeast because I got impatient and used hot milk. The yeast needs warm liquid, around 100-110°F. If your rolls come out dry, you might have added too much flour. The dough should be soft and slightly tacky. Add flour slowly and stop when it feels right. Another problem is filling leaking out while baking. This happens if you roll the dough too loosely. I remember my first time—I had sticky sugar butter all over the pan. Just roll it tight and pinch the seam closed. Which of these problems have you run into before? Fixing these issues matters because it builds your confidence in the kitchen. You learn to trust your hands and eyes. It also makes the final dish taste exactly how you imagined. That warm, gooey center is worth the small effort.
Your Top Questions Answered
Q: Can I make these gluten-free?
A: Yes, use a 1-to-1 gluten-free flour blend. The dough will be a bit stickier, so add a little extra flour if needed.
Q: Can I make the dough ahead of time?
A: Absolutely. Prepare the dough, cover it, and refrigerate overnight. Let it sit at room temp for 15 minutes before rolling.
Q: Can I swap the cream cheese icing?
A: Sure. Use a simple butter glaze with powdered sugar, milk, and vanilla. Or try a maple glaze for a different flavor.
Q: How do I scale the recipe?
A: Halve or double the ingredients easily. Just keep the ratios the same. Use two 9×13 pans if doubling.
Q: Any tips for softer rolls?
A: Brush the baked rolls with melted butter as soon as they come out of the oven. It adds moisture and shine. Which tip will you try first?
*Fun fact: Unflavored dental floss cuts cinnamon rolls cleaner than a knife. It keeps the layers from squishing.*
A Warm Goodbye from My Kitchen to Yours
Thank you for spending this time with me. I hope these cinnamon rolls fill your home with the same cozy smell I love. Every time I bake them, I think of my grandma letting us lick the icing bowl. It is a simple joy worth sharing. When you make yours, take a picture and share it with someone you love. Have you tried this recipe? Tag us on Pinterest! I cannot wait to see your beautiful rolls. Keep baking, keep tasting, and keep making memories. Happy cooking! —Chloe Hartwell.
The Morning That Changed My Baking World
I still remember the first time I tried making cinnamon rolls from scratch. I was a nervous wreck. The yeast scared me. I thought it would explode or something. Does that sound silly? Well, I laughed at myself later when the dough puffed up like a happy cloud. That day taught me something. Yeast is not magic. It is just tiny hungry friends that need warm milk and a little sugar to wake up. When you treat them kindly, they make your kitchen smell like heaven. Why does this matter? Because baking is not about being perfect. It is about learning to trust your hands. Have you ever been scared to try a new recipe? What held you back?The Secret of the One-Hour Miracle
Most people think cinnamon rolls take all day. They think you have to wake up at dawn and wait for hours. That is not true with this recipe. You can go from a bowl of flour to a warm, gooey roll in just sixty minutes. The trick is a warm oven. You turn it on low, then turn it off. That cozy little box becomes a proofing spa for your dough. *Fun fact:* Professional bakers call this a “proof box.” Fancy name for a warm spot. But your oven works just as well. I love this because it means you can make cinnamon rolls on a school morning. Or a lazy Saturday. Or right when a sugar craving hits. Why does this matter? Because homemade food should not feel like a chore. It should feel like a hug you can make anytime. Have you ever made cinnamon rolls before? Or do you usually buy the ones in a tube? I promise, these are different. The difference is love. And butter. Lots of butter.Rolling, Filling, and a Little Story
My granddaughter Lily helped me roll out the dough last weekend. She pressed too hard and made a hole. I almost said something. But instead, I showed her how to pinch it closed like a little blanket. She giggled and said it looked like a bandage. I still laugh at that. The filling is the best part anyway. Butter, brown sugar, and cinnamon create a swirl that tastes like autumn in every bite. When you roll the dough tight, you seal in all that sweetness. Then you slice it with dental floss. Yes, dental floss. It gives you clean cuts without squishing the dough. Try it next time. You will thank me. Do you have a funny kitchen helper story? Maybe a kid or a pet who got into the flour? I would love to hear it.Why the Icing Is Non-Negotiable
Some people eat cinnamon rolls without icing. I do not trust those people. Just kidding. But seriously, the cream cheese icing is what turns a good roll into a memorable one. It is tangy, sweet, and smooth. You spread it over the warm rolls, and it melts into every swirl. I like to add a little extra vanilla. It makes the kitchen smell even better than before. Doesnt that smell amazing? I think the icing is why we keep coming back for seconds. Why does this matter? Because food is about pleasure. A little indulgence makes life sweeter. And you deserve that.Your Turn to Make a Memory
Ingredients:
| Ingredient | Amount | Notes |
|---|---|---|
| Milk (whole or 2%) | 1 cup | |
| Unsalted butter, melted | 1/4 cup (1/2 stick) | |
| Active dry yeast | 1 (0.25 oz) packet (about 2 1/4 tsp) | |
| Granulated sugar | 1/4 cup | For dough |
| Large egg | 1 | |
| Salt | 1/2 teaspoon | |
| Vanilla extract | 1 teaspoon | For dough |
| All-purpose flour | 3 1/2 cups | |
| Unsalted butter, softened | 1/2 cup (1 stick) | For filling |
| Brown sugar | 1/2 cup | For filling |
| Granulated sugar | 1/2 cup | For filling |
| Ground cinnamon | 1 1/2 tablespoons | For filling |
| Vanilla extract | 1 teaspoon | For filling |
| Cream cheese, softened | 4 ounces | For icing |
| Powdered sugar | 2 cups | For icing |
| Vanilla extract | 1 teaspoon | For icing |
| Milk | 2–4 tablespoons | Add 1 tbsp at a time, as needed |
The Story Behind These Speedy Cinnamon Rolls
I remember the first time I tried making cinnamon rolls from scratch. I was about your age, and my kitchen looked like a flour bomb had gone off. My grandma just laughed and handed me a damp cloth. Now I have a secret that saves time without losing that warm, gooey feeling. These rolls come together in just one hour, start to finish. Doesn’t that sound like a wonderful weekend project?
The best part is the smell that fills your whole house. It is like a cozy hug from the kitchen. My neighbor once knocked on my door asking what I was baking. I still laugh at that every time I pull these rolls from the oven.
Let me walk you through it step by step. I promise, if a 12-year-old me could do it, you can too.
Step 1: First, melt the butter in a microwave-safe bowl for about 40 seconds. Then warm the milk in the same bowl for 45 seconds. Check that the mixture feels warm to your wrist, not hot. (Hard-learned tip: If the milk is too hot, it will kill the yeast. Think bath water, not soup.) Add the sugar and yeast, stir, and cover with a towel. Wait 10 minutes until it looks frothy like a sea foam. Isn’t it amazing how yeast wakes up?
Step 2: While you wait, preheat your oven to its lowest setting, then turn it off. This creates a cozy warm spot for the dough to rise. Once the yeast is foamy, crack in the egg, add salt, and pour in the vanilla. Mix it all together with a spoon. Do you hear that little sizzle? That is the yeast saying hello.
Step 3: Now add the flour, half a cup at a time. Stir gently with a spatula, then use your hands to bring the dough together. It should feel soft and a little sticky, like a marshmallow. If it sticks too much, add a tiny sprinkle of flour. Knead it just a few times until it forms a ball. What is your favorite thing to make in the kitchen? Share below!
Step 4: Place the dough ball in a greased bowl, cover with a tea towel, and pop it in the warm oven for 10 minutes. This is called proofing, and it makes the dough puffy and happy. While it rests, mix the filling. Cream together the softened butter, brown sugar, white sugar, cinnamon, and vanilla until smooth. This filling smells like a candy shop. I sometimes sneak a tiny taste before spreading it.
Step 5: Take the dough out and roll it on a lightly floured surface into a big rectangle. Aim for about 14 inches by 18 inches, roughly the size of a baking sheet. Spread the cinnamon filling all over, leaving a small border around the edges. Then roll it up tightly from the shorter side, like a sleeping bag. Use a sharp knife or dental floss to cut 12 even rolls. Dental floss works like magic and gives clean edges.
Step 6: Place the rolls cut side up in a greased 9×13-inch baking dish. Bake at 350°F for 20 to 25 minutes until golden brown. Let them cool in the pan for 10 minutes. While they cool, beat the cream cheese, powdered sugar, vanilla, and milk into a thick icing. Spread it on warm rolls so it melts into every swirl. Serve immediately and watch them disappear.
Cook Time: 20–25 minutes
Total Time: 1 hour
Yield: 12 cinnamon rolls
Category: Breakfast, Dessert
Three Fun Twists to Try
Once you master the basic recipe, you can play around a little. Here are three of my favorite twists. Each one adds a new flavor without extra work.
Apple Pie Rolls: Before spreading the filling, scatter half a cup of finely chopped apples over the butter. The apples get soft and sweet as they bake. It tastes like a pie in a roll.
Spicy Chocolate Swirl: Add a teaspoon of cocoa powder and a pinch of cayenne pepper to the cinnamon sugar. It gives a warm, surprising kick that grown-ups love.
Lemon Blueberry Version: Swap the cinnamon for lemon zest and replace the brown sugar with white sugar. Fold in a handful of fresh or frozen blueberries before rolling. These are perfect for a summer morning.
Which one would you try first? Comment below!
How to Serve and Sip Along
Cinnamon rolls are wonderful on their own, but a few extras make them feel special. Serve them warm with a pat of butter melting on top. A small sprinkle of chopped pecans or walnuts adds a nice crunch.
For a breakfast treat, place a single roll in a bowl and pour a little cold milk around it. The milk turns sweet and cinnamon-y. For a dessert plate, drizzle extra icing and add fresh berries on the side. They look like little jewels next to the golden rolls.
For drinks, pour yourself a tall glass of cold milk or a cup of hot cocoa. Grown-ups might enjoy a cup of strong black coffee or a warm chai latte. The spices in the rolls and the drink match perfectly. Which would you choose tonight?
Storing and Reheating Your Cinnamon Rolls
These cinnamon rolls stay soft for days if you store them right. Keep them in an airtight container at room temperature for up to two days. I remember the first time I made a whole batch for a sleepover. We ate half and put the rest in the fridge. The next morning, they were still tender, but the icing had soaked in a bit. For the freezer, wrap each roll tightly in plastic wrap, then foil. They keep for up to three months. To reheat, pop one in the microwave for 15 seconds or warm them in a 350°F oven for 5 minutes. Batch cooking is a lifesaver for busy mornings. You can make the dough the night before, refrigerate it, and bake fresh in the morning. That way, you get warm rolls without the rush. Have you ever tried storing it this way? Share below! Storing properly saves you time and keeps that fresh-baked taste. It means you can enjoy homemade goodness whenever you want.
Common Problems and Easy Fixes
Sometimes the dough doesn’t rise well. That usually means the milk was too hot or too cold. I once killed a batch of yeast because I got impatient and used hot milk. The yeast needs warm liquid, around 100-110°F. If your rolls come out dry, you might have added too much flour. The dough should be soft and slightly tacky. Add flour slowly and stop when it feels right. Another problem is filling leaking out while baking. This happens if you roll the dough too loosely. I remember my first time—I had sticky sugar butter all over the pan. Just roll it tight and pinch the seam closed. Which of these problems have you run into before? Fixing these issues matters because it builds your confidence in the kitchen. You learn to trust your hands and eyes. It also makes the final dish taste exactly how you imagined. That warm, gooey center is worth the small effort.
Your Top Questions Answered
Q: Can I make these gluten-free?
A: Yes, use a 1-to-1 gluten-free flour blend. The dough will be a bit stickier, so add a little extra flour if needed.
Q: Can I make the dough ahead of time?
A: Absolutely. Prepare the dough, cover it, and refrigerate overnight. Let it sit at room temp for 15 minutes before rolling.
Q: Can I swap the cream cheese icing?
A: Sure. Use a simple butter glaze with powdered sugar, milk, and vanilla. Or try a maple glaze for a different flavor.
Q: How do I scale the recipe?
A: Halve or double the ingredients easily. Just keep the ratios the same. Use two 9×13 pans if doubling.
Q: Any tips for softer rolls?
A: Brush the baked rolls with melted butter as soon as they come out of the oven. It adds moisture and shine. Which tip will you try first?
*Fun fact: Unflavored dental floss cuts cinnamon rolls cleaner than a knife. It keeps the layers from squishing.*
A Warm Goodbye from My Kitchen to Yours
Thank you for spending this time with me. I hope these cinnamon rolls fill your home with the same cozy smell I love. Every time I bake them, I think of my grandma letting us lick the icing bowl. It is a simple joy worth sharing. When you make yours, take a picture and share it with someone you love. Have you tried this recipe? Tag us on Pinterest! I cannot wait to see your beautiful rolls. Keep baking, keep tasting, and keep making memories. Happy cooking! —Chloe Hartwell.
Why the Icing Is Non-Negotiable
Some people eat cinnamon rolls without icing. I do not trust those people. Just kidding. But seriously, the cream cheese icing is what turns a good roll into a memorable one. It is tangy, sweet, and smooth. You spread it over the warm rolls, and it melts into every swirl. I like to add a little extra vanilla. It makes the kitchen smell even better than before. Doesnt that smell amazing? I think the icing is why we keep coming back for seconds. Why does this matter? Because food is about pleasure. A little indulgence makes life sweeter. And you deserve that.Your Turn to Make a Memory
Ingredients:
| Ingredient | Amount | Notes |
|---|---|---|
| Milk (whole or 2%) | 1 cup | |
| Unsalted butter, melted | 1/4 cup (1/2 stick) | |
| Active dry yeast | 1 (0.25 oz) packet (about 2 1/4 tsp) | |
| Granulated sugar | 1/4 cup | For dough |
| Large egg | 1 | |
| Salt | 1/2 teaspoon | |
| Vanilla extract | 1 teaspoon | For dough |
| All-purpose flour | 3 1/2 cups | |
| Unsalted butter, softened | 1/2 cup (1 stick) | For filling |
| Brown sugar | 1/2 cup | For filling |
| Granulated sugar | 1/2 cup | For filling |
| Ground cinnamon | 1 1/2 tablespoons | For filling |
| Vanilla extract | 1 teaspoon | For filling |
| Cream cheese, softened | 4 ounces | For icing |
| Powdered sugar | 2 cups | For icing |
| Vanilla extract | 1 teaspoon | For icing |
| Milk | 2–4 tablespoons | Add 1 tbsp at a time, as needed |
The Story Behind These Speedy Cinnamon Rolls
I remember the first time I tried making cinnamon rolls from scratch. I was about your age, and my kitchen looked like a flour bomb had gone off. My grandma just laughed and handed me a damp cloth. Now I have a secret that saves time without losing that warm, gooey feeling. These rolls come together in just one hour, start to finish. Doesn’t that sound like a wonderful weekend project?
The best part is the smell that fills your whole house. It is like a cozy hug from the kitchen. My neighbor once knocked on my door asking what I was baking. I still laugh at that every time I pull these rolls from the oven.
Let me walk you through it step by step. I promise, if a 12-year-old me could do it, you can too.
Step 1: First, melt the butter in a microwave-safe bowl for about 40 seconds. Then warm the milk in the same bowl for 45 seconds. Check that the mixture feels warm to your wrist, not hot. (Hard-learned tip: If the milk is too hot, it will kill the yeast. Think bath water, not soup.) Add the sugar and yeast, stir, and cover with a towel. Wait 10 minutes until it looks frothy like a sea foam. Isn’t it amazing how yeast wakes up?
Step 2: While you wait, preheat your oven to its lowest setting, then turn it off. This creates a cozy warm spot for the dough to rise. Once the yeast is foamy, crack in the egg, add salt, and pour in the vanilla. Mix it all together with a spoon. Do you hear that little sizzle? That is the yeast saying hello.
Step 3: Now add the flour, half a cup at a time. Stir gently with a spatula, then use your hands to bring the dough together. It should feel soft and a little sticky, like a marshmallow. If it sticks too much, add a tiny sprinkle of flour. Knead it just a few times until it forms a ball. What is your favorite thing to make in the kitchen? Share below!
Step 4: Place the dough ball in a greased bowl, cover with a tea towel, and pop it in the warm oven for 10 minutes. This is called proofing, and it makes the dough puffy and happy. While it rests, mix the filling. Cream together the softened butter, brown sugar, white sugar, cinnamon, and vanilla until smooth. This filling smells like a candy shop. I sometimes sneak a tiny taste before spreading it.
Step 5: Take the dough out and roll it on a lightly floured surface into a big rectangle. Aim for about 14 inches by 18 inches, roughly the size of a baking sheet. Spread the cinnamon filling all over, leaving a small border around the edges. Then roll it up tightly from the shorter side, like a sleeping bag. Use a sharp knife or dental floss to cut 12 even rolls. Dental floss works like magic and gives clean edges.
Step 6: Place the rolls cut side up in a greased 9×13-inch baking dish. Bake at 350°F for 20 to 25 minutes until golden brown. Let them cool in the pan for 10 minutes. While they cool, beat the cream cheese, powdered sugar, vanilla, and milk into a thick icing. Spread it on warm rolls so it melts into every swirl. Serve immediately and watch them disappear.
Cook Time: 20–25 minutes
Total Time: 1 hour
Yield: 12 cinnamon rolls
Category: Breakfast, Dessert
Three Fun Twists to Try
Once you master the basic recipe, you can play around a little. Here are three of my favorite twists. Each one adds a new flavor without extra work.
Apple Pie Rolls: Before spreading the filling, scatter half a cup of finely chopped apples over the butter. The apples get soft and sweet as they bake. It tastes like a pie in a roll.
Spicy Chocolate Swirl: Add a teaspoon of cocoa powder and a pinch of cayenne pepper to the cinnamon sugar. It gives a warm, surprising kick that grown-ups love.
Lemon Blueberry Version: Swap the cinnamon for lemon zest and replace the brown sugar with white sugar. Fold in a handful of fresh or frozen blueberries before rolling. These are perfect for a summer morning.
Which one would you try first? Comment below!
How to Serve and Sip Along
Cinnamon rolls are wonderful on their own, but a few extras make them feel special. Serve them warm with a pat of butter melting on top. A small sprinkle of chopped pecans or walnuts adds a nice crunch.
For a breakfast treat, place a single roll in a bowl and pour a little cold milk around it. The milk turns sweet and cinnamon-y. For a dessert plate, drizzle extra icing and add fresh berries on the side. They look like little jewels next to the golden rolls.
For drinks, pour yourself a tall glass of cold milk or a cup of hot cocoa. Grown-ups might enjoy a cup of strong black coffee or a warm chai latte. The spices in the rolls and the drink match perfectly. Which would you choose tonight?
Storing and Reheating Your Cinnamon Rolls
These cinnamon rolls stay soft for days if you store them right. Keep them in an airtight container at room temperature for up to two days. I remember the first time I made a whole batch for a sleepover. We ate half and put the rest in the fridge. The next morning, they were still tender, but the icing had soaked in a bit. For the freezer, wrap each roll tightly in plastic wrap, then foil. They keep for up to three months. To reheat, pop one in the microwave for 15 seconds or warm them in a 350°F oven for 5 minutes. Batch cooking is a lifesaver for busy mornings. You can make the dough the night before, refrigerate it, and bake fresh in the morning. That way, you get warm rolls without the rush. Have you ever tried storing it this way? Share below! Storing properly saves you time and keeps that fresh-baked taste. It means you can enjoy homemade goodness whenever you want.
Common Problems and Easy Fixes
Sometimes the dough doesn’t rise well. That usually means the milk was too hot or too cold. I once killed a batch of yeast because I got impatient and used hot milk. The yeast needs warm liquid, around 100-110°F. If your rolls come out dry, you might have added too much flour. The dough should be soft and slightly tacky. Add flour slowly and stop when it feels right. Another problem is filling leaking out while baking. This happens if you roll the dough too loosely. I remember my first time—I had sticky sugar butter all over the pan. Just roll it tight and pinch the seam closed. Which of these problems have you run into before? Fixing these issues matters because it builds your confidence in the kitchen. You learn to trust your hands and eyes. It also makes the final dish taste exactly how you imagined. That warm, gooey center is worth the small effort.
Your Top Questions Answered
Q: Can I make these gluten-free?
A: Yes, use a 1-to-1 gluten-free flour blend. The dough will be a bit stickier, so add a little extra flour if needed.
Q: Can I make the dough ahead of time?
A: Absolutely. Prepare the dough, cover it, and refrigerate overnight. Let it sit at room temp for 15 minutes before rolling.
Q: Can I swap the cream cheese icing?
A: Sure. Use a simple butter glaze with powdered sugar, milk, and vanilla. Or try a maple glaze for a different flavor.
Q: How do I scale the recipe?
A: Halve or double the ingredients easily. Just keep the ratios the same. Use two 9×13 pans if doubling.
Q: Any tips for softer rolls?
A: Brush the baked rolls with melted butter as soon as they come out of the oven. It adds moisture and shine. Which tip will you try first?
*Fun fact: Unflavored dental floss cuts cinnamon rolls cleaner than a knife. It keeps the layers from squishing.*
A Warm Goodbye from My Kitchen to Yours
Thank you for spending this time with me. I hope these cinnamon rolls fill your home with the same cozy smell I love. Every time I bake them, I think of my grandma letting us lick the icing bowl. It is a simple joy worth sharing. When you make yours, take a picture and share it with someone you love. Have you tried this recipe? Tag us on Pinterest! I cannot wait to see your beautiful rolls. Keep baking, keep tasting, and keep making memories. Happy cooking! —Chloe Hartwell.
Easy One Hour Cinnamon Rolls Recipe
Description
Fluffy, gooey one hour cinnamon rolls from scratch. Quick yeast dough with buttery cinnamon sugar. Easy homemade breakfast or dessert.
Ingredients
Instructions
- Prepare the Dough: Melt 1/4 cup (1/2 stick) unsalted butter in a microwave-safe bowl for about 40-45 seconds. Pour the melted butter into a medium bowl. Using the same bowl, warm 1 cup of milk for 45 seconds, then add it to the butter. Ensure the mixture is between 100-110°F; cool or warm as needed.
- Activate the Yeast & Preheat Oven: Stir in 1/4 cup granulated sugar and 2 1/4 teaspoons active dry yeast until dissolved. Cover with a towel or plastic wrap and let sit for 10 minutes until foamy. While waiting, preheat your oven to its lowest setting (~170°F), then turn it off to create a warm proofing environment.
- Mix Wet Ingredients: Once the yeast mixture is frothy, add 1 large egg, 1/2 teaspoon salt, and 1 teaspoon vanilla extract. Mix well to combine.
- Add the Flour: Gradually add 3 1/2 cups all-purpose flour in 1/2 cup increments, stirring with a spatula. Use your hands to knead any remaining flour gently. The dough should be soft and slightly tacky but not overly sticky.
- Proof the Dough: Form the dough into a ball, cover it with a tea cloth, and place it in the warm, turned-off oven to proof for 10 minutes.
- Prepare the Cinnamon Sugar Filling: In a medium bowl, cream together 1/2 cup softened unsalted butter, 1/2 cup brown sugar, 1/2 cup granulated sugar, 1 1/2 tablespoons ground cinnamon, and 1 teaspoon vanilla extract until light and fluffy. Set aside.
- Roll Out the Dough: Remove the dough from the oven and place it on a lightly greased or floured surface. Roll it into a 14″ x 18″ rectangle about 1/4″ thick.
- Add Filling: Preheat the oven to 350°F. Spread the cinnamon sugar filling evenly over the rolled dough, leaving a small margin around the edges.
- Roll and Slice: Starting from the shorter edge, tightly roll the dough into a log. Using a sharp knife or unflavored dental floss, cut the log into 12 even rolls by gentle sawing motions for clean edges.
- Bake: Place the rolls cut side up in a greased 9×13-inch baking dish. Bake at 350°F for 20-25 minutes, or until golden brown. Let cool in the pan for 10 minutes.
- Make the Cream Cheese Icing: While rolls cool, beat 4 ounces softened cream cheese, 2 cups powdered sugar, 1 teaspoon vanilla extract, and 2 tablespoons milk together. Add more milk one tablespoon at a time until reaching desired spreading or drizzling consistency.
- Frost and Serve: Spread the cream cheese icing generously over warm cinnamon rolls. Serve immediately and enjoy your delicious homemade cinnamon rolls.
Rolling, Filling, and a Little Story
My granddaughter Lily helped me roll out the dough last weekend. She pressed too hard and made a hole. I almost said something. But instead, I showed her how to pinch it closed like a little blanket. She giggled and said it looked like a bandage. I still laugh at that. The filling is the best part anyway. Butter, brown sugar, and cinnamon create a swirl that tastes like autumn in every bite. When you roll the dough tight, you seal in all that sweetness. Then you slice it with dental floss. Yes, dental floss. It gives you clean cuts without squishing the dough. Try it next time. You will thank me. Do you have a funny kitchen helper story? Maybe a kid or a pet who got into the flour? I would love to hear it.Why the Icing Is Non-Negotiable
Some people eat cinnamon rolls without icing. I do not trust those people. Just kidding. But seriously, the cream cheese icing is what turns a good roll into a memorable one. It is tangy, sweet, and smooth. You spread it over the warm rolls, and it melts into every swirl. I like to add a little extra vanilla. It makes the kitchen smell even better than before. Doesnt that smell amazing? I think the icing is why we keep coming back for seconds. Why does this matter? Because food is about pleasure. A little indulgence makes life sweeter. And you deserve that.Your Turn to Make a Memory
Ingredients:
| Ingredient | Amount | Notes |
|---|---|---|
| Milk (whole or 2%) | 1 cup | |
| Unsalted butter, melted | 1/4 cup (1/2 stick) | |
| Active dry yeast | 1 (0.25 oz) packet (about 2 1/4 tsp) | |
| Granulated sugar | 1/4 cup | For dough |
| Large egg | 1 | |
| Salt | 1/2 teaspoon | |
| Vanilla extract | 1 teaspoon | For dough |
| All-purpose flour | 3 1/2 cups | |
| Unsalted butter, softened | 1/2 cup (1 stick) | For filling |
| Brown sugar | 1/2 cup | For filling |
| Granulated sugar | 1/2 cup | For filling |
| Ground cinnamon | 1 1/2 tablespoons | For filling |
| Vanilla extract | 1 teaspoon | For filling |
| Cream cheese, softened | 4 ounces | For icing |
| Powdered sugar | 2 cups | For icing |
| Vanilla extract | 1 teaspoon | For icing |
| Milk | 2–4 tablespoons | Add 1 tbsp at a time, as needed |
The Story Behind These Speedy Cinnamon Rolls
I remember the first time I tried making cinnamon rolls from scratch. I was about your age, and my kitchen looked like a flour bomb had gone off. My grandma just laughed and handed me a damp cloth. Now I have a secret that saves time without losing that warm, gooey feeling. These rolls come together in just one hour, start to finish. Doesn’t that sound like a wonderful weekend project?
The best part is the smell that fills your whole house. It is like a cozy hug from the kitchen. My neighbor once knocked on my door asking what I was baking. I still laugh at that every time I pull these rolls from the oven.
Let me walk you through it step by step. I promise, if a 12-year-old me could do it, you can too.
Step 1: First, melt the butter in a microwave-safe bowl for about 40 seconds. Then warm the milk in the same bowl for 45 seconds. Check that the mixture feels warm to your wrist, not hot. (Hard-learned tip: If the milk is too hot, it will kill the yeast. Think bath water, not soup.) Add the sugar and yeast, stir, and cover with a towel. Wait 10 minutes until it looks frothy like a sea foam. Isn’t it amazing how yeast wakes up?
Step 2: While you wait, preheat your oven to its lowest setting, then turn it off. This creates a cozy warm spot for the dough to rise. Once the yeast is foamy, crack in the egg, add salt, and pour in the vanilla. Mix it all together with a spoon. Do you hear that little sizzle? That is the yeast saying hello.
Step 3: Now add the flour, half a cup at a time. Stir gently with a spatula, then use your hands to bring the dough together. It should feel soft and a little sticky, like a marshmallow. If it sticks too much, add a tiny sprinkle of flour. Knead it just a few times until it forms a ball. What is your favorite thing to make in the kitchen? Share below!
Step 4: Place the dough ball in a greased bowl, cover with a tea towel, and pop it in the warm oven for 10 minutes. This is called proofing, and it makes the dough puffy and happy. While it rests, mix the filling. Cream together the softened butter, brown sugar, white sugar, cinnamon, and vanilla until smooth. This filling smells like a candy shop. I sometimes sneak a tiny taste before spreading it.
Step 5: Take the dough out and roll it on a lightly floured surface into a big rectangle. Aim for about 14 inches by 18 inches, roughly the size of a baking sheet. Spread the cinnamon filling all over, leaving a small border around the edges. Then roll it up tightly from the shorter side, like a sleeping bag. Use a sharp knife or dental floss to cut 12 even rolls. Dental floss works like magic and gives clean edges.
Step 6: Place the rolls cut side up in a greased 9×13-inch baking dish. Bake at 350°F for 20 to 25 minutes until golden brown. Let them cool in the pan for 10 minutes. While they cool, beat the cream cheese, powdered sugar, vanilla, and milk into a thick icing. Spread it on warm rolls so it melts into every swirl. Serve immediately and watch them disappear.
Cook Time: 20–25 minutes
Total Time: 1 hour
Yield: 12 cinnamon rolls
Category: Breakfast, Dessert
Three Fun Twists to Try
Once you master the basic recipe, you can play around a little. Here are three of my favorite twists. Each one adds a new flavor without extra work.
Apple Pie Rolls: Before spreading the filling, scatter half a cup of finely chopped apples over the butter. The apples get soft and sweet as they bake. It tastes like a pie in a roll.
Spicy Chocolate Swirl: Add a teaspoon of cocoa powder and a pinch of cayenne pepper to the cinnamon sugar. It gives a warm, surprising kick that grown-ups love.
Lemon Blueberry Version: Swap the cinnamon for lemon zest and replace the brown sugar with white sugar. Fold in a handful of fresh or frozen blueberries before rolling. These are perfect for a summer morning.
Which one would you try first? Comment below!
How to Serve and Sip Along
Cinnamon rolls are wonderful on their own, but a few extras make them feel special. Serve them warm with a pat of butter melting on top. A small sprinkle of chopped pecans or walnuts adds a nice crunch.
For a breakfast treat, place a single roll in a bowl and pour a little cold milk around it. The milk turns sweet and cinnamon-y. For a dessert plate, drizzle extra icing and add fresh berries on the side. They look like little jewels next to the golden rolls.
For drinks, pour yourself a tall glass of cold milk or a cup of hot cocoa. Grown-ups might enjoy a cup of strong black coffee or a warm chai latte. The spices in the rolls and the drink match perfectly. Which would you choose tonight?
Storing and Reheating Your Cinnamon Rolls
These cinnamon rolls stay soft for days if you store them right. Keep them in an airtight container at room temperature for up to two days. I remember the first time I made a whole batch for a sleepover. We ate half and put the rest in the fridge. The next morning, they were still tender, but the icing had soaked in a bit. For the freezer, wrap each roll tightly in plastic wrap, then foil. They keep for up to three months. To reheat, pop one in the microwave for 15 seconds or warm them in a 350°F oven for 5 minutes. Batch cooking is a lifesaver for busy mornings. You can make the dough the night before, refrigerate it, and bake fresh in the morning. That way, you get warm rolls without the rush. Have you ever tried storing it this way? Share below! Storing properly saves you time and keeps that fresh-baked taste. It means you can enjoy homemade goodness whenever you want.
Common Problems and Easy Fixes
Sometimes the dough doesn’t rise well. That usually means the milk was too hot or too cold. I once killed a batch of yeast because I got impatient and used hot milk. The yeast needs warm liquid, around 100-110°F. If your rolls come out dry, you might have added too much flour. The dough should be soft and slightly tacky. Add flour slowly and stop when it feels right. Another problem is filling leaking out while baking. This happens if you roll the dough too loosely. I remember my first time—I had sticky sugar butter all over the pan. Just roll it tight and pinch the seam closed. Which of these problems have you run into before? Fixing these issues matters because it builds your confidence in the kitchen. You learn to trust your hands and eyes. It also makes the final dish taste exactly how you imagined. That warm, gooey center is worth the small effort.
Your Top Questions Answered
Q: Can I make these gluten-free?
A: Yes, use a 1-to-1 gluten-free flour blend. The dough will be a bit stickier, so add a little extra flour if needed.
Q: Can I make the dough ahead of time?
A: Absolutely. Prepare the dough, cover it, and refrigerate overnight. Let it sit at room temp for 15 minutes before rolling.
Q: Can I swap the cream cheese icing?
A: Sure. Use a simple butter glaze with powdered sugar, milk, and vanilla. Or try a maple glaze for a different flavor.
Q: How do I scale the recipe?
A: Halve or double the ingredients easily. Just keep the ratios the same. Use two 9×13 pans if doubling.
Q: Any tips for softer rolls?
A: Brush the baked rolls with melted butter as soon as they come out of the oven. It adds moisture and shine. Which tip will you try first?
*Fun fact: Unflavored dental floss cuts cinnamon rolls cleaner than a knife. It keeps the layers from squishing.*
A Warm Goodbye from My Kitchen to Yours
Thank you for spending this time with me. I hope these cinnamon rolls fill your home with the same cozy smell I love. Every time I bake them, I think of my grandma letting us lick the icing bowl. It is a simple joy worth sharing. When you make yours, take a picture and share it with someone you love. Have you tried this recipe? Tag us on Pinterest! I cannot wait to see your beautiful rolls. Keep baking, keep tasting, and keep making memories. Happy cooking! —Chloe Hartwell.
Rolling, Filling, and a Little Story
My granddaughter Lily helped me roll out the dough last weekend. She pressed too hard and made a hole. I almost said something. But instead, I showed her how to pinch it closed like a little blanket. She giggled and said it looked like a bandage. I still laugh at that. The filling is the best part anyway. Butter, brown sugar, and cinnamon create a swirl that tastes like autumn in every bite. When you roll the dough tight, you seal in all that sweetness. Then you slice it with dental floss. Yes, dental floss. It gives you clean cuts without squishing the dough. Try it next time. You will thank me. Do you have a funny kitchen helper story? Maybe a kid or a pet who got into the flour? I would love to hear it.Why the Icing Is Non-Negotiable
Some people eat cinnamon rolls without icing. I do not trust those people. Just kidding. But seriously, the cream cheese icing is what turns a good roll into a memorable one. It is tangy, sweet, and smooth. You spread it over the warm rolls, and it melts into every swirl. I like to add a little extra vanilla. It makes the kitchen smell even better than before. Doesnt that smell amazing? I think the icing is why we keep coming back for seconds. Why does this matter? Because food is about pleasure. A little indulgence makes life sweeter. And you deserve that.Your Turn to Make a Memory
Ingredients:
| Ingredient | Amount | Notes |
|---|---|---|
| Milk (whole or 2%) | 1 cup | |
| Unsalted butter, melted | 1/4 cup (1/2 stick) | |
| Active dry yeast | 1 (0.25 oz) packet (about 2 1/4 tsp) | |
| Granulated sugar | 1/4 cup | For dough |
| Large egg | 1 | |
| Salt | 1/2 teaspoon | |
| Vanilla extract | 1 teaspoon | For dough |
| All-purpose flour | 3 1/2 cups | |
| Unsalted butter, softened | 1/2 cup (1 stick) | For filling |
| Brown sugar | 1/2 cup | For filling |
| Granulated sugar | 1/2 cup | For filling |
| Ground cinnamon | 1 1/2 tablespoons | For filling |
| Vanilla extract | 1 teaspoon | For filling |
| Cream cheese, softened | 4 ounces | For icing |
| Powdered sugar | 2 cups | For icing |
| Vanilla extract | 1 teaspoon | For icing |
| Milk | 2–4 tablespoons | Add 1 tbsp at a time, as needed |
The Story Behind These Speedy Cinnamon Rolls
I remember the first time I tried making cinnamon rolls from scratch. I was about your age, and my kitchen looked like a flour bomb had gone off. My grandma just laughed and handed me a damp cloth. Now I have a secret that saves time without losing that warm, gooey feeling. These rolls come together in just one hour, start to finish. Doesn’t that sound like a wonderful weekend project?
The best part is the smell that fills your whole house. It is like a cozy hug from the kitchen. My neighbor once knocked on my door asking what I was baking. I still laugh at that every time I pull these rolls from the oven.
Let me walk you through it step by step. I promise, if a 12-year-old me could do it, you can too.
Step 1: First, melt the butter in a microwave-safe bowl for about 40 seconds. Then warm the milk in the same bowl for 45 seconds. Check that the mixture feels warm to your wrist, not hot. (Hard-learned tip: If the milk is too hot, it will kill the yeast. Think bath water, not soup.) Add the sugar and yeast, stir, and cover with a towel. Wait 10 minutes until it looks frothy like a sea foam. Isn’t it amazing how yeast wakes up?
Step 2: While you wait, preheat your oven to its lowest setting, then turn it off. This creates a cozy warm spot for the dough to rise. Once the yeast is foamy, crack in the egg, add salt, and pour in the vanilla. Mix it all together with a spoon. Do you hear that little sizzle? That is the yeast saying hello.
Step 3: Now add the flour, half a cup at a time. Stir gently with a spatula, then use your hands to bring the dough together. It should feel soft and a little sticky, like a marshmallow. If it sticks too much, add a tiny sprinkle of flour. Knead it just a few times until it forms a ball. What is your favorite thing to make in the kitchen? Share below!
Step 4: Place the dough ball in a greased bowl, cover with a tea towel, and pop it in the warm oven for 10 minutes. This is called proofing, and it makes the dough puffy and happy. While it rests, mix the filling. Cream together the softened butter, brown sugar, white sugar, cinnamon, and vanilla until smooth. This filling smells like a candy shop. I sometimes sneak a tiny taste before spreading it.
Step 5: Take the dough out and roll it on a lightly floured surface into a big rectangle. Aim for about 14 inches by 18 inches, roughly the size of a baking sheet. Spread the cinnamon filling all over, leaving a small border around the edges. Then roll it up tightly from the shorter side, like a sleeping bag. Use a sharp knife or dental floss to cut 12 even rolls. Dental floss works like magic and gives clean edges.
Step 6: Place the rolls cut side up in a greased 9×13-inch baking dish. Bake at 350°F for 20 to 25 minutes until golden brown. Let them cool in the pan for 10 minutes. While they cool, beat the cream cheese, powdered sugar, vanilla, and milk into a thick icing. Spread it on warm rolls so it melts into every swirl. Serve immediately and watch them disappear.
Cook Time: 20–25 minutes
Total Time: 1 hour
Yield: 12 cinnamon rolls
Category: Breakfast, Dessert
Three Fun Twists to Try
Once you master the basic recipe, you can play around a little. Here are three of my favorite twists. Each one adds a new flavor without extra work.
Apple Pie Rolls: Before spreading the filling, scatter half a cup of finely chopped apples over the butter. The apples get soft and sweet as they bake. It tastes like a pie in a roll.
Spicy Chocolate Swirl: Add a teaspoon of cocoa powder and a pinch of cayenne pepper to the cinnamon sugar. It gives a warm, surprising kick that grown-ups love.
Lemon Blueberry Version: Swap the cinnamon for lemon zest and replace the brown sugar with white sugar. Fold in a handful of fresh or frozen blueberries before rolling. These are perfect for a summer morning.
Which one would you try first? Comment below!
How to Serve and Sip Along
Cinnamon rolls are wonderful on their own, but a few extras make them feel special. Serve them warm with a pat of butter melting on top. A small sprinkle of chopped pecans or walnuts adds a nice crunch.
For a breakfast treat, place a single roll in a bowl and pour a little cold milk around it. The milk turns sweet and cinnamon-y. For a dessert plate, drizzle extra icing and add fresh berries on the side. They look like little jewels next to the golden rolls.
For drinks, pour yourself a tall glass of cold milk or a cup of hot cocoa. Grown-ups might enjoy a cup of strong black coffee or a warm chai latte. The spices in the rolls and the drink match perfectly. Which would you choose tonight?
Storing and Reheating Your Cinnamon Rolls
These cinnamon rolls stay soft for days if you store them right. Keep them in an airtight container at room temperature for up to two days. I remember the first time I made a whole batch for a sleepover. We ate half and put the rest in the fridge. The next morning, they were still tender, but the icing had soaked in a bit. For the freezer, wrap each roll tightly in plastic wrap, then foil. They keep for up to three months. To reheat, pop one in the microwave for 15 seconds or warm them in a 350°F oven for 5 minutes. Batch cooking is a lifesaver for busy mornings. You can make the dough the night before, refrigerate it, and bake fresh in the morning. That way, you get warm rolls without the rush. Have you ever tried storing it this way? Share below! Storing properly saves you time and keeps that fresh-baked taste. It means you can enjoy homemade goodness whenever you want.
Common Problems and Easy Fixes
Sometimes the dough doesn’t rise well. That usually means the milk was too hot or too cold. I once killed a batch of yeast because I got impatient and used hot milk. The yeast needs warm liquid, around 100-110°F. If your rolls come out dry, you might have added too much flour. The dough should be soft and slightly tacky. Add flour slowly and stop when it feels right. Another problem is filling leaking out while baking. This happens if you roll the dough too loosely. I remember my first time—I had sticky sugar butter all over the pan. Just roll it tight and pinch the seam closed. Which of these problems have you run into before? Fixing these issues matters because it builds your confidence in the kitchen. You learn to trust your hands and eyes. It also makes the final dish taste exactly how you imagined. That warm, gooey center is worth the small effort.
Your Top Questions Answered
Q: Can I make these gluten-free?
A: Yes, use a 1-to-1 gluten-free flour blend. The dough will be a bit stickier, so add a little extra flour if needed.
Q: Can I make the dough ahead of time?
A: Absolutely. Prepare the dough, cover it, and refrigerate overnight. Let it sit at room temp for 15 minutes before rolling.
Q: Can I swap the cream cheese icing?
A: Sure. Use a simple butter glaze with powdered sugar, milk, and vanilla. Or try a maple glaze for a different flavor.
Q: How do I scale the recipe?
A: Halve or double the ingredients easily. Just keep the ratios the same. Use two 9×13 pans if doubling.
Q: Any tips for softer rolls?
A: Brush the baked rolls with melted butter as soon as they come out of the oven. It adds moisture and shine. Which tip will you try first?
*Fun fact: Unflavored dental floss cuts cinnamon rolls cleaner than a knife. It keeps the layers from squishing.*
A Warm Goodbye from My Kitchen to Yours
Thank you for spending this time with me. I hope these cinnamon rolls fill your home with the same cozy smell I love. Every time I bake them, I think of my grandma letting us lick the icing bowl. It is a simple joy worth sharing. When you make yours, take a picture and share it with someone you love. Have you tried this recipe? Tag us on Pinterest! I cannot wait to see your beautiful rolls. Keep baking, keep tasting, and keep making memories. Happy cooking! —Chloe Hartwell.
The Secret of the One-Hour Miracle
Most people think cinnamon rolls take all day. They think you have to wake up at dawn and wait for hours. That is not true with this recipe. You can go from a bowl of flour to a warm, gooey roll in just sixty minutes. The trick is a warm oven. You turn it on low, then turn it off. That cozy little box becomes a proofing spa for your dough. *Fun fact:* Professional bakers call this a “proof box.” Fancy name for a warm spot. But your oven works just as well. I love this because it means you can make cinnamon rolls on a school morning. Or a lazy Saturday. Or right when a sugar craving hits. Why does this matter? Because homemade food should not feel like a chore. It should feel like a hug you can make anytime. Have you ever made cinnamon rolls before? Or do you usually buy the ones in a tube? I promise, these are different. The difference is love. And butter. Lots of butter.Rolling, Filling, and a Little Story
My granddaughter Lily helped me roll out the dough last weekend. She pressed too hard and made a hole. I almost said something. But instead, I showed her how to pinch it closed like a little blanket. She giggled and said it looked like a bandage. I still laugh at that. The filling is the best part anyway. Butter, brown sugar, and cinnamon create a swirl that tastes like autumn in every bite. When you roll the dough tight, you seal in all that sweetness. Then you slice it with dental floss. Yes, dental floss. It gives you clean cuts without squishing the dough. Try it next time. You will thank me. Do you have a funny kitchen helper story? Maybe a kid or a pet who got into the flour? I would love to hear it.Why the Icing Is Non-Negotiable
Some people eat cinnamon rolls without icing. I do not trust those people. Just kidding. But seriously, the cream cheese icing is what turns a good roll into a memorable one. It is tangy, sweet, and smooth. You spread it over the warm rolls, and it melts into every swirl. I like to add a little extra vanilla. It makes the kitchen smell even better than before. Doesnt that smell amazing? I think the icing is why we keep coming back for seconds. Why does this matter? Because food is about pleasure. A little indulgence makes life sweeter. And you deserve that.Your Turn to Make a Memory
Ingredients:
| Ingredient | Amount | Notes |
|---|---|---|
| Milk (whole or 2%) | 1 cup | |
| Unsalted butter, melted | 1/4 cup (1/2 stick) | |
| Active dry yeast | 1 (0.25 oz) packet (about 2 1/4 tsp) | |
| Granulated sugar | 1/4 cup | For dough |
| Large egg | 1 | |
| Salt | 1/2 teaspoon | |
| Vanilla extract | 1 teaspoon | For dough |
| All-purpose flour | 3 1/2 cups | |
| Unsalted butter, softened | 1/2 cup (1 stick) | For filling |
| Brown sugar | 1/2 cup | For filling |
| Granulated sugar | 1/2 cup | For filling |
| Ground cinnamon | 1 1/2 tablespoons | For filling |
| Vanilla extract | 1 teaspoon | For filling |
| Cream cheese, softened | 4 ounces | For icing |
| Powdered sugar | 2 cups | For icing |
| Vanilla extract | 1 teaspoon | For icing |
| Milk | 2–4 tablespoons | Add 1 tbsp at a time, as needed |
The Story Behind These Speedy Cinnamon Rolls
I remember the first time I tried making cinnamon rolls from scratch. I was about your age, and my kitchen looked like a flour bomb had gone off. My grandma just laughed and handed me a damp cloth. Now I have a secret that saves time without losing that warm, gooey feeling. These rolls come together in just one hour, start to finish. Doesn’t that sound like a wonderful weekend project?
The best part is the smell that fills your whole house. It is like a cozy hug from the kitchen. My neighbor once knocked on my door asking what I was baking. I still laugh at that every time I pull these rolls from the oven.
Let me walk you through it step by step. I promise, if a 12-year-old me could do it, you can too.
Step 1: First, melt the butter in a microwave-safe bowl for about 40 seconds. Then warm the milk in the same bowl for 45 seconds. Check that the mixture feels warm to your wrist, not hot. (Hard-learned tip: If the milk is too hot, it will kill the yeast. Think bath water, not soup.) Add the sugar and yeast, stir, and cover with a towel. Wait 10 minutes until it looks frothy like a sea foam. Isn’t it amazing how yeast wakes up?
Step 2: While you wait, preheat your oven to its lowest setting, then turn it off. This creates a cozy warm spot for the dough to rise. Once the yeast is foamy, crack in the egg, add salt, and pour in the vanilla. Mix it all together with a spoon. Do you hear that little sizzle? That is the yeast saying hello.
Step 3: Now add the flour, half a cup at a time. Stir gently with a spatula, then use your hands to bring the dough together. It should feel soft and a little sticky, like a marshmallow. If it sticks too much, add a tiny sprinkle of flour. Knead it just a few times until it forms a ball. What is your favorite thing to make in the kitchen? Share below!
Step 4: Place the dough ball in a greased bowl, cover with a tea towel, and pop it in the warm oven for 10 minutes. This is called proofing, and it makes the dough puffy and happy. While it rests, mix the filling. Cream together the softened butter, brown sugar, white sugar, cinnamon, and vanilla until smooth. This filling smells like a candy shop. I sometimes sneak a tiny taste before spreading it.
Step 5: Take the dough out and roll it on a lightly floured surface into a big rectangle. Aim for about 14 inches by 18 inches, roughly the size of a baking sheet. Spread the cinnamon filling all over, leaving a small border around the edges. Then roll it up tightly from the shorter side, like a sleeping bag. Use a sharp knife or dental floss to cut 12 even rolls. Dental floss works like magic and gives clean edges.
Step 6: Place the rolls cut side up in a greased 9×13-inch baking dish. Bake at 350°F for 20 to 25 minutes until golden brown. Let them cool in the pan for 10 minutes. While they cool, beat the cream cheese, powdered sugar, vanilla, and milk into a thick icing. Spread it on warm rolls so it melts into every swirl. Serve immediately and watch them disappear.
Cook Time: 20–25 minutes
Total Time: 1 hour
Yield: 12 cinnamon rolls
Category: Breakfast, Dessert
Three Fun Twists to Try
Once you master the basic recipe, you can play around a little. Here are three of my favorite twists. Each one adds a new flavor without extra work.
Apple Pie Rolls: Before spreading the filling, scatter half a cup of finely chopped apples over the butter. The apples get soft and sweet as they bake. It tastes like a pie in a roll.
Spicy Chocolate Swirl: Add a teaspoon of cocoa powder and a pinch of cayenne pepper to the cinnamon sugar. It gives a warm, surprising kick that grown-ups love.
Lemon Blueberry Version: Swap the cinnamon for lemon zest and replace the brown sugar with white sugar. Fold in a handful of fresh or frozen blueberries before rolling. These are perfect for a summer morning.
Which one would you try first? Comment below!
How to Serve and Sip Along
Cinnamon rolls are wonderful on their own, but a few extras make them feel special. Serve them warm with a pat of butter melting on top. A small sprinkle of chopped pecans or walnuts adds a nice crunch.
For a breakfast treat, place a single roll in a bowl and pour a little cold milk around it. The milk turns sweet and cinnamon-y. For a dessert plate, drizzle extra icing and add fresh berries on the side. They look like little jewels next to the golden rolls.
For drinks, pour yourself a tall glass of cold milk or a cup of hot cocoa. Grown-ups might enjoy a cup of strong black coffee or a warm chai latte. The spices in the rolls and the drink match perfectly. Which would you choose tonight?
Storing and Reheating Your Cinnamon Rolls
These cinnamon rolls stay soft for days if you store them right. Keep them in an airtight container at room temperature for up to two days. I remember the first time I made a whole batch for a sleepover. We ate half and put the rest in the fridge. The next morning, they were still tender, but the icing had soaked in a bit. For the freezer, wrap each roll tightly in plastic wrap, then foil. They keep for up to three months. To reheat, pop one in the microwave for 15 seconds or warm them in a 350°F oven for 5 minutes. Batch cooking is a lifesaver for busy mornings. You can make the dough the night before, refrigerate it, and bake fresh in the morning. That way, you get warm rolls without the rush. Have you ever tried storing it this way? Share below! Storing properly saves you time and keeps that fresh-baked taste. It means you can enjoy homemade goodness whenever you want.
Common Problems and Easy Fixes
Sometimes the dough doesn’t rise well. That usually means the milk was too hot or too cold. I once killed a batch of yeast because I got impatient and used hot milk. The yeast needs warm liquid, around 100-110°F. If your rolls come out dry, you might have added too much flour. The dough should be soft and slightly tacky. Add flour slowly and stop when it feels right. Another problem is filling leaking out while baking. This happens if you roll the dough too loosely. I remember my first time—I had sticky sugar butter all over the pan. Just roll it tight and pinch the seam closed. Which of these problems have you run into before? Fixing these issues matters because it builds your confidence in the kitchen. You learn to trust your hands and eyes. It also makes the final dish taste exactly how you imagined. That warm, gooey center is worth the small effort.
Your Top Questions Answered
Q: Can I make these gluten-free?
A: Yes, use a 1-to-1 gluten-free flour blend. The dough will be a bit stickier, so add a little extra flour if needed.
Q: Can I make the dough ahead of time?
A: Absolutely. Prepare the dough, cover it, and refrigerate overnight. Let it sit at room temp for 15 minutes before rolling.
Q: Can I swap the cream cheese icing?
A: Sure. Use a simple butter glaze with powdered sugar, milk, and vanilla. Or try a maple glaze for a different flavor.
Q: How do I scale the recipe?
A: Halve or double the ingredients easily. Just keep the ratios the same. Use two 9×13 pans if doubling.
Q: Any tips for softer rolls?
A: Brush the baked rolls with melted butter as soon as they come out of the oven. It adds moisture and shine. Which tip will you try first?
*Fun fact: Unflavored dental floss cuts cinnamon rolls cleaner than a knife. It keeps the layers from squishing.*
A Warm Goodbye from My Kitchen to Yours
Thank you for spending this time with me. I hope these cinnamon rolls fill your home with the same cozy smell I love. Every time I bake them, I think of my grandma letting us lick the icing bowl. It is a simple joy worth sharing. When you make yours, take a picture and share it with someone you love. Have you tried this recipe? Tag us on Pinterest! I cannot wait to see your beautiful rolls. Keep baking, keep tasting, and keep making memories. Happy cooking! —Chloe Hartwell.
The Morning That Changed My Baking World
I still remember the first time I tried making cinnamon rolls from scratch. I was a nervous wreck. The yeast scared me. I thought it would explode or something. Does that sound silly? Well, I laughed at myself later when the dough puffed up like a happy cloud. That day taught me something. Yeast is not magic. It is just tiny hungry friends that need warm milk and a little sugar to wake up. When you treat them kindly, they make your kitchen smell like heaven. Why does this matter? Because baking is not about being perfect. It is about learning to trust your hands. Have you ever been scared to try a new recipe? What held you back?The Secret of the One-Hour Miracle
Most people think cinnamon rolls take all day. They think you have to wake up at dawn and wait for hours. That is not true with this recipe. You can go from a bowl of flour to a warm, gooey roll in just sixty minutes. The trick is a warm oven. You turn it on low, then turn it off. That cozy little box becomes a proofing spa for your dough. *Fun fact:* Professional bakers call this a “proof box.” Fancy name for a warm spot. But your oven works just as well. I love this because it means you can make cinnamon rolls on a school morning. Or a lazy Saturday. Or right when a sugar craving hits. Why does this matter? Because homemade food should not feel like a chore. It should feel like a hug you can make anytime. Have you ever made cinnamon rolls before? Or do you usually buy the ones in a tube? I promise, these are different. The difference is love. And butter. Lots of butter.Rolling, Filling, and a Little Story
My granddaughter Lily helped me roll out the dough last weekend. She pressed too hard and made a hole. I almost said something. But instead, I showed her how to pinch it closed like a little blanket. She giggled and said it looked like a bandage. I still laugh at that. The filling is the best part anyway. Butter, brown sugar, and cinnamon create a swirl that tastes like autumn in every bite. When you roll the dough tight, you seal in all that sweetness. Then you slice it with dental floss. Yes, dental floss. It gives you clean cuts without squishing the dough. Try it next time. You will thank me. Do you have a funny kitchen helper story? Maybe a kid or a pet who got into the flour? I would love to hear it.Why the Icing Is Non-Negotiable
Some people eat cinnamon rolls without icing. I do not trust those people. Just kidding. But seriously, the cream cheese icing is what turns a good roll into a memorable one. It is tangy, sweet, and smooth. You spread it over the warm rolls, and it melts into every swirl. I like to add a little extra vanilla. It makes the kitchen smell even better than before. Doesnt that smell amazing? I think the icing is why we keep coming back for seconds. Why does this matter? Because food is about pleasure. A little indulgence makes life sweeter. And you deserve that.Your Turn to Make a Memory
Ingredients:
| Ingredient | Amount | Notes |
|---|---|---|
| Milk (whole or 2%) | 1 cup | |
| Unsalted butter, melted | 1/4 cup (1/2 stick) | |
| Active dry yeast | 1 (0.25 oz) packet (about 2 1/4 tsp) | |
| Granulated sugar | 1/4 cup | For dough |
| Large egg | 1 | |
| Salt | 1/2 teaspoon | |
| Vanilla extract | 1 teaspoon | For dough |
| All-purpose flour | 3 1/2 cups | |
| Unsalted butter, softened | 1/2 cup (1 stick) | For filling |
| Brown sugar | 1/2 cup | For filling |
| Granulated sugar | 1/2 cup | For filling |
| Ground cinnamon | 1 1/2 tablespoons | For filling |
| Vanilla extract | 1 teaspoon | For filling |
| Cream cheese, softened | 4 ounces | For icing |
| Powdered sugar | 2 cups | For icing |
| Vanilla extract | 1 teaspoon | For icing |
| Milk | 2–4 tablespoons | Add 1 tbsp at a time, as needed |
The Story Behind These Speedy Cinnamon Rolls
I remember the first time I tried making cinnamon rolls from scratch. I was about your age, and my kitchen looked like a flour bomb had gone off. My grandma just laughed and handed me a damp cloth. Now I have a secret that saves time without losing that warm, gooey feeling. These rolls come together in just one hour, start to finish. Doesn’t that sound like a wonderful weekend project?
The best part is the smell that fills your whole house. It is like a cozy hug from the kitchen. My neighbor once knocked on my door asking what I was baking. I still laugh at that every time I pull these rolls from the oven.
Let me walk you through it step by step. I promise, if a 12-year-old me could do it, you can too.
Step 1: First, melt the butter in a microwave-safe bowl for about 40 seconds. Then warm the milk in the same bowl for 45 seconds. Check that the mixture feels warm to your wrist, not hot. (Hard-learned tip: If the milk is too hot, it will kill the yeast. Think bath water, not soup.) Add the sugar and yeast, stir, and cover with a towel. Wait 10 minutes until it looks frothy like a sea foam. Isn’t it amazing how yeast wakes up?
Step 2: While you wait, preheat your oven to its lowest setting, then turn it off. This creates a cozy warm spot for the dough to rise. Once the yeast is foamy, crack in the egg, add salt, and pour in the vanilla. Mix it all together with a spoon. Do you hear that little sizzle? That is the yeast saying hello.
Step 3: Now add the flour, half a cup at a time. Stir gently with a spatula, then use your hands to bring the dough together. It should feel soft and a little sticky, like a marshmallow. If it sticks too much, add a tiny sprinkle of flour. Knead it just a few times until it forms a ball. What is your favorite thing to make in the kitchen? Share below!
Step 4: Place the dough ball in a greased bowl, cover with a tea towel, and pop it in the warm oven for 10 minutes. This is called proofing, and it makes the dough puffy and happy. While it rests, mix the filling. Cream together the softened butter, brown sugar, white sugar, cinnamon, and vanilla until smooth. This filling smells like a candy shop. I sometimes sneak a tiny taste before spreading it.
Step 5: Take the dough out and roll it on a lightly floured surface into a big rectangle. Aim for about 14 inches by 18 inches, roughly the size of a baking sheet. Spread the cinnamon filling all over, leaving a small border around the edges. Then roll it up tightly from the shorter side, like a sleeping bag. Use a sharp knife or dental floss to cut 12 even rolls. Dental floss works like magic and gives clean edges.
Step 6: Place the rolls cut side up in a greased 9×13-inch baking dish. Bake at 350°F for 20 to 25 minutes until golden brown. Let them cool in the pan for 10 minutes. While they cool, beat the cream cheese, powdered sugar, vanilla, and milk into a thick icing. Spread it on warm rolls so it melts into every swirl. Serve immediately and watch them disappear.
Cook Time: 20–25 minutes
Total Time: 1 hour
Yield: 12 cinnamon rolls
Category: Breakfast, Dessert
Three Fun Twists to Try
Once you master the basic recipe, you can play around a little. Here are three of my favorite twists. Each one adds a new flavor without extra work.
Apple Pie Rolls: Before spreading the filling, scatter half a cup of finely chopped apples over the butter. The apples get soft and sweet as they bake. It tastes like a pie in a roll.
Spicy Chocolate Swirl: Add a teaspoon of cocoa powder and a pinch of cayenne pepper to the cinnamon sugar. It gives a warm, surprising kick that grown-ups love.
Lemon Blueberry Version: Swap the cinnamon for lemon zest and replace the brown sugar with white sugar. Fold in a handful of fresh or frozen blueberries before rolling. These are perfect for a summer morning.
Which one would you try first? Comment below!
How to Serve and Sip Along
Cinnamon rolls are wonderful on their own, but a few extras make them feel special. Serve them warm with a pat of butter melting on top. A small sprinkle of chopped pecans or walnuts adds a nice crunch.
For a breakfast treat, place a single roll in a bowl and pour a little cold milk around it. The milk turns sweet and cinnamon-y. For a dessert plate, drizzle extra icing and add fresh berries on the side. They look like little jewels next to the golden rolls.
For drinks, pour yourself a tall glass of cold milk or a cup of hot cocoa. Grown-ups might enjoy a cup of strong black coffee or a warm chai latte. The spices in the rolls and the drink match perfectly. Which would you choose tonight?
Storing and Reheating Your Cinnamon Rolls
These cinnamon rolls stay soft for days if you store them right. Keep them in an airtight container at room temperature for up to two days. I remember the first time I made a whole batch for a sleepover. We ate half and put the rest in the fridge. The next morning, they were still tender, but the icing had soaked in a bit. For the freezer, wrap each roll tightly in plastic wrap, then foil. They keep for up to three months. To reheat, pop one in the microwave for 15 seconds or warm them in a 350°F oven for 5 minutes. Batch cooking is a lifesaver for busy mornings. You can make the dough the night before, refrigerate it, and bake fresh in the morning. That way, you get warm rolls without the rush. Have you ever tried storing it this way? Share below! Storing properly saves you time and keeps that fresh-baked taste. It means you can enjoy homemade goodness whenever you want.
Common Problems and Easy Fixes
Sometimes the dough doesn’t rise well. That usually means the milk was too hot or too cold. I once killed a batch of yeast because I got impatient and used hot milk. The yeast needs warm liquid, around 100-110°F. If your rolls come out dry, you might have added too much flour. The dough should be soft and slightly tacky. Add flour slowly and stop when it feels right. Another problem is filling leaking out while baking. This happens if you roll the dough too loosely. I remember my first time—I had sticky sugar butter all over the pan. Just roll it tight and pinch the seam closed. Which of these problems have you run into before? Fixing these issues matters because it builds your confidence in the kitchen. You learn to trust your hands and eyes. It also makes the final dish taste exactly how you imagined. That warm, gooey center is worth the small effort.
Your Top Questions Answered
Q: Can I make these gluten-free?
A: Yes, use a 1-to-1 gluten-free flour blend. The dough will be a bit stickier, so add a little extra flour if needed.
Q: Can I make the dough ahead of time?
A: Absolutely. Prepare the dough, cover it, and refrigerate overnight. Let it sit at room temp for 15 minutes before rolling.
Q: Can I swap the cream cheese icing?
A: Sure. Use a simple butter glaze with powdered sugar, milk, and vanilla. Or try a maple glaze for a different flavor.
Q: How do I scale the recipe?
A: Halve or double the ingredients easily. Just keep the ratios the same. Use two 9×13 pans if doubling.
Q: Any tips for softer rolls?
A: Brush the baked rolls with melted butter as soon as they come out of the oven. It adds moisture and shine. Which tip will you try first?
*Fun fact: Unflavored dental floss cuts cinnamon rolls cleaner than a knife. It keeps the layers from squishing.*
A Warm Goodbye from My Kitchen to Yours
Thank you for spending this time with me. I hope these cinnamon rolls fill your home with the same cozy smell I love. Every time I bake them, I think of my grandma letting us lick the icing bowl. It is a simple joy worth sharing. When you make yours, take a picture and share it with someone you love. Have you tried this recipe? Tag us on Pinterest! I cannot wait to see your beautiful rolls. Keep baking, keep tasting, and keep making memories. Happy cooking! —Chloe Hartwell.




Leave a Reply